
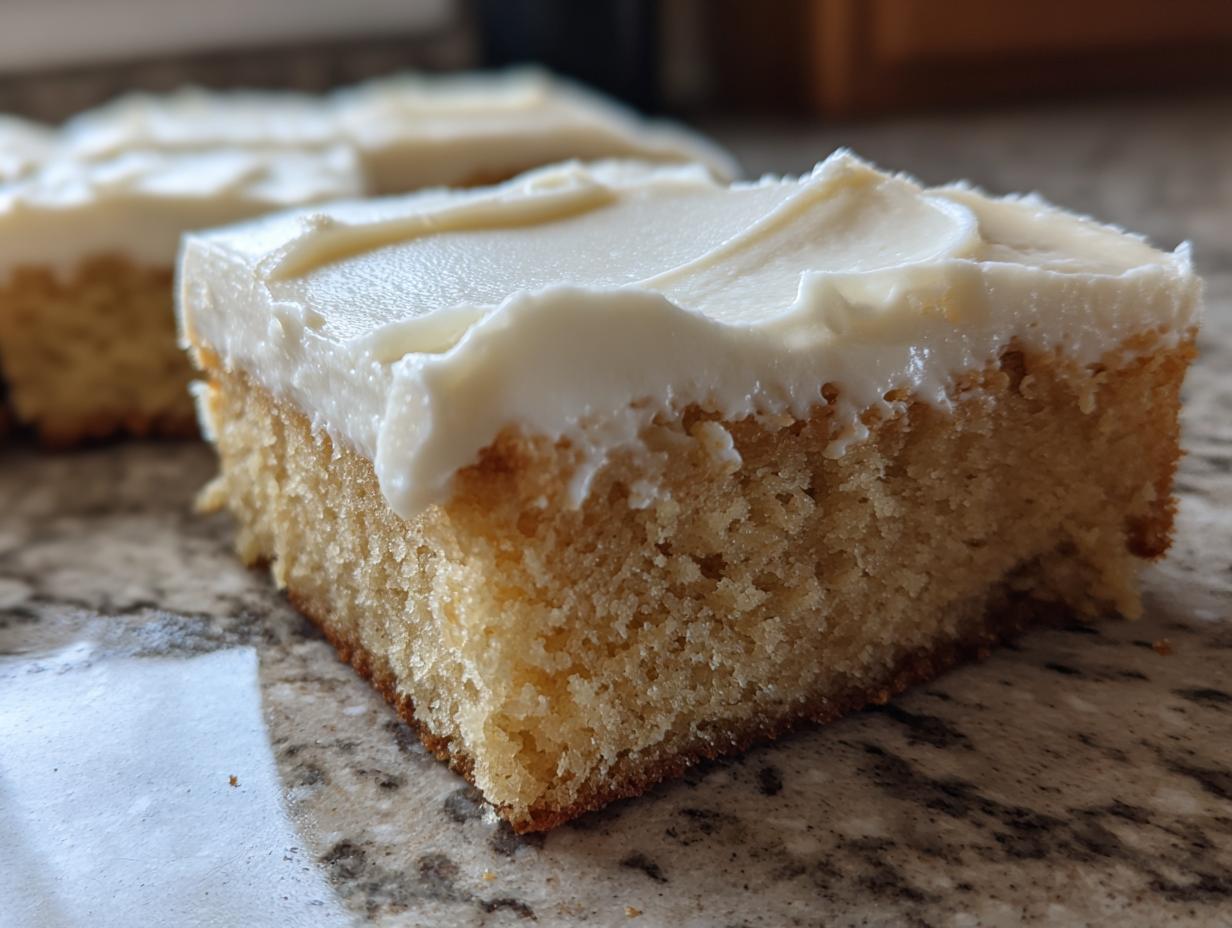
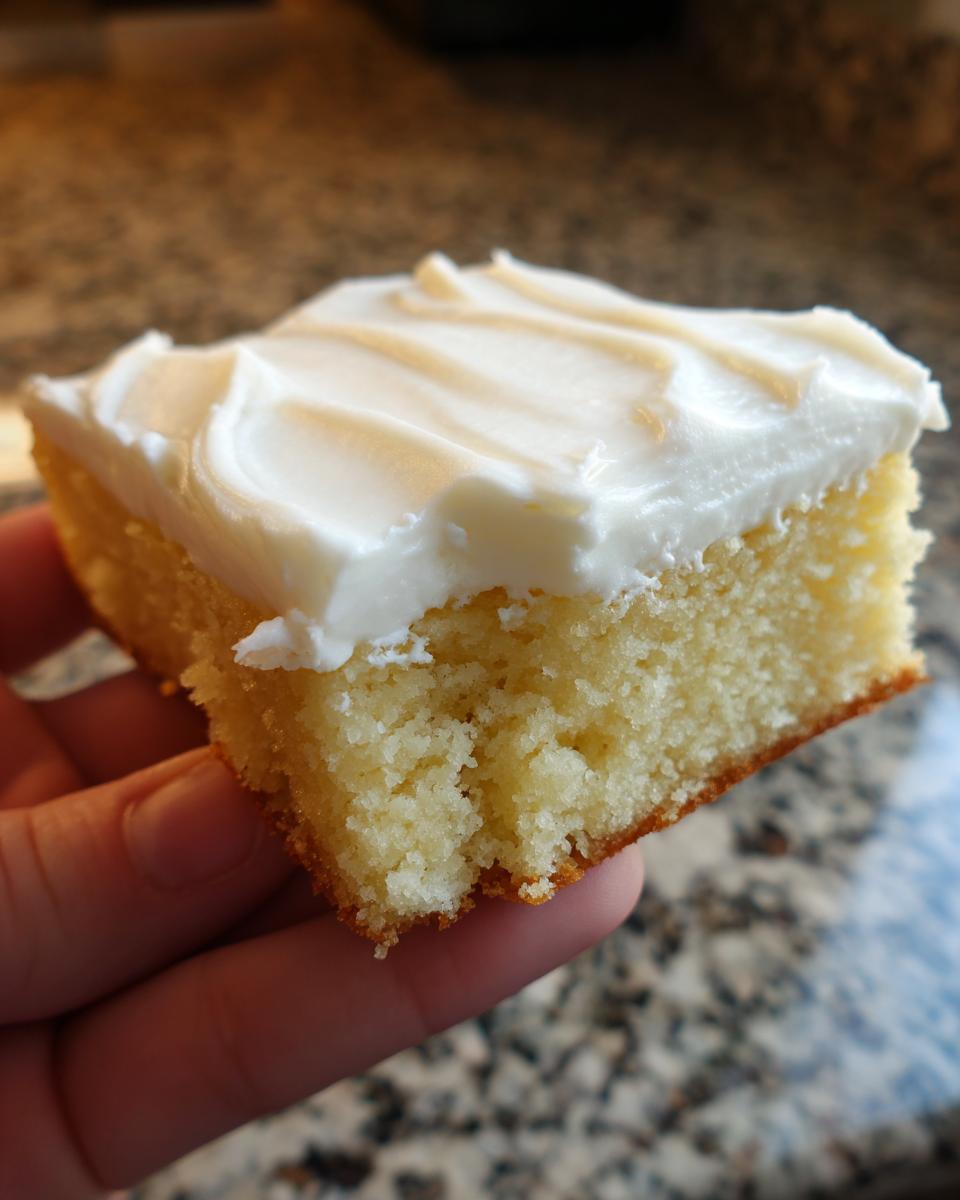
Oh, how I love a good holiday cookie, but honestly, sometimes I just cannot deal with the rolling, the cutting, and the inevitable frustration of trying to keep those tiny shapes perfect while the dough warms up. If that sounds like you, then I have found our salvation! We are ditching the cookie cutters today because we are diving headfirst into the ultimate soft & chewy frosted sugar cookie bars recipe. Seriously, these are the best. They bring all that comforting, sugary flavor and that thick, satisfying bite of a perfect cut-out, but they come together in one single pan. It’s that simple, stress-free baking magic I always chase when I need a taste of home without any fuss.
- Why These Are The Best Sugar Cookie Bars (Soft, Chewy, and Thick)
- Gathering Ingredients for Your Soft Vanilla Cookie Bars
- Step-by-Step Instructions for Perfect Sugar Cookie Bars
- Tips for Achieving Thick Cookie Bars Every Time
- Ingredient Notes and Simple Baking Recipe Substitutions
- Make-Ahead and Storage for Frosted Sugar Cookie Bars
- Serving Suggestions for Dessert Bars for Parties
- Frequently Asked Questions About Sugar Cookie Bars
- Estimated Nutrition for These Easy Dessert Bars
Why These Are The Best Sugar Cookie Bars (Soft, Chewy, and Thick)
I know, I know—everyone claims their version is the best. But these sugar cookie bars genuinely solve every single problem traditional sugar cookies give you! You get the same wonderful, buttery flavor without the giant mess afterward. After testing so many different recipes, I landed on a formula that guarantees texture every single time. Trust me, you need these in your rotation.
What makes them superior? Well, let’s look at what you gain:
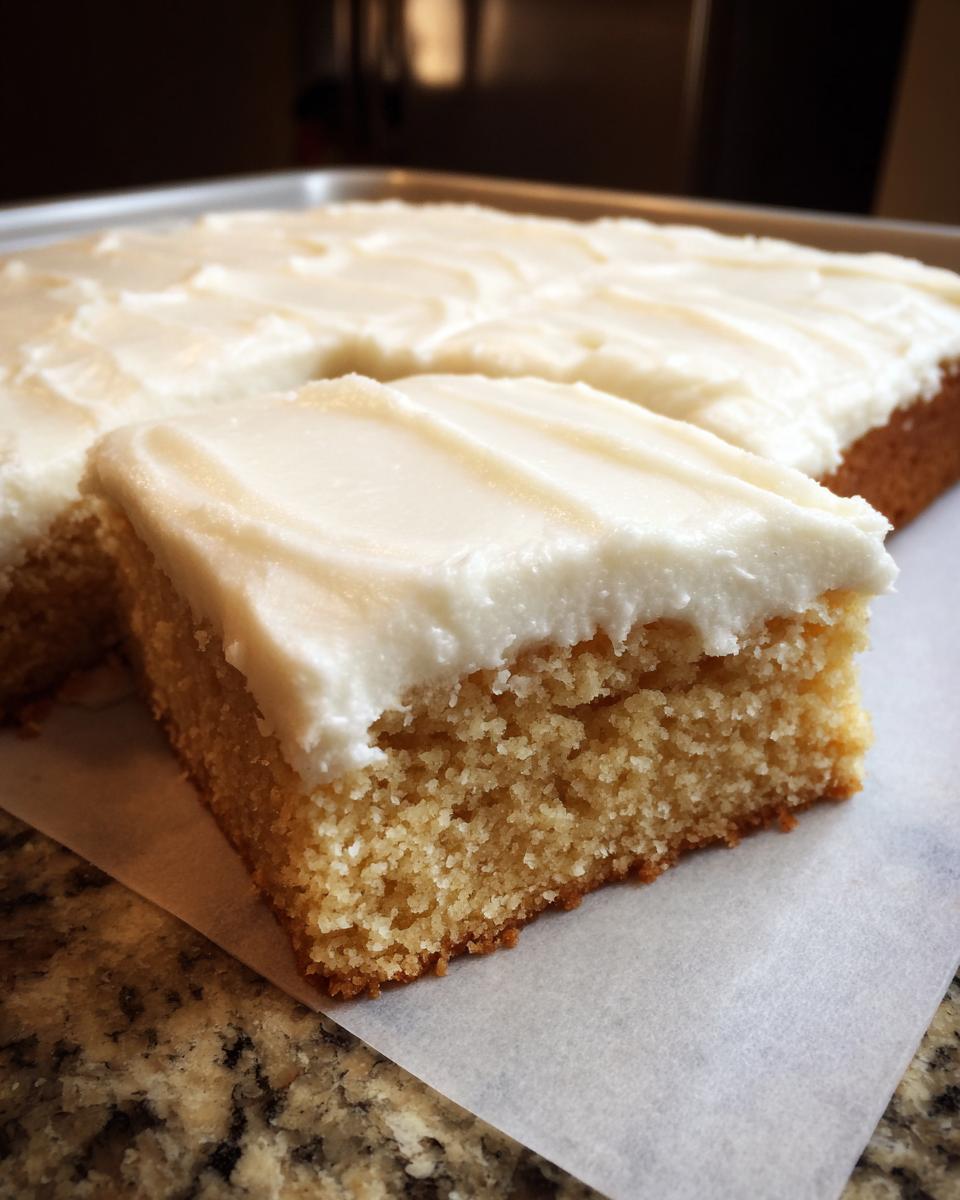
- They bake up beautifully thick cookie bars, so you get that substantial, satisfying bite.
- The balance of ingredients keeps them incredibly soft and perfectly chewy cookie squares, never cakey or crumbly.
- Minimal effort! Since everything stays in one pan, you avoid the tedious step of chilling and rolling dough, making these the ultimate easy dessert bars for a busy weeknight.
If you love the flavor of classic sugar cookies but hate the cleanup, we found our match right here. For more inspiration on achieving that soft texture, check out my tips for making the softest chocolate chip cookies—the creaming method is key for both!
Gathering Ingredients for Your Soft Vanilla Cookie Bars
Before we even think about turning on the oven, let’s talk about what we need. The absolute best part about these sugar cookie bars is that you probably already have everything sitting in your pantry! I hate recipes that require some specialty jar I can only find in one store three towns over. Not here! We are sticking to simple, accessible ingredients that deliver big, buttery flavor.
When gathering things like butter, make sure you follow my lead: soften it first! Room temperature butter that you can easily press a finger into is crucial for that fluffy base we talked about. Also, before you start mixing, make sure your 9×13 inch baking pan is ready—I usually grease mine generously and then line it with parchment paper. Leaving a little overhang on the long sides helps you lift the whole thing out later, which is a lifesaver for clean slicing!
Now that we’re prepped, here are the exact components you’ll need for the base and, most importantly, that irresistible frosting that makes these frosted cookie recipes so good. If you’re looking for frosting twists later, I’ve got a great guide on how I make my famous cream cheese frosting!
For the Chewy Sugar Cookie Bars Base
- 1 cup (2 sticks) unsalted butter, softened perfectly—not melted!
- 1 1/2 cups granulated sugar
- 2 large eggs, room temperature is best
- 1 tablespoon pure vanilla extract
- 3 3/4 cups all-purpose flour
- 1 teaspoon baking powder (this gives us thickness!)
- 1/2 teaspoon salt
- 1/2 cup milk
For the Buttercream Frosted Cookie Recipes Topping
This frosting is what takes these from good to ridiculously good. It’s thick, creamy, and holds those sprinkles perfectly in place!
- 1 cup (2 sticks) unsalted butter, softened
- 4 cups powdered sugar, make sure you sift this, seriously!
- 1 teaspoon vanilla extract
- 2 to 4 tablespoons milk or heavy cream (we adjust this for perfect spreadability)
- Optional: All your favorite fun sprinkles for decorating!
Step-by-Step Instructions for Perfect Sugar Cookie Bars
Okay, now for the fun—and surprisingly fast—part! Seriously, making these spectacular sugar cookie bars goes by so quickly because we aren’t stopping to roll dough out or fuss with cutters. It’s all about mixing, pressing, baking, and frosting. The most important thing I learned watching my mom bake these is that you have to follow the order, and you *must* let them cool completely before touching the frosting. If you rush the cooling step, you end up with a melted, soupy mess of vanilla goodness, and nobody wants that!
We are going to break this workflow into two easy sections: baking the base and then whipping up that incredible topping. When you’re done, you’ll have the thickest, chewiest bars you’ll ever make! If you want some quick ideas for what to serve alongside these amazing bars, check out some of my go-to easy breakfast ideas—you can totally adapt them for quick snacks, too!
Preparing and Baking the Sugar Cookie Bars
This is the base layer, and it sets the tone for the whole soft texture we are going for. Pay attention through the mixing phase; that’s where the magic happens!
- First things first: crank that oven up to 350°F (175°C). Remember how I mentioned lining that 9×13 inch pan with parchment, leaving the hangover flaps? Do that now!
- Grab your mixing bowl and cream that softened butter and the sugar until it looks fluffy and pale—you’re building air pockets, which equals softness later.
- Beat the eggs in one at a time, mixing well after each one, then mix in your vanilla.
- In a separate bowl, quickly whisk together your flour, baking powder, and salt.
- Now, slow down! This is the crucial part for avoiding tough cookies. Add the dry ingredients alternately with the milk, starting and finishing with the dry stuff. Mix it on low just until that last streak of flour disappears. If you overmix here, you activate the gluten, and kiss soft and chewy goodbye!
- Scrape the batter into your prepared pan and press it down firmly and evenly. Get right into those corners!
- Bake it for about 20 to 25 minutes.
- Here’s my pro tip for that perfect texture: Don’t wait for a completely clean toothpick! When you test them, you want to see just a few moist crumbs clinging to the toothpick. If it comes out bone dry, you’ve gone too far, and they won’t be as delightfully soft. Pull them out right when they look set, which is usually when the edges start turning just barely golden.
Now, step away! You must let these cool completely—I mean rock solid cool—on a wire rack before you even think about frosting them. That patience is rewarded with perfect squares later.
Making and Applying the Buttercream Frosting
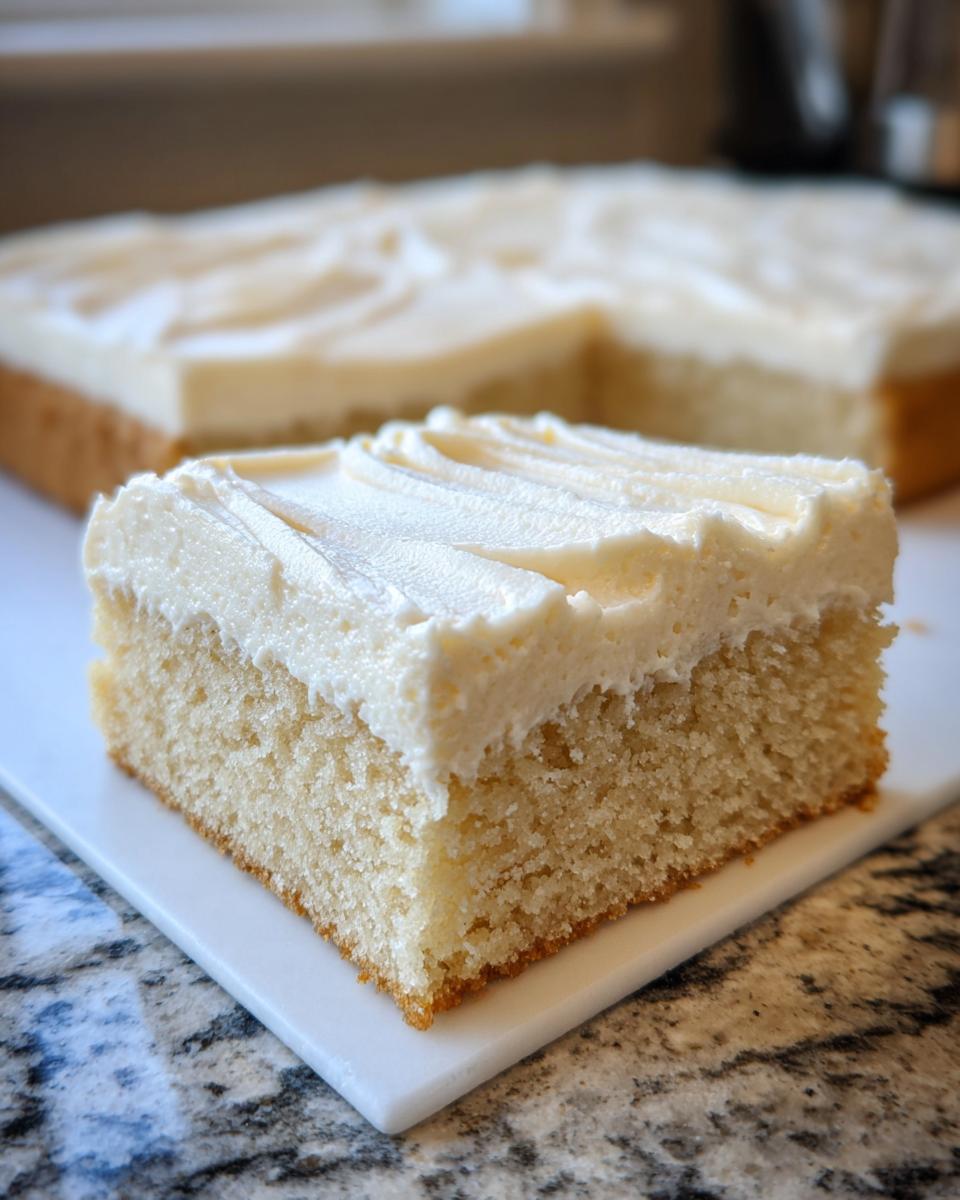
While the bars are chilling out (literally and figuratively), let’s make the ultimate topping. This is a classic, fluffy vanilla buttercream that spreads like a dream on top of those slightly crisp edges.
- Start by beating your softened butter until it’s smooth and creamy.
- Slowly mix in that sifted powdered sugar. I mean slowly, or you’ll be wearing half a cup of sugar dust! Mix on low until it’s somewhat combined.
- Add your vanilla and start with just 2 tablespoons of milk or cream.
- Beat vigorously on medium speed until it gets light and fluffy—you are whipping air into it! If it looks too stiff to spread, add the remaining milk, one teaspoon at a time, until you get a texture that looks beautifully spreadable, kind of like thick peanut butter.
- Once the bars are completely cool, just spread that glorious topping right over the top layer using an offset spatula.This is my favorite tool for everything, honestly!
- If you are using sprinkles, now is the time to decorate! Toss them on immediately while the frosting is still tacky, so they stick perfectly.
Wait just a little bit until that frosting firms up slightly, then use those parchment overhangs to lift the whole slab out onto a cutting board. Slice them into squares or rectangles, and congratulations—you just made the easiest, thickest, chewiest dessert ever!
Tips for Achieving Thick Cookie Bars Every Time
The number one thing people ask me about when they try these sugar cookie bars for the first time is: “How did you get them so thick?” Because we aren’t doing the fuss of rolling dough, there are a few little secrets I rely on—secrets that help prevent spreading and promote that beautiful, sturdy height we all want in a dessert bar. Think of these as the final checks before you even start mixing!
It all comes down to temperature control and how you respect your pan preparation. These small details make the difference between a soft, chewy square and a thin, crumbly layer. We’re aiming for substantial, bakery-style sweetness here, not snack crackers!
When you’re ready to bake, remember these three things. For more insight on great textures in desserts, check out the methods I use for my Jiffy Corn Casserole—it’s amazing how ingredient temperature changes the final result in absolutely everything we bake!
The Butter Temperature is Non-Negotiable
You simply cannot rush the butter. If your butter is too warm or, heaven forbid, melted, the fat will spread out instantly when it hits the 350-degree oven heat. That means your beautiful dough pancake spreads thin before it has a chance to bake up tall. You need that butter softened—meaning cool to the touch but yielding easily to pressure, like a chilly stick right out of the cottage fridge after sitting on the counter for about 45 minutes.
When you cream that room-temperature butter with the sugar, you are trapping air. Those little air pockets are literally what pushes your sugar cookie bars upward! If the butter is too soft, those pockets collapse before they ever enter the oven.
Don’t Skip the Parchment Paper Overhang
I mentioned this before in the steps, but it bears repeating because it affects the final shape. Lining your 9×13 pan with parchment paper and leaving those two flaps hanging over the sides acts almost like handles. It lets you gently lift the ENTIRE baked cookie slab out of the hot pan and place it directly onto a cooling rack. Why do we care? When the bars cool down inside the hot metal pan, the edges continue to cook, sometimes hardening them too much and making them shrink slightly.
Lifting that slab out quickly allows the edges to solidify gently on the cool rack, locking in that wonderful thickness across the entire batch. This is key for getting uniform, thich cookie bars.
Don’t Add Too Much Milk
When you get to alternating the wet and dry ingredients (Step 5 in the instructions), be stingy with that half cup of milk! You are aiming for a very, very thick dough that you physically have to press into the pan. If you dump in the full half cup of milk and the mixture looks easily pourable—it’s too wet! That liquid will ensure your cookie bars spread flat before they bake.
If your dough seems too loose after mixing, pause and add a tablespoon of flour. It needs to feel more like stiff cookie dough than cake batter. This density is your final tool for beautiful, tall sugar cookie bars that hold up perfectly under that creamy frosting.
Ingredient Notes and Simple Baking Recipe Substitutions
I want you to feel totally empowered making these sugar cookie bars, and sometimes life means we need to swap things out, right? Maybe you are out of milk, or maybe you just really, really love cream cheese frosting. I want to be clear: while I think the original ingredients yield the absolute best, soft result, you can absolutely make smart swaps here without ruining the entire pan.
The key thing to remember when substituting in recipes like this is that we are trying to maintain that specific soft, thick texture. Anything you add that drastically increases moisture or changes the fat content is going to impact how wide these spread in the oven. We want minimal spread and maximum chewiness!
For instance, if you’re swapping flavors, stick to high-quality vanilla. It really is the star here, but if you want to get adventurous, a tiny splash of almond extract can give these a wonderful nutty warmth, kind of pushing them toward that classic Lofthouse flavor profile. If you want to explore other baking adventures, my Pumpkin banana bread recipe shows how a simple fruit swap can transform something familiar!
Vanilla Extract: Quality Matters
I always preach using pure vanilla extract over imitation, and this is one of those times where you’ll actually taste the difference. Imitation vanilla can sometimes have a slightly chemical aftertaste that really comes through in a recipe this simple where vanilla is prominent. I always buy the big bottle of pure extract because I use it so much!
However, if you happen to have vanilla bean paste, use that by volume—it adds those gorgeous little black specks, which is just fun! If you’re in a bind and only have imitation, use a little less than the recipe calls for; maybe start with a scant tablespoon instead of a full one.
Swapping Milk for Other Liquids
The recipe calls for regular milk to help bring the dough together during the alternating mixing step. If you don’t have standard whole milk, you can use almost any liquid! Heavy cream makes the bars richer, but you’ll definitely need less of it, maybe only 2 tablespoons total, because it has more fat content.
You can even use plain yogurt or sour cream in a pinch, but here is the warning: if you use sour cream, you reduce the amount of milk called for to zero. Sour cream adds tang and moisture, so substituting it means you need to treat the mixture more like a thick cake batter foundation. Keep it simple, though, and regular milk usually works wonders for these sugar cookie bars.
Can I Substitute Butter in the Frosting?
This is where I draw the line a little bit, at least for the best result. The structure of the buttercream relies heavily on the specific way butter incorporates air when beaten with powdered sugar. Margarine often has a higher water content, which means your frosting might end up way too thin or greasy instead of light and fluffy.
That said, I know people have allergies or preferences! If you must substitute butter in the frosting, use a high-quality stick shortening instead. I wouldn’t recommend trying to use coconut oil, as it tends to melt at room temperature much faster, and you’ll end up with a runny mess coating your beautiful bars.
Make-Ahead and Storage for Frosted Sugar Cookie Bars
One of the things that makes these sugar cookie bars such incredible quick dessert squares is that you don’t have to serve them immediately! Seriously, knowing you can bake them ahead of time is a huge relief when you’re planning a party or just trying to get ahead of the week. The base dough itself is actually pretty resilient, and the frosting holds up well, too, which is a massive bonus.
I usually bake a batch on a Saturday, and honestly, they are often better on Day Two! That little bit of extra time lets the vanilla flavor really settle into the chewy cookie layer. When it comes to storing them, we have to keep the frosting condition in mind, but it’s super simple either way.
Storing Frosted Sugar Cookie Bars
Once you have spread that beautiful vanilla buttercream on top, these bars should be stored airtight at room temperature. I prefer using an actual cake carrier or a container with a tight lid. Make sure the frosting has set up a little bit before you put the lid on, or you might end up with some frosting sticking to the inside of the plastic!
At room temperature, these stay perfectly soft and chewy for about three to four days. They are so moist that they rarely dry out at all, which is why they are one of my top choices for potlucks or school treats where they might sit out for a bit. If it’s super hot where you live, or if you used cream cheese frosting instead (which you totally can!), you might want to keep them in the fridge, but I find the cold dulls that beautiful vanilla flavor.
Freezing Your Cookie Squares
Yes, you can absolutely freeze these beauties! Freezing is great if you made a double batch or if you made them way ahead for the holidays. If you plan on freezing them, I strongly suggest frosting them after they thaw. The moisture change when freezing and thawing in the fridge can sometimes cause the buttercream to sweat a little bit.
To freeze the base layer: Let the baked bars cool completely, slice them into squares, and lay them in a single layer in a freezer-safe container. Put a layer of parchment paper or wax paper between the layers so they don’t stick together. They freeze beautifully like this for up to three months! When you’re ready to serve, just thaw them on the counter for a few hours, frost them up, and you’ve got instant, fresh sugar cookie bars!
Speaking of dips and sweet things, if you are looking for another make-ahead treat that requires zero baking, you have to check out my recipe for easy pumpkin dip—it’s always a crowd-pleaser!
Serving Suggestions for Dessert Bars for Parties
Now that you have this massive, delicious slab of homemade frosted cookie goodness, the only question left is: how do we serve these wonderful dessert bars for parties without them disappearing in five minutes? Presentation is everything, especially when you’ve put love into whipping up that thick cookie base and perfect buttercream.
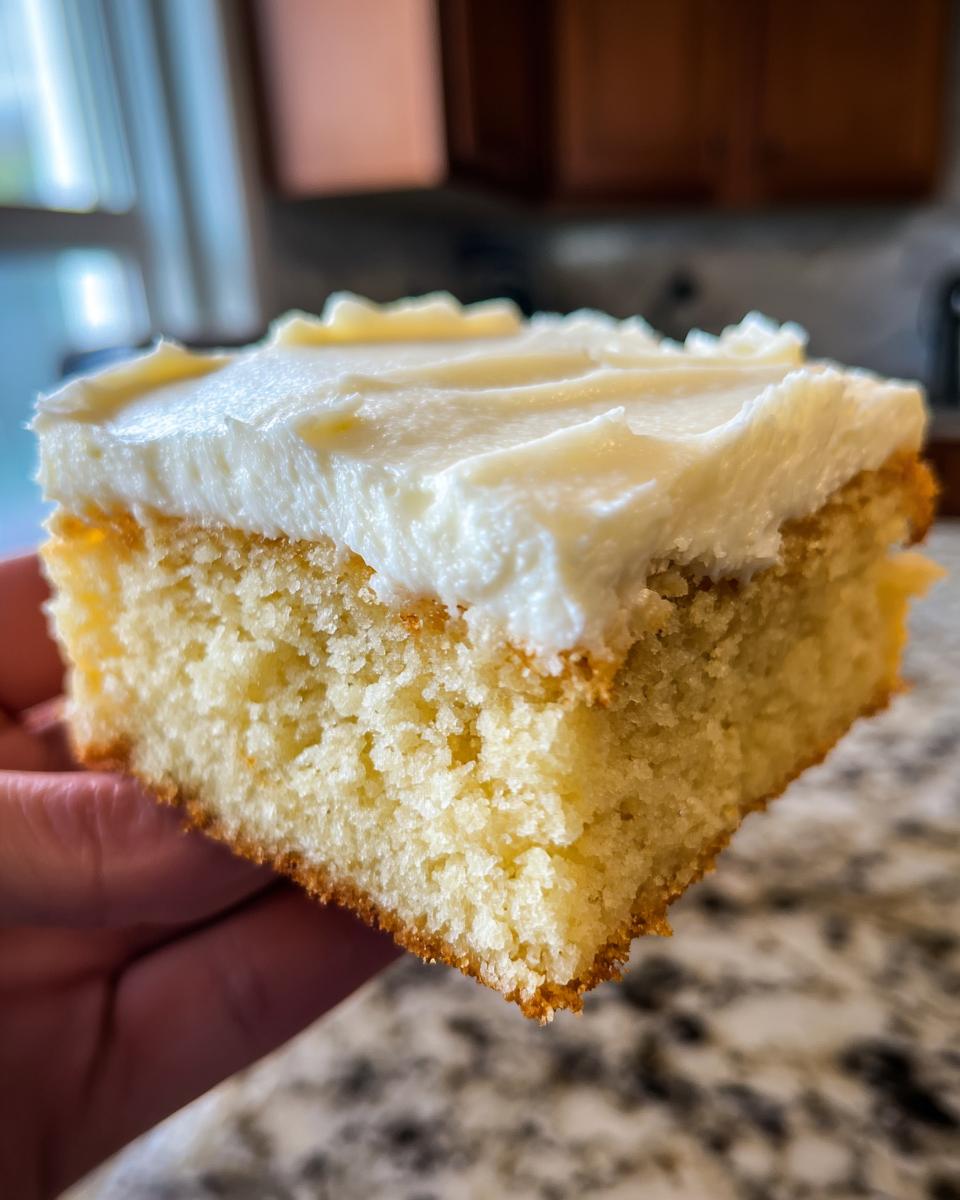
These bars are phenomenal served straight from room temperature—that’s when the cookie is at its softest and the frosting is perfectly creamy and yielding. If you are setting up a dessert buffet, I find arranging them on a clean white platter makes the colorful sprinkles just pop. If you’re serving them during the holidays, you can even cut them into fun shapes before frosting; just make sure that cookie base is completely cold before you get artistic with the knife!
For pairing, you absolutely cannot go wrong by serving these with something cool and creamy or something hot and robust. A tall glass of ice-cold milk is the classic answer, and it truly is the best way to balance the pure sweetness of the vanilla frosting. Don’t forget the little ones!
If you are serving these later in the evening alongside coffee, I always recommend letting the bars sit out on the counter for about 30 minutes before guests arrive if they were stored in the fridge. The warmth brings out the buttery notes in the cookie base beautifully. And speaking of savory mains to serve before dessert hits the table, you must try my apple cider pork shoulder recipe—it’s the perfect cozy comfort food to precede a sweet treat like this!
Frequently Asked Questions About Sugar Cookie Bars
I get so many questions after people try these sugar cookie bars, which I take as a huge compliment! It means you’re just as obsessed with this easy baking method as I am. Most of the questions revolve around texture—getting them perfectly soft and thick. Don’t worry, I’ve compiled the most common things people ask to make sure your batch turns out just like mine, every single time. If you’re looking for a completely different kind of easy weeknight meal, check out my Chicken Broccoli Casserole!
Can I make these sugar cookie bars without chilling the dough?
The short answer is yes, absolutely! This recipe is designed to be pretty forgiving, making it one of my favorite no-chill cookie bar dough options when I need a dessert fast. You can absolutely press the dough right into the pan and bake it immediately without any resting time.
However, I want to be honest with you. If you are looking for the absolute thickest bar possible, chilling the dough for just 30 minutes before pressing it into the pan helps the fats solidify just a touch. That slight chill prevents the butter from spreading too much in those first few minutes in the oven, guaranteeing a slightly taller final product. If I’m not in a rush, I chill it, but if I’m baking last minute, skipping that step leaves you with slightly thinner, but still wonderfully chewy, dessert bars for parties!
How do I get the texture exactly like a Lofthouse cookie bar?
Ah, the coveted Lofthouse texture! That super soft, melt-in-your-mouth quality is what everyone is chasing when they want copycat Lofthouse cookie bars. It comes down to two major factors in our recipe here, neither of which involves rolling or cutting, thank goodness!
First, the base has to be slightly underbaked. I cannot stress this enough! When you see those moist crumbs clinging to your toothpick (as I mentioned in the instructions), pull them out immediately. They will continue to cook for a few minutes on the hot pan, and pulling them early ensures that signature softness stays locked in. If you wait until the toothpick is bone dry, you’ve overbaked them, and they will be firmer.
Second, it’s all about the frosting ratio. Lofthouse cookies are famous for having a thick layer of frosting that’s almost as substantial as the cookie itself. Make sure you don’t skimp on that buttercream! Using the full amount listed, and being generous when you spread it edge-to-edge, is what truly achieves that look and feel. If you want to see a great example of a heavily frosted finish, check out how they handle the topping over at Design Eat Repeat.
Estimated Nutrition for These Easy Dessert Bars
You know I always keep things simple, and that extends to how we look at nutrition! When you’re whipping up something this delicious, focusing too heavily on the numbers can sometimes ruin the joy, but I know many of you like to keep track. I’ve run these ingredients through a standard calculator to give you a general idea of what you’re working with per serving.
Please remember, these numbers are just an estimate based on dividing the entire 9×13 pan into 24 even squares. How thick you slice them, how generous you are with the frosting, and what brand of butter you use will all change these figures slightly. Think of this as a helpful guideline for enjoying these wonderful easy dessert bars rather than a strict dietary measurement!
If you are really focused on upping the protein content in your snacks, you might want to check out my recipe for no-bake protein bars—those are fantastic for fueling up after a busy day!
Here is the breakdown for one generous square of our frosted sugar cookie bars:
- Calories: Approximately 350
- Total Fat: Around 18 grams
- Carbohydrates: About 45 grams
- Protein: Roughly 4 grams
The beauty of these bars is their simplicity, which means the fat and sugar content are what you expect from a classic, generous buttercream-frosted cookie square. Enjoy them with a smile, knowing you skipped all the rolling and cutting frustration!
PrintThe Ultimate Soft & Chewy Frosted Sugar Cookie Bars
Make these easy sugar cookie bars for a soft, chewy dessert that tastes like your favorite cut-out cookies without the fuss. Top them with simple vanilla buttercream frosting for a perfect treat.
- Prep Time: 15 min
- Cook Time: 25 min
- Total Time: 40 min
- Yield: 24 servings 1x
- Category: Dessert
- Method: Baking
- Cuisine: American
- Diet: Vegetarian
Ingredients
- 1 cup (2 sticks) unsalted butter, softened
- 1 1/2 cups granulated sugar
- 2 large eggs
- 1 tablespoon vanilla extract
- 3 3/4 cups all-purpose flour
- 1 teaspoon baking powder
- 1/2 teaspoon salt
- 1/2 cup milk
- For the Frosting:
- 1 cup (2 sticks) unsalted butter, softened
- 4 cups powdered sugar, sifted
- 1 teaspoon vanilla extract
- 2–4 tablespoons milk or heavy cream
- Optional: Sprinkles for decoration
Instructions
- Preheat your oven to 350°F (175°C). Grease and flour a 9×13 inch baking pan, or line it with parchment paper, leaving an overhang on the sides.
- In a large bowl, cream together the softened butter and granulated sugar until the mixture is light and fluffy.
- Beat in the eggs one at a time, mixing well after each addition. Stir in the vanilla extract.
- In a separate bowl, whisk together the flour, baking powder, and salt.
- Gradually add the dry ingredients to the wet ingredients, alternating with the milk, beginning and ending with the flour mixture. Mix only until just combined; do not overmix.
- Press the dough evenly into the prepared 9×13 inch pan.
- Bake for 20 to 25 minutes, or until the edges are lightly golden and a toothpick inserted near the center comes out clean or with moist crumbs attached.
- Let the cookie bars cool completely in the pan on a wire rack before frosting. This step is important for a clean slice.
- To make the frosting, beat the softened butter until smooth. Gradually add the sifted powdered sugar, mixing on low speed until combined.
- Add the vanilla extract and 2 tablespoons of milk or cream. Beat on medium speed until light and fluffy. Add more milk or cream, one teaspoon at a time, until you reach a smooth, spreadable consistency.
- Spread the vanilla buttercream evenly over the cooled sugar cookie bars.
- Immediately top with sprinkles, if using.
- Once the frosting is set, lift the bars out of the pan using the parchment paper overhang and cut into squares or rectangles.
Notes
- For the softest cookie bars, avoid overbaking. They should look slightly underdone in the center when you remove them from the oven.
- If you want a cream cheese frosting instead, substitute 4 ounces of softened cream cheese for half of the butter in the frosting recipe.
- You can chill the dough for 30 minutes before pressing it into the pan to help prevent spreading during baking.
Nutrition
- Serving Size: 1 bar
- Calories: 350
- Sugar: 35
- Sodium: 150
- Fat: 18
- Saturated Fat: 11
- Unsaturated Fat: 7
- Trans Fat: 0
- Carbohydrates: 45
- Fiber: 1
- Protein: 4
- Cholesterol: 55