
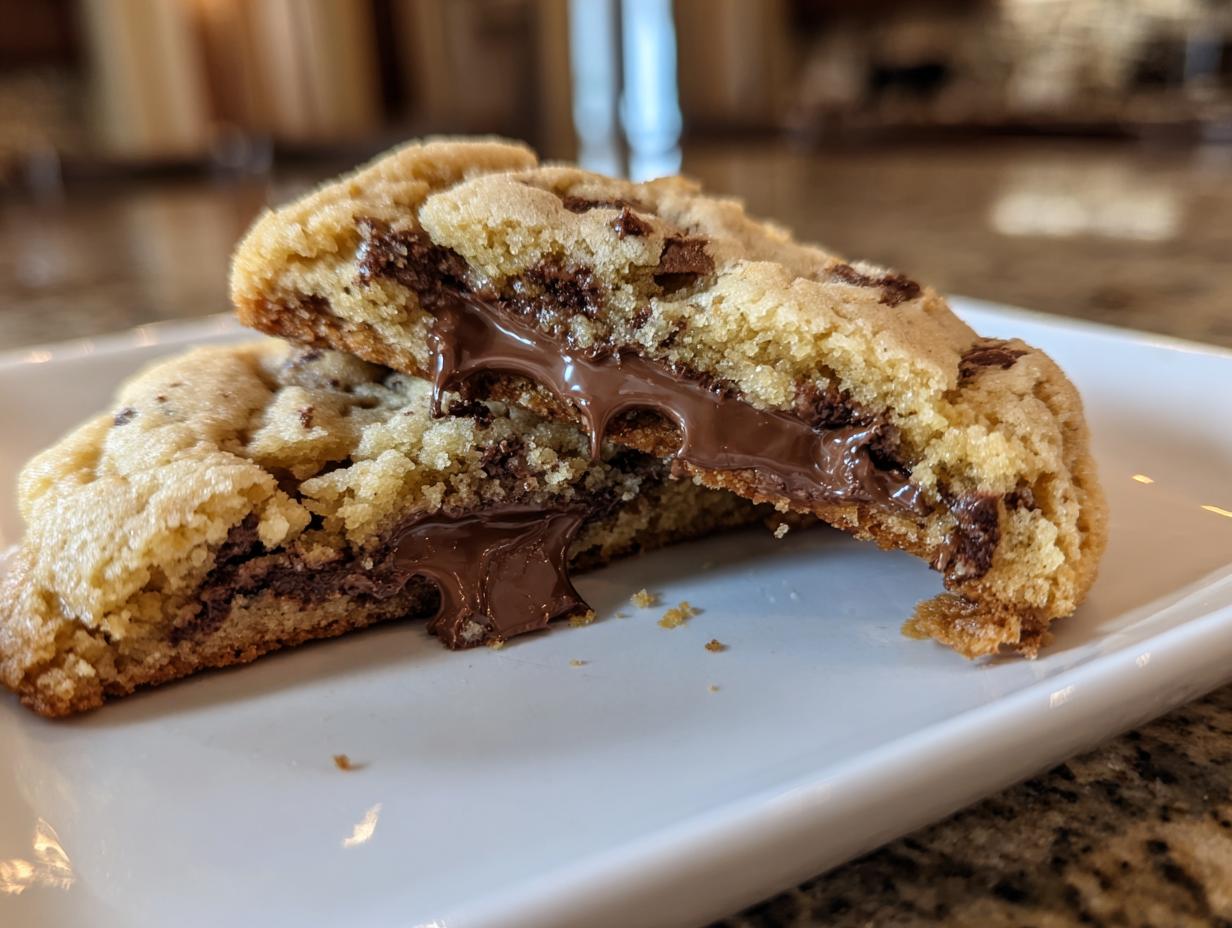
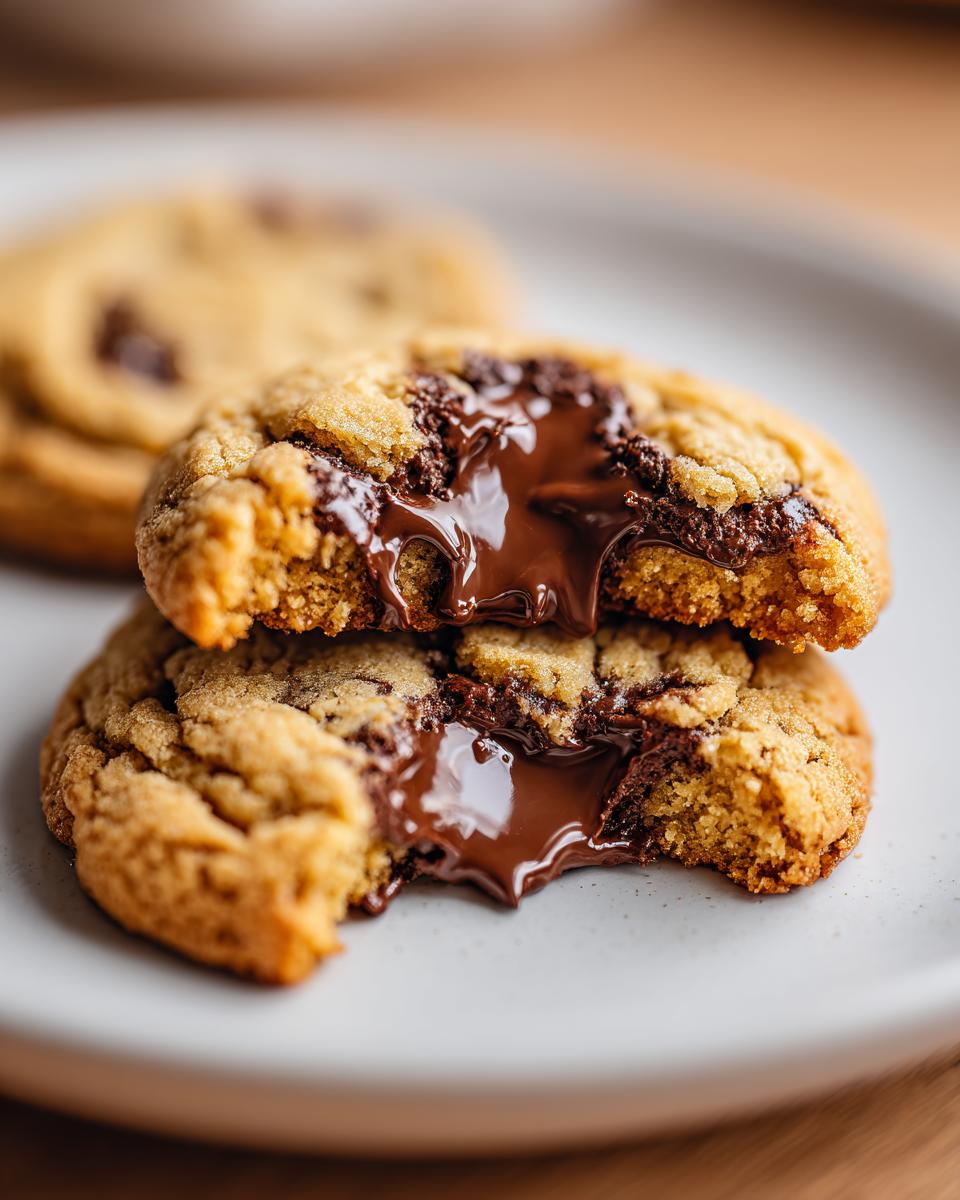
If you’re anything like me, the combination of rich, melted chocolate and salty, creamy peanut butter sends you straight back to the memories of opening a candy bar on a Saturday afternoon. That’s the feeling I bottled up when I developed these peanut butter cup cookies! Forget dry, crumbly things; we are making treats that are incredibly easy, wonderfully soft, and perfectly chewy. Honestly, sometimes life is too busy for fussy baking, which is why these come together so quickly. I promise you, these cookies are pure comfort on a plate, and they are built to be reliable. You mix them, bake them in under 30 minutes total, and they taste exactly like the best homemade candy you can imagine. Trust me, these are the keepers.
- Why This is the Best peanut butter cup cookies Recipe (E-E-A-T Focused)
- Gathering Ingredients for Your peanut butter cup cookies
- Step-by-Step Guide to Making Soft peanut butter cup cookies
- Tips for Achieving the Best peanut butter cup cookies Texture
- Storage and Keeping Your peanut butter cup cookies Fresh
- Variations on Classic peanut butter cup cookies
- Serving Suggestions for Your Decadent Cookie Recipes
- Frequently Asked Questions about peanut butter cup cookies
- Nutritional Estimates for peanut butter cup cookies
- Nutritional Estimates for peanut butter cup cookies
Why This is the Best peanut butter cup cookies Recipe (E-E-A-T Focused)
When I was testing this recipe, I realized that most recipes promise everything but deliver a cookie that’s hard by the next morning. Not these! I focused on making sure that every cookie lives up to the promise of being a truly decadent cookie recipe. I want you to have total confidence when you pull these out of the oven.
Here’s what makes my approach to these peanut butter cup cookies different:
- Guaranteed Texture: We use a blend of sugars and a specific creaming time to ensure these stay wonderfully soft baked cookies, even a couple of days later.
- Speed is Key: If you need quick peanut butter treats, these fit the bill! From start to finish, you’re looking at under 30 minutes, which is amazing for such a rich flavor profile.
- The Gooey Center Secret: The magic isn’t just in rolling the dough; it’s about *when* we press that candy in. I’ll show you how to create that perfect, slightly melted core that makes these irresistible.
If you love rich, home-baked classics, you’ll want to see how I approach my classic chocolate chip cookies too—it’s the same philosophy!
Gathering Ingredients for Your peanut butter cup cookies
Okay, let’s get organized! For these fantastic peanut butter cup cookies, we only need simple pantry staples plus the star ingredient, of course. Having everything measured out before you start creaming that butter makes the whole process smoother. I always have my peanut butter cups unwrapped and ready to go on a small plate beside me.
Here is exactly what you need for a batch of about 24 cookies:
- 1 cup unsalted butter, softened—make sure it’s truly soft!
- 1 cup creamy peanut butter (I use the regular Jif kind, don’t overthink it!)
- ¾ cup granulated sugar
- ¾ cup packed brown sugar—the dark stuff gives such better depth!
- 2 large eggs
- 1 teaspoon vanilla extract
- 2 ¼ cups all-purpose flour
- 1 teaspoon baking soda
- ½ teaspoon salt
- 1 cup peanut butter chips (just if you want *extra* peanut butter flavor, honestly they’re great without!)
- 12 standard-size peanut butter cups, unwrapped and halved, or 24 minis.
If you generally stick to my easy peanut butter cookies recipe, you’ll notice this base is super similar. It’s just an elevation of a classic! Grab those things, and we can move right along to mixing.
Step-by-Step Guide to Making Soft peanut butter cup cookies
Alright, this is where the fun starts! We need to get that oven warmed up first, so go ahead and preheat it to 375 degrees Fahrenheit. Line your baking sheets with parchment paper—it saves on cleanup, which is always a win in my book. This whole process moves quickly, but you have to give each step space! Remember, good things take just a little bit of intention.
Creaming the Wet Ingredients for perfect peanut butter cup cookies
In your big bowl, you’ll start with the butter, both kinds of peanut butter, and both sugars. You have to beat this until it’s genuinely light and fluffy. I mean fluffy! That takes patience, but this is how we get air into the dough, which keeps these peanut butter cup cookies soft later on. Once you hit that perfect texture, drop in the eggs, don’t rush it—beat them in one at a time, letting each one incorporate fully before adding the next. Finally, swirl in that vanilla extract.
Combining Dry Ingredients and Final Dough Mix
While that beautiful wet mixture is waiting, grab a separate bowl and whisk together the flour, baking soda, and salt. We want those leaveners evenly distributed! Now, start adding the dry stuff to the wet stuff gradually. I mean slowly! If you dump it all in at once, you’ll end up with a dense mess. Mix until you *just* see the flour disappear. If you’re using them, fold in those optional peanut butter chips right here. If you overmix now, you’ll lose that beautiful texture we worked so hard building in the creaming step.
Shaping and Inserting the Peanut Butter Cups
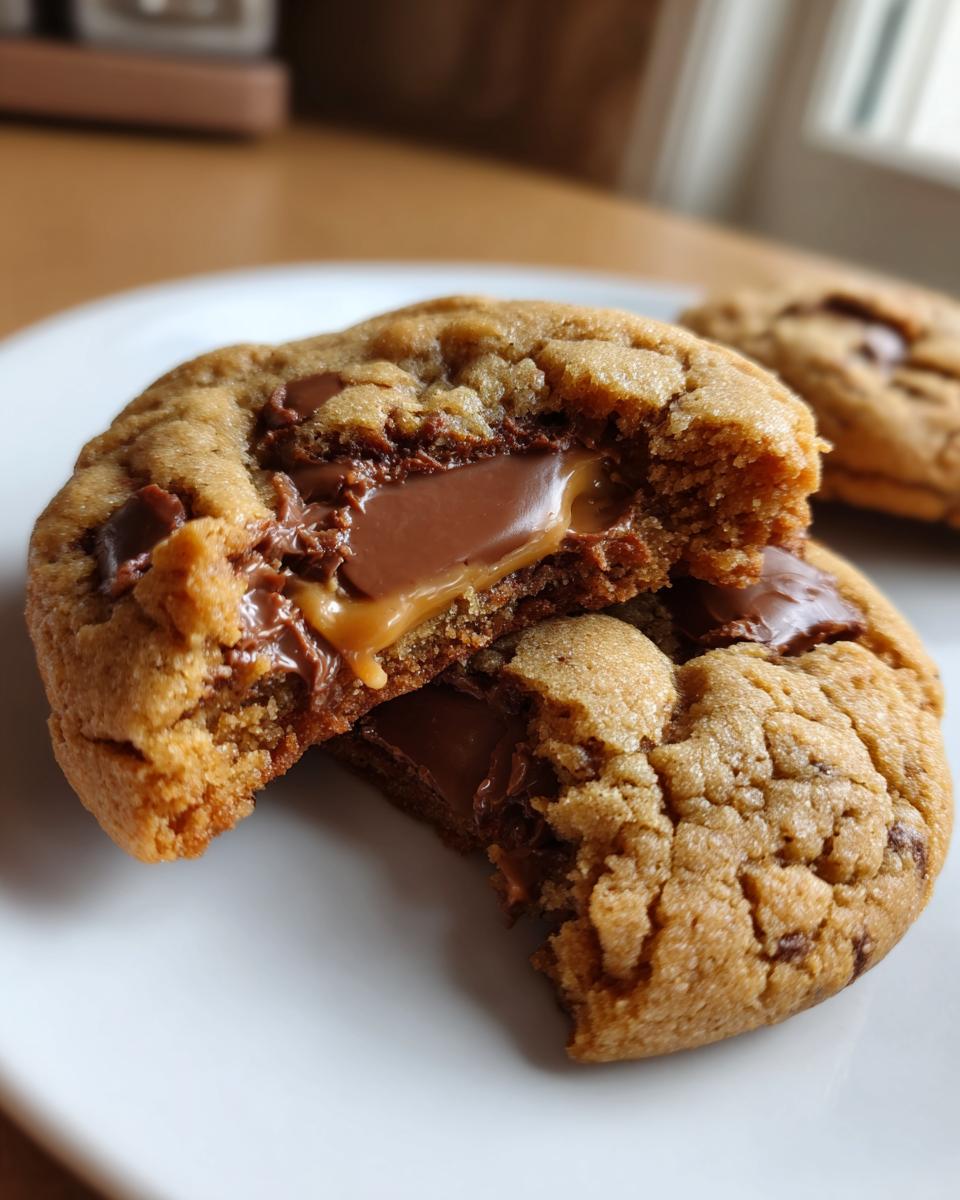
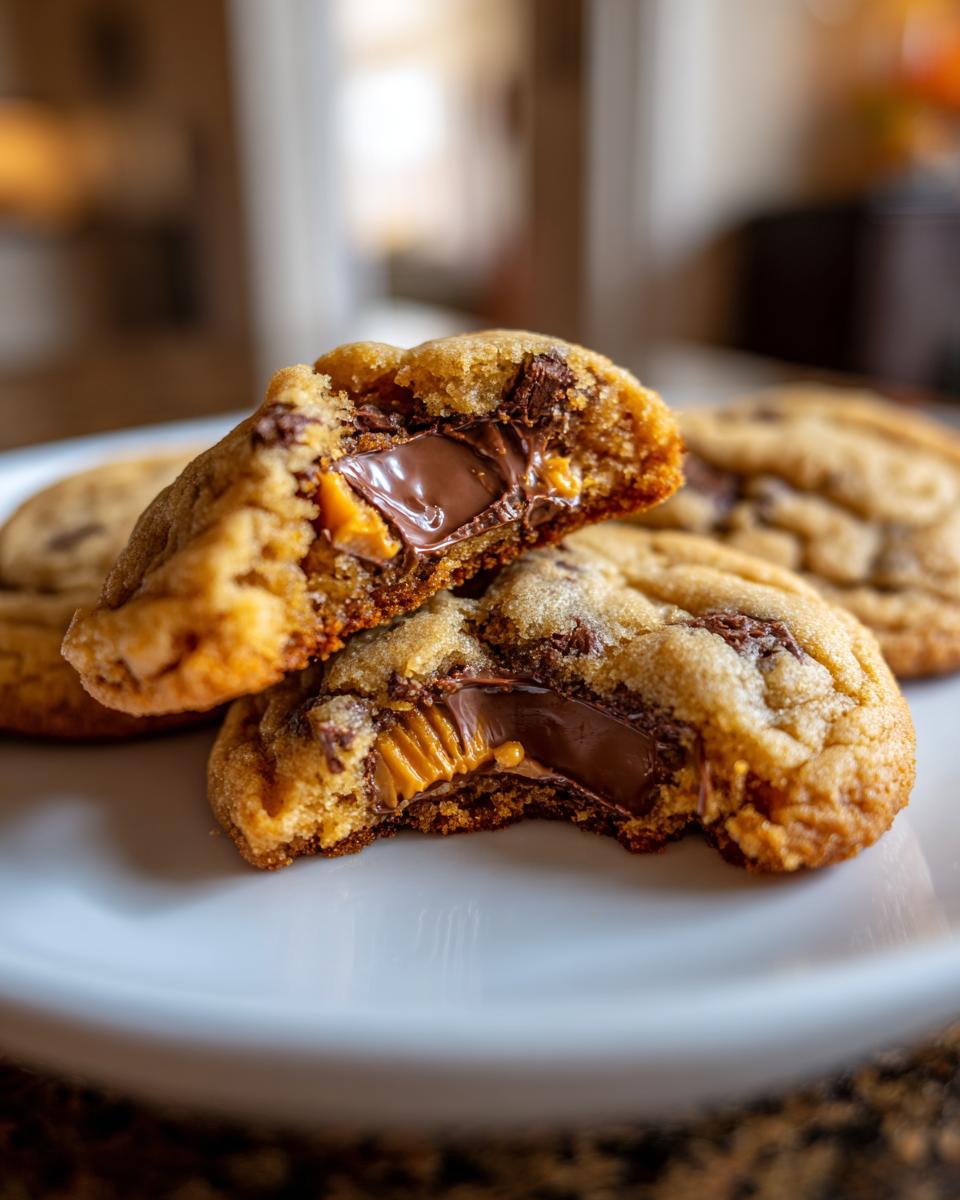
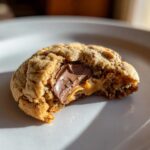
Time to scoop! Use a medium cookie scoop—around 1.5 tablespoons of dough is perfect—and roll those into nice balls. Place them on the parchment paper, making sure you leave a little space between them since they’ll spread a bit. Now for the gooey center secret: use your thumb or the back of a small spoon to press a good little dent right in the middle of each dough ball. Pop one half of your standard peanut butter cup (or a mini one) right into that pocket. If you want that truly melted, slightly messy look—which I love for a decadent cookie recipe—press it down a tiny bit more right when they come out of the oven. Bake them for about 9 to 11 minutes, and then let them sit on the hot sheet for 5 minutes before moving them over to cool completely. That resting time helps them set up just right!
You can check out some of my other favorite chewy chocolate chip cookies for more tips on texture control!
Tips for Achieving the Best peanut butter cup cookies Texture
The difference between a good cookie and the *best* cookie often comes down to one little timing decision, especially when we’re dealing with melt-in-your-mouth centers like these peanut butter cup cookies. If you want that gooey center that oozes just a little when you bite in, try pressing the peanut butter cup into the dough *right* before they go into the oven. They will melt perfectly during the bake!
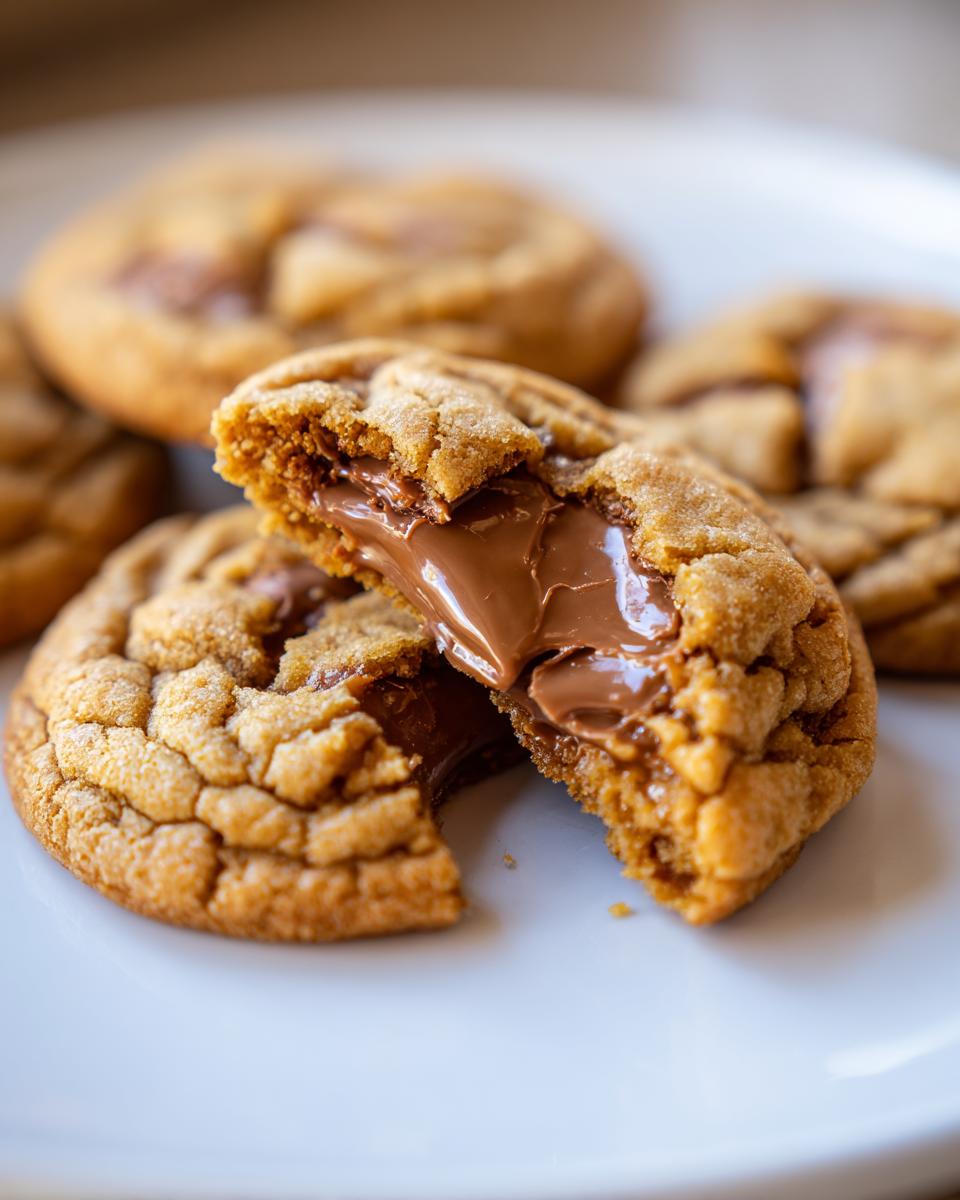
Now, if you prefer a cleaner look—where the candy doesn’t spread quite as much—you can skip that step and press the cup into the cookie immediately after they come out of the oven. The residual heat will melt the chocolate perfectly without making the candy slide everywhere. Trust me, it’s worth experimenting with both ways!
Also, don’t forget texture! If you’re a fan of chunky bits in your dough, feel free to swap out the creamy peanut butter in the base dough for crunchy peanut butter. It gives the cookie itself a bit more structure. No matter what you choose, remember that slightly soft look when you pull them out is your goal. If you want more ideas for chewy treats, check out my easy peanut butter cookies post—similar rules apply!
Storage and Keeping Your peanut butter cup cookies Fresh
Okay, these peanut butter cup cookies are so good that I highly doubt you’ll have many left over, but we should always plan ahead, right? The main goal here is preventing them from getting hard, because we worked so hard to get that soft baked texture!
The biggest thing you need to remember is air—air is the enemy of soft cookies. If you want these to stay delightfully gooey and chewy for days, skip the fridge. Seriously, the fridge dries out cookies like nobody’s business.
Instead, treat these just like you would any good homemade candy cookie. Stack them in an airtight container. I usually put a piece of small parchment paper or wax paper between the layers if I stack more than two high, just so the melted chocolate doesn’t stick the tops together. Keep that container on the counter at room temperature.
If you store them correctly, they’ll stay just as delightfully soft and fudgy as they were when they first cooled down. I’ve kept batches this way for nearly a week, maybe longer if I can resist them! It’s all about keeping that moisture locked in so you can enjoy that perfect chocolate peanut butter dessert whenever a craving hits.
Variations on Classic peanut butter cup cookies
While I stand by this recipe as the absolute gold standard for peanut butter cup cookies—it’s perfect, trust me—I know some of you bakers like to switch things up! That’s the fun of home baking; you use what you have and make it your own. These cookies are super forgiving, so feel free to experiment with the candy part!
You mentioned wanting different types of candies, and that’s a fantastic idea. Instead of the standard milk chocolate cups, try swapping them out for dark chocolate peanut butter cups if you want a deeper, less sweet pairing with the peanut butter base. Or, if you’re making these for a super fun gathering and want tons of melted pockets, use mini peanut butter cups instead of cutting standard ones in half. You might get one mini cup per cookie this way, and it fills out the cookie nicely!
If you’re looking to add a bit more texture or contrast, I have a couple of go-to mix-ins that work beautifully with the chocolate and peanut butter flavor profile. A few sprinkles of flaky sea salt right on top before baking really makes the peanut butter pop. Honestly, it balances the richness perfectly!
Another easy addition is tossing in about half a cup of regular chocolate chips along with your regular cookie dough mix. It just means more chocolate! If you like that warm flavor profile for the holidays, check out my pumpkin snickerdoodle cookies post for inspiration on how spices can transform a classic dough. But for now, keep these peanut butter cup cookies simple, or give them a little salty or dark chocolate twist!
Serving Suggestions for Your Decadent Cookie Recipes
Okay, you’ve done the hard work—or maybe the easy work, depending on how you look at it! Now that you have these incredible peanut butter cup cookies cooling, you have to think about the best way to enjoy them. Honestly, they are perfect just eaten standing over the sink, but for maximum enjoyment, let’s talk pairings!
The classic companion for any chocolate and peanut butter treat is always ice-cold milk. There’s just something about that refreshing chill cutting through the richness of the cookie. If you want to get fancy, I actually have a recipe for best homemade chocolate milk recipe that turns a simple glass of milk into a decadent experience on its own. It’s perfect for dipping!
If it’s later in the day, these cookies pair beautifully with a strong cup of hot coffee or a creamy latte. That bitterness from the coffee really enhances the sweetness of the peanut butter cups and the savory quality of the peanut butter base. Since these are such crowd-pleasers, I always make a double batch if I know a picnic or a holiday gathering is coming up. They travel well and always manage to disappear first!
For a really decadent dessert display, serve the cookies slightly warmed with a scoop of vanilla bean ice cream balanced right on top. That warmth melts the residual chocolate ever so slightly, making for the gooest bite ever. Enjoy every single one!
Frequently Asked Questions about peanut butter cup cookies
If you have questions, I certainly have the answers! Baking these peanut butter cup cookies is straightforward, but it’s always good to iron out the little things before you start. I swear, I’ve tried every mistake possible, so I’ve learned a thing or two about what works best for getting that perfect, soft-baked cookie every time.
What is the best peanut butter to use for these chewy peanut butter cups bars?
For the absolute best results that lead to soft baked cookies, stick with creamy peanut butter—not the natural, oily kind that separates! The standard jarred, processed peanut butter (like Jif or Skippy) has stabilizers that help hold the moisture in the dough. This is crucial for texture and keeping these quick peanut butter treats soft for days! If you use natural peanut butter, you might need an extra teaspoon or two of flour.
How do I keep the bottoms from burning while the center is gooey?
This is a classic baking challenge, especially with delicious treats like these. Since the candy centers take a bit of extra time to melt, the bottoms can sometimes get too dark. My trick is to bake them on a very light-colored aluminum baking sheet, not dark non-stick ones, which conduct heat faster. If you notice them browning too quickly, you can always slide a second, empty baking sheet underneath the one they are on halfway through the baking time. That second sheet acts like a heat shield for the bottoms!
Can I make the dough for these peanut butter cup cookies ahead of time?
Yes, absolutely! You can definitely whip up the dough and keep it wrapped tightly in plastic wrap in the fridge for up to three days. When you’re ready to bake, just let the dough sit out on the counter for about 20 minutes so it softens up slightly before scooping. If you bake it straight from the fridge, they might not spread as much, result in thicker cookies, which is fine if you prefer that style!
Do I need to chill the dough before baking?
Nope! That’s one of the joys of this recipe—it’s designed to be a quick peanut butter treat. Unlike some cutout cookies, chilling the dough for these peanut butter cup cookies isn’t necessary. We want them soft, and chilling can make them a bit too firm before they hit the heat. Just make sure your butter is softened, not melted, and you’re good to go!
If you’re looking for more reliable recipes that fit right into a busy week, I share tons of reliable methods over on my page about easy weeknight dinners!
Nutritional Estimates for peanut butter cup cookies
I always want to be clear that these numbers are just estimates, you know? Everyone’s flour density and the exact size of their peanut butter cups are a little different! But based on standard ingredients, here’s what you can generally expect per cookie from these peanut butter cup cookies.
- Serving Size: 1 cookie
- Calories: 250
- Fat: 15g (with 6g Saturated Fat)
- Carbohydrates: 25g
- Sugar: 20g
- Protein: 5g
- Cholesterol: 30mg
Since we are using rich ingredients like butter and peanut butter, they clock in a bit higher in the fat department, but that’s where the richness comes from, right? Everything in moderation, especially when it tastes this good!
PrintEasy, Soft, and Chewy Peanut Butter Cup Cookies
Bake these soft, chewy peanut butter cup cookies using simple ingredients. They feature a rich peanut butter base and a melted peanut butter cup center, making them a decadent chocolate peanut butter dessert perfect for any occasion.
- Prep Time: 15 min
- Cook Time: 11 min
- Total Time: 26 min
- Yield: 24 cookies 1x
- Category: Dessert
- Method: Baking
- Cuisine: American
- Diet: Vegetarian
Ingredients
- 1 cup unsalted butter, softened
- 1 cup creamy peanut butter
- ¾ cup granulated sugar
- ¾ cup packed brown sugar
- 2 large eggs
- 1 teaspoon vanilla extract
- 2 ¼ cups all-purpose flour
- 1 teaspoon baking soda
- ½ teaspoon salt
- 1 cup peanut butter chips (optional)
- 12 standard-size peanut butter cups, unwrapped and halved (or 24 mini peanut butter cups)
Instructions
- Preheat your oven to 375 degrees Fahrenheit. Line baking sheets with parchment paper.
- In a large bowl, cream together the softened butter, peanut butter, granulated sugar, and brown sugar until the mixture is light and fluffy.
- Beat in the eggs one at a time, then mix in the vanilla extract.
- In a separate bowl, whisk together the flour, baking soda, and salt. Gradually add the dry ingredients to the wet ingredients, mixing until just combined. If using, stir in the peanut butter chips.
- Scoop dough using a medium cookie scoop (about 1.5 tablespoons) and roll into balls. Place them on the prepared baking sheets, leaving space between them.
- Press a slight indentation into the center of each dough ball. Place one half of a standard peanut butter cup (or one mini peanut butter cup) into the indentation of each cookie.
- Bake for 9 to 11 minutes, or until the edges are set but the centers still look slightly soft.
- Remove the cookies from the oven. Immediately press the peanut butter cup down slightly again if needed, as the chocolate will be melted.
- Let the cookies cool on the baking sheet for 5 minutes before transferring them to a wire rack to cool completely. This helps achieve that soft baked cookies texture.
Notes
- For a gooey center, press the peanut butter cup into the dough right before baking. For a cleaner look, you can press the candy into the cookie immediately after it comes out of the oven.
- You can use crunchy peanut butter if you prefer texture in your peanut butter cup cookies.
- This recipe makes the best peanut butter cookie cups when using mini cups pressed into the center.
Nutrition
- Serving Size: 1 cookie
- Calories: 250
- Sugar: 20
- Sodium: 150
- Fat: 15
- Saturated Fat: 6
- Unsaturated Fat: 9
- Trans Fat: 0
- Carbohydrates: 25
- Fiber: 1
- Protein: 5
- Cholesterol: 30