
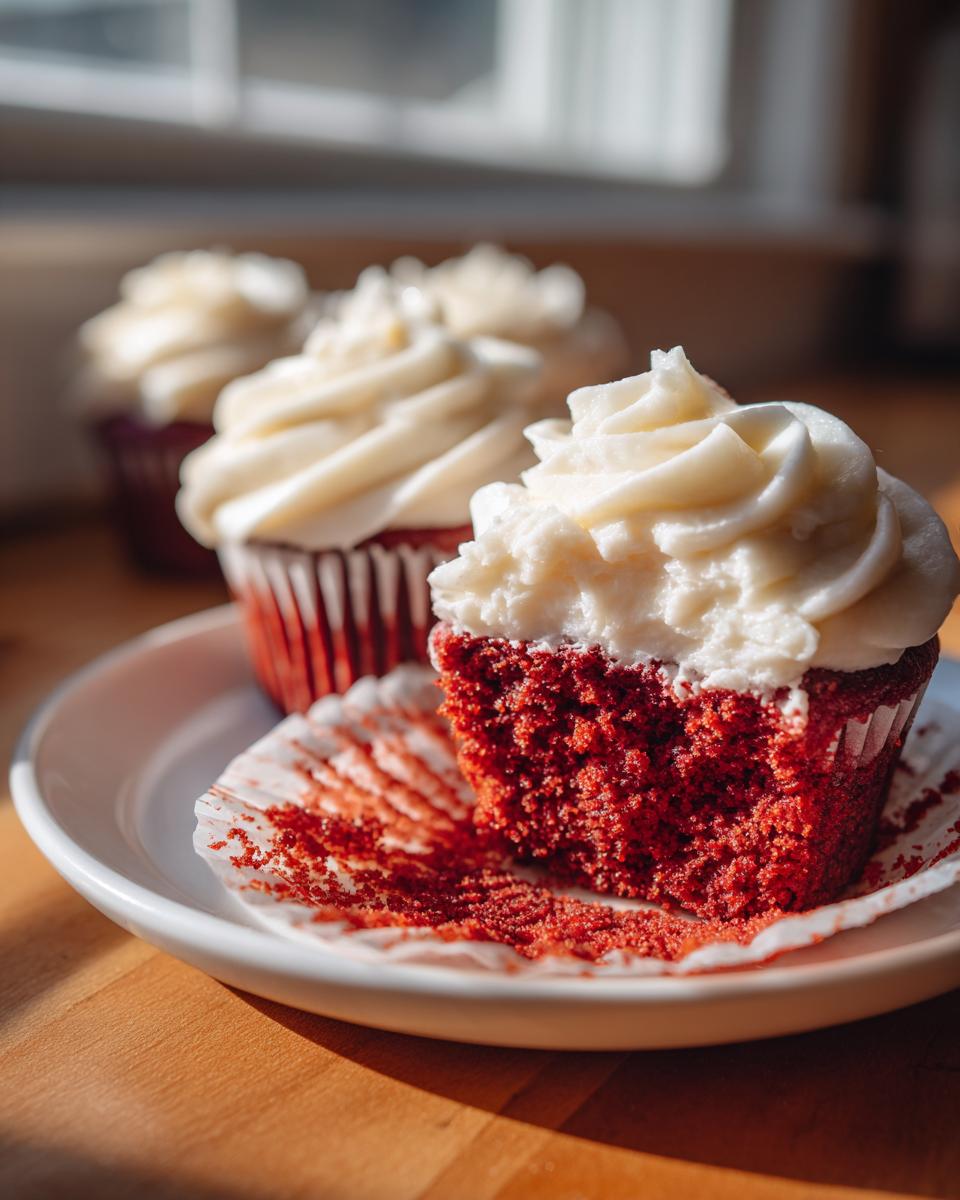
Oh, you know how much I love a classic American dessert that looks fancy but is actually totally achievable at home! Life gets hectic, right? There were times when I was trying to hustle in the city, and all I could think about was the taste of home. That’s when I started diving deep into reviving those comforting, reliable recipes, and nothing screams tradition like perfectly balanced red velvet cupcakes. This recipe isn’t just some fly-by-night internet find; I’ve tested this until it’s rock solid, giving you the most wonderfully moist red velvet cupcakes topped with that signature, slightly tangy cream cheese frosting. Trust me, this is the one you’ll want saved for every celebration!
- Why This is Your Go-To Recipe for Moist Red Velvet Cupcakes
- Essential Ingredients for Perfect Red Velvet Cupcakes
- Step-by-Step Instructions for Easy Red Velvet Recipe
- Mastering the Cream Cheese Frosting for Cupcakes
- Expert Red Velvet Baking Tips for Bakery Style Cupcakes
- Serving and Storing Your Homemade Red Velvet Treats
- Frequently Asked Questions About Red Velvet Cupcakes
- Making Southern Style Red Velvet Cupcakes
- Nutritional Estimate for Your Red Velvet Cupcakes
Why This is Your Go-To Recipe for Moist Red Velvet Cupcakes
I’m not going to lie; I’ve tried a million variations trying to crack the code for the best red velvet cupcakes. So many turn out either too dry or too sweet. This one? This one works, and it works beautifully every time. It’s reliable, which is all I ever want when I’m baking for company. You don’t need to be a professional baker to nail this batch.
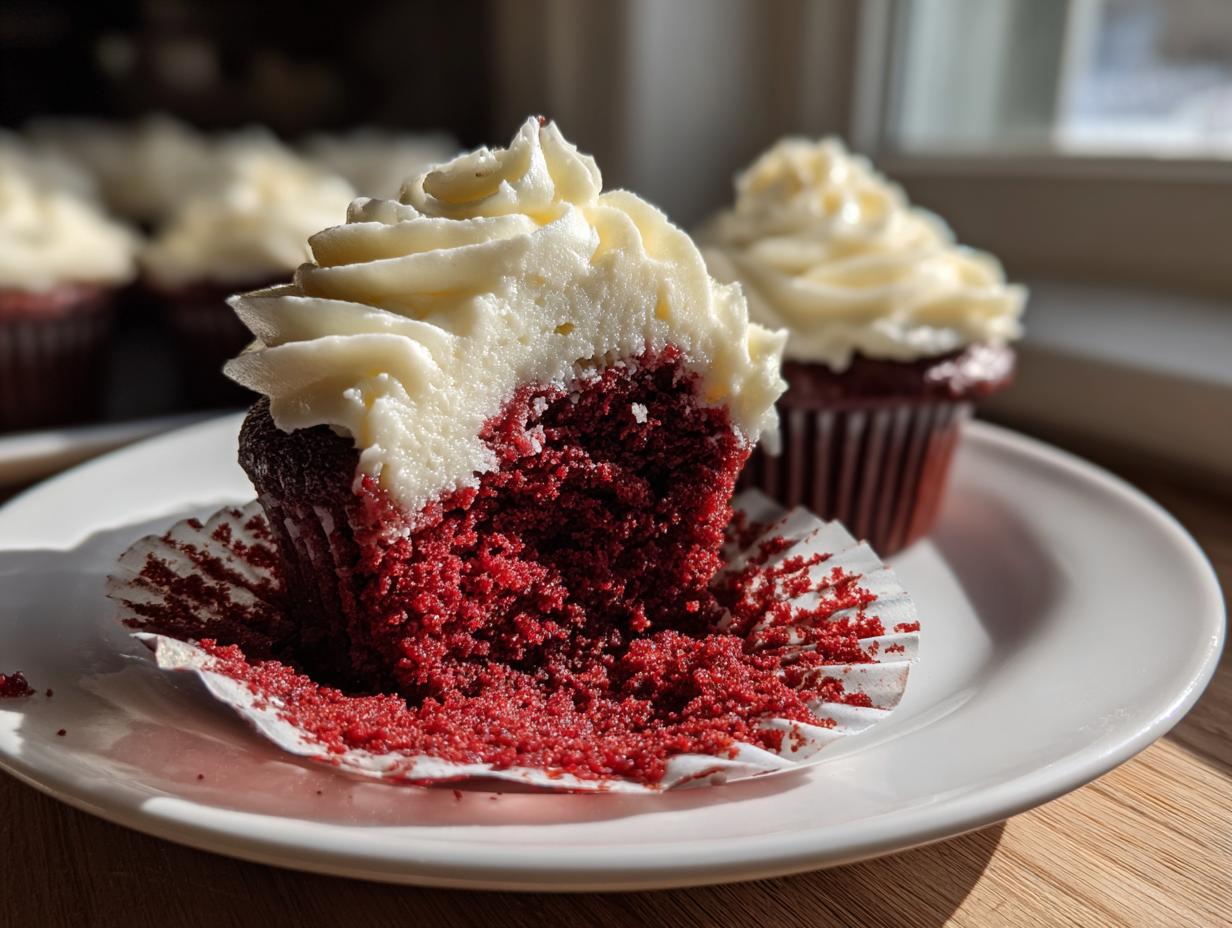
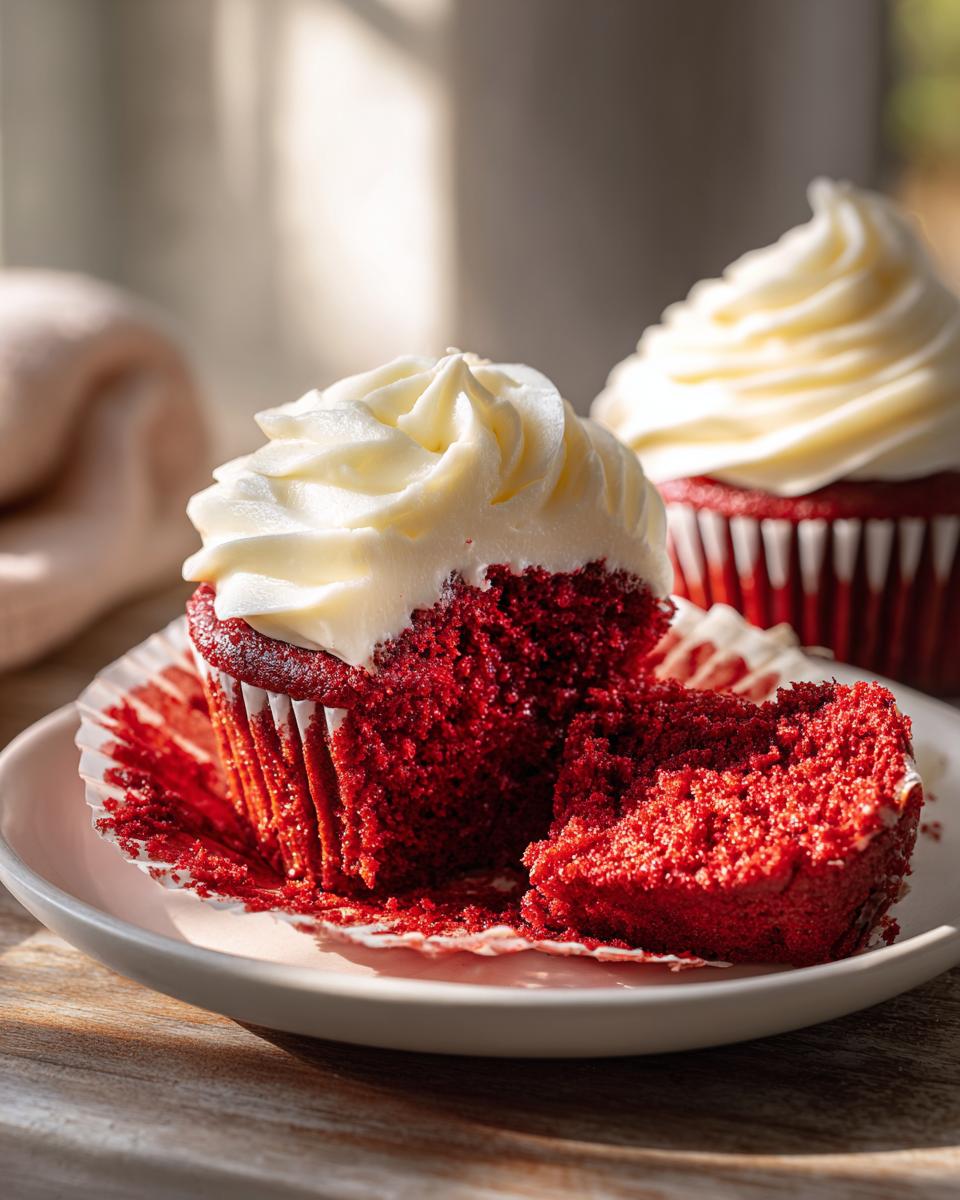
- The texture is genuinely soft and velvety texture desserts quality—never crumbly!
- It hits that perfect flavor note: rich cocoa balanced by a lovely buttermilk tang.
- If you follow these steps, you’ll easily create a beginner friendly cupcake recipe result that looks bakery style.
Whenever I make these, I remember how much better they taste when they’re perfectly balanced. You can check out my guide on combining cream cheese frosting when you get to that stage, which perfectly complements these little cakes—it’s divine!
Achieving That Signature Velvety Texture in Red Velvet Cupcakes
The secret to that famous tenderness is twofold, really. First, we use buttermilk, which reacts with the baking soda to create the perfect lift and tenderness. Second, the mixing! We mix just until those ingredients are happy—any more, and you activate too much gluten, which gives you a tougher cupcake instead of that wonderful, moist red velvet cupcakes crumb we are after.
Essential Ingredients for Perfect Red Velvet Cupcakes
Okay, let’s talk ingredients because this is where the magic—and the color—happens for these red velvet cupcakes. When you gather everything, make sure your butter and cream cheese (for the frosting later, but good habit now!) are softened. Nobody wants lumps when aiming for that gorgeous, smooth result. We need the dry stuff whisked separately, and the wet stuff mixed lovingly.
The absolute star here, besides the cocoa, is the buttermilk! I cannot stress this enough. It’s what gives you those incredibly moist red velvet cupcakes and that necessary little tang we associate with southern style red velvet. Don’t skip it, seriously!
Here is everything you need to collect before we start hitting that mixer:
- 1 1/2 cups all-purpose flour
- 1 teaspoon baking soda
- 1 teaspoon unsweetened cocoa powder
- 1/2 teaspoon salt
- 1 cup granulated sugar
- 1/2 cup unsalted butter, softened
- 2 large eggs
- 1 teaspoon vanilla extract
- 1 cup buttermilk
- 1 tablespoon red gel food coloring
- 1 teaspoon white vinegar
- For the Frosting (We worry about this later!): 1/2 cup cream cheese, softened, 1/4 cup unsalted butter, softened, 2 cups powdered sugar, 1/2 teaspoon vanilla extract, and 1 tablespoon milk or heavy cream.
If you’re short on buttermilk, don’t panic! It happens to me too. Mix 1 tablespoon of white vinegar or lemon juice into your regular milk and let it sit for five minutes. You’ve essentially made a quick version for this buttermilk cupcakes recipe, which works great for giving you those tender results, similar to how I handle my banana bread!
Ingredient Notes and Substitutions for Your Red Velvet Cupcakes
A couple of quick pointers before you dive in. For the color—please, please use red gel food coloring instead of the liquid drops. Liquid coloring messes with the chemistry of the batter, often making it too wet, and you’d have to use way too much to get the deep color we want. Gel drops just give you vibrant pigment without drowning the cake structure. Also, that vinegar? It’s working with the baking soda and buttermilk to give you that signature rise and delicate crumb. Don’t substitute that out if you can help it!
Step-by-Step Instructions for Easy Red Velvet Recipe
Alright, now that we have our ingredients lined up—that’s half the battle won for an easy red velvet recipe! We want to make sure everything goes together smoothly so we get those picture-perfect, fluffy red velvet dessert results. First things first: get your oven warmed up to 350°F (175°C). I always have my 12-cup muffin tin ready with paper liners before I even touch the mixer. Speed is key here because time matters for the chemical reactions!
Once the oven is happy, whisk your dry things—flour, cocoa, baking soda, and salt—in a medium bowl. Set that aside. Now, cream your softened butter and the full cup of sugar until it looks pale and fluffy. Beat in those two eggs one at a time, making sure each one disappears before adding the next, plus that teaspoon of vanilla. We also mix the buttermilk, the vinegar, and all that gorgeous red food coloring together. Whew, that’s the wet team!
Mixing the Red Velvet Cupcakes Batter Correctly
This step is where you need to listen carefully to my number one rule for red velvet baking tips: WE DO NOT OVERMIX. I mean it! You’re going to alternate adding your dry flour mix and your colorful buttermilk mix into the creamed butter base. Start and end with the dry ingredients. This keeps everything from separating and guarantees that beautiful, fine crumb. Just mix until you see no streaks of flour left. Stop right there! Don’t try to smooth out every tiny lump; that’s how you end up with tough cakes.
Baking Time and Cooling for Fluffy Red Velvet Dessert
Divide that lovely batter evenly into your liners—make sure they’re only about two-thirds full so you get that perfect dome. Bake them for about 18 to 20 minutes at 350°F. You can check readiness with a toothpick inserted in the center; if it comes out clean with just a few moist crumbs clinging to it? Perfection! Then, let them chill in the pan for just five minutes before popping them onto a wire rack to cool down completely. If you try to frost them warm, that gorgeous cream cheese frosting for cupcakes will turn into a melted, soupy nightmare. Patience pays off!
You’ll find that once you get the hang of this alternating method, you can apply that same technique to making my famous chocolate chip cookies too!
Mastering the Cream Cheese Frosting for Cupcakes
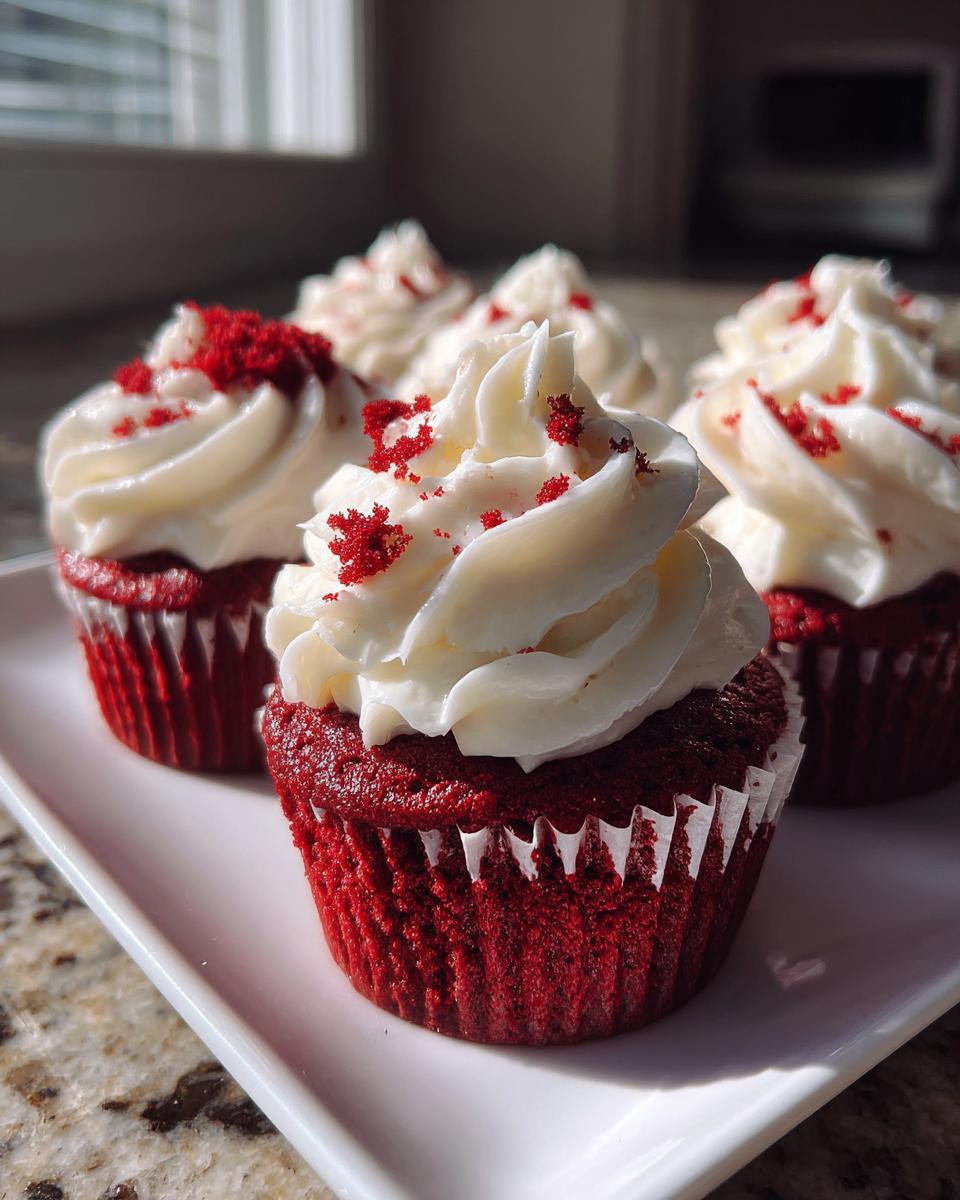
Now, let’s get to the best part of any true Southern treat: that gloriously tangy, swirly topping! You can have the most colorful, moist red velvet base in the world, but if the frosting flops, the whole party is ruined. Making fantastic cream cheese frosting for cupcakes is surprisingly simple, but it demands one thing: very, very soft ingredients. I mean butter-soft cream cheese and butter.
When you start creaming that cream cheese and butter together, you’re building the foundation for a smooth application. Don’t rush this part, and make sure you beat out all those lumps before you start adding the powdered sugar. Once the sugar is in, beat it until it’s fluffy, adding just a splash of milk or cream to get it swirling perfectly on the mixer attachment. This frosting is what elevates these from simple cakes to truly indulgent dessert ideas.
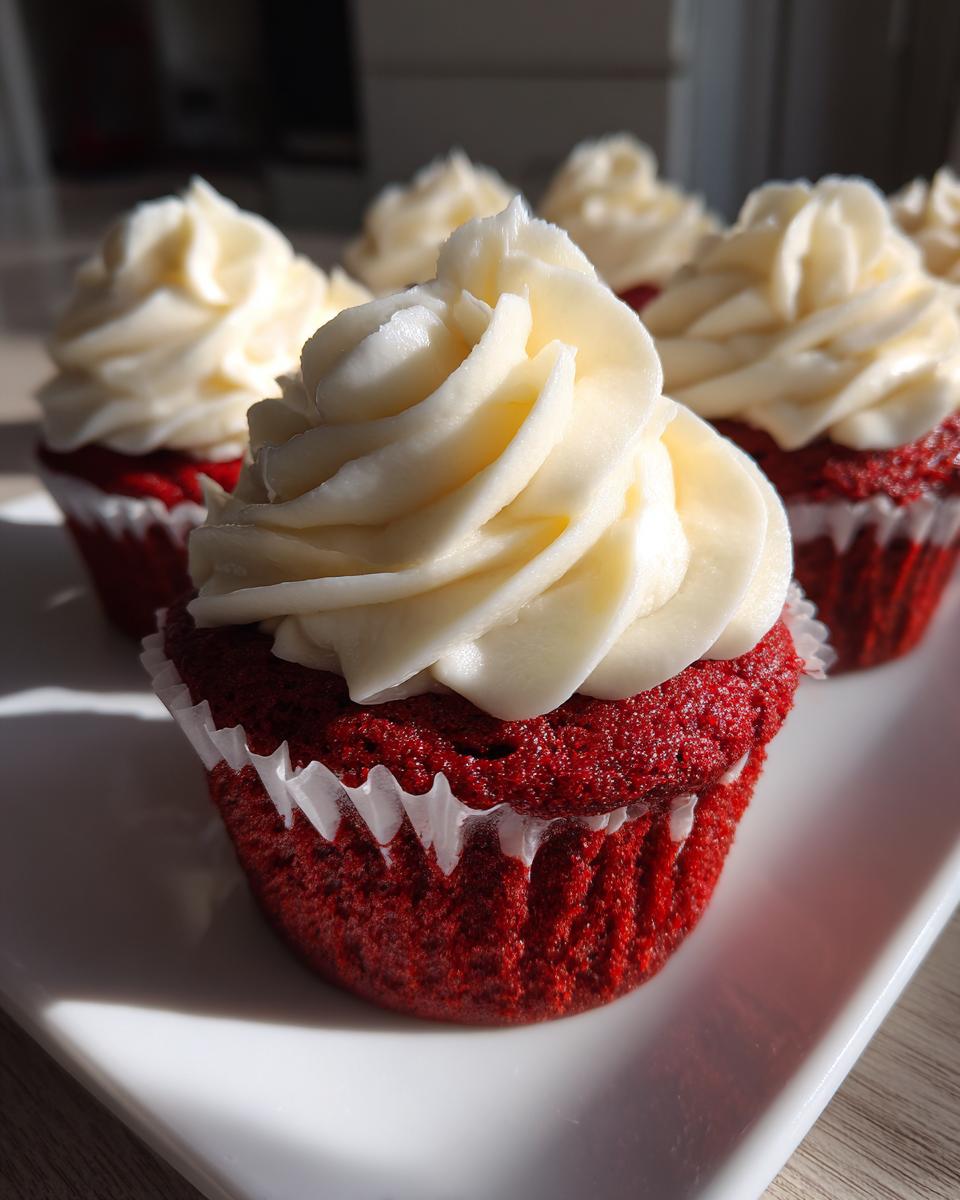
Here’s a little trick I learned because I always get impatient: If your frosting seems a little too soft after mixing, especially if your kitchen is warm, pop the whole bowl into the fridge for about 10 to 15 minutes. That short chill time firms it up just enough so it holds those beautiful peaks when you pipe it onto your cooled treats. It makes piping so much cleaner! You can find my technique for using cream cheese frosting with sweet bakes like dump cakes, which helps ensure supreme smoothness.
Expert Red Velvet Baking Tips for Bakery Style Cupcakes
So, you want those show-stopping, almost too-pretty-to-eat bakery style cupcakes? I get it! We nailed the moisture, but now we dial in the finish. Getting that classic look and deep flavor requires just a few extra mindful steps. My biggest piece of advice, besides the gel coloring, hinges on temperature.
Almost everything in this recipe needs to be at room temperature—the eggs, the butter, the buttermilk. This allows them to emulsify properly when mixing, resulting in that smooth, stable batter that bakes evenly. If your ingredients are too cold, they won’t combine well, and you end up with pockets of unmixed fat, which definitely ruins the chance of getting those moist red velvet cupcakes.
Also, remember that hint of cocoa? That tiny bit of unsweetened chocolate is what gives red velvet its signature background flavor. It separates it from just being red-tinted vanilla cake! It adds depth to the red velvet with cocoa notes we are aiming for. Trust me on this—it makes a difference when you’re aiming for that authentic taste. For more advanced tips on stabilizing fillings, I talk a bit about how I handle frosting in my guide on pumpkin bars with cream cheese frosting!
Serving and Storing Your Homemade Red Velvet Treats
Once you’ve frosted those gorgeous, vibrant red velvet cupcakes, the next challenge is making sure they look as amazing as they taste until serving time! Because we use that rich, tangy cream cheese frosting, these babies definitely need to live in the fridge if you aren’t eating them right away. Don’t worry, though; they won’t dry out overnight.
If you need to store them, place them in an airtight container in the refrigerator. I usually pull them out about 30 minutes before serving, just to take the chill off the cake part—it brings back that soft texture! These are perfect cupcakes for celebrations, from birthdays to an impromptu romantic moment on Valentine’s Day.
Honestly, I rarely have leftovers because everyone devours them, but if you do, they stay perfectly good for about three days in the cold. Remember to keep the frosting covered so it doesn’t absorb any weird fridge smells. They’re meant to be devoured, so try not to wait too long to share these delicious homemade red velvet treats!
Frequently Asked Questions About Red Velvet Cupcakes
I know sometimes the baking process brings up last-minute questions, and that’s totally normal! When I first started experimenting with brighter colors in my red velvet cupcakes, I had a million questions, too. Here are the ones I get asked the most, and hopefully, this clears up any last doubts you have about kicking off this rich cocoa desserts adventure!
Why are my red velvet cupcakes not red enough?
This is almost always the coloring! If you used standard liquid red food coloring, you probably needed almost an entire bottle to get a decent hue, and guess what? That extra liquid messes up your batter, making your moist red velvet cupcakes a little soggy or sometimes even tasting a bit metallic. You absolutely need to use a good quality, highly concentrated red gel food coloring. It disperses beautifully without adding extra liquid. It seems like a small thing, but it’s a game-changer for that stunning final look!
Can I use regular milk instead of buttermilk for this recipe?
Technically, yes, you *can*, but I really, really advise against it if you want the best result. Buttermilk is essential for that signature tang and for reacting with the baking soda to give you the right light texture in this southern style red velvet recipe. If you absolutely, positively can’t get buttermilk, use the quick trick I mentioned earlier! Just mix 1 cup of regular milk with 1 tablespoon of white vinegar or lemon juice and let it sit on the counter for about five minutes until it looks slightly curdled. It’s almost as good, but nothing beats the real deal!
How long do these cupcakes last?
Because we are slathering these with that glorious, rich cream cheese frosting for cupcakes, you must store leftovers in an airtight container in the refrigerator. They usually stay wonderfully fresh for about three to four days. If you are looking for a very quick recipe, you can see how simple this process is compared to some longer bakes, like my Jiffy corn casserole, which reheats well, too. For the best taste and texture, always let the frosted cupcakes sit out on the counter for about 20 minutes before serving so the cake softens up!
Is this recipe also good for a classic red velvet cake?
Absolutely! The batter ratio here is perfect for creating a gorgeous classic red velvet cake. If you decide to scale this up to bake in two 9-inch round pans, just keep an eye on the baking time; it’ll likely need closer to 30 to 35 minutes, depending on your oven, so start checking around the 28-minute mark. You’ll want to check out other frosting ideas for a full cake, but my traditional cream cheese recipe works just as beautifully layered!
I found some great inspiration on how to finish off your cakes by checking out this recipe on the web if you want a slightly different approach. Happy baking, and remember, these are perfect for any special occasion!
Making Southern Style Red Velvet Cupcakes
You know, when I really dug into the history of this dessert, I learned that these aren’t just any cupcakes; they are truly rooted in southern style red velvet tradition. The ancestors of this recipe weren’t just about that pretty color. They were about chemistry! That tiny bit of acidity from the buttermilk and the vinegar working with the cocoa powder? That reaction historically gave the cake its mild tang and helped pull out just a little bit of the reddish hue before the food coloring boom.
It’s that authentic balance that makes this recipe feel so right. It’s not overly sweet; it’s rich, tender, and balanced by that perfect cream cheese topping. When you make these using the buttermilk the way I laid out, you’re paying homage to those original bakers! If you want to see another amazing traditional dessert recipe using a simple glaze, check out my thoughts on amazing meatloaf with glaze—it’s comfort food elevated!
For a little extra inspiration on how other folks bake these classics, I always love seeing how different regions approach this treat. You can peek at this version from Ladies Nest for another angle on these beautiful cakes!
Nutritional Estimate for Your Red Velvet Cupcakes
Now, I know some of us are tracking things, and while these red velvet cupcakes are definitely an indulgent treat for celebrations, it’s always good to have a ballpark idea of what you’re enjoying! Keep in mind that because I cook with love and sometimes add an extra splash of vanilla here or there, these numbers are just my best guesstimate based on the standard ingredient amounts for one cupcake serving.
I put these together after reviewing the core components—the butter, the sugar, the full-fat dairy in that amazing frosting—so treat this like a helpful guide rather than a strict medical label. If you start swapping out sugar for substitutes or using skim milk in the frosting, your numbers will definitely change! This estimate is based on the full recipe yield of 12 servings.
Here’s the breakdown for one delightful, frosted cupcake:
- Serving Size: 1 cupcake
- Calories: 350
- Total Fat: 18g (It’s worth it for the cream cheese!)
- Carbohydrates: 45g
- Protein: 4g
See? Perfectly reasonable for a party staple! Don’t forget that these values don’t account for any extra sprinkles or decadent drizzles you might be tempted to add on top. For more guidance on fitting delicious treats into your week, sometimes I look at lighter meal ideas, like my recipe for the chicken broccoli casserole, just to balance things out!
PrintThe Best Moist Red Velvet Cupcakes with Tangy Cream Cheese Frosting
Bake rich and moist red velvet cupcakes with this simple recipe. These treats have a soft, velvety texture, a hint of cocoa, and a creamy topping, making them perfect for any celebration.
- Prep Time: 20 min
- Cook Time: 20 min
- Total Time: 40 min
- Yield: 12 servings 1x
- Category: Dessert
- Method: Baking
- Cuisine: American
- Diet: Vegetarian
Ingredients
- 1 1/2 cups all-purpose flour
- 1 teaspoon baking soda
- 1 teaspoon unsweetened cocoa powder
- 1/2 teaspoon salt
- 1 cup granulated sugar
- 1/2 cup unsalted butter, softened
- 2 large eggs
- 1 teaspoon vanilla extract
- 1 cup buttermilk
- 1 tablespoon red gel food coloring
- 1 teaspoon white vinegar
- 1/2 cup cream cheese, softened
- 1/4 cup unsalted butter, softened (for frosting)
- 2 cups powdered sugar
- 1/2 teaspoon vanilla extract (for frosting)
- 1 tablespoon milk or heavy cream (for frosting)
Instructions
- Preheat your oven to 350°F (175°C). Line a 12-cup muffin tin with paper liners.
- In a medium bowl, whisk together the flour, baking soda, cocoa powder, and salt. Set this dry mixture aside.
- In a large bowl, cream together the 1 cup of sugar and 1/2 cup of softened butter until light and fluffy.
- Beat in the eggs one at a time, mixing well after each addition. Stir in 1 teaspoon of vanilla extract.
- In a separate small bowl, mix the buttermilk, red gel food coloring, and white vinegar until combined.
- Alternate adding the dry ingredients and the buttermilk mixture to the butter mixture, beginning and ending with the dry ingredients. Mix until just combined; do not overmix.
- Spoon the batter evenly into the prepared cupcake liners, filling each about two-thirds full.
- Bake for 18 to 20 minutes, or until a toothpick inserted into the center comes out clean. Let the cupcakes cool in the pan for 5 minutes before transferring them to a wire rack to cool completely.
- To make the cream cheese frosting, beat the softened cream cheese and 1/4 cup softened butter together until smooth.
- Gradually beat in the powdered sugar until fully incorporated. Add 1/2 teaspoon vanilla extract and 1 tablespoon of milk or cream. Beat until the frosting is light and fluffy.
- Once the cupcakes are completely cool, pipe or spread the cream cheese frosting onto each cupcake.
Notes
- Use red gel food coloring for the most vibrant color without affecting the texture.
- Buttermilk is key for the classic tang and moist texture in this southern style red velvet recipe.
- For bakery style cupcakes, chill the frosted cupcakes briefly before serving.
Nutrition
- Serving Size: 1 cupcake
- Calories: 350
- Sugar: 35g
- Sodium: 250mg
- Fat: 18g
- Saturated Fat: 10g
- Unsaturated Fat: 8g
- Trans Fat: 0g
- Carbohydrates: 45g
- Fiber: 1g
- Protein: 4g
- Cholesterol: 60mg