
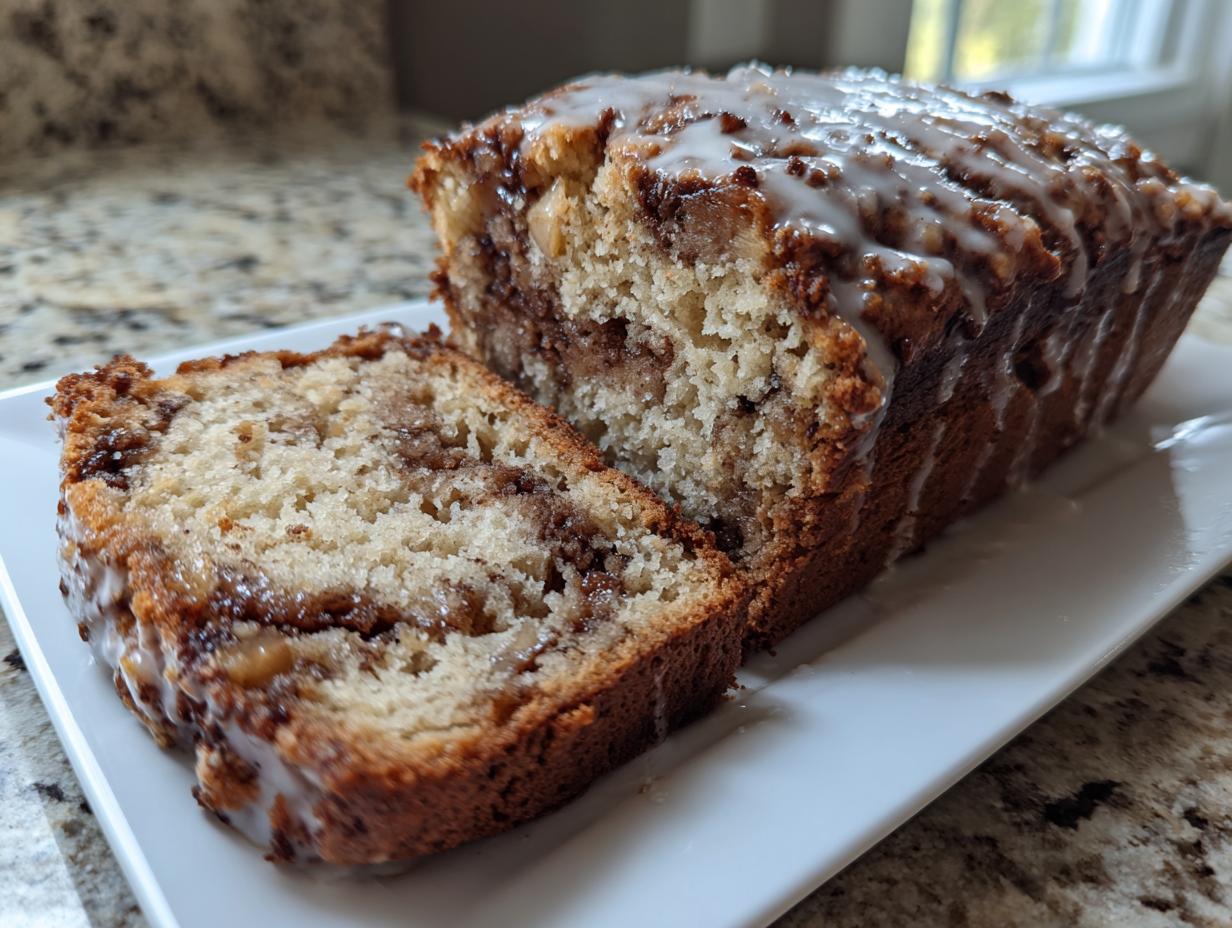
Oh, you guys, can you smell that? That scent of cinnamon and warm, sweet apples drifting through the air—that’s the smell of total comfort, isn’t it? When I finally stepped away from the city rush and decided to reconnect with home, it was through simple, honest bakes like this. And trust me, this isn’t just any loaf you whip up; this is my “Incredibly **Moist Apple Bread** with Brown Sugar Swirl.”
If you’re chasing that perfect **moist apple bread recipe** that stays soft long after it leaves the oven, stop searching! This recipe is pure autumn magic made easy. We pack it full of fresh apples and that addictive swirl layer. It brings back all those cozy autumn baking memories I thought I’d lost. It’s quick, it’s straightforward, and it absolutely delivers that bakery-style tenderness you dream about.
- Why This Moist Apple Bread Recipe is Your New Fall Favorite
- Gathering Ingredients for the Best Cinnamon Apple Bread
- Step-by-Step Instructions for Your Quick Apple Bread Loaf
- Tips for Perfect Homemade Apple Spice Bread
- Variations: From Apple Fritter Bread to Streusel Topped Apple Bread
- Serving Suggestions for Your Sweet Apple Snack Bread
- Storage and Reheating Instructions for Apple Bread
- Frequently Asked Questions About Apple Bread
- Nutritional Estimates for This Apple Bread Loaf
Why This Moist Apple Bread Recipe is Your New Fall Favorite
Look, I’ve made so many loaves of this **apple bread** over the years testing it for the site. My goal with every piece of **easy fall baking** we share is that it has to be foolproof and incredibly delicious. If it isn’t moist, well, it’s not worth the counter space!
That’s why I spent so much time getting the texture just right so you get that dreamy, almost **fluffy apple bread** crumb. This specific **moist apple bread recipe** wins every time because of that mandatory brown sugar swirl—it keeps the middle gorgeously gooey. You can see how much I love these cozy bakes when you check out my recipes for pumpkin banana bread, too!
It’s the perfect simple slice for breakfast, snack, or dessert. If you need a reliable recipe to carry you right through the holidays, this is it. I promise, this loaf is just as good as the one written about by others who love fall baking, like what you see over at this great writer!
Gathering Ingredients for the Best Cinnamon Apple Bread
Okay, taking the time to measure things out properly is what separates a regular loaf from the **best cinnamon apple bread** you’ve ever smelled. I know it seems like a lot of separate little piles, but trust me, this attention to detail in the prep stage is the secret to making sure your final **apple bread** comes out unbelievably moist and perfectly swirled. We’re treating our spices and our apples with respect here!
Having everything ready to go before you even look at the mixer makes the rest of the process so fast—we don’t want any sad, sitting-out ingredients getting too warm. Below are the things you need for the main structure, the swirl that brings all that flavor, and the optional drizzle if you’re feeling fancy.
For the Apple Bread Batter
- 2 1/2 cups all-purpose flour
- 1 teaspoon baking soda
- 1 teaspoon ground cinnamon
- 1/2 teaspoon ground nutmeg
- 1/2 teaspoon salt
- 1 cup granulated sugar
- 1/2 cup packed light brown sugar
- 1/2 cup (1 stick) unsalted butter, softened – make sure this is actually soft, not melted!
- 2 large eggs
- 1 teaspoon vanilla extract
- 1/2 cup milk
- 2 cups peeled and **finely chopped fresh apples** – I only use firm, tart ones like Granny Smith; they hold up better!
- 1/2 cup chopped walnuts or pecans (only if you love nuts, of course!)
For the Cinnamon Sugar Swirl
- 1/4 cup granulated sugar mixed with 1 teaspoon cinnamon
- 1/4 cup packed light brown sugar (this is kept separate from the batter’s sugar!)
Optional Glaze Ingredients
- 1/2 cup powdered sugar
- 1-2 tablespoons milk (use just enough to get that nice drizzle consistency)
Step-by-Step Instructions for Your Quick Apple Bread Loaf
Alright, let’s roll up those sleeves! This is where the magic happens, turning those prepped ingredients into the most glorious **Quick Apple Bread Loaf**. Because this is a **Simple Apple Quick Bread**, timing is key, but don’t stress—we aren’t juggling complex yeast or proofing times here, which is why I love it for busy days!
My biggest rule for this part, and what keeps it the **moist apple bread** you deserve, is about mixing. Once you add the flour, you only mix until you can *barely* see no more white streaks. Overmixing develops gluten, and gluten means tough bread. We want tender and fluffy! When you follow these steps carefully, you’ll realize how easy it is to get bakery-style results right in your home kitchen. I swear, the whole house smells incredible halfway through the bake!

Preparing the Oven and Dry Mix
- First things first: fire up that oven to 350°F (175°C). Get your 9×5 inch loaf pan greased up really well and even dusted with flour—don’t skip this step, or you’ll be crying later!
- In a medium bowl, take your flour, baking soda, 1 teaspoon of cinnamon, nutmeg, and salt. Grab your whisk and give that dry mixture a good, thorough combining. Set it aside for now.
Creating the Batter for Your Apple Bread
- In your big mixing bowl, start by creaming together the 1 cup of granulated sugar, the 1/2 cup of brown sugar, and that softened stick of butter. Beat it until it actually looks light and fluffy—you need to whip some air in there!
- Add your eggs, one at a time, making sure the first one is fully incorporated before bringing in the second. Follow up with the vanilla extract.
- Now for the alternating dance: add about a third of your dry mix, mix gently until just combined. Then pour in all your milk and mix gently again. Finish by adding the rest of your dry mix. **Stop mixing** the second the last flour streaks disappear!
- Gently fold in those lovely chopped apples and nuts (if you’re using them!).
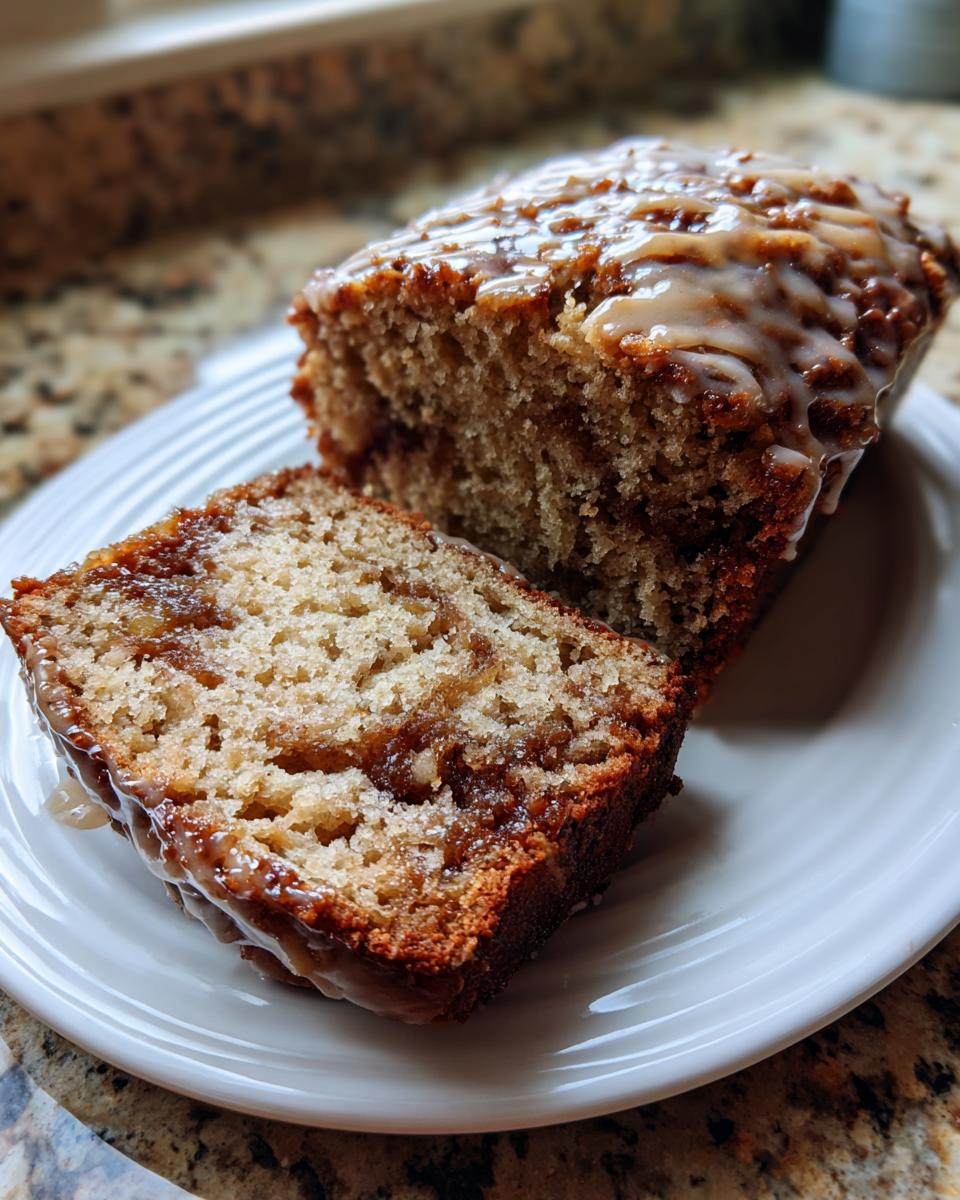
Assembling and Swirling the Apple Bread
This is the part that makes this recipe special—that beautiful **Cinnamon Apple Swirl**!
- Pour exactly half of your beautiful batter into your prepared loaf pan. Try to keep it level.
- Take your swirl mixture (the extra sugars and cinnamon) and sprinkle that entire amount evenly over the batter layer. Don’t worry if it sinks a bit; that’s fine!
- Gently spoon the remaining apple bread batter right on top of the swirl mixture.
Baking and Cooling
- Slide that loaf into the preheated oven. It usually takes about 55 to 65 minutes to bake completely.
- Keep an eye on the top! If you notice it getting really dark around the 40-minute mark, just loosely tent a piece of foil over the top. That keeps the crust from burning before the middle cooks through.
- When a wooden skewer poked in the center comes out clean—not wet, just clean!—it’s done.
- Let it cool in the pan for about 10 minutes. Seriously, wait the 10 minutes! Then turn it out onto a wire rack to cool all the way down before you attempt a glaze, or you’ll have a sugary puddle! If you want a fun diversion while you wait, check out my tips for pumpkin snickerdoodle cookies. Don’t forget to check out the method used by these bakers for comparison!
Tips for Perfect Homemade Apple Spice Bread
Getting that “perfect” quality in your **Homemade Apple Spice Bread** comes down to a few small things I learned through trial and error—and believe me, I’ve made some dense bricks in my time! Since we are **baking with fresh apples**, we have to be smart about how we handle the liquids and the mixing to ensure that tender, not tough, result.
If you follow just three simple rules, this loaf transforms from good to absolutely irresistible. These small steps are the authority builders that make sure your experience is a success, just like I strive for in my homemade applesauce recipe.
Keep It Tart with Granny Smith
This is non-negotiable for me! When you choose your apples, please reach for a firm, tart variety like Granny Smith. Why? Because sweeter apples like Gala or Fuji tend to break down too much during the hour-long bake time, dissolving into mush. We want defined, little pockets of apple flavor, not just wet spots in the bread. The tartness also cuts through the sweetness of the brown sugar swirl beautifully. Save those softer apples for snacking!
The ‘Don’t Overmix’ Rule
I mentioned it before, but it bears repeating because it’s the number one mistake people make in quick bread! Once that flour meets the wet ingredients, you must switch gears to gentle folding. You can see experts talking about this exact issue over at this fantastic spot. Seriously, stop mixing when you see those little white streaks of flour remaining. That stirring you do while folding in the apples will finish the job, and you’ll keep that light texture.
Freezing for Later Cozy Bakes
This **apple bread** freezes like a dream, especially if you’re baking ahead for the holidays or just want a guaranteed **sweet apple snack bread** ready to go. Once the loaf is completely cool, wrap it tightly. I mean, plastic wrap snug, followed by a layer of aluminum foil. It keeps beautifully for about three months. When you want to serve it, just thaw it on the counter, and you’re ready to go! It tastes just as fresh.

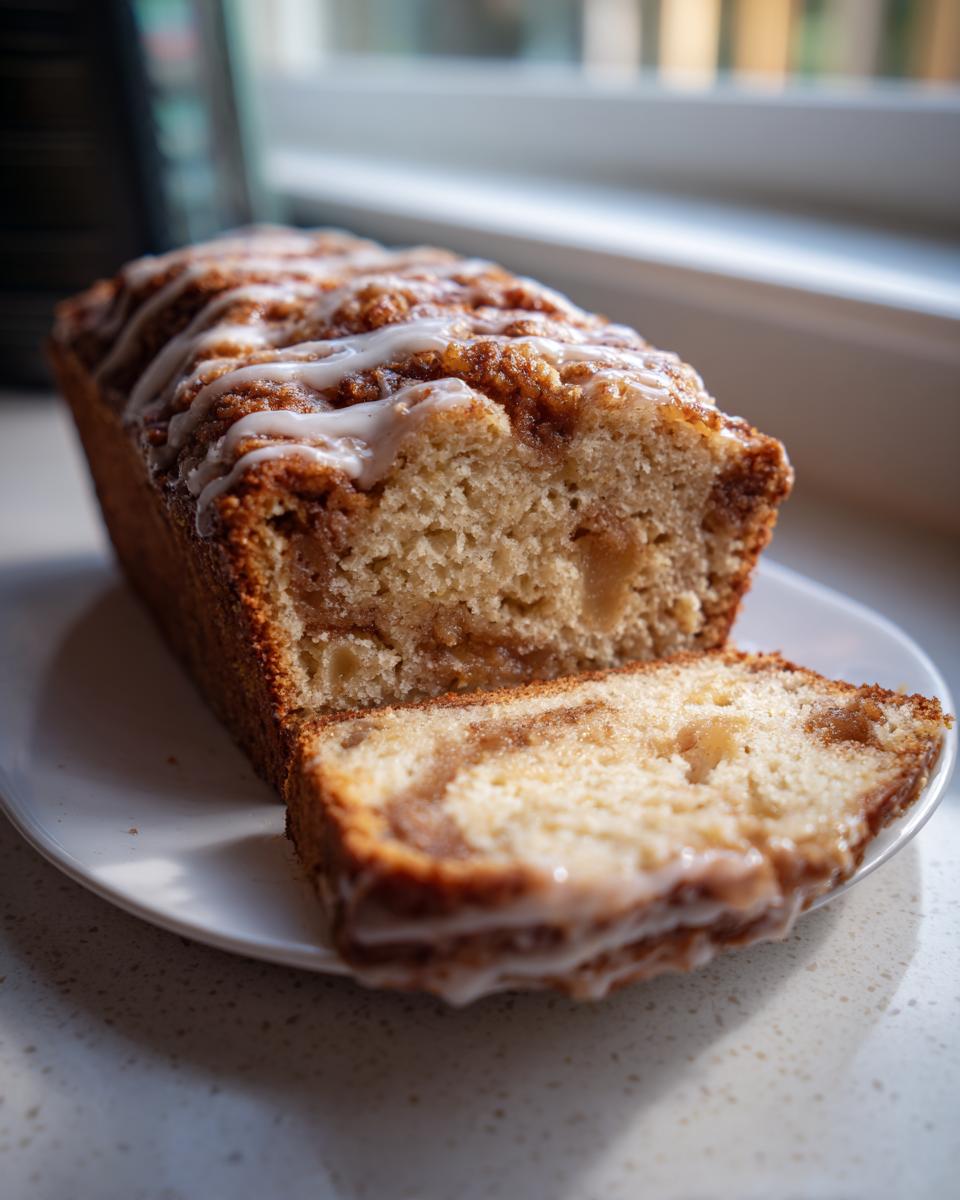
Variations: From Apple Fritter Bread to Streusel Topped Apple Bread
One of the best things about a solid base **apple bread** recipe is how easily it can be transformed into something entirely new! We all see those gorgeous pin photos of things like **Apple Fritter Bread**, and I want you to know you probably already have the structure for it.
If you want that full-on doughnut experience, you can easily turn this into an **Amish Apple Bread**-style treat. After the loaf is completely cool, skip the thin glaze and whip up a thicker, sweeter glaze using just powdered sugar and a splash of milk, maybe even adding a teaspoon of apple cider vinegar for that slight fritter tang. Drizzle it generously! You can see my approach to yeast-free comfort breads over at my guide to Amish Cinnamon Bread, which shares a similar cozy vibe.
Or maybe you prefer crunch? For a fantastic **Streusel Topped Apple Bread**, just whip up a simple topping of flour, brown sugar, cinnamon, and chilled butter cut into pea-sized crumbles. Sprinkle that heavily over the top batter right before it goes into the oven. It bakes right into the crust, giving you that fabulous topping everyone loves. It’s amazing how one recipe can satisfy so many cravings! For inspiration on how that fritter style looks, check out the details on this delicious version.
Serving Suggestions for Your Sweet Apple Snack Bread
This **apple bread** is one of those wonderful recipes that transitions perfectly through your day, making it ideal for whatever you need. Want a comforting **Breakfast Apple Loaf**? Slice it thick and serve it warm while you sip your morning coffee.
It’s fantastic on its own as a **Sweet Apple Snack Bread** during that mid-afternoon slump. But if you serve it for dessert, you absolutely must jazz it up! Try warming a slice slightly and topping it with a scoop of vanilla bean ice cream—the contrast between the warm cinnamon and the cold cream is just heavenly.
If you’re looking for more ideas to spice up your mornings, I put together a whole guide on easy breakfast ideas that might inspire you too!
Storage and Reheating Instructions for Apple Bread
Keeping this **apple bread** moist is my top priority, even after the first day! At room temperature, keep it wrapped up tightly in plastic wrap or aluminum foil on your counter. It stays wonderfully fresh for about three full days this way. Don’t even think about putting it in the fridge; that will only dry it out faster!
If you have leftovers after that, wrap those slices well just like I mentioned for freezing in the tips section. If you want to revive a slice later, don’t just microwave it plain! Place the slice on a plate with just a tiny splash of water next to it, cover it loosely with a damp paper towel, and heat for 10-15 seconds. That steam brings back all the soft texture instantly. It’s like baking it fresh all over again. For more storage ideas on other fruits breads, check out my thoughts on date nut bread!
Frequently Asked Questions About Apple Bread
I totally get it—baking questions pop up once you are actually in the process! I gathered a few things people always ask me about this specific **apple bread** loaf. If you’re using firm apples or worrying about that swirl, these should help clear things up so you can enjoy your slice of pure autumn bliss. It’s all about building confidence in the kitchen!
What is the best apple to use for this apple bread?
You absolutely have to use firm, tart apples for this recipe to stay perfectly moist! I swear by Granny Smith apples. They hold their shape beautifully during that full hour in the oven, giving you pockets of actual apple rather than just sweet mush. If you use a softer apple, it tends to break down too much.
Can I make this without the brown sugar swirl?
Yes, you certainly can skip the swirl if you want a simpler, lighter **Simple Apple Quick Bread**! If you skip it, just pour all the batter into the pan, gently fold in the apples and nuts, and bake as directed. It will still be delicious, but it’ll miss out on that rich, gooey, decadent center that makes this loaf so special. You can always add a thicker glaze on top instead!
How do I prevent the top of my apple bread from burning before the center cooks?
This happens when the sugar on top browns too fast—it’s super common in quick breads! Like I mentioned in the instructions, if you notice the top is getting dark way before the 55-minute mark (usually around 40 minutes), just grab a piece of aluminum foil and loosely tent it over the loaf pan. That foil acts like a shield, letting the inside finish baking without scorching the crust. It’s a game-changer for getting that even bake! For more ideas on baking with fruit, feel free to check out my recipe for apple cranberry cobbler.
Is this recipe good for making ahead?
Yes! I always prefer baking this loaf the day *before* I plan to serve it. Quick breads actually taste better the next day! If you’re set on making it farther ahead, remember that freezing works best if you wrap the completely cooled loaf super tight. You want to make sure you don’t dry it out, kind of like the advice given by these bakers on keeping things moist!
Nutritional Estimates for This Apple Bread Loaf
Now, I know most of us aren’t baking for a nutrition label, we’re baking for joy (and that amazing cinnamon smell!), but I always like to give you a ballpark idea of what you’re working with here. Since this **apple bread** has sugar, butter, and apples, it definitely falls into the comforting treat category!
Please remember, these numbers are just estimates based on the ingredients list I provided, assuming you skip the optional glaze and don’t use the nuts. If you use extra butter or load up on the swirl, those numbers will definitely shift upwards! But for a generous slice of this **sweet apple snack bread**, here’s what we are looking at:
- Serving Size: 1 slice
- Calories: 320
- Fat: 16g
- Carbohydrates: 44g
- Protein: 4g
- Sugar: 28g
It’s rich, it’s satisfying, and it’s packed with the goodness of real apples, which is always a win in my book! Enjoy every bite!
PrintIncredibly Moist Apple Cinnamon Quick Bread with Brown Sugar Swirl
Make this incredibly moist apple bread featuring fresh apples, warm spices, and a rich brown sugar cinnamon swirl. This quick bread is perfect for a cozy breakfast, snack, or fall dessert.
- Prep Time: 20 min
- Cook Time: 60 min
- Total Time: 80 min
- Yield: 1 loaf (about 10 servings) 1x
- Category: Breakfast
- Method: Baking
- Cuisine: American
- Diet: Vegetarian
Ingredients
- 2 1/2 cups all-purpose flour
- 1 teaspoon baking soda
- 1 teaspoon ground cinnamon
- 1/2 teaspoon ground nutmeg
- 1/2 teaspoon salt
- 1 cup granulated sugar
- 1/2 cup packed light brown sugar, plus 1/4 cup for the swirl
- 1/2 cup (1 stick) unsalted butter, softened
- 2 large eggs
- 1 teaspoon vanilla extract
- 1/2 cup milk
- 2 cups peeled and finely chopped fresh apples (about 2 medium apples)
- 1/2 cup chopped walnuts or pecans (optional)
- 1/4 cup granulated sugar mixed with 1 teaspoon cinnamon (for the swirl)
- 1/2 cup powdered sugar mixed with 1-2 tablespoons milk (for optional glaze)
Instructions
- Preheat your oven to 350°F (175°C). Grease and flour a 9×5 inch loaf pan.
- In a medium bowl, whisk together the flour, baking soda, 1 teaspoon cinnamon, nutmeg, and salt. Set this dry mixture aside.
- In a large bowl, cream together the 1 cup granulated sugar, 1/2 cup brown sugar, and softened butter until light and fluffy.
- Beat in the eggs one at a time, mixing well after each addition. Stir in the vanilla extract.
- Alternate adding the dry ingredient mixture and the milk to the wet ingredients, beginning and ending with the dry ingredients. Mix only until just combined; do not overmix.
- Gently fold in the chopped apples and nuts, if using.
- Prepare the swirl: In a small bowl, combine the 1/4 cup brown sugar, 1/4 cup granulated sugar, and 1 teaspoon cinnamon.
- Pour half of the batter into the prepared loaf pan. Sprinkle the entire sugar-cinnamon swirl mixture evenly over the batter. Top with the remaining batter.
- Bake for 55 to 65 minutes, or until a wooden skewer inserted into the center comes out clean. If the top browns too quickly, loosely tent it with foil after 40 minutes.
- Let the apple bread cool in the pan for 10 minutes before inverting it onto a wire rack to cool completely.
- If desired, whisk together the powdered sugar and milk to create a thin glaze. Drizzle over the cooled bread before slicing and serving.
Notes
- Use firm, tart apples like Granny Smith for the best texture and flavor contrast against the sweet bread.
- To keep this bread moist, avoid overmixing the batter once the flour is added.
- This bread freezes well. Wrap the cooled loaf tightly in plastic wrap and then foil before freezing for up to three months.
Nutrition
- Serving Size: 1 slice
- Calories: 320
- Sugar: 28g
- Sodium: 250mg
- Fat: 16g
- Saturated Fat: 9g
- Unsaturated Fat: 7g
- Trans Fat: 0g
- Carbohydrates: 44g
- Fiber: 2g
- Protein: 4g
- Cholesterol: 65mg