
Oh my goodness, is there any dessert that just screams fun and celebration like red velvet? It’s got that beautiful, vibrant color, and honestly, that slight cocoa tang paired with the cream cheese just makes my heart sing. But sometimes, those baked versions feel like too much work, right? That’s why I absolutely *had* to perfect these red velvet cake pops. Here at MDLATDMM, my whole philosophy—Maddie Thompson’s way—is taking those beloved, time-honored flavors and making them totally reliable for your busy kitchen. Trust me, this recipe is the bridge between wanting a bakery-style treat and actually making it happen without losing your sanity. It all comes down to that perfect, moist mix! If you love how that cream cheese flavor works in a cake, you’ll need to check out my ideas for the absolute best cream cheese frosting recipes, too.
- Why You Will Love This Moist Red Velvet Cake Pops Recipe
- Essential Ingredients for Perfect Red Velvet Cake Pops
- Step-by-Step Instructions for Bakery Style Red Velvet Cake Pops
- Pro Tips for Perfect Red Velvet Cake Pops Every Time
- Variations: Making Red Velvet Cake Truffles and More
- Serving Suggestions for Your Festive Dessert Ideas
- Storage and Reheating Instructions for Red Velvet Cake Pops
- Frequently Asked Questions About Red Velvet Cake Pops Recipe
- Your Next Step in Creating Bite Sized Red Velvet Desserts
- Your Next Step in Creating Bite Sized Red Velvet Desserts
Why You Will Love This Moist Red Velvet Cake Pops Recipe
I know you’re busy, so here’s the quick version of why these pops are about to become your new favorite thing to make:
- Super Easy Prep: We’re leaning on a box mix, which saves so much time, but the results taste totally decadent and homemade.
- Unbeatable Texture: That cream cheese binder ensures these aren’t dry! They stay incredibly moist, like little bites of heaven.
- Party Perfect: They look gorgeous right out of the box—vibrant red and ready for any celebration!
- Beginner Friendly: Even if you’ve never dipped a pop before, these are tough to mess up!
Essential Ingredients for Perfect Red Velvet Cake Pops
Okay, let’s talk supplies! Because we are aiming for that bakery style, the quality of what you start with actually matters here. Don’t worry, we are keeping the list short and sweet. Remember how I always preach about reliability? Having the right core stuff means less guessing later on, especially when it comes to getting that super moist crumb. If you like rich, creamy things in general, you might also want to check out my go-to recipe for pumpkin dip with cool whip when you’re done here.
For the Cake Base and Binder
The cake itself is made super simple: just grab one box of red velvet cake mix. Then, you’ll mix in whatever the box normally calls for—you know, eggs, the oil, and water. But here is the real star: eight ounces of cream cheese. This isn’t just for flavor, though it definitely brings that lovely tang! The cream cheese is what makes the difference between crumbly cake crumbs and a rich, firm dough perfect for rolling those gorgeous red velvet cake pops.
For the Coating and Finishing Touches
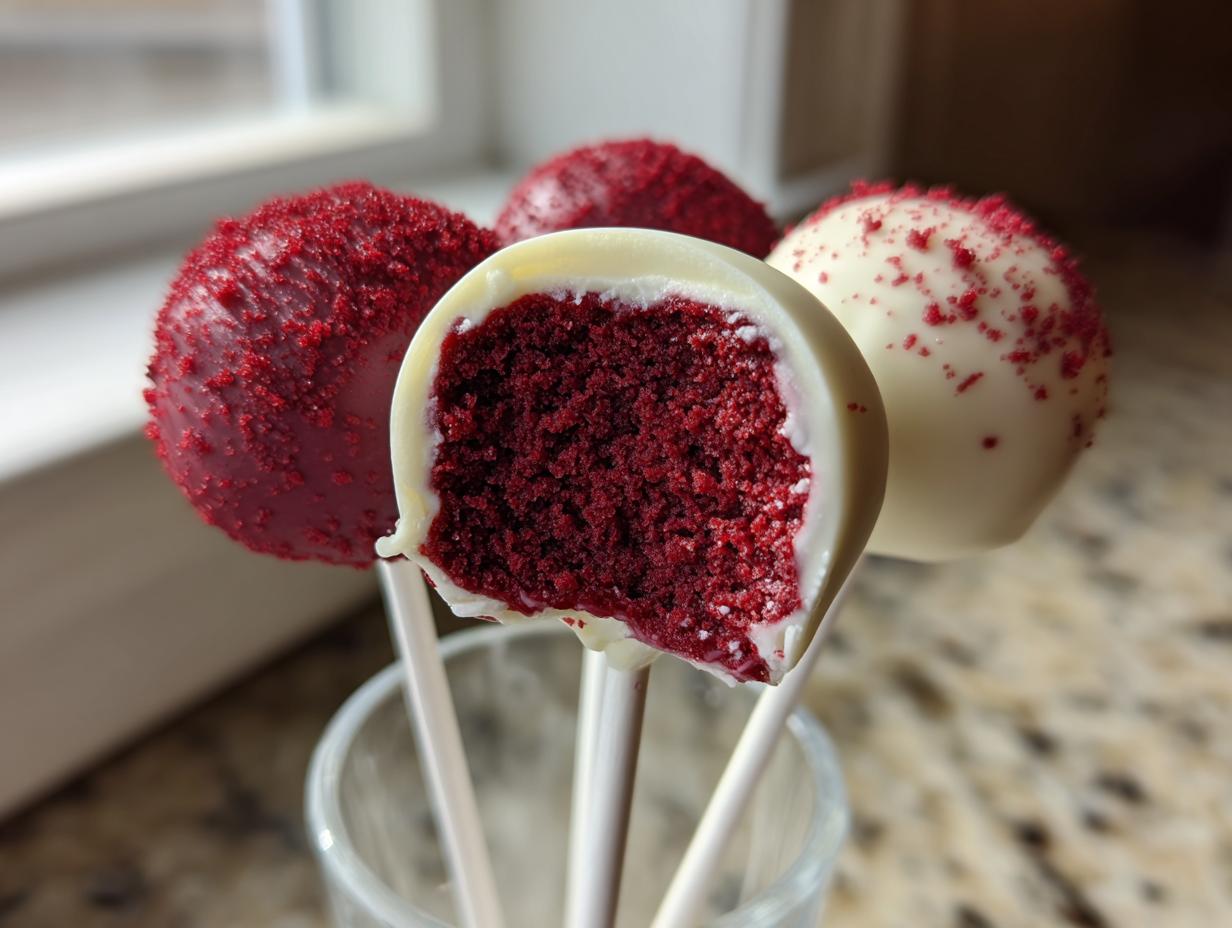
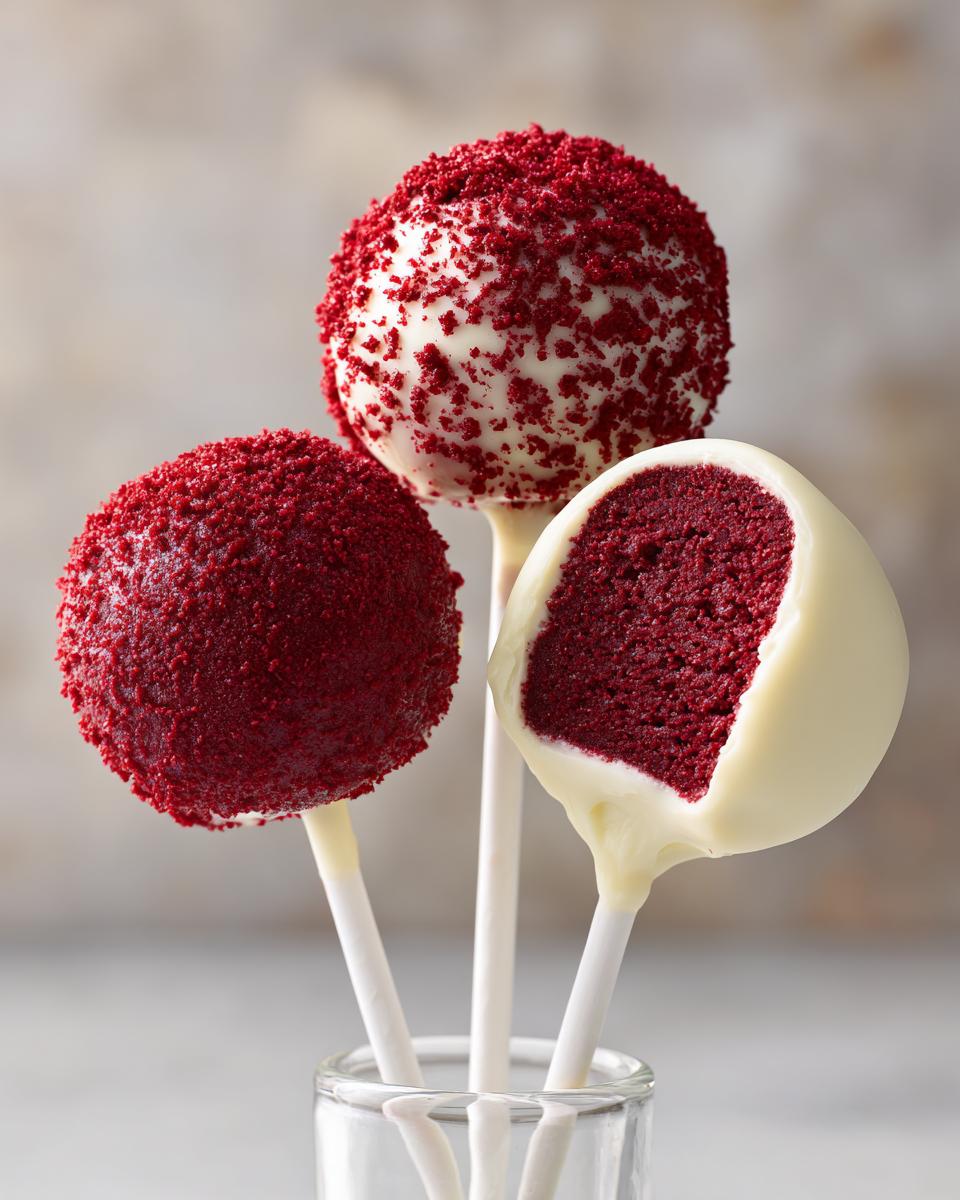
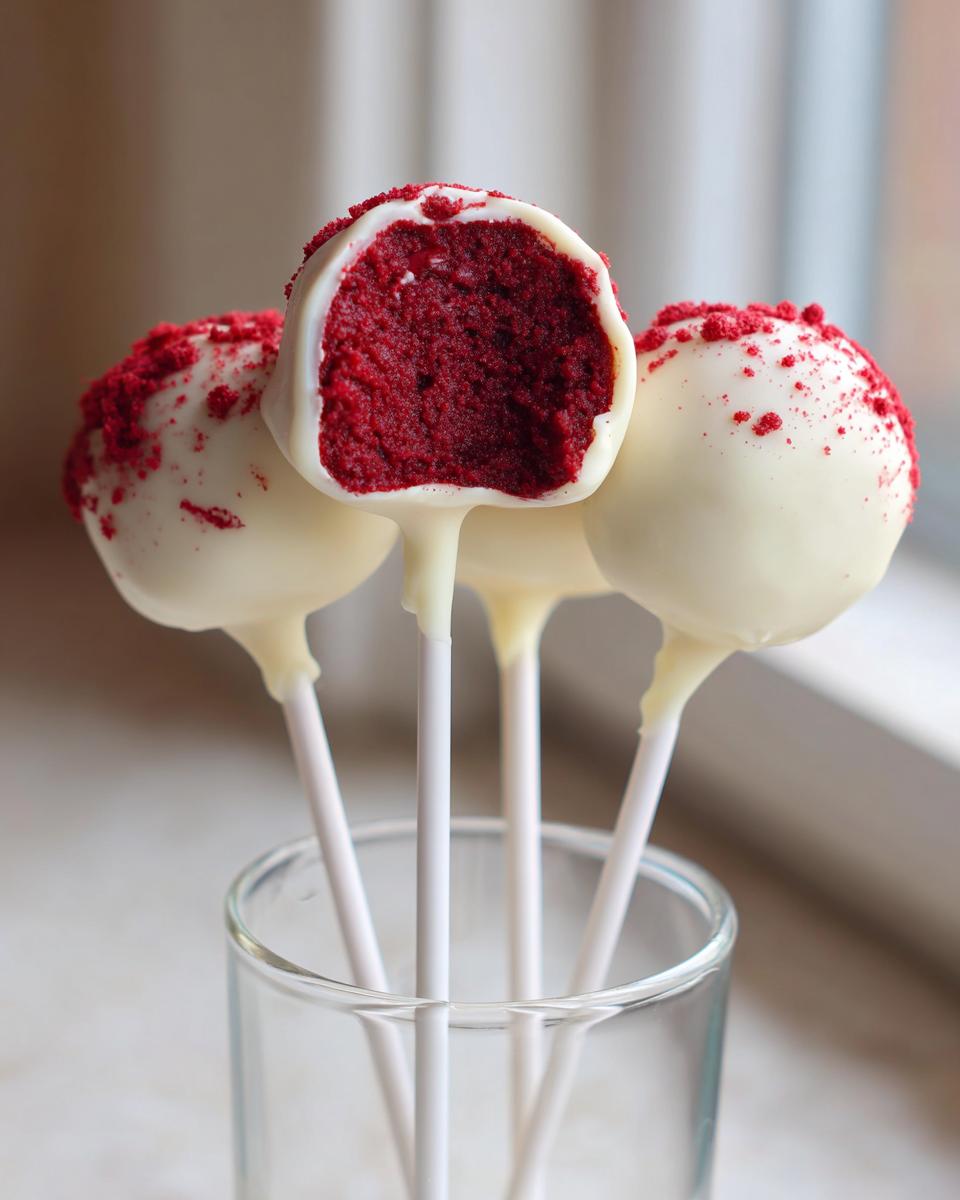
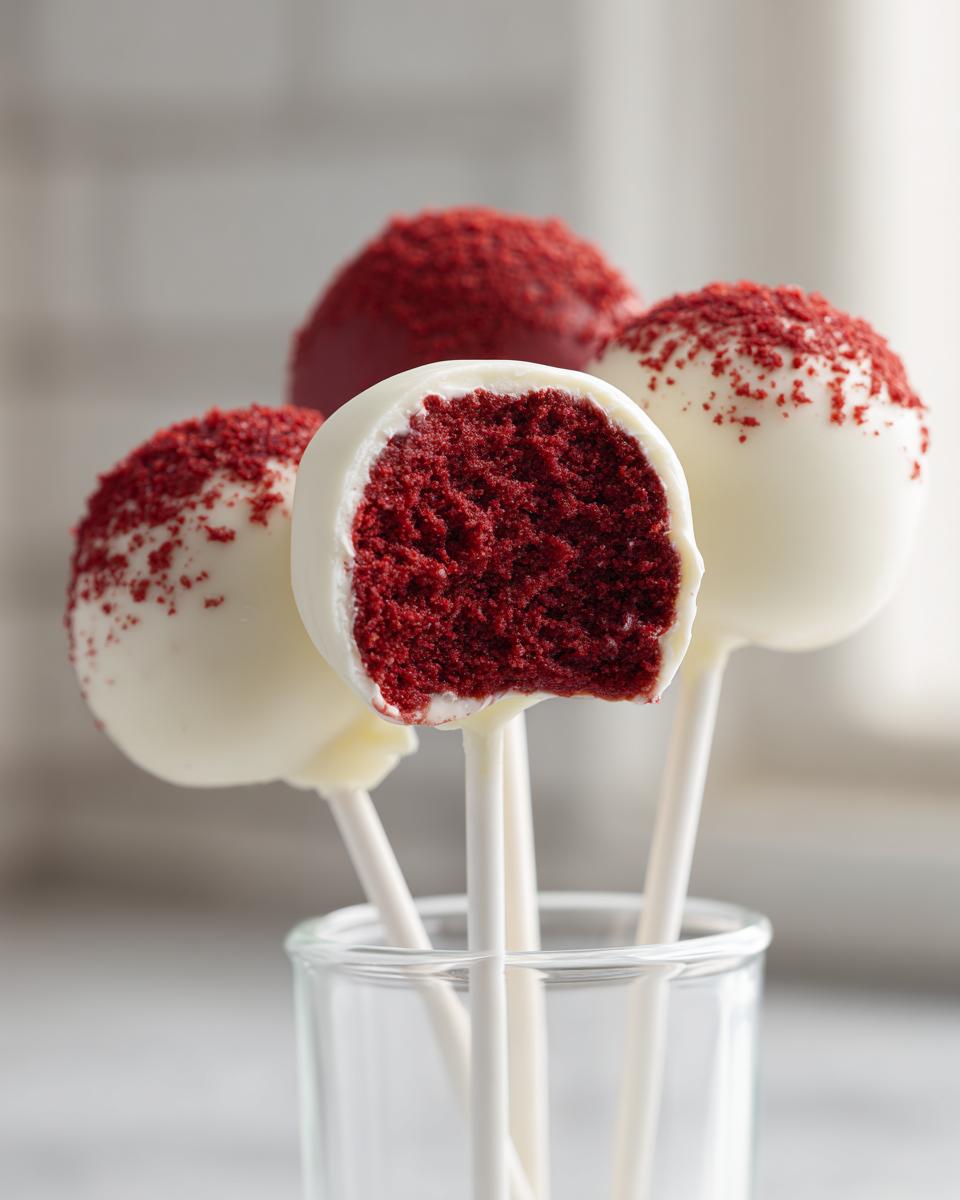
To get that shiny, crisp shell you see in the nice bakeries, you need about a pound of white chocolate melting wafers, or almond bark works great too. This is where a tiny bit of optional vegetable oil comes in handy to thin things out just enough for dipping without breaking the coating. Of course, we need the cake pop sticks! Quick tip: if you decide to skip the sticks entirely—maybe you’re feeling more like a truffle vibe—you simply roll the balls and coat them, turning them into decadent red velvet cake truffles instead!
Step-by-Step Instructions for Bakery Style Red Velvet Cake Pops
Alright, let’s get down to business! This recipe moves fast once the cake is baked, which makes it perfect for whipping up a quick batch of festive treats. Remember, the less effort we put into the cake part—thanks to the box mix—the more time we have for the fun dipping part. If you’ve tried making things like this before and ended up with a mess, stick close to these steps, especially the chilling parts! It makes all the difference for getting that smooth, professional finish we want for our red velvet cake pops recipe.
Baking and Creating the Red Velvet Cake Pops Dough
First things first, bake that red velvet cake exactly how the box tells you to. Don’t try to change the temp or time right now; we want a standard cake! Once it’s out, you absolutely must let it cool completely. I mean it—totally cooled on a wire rack. If it’s even slightly warm, the cream cheese melts right into soup, and we need that thick dough! When it’s cool, just grab a big bowl and crumble that cake up finely. Seriously crumble it! Toss out any dry, brown edges; we want the soft stuff. Then, bring in the softened cream cheese. Mix it all together—I usually use my hands for the last bit—until it looks like one uniform, deep red dough. It should feel stiff, not sloppy.
Rolling, Shaping, and Chilling for Dipping Success
Now for the part where we work on creating perfect little spheres! You want to scoop out spoonfuls of that dough and roll them between your palms into uniform balls, about an inch to an inch-and-a-half across. This recipe should give you about two to three dozen balls, depending on how big you make them. Get them all shaped and onto a piece of parchment paper. This is the most important bit: stick the pop sticks about halfway into each ball—do this gently!—and then they HAVE to chill. I mean seriously chill them for at least two hours in the fridge. When those red velvet cake pops are rock solid, they won’t crumble or fall apart when you dip them!
Mastering How to Dip Cake Pops Perfectly
Time for the chocolate coating! Melt your white chocolate wafers or almond bark using the microwave instructions on the package. If it looks really thick, stir in just a teeny, tiny bit of oil to help it flow smoothly. Now, pull those cold cake balls out of the fridge. Take a stick, dip the tip into the melted chocolate first, and then push it into the ball about halfway for stability—this acts as glue on the stick. Let that set for maybe 30 seconds. Then, dip the whole thing! Gently swirl it around, lift it up, and tap the stick against the bowl edge to let any extra coating drip off. This tapping makes the difference between a thick shell and a gorgeous finish. If you want some extra flair, throw on some sprinkles here before that coating sets. You can find more on making dessert mixtures like this when exploring lemon cream cheese dump cake ideas!
Pro Tips for Perfect Red Velvet Cake Pops Every Time
Listen, even with the best intentions, sometimes the chocolate coating decides it wants to rebel. It’s frustrating! But don’t panic—we need to treat this coating like a delicate thing, which it absolutely is. If you want those beautiful, shiny red velvet cake pops that look like they cost a fortune at the bakery, temperature control is something you simply can’t ignore. I really wish I had known these tricks when I started out making treats like my favorite chewy chocolate chip cookies!
Troubleshooting Common Red Velvet Cake Pops Issues
If your smooth white chocolate coating suddenly turns thick and sandy, it has “seized.” Usually, this means a tiny drop of water got in there, or it got too hot on the microwave timer. If it’s just too thick to dip nicely, don’t throw it out! Stir in just a few drops—and I mean a few—of vegetable oil until it loosens back up. Another huge issue is cracking shells. If your coating immediately cracks when it sets, I guarantee it’s because your cake balls weren’t cold enough! We need them fridge-cold, almost frosty, so the warm chocolate dries instantly around that icy core. If you want to see someone who really nails the coating process, check out this great homemade cake pops tutorial online.
Variations: Making Red Velvet Cake Truffles and More
So, what if you love the cake-and-frosting center but just aren’t a fan of the stick situation? Hey, I get it! We all have different preferences, and that’s why I love that this recipe is so flexible. Making red velvet cake truffles is probably the easiest swap you can make, and honestly, sometimes they look a bit more elegant on a platter!
To turn your pops into truffles, you just skip the whole dipping-the-stick procedure. Once you have your chilled balls—remember, they have to be cold!—you dip them just like before, but you don’t have to worry about sticking them upright to dry. Another cool way to finish them is to skip the chocolate coating entirely and just roll the cold balls in something pretty. Think about rolling them in powdered sugar, or maybe some extra cocoa powder for a deeper chocolate flavor. They become these decadent, bite-sized desserts that just melt in your mouth!

And let’s just revisit that box mix convenience. Using that red velvet cake mix is what makes this whole endeavor feel like a quick win for me. If you’re looking for more ways to use convenience ingredients without sacrificing flavor, I have a whole guide on box mix red velvet cake pops hacks where we take shortcuts but keep the quality high. These little variations make sure there’s a perfect red velvet option for every single party!
Serving Suggestions for Your Festive Dessert Ideas
These vibrant red velvet party treats look so appealing, it’s almost a shame to hide them! If you’ve made a big batch, you absolutely need a proper stand. Those tall foam blocks work great for drying them, but for serving, use a tiered tray if you have one—it makes them look like true bakery creations. I love setting them out next to a simple black coffee or a cold glass of milk; that cuts through the richness perfectly.
For holidays, if you check out my ideas for pumpkin spice cupcakes with cream cheese frosting, you’ll see presentation matters. Sprinkle tops with just a little edible gold dust if you’re feeling fancy! These bite-sized beauties are just begging to be the star of your dessert table.
Storage and Reheating Instructions for Red Velvet Cake Pops
Now that you’ve made these gorgeous little gems, we need to keep them perfect! Since we used that cream cheese binder, these are best kept cool. Pop your finished, dry red velvet cake pops into an airtight container—a big plastic tub works wonders—and store them in the refrigerator. They hold up beautifully for about a week that way. I like to get my chilling done ahead of time, especially if I’m making apple cinnamon muffins the next day, honestly! If you need to keep them longer, they freeze like a dream, too.
When you freeze them, make sure they are tightly wrapped, maybe even in a layer of plastic wrap before going into the container, just to protect that shiny coating. Don’t worry about reheating; you serve these cold or let them sit out on the counter for about 15 to 20 minutes before serving so the chocolate coating isn’t stiff when people bite into them.
Frequently Asked Questions About Red Velvet Cake Pops Recipe
It’s totally normal to have a few nagging questions when you try a new treat, especially something that needs a few cooling steps! I’ve gathered up the ones I hear most often from folks trying to get that perfect, decadent bite. If you’re aiming for those soft centers, you’ll see the answers usually circle back to temperature control!
Can I use homemade red velvet cake instead of a box mix for my red velvet cake pops?
Oh, absolutely! My go-to here is the box mix because it’s such a foolproof way to get started, especially if you’re new to making these, but if you have a scratch recipe you absolutely adore that yields a moist red velvet cake, please use that! Just make sure your homemade cake is baked fully and completely cool before crumbling. It needs to be sturdy enough to handle that cream cheese!
What is the best cake pop coating besides white chocolate?
If white chocolate isn’t your absolute favorite, you have great options! You can definitely use good quality milk chocolate melting wafers or even dark chocolate. The key, no matter what you choose, is to use candy melts or melting wafers rather than standard chocolate chips. Chips have stabilizers that make them harder to get smooth, and we really need that silky finish for our cream cheese frosting cake pops.
Why do my homemade cake pops always fall off the stick?
This is the biggest heartache, isn’t it? Seeing your precious ball slide right off into the chocolate! Nine times out of ten, it means two things: either your cake balls weren’t cold enough when you dipped them, or you dipped the stick in first without letting that tiny bit of chocolate glue set up. Always remember the crucial step of chilling those rolled balls until they are nearly frozen! That solid core is what keeps your beautiful moist red velvet cake balls firmly attached. For more inspiration on perfecting the coating, take a peek at these excellent red velvet cake balls guides online!
Your Next Step in Creating Bite Sized Red Velvet Desserts
Well, that’s it! You have everything you need to create show-stopping red velvet cake pops that taste straight from a specialty shop. Don’t be shy—I want to see your creations! Rate this recipe below and let me know how they turned out for your next celebration. I’m always tweaking things, and your feedback helps me keep my recipes helpful for everyone looking for delicious holiday dessert ideas!
PrintMoist Red Velvet Cake Pops with Cream Cheese Frosting

Make bakery-style red velvet cake pops at home. This recipe uses a simple binder to create moist, decadent, bite-sized treats coated in smooth white chocolate.
- Prep Time: 30 min
- Cook Time: 35 min
- Total Time: 3 hours 5 min
- Yield: 24 servings 1x
- Category: Dessert
- Method: No Bake (after initial cake baking)
- Cuisine: American
- Diet: Vegetarian
Ingredients
- 1 box red velvet cake mix (plus ingredients called for on box, usually eggs, oil, water)
- 1 (8 ounce) package cream cheese, softened
- 1 pound white chocolate melting wafers or almond bark
- 1 teaspoon vegetable oil (optional, for thinning coating)
- Cake pop sticks
Instructions
- Bake the red velvet cake according to the package directions. Let the cake cool completely on a wire rack.
- Crumble the cooled cake into fine crumbs in a large bowl. Discard any overly browned edges.
- Add the softened cream cheese to the cake crumbs. Use your hands or a stand mixer to combine the mixture until it forms a uniform, thick dough. This is your binder.
- Roll the dough into uniform balls, about 1 to 1.5 inches in diameter. You should get about 24 to 30 balls.
- Place the rolled balls on a baking sheet lined with parchment paper. Insert a cake pop stick about halfway into each ball.
- Chill the cake balls in the refrigerator for at least 2 hours, or until firm. This step is crucial for a good coating.
- Melt the white chocolate wafers or almond bark according to package directions. If the coating is too thick, stir in a small amount of vegetable oil until it reaches a smooth, dipping consistency.
- Dip each chilled cake ball into the melted chocolate, ensuring it is fully coated. Gently tap the stick against the side of the bowl to remove excess coating.
- If desired, immediately add sprinkles or drizzle with contrasting chocolate before the coating sets.
- Place the dipped cake pops upright in a styrofoam block or cake pop stand to dry completely.
Notes
- For the smoothest white chocolate dip, keep the melted chocolate warm but not hot. If it seizes or becomes too thick, add a few drops of vegetable oil and stir well.
- If you skip the sticks, you have made red velvet cake truffles. Roll them in powdered sugar or cocoa powder instead of dipping.
- Make sure your cake balls are very cold before dipping. Warm cake balls will cause the chocolate coating to crack as they warm up.
Nutrition
- Serving Size: 1 pop
- Calories: 250
- Sugar: 25g
- Sodium: 150mg
- Fat: 15g
- Saturated Fat: 8g
- Unsaturated Fat: 7g
- Trans Fat: 0.5g
- Carbohydrates: 28g
- Fiber: 1g
- Protein: 3g
- Cholesterol: 20mg