
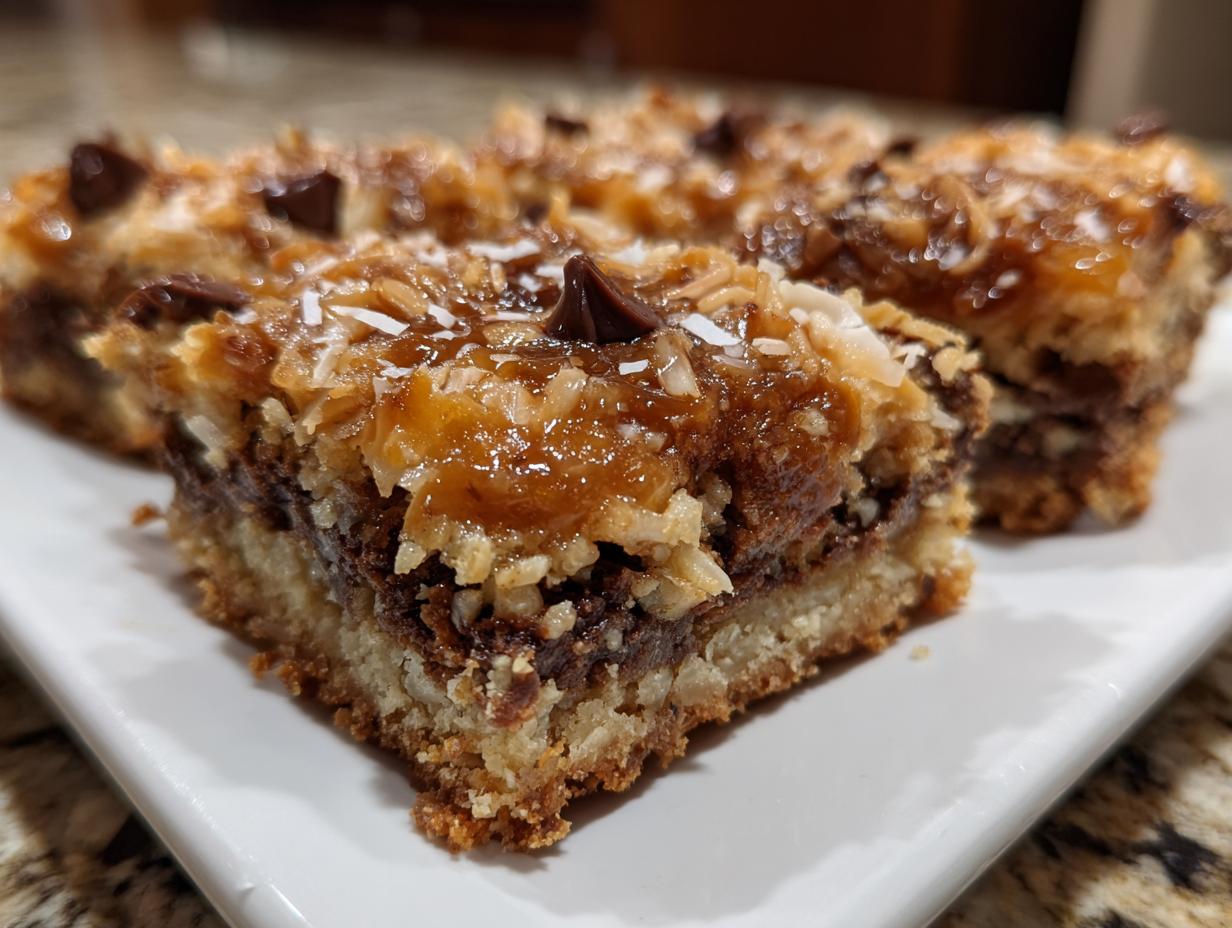
Oh, you know those desserts that just smell like childhood parties and cozy holiday gatherings? For me, that’s these magic cookie bars. In this kitchen, we don’t mess around with complicated layers that fall apart. We want comfort, we want sweet nostalgia, and we definitely want that rich, gooey texture that makes a bar worth eating. Trust me, this recipe is the one that finally settled all the debates at my house. It’s the ultimate, reliable method for achieving those perfect, sticky layers every single time. I’ve tested countless versions, but nothing beats the simple, honest joy of these classic bars done right.
- Why This Classic Magic Cookie Bars Recipe Works Every Time
- Gathering Ingredients for Perfect Magic Cookie Bars
- Step-by-Step Instructions for Making Magic Cookie Bars
- Tips for Success with Your Best Magic Bars Recipe
- Variations for Your Seven Layer Bars
- Serving Suggestions for These Crowd Pleasing Magic Cookie Bars
- Storage and Reheating Instructions for Chewy Dessert Bars
- Frequently Asked Questions About Magic Cookie Bars Recipe
- Share Your Classic Holiday Cookies Experience
Why This Classic Magic Cookie Bars Recipe Works Every Time
There are a million ways to make dessert bars, but if you’re looking for the truly Ultimate Gooey Bars that taste exactly like the ones you remember, you have to stick to the layering structure. We are aiming for that perfect harmony between a crisp bottom and a molten top, transforming simple ingredients into something spectacular. That’s why I call these my “why it works” recipe—it’s not just tossing things in a pan, it’s architecting happiness! If you’ve been chasing that perfect texture, check out my tips for chewy chocolate chip cookies; it’s the same principle of not overmixing!
I spent an entire weekend testing ratios because I absolutely refuse to serve a dry bar. My goal was to nail the texture that makes these an enduring favorite among Easy Bar Recipes. If you follow the order, you get distinct bands of flavor rather than a muddy mess. Seriously, one batch ended up too crumbly—a total disaster—but once I got the milk timing right, wow! It was magic.
The Secret to Gooey Chocolate Bars Texture
Look, the entire structural integrity of these bars—the thing that makes them so ridiculously delicious—comes down to that can of sweetened condensed milk. It’s the delicious, syrupy glue holding those chips, coconut, and nuts together. Don’t cheat on this, okay? Also, and this is crucial for that wonderfully chewy bite, you HAVE to let them cool down completely. Seriously. Patience guarantees you get sliceable, gooey squares instead of a warm skillet mess.
Gathering Ingredients for Perfect Magic Cookie Bars
Okay, this is where the magic starts to solidify, quite literally! Because we are building layers, precision matters way more than when I’m just tossing stuff into my famous cookie bars on impulse. Every ingredient has a job here, from the bottom crust to the very top sprinkle. We need the right amounts of crunchy things, melty things, and the essential sticky binder. Don’t skimp on quality here, especially when it comes to that milk!
Ingredient Clarity for Layered Cookie Bars
If you show up to the counter with vague ideas, you’ll end up with mediocre bars, and we are not making mediocre bars! I need you to measure these things out right so the structure sets up perfectly. Here is exactly what you’ll need for this classic dessert bar recipe:
- 1 1/2 cups graham cracker crumbs (make sure they’re fine!)
- 1/2 cup unsalted butter, melted (don’t heat it too much; just liquid enough to mix)
- 1 (14 ounce) can sweetened condensed milk (I’m telling you, the full-fat version or even the famous Eagle Brand makes a difference here!)
- 1 cup semi-sweet chocolate chips
- 1 cup flaked coconut (unsweetened is fine, but sweet is often better)
- 3/4 cup chopped pecans or walnuts (your choice—I love walnuts for a slight edge)
- 1/2 cup butterscotch chips (these are optional but bring such a nice depth!)
Step-by-Step Instructions for Making Magic Cookie Bars
Alright, time to get this assembly line moving! These bars are built in layers, which is why they look so impressive when you slice them. Don’t worry, it’s so easy you can practically do it standing on one foot. It’s all about following the order I use when I make my casseroles—everything goes in its intended spot! Let’s start with that crunchy base that holds the whole glorious structure together.
Preparing the Graham Cracker Crust Desserts Base
First things first: get your oven heated up to 350 degrees F. That’s what we need for that perfect bake. Now, grab your 9×13 inch pan. Here’s a pro tip from my mother: line it with parchment paper BEFORE you start, but make sure you leave some paper hanging over the sides—that’s your handle later! In a bowl, mix your graham cracker crumbs and the melted butter until it looks like wet sand. Press that tightly and evenly into the bottom of the pan. Don’t be shy about pressing hard; we want this crust sturdy! Pop it into the oven for about 8 minutes just to set it up before the real fun begins.
Layering the Ultimate Gooey Bars
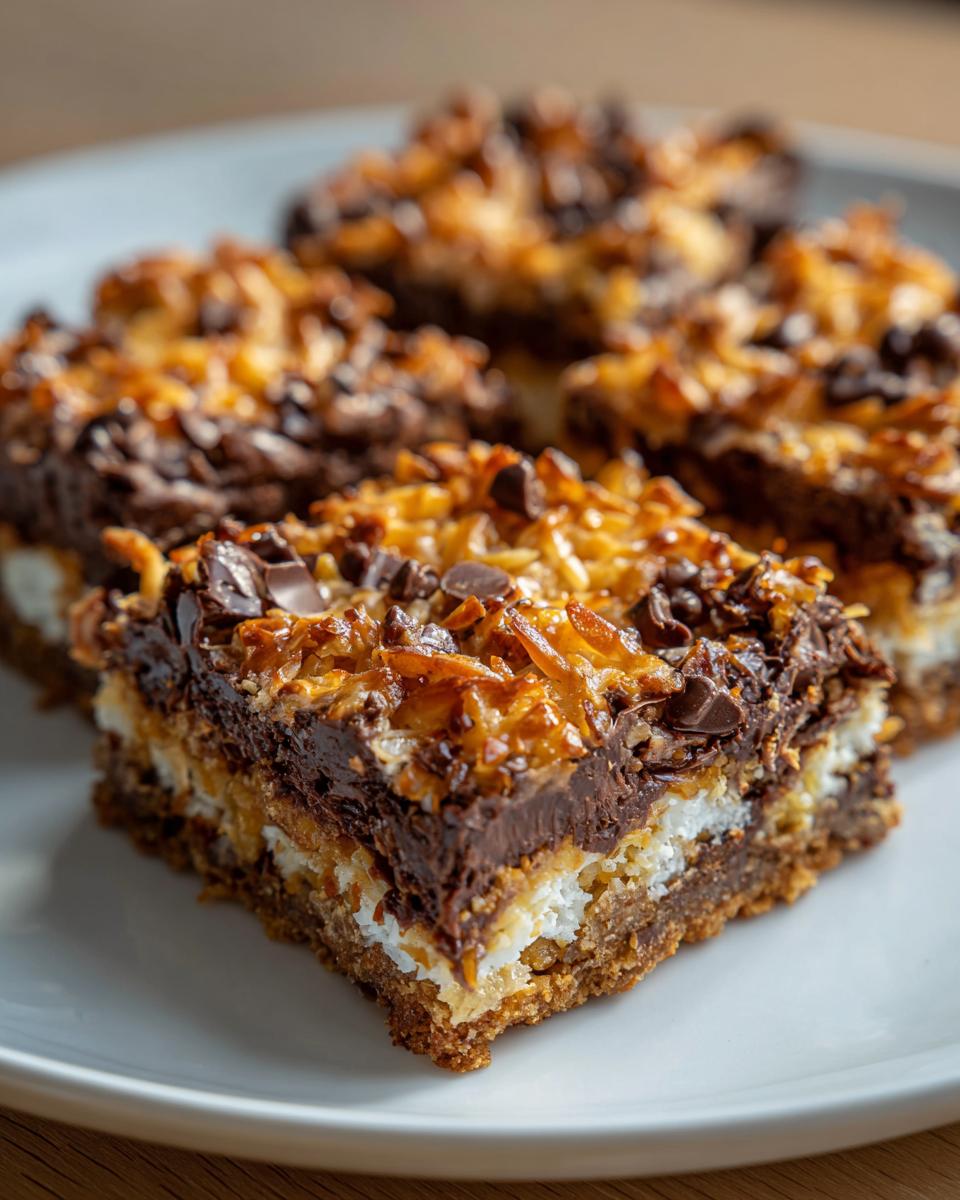
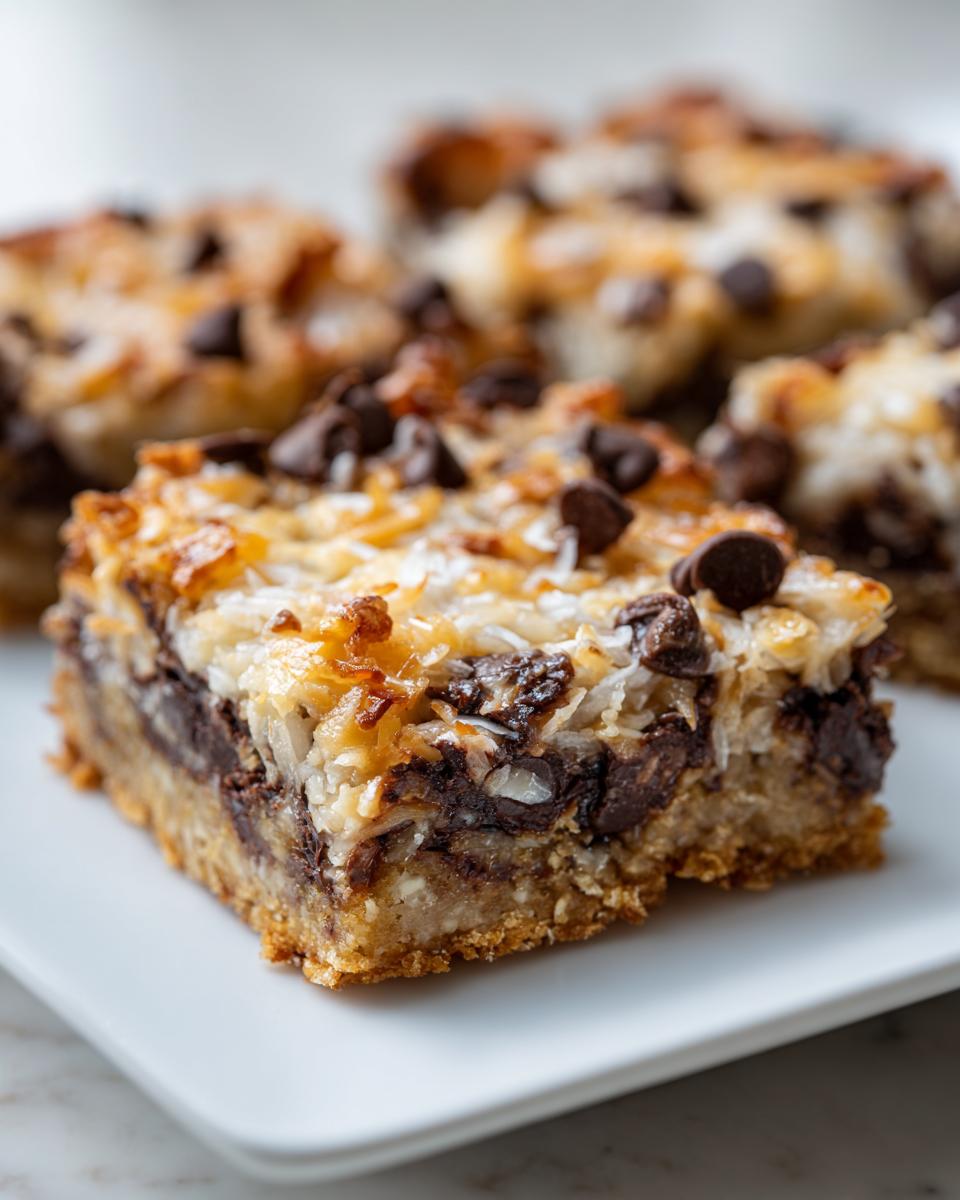
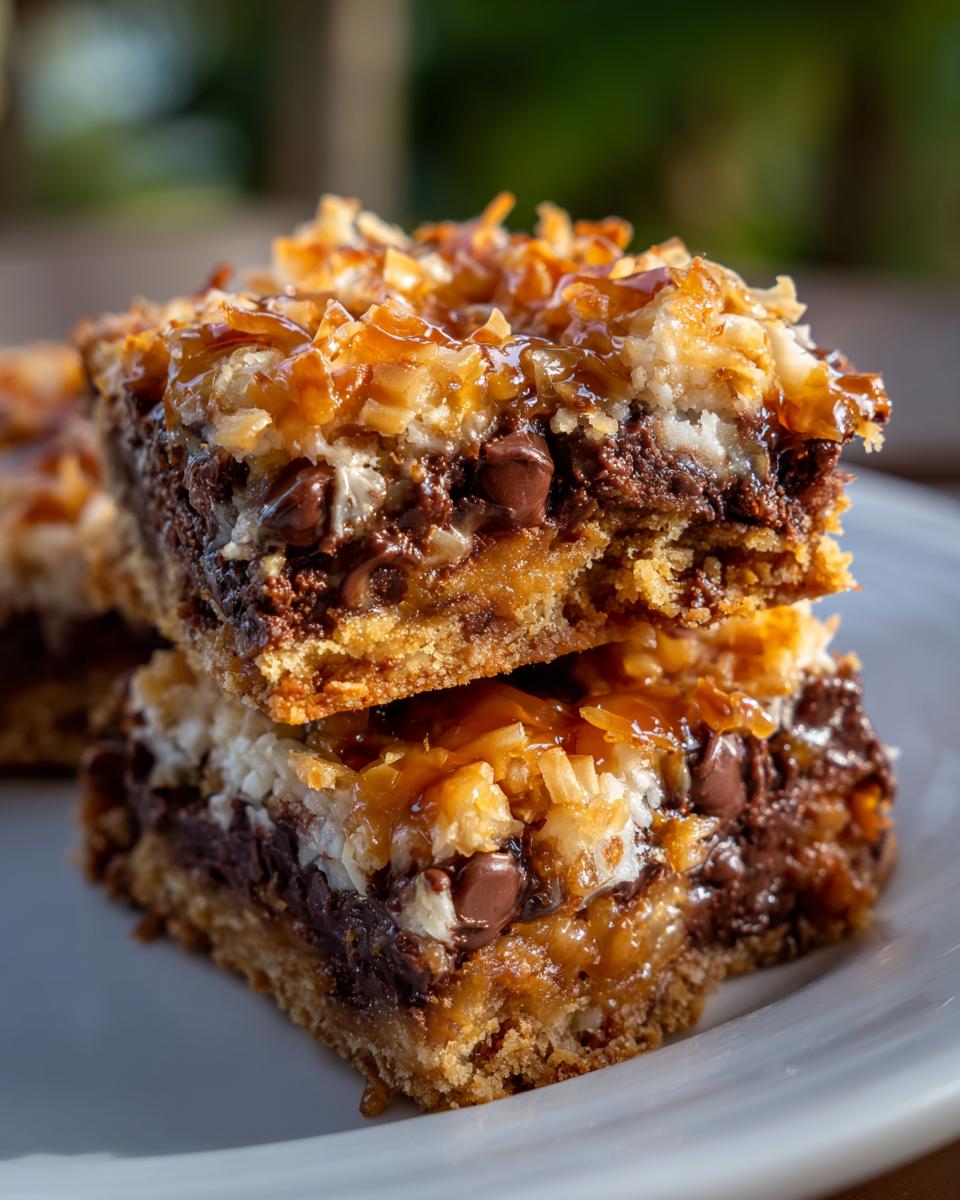
Once that crust is warm from the oven, take it out immediately. This is important! Pour that gorgeous, thick sweetened condensed milk evenly across the warm crust. It’s going to melt just slightly, which is exactly what we want for binding. Now, start sprinkling! Chocolate chips go down first, followed immediately by the flaked coconut. Don’t overlap too much; try to keep the layers even if you can. Finally, sprinkle your nuts and butterscotch chips (if you’re using them). Just scatter them gently over the top; they don’t need to be pressed into the milk layer at all.
Baking and Cooling the Magic Cookie Bars
Back into the 350-degree oven they go for about 20 to 25 minutes. You’re looking for the edges to look golden brown and happy, and you want to see that sweet milk layer bubbling gently—that means it’s cooked through! But listen closely: this step is the hardest part. You cannot slice these right out of the oven! Let them cool on a wire rack for at least two hours. Seriously, two full hours. If you rush it, they turn into delicious, sticky goo that’s impossible to serve. Cooling is what develops that amazing chewy texture!
Tips for Success with Your Best Magic Bars Recipe
We’ve put in the work, right? We layered them perfectly, we baked them beautifully, and now we need to make sure these Crowd Pleasing Desserts stand the test of time. When you’re making something this rich, a few insider tips can elevate them from good to absolutely unforgettable. I treat these Simple Dessert Bars with a little reverence because they are just so perfectly nostalgic, and I want you to get that satisfying, chewy texture every single time.
My personal secret for the perfect chew, beyond the cooling time? I like to slightly under-bake the bars by about three minutes. They keep cooking as they set up, and that tiny bit of extra moisture trapped inside makes them melt in your mouth rather than feel firm when you bite in. When you peek through the oven door, they should look just barely set in the center. If you love pecans, wait until you try these in my pecan cream pie!
Ingredient Notes and Substitutions for Magic Cookie Bars
Let’s talk about making minor adjustments without ruining the whole thing. Because this recipe relies so heavily on that sweet, thick liquid, you cannot substitute evaporated or regular milk for the sweetened condensed version—it just won’t set correctly. That thick sugar content is the whole point!
- Sweetened Condensed Milk: Seriously, go for the full-fat can. If you can find the classic Eagle Brand, it’s what this recipe was practically born to use. It provides that unmistakable rich flavor.
- Coconut: If you have five extra minutes, toss your flaked coconut into a dry skillet over medium heat until it smells nutty and turns light gold. Toasted coconut adds so much extra depth that complements the chocolate chips perfectly.
- Nuts: If you or anyone you’re serving has a nut allergy, don’t sweat it! Just leave them out entirely. The bars will still set up beautifully without the nuts, they just won’t have that extra crunch. You can even add extra chocolate or butterscotch chips if you want to bulk up the non-nut layers! We want everyone to enjoy these seven layer bars.
Variations for Your Seven Layer Bars
Look, while this classic version is unbeatable—truly, it’s perfected—I know we home cooks like to add our little signature touches every now and then. These bars are built on such a stable foundation that you can absolutely play around with the toppings without worrying about the whole thing crumbling. It’s fun to keep people guessing what your secret ingredient is!
If you’re feeling adventurous, here are a few little kitchen tweaks I’ve played with that still honour the spirit of this recipe. They are all super simple additions, meaning less fuss and more flavor, which is what we are all about here!
Swapping Out the Chips
The chocolate chip and butterscotch combo is divine, but you can completely transform the flavor profile just by switching the chips. If you love a deeper, richer taste, try swapping the semi-sweets for dark chocolate chips. Or maybe you’re a white chocolate fan—they pair unbelievably well with the coconut layer. I even tried using peanut butter chips once, and they created this amazing swirl when the condensed milk baked up around them. It adds another layer of richness to the standard desserts we make.
Adding Some Spice Magic
This is unexpected, but trust me on this one. Since we already love warm spices in so many of our bakes, a tiny pinch of ground cinnamon added right into the graham cracker crust base wakes up the whole bar. You only need about half a teaspoon, but that little bit of warmth is fantastic alongside the sweet coconut chocolate bars. It’s subtle, but it makes people stop and wonder what that hint of flavor is!
Going Tropical with the Coconut
When I have extra time, I love taking the fresh coconut a step further. Instead of just tossing the flaked coconut on top, sometimes I mix it with a tablespoon of melted butter and a teaspoon of brown sugar right before I sprinkle it on Layer 4. This creates a slightly caramelized top layer once baked. It offers a beautiful chewiness that complements the chocolate chips so perfectly. It’s a small addition that makes these Seven Layer Bars feel a little more gourmet without complicating the baking.
Serving Suggestions for These Crowd Pleasing Magic Cookie Bars
Once these beautiful, gooey squares have cooled completely—and I mean sink-your-teeth-in-and-wait-until-tomorrow cool—they are ready to serve! Because these magic cookie bars are so incredibly rich and sweet, they really sing when paired with something simple. They are fantastic on their own for a bake sale, but if you’re serving them after dinner, you might want to balance that sweetness just a touch.
When I’m expecting company or serving these at a family gathering, I always have two things ready. First, a really good, strong cup of coffee. That slight bitterness cuts through the sweetness of the condensed milk and chocolate perfectly. Honestly, it’s like they were made for each other!
Pairing with Dairy
For the kids, or anyone who just loves a classic combination, a tall glass of cold milk is non-negotiable. But if you want to dress them up just a tiny bit more without making another dessert, try serving a small square alongside a scoop of vanilla bean ice cream. The melting ice cream hitting that still-slightly-chewy center? That’s pure comfort food heaven. It feels fancy, but it’s the easiest thing you’ll do all day!
Presentation for Gatherings
Since these are technically crowd pleasing desserts, presentation helps show off those gorgeous layers. Cut them neatly—use a long, sharp knife wiped clean between cuts, even if they’re fully chilled. Arrange them on a simple white platter. I often sprinkle just a tiny, tiny dusting of powdered sugar right before serving, just for contrast against the dark chocolate and coconut. It makes them look professional, even though you made them with almost zero effort!
You can even put these out alongside something savory, like something smoky you might throw in the slow cooker later, like my apple cider braised pork shoulder, just to give people a break from all that sugar!
Storage and Reheating Instructions for Chewy Dessert Bars
Oh, the sad moment when you’ve eaten half the pan and you have to figure out how to keep the rest perfect! If you’re lucky enough to have any leftovers—and that’s a big “if” around my house—you need to treat these Chewy Dessert Bars correctly to keep that gooey texture from drying out.
Because these bars are so rich and have that high sugar content from the condensed milk, they actually do pretty well sitting out, but the fridge is where they truly thrive for longevity. I always try to keep them covered tightly; exposure to air is the enemy of chewiness!
Room Temperature vs. Refrigerator Storage
For short-term enjoyment—say, the next day or two if you have a dedicated cookie stash—you can absolutely keep these bars in an airtight container on your counter. The butterfat in the chips helps keep things moist. Just make sure they are completely cool before you put the lid on, or you’ll steam them slightly and mess up that crust!
For longer storage, which means up to a week for me, the refrigerator is your best friend. Storing them in an airtight container in the fridge is the secret to preserving that gorgeous, soft chewiness. When you pull them out, let them sit on the counter for about 20 minutes before slicing. That little bit of warmth makes the chocolate soft again, almost like they were freshly baked. If you’ve ever made my slow cooker soup, you know I appreciate low-maintenance storage, and these bars fit right in!
Can I Freeze Magic Cookie Bars?
Yes! Absolutely you can freeze them. If you’re thinking ahead for holidays or bake sales, this is the way to go. After you’ve baked and completely cooled them, slice them first—this is way easier than trying to cut a frozen slab later. Wrap the individual squares tightly in plastic wrap, and then pop those wrapped bars into a heavy-duty freezer bag. They keep beautifully for up to three months!
When you want to enjoy one, just pull it out of the freezer and let it thaw on the counter for an hour or so. It thaws perfectly back into that perfect, rich, gooey state that makes these the best dessert bars around. Seriously, don’t even bother reheating them; they are meant to be chewy and soft straight from the thaw!
Frequently Asked Questions About Magic Cookie Bars Recipe
I always get so many questions once people start baking these because they look so simple, but there are a few key points that make all the difference between a good bar and the best bar! People want to know everything about making these Easy Bar Recipes foolproof before they serve them to a crowd. Ask away, I’m happy to share!
Can I make magic cookie bars without nuts?
Oh, absolutely, yes! Don’t worry for one second if your serving group has nut allergies or just plain dislikes pecans or walnuts. The recipe is designed to work perfectly even if you skip them entirely. The nuts just add a little bit of crunch contrast, but the bulk of the texture and flavor comes from that thick layer of sweetened condensed milk and the chocolate. If you leave them out, I sometimes encourage readers to add a few extra chocolate chips or butterscotch chips—just because everything is better with more chocolate, right?
What is the best way to cut these bars neatly?
This is the question I get asked the most! You can have the most beautiful, perfectly layered bars, but if you rush the cutting, you end up with a sticky mess all over your platter. The absolute number one rule is cooling time. You must let them sit for at least two full hours until they are basically room temperature or even slightly chilled. Once they are set, if you still struggle, try this trick: wipe a long, sharp knife with a damp, hot cloth, wipe it clean, and then make your cut. The heat helps glide right through those gooey layers without dragging the ingredients.
Is using Eagle Brand sweetened condensed milk required?
The truth is, any full-fat, high-quality sweetened condensed milk will work to bind your layers together. However, I find that sticking with classics like Eagle Brand just gives you that familiar, sweet, caramelized flavor that makes these bars what they are. If you’re looking for that perfect pull, that tried-and-true sweetness, I always recommend splurging on the recognizable brand. It’s the foundation of these Sweetened Condensed Milk Bars!
How important is it to pre-bake the crust?
For me, it’s key for structure! If you skip that initial 8-minute bake on the cracker base, you risk having a crust that just crumbles apart when you lift it or slice it. Taking that short time in the oven solidifies the butter and crumbs just enough so you have a dependable platform to build the rest of your seven layers on. If you skip that step, you risk the crust turning soggy underneath all that delicious milk.
If you’ve tried this recipe, please let me know your results in the comments below! What chips did you use? Did you try swapping anything out? I love seeing your baking adventures, especially when they involve my favorite no-fuss recipes!
Share Your Classic Holiday Cookies Experience
Now that you’ve got the ultimate blueprint for the most gooey, layered, seriously satisfying magic cookie bars, I truly want to hear about it! Home cooking is about community, right? It’s about connecting over the smells and tastes that bring us back to our favorite moments. So, when you make a batch of these classic treats, don’t keep that victory to yourself!
Did you find that the cooling time was the hardest part? Did you decide to add the optional butterscotch chips, and if so, was it worth it? Let me know! I love seeing how these recipes take on a life of their own in different kitchens.
Rate and Review This Easy Bar Recipe
Once you’ve cut those clean squares and served them up (ideally with a strong cup of coffee, like I mentioned!), come right back here and leave a rating. The feedback helps other busy cooks trust that this recipe truly delivers on its promise of being an easy bar recipe that tastes like nostalgia. Did it disappear immediately at your gathering? That’s how you know you hit a home run!
Show Off Your Layers on Social Media
If you snap a picture showing off those gorgeous, distinct layers—the graham crust, the melty chips, the chewy coconut—please tag me! Sharing pictures of your perfectly set seven layer bars makes my day. Use the hashtag so I can see your success! It’s so rewarding to watch you all bring these comforting classics to life.
And hey, if you’re looking for something savory to serve before you bring out these decadent bars, maybe try checking out my recipe for bacon cheeseburger soup. It’s another fantastic crowd-pleaser!
Drop Your Magic Bar Variations Below!
Did you try adding a sprinkle of flaky sea salt on top just before serving? Or maybe you decided to use peanut butter chips instead of butterscotch? Leave your best, most successful variations in the comments below. We’re building a library of comfort food here, and every tip helps the next person who wants a perfect slice of gooey magic!
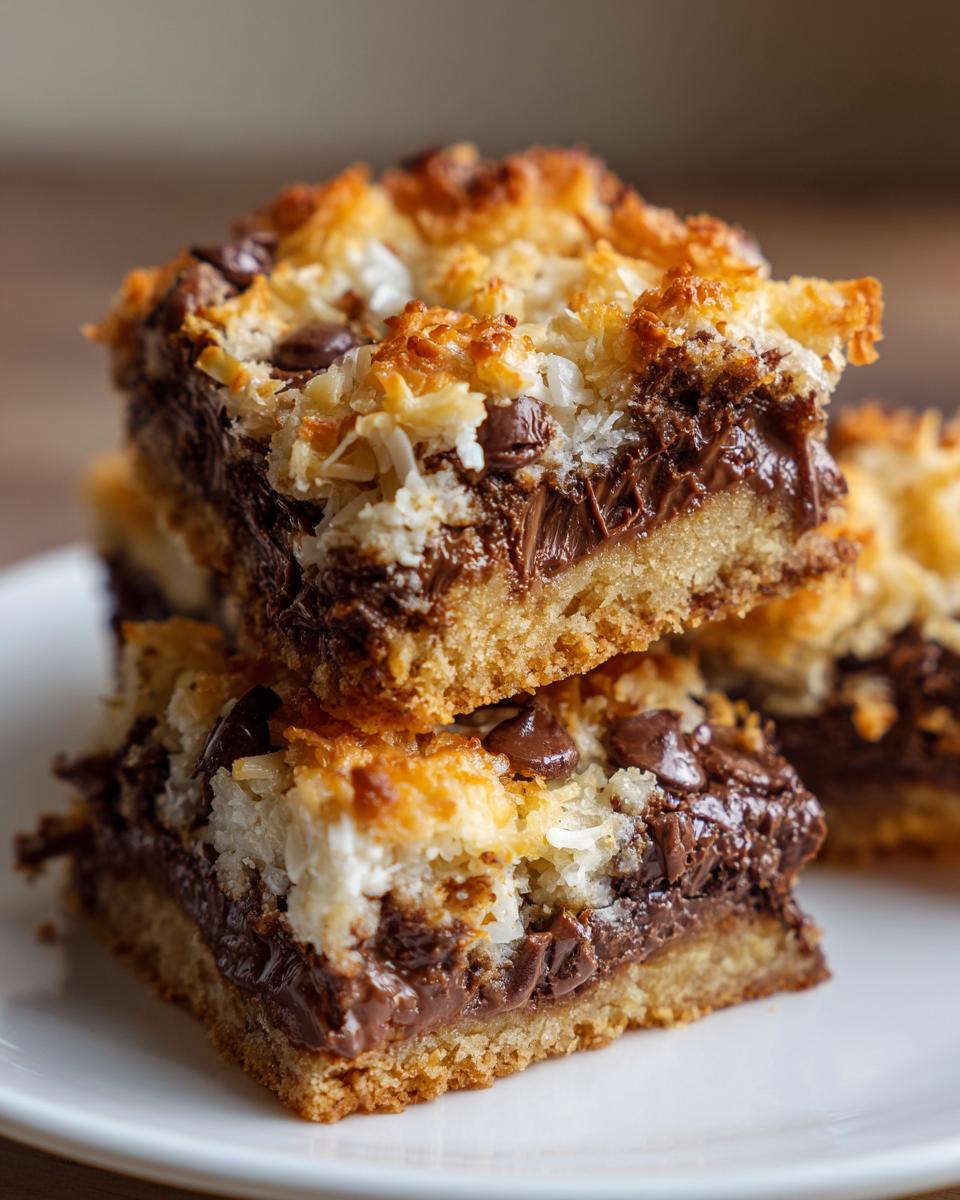
PrintThe Ultimate Gooey Magic Cookie Bars Recipe (Classic Seven Layer Bars)

Make the best Magic Cookie Bars, a classic layered dessert featuring a graham cracker crust, chocolate chips, coconut, nuts, and sweetened condensed milk for a rich, chewy texture. This recipe is simple and perfect for crowds.
- Prep Time: 15 min
- Cook Time: 25 min
- Total Time: 40 min
- Yield: 24 servings 1x
- Category: Dessert
- Method: Baking
- Cuisine: American
- Diet: Vegetarian
Ingredients
- 1 1/2 cups graham cracker crumbs
- 1/2 cup unsalted butter, melted
- 1 (14 ounce) can sweetened condensed milk (Eagle Brand recommended)
- 1 cup semi-sweet chocolate chips
- 1 cup flaked coconut
- 3/4 cup chopped pecans or walnuts
- 1/2 cup butterscotch chips (optional)
Instructions
- Preheat your oven to 350 degrees F. Line a 9×13 inch baking pan with parchment paper, leaving an overhang for easy removal.
- Prepare the crust: In a medium bowl, mix the graham cracker crumbs and melted butter until fully combined. Press this mixture firmly and evenly into the bottom of the prepared pan.
- Bake the crust for 8 minutes until lightly set. Remove from the oven.
- Pour the entire can of sweetened condensed milk evenly over the warm crust. This acts as the binder for your layers.
- Sprinkle the chocolate chips evenly over the milk layer.
- Distribute the flaked coconut over the chocolate chips.
- Sprinkle the chopped nuts and butterscotch chips (if using) over the coconut layer.
- Bake for 20 to 25 minutes, or until the edges are golden brown and the condensed milk is bubbly.
- Let the bars cool completely in the pan on a wire rack. Cooling is important for clean cutting.
- Once cool, lift the bars out using the parchment paper overhang. Cut into squares.
Notes
- For the best gooey texture, use a full-fat, high-quality sweetened condensed milk like Eagle Brand.
- If you want a richer flavor, lightly toast the coconut flakes before sprinkling them on top.
- Allow the bars to cool for at least 2 hours before cutting; chilling them speeds up this process.
- To make this recipe nut-free, simply omit the nuts.
Nutrition
- Serving Size: 1 bar
- Calories: 200
- Sugar: 18g
- Sodium: 75mg
- Fat: 12g
- Saturated Fat: 6g
- Unsaturated Fat: 6g
- Trans Fat: 0g
- Carbohydrates: 22g
- Fiber: 1g
- Protein: 3g
- Cholesterol: 15mg