
When the summer heat hits and you realize you need the most *refreshing* frozen dessert recipes but absolutely cannot turn on the oven? Trust me, I’ve been there! That’s when you need something gloriously cold, ridiculously easy, and ready for any party or birthday celebration. This No-Bake Ultimate Oreo **ice cream pie** is my personal go-to for those days. Here at MDLATDMM, my goal is to translate those old family “splashes” into clear, reliable instructions, and this pie is foolproof. It takes a crunchy, buttery base and fills it with creamy layers that everyone—and I mean everyone—will rave about. Get your freezer ready!
- Why This No-Bake Ice Cream Pie Recipe Works for You
- Essential Ingredients for Your Homemade Ice Cream Pie
- Step-by-Step Guide to Making the Ultimate Oreo Ice Cream Pie
- Tips for the Perfect No Bake Ice Cream Pie Every Time
- Ingredient Notes and Substitutions for Your Ice Cream Pie
- Serving Suggestions for Your Refreshing Summer Treats
- Storage and Make Ahead Dessert Instructions for This Ice Cream Pie
- Frequently Asked Questions About Making an Ice Cream Pie Recipe
- Estimated Nutritional Snapshot for This Creamy Frozen Pie
Why This No-Bake Ice Cream Pie Recipe Works for You
Honestly, who needs more heat in the kitchen when it’s 90 degrees out? That’s why I built this recipe around speed and satisfaction. It’s exactly what you need when you’re looking for fantastic summer pie ideas that don’t require turning on a single burner.
- We call this an easy ice cream dessert because prep time is lightning fast—just 20 minutes!
- Since there’s no baking involved, it’s truly a set-it-and-forget-it kind of deal until you need that sweet slice.
- This Oreo crust pie is guaranteed to be a huge hit at any gathering. It’s the perfect make ahead dessert for birthdays or cookouts.
- It delivers that ultra-creamy frozen pie texture without any fuss.
Essential Ingredients for Your Homemade Ice Cream Pie
To make this ultimate treat, you only need a handful of things, but the quality and preparation of each ingredient really make the difference in this easy ice cream pie recipe. Don’t worry if you’re short on time; everything here is accessible! Remember, we’re aiming for that perfect blend of crunch, creaminess, and cold satisfaction.
Here’s what you’ll need:
- 2 cups crushed Oreo cookies (Make sure those cookies are fine crumbs!)
- 6 tablespoons melted butter (This binds the crust together, so don’t skip it!)
- 1.5 quarts vanilla ice cream, softened (Crucial tip: make sure it’s softened, not melted!)
- 1 cup heavy cream (This is for our gorgeous topping.)
- 1/4 cup powdered sugar
- 1 teaspoon vanilla extract
- 1/2 cup chocolate fudge sauce, for topping (Warm this slightly before drizzling!)
That’s it! Seven simple ingredients responsible for the best frozen dessert recipes of the summer.
Step-by-Step Guide to Making the Ultimate Oreo Ice Cream Pie
Okay, let’s get messy! Since this is a fantastic homemade ice cream pie, you don’t need to worry about oven temperatures, but you do need to respect the freezer! Follow these steps exactly—especially the freezing times—and you’ll have the most incredible, sliceable treat ready for your next party.
Preparing the Oreo Crust Pie Base
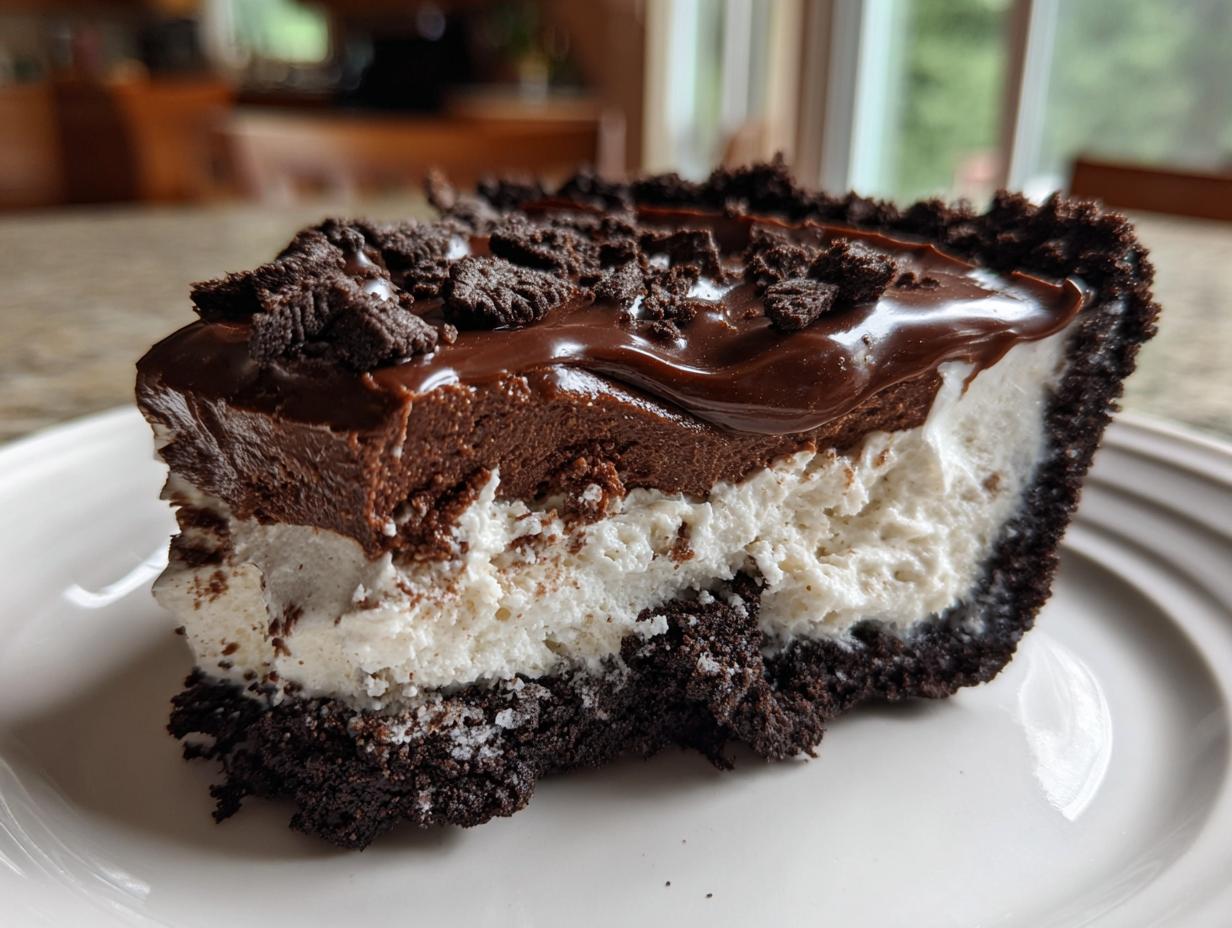
First things first, get that crust ready. You’re just combining your 2 cups of crushed Oreos with the 6 tablespoons of melted butter. Mix it up until it looks like wet sand. Now, press it down into your 9-inch pie plate. Really press it firmly, right on the bottom and up the sides! If you don’t press it hard, the crust will fall apart when you try to cut it later. Pop that base in the freezer for about 30 minutes. This quick freeze solidifies the butter and holds everything together!
Layering and Freezing the Creamy Frozen Dessert Recipes Filling
While your crust is chilling, take that vanilla ice cream out. It needs to be softened up—remember my note? Let it sit on the counter for about 10 to 15 minutes until it’s spreadable but not soupy. Gently spread that softened ice cream over the frozen Oreo crust. Smooth the top out neatly! Then, into the deep freeze it goes for a solid 2 hours, minimum. This long chill time is vital for stabilizing this perfect creamy frozen pie. Side note: If you decide to use chocolate or mint chip ice cream instead, this is when you layer it in!

Finishing Your Easy Ice Cream Dessert Topping
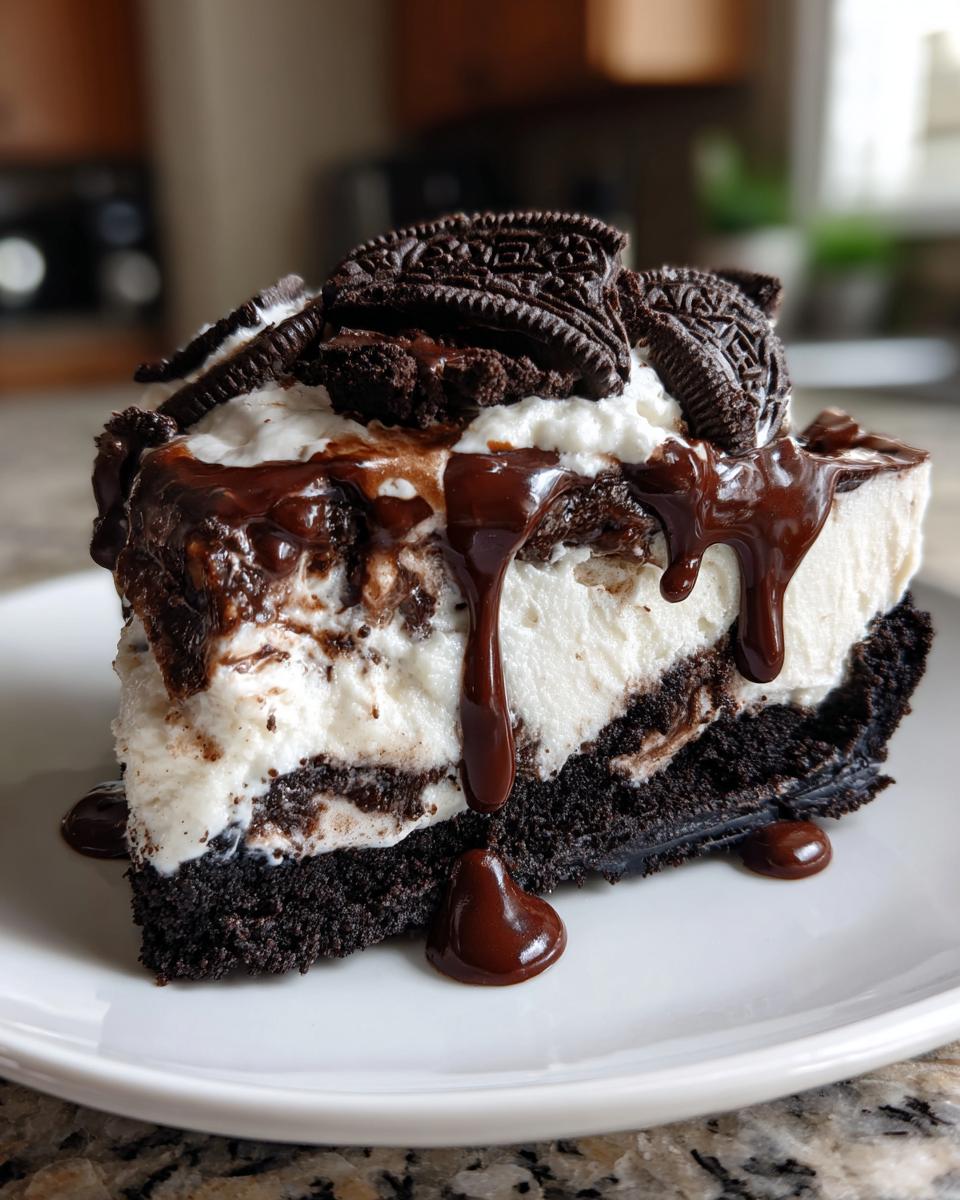
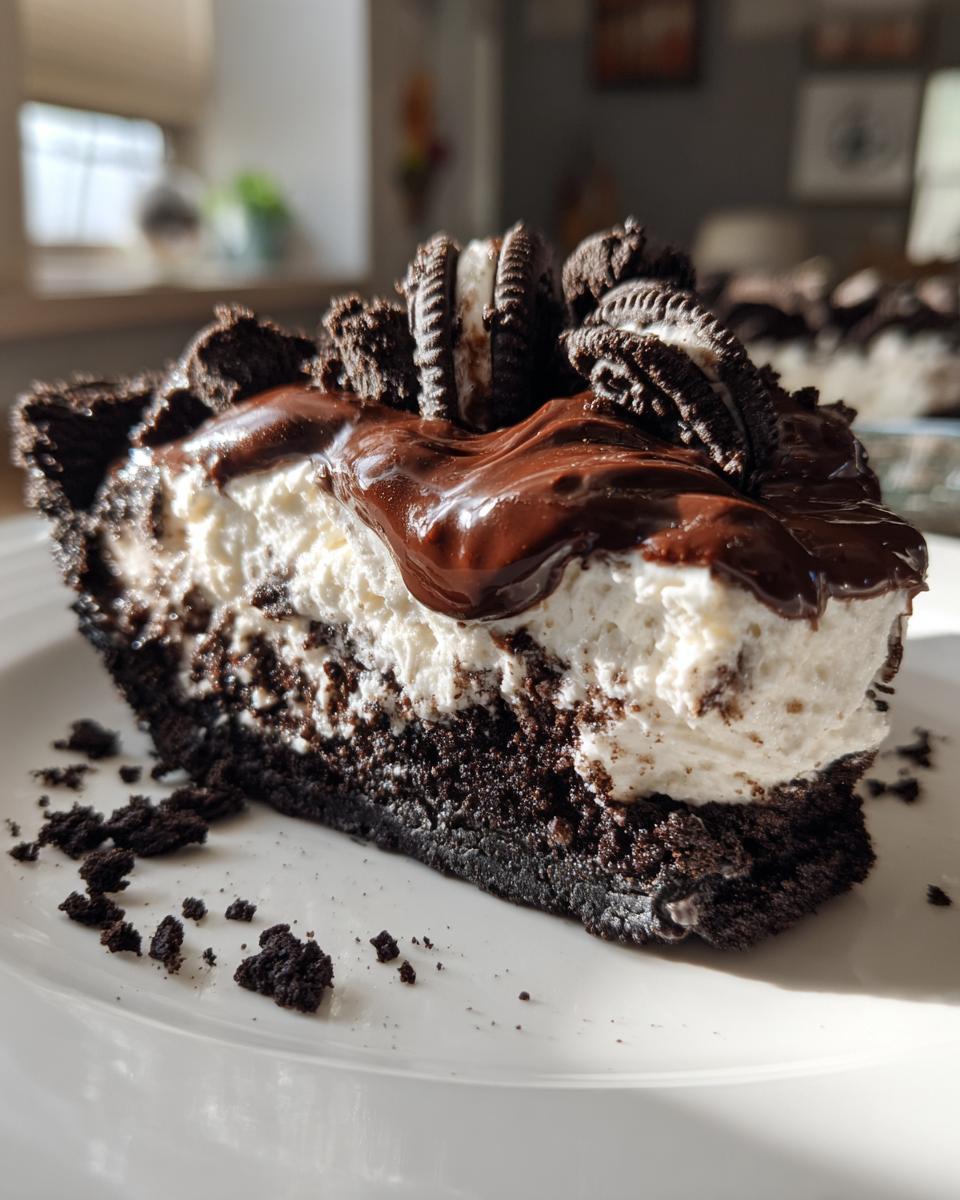
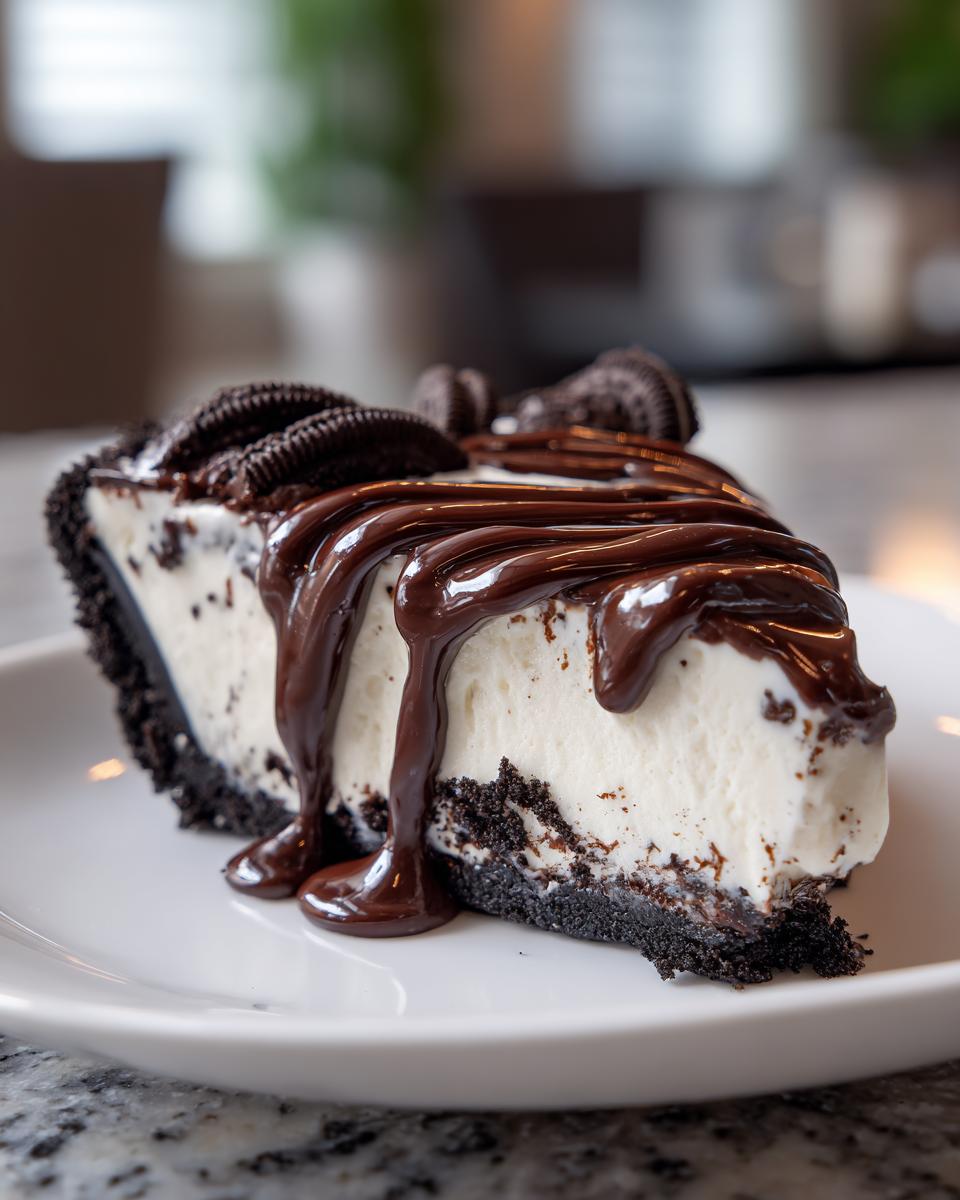
Once your ice cream layer is solid as a rock, it’s time for the best part! You’re going to whip up a quick topping. Beat the heavy cream, powdered sugar, and vanilla extract together until you have stiff peaks. You want that airy, gorgeous volume! Dollop or spread this whipped cream beautifully over the frozen ice cream layer. Then, take that chocolate fudge sauce—I like mine slightly runny—and drizzle it generously everywhere. Back into the freezer for one final hour. This final freeze locks in that beautiful whipped topping before serving!
Tips for the Perfect No Bake Ice Cream Pie Every Time
We’ve covered the basic build, but if you want this **ice cream pie** to go from “great” to “OMG, I need the recipe,” you have to follow a few of my little tricks. Since these frozen dessert recipes rely heavily on freezing solid, timing is everything! These little bits of knowledge are what connect my kitchen to yours, making sure your slice comes out pristine.
Here are my absolute must-dos for achieving perfection:
- The Hot Knife Trick for Clean Slices: This is non-negotiable for presentation! Before you slice, grab a tall glass of very hot water. Dip your sharpest knife into the water for about 10 seconds, wipe it quickly with a clean towel, and then slice. The warm blade cuts right through the hard ice cream like butter! Wipe and reheat the knife between every single slice, or you’ll end up with a messy wedge.
- Preventing Freezer Burn Drama: Once the pie is completely set (after that final hour of freezing), you need to seal it up tight. Plastic wrap alone won’t cut it; it sticks to the whipped cream and ruins the look when you peel it off. After the last freeze, cover the entire pie dish tightly with two layers of plastic wrap, pressing the first layer gently onto the topping. Then, slide the whole thing into a large, tightly sealed freezer bag. This keeps those crystal ice shards away from your beautiful creation.
- Don’t Skimp on the Crust Freeze: I know waiting 30 minutes for the crust seems like forever when you’re excited, but trust me, that initial freeze is what gives you a sturdy foundation. If you rush this, the soft ice cream layer will push the buttery crumbs out the sides when you spread it. A solid crust means a reusable pie plate and no sad, crust-less bites for you! You can read more about making pies at home over at Farm Fresh Feasts, too—they have great tips for these simple recipes.
Ingredient Notes and Substitutions for Your Ice Cream Pie
This Ultimate Oreo **ice cream pie** is definitely a classic, but the fun of making your own frozen dessert recipes is seeing what you can swap out! I love the Oreo crust, but Mom always used a simple graham cracker crust dessert when she was feeling lazy, and honestly, it’s just as delicious. If you go that direction, just use 2 cups of graham crumbs, 1/4 cup of sugar, and 1/2 cup of melted butter instead of the Oreos. Both give you that perfect, crisp barrier between the freezer and your hand!
Now, let’s talk ice cream flavors. While I set this recipe up with vanilla because it lets the topping’s chocolate flavor shine, you don’t have to stick to it! This is where you can chase those cravings.
If you’re looking for something bold, think about using a good quality peanut butter ice cream. That combination is just fantastic—seriously decadent! We have a recipe for easy peanut butter cookies, and the flavor profile is similar. Or, you can go minty! A rich mint chocolate chip ice cream layer in this pie is otherworldly, especially if you fold in some chopped dark chocolate chunks before freezing it solid.
Just remember this one rule for any substitution: the ice cream layer has to be perfectly softened for spreading, and then frozen completely before you add that sweet, whipped topping. Stick to that, and your **ice cream pie** will be an indulgent frozen slice masterpiece every single time.
Serving Suggestions for Your Refreshing Summer Treats
Okay, your ultimate **ice cream pie** is set, it’s frozen hard, and you’re minutes away from serving this incredible party dessert idea. Presentation matters, even for something this easy! Since this is already such an indulgent frozen slice with the Oreo crust and the fudge swirl, sometimes the best thing to do is just let it shine.
But if you want to dress it up just a bit for your backyard gathering, I have a couple of super quick ways to elevate the look without adding any more mess or fuss:
- Fresh Berry Pop: Since we used chocolate and vanilla, tartness is your friend! A handful of fresh raspberries or sliced strawberries scattered artfully around the base of the sliced pie on the plate adds a beautiful color contrast. They cut through the richness perfectly.
- Extra Sauce Drizzle: If you have leftover chocolate fudge, great! But if you want to mix it up, a slightly warmed homemade caramel sauce drizzled over the top just before serving adds a different, beautiful brown color. You can find my simple recipe for my chewy chocolate chip cookies batter—the caramel element is similar!
- A Crunch Factor: If you didn’t use chopped nuts in the recipe (and many people skip them!), you can sprinkle a tiny pinch of chopped pecans or almonds right over the whipped cream just before you bring it to the table. You want the crunch to be the last thing, so don’t freeze it again after adding the nuts!
Keep it simple! This is supposed to be a relaxing no bake ice cream pie, not a full pastry operation. A little color and a good knife [see previous section!] are all you need!
Storage and Make Ahead Dessert Instructions for This Ice Cream Pie
The best part about this Ultimate Oreo **ice cream pie**? It’s designed to be a fantastic make ahead dessert! You can assemble the entire thing—crust, ice cream, whipped topping, and fudge drizzle—and stick it in the freezer until you need it. It truly shines when you can pull a gorgeous, ready-to-serve, cold slice out when guests arrive.
But just like any good frozen slice, storage matters, or you risk ending up with weird ice crystals on your beautiful whipped topping. I’ve perfected a technique to keep this pie tasting just as fresh as the day you made it. Remember, this whole thing needs to stay rock solid!
Here is my foolproof method for keeping your **ice cream pie** happy in the freezer:
- The Double Freeze Seal: Once the pie has had its final hour of freezing (after the fudge drizzle), take it straight from the freezer. Use plastic wrap first—press it gently down onto the topping so it smooths out any peaks or valleys and keeps the air away from the surface. Then, grab a large, zip-top freezer bag (the sturdy kind!) and slide the entire covered pie dish inside. This double barrier locks out freezer smells and harsh cold air.
- Freezer Lifespan: Properly sealed up like this, your **ice cream pie** will be fantastic for about two weeks. Past that, the Oreo crust starts to get a little too hard, and you risk freezer burn, even with the wrapping. For the best texture, try to serve it within 7 to 10 days.
- Serving Straight From the Cold: This is a no-bake ice cream pie, which means you don’t thaw it; you serve it cold! Don’t let it sit on the counter for too long. Grab your hot knife (you remember this trick from earlier, right?) and slice it immediately after pulling it from the freezer. Because the filling is so rich, the knife will glide through, keeping your slices neat and tidy for serving. If you let it sit out longer than 5 minutes before cutting, you lose that perfect structure!
When you need a dessert that’s ready when you are, this recipe is a total lifesaver. Just keep it tucked away in the back of the freezer!
Frequently Asked Questions About Making an Ice Cream Pie Recipe
I get so many wonderful questions about this No-Bake **ice cream pie**! It’s simple, but since we are dealing with layers that need to freeze completely, people often want reassurance about timelines and substitutions. I’ve pulled together the absolute most common queries to make sure your journey to making the best ice cream pie recipe is smooth sailing!
Can I use a different crust besides the Oreo one?
Absolutely! While I adore the crunchy texture of the Oreo crust pie, it’s super easy to swap it out if you prefer a different flavor profile. You can definitely use a standard graham cracker crust dessert base, or if you’re feeling creative, try crushing up some chocolate wafers or even those stale Krispy Kreme doughnuts everyone loves! Just make sure your crumb-to-butter ratio is right so it holds together firm.
How long does this actually need to freeze? Can I rush it?
You can’t really rush perfection when dealing with creamy frozen pie! The total active freezing time is about 3 hours, but that’s split up. You need 30 minutes for the crust, 2 hours for the ice cream layer to set rock hard, and then a final hour after the whipped topping goes on. If you skip that 2-hour middle freeze, spreading the whipped cream will just turn your ice cream into soup, and nobody wants that! For more inspiration on frozen treats, check out the ideas over at Chefs Bliss.
What if I want to use a homemade no churn ice cream pie filling instead of store-bought?
That’s a fantastic idea! If you’re opting for a no churn ice cream pie filling, you need to make sure that filling is completely frozen before you even attempt to spread the whipped cream on top. No-churn recipes sometimes take longer than commercial tubs to firm up. Once your homemade base is totally solid, the rest of the process—whipped topping and final freeze—stays the same. It just means you might need 4 hours of setting time instead of 2!
Is this a good idea for a birthday dessert?
Does the sun come up? Yes! This is one of my absolute favorite birthday ice cream dessert options because it looks so fancy with the fudge drizzle, but it takes almost zero effort on the day of the party. Since it’s a make-ahead dessert, you do all the work the day before, and it’s ready to slice and serve straight from the freezer!
Estimated Nutritional Snapshot for This Creamy Frozen Pie
I always like to give you an idea of what you are getting into when you make one of my favorite treats. Because this No-Bake Ultimate Oreo **Ice Cream Pie** relies on a few wonderful, indulgent ingredients like the buttery crust and rich cream topping, it definitely lands on the side of a special occasion dessert! Remember, these numbers are just an estimate based on standard measurements. If you swap out the Oreos for chocolate wafers, or use low-fat cream instead of heavy cream, your totals are going to change a bit!
This table breaks down the estimated nutritional breakdown for one satisfying slice:
- Serving Size: 1 slice
- Calories: 450
- Sugar: 35g
- Sodium: 320mg
- Fat: 28g
- Saturated Fat: 15g
- Unsaturated Fat: 13g
- Trans Fat: 0.5g
- Carbohydrates: 45g
- Fiber: 1g
- Protein: 5g
- Cholesterol: 55mg
This is definitely one of the more decadent frozen dessert recipes we make, but it is worth every single bite when that summer heat is really getting to you! Enjoy knowing exactly what you are using to create pure frozen joy!
PrintNo-Bake Ultimate Oreo Ice Cream Pie

Make this easy, no-bake ice cream pie using a crunchy Oreo crust and creamy filling. This recipe is perfect for summer parties or as a make-ahead dessert.
- Prep Time: 20 min
- Cook Time: 0 min
- Total Time: 3 hours 20 min
- Yield: 8 servings 1x
- Category: Dessert
- Method: No Bake
- Cuisine: American
- Diet: Vegetarian
Ingredients
- 2 cups crushed Oreo cookies
- 6 tablespoons melted butter
- 1.5 quarts vanilla ice cream, softened
- 1 cup heavy cream
- 1/4 cup powdered sugar
- 1 teaspoon vanilla extract
- 1/2 cup chocolate fudge sauce, for topping
Instructions
- Combine the crushed Oreo cookies and melted butter in a bowl. Press the mixture firmly into the bottom and up the sides of a 9-inch pie plate. Freeze the crust for 30 minutes.
- Spread the softened vanilla ice cream evenly over the frozen Oreo crust. Return the pie to the freezer and freeze for at least 2 hours, or until firm.
- Prepare the topping: In a medium bowl, beat the heavy cream, powdered sugar, and vanilla extract until stiff peaks form.
- Spread the whipped cream over the frozen ice cream layer.
- Drizzle the chocolate fudge sauce over the whipped cream topping.
- Freeze the finished pie for at least 1 hour before slicing and serving.
Notes
- If you do not have softened ice cream, let it sit on the counter for 10 to 15 minutes before spreading it into the crust.
- You can substitute vanilla ice cream with your favorite flavor, such as chocolate or mint chocolate chip.
- For an extra layer of flavor, spread a thin layer of hot fudge or peanut butter between the ice cream and the crust before freezing.
Nutrition
- Serving Size: 1 slice
- Calories: 450
- Sugar: 35g
- Sodium: 320mg
- Fat: 28g
- Saturated Fat: 15g
- Unsaturated Fat: 13g
- Trans Fat: 0.5g
- Carbohydrates: 45g
- Fiber: 1g
- Protein: 5g
- Cholesterol: 55mg