

Are you ever just slammed, counting down the minutes until quitting time, but you *know* you need something rich, chocolatey, and utterly satisfying for dessert? Trust me, I’ve been there! That’s why I’m so thrilled to share what I consider the absolute best Oreo Pie you will ever make. Seriously, this is the ultimate No Bake Oreo Pie that delivers maximum decadence with zero oven angst.
When I started MDLATDMM Recipes, my whole goal was to take those recipes that seemed too time-consuming and make them foolproof for the busy home cook. This pie exemplifies that perfectly. Maddie Thompson is dedicated to simple, reliable home recipes, and this creamy, dreamy dessert is proof. It’s quick to pull together, and the chilling time is all hands-off, leaving you free to relax.
- Why This No Bake Oreo Pie is Your New Favorite Easy Oreo Pie Recipe
- Gathering Ingredients for Your Creamy Oreo Dessert
- Step-by-Step Instructions for the Best Oreo Pie Recipe
- Tips for Success with Your Oreo Pie
- Make Ahead Pie Recipe and Storage for Your Oreo Pie
- Serving Suggestions for This Cookies and Cream Pie
- Frequently Asked Questions About the Oreo Pie
- Nutritional Information for One Slice of Oreo Pie
- Share Your Experience Making This Easy Oreo Pie Recipe
Why This No Bake Oreo Pie is Your New Favorite Easy Oreo Pie Recipe
If you’re looking for a knockout dessert that doesn’t require you to heat up the house—or spend hours hovering over the stove—this is it! This No Bake Oreo Pie is honestly the kind of recipe I hide in my back pocket for unexpected company. It truly shines because it hits every single mark people look for in a quick, indulgent treat. It’s that perfect marriage of satisfying crunch and cloud-like topping.
I’m dedicating this recipe to all of us who need to make an Easy Party Dessert without the fuss. When you check out how fast it comes together, you’ll see why it’s quickly climbing the ranks to become a true Family Favorite Oreo Dessert on my table. For more simple delights, I always recommend checking out my list of delicious dessert recipes!
Quick Prep Time for an Easy Oreo Pie Recipe
Okay, are you sitting down? The hands-on prep time for this whole showstopper is just about 20 minutes. Twenty minutes! That’s faster than most episodes of my favorite mindless TV show. Because it’s one of the best Quick Oreo Recipes out there, you can mix up the crust, whip the filling, and get it into the fridge before you even feel tired. It’s the dream for those evenings when you want something incredibly decadent but don’t have the energy for baking.
Achieving the Perfect Fluffy Oreo Filling
The real magic of this Cookies and Cream Pie is the texture contrast. You get the sturdy, slightly salty crunch of the chocolate crust, and then BAM! You hit that light, airy filling. The key here, and this is crucial for that signature texture, is using the thawed whipped topping and folding it in *gently*. You aren’t trying to beat air into it; you’re just incorporating it to create that light, mousse-like quality we call the Fluffy Oreo Filling. Resist the urge to overmix, or you’ll deflate all that gorgeous air!
Gathering Ingredients for Your Creamy Oreo Dessert
Alright, let’s talk components! Since this is an incredibly Easy Oreo Pie Recipe, you won’t need a cart full of specialty items. That’s the beauty of a fantastic No Bake Oreo Pie—it’s mostly pantry staples mixed with the obvious star of the show: those amazing cookies! When pulling everything out, make sure to check your labels, especially for the cream cheese. If it’s not soft, you’ll end up with lumps, and we definitely don’t want that! For more easy appetizer inspiration that pairs well with a rich dessert, take a look at my recipe for pumpkin dip with Cool Whip.
Simple Oreo Crust Pie Components
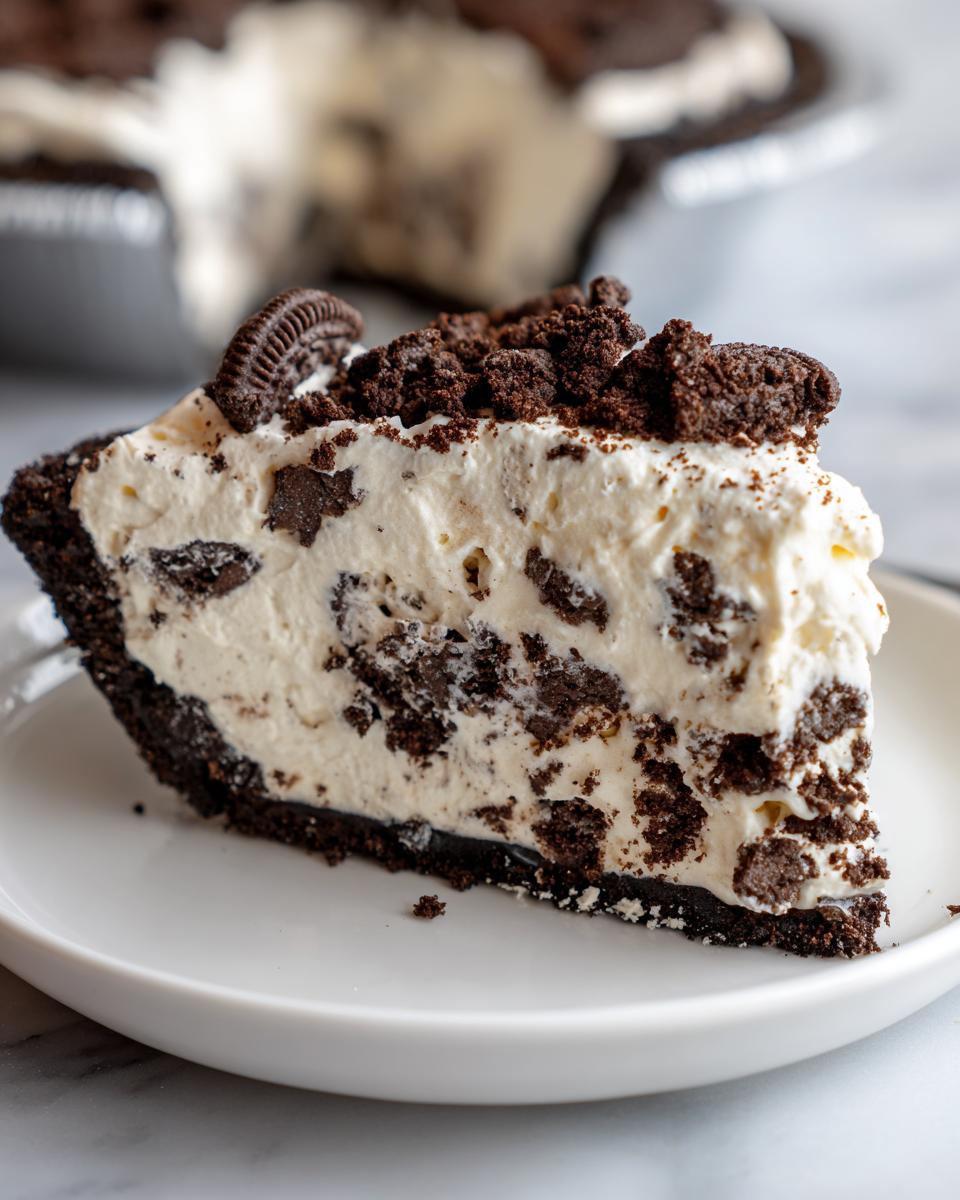
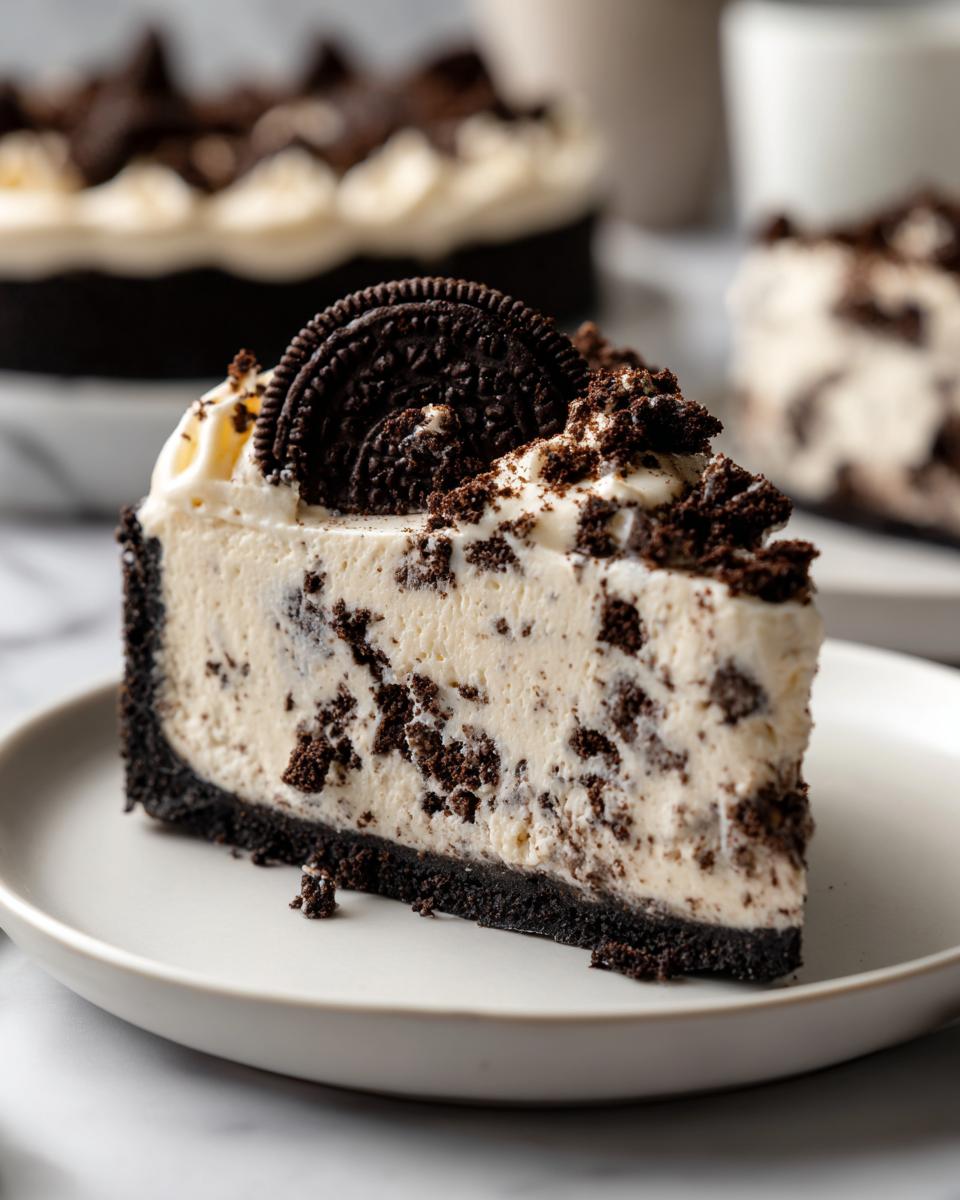
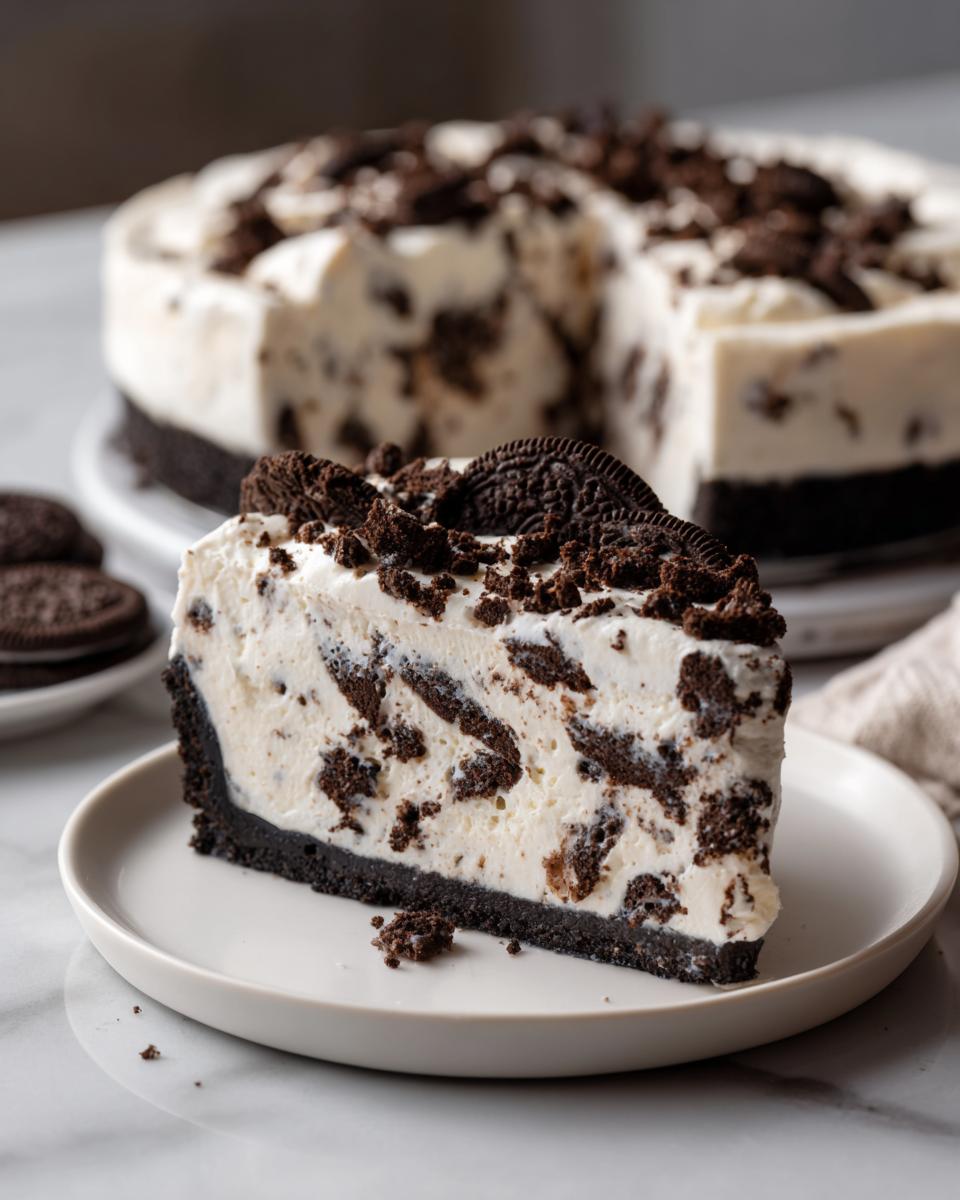
First up is the crust, which gives us that crucial crunch. You’ll need one standard package—that’s the 14.3-ounce size—of Oreo cookies. You need those crumbs to be *finely* crushed, so about three cups total. I usually throw the whole thing, cookies and cream, into the food processor. Then, stir in 6 tablespoons of melted, unsalted butter. Press that mixture firmly into your 9-inch pie plate. Don’t be shy with pressing it down; a solid crust is key to a great slice!
Ingredients for the Fluffy Oreo Filling
Now for the decadent center, the reason we call this a Creamy Oreo Dessert! Make sure your 8 ounces of cream cheese are fully softened. I mean truly soft enough to press a fingerprint into without struggle. Cream that with 1 cup of powdered sugar and 1 teaspoon of vanilla extract until it’s perfectly smooth—no graininess allowed! After that, gently fold in one 12-ounce container of thawed whipped topping, followed by about 1 cup of extra crushed Oreos. That little addition of extra cookie pieces inside the filling gives you that perfect hit every single time.
Step-by-Step Instructions for the Best Oreo Pie Recipe
I know you’re excited to get this beautiful Oreo Pie into the fridge, so let’s run through the steps. You’ll see that this recipe is all about good technique rather than complex cooking. Since we aren’t baking, our focus is mixing properly and chilling sufficiently. You’re going to feel like a dessert magician when this comes together! If you’ve been waiting for a fantastic make-ahead dessert, this is it. For other classic cool desserts, you might want to look at my pecan cream pie recipe.
Preparing the Simple Oreo Crust Pie Base
This starts the same way we mixed the ingredients earlier. Take those crushed Oreos and toss them in a bowl with the 6 tablespoons of melted butter. Make sure every crumb is coated—you want it to look like damp sand, not dusty dry stuff! Next, press that mixture firmly into your 9-inch pie plate. I usually use the bottom of a measuring cup to really pack it in tight around the bottom and up the sides. This solid base is essential! Once it’s packed, slide that crust into the freezer for about 15 minutes while you focus on the filling. Gotta keep that crust nice and chilled!
Creating the Creamy Oreo Dessert Filling
This is where we build the cloud-like center for our Creamy Oreo Dessert. You already beat your softened cream cheese, powdered sugar, and vanilla until it was silky smooth—remember, no lumps! Now, here’s the most important part for that light texture: Take your thawed whipped topping and fold it in. Don’t stir it like you’re mixing concrete; gently fold it using a spatula until it’s just incorporated. You want that filling to retain as much air as possible! Once that’s done, carefully fold in an extra cup of crushed Oreos to give you those irresistible cookie chunks throughout the slice.
Chilling and Finishing Your Oreo Pie
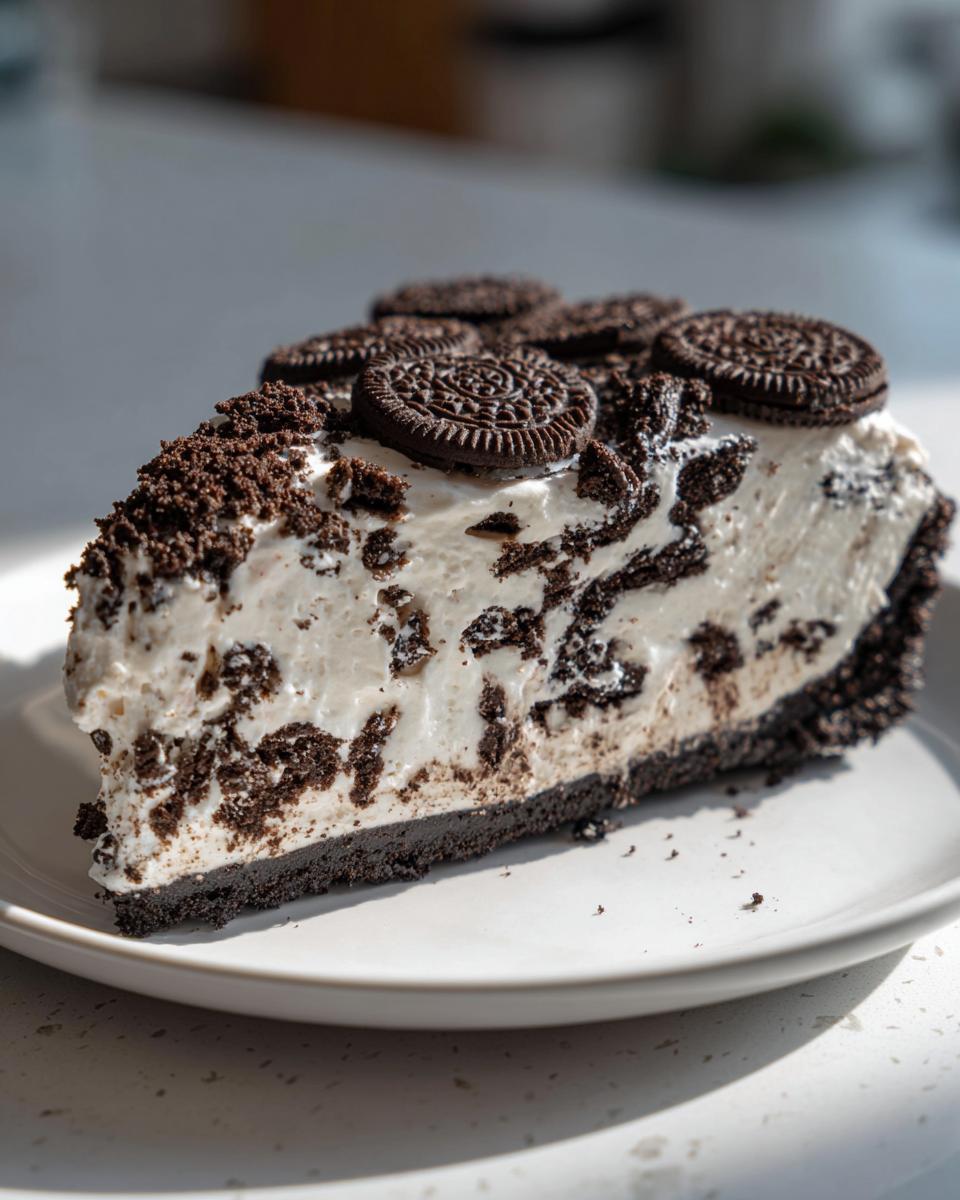
Go ahead and spoon that glorious, fluffy filling into your now-chilled crust. Smooth out the top with your spatula—nice and neat, since this will be the final look! Now, the hardest part: waiting. This No Bake Oreo Pie needs a good, solid chill. Put it in the refrigerator for at least four hours, but honestly, if you can let it hang out overnight, the filling sets up perfectly dense and creamy. Once it’s firm, you can top it with leftover whipped cream or drizzle it with that optional chocolate ganache. Serve it cold and enjoy the compliments!
Tips for Success with Your Oreo Pie
Even though this is a No Bake Oreo Pie, attention to detail in how you mix things makes all the difference between a good dessert and the Best Oreo Pie Recipe ever! When I first started making this, I had a few minor setbacks, but going back through my notes showed me the little things that guarantee success every single time we make this Creamy Oreo Dessert. For my favorite cookie tricks, check out my guide on chewy chocolate chip cookies!
Achieving a Lump-Free Filling
This is non-negotiable, friends: your cream cheese absolutely has to be completely soft. If you pull it straight from the fridge, you’re going to end up with little cold chunks suspended in your filling, and that defeats the purpose of a smooth, creamy experience. I always take mine out at least an hour before I plan to start mixing. If you get caught short on time—oops!—you can microwave it for about 10 to 15 seconds, but be careful! You want it soft, not melted or greasy. This is one of those crucial steps for recipe reliability.
Enhancing the Chocolate Oreo Pie Flavor
If you’re like me and you want your chocolate flavor to really punch through the sweetness of the whipped topping, I have a little trick for doubling down on that deep chocolate note in your Chocolate Oreo Pie. Instead of using the full cup of powdered sugar, you can substitute about half of it—say, 1/2 cup of powdered sugar for 1/4 cup of unsweetened cocoa powder. Trust me, blend that cocoa powder in really well with the cream cheese first before you add the whipped topping. It makes the whole filling taste deeper, richer, and even more indulgent!
Make Ahead Pie Recipe and Storage for Your Oreo Pie
One of the biggest wins for this No Bake Oreo Pie is that it’s a fantastic Make Ahead Pie Recipe. Seriously, the chilling time is non-negotiable for texture, but that means you can assemble the whole thing the day before you need it! If you’re hosting a huge gathering or just want one less thing stressing you out on a party day, make this pie ahead of time. It actually tastes *better* the next day once everything has fully set up.
When storing leftovers—if there are any, ha!—you definitely want to keep it covered tightly in the refrigerator. This pie holds up really well for about three days in the fridge, still maintaining its creamy texture. Just make sure it’s covered so it doesn’t absorb any weird fridge smells. I cover mine loosely with plastic wrap first, then put a lid on the pie dish if I have one, or just tent it lightly. For more tips on planning those big meals, I wrote a whole guide on make ahead pie recipe timing because I hate rushing dessert!
Serving Suggestions for This Cookies and Cream Pie
This Cookies and Cream Pie is already spectacular all on its own, but because we want it to be the star of whatever table you set—whether it’s a backyard BBQ or a quiet family night—a little garnish goes a long way in making it look like a professional Easy Party Dessert. Skip the fancy sauces; this rich chocolate flavor just needs simple complements.
I love placing whole, extra Oreos right on top just before serving, almost like little chocolate cookies standing guard! A dusting of high-quality cocoa powder also looks incredibly elegant against the white whipped topping. If you happen to be making this during the winter holidays, adding a tiny hint of something bright really cuts through the richness. Try a few fresh raspberries sprinkled around the edge for color and a pop of tartness. For a fun pairing recipe, you can look at my easy apple cinnamon muffins, though they are definitely best served warm!
Frequently Asked Questions About the Oreo Pie
Okay, I know when you find a great Easy Oreo Pie Recipe, you always have questions about tweaking it or making ingredient swaps. That’s how you know it’s a good recipe—it invites experimentation! Because this is a No Bake Oreo Pie, we have a few unique considerations compared to traditional baked desserts. You can find tons of other neat inspiration over in my collection of easy dessert ideas, but here are the answers to the most common things people ask me about this recipe.
Can I make this Oreo Pie Recipe with a baked crust?
Nope! And you absolutely don’t need to! The whole joy of this No Bake Oreo Pie is that you skip the oven entirely. The crust gets perfectly firm and holds up to that luscious filling just by chilling in the freezer for a quick bit, and then setting in the fridge. If you tried to bake it, the butter would separate and you’d end up with a greasy mess, not that satisfying crunch we love for our Simple Oreo Crust Pie base. Trust me, chilling is your best friend here.
What are good variations for this Creamy Oreo Dessert?
Oh, I love seeing people customize this! The basic Fluffy Oreo Filling is such a great canvas. If you’re craving that minty goodness, try adding half a teaspoon of pure mint extract along with the vanilla; suddenly, you have a wonderful Chocolate Oreo Pie variation. Another popular swap is turning it into an Oreo Cheesecake Pie—simply swap out about half of the whipped topping volume for an extra half-block of softened cream cheese. Just beat the cream cheese and sugar really well before folding everything together. Do that, and you’ve got a whole new decadent treat!
Nutritional Information for One Slice of Oreo Pie
Okay, let’s talk real talk for a second. When you’re making something this purely joyous, the nutrition facts aren’t the main event, right? I mean, this Oreo Pie is meant to be saved for special moments, parties, or those nights when you just deserve a ridiculously rich treat. But, because I want you to have all the information you need, here are the estimated nutritional values for one slice of this Creamy Oreo Dessert.
Remember, these numbers are just ballpark figures based on the core ingredients listed in the recipe—especially if you skip the optional ganache topping! These estimates don’t account for any substitutions you might make, like using a lighter whipped topping or adding extra cookie layers. Consider this your friendly warning that this is an indulgence, but one you can feel great about enjoying!
- Serving Size: 1 slice
- Calories: Around 450, give or take!
- Fat: Approximately 30g
- Carbohydrates: About 45g
- Protein: Roughly 4g
As you can see, this No Bake Oreo Pie certainly packs a punch in the flavor department! If you are tracking specific macros, you’ll want to subtract a bit if you skip the optional chocolate topping we discussed earlier. Enjoy every single bite!
Share Your Experience Making This Easy Oreo Pie Recipe
Now that you have the blueprints for what I promise is the dreamiest, easiest Oreo Pie on the internet, I really, really want to hear from you! Honestly, seeing your creations is the absolute best part of sharing these recipes with the world. Did you make it for a big family get-together? Did you manage to get away with only using three ingredients, which still blows my mind?
Please, don’t be shy! Head down to the comments section below and leave me a star rating and a note. Tell me what you thought of that Fluffy Oreo Filling or if you tried adding mint extract. Your feedback helps me maintain the reliability of this Easy Oreo Pie Recipe for everyone else coming along later. I base my trust and confidence in these recipes on hearing from real people who made them!
If you snapped a picture of your finished, chilled masterpiece—especially if you drizzled it with that optional chocolate topping—I’d be thrilled if you shared it on social media! Tag me so I can see your gorgeous No Bake Oreo Pie. It makes my day when I see your kitchen bringing these simple, comforting treats back to life. If you love sharing your dessert wins, you should definitely pop over and check out my favorite easy party dessert posts for more inspiration!
And hey, if you’re looking for another fantastic source of inspiration after you polish off the last slice of this pie, I always recommend checking out the detailed steps provided by the folks at King’s Cook for their take on the no-bake classic. Happy chilling, everyone!
PrintEasy No-Bake Creamy Oreo Pie

You can make this simple, creamy Oreo Pie without turning on your oven. It features a rich chocolate cookie crust and a light, fluffy cookies and cream filling. This is a quick, decadent dessert perfect for parties.
- Prep Time: 20 min
- Cook Time: 0 min
- Total Time: 4 hr 20 min
- Yield: 8 servings 1x
- Category: Dessert
- Method: No-Bake
- Cuisine: American
- Diet: Vegetarian
Ingredients
- 1 package (14.3 ounces) Oreo cookies, finely crushed (about 3 cups crumbs)
- 6 tablespoons unsalted butter, melted
- 1 package (8 ounces) cream cheese, softened
- 1 cup powdered sugar
- 1 teaspoon vanilla extract
- 1 container (12 ounces) frozen whipped topping, thawed (or homemade whipped cream)
- 1 cup milk chocolate chips (optional, for topping)
- 1 cup heavy cream (optional, for topping)
Instructions
- Prepare the crust: Place the finely crushed Oreo cookies in a medium bowl. Pour the melted butter over the crumbs and mix until the crumbs are evenly moistened.
- Press the crumb mixture firmly and evenly into the bottom and up the sides of a 9-inch pie plate. Place the crust in the freezer while you prepare the filling.
- Make the creamy filling: In a large bowl, beat the softened cream cheese, powdered sugar, and vanilla extract together until the mixture is smooth and there are no lumps.
- Gently fold in the thawed whipped topping until just combined. Do not overmix; you want the filling to stay light and fluffy.
- Fold in 1 cup of crushed Oreo cookies (reserve some for garnish if desired).
- Spoon the creamy filling evenly into the chilled Oreo crust. Smooth the top with a spatula.
- Chill the pie for at least 4 hours, or until firm. For the best texture, chill overnight.
- Prepare the topping (optional): If using chocolate chips, melt them with the heavy cream in a microwave-safe bowl in 30-second intervals, stirring until smooth. Let the ganache cool slightly.
- Spread the remaining whipped topping over the chilled pie, or drizzle with the cooled chocolate ganache. Garnish with extra crushed Oreos.
- Slice and serve this decadent no-bake treat cold.
Notes
- For the easiest crust, pulse the whole Oreos (filling included) in a food processor until fine crumbs form.
- If you want a richer chocolate flavor in the filling, substitute 1/2 cup of the powdered sugar with 1/4 cup of unsweetened cocoa powder.
- This pie sets up best when chilled for a full 6 hours. It is a great make ahead pie recipe.
Nutrition
- Serving Size: 1 slice
- Calories: 450
- Sugar: 35g
- Sodium: 320mg
- Fat: 30g
- Saturated Fat: 15g
- Unsaturated Fat: 15g
- Trans Fat: 0.5g
- Carbohydrates: 45g
- Fiber: 1g
- Protein: 4g
- Cholesterol: 45mg