
Oh, that specific craving hits you, doesn’t it? That deep, sweet, spiced longing that only cookie butter can satisfy? When that happens, you need something reliable that tastes exactly like the decadent dessert you saw online, but without turning on your oven. Trust me, I know! That’s why I developed this recipe—it is, hands down, the easiest Biscoff Cheesecake you will ever make. After years of complicated baking adventures in my city apartment, I realized the meals that brought me the most comfort were the ones that stayed true to simple, honest connection. This no-bake version lets you tap right into that feeling fast. You won’t believe how rich and creamy it gets just by chilling!
- Why This No Bake Biscoff Cheesecake Stands Above Others
- Gathering Ingredients for Your Creamy Cheesecake Recipe
- Step-by-Step Instructions for No Bake Biscoff Cheesecake
- Tips for Success Making Your biscoff cheesecake
- Variations on the biscoff cheesecake
- Serving Suggestions for Your Spiced Cookie Cheesecake
- Storage and Reheating Instructions for biscoff cheesecake
- Frequently Asked Questions About biscoff cheesecake
- Nutritional Estimates for This Decadent Biscoff Treats
- Share Your Ultimate Biscoff Dessert Creations
Why This No Bake Biscoff Cheesecake Stands Above Others
We’ve all been there: you want a show-stopping dessert, but the thought of turning on the oven in the summer feels impossible. That’s why this recipe shines! It’s totally stress-free, making it an Easy Biscoff Dessert that you can whip up in just about 20 minutes of active time. Forget complicated steps; these are some of the most reliable Simple No Oven Desserts out there. It seriously tastes like something you’d pay way too much for at a fancy restaurant, but you made it right in your own kitchen.
Achieving the Ultimate Creamy Texture in Your biscoff cheesecake
The secret to that incredible, silky mouthfeel that screams “Restaurant Style Biscoff Cheesecake” is really about two things working perfectly together. You need the cream cheese completely softened so it whips up without any lumps, which is step one for smoothness. Then, you fold in that heavily whipped cold heavy cream. Don’t skip whipping that cream separately! It incorporates the air we need to keep things light, even though the result is super rich.
The Perfect Biscoff Crust Cheesecake Base
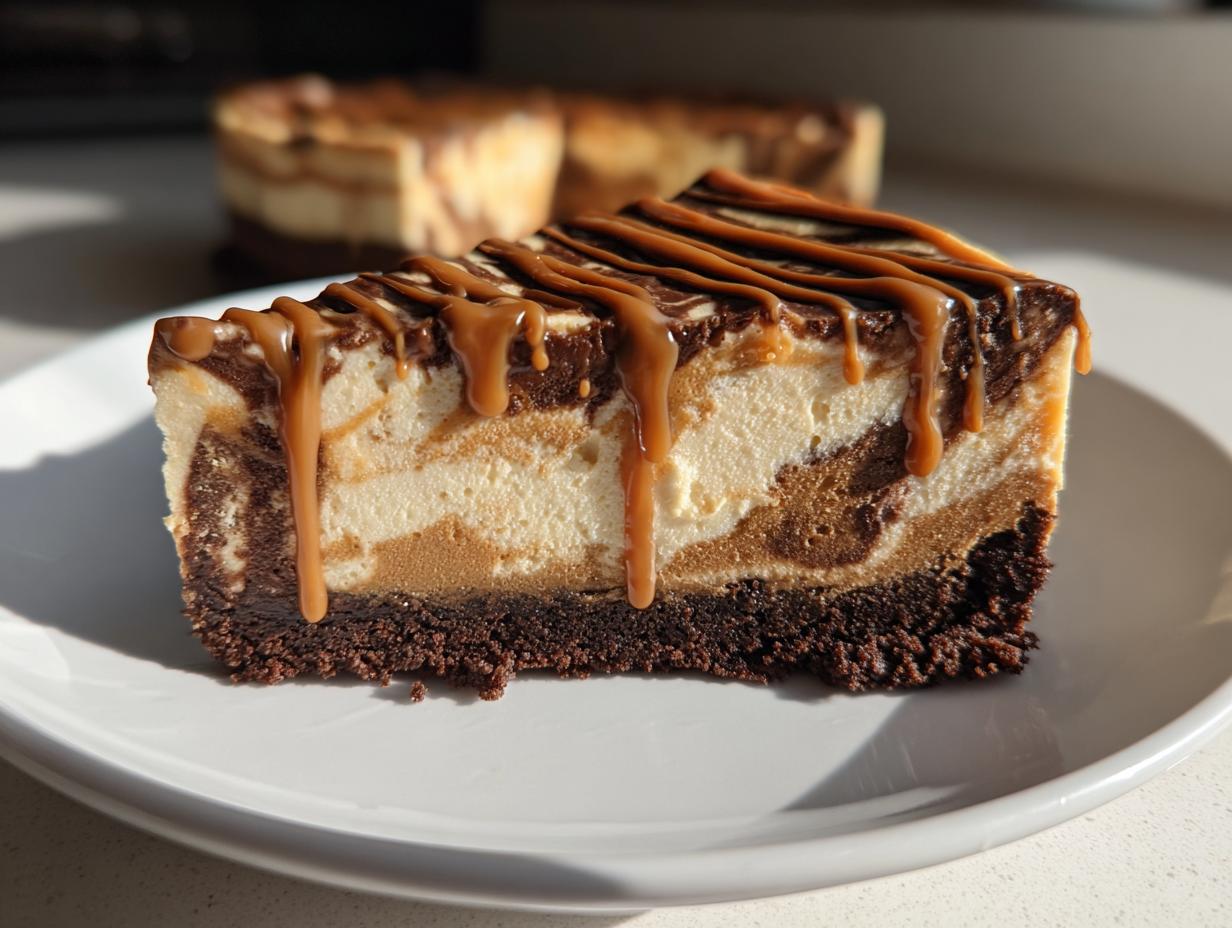
For this Biscoff Crust Cheesecake, we treat the base like the foundation of a house—it has to be sturdy! You mix those crumbs and melted butter, and then you freeze it for a bit. Seriously, don’t skip the freezing part. Pressing it down firmly against the bottom and slightly up the sides of the pan is crucial. A well-chilled crust makes slicing so clean later on; nobody wants a crumbly mess when serving!
Gathering Ingredients for Your Creamy Cheesecake Recipe
Now that you know how brilliant and easy this is, let’s talk about what you need! This is where we prove that you can make an incredible 5 Ingredient Cheesecake base without any fuss. I’ve broken the list down so you can gather things easily. Remember, the magic happens when you have your cream cheese super soft and your heavy cream ice cold. Don’t worry about that final drizzle topping yet—that’s the cherry on top!
Crust Components for the biscoff cheesecake
- 1 1/2 cups Biscoff cookie crumbs (please use the actual crumbs, not whole cookies!)
- 1/4 cup unsalted butter, melted (we need that fat to hold it together!)
Filling Ingredients for the Ultimate Biscoff Dessert
For the main event, this Ultimate Biscoff Dessert filling needs room-temperature cream cheese for zero lumps, but that heavy whipping cream has to be straight from the fridge. That contrast is key.
- 16 ounces cream cheese, softened completely
- 1 cup powdered sugar (sift it if you want to be extra fancy!)
- 1 teaspoon vanilla extract
- 1 cup heavy whipping cream, cold
- 1/2 cup Biscoff cookie butter, slightly warmed just until it’s a smooth pourable consistency
And don’t forget the finishing touch for the drizzle later: 1/4 cup of extra Biscoff cookie butter, melted.
Step-by-Step Instructions for No Bake Biscoff Cheesecake
Okay, let’s get mixing! We’re keeping this fast, since our total active time is only about 20 minutes. That’s what I love about this excellent No Bake Biscoff Cheesecake—it’s perfect for those nights when you need to pull together something incredible in a snap. Just remember that while the prep is quick, the reward comes after some serious chilling time!
Preparing and Chilling the Biscoff Crust Cheesecake
First things first, the crust! You’ll need a 9-inch springform pan for this. In a bowl, just combine those 1 1/2 cups of cookie crumbs with the 1/4 cup of melted butter. Mix it up until it looks like wet sand. Then, press that mixture firmly and evenly into the bottom of your prepared pan. Don’t be shy here; use the bottom of a glass to really pack it down tight. Pop that whole pan into the freezer right away while we tackle the main event.
Creating the Creamy Filling and Folding in Whipped Cream
Grab your large mixing bowl. Start by beating the softened cream cheese, powdered sugar, and vanilla until it’s totally smooth—no grainy bits allowed! Then, beat in that half-cup of slightly warmed cookie butter until everything is perfectly combined. Now, here is the crucial trust moment: Whip your heavy cream separately until you get stiff peaks. If you mix this in too aggressively, you lose all that gorgeous air! You’ve got to gently fold the whipped cream into the Biscoff cream cheese mixture in about two additions. Mix just until you can’t see white streaks anymore. Stop mixing then! Overmixing means your cheesecake will deflate.
Setting and Finishing Your biscoff cheesecake
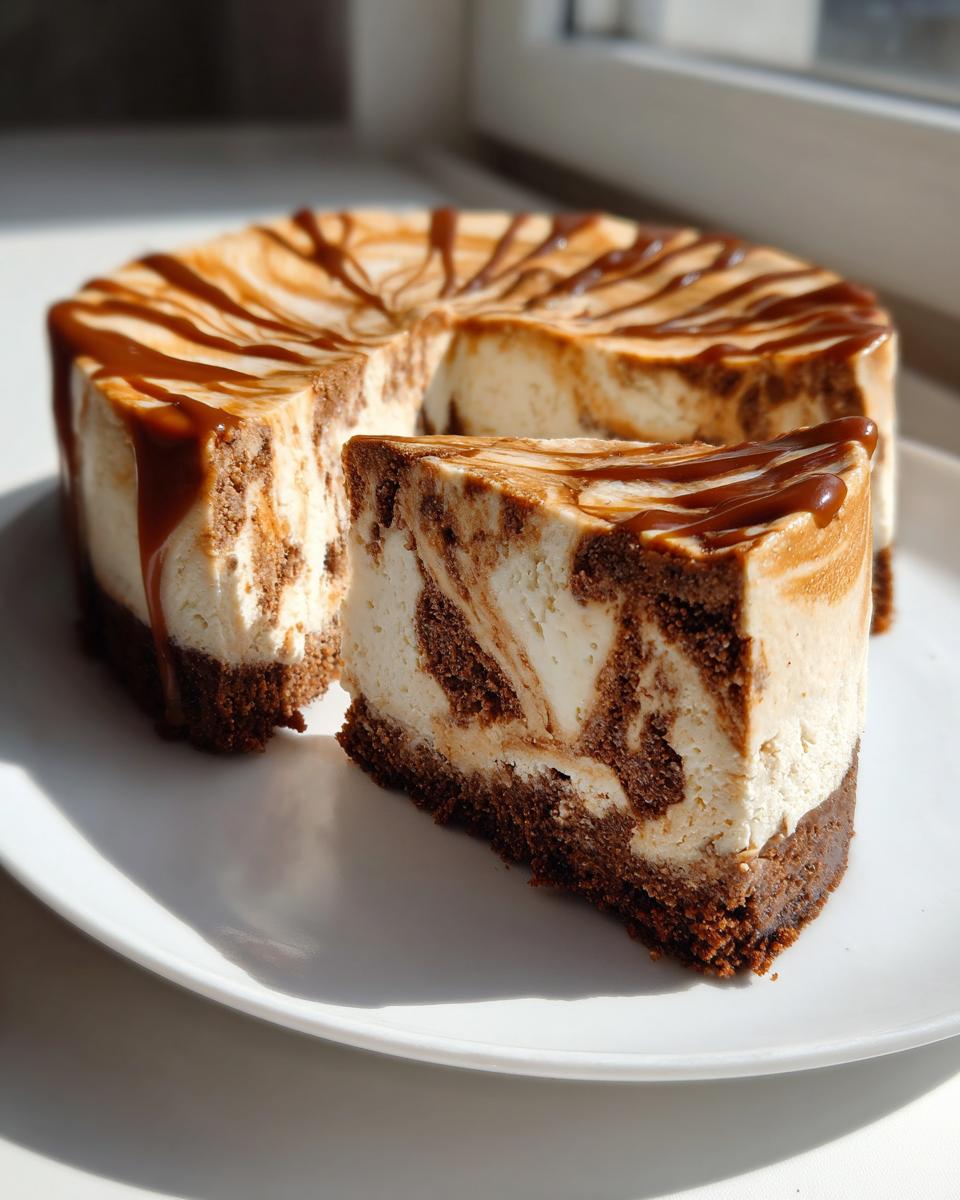
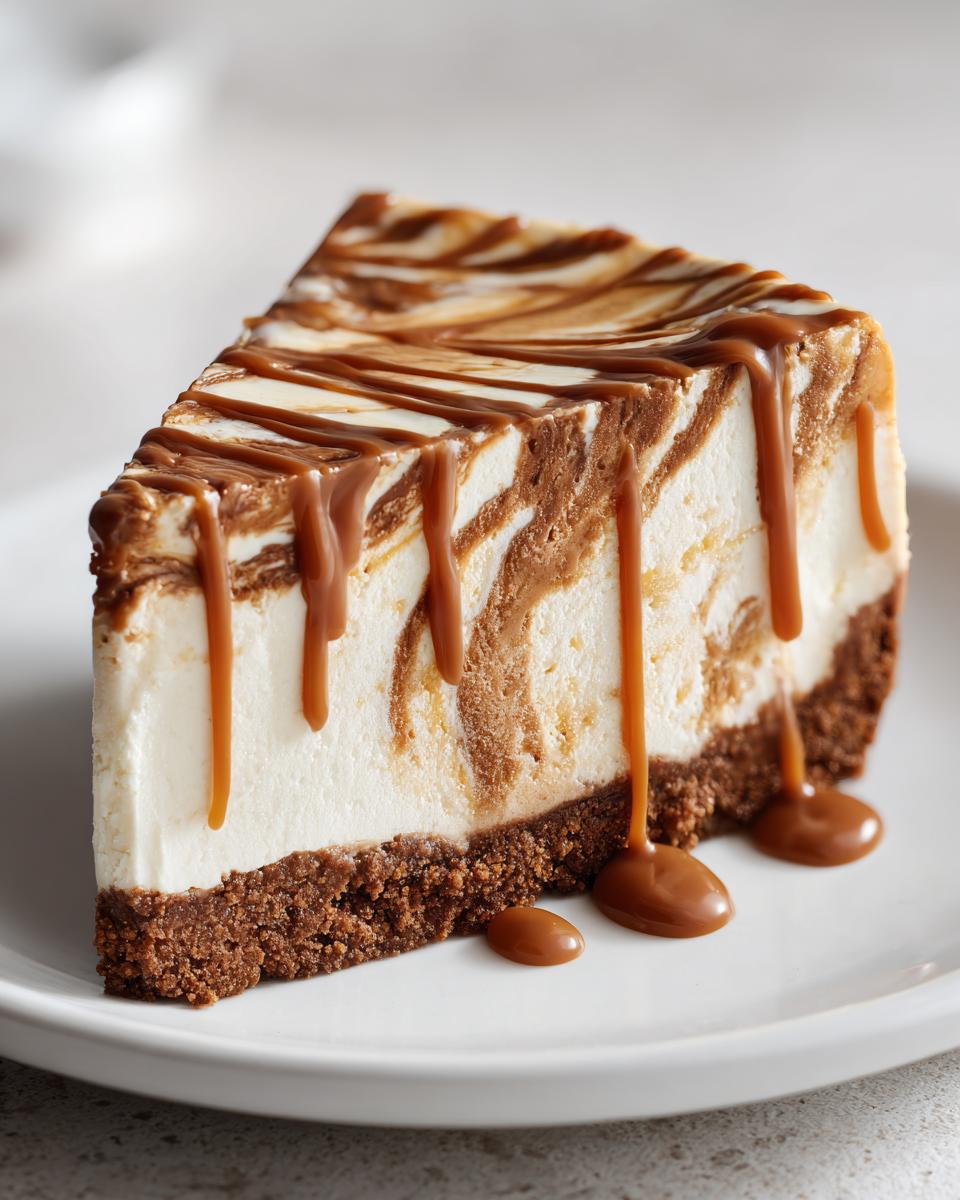
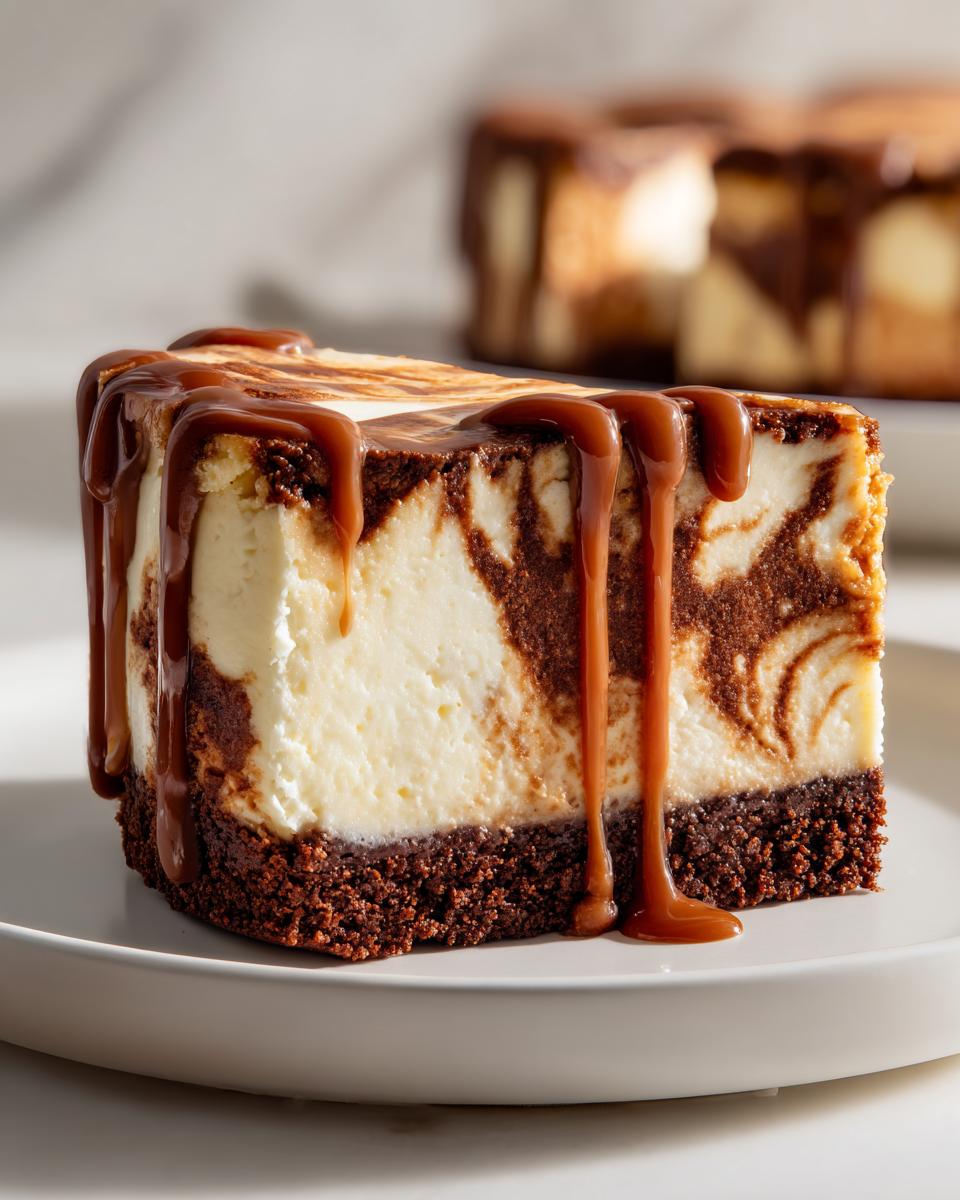
Pour all that beautiful, airy filling right over your frozen crust and smooth the top out neatly. Now comes the waiting! You need to chill this in the refrigerator for a minimum of six hours, but honestly, I always go for overnight to guarantee it’s super firm. Before serving, gently warm that last 1/4 cup of cookie butter just until it drizzles easily off a spoon. Drizzle that right over the top for the final flourish. You can see more of my favorite delicious dessert recipes right here!
Tips for Success Making Your biscoff cheesecake
We are aiming for one of the Best Cheesecake Recipes here, so let’s talk about a few details that move this from good to mind-blowingly great. I’ve learned a couple of hard lessons along the way! I once tried rushing the chilling process because I needed a snack immediately—big mistake! The filling was sloppy, and cutting it was a disaster. It absolutely needs that time to set up properly. Trust me, the longer you chill it, the better your slice will look.
Ingredient Temperature Matters for Perfect biscoff cheesecake
This is non-negotiable advice for any creamy cheesecake recipe! Your cream cheese? Has to be room temperature soft—think squishy, but not melty. That’s what keeps the base smooth. Conversely, your heavy whipping cream needs to be as cold as possible. When the cold cream hits the mixer, it whips up into those stiff peaks much faster and holds its air. Combine warm cream cheese with cold cream, and you’re asking for lumps!
Make Ahead Desserts: Timing Your biscoff cheesecake
Because this is a no-bake recipe, it’s truly one of the best Make Ahead Desserts you can have in your back pocket. I always aim to have this chilling for at least 12 hours, even though the recipe says six hours minimum. When it has that extra time, the crust pulls its moisture from the filling just a tiny bit, making the whole thing feel denser, richer, and incredibly satisfying.
Variations on the biscoff cheesecake
While this simple biscoff cheesecake is perfection as is, I absolutely love experimenting! If you’re feeling adventurous, you can totally switch it up. The biggest crowd-pleaser variation I’ve tried lately is definitely making a Biscoff Swirl Cheesecake. Right before chilling, drizzle a little salted caramel right over the top of the filling, and then just run a skewer through it a couple of times. Don’t go crazy swirling it, or you’ll mess up that beautiful smooth texture! For other pie-style inspiration, you might want to check out my great recipe for pecan cream pie if you need another make-ahead treat. And if you’re looking for a classic take on cookie butter cheesecake inspiration, this recipe always has great ideas!
Serving Suggestions for Your Spiced Cookie Cheesecake
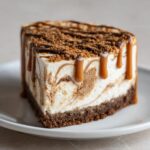
Once this incredible Spiced Cookie Cheesecake is perfectly set, the presentation is almost as fun as the eating! Since the flavor profile is so rich and warm already, you don’t need much else. Keep it simple so the cookie butter really sings. A light dusting of extra Biscoff crumbs over the top gives it that professional, textured finish—it looks so pretty right out of the pan.

For an extra special dessert, especially if you skipped the caramel swirl, try serving individual slices with a tiny dollop of stabilized whipped cream and maybe a sprinkle of cinnamon sugar. If you happen to have some of my apple cinnamon muffins around, the leftover crumbs could even be used as a garnish! Don’t overthink this part; the cheesecake does most of the heavy lifting!
Storage and Reheating Instructions for biscoff cheesecake
The best part about an amazing biscoff cheesecake? It’s perfect for making ahead! Since this is no-bake, storage is super easy, but we still need to protect that creamy top layer. Keep any leftovers covered tightly right in the refrigerator. I find they stay wonderfully fresh for about four days, but honestly, they rarely last that long in my house!
If you really need to make this far in advance, freezing works like a charm. Cover it really well—I use plastic wrap followed by a layer of foil to keep freezer burn away. When you’re ready to enjoy it, you must thaw it slowly in the fridge overnight. Never try to rush it at room temperature! If you struggle with dips or creamy recipes, check out my tips on pumpkin dip with cool whip; the storage advice overlaps!
Frequently Asked Questions About biscoff cheesecake
I always get so many questions once I post pictures of this dessert popping up on my feed! It’s great that you’re thinking ahead about the details, because getting these little things right is what turns a good recipe into one of the Best Cheesecake Recipes you’ll ever make. Here are a few things I hear most often about making the ultimate, easy biscoff cheesecake.
Can I use a different cookie for the crust in this biscoff cheesecake?
You absolutely can, but you’ll lose that specific spiced cookie punch, won’t you? If you must substitute, classic graham crackers work fine, but you might need to add a tiny pinch of cinnamon to your crumb/butter mix to try and mimic that warm flavor. Shortbread cookies make a lovely buttery crust too! Just remember that if you use a standard sweet cookie instead of Biscoff, you might want to dial back the powdered sugar just a touch in the filling since you’re losing that complex, spiced sweetness from the original cookie.
How do I get the perfect swirl if I add caramel to my biscoff cheesecake?
If you’re making a Layered Biscoff Cheesecake with caramel—and wow, you should try it—the key is restraint! Once you’ve poured the filling into the chilled crust, drizzle the caramel on top in thick ribbons. Then, take a butter knife or a small skewer and draw it through the caramel *only once or twice* in a deliberate sweep. That’s it! If you mix it around too much, the caramel gets absorbed and you lose that beautiful contrast layer. A light touch creates the best effect!
What is the best brand of cookie butter to use?
Honestly, for this recipe, I stick to the original Lotus Biscoff brand because it contains the most balanced spice blend. If you use a generic cookie butter, sometimes it can be too sweet or they might use different spices that fight with the vanilla in the filling. Since this is such a simple, no-bake recipe, we rely heavily on that signature flavor coming through loud and clear!
Nutritional Estimates for This Decadent Biscoff Treats
Okay, let’s talk numbers for a second. I’m not a nutritionist, and my kitchen isn’t a lab over here, so please know these are just general estimates, per slice, based on the ingredients listed. Since this is such a rich and Decadent Biscoff Treat, we have to acknowledge that it’s totally an indulgence! But isn’t that what a show-stopping cheesecake is supposed to be?
When you look at the breakdown, you can see where that richness comes from—mostly from the butter in the crust and the heavy cream in the filling. But wow, is it worth it. Keep this in mind if you’re tracking things closely, but remember, the true measure of success here is how many smiles you get when you serve it!
- Serving Size: 1 slice
- Calories: Approximately 450
- Fat: Around 30g
- Carbohydrates: About 40g
- Sugar: Roughly 35g
It’s definitely a dessert that satisfies that sweet craving completely, meaning you usually only need one slice to feel totally content!
Share Your Ultimate Biscoff Dessert Creations
And there you have it! That is the whole journey to making the most ridiculously creamy, ridiculously easy biscoff cheesecake you can imagine. I hope you feel as much joy making this as I do every time I pull it out of the fridge. I just know you’re going to wow whoever you share it with.
Now, I really, truly want to hear all about it! This is the part where you become part of the family. Did it set perfectly for you? Were the spiced cookie notes exactly what you were hoping for? Don’t be shy—head down to the comments section and let me know what you think. Seriously, those little notes and five-star ratings help other people find honest recipes that really work.
If you snapped a photo of your finished masterpiece—especially if you tried the salted caramel swirl—please tag me on social media! I love seeing your creations come to life. It makes my day to know that a memory I created in my kitchen is now showing up on your table. If you ever need to get in touch about substitutions or troubleshooting, you can always reach out through my contact page. Happy baking (or, well, happy chilling)!
PrintEasy No-Bake Biscoff Cheesecake
Make this rich, creamy No-Bake Biscoff Cheesecake with a crunchy cookie crust. This simple recipe requires no oven and delivers the ultimate spiced cookie butter flavor.
- Prep Time: 20 min
- Cook Time: 0 min
- Total Time: 6 hr 20 min
- Yield: 10 servings 1x
- Category: Dessert
- Method: No-Bake
- Cuisine: American
- Diet: Vegetarian
Ingredients
- 1 1/2 cups Biscoff cookie crumbs (for crust)
- 1/4 cup unsalted butter, melted (for crust)
- 16 ounces cream cheese, softened
- 1 cup powdered sugar
- 1 teaspoon vanilla extract
- 1 cup heavy whipping cream, cold
- 1/2 cup Biscoff cookie butter, slightly warmed (for filling)
- 1/4 cup Biscoff cookie butter, melted (for topping)
Instructions
- Prepare the crust: Mix the Biscoff cookie crumbs and melted butter in a bowl until combined. Press the mixture firmly into the bottom of a 9-inch springform pan. Place the crust in the freezer while you prepare the filling.
- Make the filling: In a large bowl, beat the softened cream cheese, powdered sugar, and vanilla extract with an electric mixer until smooth and creamy. Scrape down the sides of the bowl.
- Add the slightly warmed Biscoff cookie butter to the cream cheese mixture and beat until fully incorporated.
- In a separate, clean bowl, whip the cold heavy whipping cream until stiff peaks form.
- Gently fold the whipped cream into the cream cheese mixture in two additions until just combined. Do not overmix.
- Pour the filling over the chilled crust and spread evenly.
- Chill the cheesecake in the refrigerator for at least 6 hours, or preferably overnight, until firm.
- To serve, gently warm the remaining 1/4 cup of Biscoff cookie butter until it is pourable. Drizzle the melted cookie butter over the top of the set cheesecake. Slice and serve immediately.
Notes
- For a thicker crust, use 1/3 cup of melted butter instead of 1/4 cup.
- If you want a salted caramel swirl, drizzle 1/4 cup of salted caramel sauce over the filling before chilling, then swirl lightly with a knife.
- This dessert tastes best when fully chilled for the full overnight period.
Nutrition
- Serving Size: 1 slice
- Calories: 450
- Sugar: 35g
- Sodium: 250mg
- Fat: 30g
- Saturated Fat: 18g
- Unsaturated Fat: 12g
- Trans Fat: 0g
- Carbohydrates: 40g
- Fiber: 1g
- Protein: 5g
- Cholesterol: 90mg