
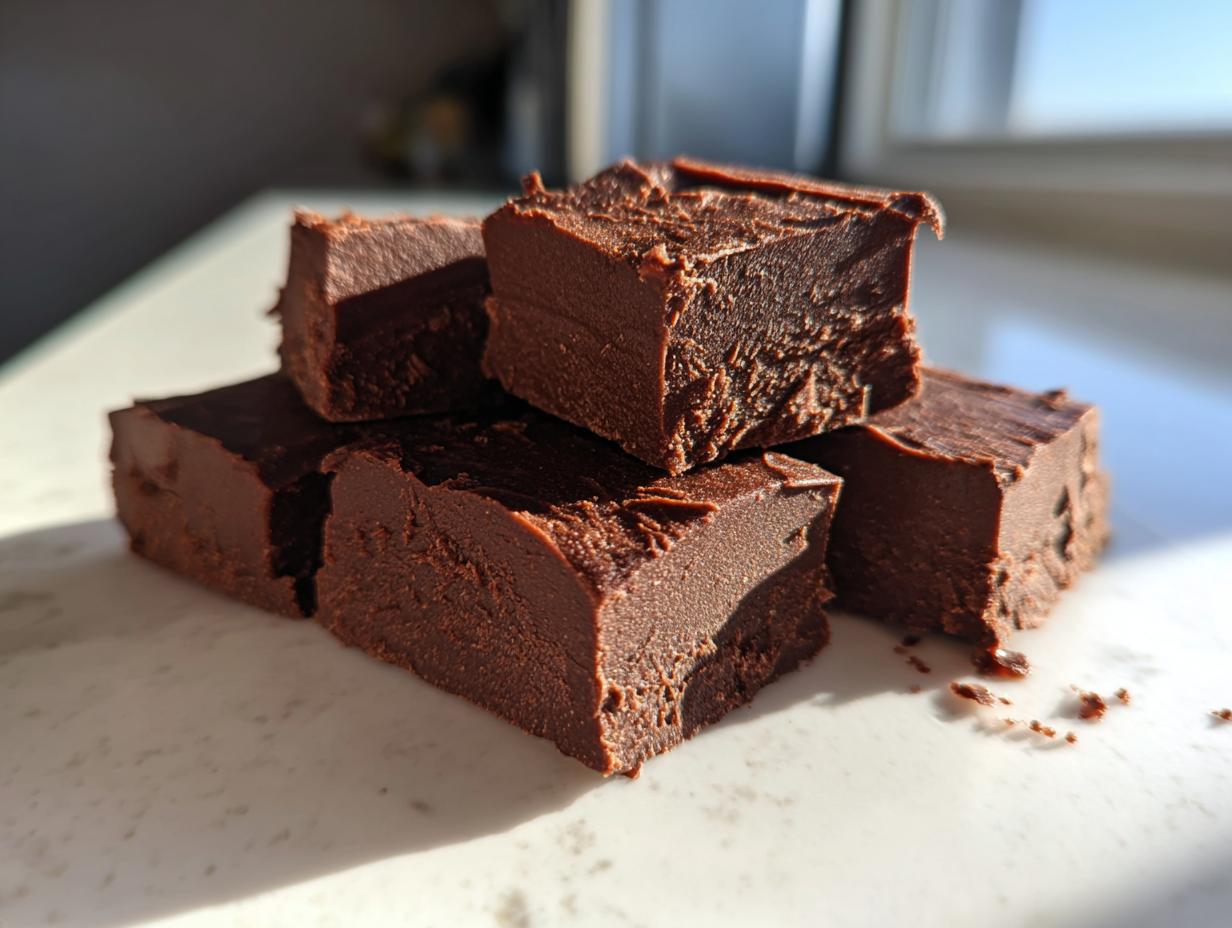
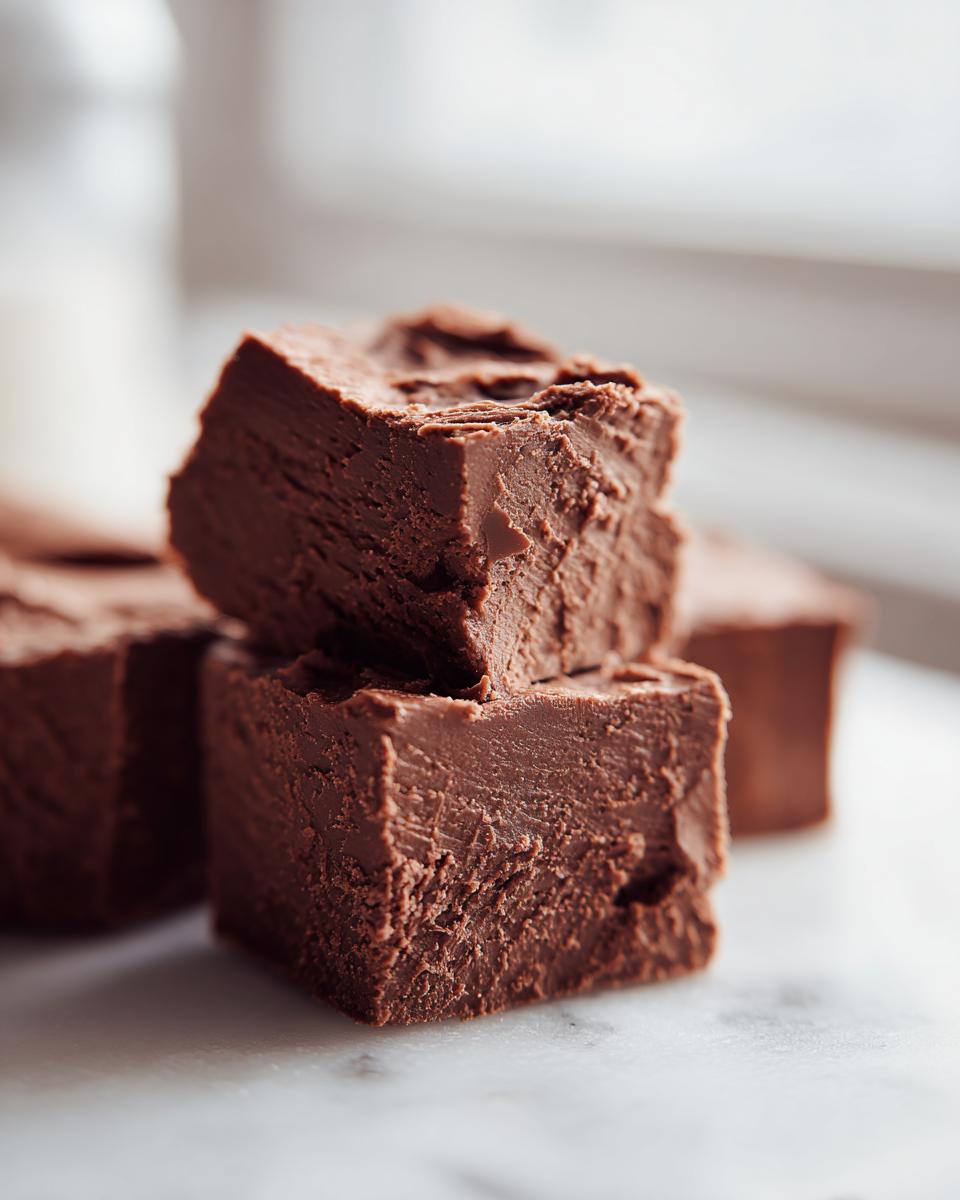
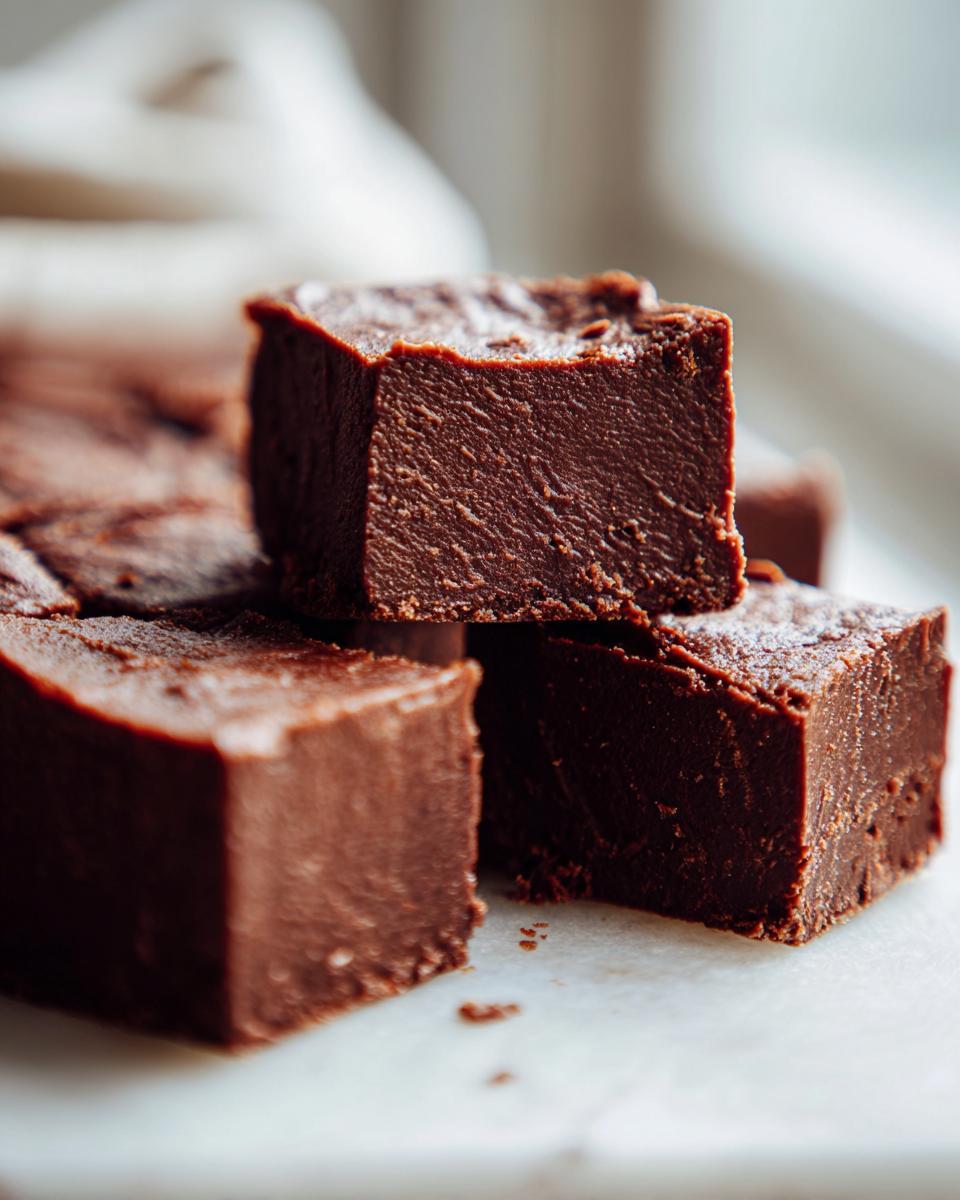
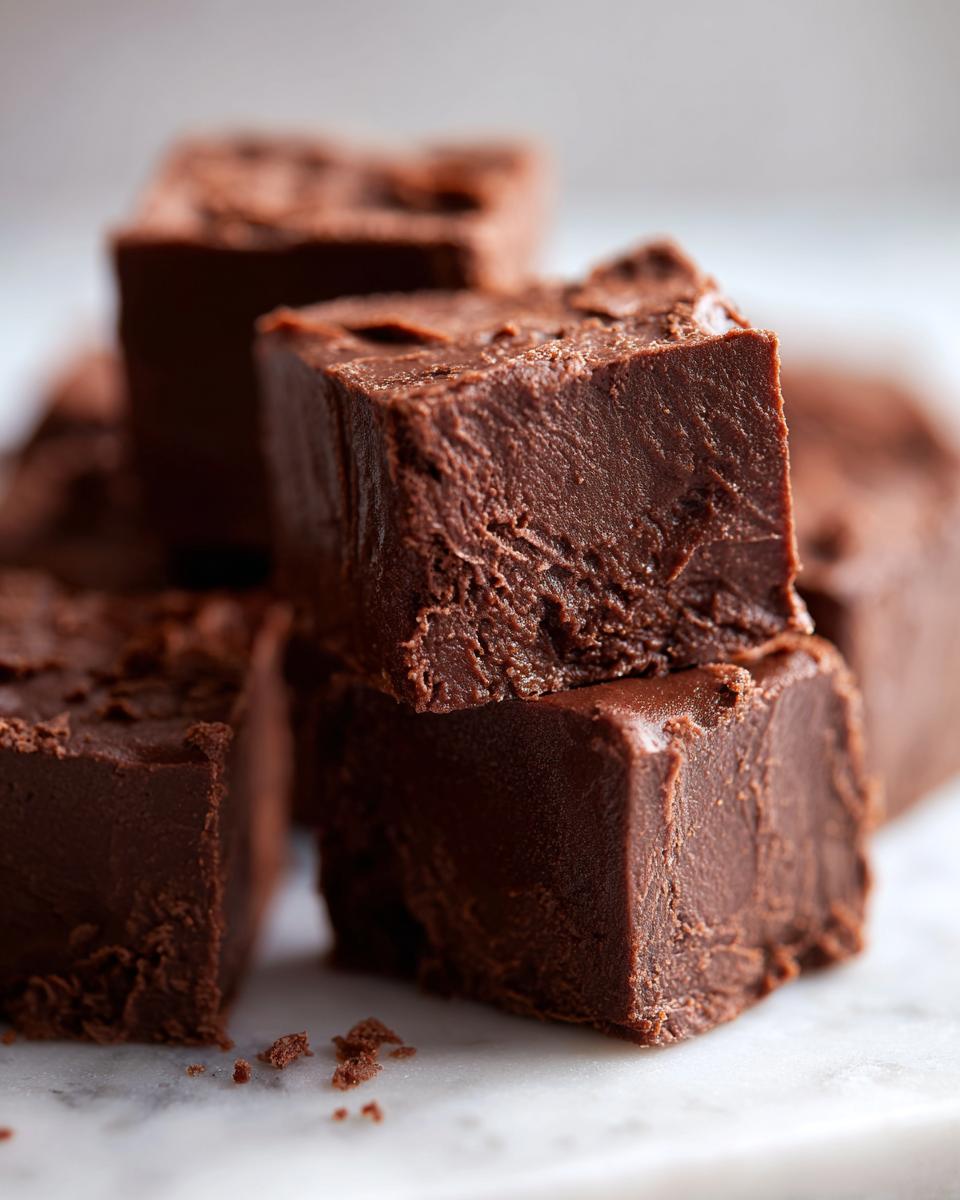
Do you ever hit that wall mid-week where only something deeply, intensely chocolatey will fix it? I know I do! When that rich chocolate craving hits, I skip anything complicated involving stirring sugar to 234 degrees. That’s why I lean so heavily on this incredible Easy 3-Ingredient No-Bake Chocolate Fudge recipe. It’s my go-to fudge recipe because it’s guaranteed smooth, unbelievably creamy, and you don’t even need to look at a candy thermometer. Here at MD LATDMM, my whole philosophy centers around giving you reliable home cooking that tastes amazing without taking all day, and this magic fudge proves that theory perfectly. It sets up fast and brings that deep, comforting flavor we all need. If you love quick sweets, this is just one of many wonderful delicious dessert recipes we have waiting for you.
- Why This Is the Best Fudge Recipe for Quick Desserts
- Gathering Ingredients for Your Easy Fudge Recipe
- Step-by-Step Instructions for the No Bake Fudge
- Tips for Achieving Melt in Your Mouth Fudge Texture
- Making Variations of the Classic Fudge Recipe
- Serving Suggestions for Your Homemade Fudge
- Storage and Reheating Instructions for This Fudge Recipe
- Frequently Asked Questions About Making Fudge
- Nutritional Snapshot of This Simple Fudge Squares
- Share Your Experience Making This Fudge Recipe
- Nutritional Snapshot of This Simple Fudge Squares
- Share Your Experience Making This Fudge Recipe
Why This Is the Best Fudge Recipe for Quick Desserts
Listen, I love my grandma’s old fashioned fudge recipe as much as the next person, but who has the time to stand over a double boiler for forty minutes on a Tuesday evening? Seriously, nobody! That’s why this easy fudge recipe jumped right to the top of my must-make list. It’s truly a no bake fudge that delivers rich, decadent results in minutes of actual work. This isn’t just simple; it’s a genuine no fail fudge that I trust even when I’m rushing around. If you need a quick dessert recipe that feels impressive, you’ve found your winner here. I linked up some other great quick weeknight dinners if you need to balance out all this sweetness!
The Magic of 3 Ingredient Fudge
What’s the secret sauce that lets us skip the stove entirely? Sweetened condensed milk, hands down. This pantry staple is the key that unlocks this amazing 3 ingredient fudge. It’s already cooked down milk and sugar, right? That concentrated sugar content is what sets up the structure without us having to boil anything. We’re essentially just using perfectly melted chocolate and this creamy base to marry everything together. Because the milk has done all the heavy lifting regarding sugar crystallization, we get that smooth, perfect, melt-in-your-mouth texture every single time. It’s pure, sweet science!
Gathering Ingredients for Your Easy Fudge Recipe
Okay, for this incredibly easy fudge recipe to work its magic, you absolutely need the right stuff. Since this relies on a no-bake method, the ingredients have to be top-notch because we aren’t cooking away any imperfections. I want you to pay close attention to the chocolate amount—we aren’t guessing here! We need exactly 24 ounces of chocolate chips or bars. This is the foundation of your perfect sweetened condensed milk fudge, so be generous with the chocolate!
Ingredient List for the Creamy Fudge Recipe
You simply won’t believe this list! You’ll need one full 14-ounce can of sweetened condensed milk—and make sure it’s unopened until you’re ready, please! Then grab your 24 ounces of chocolate chips; semi-sweet or bittersweet works great for a richer flavor profile. Finally, just one teaspoon of vanilla extract is all it takes to round out that gorgeous chocolate taste. That’s all, folks! Three things for the absolute best, most reliable, creamy fudge you’ve ever made.
Ingredient Notes and Simple Fudge Variations
Just a couple of my little secrets here to take this from good to OMG. If you want your rich chocolate dessert to really sing, ditch the milk chocolate chips and use a good quality semi-sweet or dark chocolate instead. It cuts the sweetness just right. Also, I love tossing in about half a cup of chopped pecans or maybe some mini marshmallows right after everything is mixed—they add a super fun texture! If you’re itching to try a batch of peanut butter fudge next time, you would swap out the chocolate for peanut butter in a similar ratio, but for this batch, stick to the chocolate goodness!
Step-by-Step Instructions for the No Bake Fudge
This is where the magic happens, and honestly, it’s so fast you’ll think you missed something! The active time for this whole fudge recipe is barely five minutes, and the warming time is maybe two minutes total. My job here is to make sure you don’t scorch that beautiful melted chocolate. Pay attention to intervals, and you’ll have perfect simple fudge squares ready for the fridge in no time flat.
Preparing Your Pan and Melting the Chocolate
First things first, get your 8×8 inch pan ready. You absolutely must line it with parchment paper, and here’s the trick: leave an overhang on two opposite sides. These flaps are your handles later when you lift the whole slab out—don’t skip this step! Next, put your 24 ounces of chocolate chips into a medium bowl that’s safe for the microwave. Now, here is critical advice: microwave in 30-second bursts only. After each 30 seconds, pull it out and stir really well, even if it doesn’t look melted yet. The residual heat makes things smooth. Keep doing this until it’s silky smooth. We are gently coaxing it, not attacking it!
Combining and Setting the Rich Chocolate Fudge Recipe
Once that chocolate is beautifully liquid and glossy, toss in the 14-ounce can of sweetened condensed milk and your teaspoon of vanilla extract. Now you stir. You want to stir until it is *just* combined. Stop mixing as soon as the ribbons of white disappear into the dark chocolate. Over-mixing can sometimes make things seize up, and we are aiming for that plush, creamy fudge texture. Scrape that glorious mixture into your prepared pan and spread it evenly across the bottom. Patience time! You must now refrigerate this for at least two full hours. That chilling time is non-negotiable if you want to cut clean, beautiful simple fudge squares later on. We can’t have gooey messes when we try to serve this quick dessert idea!
Tips for Achieving Melt in Your Mouth Fudge Texture
We nailed the basic three steps for this easy fudge recipe, but if you want that truly luxurious, melt in your mouth fudge experience—the kind that disappears on your tongue—we need to talk texture for just a second. This is where the difference between good fudge and *absolutely incredible* fudge lies. Even though this is a no-bake style where we don’t pull out a candy thermometer, ingredient quality and gentle handling still matter hugely.
For that ultimate richness, source good quality chocolate. I know it seems small, but junk chocolate chips often have stabilizers that can make the final texture slightly waxy instead of perfectly smooth. If you splurge on better chocolate—maybe even chop up a couple of good quality bars instead of using chips—you’ll notice the difference in that satisfying, soft way it dissolves. We want that luxurious feel, not something hard or grainy!
When you’re stirring in that sweetened condensed milk, don’t overdo it! This mixture comes together famously fast. Stop mixing as soon as everything looks uniform. If you stir for too long, you can sometimes introduce too much air or encourage the sugar molecules to settle weirdly. It’s a quick marriage, not a long conversation between the ingredients.
If you are worried about scorching the chocolate while melting it—which is the biggest danger zone for this kind of quick fudge—you can switch to the stovetop. Just use a proper double boiler, or fashion one with a glass bowl set over a saucepan of simmering water. You’ll gently warm the chocolate until about 75% melted, then stir until the residual heat takes care of the rest. This gentle introduction of heat is often the secret professionals use, even for non-traditional methods. For more tips on getting perfect textures, make sure you check out my secrets for chewy chocolate chip cookies, because texture is everything!
Also, here’s an interesting tidbit: If you’re ever curious what a slightly more traditional approach looks like—one that still prioritizes ease but uses a different liquid base—you can check out how Julie handles her version over at Easy Chocolate Fudge. Her approach is fantastic, too, just a slightly different path to that same blissful, creamy endpoint!
Making Variations of the Classic Fudge Recipe
While this core fudge recipe is heavenly just as written—pure, rich chocolate—sometimes you just need a little something extra, right? That’s the beauty of having such a solid, easy base. Because we aren’t relying on complicated sugar chemistry, we have lots of room to play around with textures and flavors. It’s so fun to make a batch just for ourselves and then whip up a second, wilder batch for a holiday platter!
If you are craving more fluff, you might be thinking about that classic marshmallow fudge texture. You can totally pivot towards that! Instead of adding nuts or sprinkles at the very end, gently fold in about one cup of mini marshmallows right after you stir in the vanilla and condensed milk. They’ll soften slightly when they hit the warm chocolate mixture, giving you a lighter, spongier bite in your simple fudge squares. Be quick with this step, though; marshmallows melt fast!
We also love using extracts! Vanilla is great, but if you happen to have any fun extracts lying around, this is the perfect, low-stakes way to use them. A quarter teaspoon of peppermint extract turns this into instant holiday magic—just enough bright flavor to cut through the deep chocolate. Or, if you happen to have some almond extract, that gives a really interesting, almost nutty depth to the chocolate, even without adding actual nuts. It’s a neat trick for a surprise flavor profile.
And speaking of nuts, don’t forget the roasted and salted varieties! A half cup of chopped pecans or walnuts folded in at the end provides that necessary crunch against the smooth fudge. Plus, the saltiness really enhances the chocolate flavor overall. If you’re looking for a way to transition your baking efforts toward cozy flavors later on, check out my recipe for pumpkin banana bread—it uses warming spices that pair beautifully with this chocolate!
Serving Suggestions for Your Homemade Fudge
Now that you have this unbelievably easy, luxurious slab of creamy fudge sitting firm in the fridge, what do you do next? Well, the best part of a no bake fudge that sets up so quickly is that it becomes a perfect standby for last-minute needs! Whether you need a speedy hello to a new neighbor or you realize you forgot a small treat for a get-together, this is your secret weapon for excellent last minute gifts food.
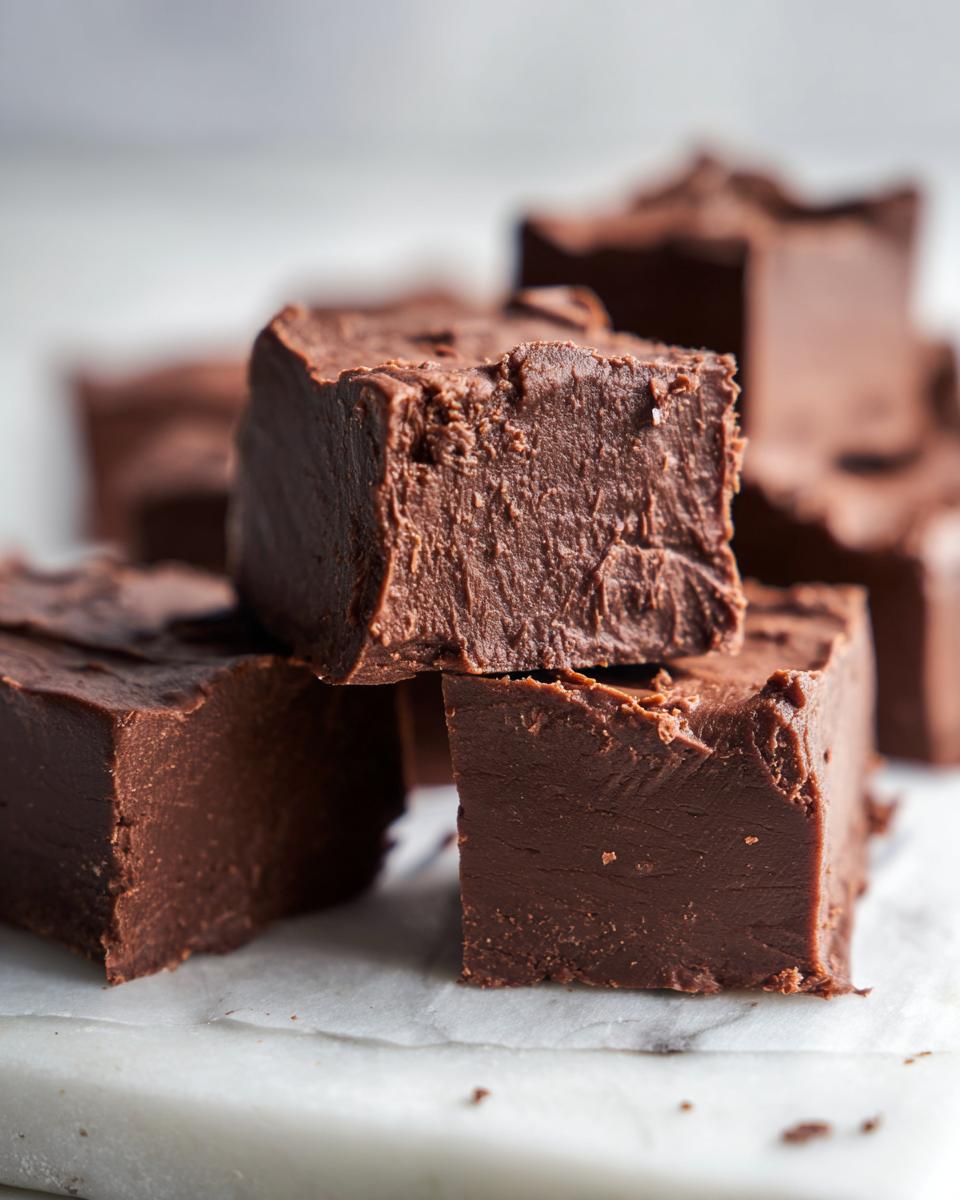
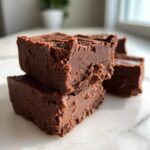
First, let’s talk about cutting. To get those perfect, uniform simple fudge squares, let the fudge chill until it’s completely firm—seriously, don’t rush it! Use the parchment paper overhang to lift the whole block out onto a clean cutting board. Wipe a long, sharp knife with a little bit of hot water (and dry it!) between each cut. This keeps the knife from dragging and tearing the beautiful, smooth surface. Aim for small squares, maybe 1 inch by 1 inch, because this chocolate is rich!
Presentation is everything, especially when you’re giving this away. You can stack the squares into cute little towers held together with a ribbon—it looks so festive! Or, if you’re serving it immediately, arrange the squares on a platter alongside other small bites, maybe even something savory like crackers or a fun dip. Check out my recipe for pumpkin dip with cool whip if you need a quick savory counterpoint for your snack board!
If you’re packaging these up as gifts, line a small tin or a cellophane bag with a coffee filter or a square of patterned paper before adding the homemade fudge. A small bow on top is all it takes. Honestly, your friends won’t believe it only took three ingredients! If you’re looking for another incredibly quick dessert that travels well, you should totally look up how Paula Deen handles her speedy version over at Paula Deen Fudge Recipe That Tastes Truly Amazing for another last-minute idea!
Storage and Reheating Instructions for This Fudge Recipe
Because this is such a simple, rich chocolate fudge recipe relying on the stabilizing magic of sweetened condensed milk, storage is ridiculously easy. No fussy vacuum seals or specialized containers needed here! Once you cut your perfect simple fudge squares, you just need to keep them protected from the air so they don’t get that dusty, dry top layer we all hate.
My absolute favorite way to keep this homemade fudge fresh is simply layering it in an airtight container. You don’t even need wax paper between the layers, though if you are stacking huge towers of it, a piece of parchment between the first and second layer won’t hurt. You can keep it sitting right out on the counter at room temperature for about a week, and it will stay wonderfully soft and creamy. Seriously, it tastes just as good on day six as it did on day one!
Now, if you made an enormous batch—and I often do, because this stuff disappears fast—you can absolutely pop that airtight container into the refrigerator. I find that if I chill it longer than three days, the fudge gets a touch firmer than I prefer, kind of like biting into room-temperature chocolate versus cold chocolate. If you do store it in the fridge, just remember to pull your squares out about 20 minutes before you plan to serve them. That little bit of time lets them come back to that perfect, soft, melt-in-your-mouth consistency.
As for reheating? Bless your heart, you shouldn’t need to! Since we aren’t dealing with a cooked sugar syrup that needs to be brought back to life, reheating this no bake fudge usually just makes it too soft or even oily. If, by some chance, you left a piece out in a very hot kitchen and it got too soft, just pop it back in the fridge for 15 minutes to firm up again. This recipe is happy cold or room temperature, but never hot. Think of it as candy, not cake batter! If you ever need another easy dessert that freezes well, you should definitely try my pumpkin snickerdoodle cookies—they hold up great for months!
Frequently Asked Questions About Making Fudge
Whenever I share this truly wonderful fudge recipe, people always have a few quick questions about what makes it work so well, especially since we skip the time-consuming candy-making steps. It’s totally natural! Having these clear answers helps build confidence, so you know this is the best fudge recipe for your needs. Getting that reliable, dreamy texture every time is totally within reach, trust me on this one!
Can I use regular milk instead of sweetened condensed milk in this fudge recipe?
Oh, I get why you’d ask this! Regular milk just doesn’t have the necessary magic here to make this work as a true sweetened condensed milk fudge. Condensed milk has had nearly all the water cooked out of it, leaving behind a super-concentrated blend of milk solids and sugar. That concentration is what gives this no bake fudge its structure and sweetness. If you swap it for regular milk, you’ll end up with a chocolate soup because there isn’t enough sugar to solidify when it cools down. Stick to the can for that amazing, easy outcome!
How do I get perfectly smooth, creamy fudge?
This is the key to achieving that glorious, creamy fudge texture that just melts when you eat it! It boils down to two things: gentle warming and barely stirring. When you melt the chocolate, go slow in those short microwave bursts like I mentioned—don’t let it get hot! High heat ruins the smoothness. Once you add the condensed milk, you mix only until everything is uniform. Seriously, stop stirring the second you don’t see white streaks. Overworking it introduces air bubbles and can encourage that grainy texture you dread. When in doubt, stop mixing!
Is this considered an ‘old fashioned fudge recipe’?
That’s a fun question! While this chocolate fudge recipe hits all the same amazing flavor notes as the old fashioned fudge my great-aunt used to make—deep chocolate, rich sweetness—the *method* is actually quite modern and speedy. Traditional recipes require constant temperature monitoring, which is what makes them so tricky and intimidating. We are shortcutting that boiling process by using sweetened condensed milk, which eliminates the need for a candy thermometer entirely. So, it tastes completely classic, but the process is definitely faster and easier, making it a fantastic beginner fudge recipe!
If you need help frosting something truly traditional after all this no-bake goodness, I have a whole post dedicated to making the best batch of carrot cake cream cheese frosting that I think you’ll love. And hey, if you ever run into trouble with your fudge setting, check out this great troubleshooting guide on Easy Fudge Recipe tips; they cover a lot of common pitfalls!
Nutritional Snapshot of This Simple Fudge Squares
When you’re making something this decadent, sometimes you just want to know the basics, even if nobody is counting calories when these simple fudge squares show up! Here’s a general idea of what you can expect from one small square based on my standard ingredient list. Remember, because we are using rich chocolate and condensed milk, these are definitely a satisfying treat, not a light snack!
- Serving Size: 1 square
- Calories: approximately 145
- Sugar: 18g
- Fat: 8g (with 5g being saturated fat)
- Protein: 2g
Please know that these are just estimates, okay? If you use dark chocolate versus milk chocolate, or if you toss in a cup of nuts like I sometimes do, these numbers are going to shift a bit. But for the basic 3-ingredient version, this gives you a good ballpark estimate for your pecan cream pie counterpart dessert!
Share Your Experience Making This Fudge Recipe
Okay, my wonderful cook, now it’s your turn! I have shared all my secrets for making what I truly believe is the most reliable chocolate fudge recipe out there. I’ve told you why the 3-ingredient method is a lifesaver, and now I want to hear from you! Did this work perfectly on your first try? Was it exactly the rich chocolate dessert you were craving this week?
Jump down to the comments below and let me know how you rated this homemade fudge! Give it a star rating out of five? Better yet, tell me how you customized it! Did you add peppermint extract? Did you go for the peanut butter swap? I absolutely love seeing your variations and hearing how you’re bringing the comfort of home-cooked sweets into your busy life. Happy fudge making, and don’t forget to check out my lemon cream cheese dump cake next time you need something truly easy!
Nutritional Snapshot of This Simple Fudge Squares
When you’re making something this decadent, sometimes you just want to know the basics, even if nobody is counting calories when these simple fudge squares show up! Here’s a general idea of what you can expect from one small square based on my standard ingredient list. Remember, because we are using rich chocolate and condensed milk, these are definitely a satisfying treat, not a light snack!
- Serving Size: 1 square
- Calories: approximately 145
- Sugar: 18g
- Fat: 8g (with 5g being saturated fat)
- Protein: 2g
Please know that these are just estimates, okay? If you use dark chocolate versus milk chocolate, or if you toss in a cup of nuts like I sometimes do, these numbers are going to shift a bit. But for the basic 3-ingredient version, this gives you a good ballpark estimate for your pecan cream pie counterpart dessert!
Share Your Experience Making This Fudge Recipe
Okay, my wonderful cook, now it’s your turn! I have shared all my secrets for making what I truly believe is the most reliable fudge recipe out there. I’ve told you why the 3-ingredient method is a lifesaver, and now I want to hear from you! Did this work perfectly on your first try? Was it exactly the rich chocolate dessert you were craving this week?
Jump down to the comments below and let me know how you rated this homemade fudge! Give it a star rating out of five? Better yet, tell me how you customized it! Did you add peppermint extract? Did you go for the peanut butter swap? I absolutely love seeing your variations and hearing how you’re bringing the comfort of home-cooked sweets into your busy life. Happy fudge making, and don’t forget to check out my lemon cream cheese dump cake next time you need something truly easy!
PrintEasy 3-Ingredient No-Bake Chocolate Fudge Recipe
Make rich, creamy chocolate fudge with only three simple ingredients. This no-fail recipe requires no candy thermometer and sets quickly, making it perfect for quick desserts or holiday gifting.
- Prep Time: 5 min
- Cook Time: 2 min
- Total Time: 125 min
- Yield: 36 small squares 1x
- Category: Dessert
- Method: No Bake
- Cuisine: American
- Diet: Vegetarian
Ingredients
- 1 (14 ounce) can sweetened condensed milk
- 24 ounces chocolate chips (or chopped chocolate bars)
- 1 teaspoon vanilla extract
Instructions
- Line an 8×8 inch baking pan with parchment paper, leaving an overhang on the sides for easy removal.
- Place the chocolate chips in a medium, microwave-safe bowl.
- Microwave the chocolate chips in 30-second intervals, stirring well after each interval, until the chocolate is completely melted and smooth.
- Stir the sweetened condensed milk and vanilla extract into the melted chocolate until fully combined.
- Pour the fudge mixture into the prepared pan and spread it evenly.
- Refrigerate for at least 2 hours, or until the fudge is firm enough to cut.
- Lift the fudge out of the pan using the parchment paper overhang and cut into small squares.
Notes
- For a richer flavor, use semi-sweet or dark chocolate chips instead of milk chocolate.
- You can add 1/2 cup of chopped nuts or mini marshmallows after stirring in the condensed milk for texture variation.
- If you prefer a stovetop method, combine the chocolate and condensed milk in a double boiler over low heat, stirring until smooth before adding vanilla.
Nutrition
- Serving Size: 1 square
- Calories: 145
- Sugar: 18
- Sodium: 35
- Fat: 8
- Saturated Fat: 5
- Unsaturated Fat: 3
- Trans Fat: 0
- Carbohydrates: 18
- Fiber: 1
- Protein: 2
- Cholesterol: 10