
Oh, that feeling when the leaves start to turn and there’s a crispness in the air? It just calls for something warm, comforting, and absolutely delicious, right? For me, nothing screams fall and cozy gatherings quite like a perfect Apple pie. It’s that timeless, crowd-pleasing dessert that just brings everyone together. You know, the kind with a beautiful golden crust and a filling that’s just bursting with sweet, spiced apples? Our founder, Maddie, grew up with those kinds of kitchen memories, where every pie was a labor of love and a way to connect. That’s exactly what we aim for here – taking those cherished family recipes, meticulously testing them, and making sure they work perfectly for YOUR kitchen, every single time.
- Why You'll Love This Classic Apple Pie
- The Best Apples for Your Apple Pie
- Ingredients for a Perfect Homemade Apple Pie
- Crafting the Flakiest Pie Crust
- How to Make the Best Apple Pie Filling
- Assembling and Baking Your Apple Pie
- Make-Ahead and Storage for Your Apple Pie
- Serving Your Apple Pie for Thanksgiving and Fall
- Frequently Asked Questions About Apple Pie
- Nutritional Information (Estimate)
- Share Your Apple Pie Creations!
Why You’ll Love This Classic Apple Pie
Trust me, this isn’t just any apple pie recipe – it’s pure comfort in a crust! You’ll adore how incredibly easy it is to whip up, even on a busy weeknight. Plus, that irresistible combination of flaky crust and perfectly spiced apples makes it a guaranteed hit for any occasion, especially those special fall gatherings and Thanksgiving dinners. It’s simply the *best* way to bring that homemade warmth to your table.
The Best Apples for Your Apple Pie
Okay, let’s talk apples! This is where the magic really starts for your granny smith apple pie. You can’t just grab any old apple off the shelf, you know? For that perfect balance of tartness and sweetness, and a filling that holds up without getting mushy, I always lean towards Granny Smith. They’ve got just the right bite to them, and they bake up beautifully. But don’t stop there! I love mixing them with a sweeter apple, like Honeycrisp or Fuji. This combo gives you that *wow* factor – a little bit of sweet, a little bit of tart, and a texture that’s just divine. It makes all the difference!
Ingredients for a Perfect Homemade Apple Pie
Alright, time for the good stuff! To make this amazing homemade apple pie, you’ll need a few key players. Don’t worry, they’re all pretty standard, but getting them just right makes all the difference.
First up, you’ll need a recipe for your double pie crust. Whether you have your own tried-and-true method or want to try something new, make sure it’s ready to go!
Now, for that glorious apple filling:
- About 6 medium Granny Smith apples – you want them peeled, cored, and nice and thinly sliced so they cook evenly.
- 3/4 cup granulated sugar – this is for the sweet filling.
- 2 tablespoons all-purpose flour – this helps thicken everything up so it’s not runny!
- 1 teaspoon ground cinnamon – the quintessential apple pie spice!
- 1/4 teaspoon ground nutmeg – just a whisper to add warmth.
- 1/4 teaspoon salt – really brings out the apple flavor.
- 1 tablespoon lemon juice – a little brightness to balance the sweetness.
- 2 tablespoons unsalted butter, cut into tiny little pieces – these little gems melt into the apples and make them extra luscious.
- To finish it off, you’ll need 1 large egg, beaten – that’s for a gorgeous golden egg wash.
- And finally, 1 more tablespoon of granulated sugar for sprinkling on top – hello, sparkle!
Crafting the Flakiest Pie Crust
Okay, let’s get down to business with the foundation of any good apple pie: that glorious, flaky crust! This is where the real magic happens, and trust me, it’s totally achievable. The secret to a truly flaky pie crust? Keep everything super cold!
When you’re mixing your dough, make sure your butter (or shortening, if you prefer!) and your water are ice cold. I like to even keep my mixing bowl chilling in the fridge for a bit. You’ll want to cut the cold fat into the flour until it looks like coarse crumbs with some pea-sized pieces still floating around. Those little fatty bits are what create steam pockets as it bakes, giving you all those lovely flaky layers. Don’t overwork the dough when you add the water; just mix until it *barely* comes together. Chilling the dough after you mix it is also a game-changer, letting the gluten relax so it’s easier to roll out and prevents shrinkage later. Remember, a little patience here goes a long, long way! If you’re feeling adventurous, you can even look into how sourdough starter can add a unique tang to your pie crust, though for this classic recipe, keeping it simple with cold ingredients is key!
How to Make the Best Apple Pie Filling
Now for the heart of our spectacular Apple pie: that luscious, perfectly spiced filling! We’re going for balance here – not too sweet, not too tart, just pure apple-y goodness. When you’re making this, seriously, take a moment to just *smell* those spices mixing. It’s heavenly!
First, grab a big bowl. Toss in your sliced apples – remember, we peeled, cored, and sliced them nice and thin. Now, let’s add the magic:
Mix in 3/4 cup of granulated sugar. This is the base sweetness. Then come the flavor powerhouses: 2 tablespoons of all-purpose flour to help thicken up all those lovely apple juices so you don’t end up with a watery mess (a common pie-making oops!), 1 teaspoon of ground cinnamon for that warm, comforting hug, a little whisper of 1/4 teaspoon ground nutmeg to add depth, and 1/4 teaspoon of salt to really make those apple flavors pop. Don’t forget that 1 tablespoon of lemon juice – it’s our little secret to brightening everything up and cutting through the sweetness just right. Give it all a gentle toss so every single apple slice is coated. If you’re looking for more apple inspiration, check out my homemade applesauce or my apple cinnamon muffins – they’re also amazing ways to use up those apples!
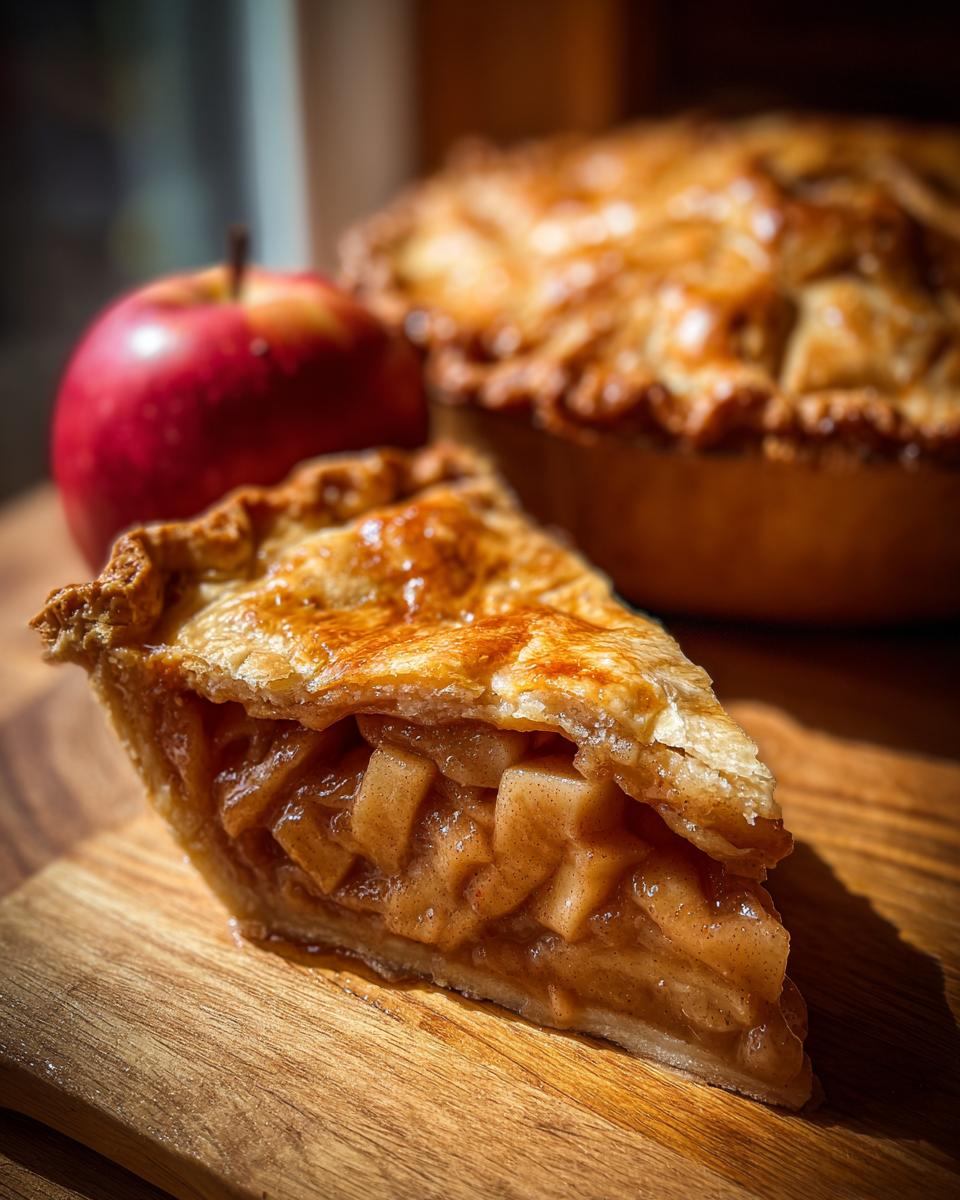
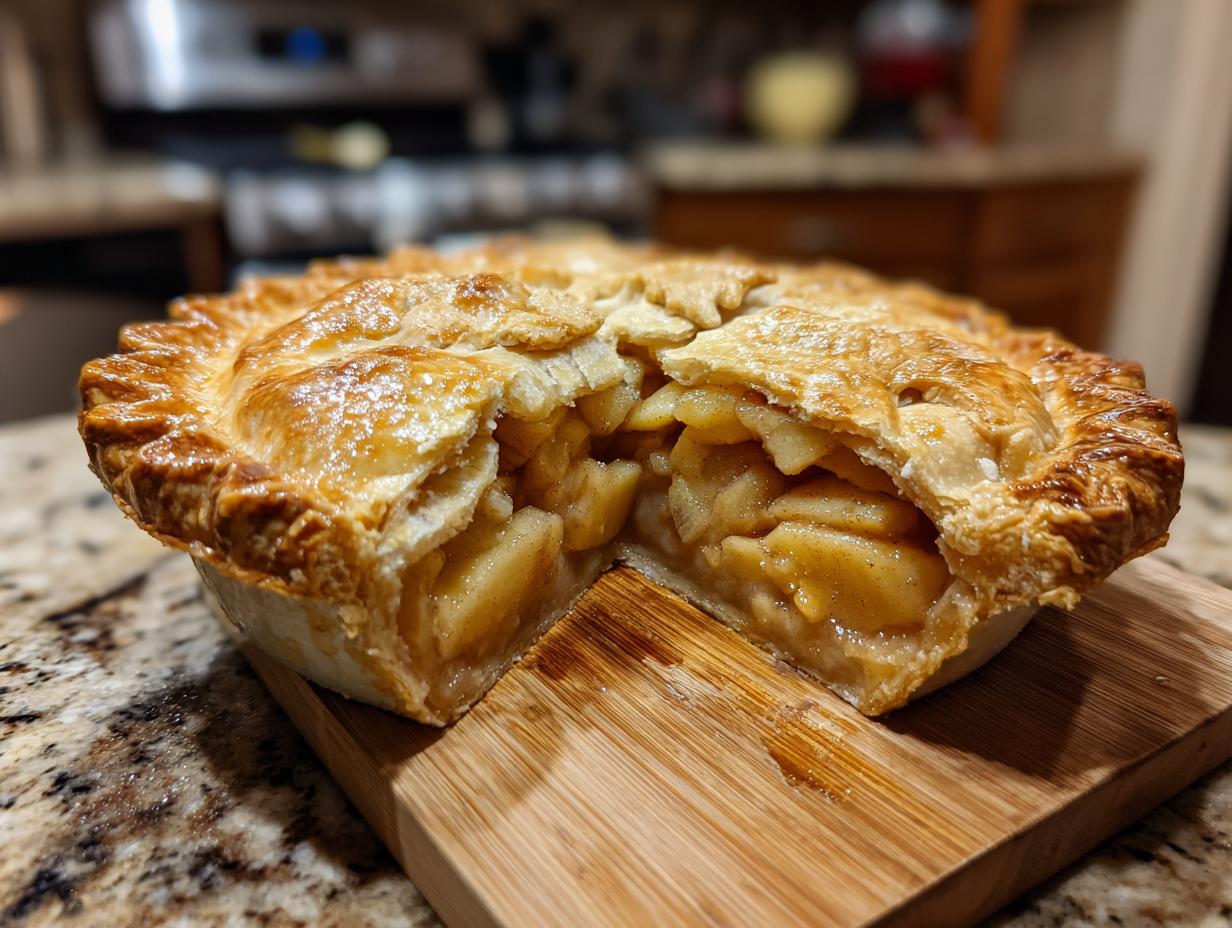
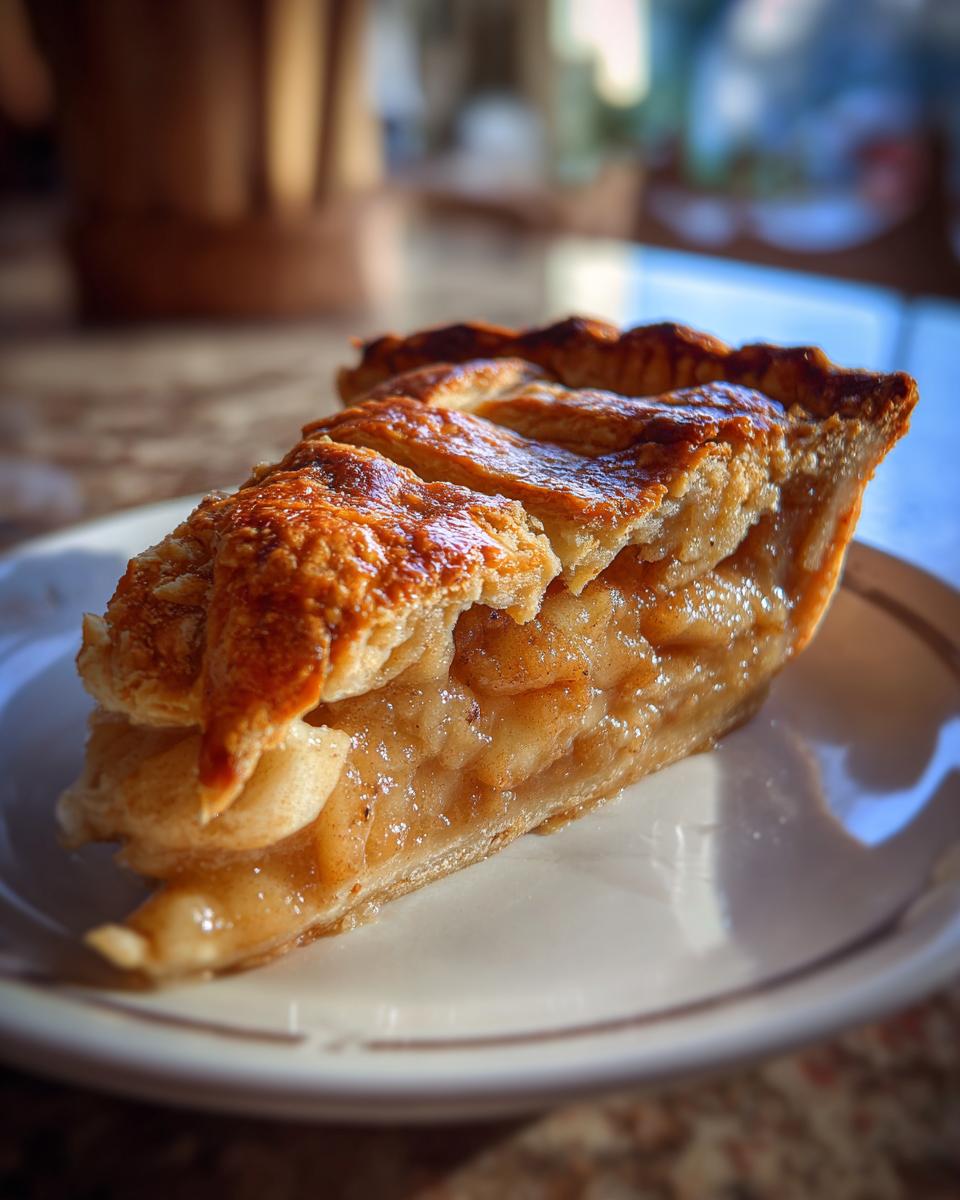
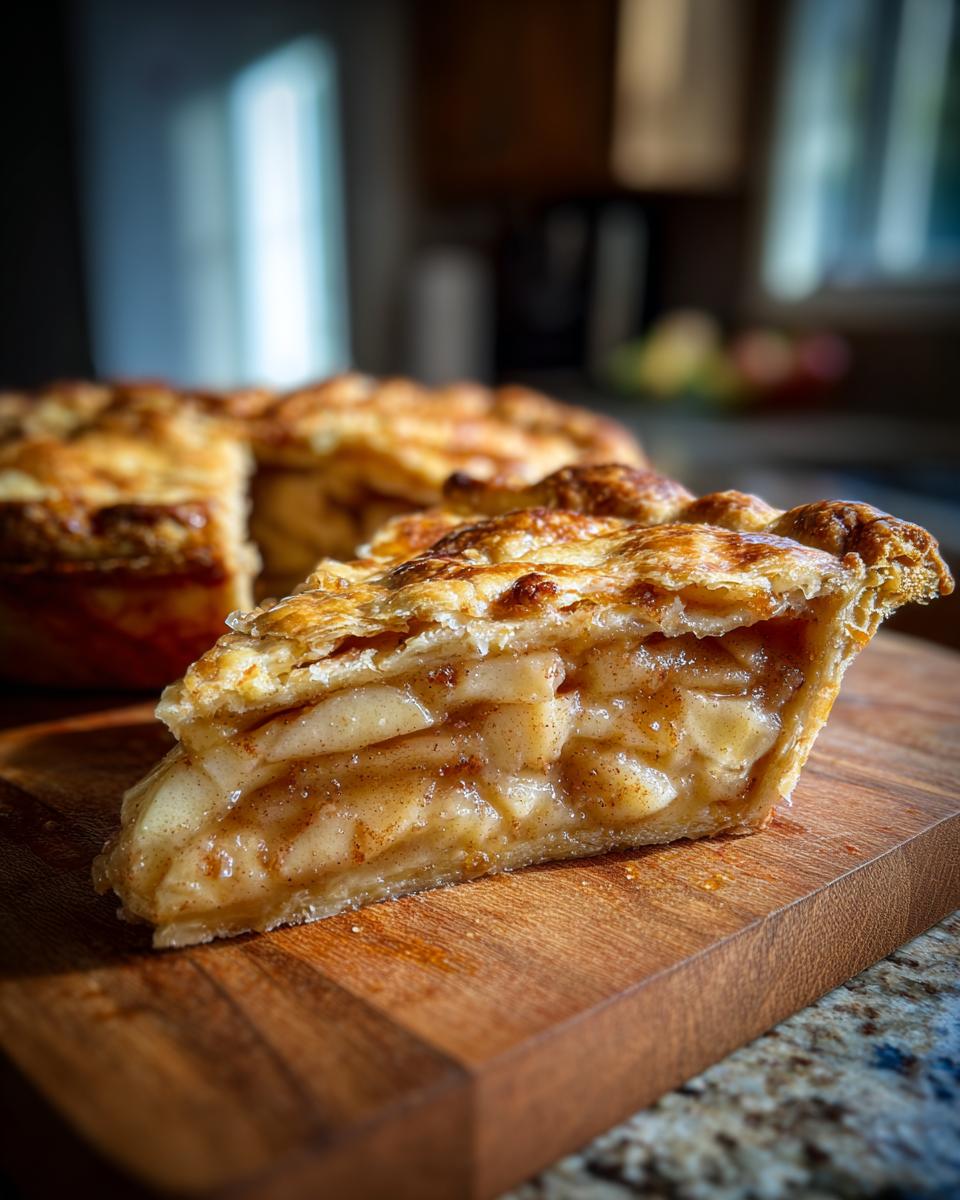
Assembling and Baking Your Apple Pie
Alright, we’ve chopped, spiced, and mixed – now it’s time to bring this show-stopping Apple pie to life! This is the moment where all our hard work comes together. We’re going to create that beautiful double-crust magic, or maybe you’re feeling fancy with a lattice crust pie. Whatever you choose, make sure your oven is preheated to a toasty 425°F (220°C) – we want some serious heat to get things going!
Carefully pour that delicious apple filling into your bottom crust. Don’t be shy, pile it high if you’re going for a generous deep dish apple pie! Then, tuck those little bits of butter all over the apples; they’ll melt into pure caramel goodness. Now, place your top crust over the filling. Crimp those edges firmly to seal everything in – you don’t want any precious filling escaping! If you’re doing a double crust, cut a few vents in the top to let the steam escape. If you’re going for the lattice look, weave those beautiful strips right over the top. Give the whole beautiful thing a brush with that beaten egg wash and a sprinkle of sugar for that irresistible golden sparkle. Pop it on a baking sheet (essential for catching any runaway bubbly filling!) and get it into that hot oven.
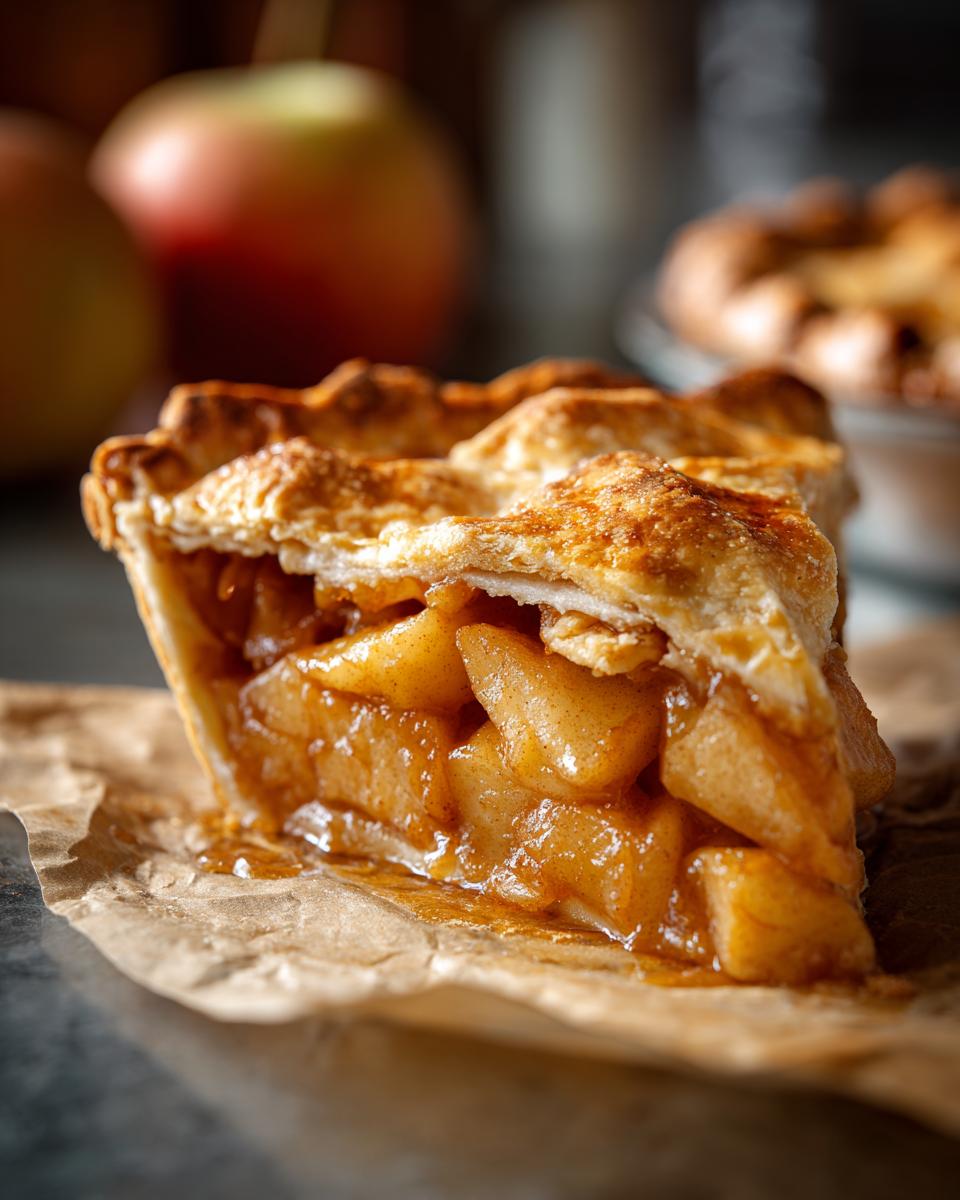
After about 15 minutes at 425°F, reduce the heat to 375°F (190°C). Now it’s time for it to really bake and get golden and bubbly, usually another 35-45 minutes. Keep an eye on it – if the crust starts looking a little too brown, just loosely tent it with some foil. While this bakes, think about other apple delights like my apple pie cookies or a rustic apple crumble!
Tips for a Perfect Bake
To make sure your pie turns out just right, here are a few tricks: Always put your pie onto a baking sheet – it catches drips and makes cleanup a breeze. If you see the crust edges browning too fast before the filling is bubbly, just loosely cover those edges with strips of aluminum foil. This is a lifesaver for getting that perfect golden-brown finish all over. And remember, patience is key with cooling – it lets everything set up beautifully!
Make-Ahead and Storage for Your Apple Pie
Sometimes life gets crazy, right? That’s why I love that this make ahead pie is so forgiving! You can totally get a jump start on your baking. Want to assemble the whole pie a day before your gathering? Go for it! Just cover it up loosely with plastic wrap, keep it in the fridge, and when you’re ready to bake, pop it in the oven. You might need to add just a few extra minutes to the baking time to make sure it gets perfectly golden and bubbly.
Got leftovers? Lucky you! Store any uneaten pie wrapped tightly at room temperature for up to two days. If it’s really warm in your house, or if you used a custard-based filling (which this one isn’t, but good to know!), refrigerating is always a safe bet. Honestly though, this pie rarely lasts that long! For other make-ahead wonders, check out my make-ahead hash brown egg casserole – it’s a lifesaver for brunches!
Serving Your Apple Pie for Thanksgiving and Fall
Okay, the moment has arrived! Your beautiful Apple pie is ready to shine, especially as one of your star thanksgiving desserts. The best way to serve it? Honestly, warm or at room temperature is perfection. And let’s be real, no slice of apple pie is complete without a big dollop of creamy vanilla ice cream melting into it, or maybe a cloud of freshly whipped cream. It’s that classic combo that just screams comfort and makes your fall baking efforts totally worth it. It’s a perfect addition to any Thanksgiving menu!
Frequently Asked Questions About Apple Pie
Got questions about whipping up the ultimate apple pie? You’ve come to the right place! We’ve all been there, wondering about those little details that make a pie go from good to absolutely spectacular.
Can I use pre-made pie crust?
Absolutely! While I adore making my crust from scratch (that flaky crust is everything!), pre-made pie crust is totally your friend, especially when you’re short on time. Just make sure to grab a good quality one, and follow its package directions for thawing or prepping. It’ll still be a delicious homemade apple pie!
How do I prevent a soggy bottom crust?
Ah, the dreaded soggy bottom! It’s a common worry, but here are a few tricks. First, make sure your filling isn’t too watery – using a little flour or cornstarch to thicken it helps. Also, chilling your pie before baking and preheating your oven nice and hot (like we do at 425°F!) gives the bottom crust a head start. Baking it on a lower oven rack or even on a preheated baking sheet can also help crisp it up.
What are the best apples for apple pie?
For the ultimate flavor and texture in your granny smith apple pie, a mix is usually best! Granny Smiths are fantastic for their tartness and firmness, but pairing them with sweeter apples like Honeycrisp, Fuji, or Gala adds incredible depth. This blend ensures your pie isn’t too sour or too sweet, and the apples hold their shape beautifully after baking. It’s the secret to that perfect bite!
Nutritional Information (Estimate)
Just a friendly heads-up, this nutritional info is an estimate and can bounce around a bit depending on the exact ingredients you use and how big you cut those slices. But, generally speaking, one slice of this scrumptious pie has about 350 calories, 18g of fat (with 10g of that being saturated), 45g of carbs, 3g of fiber, and 3g of protein. Enjoy every bite!
Share Your Apple Pie Creations!
Now that you’ve got the lowdown on making the most incredible apple pie, I absolutely *have* to see what you create! Did you go for a classic double crust or a stunning lattice? Did you try mixing up your apples? Please, leave a comment below and tell me all about it, or even better, share a picture on social media! I can’t wait to see your beautiful pies – you can even reach out if you have any questions!
PrintClassic Apple Pie

A timeless homemade apple pie with a flaky crust and a sweet, spiced apple filling, perfect for fall gatherings and holidays.
- Prep Time: 30 min
- Cook Time: 50-60 min
- Total Time: 80-90 min
- Yield: 8 servings 1x
- Category: Dessert
- Method: Baking
- Cuisine: American
- Diet: Vegetarian
Ingredients
- 1 recipe for double pie crust
- 6 medium Granny Smith apples, peeled, cored, and sliced
- 3/4 cup granulated sugar
- 2 tablespoons all-purpose flour
- 1 teaspoon ground cinnamon
- 1/4 teaspoon ground nutmeg
- 1/4 teaspoon salt
- 1 tablespoon lemon juice
- 2 tablespoons unsalted butter, cut into small pieces
- 1 large egg, beaten (for egg wash)
- 1 tablespoon granulated sugar (for sprinkling)
Instructions
- Preheat your oven to 425°F (220°C).
- Prepare your double pie crust according to your favorite recipe.
- In a large bowl, combine the sliced apples, 3/4 cup sugar, flour, cinnamon, nutmeg, salt, and lemon juice. Toss gently to coat the apples evenly.
- Pour the apple mixture into the bottom pie crust. Dot the top of the apples with the small pieces of butter.
- Place the top crust over the filling. Crimp the edges to seal and cut several vents in the top crust to allow steam to escape. You can also create a lattice top if desired.
- Brush the top crust with the beaten egg wash and sprinkle with 1 tablespoon of sugar.
- Place the pie on a baking sheet to catch any drips.
- Bake for 15 minutes at 425°F (220°C).
- Reduce the oven temperature to 375°F (190°C) and continue baking for another 35-45 minutes, or until the crust is golden brown and the filling is bubbly. If the crust starts to brown too quickly, you can loosely tent it with aluminum foil.
- Remove the pie from the oven and let it cool on a wire rack for at least 2-3 hours before slicing and serving. This allows the filling to set properly.
Notes
- For the best flavor and texture, use a mix of tart and sweet apples. Granny Smith apples provide a good tart base, and you can add Honeycrisp or Fuji for sweetness.
- Make-ahead tip: You can assemble the pie a day in advance and store it, unbaked, covered loosely in the refrigerator. Add a few extra minutes to the baking time.
- Serve warm with vanilla ice cream or whipped cream for a classic dessert experience.
Nutrition
- Serving Size: 1 slice
- Calories: 350
- Sugar: 30g
- Sodium: 200mg
- Fat: 18g
- Saturated Fat: 10g
- Unsaturated Fat: 8g
- Trans Fat: 0g
- Carbohydrates: 45g
- Fiber: 3g
- Protein: 3g
- Cholesterol: 40mg