
There’s nothing in the world that smells quite like fall baking, is there? That blend of warm cinnamon, sweet apples, and melting butter just pulls you right back to being cozy indoors. For me, that smell means home, and even when my city life got hectic, I needed that connection back. That’s why I spent so much time perfecting this – because when you’re craving true comfort, you need something reliable. Trust me when I say that this apple crisp recipe is the ultimate classic you will keep coming back to. It’s easy enough for a Tuesday night treat but delicious enough to serve for any big family gathering. We’re bringing that comforting heart of American cooking right back to your table!
- Why This Classic Old Fashioned Apple Crisp Recipe Works Every Time
- Gathering Ingredients for Your Apple Crisp Recipe
- How to Make Apple Crisp: Step-by-Step Instructions
- Tips for the Best Apple Crisp Recipe Success
- Serving Suggestions for Your Simple Baked Apple Dessert
- Storage and Reheating Instructions for Homemade Apple Crisp
- Frequently Asked Questions About This Apple Crisp Recipe
- Nutritional Estimates for This Cozy Autumn Desserts Treat
- Share Your Homemade Apple Crisp Experience
Why This Classic Old Fashioned Apple Crisp Recipe Works Every Time
So many recipes promise the world, but this Old Fashioned Apple Crisp delivers honest-to-goodness comfort without fail. I’ve tested this one until my arms ached, and I can tell you the magic is in the simplicity and the specific textures we aim for. It truly is an unbeatable combination that tastes exactly like the desserts we grew up with.
Here’s why this version always earns rave reviews:
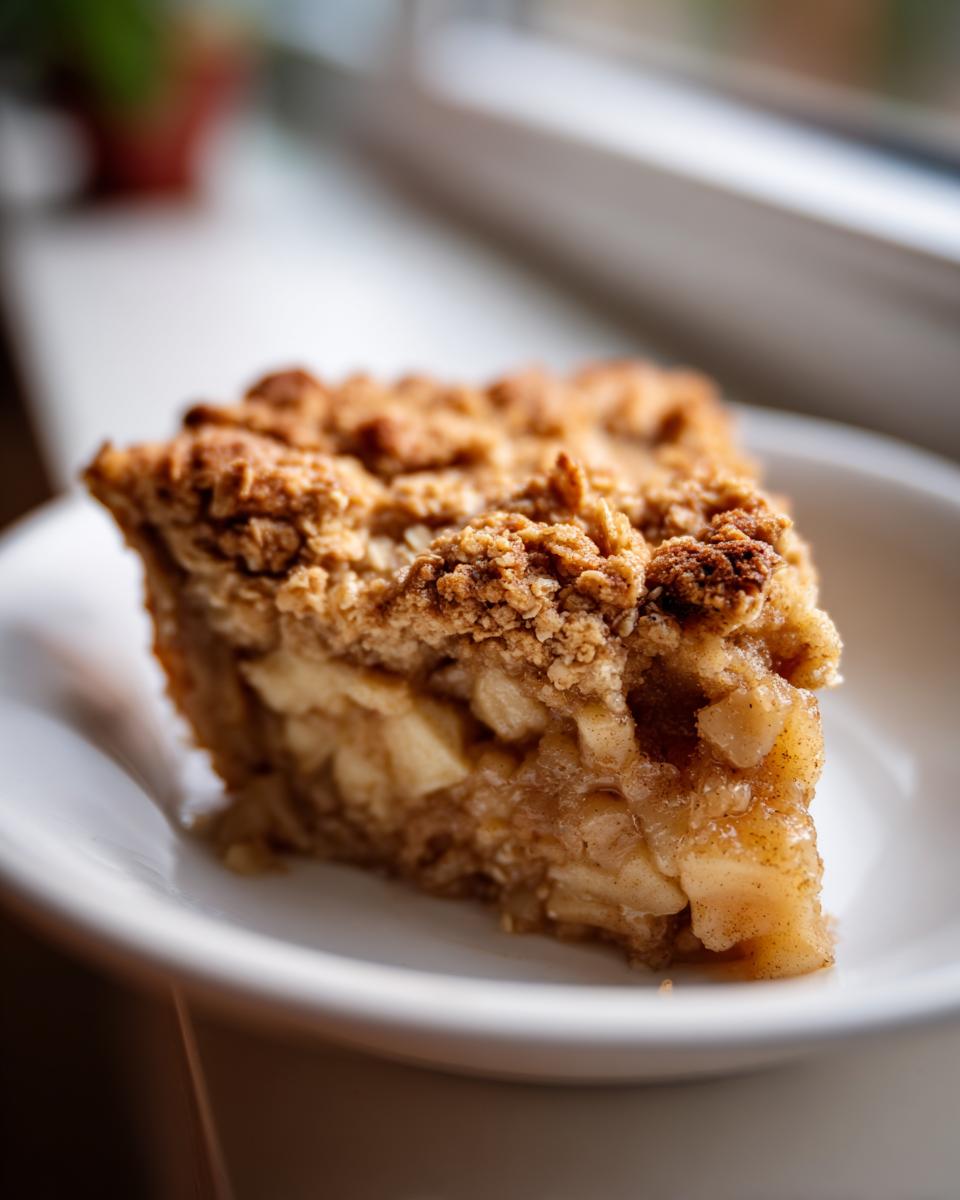
- The apples come out perfectly tender—soft enough to eat with a spoon, but they still hold their shape, thanks to just the right amount of flour and lemon juice.
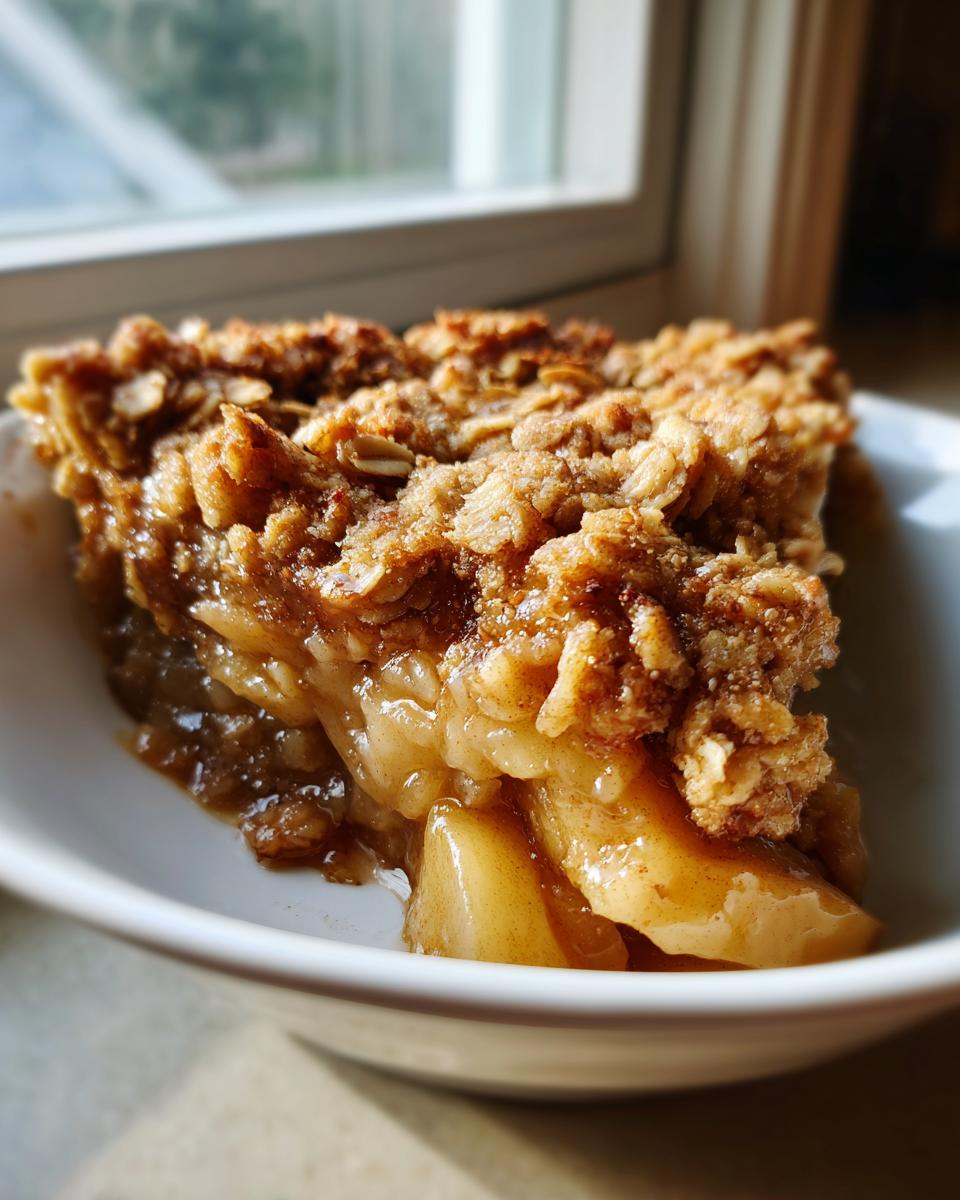
- The topping? Oh, that topping is everything. It bakes up buttery, golden brown, and ridiculously crunchy. You get that perfect textural contrast in every single bite.
The Perfect Apple Crisp Recipe Balance
It all comes down to balancing the tartness of the fruit with the deep sweetness of the topping. I love using a mix of apples, like tart Granny Smiths and sweeter Honeycrisps, so the filling isn’t just sweet mush. That hint of cinnamon and nutmeg in the fruit layer makes such a difference before we even blanket it with the buttery crunch.
Quick Prep for Your Easy Apple Crisp Dessert
Seriously, you won’t believe how fast this comes together. We’re talking maybe 15 minutes max to get the apples sliced and tossed, and the topping rubbed in. This makes it the perfect Easy Apple Crisp Dessert for when company drops by unexpectedly or you just need a quick, warm hug in a bowl after dinner. No fancy gadgets needed here!
Gathering Ingredients for Your Apple Crisp Recipe
Okay, this is the fun part! Since this is an old-fashioned recipe, you don’t need to run off to some specialty store. We’re using stuff you probably already have tucked away, which keeps this whole experience super approachable. The most important thing here is making sure your butter is properly cold when we get to the topping—that’s key for texture! If you’re wondering how to use up those extra apples after a trip to the orchard, this apple cinnamon muffins recipe is another great option, but for now, let’s get our crisp components ready.
For the Tender Apple Filling
This is where the sweet, warm flavor starts:
- 6 medium apples (I swear by Granny Smith mixed with Honeycrisp for that perfect sweet-tart bite), peeled, cored, and sliced about 1/4 inch thick
- 1/4 cup granulated sugar
- 1 tablespoon all-purpose flour (just a binder to thicken the juices!)
- 1 teaspoon ground cinnamon
- 1/4 teaspoon ground nutmeg
- 1 tablespoon lemon juice (keeps things bright!)
For the Crunchy Oat Topping Recipe
This oat topping is what makes it a true crisp, not a crumble. Make sure that stick of butter is straight from the fridge!
- 1 cup old-fashioned rolled oats (don’t use instant, they get too mushy)
- 1/2 cup all-purpose flour
- 1/2 cup packed light brown sugar
- 1/2 teaspoon ground cinnamon
- 1/4 teaspoon salt
- 1/2 cup (1 stick) cold unsalted butter, cut into small pieces
How to Make Apple Crisp: Step-by-Step Instructions
This is where we put it all together! Making the apple crisp recipe is straightforward, but the order of operations really locks in that amazing texture we talked about. I’ve separated the steps so you can focus on the filling first, then the topping, and finally, the glorious bake. You’ll want to check out this apple crumble recipe for similar techniques, but trust me, the oat crunch here is superior!
Preparing the Apple Crisp Recipe Filling
First things first: we need heat! Preheat your oven to 375 degrees Fahrenheit. While that’s warming up, grab your 8×8 inch baking dish and give it a little grease so nothing sticks later. Next, in a big bowl—and I mean big, because you need room to toss without launching apples everywhere—combine all your sliced fruit with the granulated sugar, the first tablespoon of flour, the cinnamon, nutmeg, and that little splash of lemon juice. Gently mix it all up until every slice is beautifully coated in spice. Then, just pour that mix into your prepared dish, making sure the apples lay flat in a nice, even layer.
Creating the Buttery Oat Topping
Time for the glorious texture! Take your dry topping ingredients—the oats, the remaining flour, brown sugar, cinnamon, and salt—and whisk them around in a separate bowl. Now, this is where your cold butter bits come into play. You need to work that butter into the dry mix. I prefer using my fingertips for this part because I can feel when it’s right. Pinch and rub the butter in until you have coarse crumbs, kind of like wet sand, but you absolutely must leave some pea-sized bumps of butter. Those bits melt into pure gold while baking!
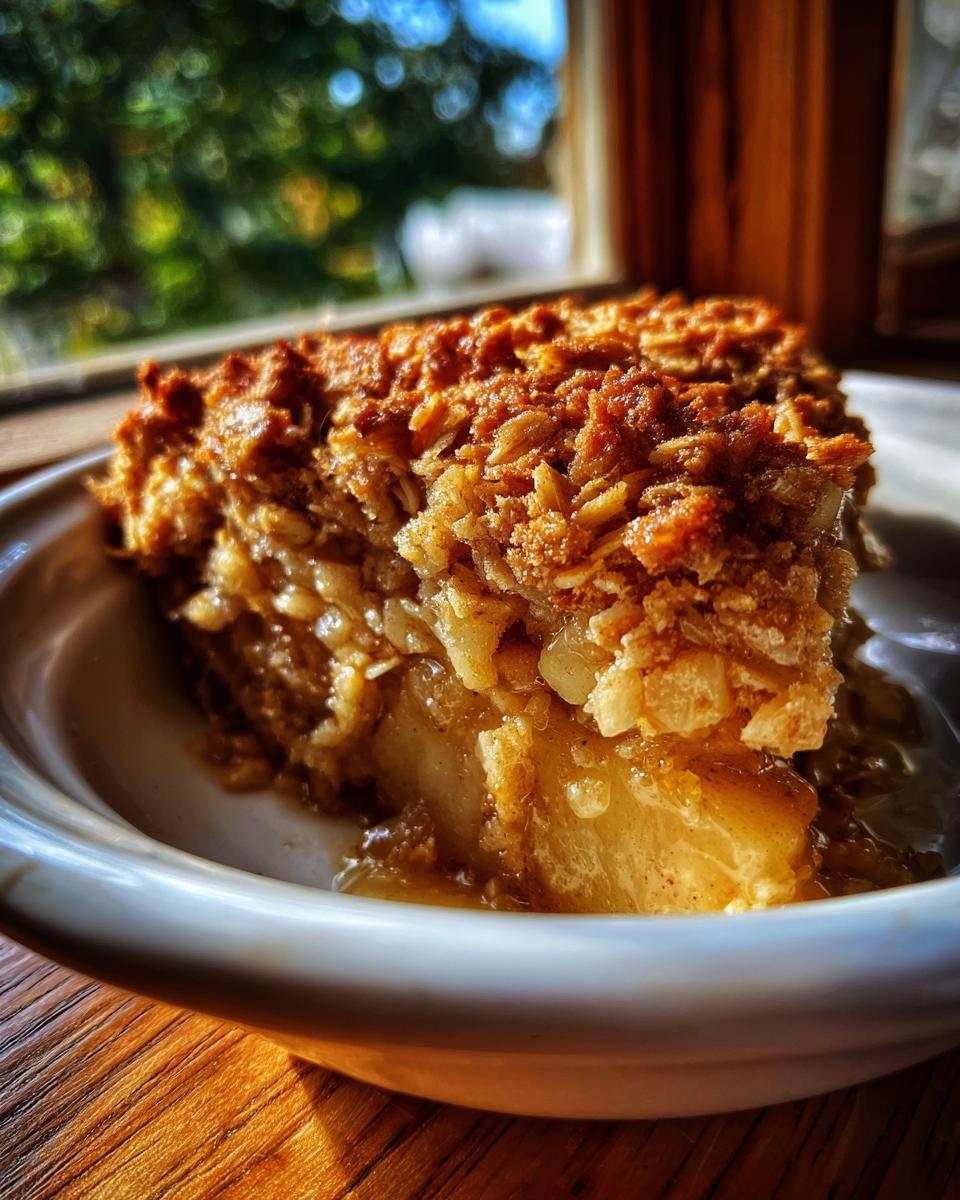
Baking and Resting Your Cinnamon Apple Treat
Once the topping is ready, sprinkle it evenly over the apples—don’t press it down! We want it loose and crumbly. Pop the whole thing into that 375°F oven for about 35 to 45 minutes. You’ll know it’s done when that topping is deeply golden brown and you can hear and *see* the filling bubbling heartily around the edges. That bubbling is the sign of perfectly tender apples! When you pull it out, you have to be patient; let it sit for at least 15 minutes to set up. This resting time is crucial for ensuring your Cinnamon Apple Treat doesn’t just run all over the plate when you scoop it out. For tips on replicating that perfect crunch, check out advice over at The Pioneer Woman’s site.
Tips for the Best Apple Crisp Recipe Success
Listen, making a really great dessert means paying attention to a few tiny details that separate “good” from “wow.” If you follow this basic apple crisp recipe, you are already winning, but these little pointers I picked up over the years will guarantee perfection. Don’t skip the rest time or you’ll regret it when serving!
Choosing and Preparing Apples
The kind of apple you pick sets the stage for the final texture. If you want that slight *zing* to cut through the brown sugar sweetness, lean heavily on tart apples like Granny Smith. If you prefer something softer and sweeter right out of the oven, use Honeycrisp or Golden Delicious. But whatever you choose, slice them pretty consistently—thick chunks mean they won’t turn to complete mush while baking alongside that crunchy topping.
Achieving Maximum Crisp Texture
My biggest secret for that wonderful, golden crunch? It’s all about the butter temperature in the topping. It needs to be rock hard and ice cold! When you cut it into the oats and flour, those cold chunks create steam pockets in the oven. Those steam pockets result in that delicious, shatteringly crisp texture. Think of it like making biscuits, but for dessert! If your kitchen is warm or your hands are hot, stick the topping bowl in the freezer for five minutes before you start rubbing in the butter. It makes a huge difference, promise! For more baking secrets, you can always check out my post on the classic homemade apple pie.
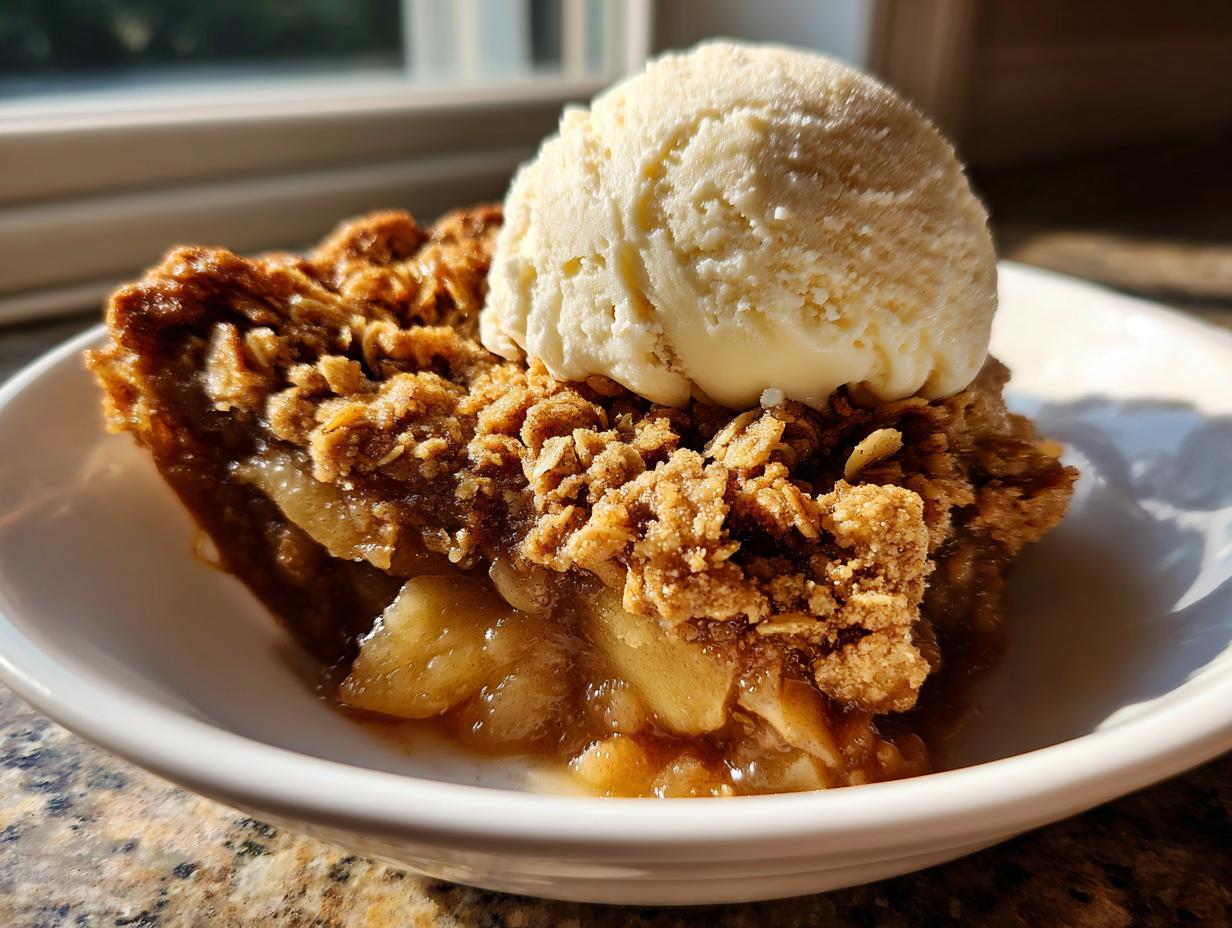
Serving Suggestions for Your Simple Baked Apple Dessert
Okay, you pulled it out of the oven, it’s bubbling away, and the whole house smells like heaven—now what? You have to serve this warm because that’s when the magic happens! This Simple Baked Apple Dessert is practically begging for something cold and creamy right on top. My absolute favorite way to eat it is warm with a big scoop of vanilla bean ice cream. The contrast between the hot, spiced apples and the cold, melting ice cream is just perfection.
If you aren’t an ice cream lover (I don’t know you, but I respect your choices!), a little drizzle of caramel sauce, maybe made from scratch using this brown butter peach cobbler inspiration, is heavenly. Or, just a dollop of good quality whipped cream works beautifully too. For an extra satisfying experience, check out the serving tips mentioned over at Foodology Geek!
Storage and Reheating Instructions for Homemade Apple Crisp
Don’t worry if you have leftovers—though I doubt you will! This Homemade Apple Crisp keeps beautifully. Once it’s mostly cooled down, just cover the baking dish tightly with plastic wrap or foil. You can definitely keep it on the counter at room temperature for a day if you plan on eating it quickly. If you’re saving it longer, the fridge is safer, just make sure it’s covered well.
When you want to bring it back to life, skip the microwave! It makes the topping soggy, and we worked too hard for that. Pop your portion, or the whole dish, back into a 350°F oven for about 10 minutes until it’s piping hot again. If you have an air fryer, that’s even better for crisping up the topping again fast!
Frequently Asked Questions About This Apple Crisp Recipe
I know that when you’re whipping up something delicious, you sometimes have little questions pop up that aren’t covered in the main steps. That’s totally normal! I’ve gathered up the things I hear most often about this recipe. Hopefully, these answers help you feel super confident tackling this apple crisp recipe!
Can I use different fruits in this apple crisp recipe?
Oh, absolutely! This whole technique works beautifully for so many orchard harvests. You can definitely swap out some or all of the apples for pears, or even use berries or peaches if they are in season. Just a heads up: if you use fruit that releases a lot more liquid than apples, like berries, you might want to increase the flour in the bottom filling by just one extra tablespoon to help thicken things up. Also, sweeter fruits might mean cutting back just a tiny bit on the granulated sugar. When in doubt, just taste that fruit mix before you pour it in!
What is the difference between an apple crisp and an apple crumble?
That’s a classic debate, isn’t it? For me, the main distinction always comes down to oats! This version is a true Oat Topping Crisp Recipe because we rely heavily on those rolled oats for that satisfying, grainy crunch when it bakes up. A traditional crumble topping usually just uses flour, sugar, and butter rubbed together—it’s softer, a bit more like a shortbread crust. If you want that super crunchy texture that crumbles wonderfully over ice cream, stick to the crisp formula we used here!
Can this be made ahead of time?
Yes, you can totally stage this ahead of time, especially if you’re trying to manage oven space during the holidays. You have two options for keeping things fresh. Option one: Prepare the apple filling and store it covered in the fridge for up to 24 hours. Prepare the topping separately and keep it chilled in a ziplock bag. Assemble right before baking, though you might need to add 5-10 minutes to the bake time since the apples will be colder. Option two: Assemble the whole thing, but don’t bake it. Keep it covered in the fridge, and then add about 15 minutes to the baking time. Either way, this is such a great option when planning out your meals, like when I make my apple cranberry cobbler!
Nutritional Estimates for This Cozy Autumn Desserts Treat
Now, let’s talk fuel! While I firmly believe that comfort food should never be quantified too strictly—it’s about the joy, after all—I know some of you like to keep an eye on the numbers. This is just a ballpark estimate based on the standard ingredients used above, so please remember that the exact type of apple or amount of butter changes things a little bit. But this gives you a good idea of what you’re getting into with this satisfying final dish.
As one of my favorite pumpkin banana bread recipes proves, dessert can still be hearty! Here are the general estimates per serving (this recipe makes about 6 generous servings):
- Calories: Around 350
- Total Fat: Roughly 18g (That’s the delicious butter doing the heavy lifting!)
- Carbohydrates: About 48g
- Protein: Approximately 4g
This is honestly a fantastic showing for a homemade baked dessert that tastes this good. It’s got fiber from the oats and apples, and honestly, it’s worth every warm, sweet bite.
Share Your Homemade Apple Crisp Experience
I am so excited for you to pull that dish out of the oven! Honestly, seeing the bubbly filling and golden oat topping is my favorite part of sharing this dessert. Once you’ve let it cool down for that essential 15 minutes, I really want to know what you thought!
Did you manage to resist eating the whole thing in one sitting? Did you try it with ice cream, or maybe a drizzle of salted caramel? Don’t keep those delicious moments to yourself!
Please take a moment to leave a star rating right below this section. It helps me know that this Best Apple Crisp Recipe is working its magic for everyone else, just like it does for my family. If you used any of the tips I shared, or if you made a slight tweak that blew your mind, tell me about it in the comments! I love reading your success stories and seeing your creations.
And if you snap a picture of that perfect, warm, cinnamon-scented scoop, tag me on social media—I’d love to share your beautiful results! Happy baking, and thanks for letting this recipe be part of your kitchen memories. You can find even more simple and satisfying treats when you browse through all the delicious dessert recipes here on the site!
PrintClassic Old Fashioned Apple Crisp Recipe

This recipe delivers a comforting classic dessert featuring tender, cinnamon-spiced apples beneath a crunchy, buttery oat topping. It is easy to prepare using common pantry ingredients for a satisfying homemade treat.
- Prep Time: 15 min
- Cook Time: 40 min
- Total Time: 55 min
- Yield: 6 servings 1x
- Category: Dessert
- Method: Baking
- Cuisine: American
- Diet: Vegetarian
Ingredients
- 6 medium apples (like Granny Smith or Honeycrisp), peeled, cored, and sliced
- 1/4 cup granulated sugar
- 1 tablespoon all-purpose flour
- 1 teaspoon ground cinnamon
- 1/4 teaspoon ground nutmeg
- 1 tablespoon lemon juice
- 1 cup old-fashioned rolled oats
- 1/2 cup all-purpose flour
- 1/2 cup packed light brown sugar
- 1/2 teaspoon ground cinnamon
- 1/4 teaspoon salt
- 1/2 cup (1 stick) cold unsalted butter, cut into small pieces
Instructions
- Preheat your oven to 375 degrees Fahrenheit. Lightly grease an 8×8 inch baking dish.
- In a large bowl, combine the sliced apples, granulated sugar, 1 tablespoon flour, 1 teaspoon cinnamon, nutmeg, and lemon juice. Toss gently until the apples are evenly coated.
- Spread the apple mixture in a single layer in the prepared baking dish.
- To make the topping, whisk together the rolled oats, 1/2 cup flour, brown sugar, 1/2 teaspoon cinnamon, and salt in a medium bowl.
- Cut in the cold butter using a pastry blender or your fingertips until the mixture resembles coarse crumbs. Do not overmix; you want some pea-sized pieces of butter remaining.
- Sprinkle the oat topping evenly over the apples in the baking dish.
- Bake for 35 to 45 minutes, or until the topping is golden brown and the apple filling is bubbly and tender when pierced with a fork.
- Let the apple crisp cool for at least 15 minutes before serving.
Notes
- Serve this warm apple crisp with a scoop of vanilla ice cream or a drizzle of caramel sauce for the ultimate comfort food experience.
- For a richer flavor, substitute half of the rolled oats with quick-cooking oats in the topping mixture.
- If your apples are very tart, increase the granulated sugar in the filling by one tablespoon.
Nutrition
- Serving Size: 1 serving
- Calories: 350
- Sugar: 30g
- Sodium: 120mg
- Fat: 18g
- Saturated Fat: 11g
- Unsaturated Fat: 7g
- Trans Fat: 0g
- Carbohydrates: 48g
- Fiber: 5g
- Protein: 4g
- Cholesterol: 45mg