
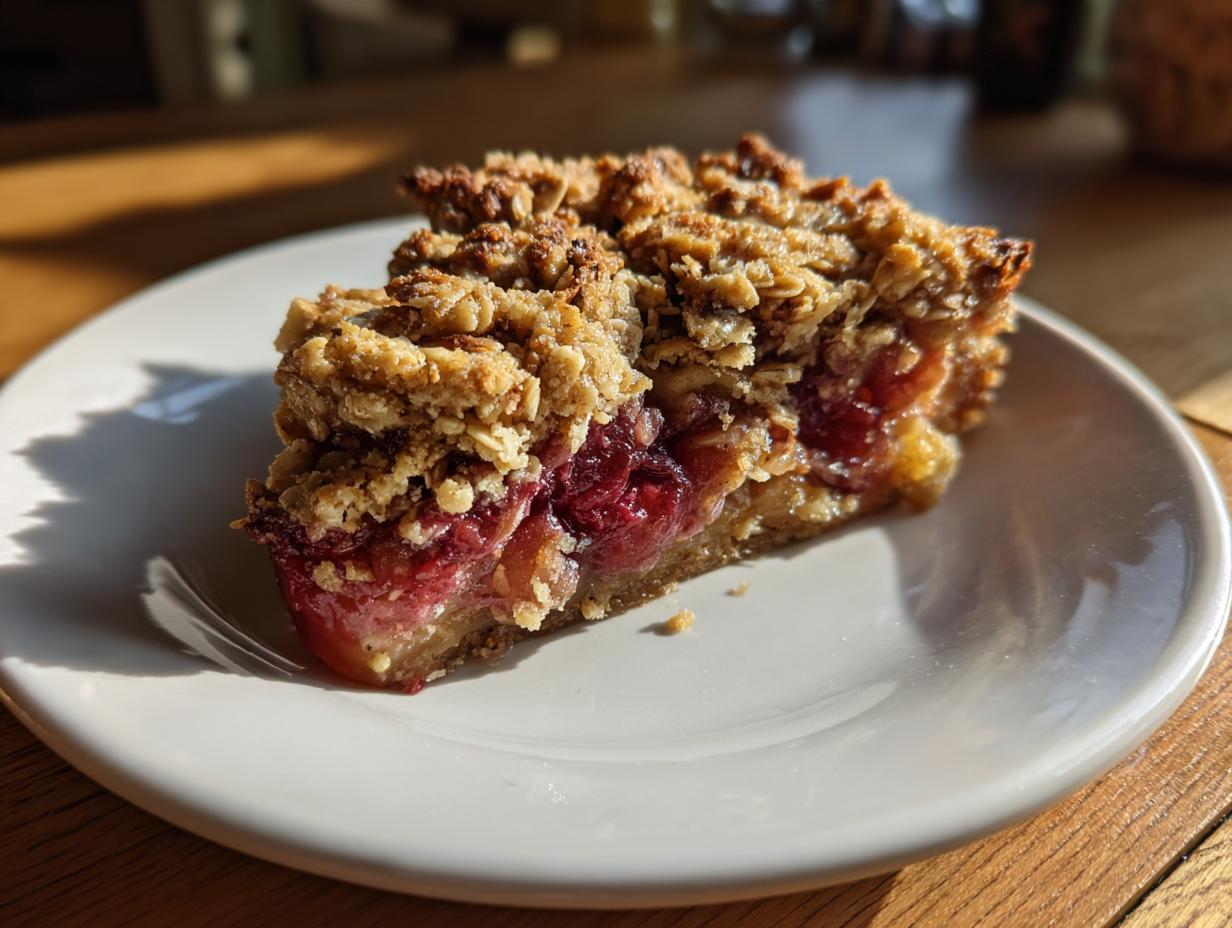
Oh, summer! Is there anything better than those gorgeous, tart cherries that just scream sunshine? When those little jewels are in season, I just can’t resist baking up a storm, and my absolute favorite way to celebrate them is with this easy sour cherry crisp. Seriously, it’s a lifesaver when you’re short on time but craving something truly special. We’re talking a 10-minute prep time, and you can even get ahead of the game by making parts of it the day before! Plus, it’s super adaptable, so whether you need a gluten-free treat or just want to try it with different nuts, it’s totally doable. It reminds me a little of how my grandma used to make simple fruit desserts, focusing on letting the fresh fruit really shine. It’s just the perfect kind of homemade goodness, you know? A real taste of summer in every bite, and exactly the kind of thing we love to share here at MDLATDMM Recipes. If you’re looking for a fuss-free way to enjoy awesome summer fruit desserts, you’ve found it!
- Why You'll Love This Easy Sour Cherry Crisp
- Gather Your Ingredients for the Best Sour Cherry Crisp
- How to Make Sour Cherry Crisp: Step-by-Step Guide
- Tips for Success with Your Tart Cherry Crisp Recipe
- Serving Suggestions for Your Old Fashioned Sour Cherry Crisp
- Storage and Reheating Your Sour Cherry Dessert
- Frequently Asked Questions About Sour Cherry Crisp
- Nutritional Information for This Fruit Crisp
- Share Your Delicious Sour Cherry Crisp Creations!
Why You’ll Love This Easy Sour Cherry Crisp
Trust me, this sour cherry crisp is a winner for so many reasons:
- Super Speedy Prep: We’re talking a genuine 10 minutes from scratch to oven! Perfect for those busy summer evenings.
- That Perfect Sweet & Tart Combo: The tartness of the cherries balanced with the sweet, crunchy oat topping is just divine.
- So Versatile: Easily made gluten-free with a few simple swaps, you can customize it to your heart’s content.
- Make-Ahead Magic: You can prep the filling and topping a day ahead, which is a total game-changer.
- Pure Comfort Food: It’s warm, cozy, and tastes like pure sunshine – exactly what you want from easy dessert recipes and summer baking recipes.
- Seriously Simple: No fussy techniques, just pure, delicious home cooking that tastes fantastic.
Gather Your Ingredients for the Best Sour Cherry Crisp
Alright, let’s get our goodies together for what I promise will be your new favorite sour cherry crisp! It’s all about using a few simple things to get that amazing flavor. You’ll want to have these on hand:
- Sour Cherries: You need about 4 cups. Fresh is wonderful if you can get them, but frozen work just as beautifully and are often easier to find year-round! Just make sure they’re all pitted.
- Granulated Sugar: Just 1/2 cup for the cherry filling to give it a little sweetness.
- Cornstarch: 2 tablespoons of this little magic dust is key to thickening up those cherry juices so they don’t run everywhere.
- Lemon Juice: A teaspoon of fresh lemon juice really brightens up the tartness of the cherries.
- Vanilla Extract: A teaspoon of this, and oh boy, does it smell amazing!
- Rolled Oats: Get a cup of these – they’re the heart of our crunchy topping. Make sure they’re rolled oats, not instant!
- All-Purpose Flour: We’ll use 1/2 cup. Or, if you’re going gluten-free, just swap this out for your favorite gluten-free flour blend – easy peasy!
- Brown Sugar: 1/2 cup, packed down nice and firm. The brown sugar is what gives our topping that perfect caramel-y flavor.
- Cinnamon: 1/2 teaspoon for that warm, cozy spice that just screams comfort.
- Salt: Just 1/4 teaspoon to balance everything out.
- Cold Unsalted Butter: You’ll need 1/2 cup, cut into little cubes. Make sure it’s cold – that’s super important for a nice crumbly topping! No substitutes here; real butter makes all the difference for a good tart cherry crumble.
- Chopped Nuts: 1/2 cup of chopped pecans or walnuts. They add such a great texture and nutty flavor!
How to Make Sour Cherry Crisp: Step-by-Step Guide
Okay, ready to whip up this amazing sour cherry crisp? It really is as easy as it sounds, and you’ll be amazed at how fast it comes together. We’re talking about a truly quick and simple process that gets you from ingredients to deliciousness in no time at all. So, grab your apron!
Preparing the Tart Cherry Filling
First things first, let’s get that glorious cherry filling ready. Just dump your 4 cups of sour cherries (fresh or frozen, remember!) into a decent-sized bowl. Sprinkle over the granulated sugar, cornstarch (this is our little helper to make sure the filling thickens up nicely), lemon juice, and that lovely vanilla extract. Give it all a gentle toss so everything is coated. Pour this beautiful cherry mixture right into your baking dish – a standard 8×8 inch pan works perfectly for this recipe. Look at those colors!
Creating the Perfect Sour Cherry Crisp Topping
Now for the best part – the crispy topping! In a separate bowl, whisk together your rolled oats, flour (or your gluten-free blend), brown sugar, cinnamon, and that pinch of salt. Make them friends! Then, grab your cold, cubed butter and toss it in. This is where the magic happens. You want to use your fingers, a pastry blender, or even a fork to cut or rub that butter into the dry stuff. Keep going until it all looks like coarse crumbs, kind of like wet sand. Don’t overwork it! Then, stir in your chopped nuts. This is your classic crisp topping recipe, and it’s going to make this sour cherry crumble extra special.
Assembling and Baking Your Homemade Sour Cherry Crisp
Time to bring it all together! Take that lovely crumb topping and sprinkle it evenly all over the cherry filling in your baking dish. Make sure you get it into all the nooks and crannies. Now, pop that into your preheated oven at 375°F (190°C). You’ll want to bake it for about 35 to 45 minutes. Keep an eye on it – you’re looking for that topping to get beautifully golden brown and for the cherry filling underneath to start bubbling up around the edges. That’s how you know your homemade sour cherry crisp is ready to go! This makes for such a satisfying baked fruit dessert.
Tips for Success with Your Tart Cherry Crisp Recipe
Making a truly great tart cherry crisp is all about a few little tricks I’ve picked up over the years. It’s what turns a good crisp into the best fruit crisp, you know? My grandma always said the little things make the biggest difference, and I totally agree!
Gluten-Free Cherry Crisp Variations
Now, if you’re going gluten-free, don’t you worry one bit! This recipe is super adaptable. Just make sure you use a good quality gluten-free flour blend in place of the all-purpose flour in the topping. Also, be sure your rolled oats are certified gluten-free – sometimes they can get a little cross-contamination in regular processing. The texture might be just a touch different, maybe even a little softer, but trust me, it’s still going to be absolutely delicious. It barely changes the flavor, and you still get that wonderful crunch.
Make-Ahead Fruit Crisp Guidance
This is my favorite part for busy days! You can totally get a head start on this make ahead fruit crisp. What I like to do is prepare the cherry filling and the crumb topping separately. Just pop them into their bowls, cover them up tight with plastic wrap, and pop them in the fridge. They’ll keep perfectly for up to 24 hours. Then, when you’re ready to bake, just assemble everything in the dish and bake as usual. It still smells amazing while baking, and it’s ready when you need it!
Serving Suggestions for Your Old Fashioned Sour Cherry Crisp
Okay, so you’ve got this beautiful, bubbly old fashioned sour cherry crisp fresh out of the oven. What’s next? Well, for me, it’s all about those perfect little finishing touches that really elevate it into true comfort food desserts territory. My go-to is always a big scoop of good old vanilla ice cream. That hot, tart cherry crisp with cold, creamy ice cream melting into it? Pure magic! Whipped cream is lovely too, or even a dollop of tangy crème fraîche if you want something just a little different. It really makes the whole dessert sing!
Storage and Reheating Your Sour Cherry Dessert
Got leftovers of this amazing sour cherry crisp? Lucky you! It keeps wonderfully. Just let it cool down completely, then cover the baking dish tightly with plastic wrap or transfer any extra to an airtight container in the fridge. It’ll stay delicious for about 3-4 days. When you’re ready for more, the best way I’ve found to reheat it is in a moderate oven, around 350°F (175°C), for about 10-15 minutes, or just until it’s warmed through and lovely and bubbly again. This keeps that topping nice and crisp, not soggy, which is key for any baked cherry desserts. It’s the perfect way to enjoy more of these sour cherry dessert ideas throughout the week!
Frequently Asked Questions About Sour Cherry Crisp
You know, I get asked a lot of questions about this sour cherry crisp, and I love it! It means you’re all diving in and making this deliciousness. Here are a few that pop up a lot:
Can I use other fruits in this crisp recipe?
Oh, absolutely! While sour cherries are my favorite for that perfect tartness, this recipe is really forgiving. You can totally use other fruits! Peaches, apples, plums, or even a mix of berries would be wonderful. Just make sure you have about 4 cups of fruit, and adjust the sugar a little depending on how sweet or tart your fruit is naturally. It’s a great way to use up whatever you have on hand, really showing you what to do with sour cherries and other seasonal fruits!
What if I don’t have nuts for the topping?
No worries at all! The nuts add a fantastic crunch, but it’s totally optional. If you don’t have pecans or walnuts, or if you have a nut allergy, just leave them out. The topping will still be wonderfully crisp and delicious with just the oats and butter. It’s still going to be a fantastic easy cherry dessert.
How do I know if my cherries are ripe and ready to use?
When you’re using fresh sour cherries, look for ones that are plump and have a deep, rich color. They should feel firm to the touch. If they feel a little soft or mushy, they might be past their prime. But honestly, even cherries that aren’t perfectly pretty will still bake up beautifully in a crisp! If you’re unsure, frozen sour cherries are already picked at their peak, so they’re always a reliable choice.
Nutritional Information for This Fruit Crisp
Just so you know, the nutrition info can really change depending on exactly what you use, but here’s a good ballpark for one serving of this delicious fruit crisp. We’re looking at roughly 350 calories, about 18g of fat (that’s mostly the butter and nuts, which we love!), 4g of protein, and around 50g of carbs. It’s got about 4g of fiber and 35g of sugar, mainly from the cherries and brown sugar. And just a little sodium, around 100mg. Keep in mind that this is just an estimate, but it gives you a great idea of what you’re working with for these wonderful sour cherry recipes!
Share Your Delicious Sour Cherry Crisp Creations!
Now that you’ve hopefully made this amazing easy sour cherry crisp, I’d absolutely LOVE to hear all about it! Did you try it with different nuts? Maybe make it gluten-free? Did it disappear in record time? Please, please leave a comment below and tell me everything! And if you snapped some photos, tag us on social media – I live for seeing your delicious creations. It makes all the baking so much more fun when we can share it!
You can also reach out via the contact page if you have any questions or just want to chat about baking!
PrintEasy Sour Cherry Crisp

A simple summer dessert featuring tart cherries with a sweet oat and nut topping. This recipe is perfect for home bakers looking for a make-ahead fruit crisp.
- Prep Time: 15 min
- Cook Time: 40 min
- Total Time: 55 min
- Yield: 6 servings 1x
- Category: Dessert
- Method: Baking
- Cuisine: American
- Diet: Vegetarian
Ingredients
- 4 cups fresh or frozen sour cherries, pitted
- 1/2 cup granulated sugar
- 2 tablespoons cornstarch
- 1 teaspoon lemon juice
- 1 teaspoon vanilla extract
- 1 cup rolled oats
- 1/2 cup all-purpose flour (or gluten-free flour blend)
- 1/2 cup packed brown sugar
- 1/2 teaspoon ground cinnamon
- 1/4 teaspoon salt
- 1/2 cup cold unsalted butter, cut into cubes
- 1/2 cup chopped pecans or walnuts
Instructions
- Preheat your oven to 375°F (190°C).
- In a large bowl, combine the sour cherries, granulated sugar, cornstarch, lemon juice, and vanilla extract. Toss gently to coat the cherries. Pour the cherry mixture into an 8×8 inch baking dish.
- In a separate medium bowl, combine the rolled oats, flour, brown sugar, cinnamon, and salt.
- Add the cold butter cubes to the oat mixture. Use a pastry blender, your fingers, or a fork to cut the butter into the dry ingredients until the mixture resembles coarse crumbs.
- Stir in the chopped nuts.
- Evenly sprinkle the oat topping over the cherry mixture in the baking dish.
- Bake for 35-45 minutes, or until the topping is golden brown and the cherry filling is bubbly.
- Let the crisp cool for at least 15 minutes before serving.
Notes
- For a gluten-free version, use a gluten-free flour blend and ensure your oats are certified gluten-free.
- You can prepare the cherry filling and the topping separately up to 24 hours in advance. Store them covered in the refrigerator. Assemble and bake just before serving.
- Serve warm with vanilla ice cream or whipped cream.
Nutrition
- Serving Size: 1 serving
- Calories: 350
- Sugar: 35g
- Sodium: 100mg
- Fat: 18g
- Saturated Fat: 10g
- Unsaturated Fat: 8g
- Trans Fat: 0g
- Carbohydrates: 50g
- Fiber: 4g
- Protein: 4g
- Cholesterol: 40mg