
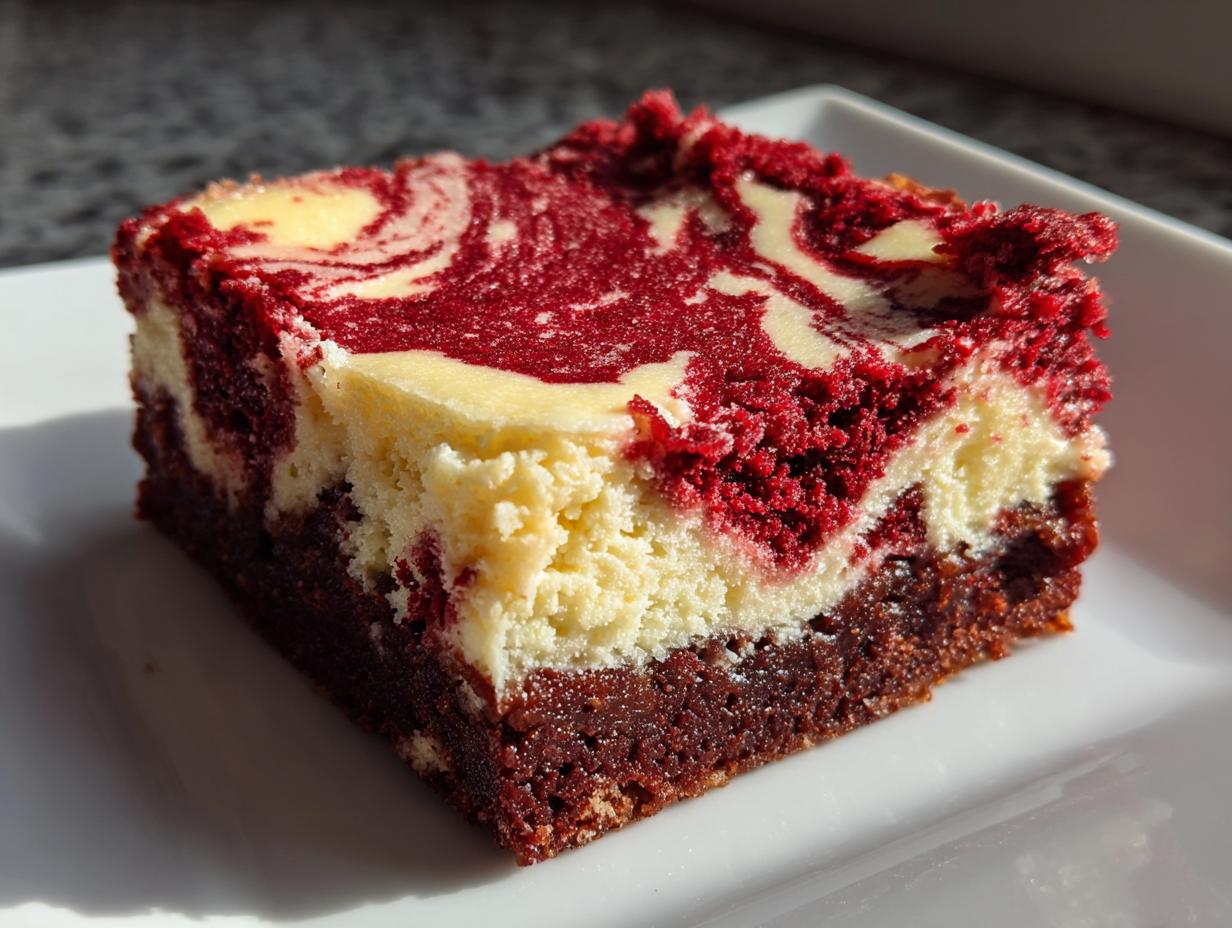
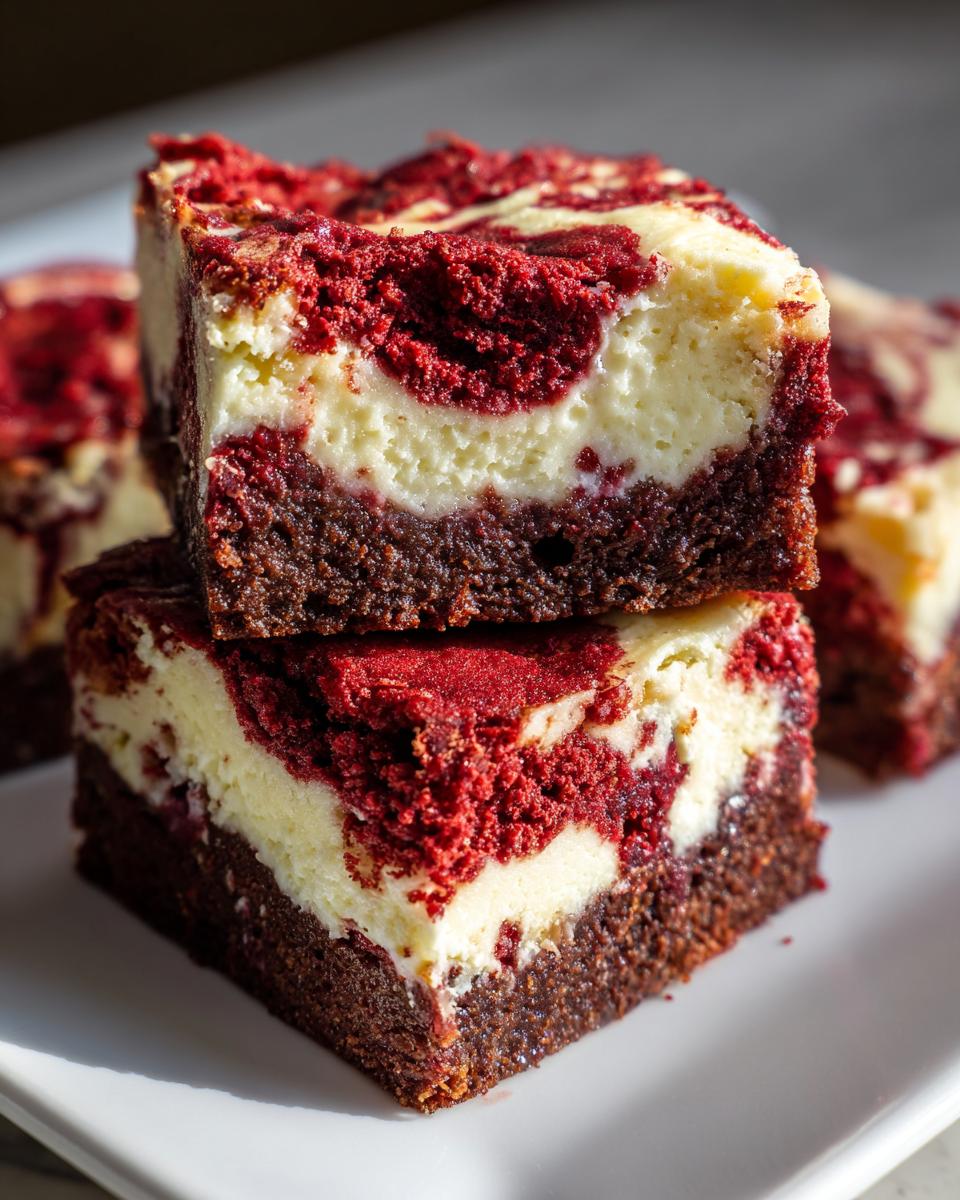
You know those moments in the kitchen when you realize you don’t have to choose just one favorite dessert? That’s exactly how I felt when I figured out how to create the ultimate chocolate-red velvet mashup: these incredible, totally show-stopping red velvet cheesecake brownies. Seriously, combining that deep, fudgy brownie base with a creamy ribbon of tangy cheesecake? It’s pure magic, and honestly, it tastes way more complicated than it is to make!
When I was rebuilding my connection to home cooking, recreating those comfort foods was everything. While a classic pot pie started the journey, these bars are what I turn to when I need a guaranteed win for the holidays or just a really tough Tuesday. They look super fancy—perfect for Christmas trays or Valentine’s Day—but trust me, they are surprisingly manageable. Forget fussy layers; we’re creating decadent dessert bars here that deliver on both texture and flavor without keeping you glued to the oven all day. Let’s get these red velvet cheesecake brownies mixed up!
If you’re looking for more easy, indulgent treats that still feel special, check out my collection of delicious dessert recipes. You’ll find favorites that are just as comforting!
- Why This Red Velvet Cheesecake Brownies Recipe Is Your Next Favorite Bake
- Gathering Ingredients for Your Red Velvet Cheesecake Brownies
- Step-by-Step Instructions: **How to Make Cheesecake Brownies**
- Tips for the Best Red Velvet Brownies Results
- Making Easy Red Velvet Cheesecake Brownies Ahead of Time
- Serving Suggestions for Your **Showstopping Baked Goods**
- Frequently Asked Questions About Red Velvet Cheesecake Brownies
- Estimated Nutritional Snapshot for This Decadent Dessert Bars Recipe
- Share Your Red Velvet Cheesecake Brownies Creations
Why This Red Velvet Cheesecake Brownies Recipe Is Your Next Favorite Bake
Making a dessert that wows your guests but doesn’t require a culinary degree is my main goal here at the kitchen counter. This red velvet cheesecake brownies recipe is one of those absolute winners. When I developed it, I wasn’t messing around—I wanted the best of both worlds, perfectly balanced.
Here’s why this layered dessert bar is going to become your go-to when you need something impressive:
- You nail that fudgy texture every single time; no sad, cakey brownies here!
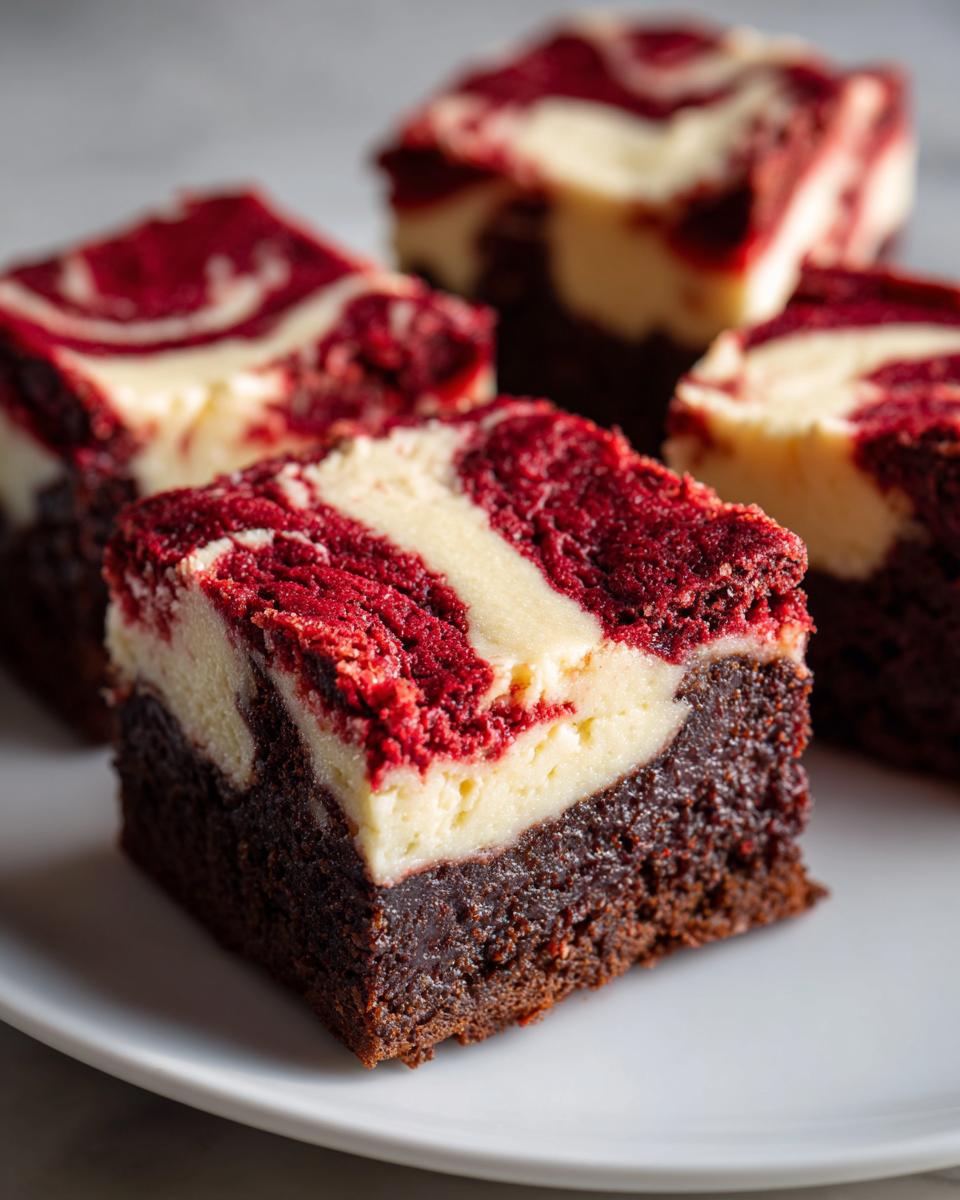
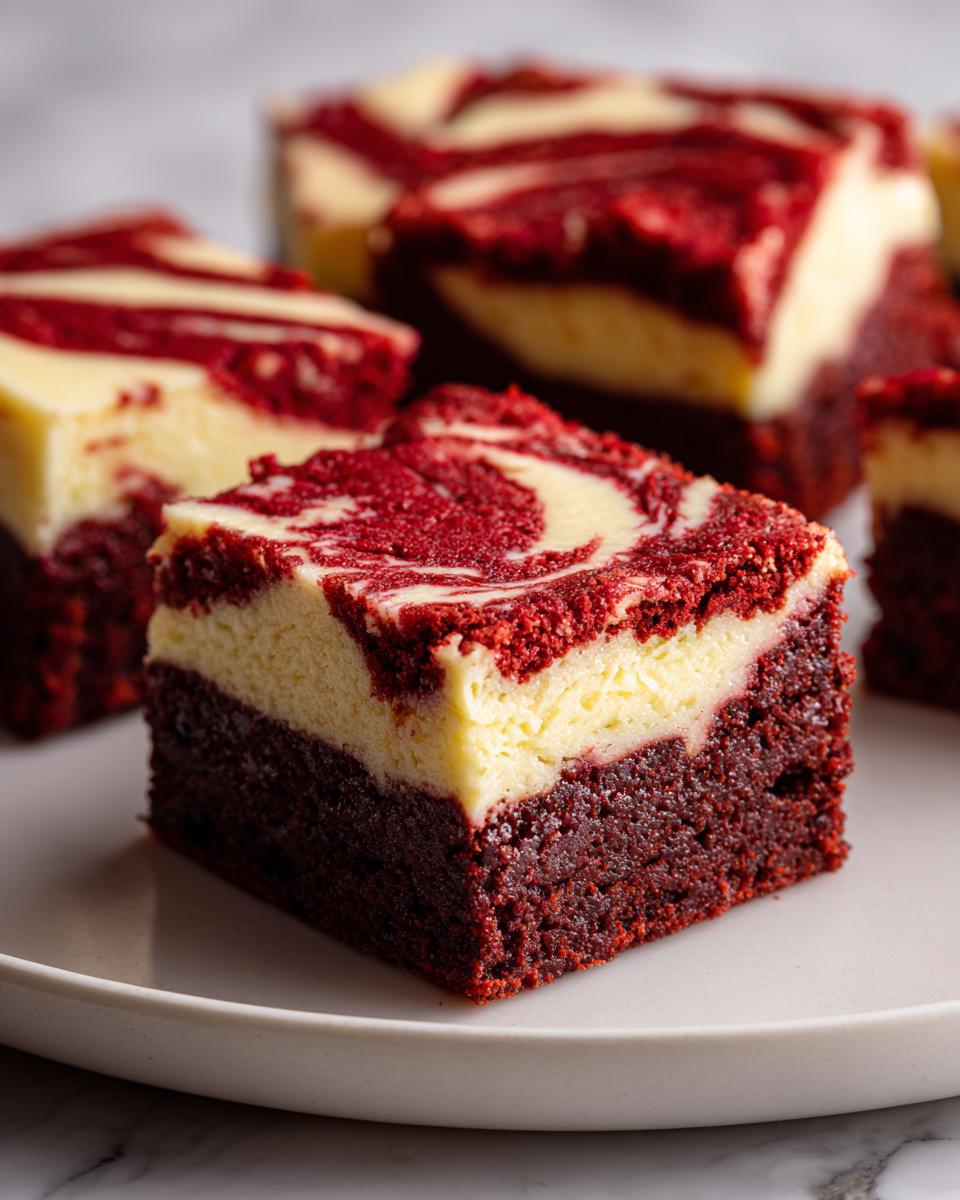
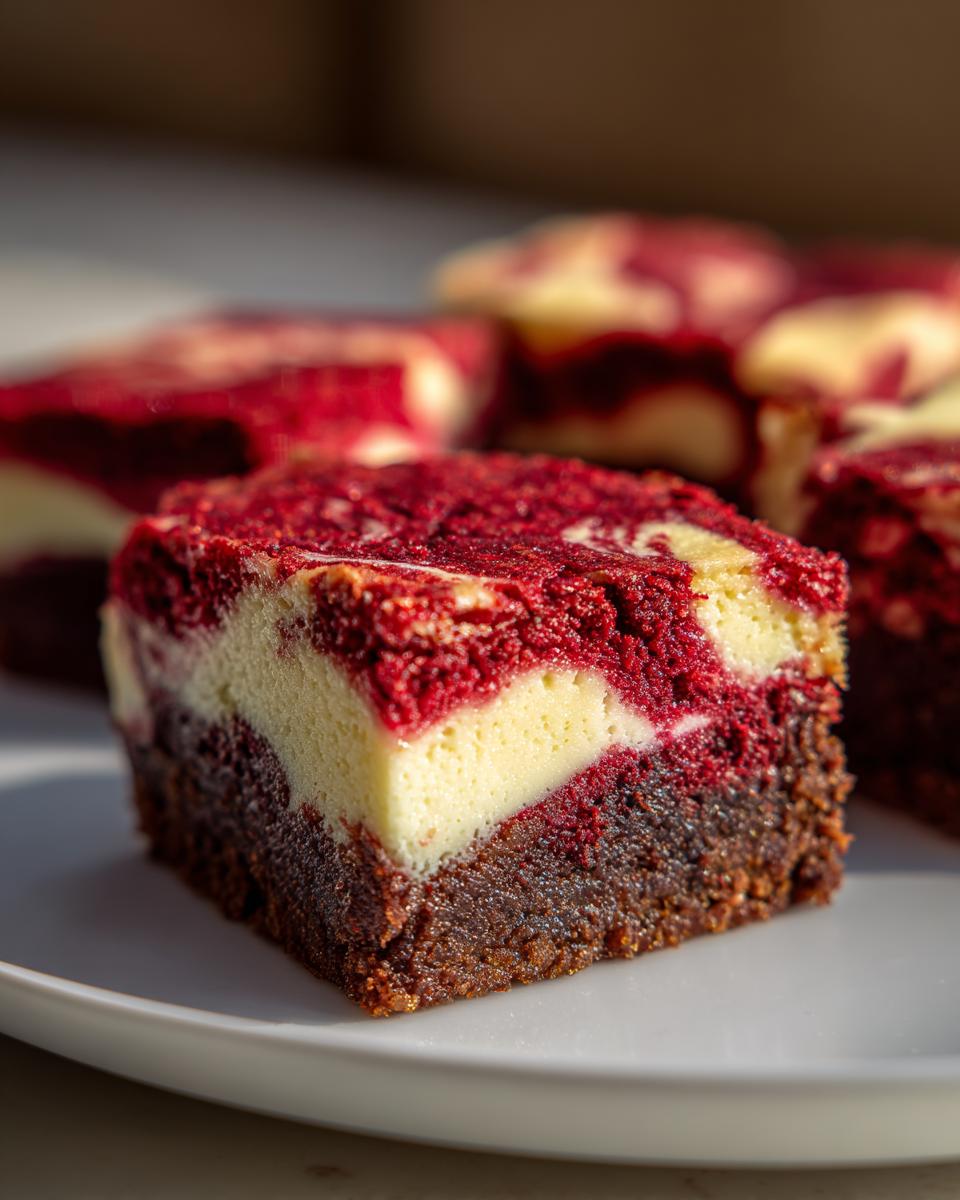
- The visual appeal is stunning—those bright red and creamy white ribbons make for a real showstopper dessert.
- It’s a genuinely reliable recipe. I’ve made sure the quantities guarantee both layers shine without one overpowering the other.
Want to see another recipe where mastering a creamy layer is key? You should absolutely check out my pumpkin bars with cream cheese frosting for more swirl inspiration.
Achieving the Perfect Fudgy Red Velvet Brownies Base
The secret to that intense, melt-in-your-mouth fudginess lies in the brownie batter itself. We use a higher ratio of sugar and melted butter compared to our flour, and we keep the leavening agents low. This means the brownie sets up dense and chewy—not airy. This sturdy, rich base is crucial because it needs to hold up when we layer that decadent cheesecake on top!
The Tangy Cream Cheese Swirl Dessert Factor
The cheesecake swirl isn’t just for looks, although they look amazing! That slight tanginess from the cream cheese is what cuts through the sweetness of the red velvet batter perfectly. It stops the whole bar from feeling heavy. It’s that contrast—the salty tang against the rich chocolatey red base—that makes every bite of this cream cheese swirl dessert addicting.
Gathering Ingredients for Your Red Velvet Cheesecake Brownies
Alright, let’s talk ingredients! As you know, around here, we believe in clarity. No ambiguous ‘pinch of this’ nonsense! Getting the quality right in these components means you’re halfway to the best red velvet cheesecake brownies ever. Grab everything below before you start mixing up those layers.
If you love using cream cheese in your bakes, you have to try my rich carrot cake cream cheese frosting sometime—it’s fantastic!
For the Fudgy Red Velvet Brownie Batter
This is the rich, fudgy foundation that needs to be mixed carefully so we don’t lose that density we talked about:
- 1 cup (2 sticks) unsalted butter, melted
- 2 cups granulated sugar
- 4 large eggs
- 1 teaspoon vanilla extract
- 1 teaspoon white vinegar (don’t skip this—it helps activate that red color!)
- 1 teaspoon red food coloring (or use gel paste for a really deep, vibrant red color)
- 1 1/2 cups all-purpose flour
- 1/2 cup unsweetened cocoa powder
- 1 teaspoon salt
For the Cream Cheese Swirl Layer
Here’s where the tangy contrast comes in. Temperature is key for this mixture to swirl beautifully:
- 8 ounces cream cheese, softened (this needs to be room temp so it’s perfectly smooth!)
- 1/2 cup granulated sugar (for the cheesecake layer)
- 1 large egg (at room temperature is best here, too)
- 1/2 teaspoon vanilla extract
Step-by-Step Instructions: **How to Make Cheesecake Brownies**
Okay, this is where we bring everything together! Even though these look like fancy bakery items from a high-end shop, I promise the process is super straightforward. Having everything ready beforehand really helps keep the flow going, which is key to not overmixing that brownie batter. You’re aiming for that delicious fusion without chaos!
If you want to try another super simple layered bake, my lemon cream cheese dump cake is just as easy and always a crowd-pleaser.
Prepping the Pan and Cheesecake Mixture
First things first, get that oven warmed up to 350°F (175°C). I always line my 9×13 pan with parchment paper, making sure the sides hang over the edge a little bit—that’s your handle to lift the whole thing out later! That parchment trick is a lifesaver, trust me.
Now for the cheesecake component: in a medium bowl, you want to beat that softened cream cheese with the 1/2 cup of sugar, the single egg, and the vanilla until it’s truly smooth and creamy. We are aiming for the perfect consistency for that lovely red velvet cheesecake brownies swirl, so make sure there are no lumps! Set that bowl aside while we whip up the batter.
Mixing the Fudgy Red Velvet Brownies Batter
Grab your large bowl for the brownie part. Whisk the melted butter and the big 2 cups of sugar together first. Then, add your four eggs one by one, mixing them just until they disappear into the mixture. Now, add the vanilla, that tiny bit of white vinegar, and your red coloring. Beat it until the color is even and vibrant—that vinegar really helps the color pop!
Here’s the crucial bit for fudginess: In a separate bowl, whisk your flour, cocoa powder, and salt. Slowly add this dry mix into the red wet ingredients. Stop mixing the second you see the last streak of flour disappear! If you keep going, you’re going to develop gluten, and those beautiful fudgy red velvet brownies will turn into tough, cakey bricks, which is the opposite of what we want.
Layering and Creating the Marbled Brownies Recipe Effect
Take about two-thirds of that gorgeous red batter and spread it evenly in your prepared pan. Don’t worry if it looks a little messy; that’s what’s fun about this process!
Next, drop spoonfuls of that reserved cheesecake mix right on top of the red layer. Then, pour the remaining one-third of the red velvet batter over those cheesecake dollops. Now came the fun part for my grandmother when she made her hybrid desserts: swirling! Use a butter knife or a wooden skewer and gently move it through the layers to create ribbons. Do not over-swirl! You want to see nice, distinct pockets of white cheesecake running through the red. We are aiming for a beautiful marbled brownies recipe look, not a uniform pink blob.
Baking and Cooling the Layered Dessert Bars
Pop that pan into the oven for about 30 to 35 minutes. When checking for doneness, you should look for the edges to be set. I test it like this: insert a toothpick near the center, and you want it to come out with moist crumbs attached—not wet batter, but definitely not bone dry! That guarantees your layered dessert bars stay wonderfully chewy.
This is the hardest part, but you absolutely must let them cool completely on a wire rack before you even think about cutting them. If you try while they are warm, the cheesecake layer will just squish out. Once they are totally cool, use those parchment overhang handles to lift the whole slab out before slicing into squares!
Tips for the Best Red Velvet Brownies Results
Now that you know the steps for making these gorgeous red velvet cheesecake brownies, I want to share a few little secrets to make sure you get that perfect bakery-quality result every single time. As a home cook, I know how frustrating it is when a recipe seems perfect on paper but misses the mark—so let’s skip the potential pitfalls!
If you’re looking for another chewy favorite, you might want to save my recipe for classic chocolate chip cookies, where temperature makes a huge difference!
Color Intensity and Ingredient Temperature for Red Velvet Cheesecake Brownies
When it comes to that signature red hue, don’t skimp! Liquid food coloring often gets absorbed by the cocoa and leaves you with a dull brown-ish color. For that vibrant, striking look that makes these red velvet cheesecake brownies so show-stopping, you really need to use a high-quality red gel paste coloring. It goes a long way!
Also, remember the cream cheese! I can’t stress this enough: if your cream cheese isn’t fully softened when you mix the filling, you will end up with lumps, not lovely ribbons. Lumps make swirling difficult, and that means you lose that creamy contrast in your cheesecake swirl brownies.
Preventing Cakey Texture in Your Moist Red Velvet Treats
The biggest crime in a brownie world is an overbaked, cakey texture, and we are not having that here! These are supposed to be decadent and fudgy, remember? That means two things:
- Do Not Overmix: Once that flour hits the wet stuff, mix only until it’s *just* combined. Overmixing activates the gluten, which gives you rise and structure—which belongs in a cake, not in these dense, moist red velvet treats.
- Watch the Clock: The toothpick test is your friend, but err on the side of underdone. If the toothpick has wet batter, it needs more time. If it comes out totally clean, you’ve gone too far! You want those moist crumbs clinging gently.
Making Easy Red Velvet Cheesecake Brownies Ahead of Time
One of the best things about a rich dessert bar like this is that you usually don’t have to stress about making it right before serving. That’s a game-changer, especially when you’re dealing with holiday baking schedules or entertaining! These easy red velvet cheesecake brownies actually benefit from a little chill time.
If you’re prepping early for a party, you have some great flexibility here. I find that chilling helps the cheesecake layer set up properly, which makes slicing so much cleaner. It’s one of those little blessings of baking for the weekend ahead of time!
Speaking of prepping ahead, if you like making cookies early, you must try my pumpkin snickerdoodle cookies—they hold up wonderfully for days!
Storage and Serving Suggestions for Decadent Dessert Bars
Because we have that wonderful cream cheese layer in here, storage is important to keep things safe and tasting fresh. Once these decadent dessert bars have completely cooled—and I mean completely cool, or they’ll sweat in the container—wrap them tightly with plastic wrap, or just keep them in an airtight container.
I actually prefer them chilled, right out of the fridge! When they are cold, the brownie base firms up just a touch more, and the cheesecake is gorgeously dense. This makes cutting super clean squares, which is essential when you’re trying to present them beautifully. If you prefer a slightly softer bite, just let the sliced bars sit out on the counter for about 20 or 30 minutes before guests arrive. They should never taste stale, either; properly wrapped, they stay fresh for three or four days, meaning you can bake them right after mixing the batter for that Valentine’s Day dessert recipe well in advance!
Serving Suggestions for Your **Showstopping Baked Goods**
We’ve made these gorgeous red velvet cheesecake brownies, and they look absolutely incredible just sitting on their own, right? But if you want to take them that extra step over the top—especially if you’re using them as a centerpiece for a holiday table or a big party—a little garnish goes a long way without masking that phenomenal flavor.
The thing about these bars is they are already so rich and decadent with the brownie and the cheesecake swirl, so trust me, you don’t need heavy sauces or complex toppings. Simplicity is key here to let that gorgeous red color and tangy swirl shine.
If you’re looking for another rich, but slightly less chocolatey, centerpiece, you have to try my pecan cream pie. That’s a whole different kind of decadent!
Here are a few simple ideas I always turn to when preparing these bars:
- A Light Dusting: Keep it classic! Once the bars are completely cool and sliced, grab a fine-mesh sieve and dust the tops very lightly with powdered sugar. It catches beautifully in the grooves of the swirl and gives it that lovely, snowy, finished look—perfect for Christmas!
- Fresh Berries: Because red velvet pairs so well with a little tartness, serving these alongside a small dollop of fresh raspberries or maybe even a few sliced strawberries is just divine. A little pop of fresh fruit cuts right through the richness.
- A Hint of White Chocolate: If you want a little extra flair, take a vegetable peeler and gently shave some high-quality white chocolate over the top. These delicate curls look so elegant against the deep red color.
- A Cold Glass of Milk: Honestly, sometimes the best accompaniment is the simplest! A rich, fudgy bar like this is just begging for a cold glass of milk or maybe even a sophisticated pairing of black coffee to balance out all that rich flavor.
No matter what you choose, remember these bars traveled all the way from being a simple baking idea to a true showstopper—they really stand on their own credit! If you try one of these tips, be sure to snap a picture and share it! I love seeing how you serve up your red velvet cheesecake brownies!
Frequently Asked Questions About Red Velvet Cheesecake Brownies
I get so many questions once people have tried baking these beauties! It just goes to show how much everyone loves this combination. Whether you’re new to baking or looking for a trick to make them even better next time, here are the things I hear most often about these red velvet cheesecake brownies.
If you’re looking for another fantastic holiday bake, make sure you check out my recipe for a super moist gingerbread cake!
Can I use box mix to make easy red velvet cheesecake brownies?
Oh, the shortcut question! I totally get it when you need an easy red velvet cheesecake brownies recipe for a last-minute gathering. While I developed this recipe from scratch because I wanted total control over the fudgy texture, yes, you absolutely can use a box mix for the red velvet base. You’ll typically fold in the required wet ingredients listed on the box, maybe reducing the liquid slightly so it stays dense enough to support that cheesecake layer.
But hear me out: the cocoa powder and the vinegar/coloring process in my recipe are what really drive that distinct red velvet flavor. If you use a box mix, you might lose some of that depth, but you will definitely save time!
Why are my cheesecake swirls sinking into the brownie and cheesecake hybrid?
This is the most common little flop when making any sort of cheesecake swirl brownies! It almost always comes down to temperature or consistency. If your red velvet brownie batter is too thin and runny, the cheesecake layer will naturally fall right through it to the bottom. This is why we make sure we don’t over-stir the flour in!
Also, if your cheesecake layer is too soft—meaning your cream cheese wasn’t softened enough or you added too much liquid—it becomes heavy and sinks. You want the cheesecake mixture to be thick, like a smooth frosting, so it stays right on top while you swirl it. A quick 15-minute chill of the cheesecake mix can sometimes help if your kitchen is super warm!
What is the best occasion for serving red velvet cheesecake brownies?
Honestly, these are perfect anytime you want to impress someone! Because of that gorgeous, bold red color, they are sensational for any big celebration. I see them flying off the platter at Valentine’s Day dessert parties because they just scream romance and indulgence. They are also a massive hit on Christmas dessert recipes trays when you need something that looks festive next to all the green and white sweets.
But truly, they are just as good for a weekend treat when you need a seriously decadent dessert bar. Don’t save them just for holidays; you deserve a red velvet cheesecake brownie any day of the week! If you want some more ideas on indulging, check out this great advice from The Best Indulgent Treat.
Estimated Nutritional Snapshot for This Decadent Dessert Bars Recipe
Okay, let’s talk numbers for a second, just so you have the full picture of what you’re baking! Remember, because these are homemade, these values are just guides based on the standard ingredients listed. What butter brand you use or how much chocolate chip you sneak in will change the real count!
But generally, here is what one square of these richly satisfying decadent dessert bars looks like, estimated:
- Serving Size: 1 square
- Calories: 350
- Total Fat: 21g
- Carbohydrates: 38g
- Sugar: 35g
- Protein: 4g
These are definitely a treat, but one that is totally worth every delicious, fudgy, tangy bite!
Share Your Red Velvet Cheesecake Brownies Creations
Now that you’ve mastered the ultimate brownie and cheesecake mashup, I really, truly want to see what you’ve been up to in your kitchens! Baking is always better when we can share the joy, right? Don’t you dare hide those beautiful swirls away!
I pour so much effort into making sure these recipes, like these incredible red velvet cheesecake brownies, work perfectly for you at home. So, if you gave them a try, please let me know how they turned out! Did your swirl stay distinct? Did your family devour the whole pan in one night?
The best way you can support this little corner of home cooking is by rating the recipe right at the top of the page. Five stars tells me this recipe is a keeper and reminds others out there that they should definitely give this decadent dessert a shot!
If you manage to snap a gorgeous picture—and knowing how stunning these layered dessert bars are, I bet you did!—please tag me on social media. I absolutely love seeing these showstopping baked goods brought to life by real home cooks like you. It keeps me inspired to keep sharing those time-honored, yet totally achievable, recipes!
Need to know more about me and why I love developing these reliable classics? You can pop over to my About Page anytime. And if you tried these and want to see what others are saying, check out why everyone is raving about the brownies featured on Mandy Cooking’s version!
PrintDecadent Red Velvet Cheesecake Brownies with Cream Cheese Swirls
Make these show-stopping Red Velvet Cheesecake Brownies. You get a rich, fudgy red velvet base perfectly marbled with a creamy, tangy cheesecake swirl for an impressive dessert that is surprisingly easy to make.
- Prep Time: 20 min
- Cook Time: 35 min
- Total Time: 55 min
- Yield: 16 servings 1x
- Category: Dessert Bars
- Method: Baking
- Cuisine: American
- Diet: Vegetarian
Ingredients
- 1 cup (2 sticks) unsalted butter, melted
- 2 cups granulated sugar
- 4 large eggs
- 1 teaspoon vanilla extract
- 1 teaspoon white vinegar
- 1 teaspoon red food coloring (or gel paste for deep color)
- 1 1/2 cups all-purpose flour
- 1/2 cup unsweetened cocoa powder
- 1 teaspoon salt
- 8 ounces cream cheese, softened
- 1/2 cup granulated sugar (for cheesecake layer)
- 1 large egg (for cheesecake layer)
- 1/2 teaspoon vanilla extract (for cheesecake layer)
Instructions
- Preheat your oven to 350°F (175°C). Line a 9×13 inch baking pan with parchment paper, leaving an overhang on the sides for easy removal. Lightly grease the paper.
- Prepare the cheesecake layer: In a medium bowl, beat the softened cream cheese, 1/2 cup sugar, 1 egg, and 1/2 teaspoon vanilla extract until the mixture is smooth and creamy. Set this aside.
- Prepare the red velvet brownie batter: In a large bowl, whisk together the melted butter and 2 cups of sugar until combined.
- Whisk in the 4 eggs one at a time until incorporated. Stir in the vanilla extract, white vinegar, and red food coloring until the batter is uniformly red.
- In a separate bowl, whisk together the flour, cocoa powder, and salt. Gradually add the dry ingredients to the wet ingredients, mixing only until just combined. Do not overmix the brownie batter.
- Pour about two-thirds of the red velvet brownie batter into the prepared baking pan and spread evenly.
- Dollop spoonfuls of the cheesecake mixture over the brownie batter. Then, pour the remaining one-third of the red velvet batter over the cheesecake dollops.
- Use a knife or a skewer to gently swirl the batters together to create a marbled effect. Do not over-swirl; you want distinct layers and ribbons of cheesecake.
- Bake for 30 to 35 minutes. The edges should look set, and a toothpick inserted near the center should come out with moist crumbs attached, not wet batter.
- Let the brownies cool completely in the pan on a wire rack before lifting them out using the parchment overhang.
- Once cool, cut into squares. These layered dessert bars are best served chilled or at room temperature.
Notes
- For the deepest red velvet color, use a high-quality red gel food coloring instead of liquid coloring.
- Do not overbake; these brownies are best when they are fudgy, not cakey.
- Chill the cheesecake layer mixture slightly before swirling if you find it too soft to manage.
Nutrition
- Serving Size: 1 square
- Calories: 350
- Sugar: 35
- Sodium: 210
- Fat: 21
- Saturated Fat: 12
- Unsaturated Fat: 9
- Trans Fat: 0.5
- Carbohydrates: 38
- Fiber: 1
- Protein: 4
- Cholesterol: 75