
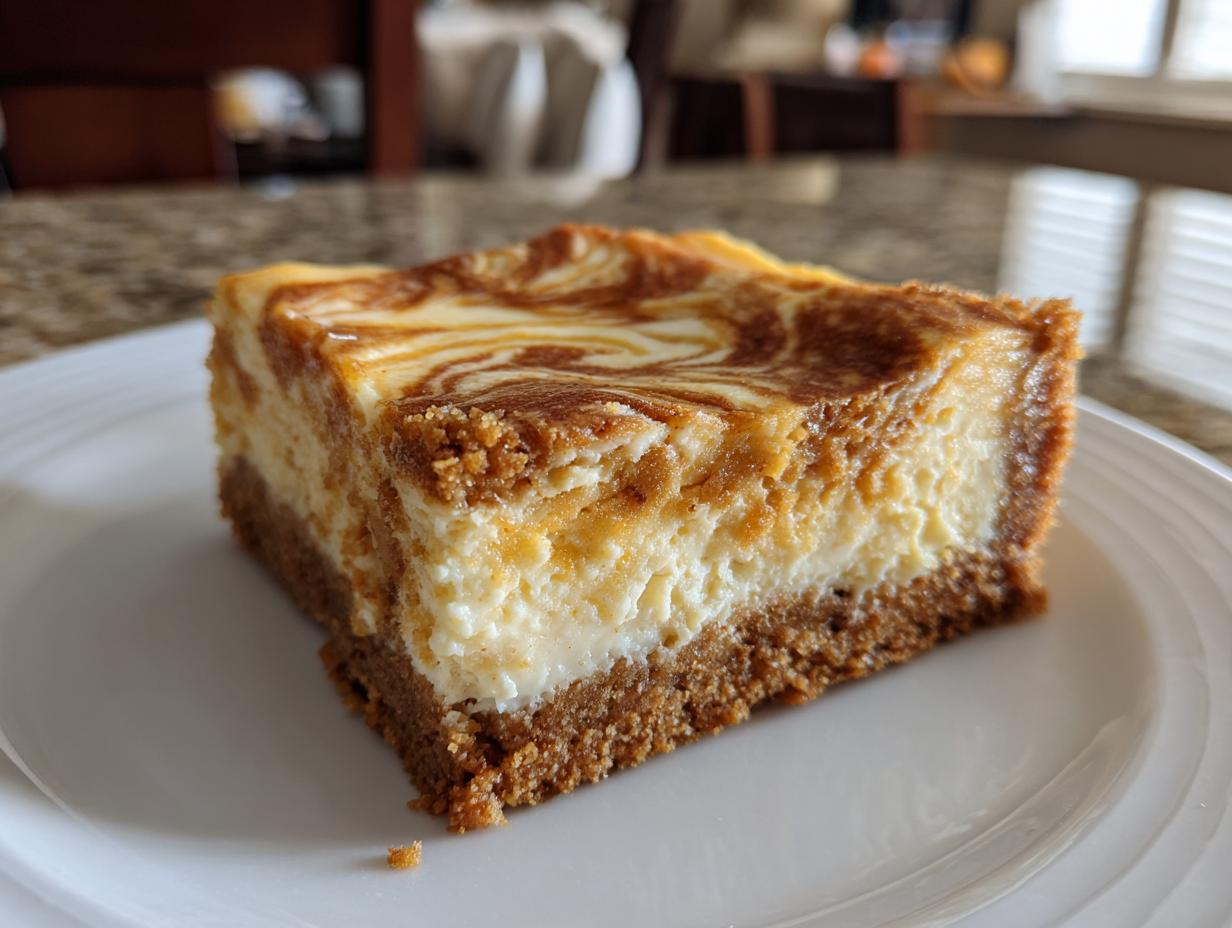
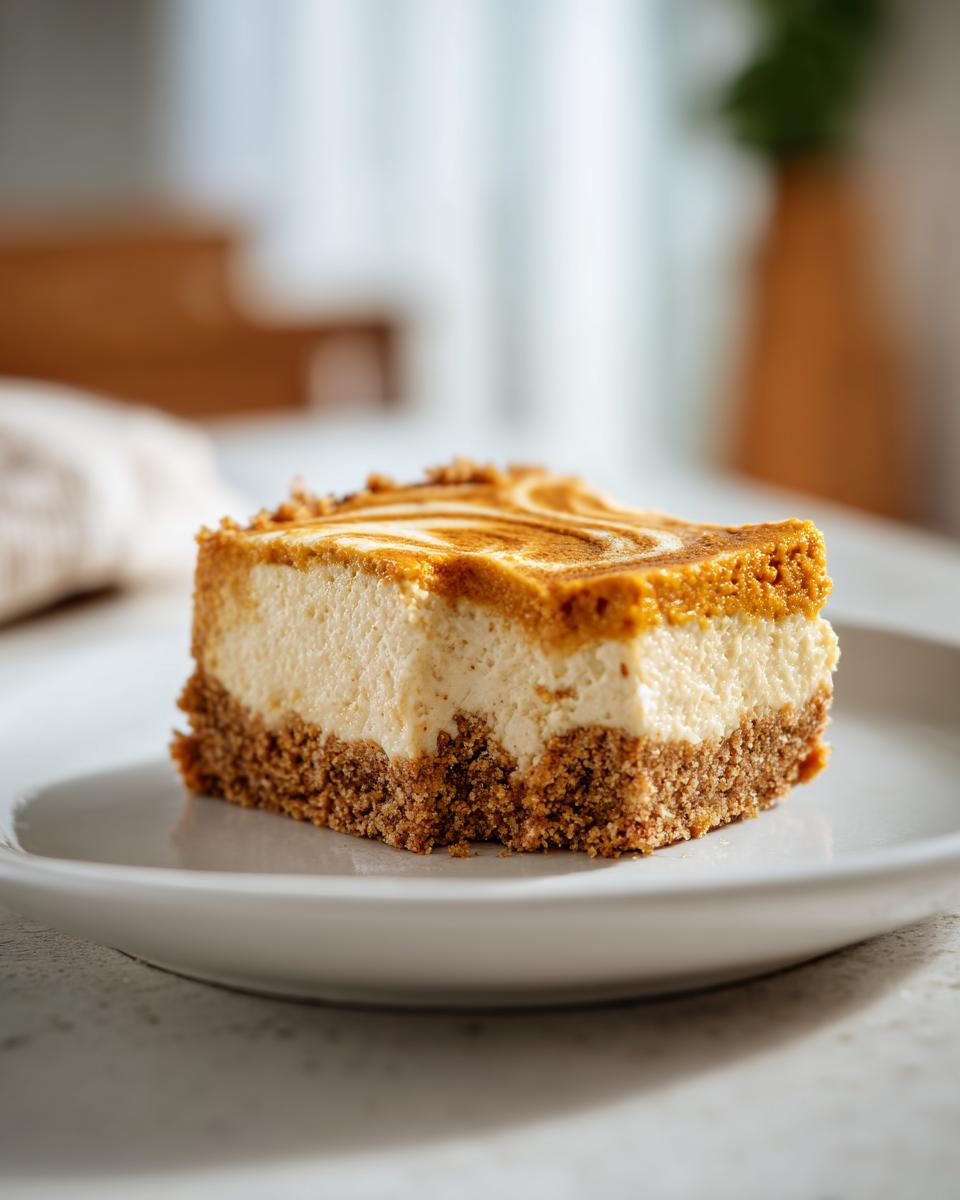
Oh, hello there! Can you just *feel* that crisp autumn air? It’s the season for cozy sweaters, warm spices, and, of course, all things pumpkin! And if you’re like me, you’re already dreaming of desserts that just scream fall. Forget the fuss for a minute, because I’ve got the ultimate treat for you: Pumpkin cheesecake bars! These beauties are like a delicious hug, perfectly blending that creamy, dreamy cheesecake texture with all the warm, spiced goodness of pumpkin pie. Seriously, I made these for our last family get-together and they disappeared faster than leaves in a windy gust!
- Why You'll Love These Pumpkin Cheesecake Bars
- Gather Your Ingredients for Pumpkin Cheesecake Bars
- Crafting the Perfect Pumpkin Cheesecake Bars: Step-by-Step
- Tips for Perfectly Sliced Pumpkin Cheesecake Bars
- Ingredient Notes and Substitutions for Pumpkin Bars
- Make-Ahead and Storage for Your Pumpkin Dessert Bars
- Frequently Asked Questions About Pumpkin Cheesecake Bars
- Estimated Nutritional Information
- Share Your Delicious Pumpkin Cheesecake Bars!
Why You’ll Love These Pumpkin Cheesecake Bars
Honestly, these aren’t just great, they’re practically perfect for so many reasons:
- They’re super easy to whip up – even if you’re a baking newbie!
- That combo of creamy cheesecake and spiced pumpkin? Total crowd-pleaser.
- You can totally make them ahead, which is a lifesaver for busy weeks.
- They’re the ultimate potluck desserts and perfect for holidays.
- No fussy water bath required for these easy cheesecake bars!
Gather Your Ingredients for Pumpkin Cheesecake Bars
Alright, let’s get our ducks in a row and gather everything we need for these magical pumpkin cheesecake bars. It’s pretty straightforward, which is exactly what we love, right? You’ll need the basics for that yummy crust: graham cracker crumbs (or gingersnaps if you’re feeling fancy!), a little granulated sugar, and some melted butter. For the super creamy cheesecake part, grab your softened cream cheese, more sugar, a couple of eggs, and a splash of vanilla extract – make sure that cream cheese is nice and soft, trust me on this! And for the star of the show, the pumpkin layer, you’ll need pumpkin puree (not pie filling, mind you – we want pure pumpkin goodness!) and that classic cozy blend of pumpkin pie spice and a little extra cinnamon. Using good quality pumpkin puree really does make a difference, so grab a good can!
Crafting the Perfect Pumpkin Cheesecake Bars: Step-by-Step
Alright, let’s roll up our sleeves and get these gorgeous pumpkin cheesecake bars made! It’s a pretty simple process, and honestly, the most satisfying part is watching those beautiful swirls come to life. We’re going to do this step by step, no stress, no fuss. And the best part? No messy water bath needed for these babies! It’s a fuss-free way to get that amazing cheesecake texture, kind of like how you can get great results with my sourdough starter without all the fuss of daily feeding.
Preparing the Crust for Your Pumpkin Cheesecake Bars
First things first, we need to get our oven preheated to 350°F (175°C). While that’s warming up, grab your 9×13 inch baking pan and line it with parchment paper. Leave a little overhang on the sides – this is like our little helper handle to lift the bars out later, super handy! Now, for the crust: just mix up your graham cracker crumbs (or if you’re feeling adventurous, use gingersnap crumbs for an extra kick!), a quarter cup of sugar, and your melted butter. Stir it all together until it’s nice and crumbly, then press it evenly into the bottom of your lined pan. Pop that into the oven for about 10 minutes just to set it. We’ll let it cool a bit while we make the stars of the show.

Making the Creamy Cheesecake Layer
This is where that creamy magic happens! In a big bowl, beat your softened cream cheese with 3/4 cup of sugar. Make sure that cream cheese is *really* soft – I can’t stress this enough, otherwise, you’ll end up with lumps, and nobody wants that! Once it’s super smooth, beat in your eggs one at a time. Don’t overmix here, just until they’re incorporated. Finish it off with a good splash of vanilla extract. You want it smooth and luscious, kind of like in my lemon cream cheese dump cake recipe!
Creating the Spiced Pumpkin Swirl
Now for the fun part – the swirl! In a separate little bowl, whisk together your pumpkin puree, pumpkin pie spice, and a bit of cinnamon. This is where all those cozy fall aromas come in. Now, grab your prepared crust. Pour about half of the cream cheese mixture over it. Then, dollop about half of your pumpkin mixture on top of that. Use a knife or a toothpick and gently swirl it all together. Don’t go crazy, we just want pretty ribbons! Repeat this with the remaining cream cheese and pumpkin mixtures. Think of it like painting a little edible masterpiece, kind of like the swirls in my pumpkin banana bread!

Baking and Chilling Your Pumpkin Cheesecake Bars
Okay, time to bake these beauties! Carefully place your pan back into the 350°F oven and bake for about 30 to 35 minutes. You’re looking for the edges to be set, but the center should still be a little jiggly – that’s perfectly normal! Once they’re done, take them out and let them cool completely on a wire rack. This is SUPER important, guys. Then, and this is the *most* crucial part for those clean cuts, pop them in the fridge for at least 2 hours, or even longer if you can wait. Seriously, patience is key here for a perfect slice of cheesecake!
Tips for Perfectly Sliced Pumpkin Cheesecake Bars
Okay, so you’ve made these gorgeous pumpkin cheesecake bars, and now you want them to look as good as they taste, right? The secret to those super clean cuts is simple: make sure those bars are *really* well-chilled! Seriously, they need at least a couple of hours in the fridge, maybe even longer. Once they’re firm, use the parchment paper overhang to lift the whole slab out of the pan. Grab a nice, sharp knife – a long one works best. Before each cut, give the knife a quick wipe with a damp cloth, then dry it. This little trick stops any crumbs or sticky bits from messing up your next slice. It might sound like a lot, but trust me, it makes all the difference!

Ingredient Notes and Substitutions for Pumpkin Bars
Let’s chat about a few things that make these bars extra special! First off, the pumpkin. Make sure you’re grabbing pure pumpkin puree, not the pumpkin pie filling. The filling already has spices and sugar in it, and we want to control all those flavors ourselves! If you want to add a little zing to your crust, definitely try the gingersnap crust swap – it adds this lovely warm spice that pairs beautifully with the pumpkin and cheesecake. And for the cheesecake itself? You absolutely *have** to use full-fat block cream cheese. The light or whipped versions just won’t give you that rich, creamy texture we’re after. Trust me, it’s worth it for that super smooth, decadent bite!
Make-Ahead and Storage for Your Pumpkin Dessert Bars
The best part about these pumpkin dessert bars? They’re total make-ahead superstars! You can totally whip them up a day or two before your event. Just make sure to let them chill *really* well, and then store them covered in the fridge. They actually taste even better the next day when all those flavors have had a chance to really meld together. No reheating needed for these beauties, just pop them out of the fridge and serve!
Frequently Asked Questions About Pumpkin Cheesecake Bars
Got questions about these delightful pumpkin cheesecake bars? I’ve got answers! Here are a few things folks often ask:
Can I use pumpkin pie filling instead of pumpkin puree?
Oh, this is a common one! It’s really best to stick with plain pumpkin puree. Pumpkin pie filling already has sugar and spices mixed in, and we want to control those flavors ourselves for the perfect balance in these pumpkin dessert bars. Sticking to puree gives us that pure, rich pumpkin flavor we’re looking for!
Why are my cheesecake bars cracking?
Don’t you worry about a little crack! A tiny crack usually means the cheesecake was baked just right and is beautifully tender. Sometimes, overbeating the eggs after the cream cheese is mixed can introduce too much air, causing them to puff up and then fall, leading to cracks. Also, baking a bit too long can dry out the edges. But honestly, even with a tiny crack, these creamy cheesecake bars will still taste amazing cracked or not!
How long do these bars last in the fridge?
These make ahead dessert wonders are quite forgiving. You can store them, covered tightly, in the refrigerator for up to 3-4 days and they’ll still be absolutely delicious! They actually tend to get even better on day two as the flavors really meld together.
Can I use a different crust, like gingersnaps?
Absolutely! While the classic graham cracker crust is wonderful, swapping it out for gingersnap crumbs is fantastic, especially for fall baking recipes. The spicy kick of gingersnaps pairs wonderfully with the pumpkin and cheesecake. Just use the same amount of crumbs and melted butter, press it into the pan, and bake it for the same 10 minutes.
Estimated Nutritional Information
Now, I know we’re not baking these for a diet, but it’s always good to have a ballpark idea, right? Keep in mind these numbers are just rough estimates, based on the ingredients we used. The exact calories, fat, and sugar can shift a bit depending on the brands you grab, especially for the cream cheese and butter. But generally, you’re looking at about 200 calories per slice, with around 12g of fat and 18g of sugar. It’s definitely a fall treat worth savoring!
Share Your Delicious Pumpkin Cheesecake Bars!
Alright, you’ve made these amazing pumpkin cheesecake bars, and I bet they look absolutely incredible! I’d just LOVE to see them. Did they make it to a potluck? Did everyone rave? Snap a pic and tag me on social media – seriously, seeing your creations makes my whole week! And if you really loved them, please consider leaving a quick rating or a comment below. It means the world to me and helps other home cooks find their new favorite fall treat!
PrintPumpkin Cheesecake Bars
Creamy pumpkin cheesecake swirled into a spiced crust, these bars offer the perfect blend of fall flavors in an easy-to-serve format.
- Prep Time: 20 min
- Cook Time: 45 min
- Total Time: 2 hr 45 min
- Yield: 24 bars 1x
- Category: Dessert
- Method: Baking
- Cuisine: American
- Diet: Vegetarian
Ingredients
- 1 1/2 cups graham cracker crumbs
- 1/4 cup granulated sugar
- 6 tablespoons unsalted butter, melted
- 16 ounces cream cheese, softened
- 3/4 cup granulated sugar
- 2 large eggs
- 1 teaspoon vanilla extract
- 1 cup pumpkin puree
- 1/2 teaspoon pumpkin pie spice
- 1/4 teaspoon ground cinnamon
Instructions
- Preheat your oven to 350°F (175°C). Line a 9×13 inch baking pan with parchment paper, leaving an overhang on the sides.
- In a medium bowl, combine graham cracker crumbs and 1/4 cup sugar. Pour in melted butter and stir until crumbs are moistened. Press mixture evenly into the bottom of the prepared pan.
- Bake the crust for 10 minutes. Remove from oven and let cool slightly.
- In a large bowl, beat softened cream cheese and 3/4 cup sugar until smooth. Beat in eggs one at a time, then stir in vanilla extract.
- In a separate small bowl, whisk together pumpkin puree, pumpkin pie spice, and cinnamon.
- Pour half of the cream cheese mixture over the crust. Dollop half of the pumpkin mixture over the cream cheese layer. Swirl gently with a knife or toothpick.
- Pour the remaining cream cheese mixture over the pumpkin layer. Dollop the remaining pumpkin mixture on top and swirl again.
- Bake for 30-35 minutes, or until the edges are set and the center is mostly firm.
- Let the bars cool completely in the pan on a wire rack.
- Chill in the refrigerator for at least 2 hours, or until firm.
- Use the parchment paper overhang to lift the bars out of the pan. Cut into squares.
Notes
- For a gingersnap crust, substitute 1 1/2 cups gingersnap cookie crumbs for graham cracker crumbs.
- Ensure your cream cheese is fully softened to avoid lumps in the cheesecake layer.
- Chill time is crucial for clean cuts.
- These bars can be made up to 2 days in advance and stored in the refrigerator.
Nutrition
- Serving Size: 1 bar
- Calories: 200
- Sugar: 18g
- Sodium: 100mg
- Fat: 12g
- Saturated Fat: 7g
- Unsaturated Fat: 5g
- Trans Fat: 0g
- Carbohydrates: 20g
- Fiber: 1g
- Protein: 3g
- Cholesterol: 40mg