
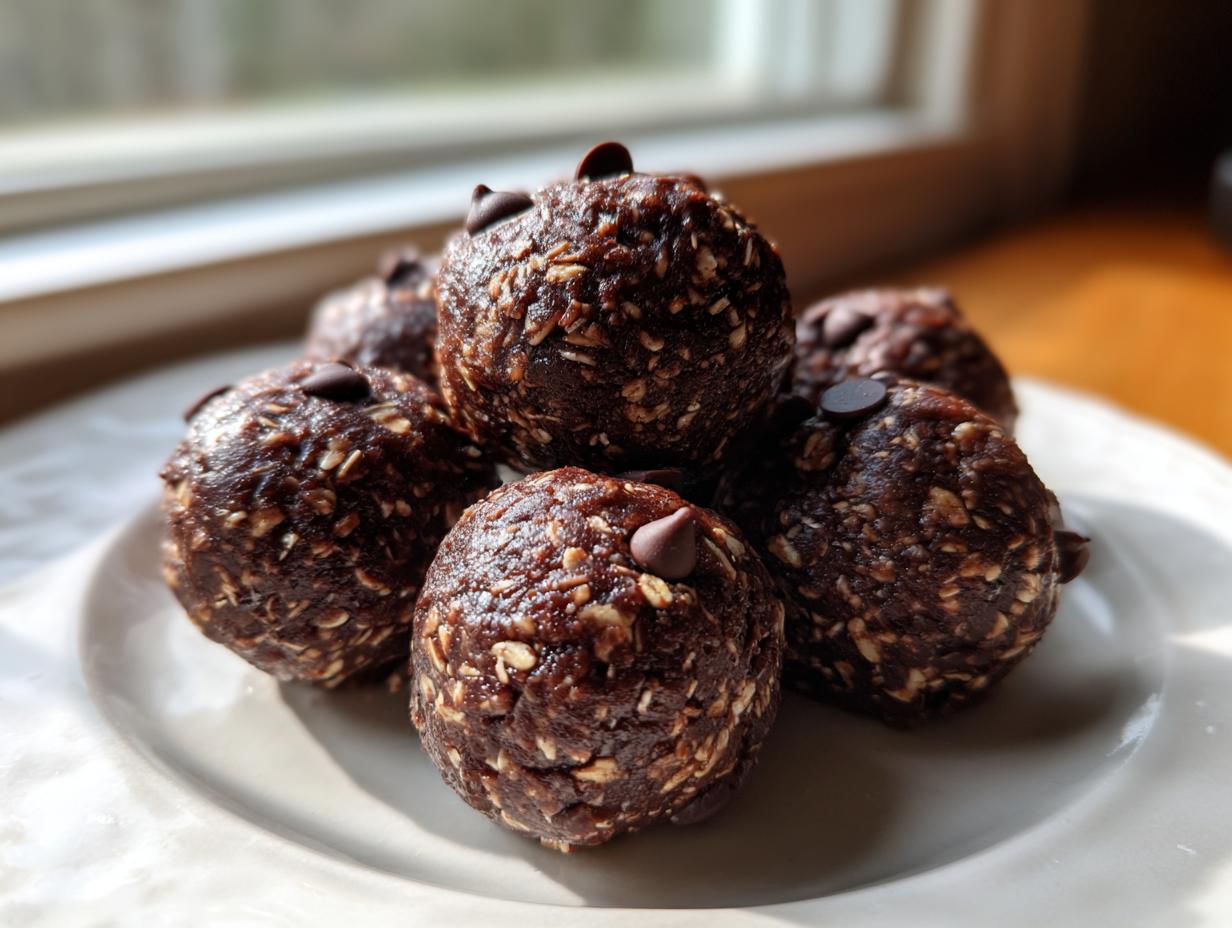
Honestly, on those days when I’m juggling deadlines and just need food *now*, everything feels like a compromise. I used to grab something processed, and I’d feel that afternoon slump hit hard. But not anymore! I perfected this recipe so I always have healthy protein snacks ready to go. Trust me when I say these No-Bake Chocolate Peanut Butter protein balls are the absolute best thing to happen to my snack drawer. They require zero oven time and come together in just 15 minutes flat. It’s like having the ultimate, guilt-free sweet treat waiting for you. You can find the inspiration behind these simple bites over at Potluck Eats, but I made this version my own so it’s perfect for my busy life!
- Why You Need These No-Bake Chocolate Peanut Butter protein balls
- Essential Ingredients for Perfect protein balls
- How to Make Quick protein balls in 15 Minutes
- Using protein balls as Post Workout Fuel and Meal Prep Energy Balls
- Storage and Reheating Instructions for Homemade protein balls recipe
- Variations for Your Favorite protein balls
- Troubleshooting Common Issues with Making protein balls
- Frequently Asked Questions About protein balls
- Estimating the Nutrition in These protein balls
Why You Need These No-Bake Chocolate Peanut Butter protein balls
I love an impressive dessert, but let’s be real—most days I need fuel, and I need it fast. That’s why these protein balls are my absolute favorite; they fit right into my hectic schedule without any drama. Forget dirtying up pans or waiting for an oven to preheat! Seriously, you can whip these up while your coffee is brewing.
Here’s why these need to be in your rotation immediately, especially if you’re looking for healthy food prep ideas:
- They take approximately 15 minutes of active prep time. That’s it!
- They are packed with satisfying protein, making them ideal healthy protein snacks.
- No baking needed! Which means no need to stress about cooling racks or burnt edges.
- They are the perfect grab-and-go solution for busy mornings or afternoon slumps.
Essential Ingredients for Perfect protein balls
When you’re making something this simple, every ingredient has to pull its weight, right? That’s why I stick rigorously to these measurements. We aren’t messing around with too many things here; we want maximum flavor and high protein bites with minimum fuss. This recipe is my go-to for meal prep energy balls because the ingredient list is so short and manageable.
Here’s what you’ll need to gather for about 16 glorious little bites:
- 1 cup rolled oats (the trusty base for texture!)
- 1/2 cup peanut butter (creamy works best for binding!)
- 1/4 cup honey or maple syrup (this is what makes them stick!)
- 1/4 cup protein powder (vanilla or chocolate, your choice!)
- 2 tablespoons chia seeds (these are optional but add great fiber)
- 1/4 cup mini chocolate chips (the payoff for all your hard work!)
Check out my recipe for high-protein overnight oats if you need more ideas for packing in that morning fuel!
Ingredient Notes and Substitutions for your protein balls
Okay, so I know not everyone keeps the exact same pantry staples. If you’re planning on making refined sugar free protein bites, swap the honey out for maple syrup—no problem at all. For the protein powder, I usually use vanilla whey, but plant-based powders work too, though you might need a touch more sweetener.
If your dough ends up looking a little too crumbly, don’t panic! It just means your peanut butter was stiffer than mine. I call this the secret to making perfect almond milk protein balls—just add one teaspoon of almond milk at a time until it comes together. It’s all about that perfect, non-sticky dough!
How to Make Quick protein balls in 15 Minutes
This is truly where the magic happens, and it’s so fast you almost don’t believe it! Since these are fantastic no bake treats, we are skipping the oven entirely. I rely heavily on my food processor here to save my arms and cut down on prep time. If you have one, use it—it makes these easy energy bites come together in minutes. Seriously, you can find more detailed steps, similar to mine, over at Fresh and Tasty Recipes!
- First up, toss your dry stuff—the rolled oats, the protein powder, and those chia seeds if you’re adding them for extra goodness—right into the food processor bowl. Pulse it a few times until those oats are just coarsely broken down. We want texture, not dust!
- Next, dump in the sticky duet: your peanut butter and your sweetener (honey or syrup). Now, run the processor until it all starts wrestling together and forms one big, sticky, gorgeous, cohesive dough mass. It should look like it definitely belongs together.
- Take that dough out and mix in the mini chocolate chips by hand. I like folding them in so they don’t get pulverized into dust by the machine.
- Time to divide! Roll uniform balls, about one inch across—aim for consistency so they all look nice together on your meal prep containers.
- Lay them out on a parchment-lined sheet and pop them in the fridge for at least 30 minutes. This chilling step is non-negotiable; it firms them up so they don’t melt into puddles. You can check out quick weeknight dinners if you need another quick idea while you wait!
Tips for Success When Rolling Your protein balls
The dough needs to be sticky enough to hold a shape but not so sticky it sticks to your entire palm! If it’s feeling too loose, pop it into the freezer for five minutes. When you roll them, use slightly damp hands—that water barrier stops all the peanut butter from taking over your skin. And please, don’t skip that final chill time! Chilling these easy energy bites makes all the difference between a perfectly shaped ball and a slightly melted blob.
Using protein balls as Post Workout Fuel and Meal Prep Energy Balls
I cannot stress enough how amazing these are when you’re trying to stick to a good routine. When I leave the gym, I need something fast, high in protein, and honestly, something that tastes like a reward. These protein balls absolutely nail that post workout fuel requirement without hitting me with a ton of unnecessary junk.
But they shine just as brightly for general healthy food prep ideas! I usually make a double batch on Sunday. They are perfect to tuck into individual bags for the week. Having these high protein bites ready means I never have to make a bad choice when the 3 PM hunger monster strikes. You can stash these away for quick snacks all week long. If you want more easy breakfast ideas to streamline your mornings, check out my favorites!
You should absolutely look at how others use their peanut butter snacks, too; check out some ideas for similar energy balls inspiration!
Storage and Reheating Instructions for Homemade protein balls recipe
Since these are no bake treats, their texture is slightly softer than something baked, so storage is key to keeping them perfect! The absolute best place for these is in an airtight container right in the refrigerator. I’ve found that if I leave them out on the counter for too long, especially if it’s warm in my kitchen, they get a little too soft and greasy.
When stored properly in the fridge, these high protein bites stay good for up to a full week. You don’t need to reheat them at all—they are designed to be eaten cold or at room temperature! If I make a huge batch, I actually freeze half of them. Just place them in a freezer-safe bag, and when you want one, just let it thaw on the counter for about 15 minutes. Quick, easy, perfect!
Variations for Your Favorite protein balls
Once you master the base of these protein balls—oats, peanut butter, and your preferred protein powder—the world is your oyster! I love changing things up so I don’t get bored of my quick protein snack. If you’re looking for a fun change, try swapping out the chocolate chips for some shredded coconut or chopped dried cranberries. It gives them a completely different vibe!
You can also play with the flavor extracts. A tiny splash of almond extract instead of vanilla changes the whole profile! If you want something super cozy to mimic one of my other favorite recipes, check out my guide to pumpkin protein cups for inspiration on spices you could add, like a pinch of cloves or extra cinnamon here.

For those of you looking for different protein boosts, check out what others are doing with variations, like the ideas found at Keto Millennial. It just shows how adaptable these healthy dessert bites truly are!
Troubleshooting Common Issues with Making protein balls
Even though these are no bake treats, sometimes the dough just doesn’t cooperate! Don’t let a sticky mess ruin your day. If your mixture is too wet and won’t hold a shape when you try to roll it, try adding in another tablespoon of your protein powder or maybe a small handful of extra oats. Don’t overdo it at once!
Now, if you’re having the opposite problem—your mix is really crumbly and dry, like sad sand that won’t stick together—it’s time to introduce a little moisture. Since these are great easy energy bites, a tiny splash of liquid helps everything bind. I always reach for a teaspoon of water or, even better, a splash of almond milk and mix it in until it just starts to feel right again. A little adjustment goes a long way!
Frequently Asked Questions About protein balls
Can I freeze these healthy protein snacks?
Yes, absolutely! Freezing is my secret for having them ready years ahead of time, which is great for my healthy food prep ideas. Just place them in a single layer on a plate or baking sheet first so they freeze separately, then transfer them to a freezer-safe bag or container. They keep beautifully for up to three months! When you want one, just let it sit on the counter for about 15 minutes to soften up a touch.
What can I use if I don’t want to use peanut butter?
If you have a peanut allergy, or just want to change things up into different energy boosting snacks, you can swap the peanut butter 1:1 with almond butter or sunflower seed butter. Both work really well in these homemade protein balls recipe batches. Just make sure that whatever nut or seed butter you choose is creamy and relatively smooth so it helps bind everything together correctly.
Are these considered low sugar snack balls?
They definitely trend toward the lower sugar side compared to commercial bars, especially since we are using refined sugar free protein bites ingredients like maple syrup instead of processed white sugar. The sugar content comes mostly from the natural sweetness in the peanut butter and the sweetener you choose. They’re a great way to satisfy a craving for guilt free sweets without a huge sugar spike!
What’s the best protein powder for these quick healthy snacks?
I usually rely on high-quality vanilla or chocolate whey concentrate, but honestly, whey isolate works great too. The key is using one that your body digests well! If you use a powder that is much thicker or absorbs a ton of liquid, you might need that extra splash of delicious dessert recipes liquid we talked about earlier to get the right consistency for rolling.
Estimating the Nutrition in These protein balls
Okay, let’s talk numbers for a minute. I always want you to feel good about what you’re eating, and that means knowing what’s inside these little energy boosters. Keep in mind, because we are using ingredients like different brands of peanut butter or whether you grab honey or maple syrup, these are just smart estimates. If you use the recipe exactly as written, you’ll be close!
Here’s a general look at what one of these healthy protein snacks delivers:
- Serving Size: 1 ball
- Calories: About 110
- Protein: A solid 7g!
- Fat: 6g
- Carbohydrates: 10g (with 2g of Fiber!)
- Sugar: Around 5g
If you’re optimizing for the lowest sugar intake possible, you can see more tips on choosing the right sweeteners over at Recipes Surge. But honestly, for a little homemade treat, 5 grams of sugar is a total win!
PrintNo-Bake Chocolate Peanut Butter Protein Balls
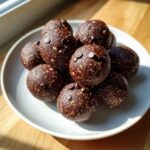
Make these quick, no-bake chocolate peanut butter protein balls. They are a simple, high-protein snack perfect for meal prep or post-workout fuel.
- Prep Time: 15 min
- Cook Time: 0 min
- Total Time: 15 min
- Yield: 16 servings 1x
- Category: Snack
- Method: No Bake
- Cuisine: American
- Diet: Vegetarian
Ingredients
- 1 cup rolled oats
- 1/2 cup peanut butter
- 1/4 cup honey or maple syrup
- 1/4 cup protein powder (vanilla or chocolate)
- 2 tablespoons chia seeds (optional, for extra fiber)
- 1/4 cup mini chocolate chips
Instructions
- Place the rolled oats, protein powder, and chia seeds (if using) into a food processor. Pulse until the oats are coarsely ground.
- Add the peanut butter and honey (or maple syrup) to the food processor. Process until the mixture comes together and forms a sticky dough.
- Transfer the dough to a bowl and fold in the mini chocolate chips by hand.
- Roll the mixture into small, uniform balls, about 1 inch in diameter.
- Place the protein balls on a baking sheet lined with parchment paper.
- Refrigerate for at least 30 minutes to firm up before serving.
Notes
- For a refined sugar free snack, use maple syrup instead of honey.
- If the mixture seems too dry, add one teaspoon of almond milk at a time until it holds together.
- Store these easy energy bites in an airtight container in the refrigerator for up to one week.
Nutrition
- Serving Size: 1 ball
- Calories: 110
- Sugar: 5g
- Sodium: 50mg
- Fat: 6g
- Saturated Fat: 1.5g
- Unsaturated Fat: 4.5g
- Trans Fat: 0g
- Carbohydrates: 10g
- Fiber: 2g
- Protein: 7g
- Cholesterol: 0mg