
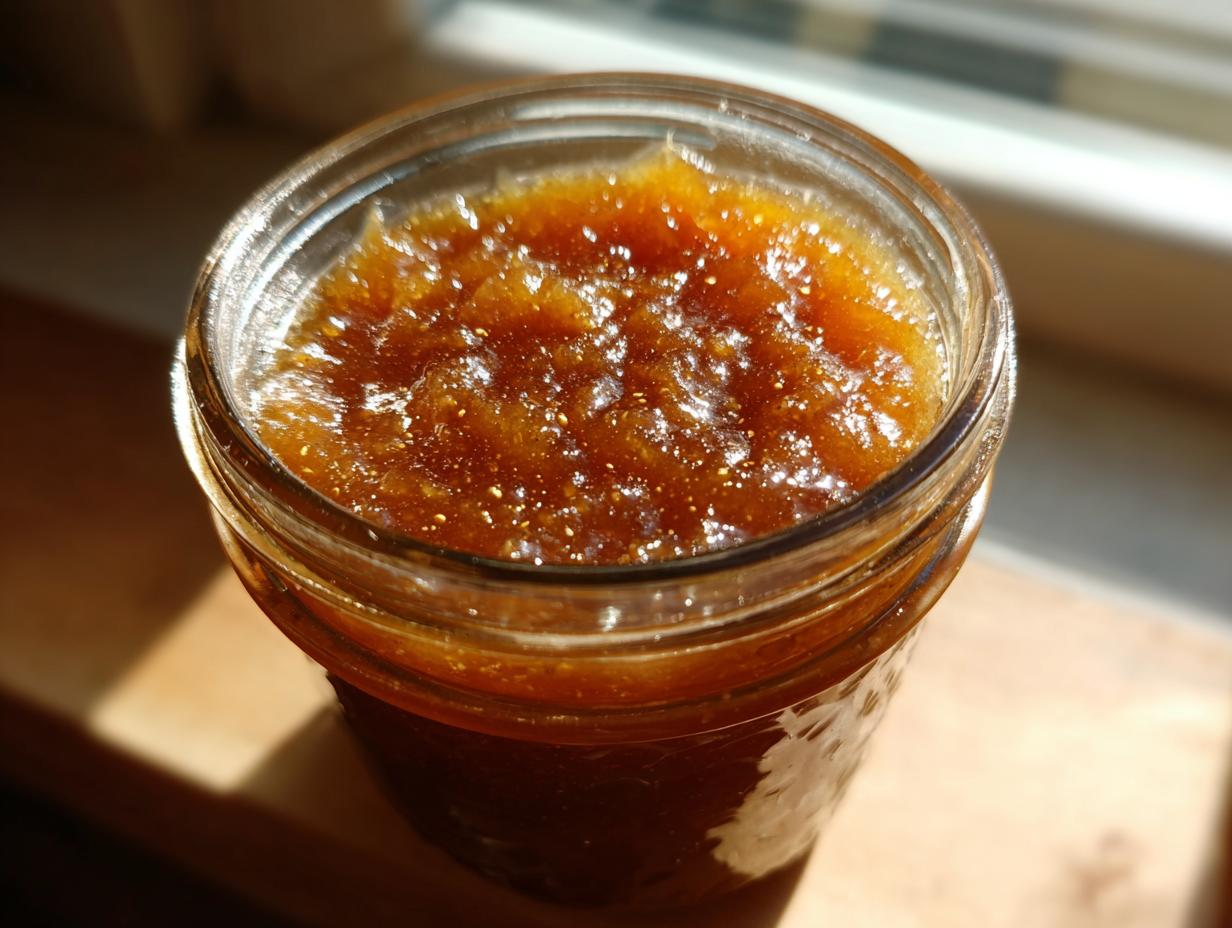
Oh, there’s just something so special about opening a jar of homemade pear preserves, isn’t there? It’s like uncorking a little bit of autumn sunshine! Especially when it’s that good, old-fashioned chunky kind that just makes you think of cozy kitchens and happy traditions. My journey with food started with exactly this feeling – the connection to heritage and the joy of making something delicious from scratch, just like my grandma used to. This recipe for pear preserves is one I’ve tested and perfected again and again, focusing on that wonderful chunky texture and, most importantly, safe water-bath canning methods so you can fill your pantry with confidence. It’s all about bringing that simple, honest cooking back into your home. You can learn more about my food philosophy here!
- Why You'll Love This Old-Fashioned Pear Preserves Recipe
- Ingredients for Pear Preserves Without Pectin
- Essential Equipment for Canning Pear Preserves
- Step-by-Step Guide to Making Pear Preserves
- Tips for Perfect Pear Preserves
- Serving Suggestions for Your Homemade Pear Preserves
- Storage and Reheating Instructions
- Frequently Asked Questions About Pear Preserves
- Estimated Nutritional Information
Why You’ll Love This Old-Fashioned Pear Preserves Recipe
Get ready to fall in love with these preserves! They’re:
- Super easy to whip up, even if you’re new to canning.
- Packed with that wonderful, pure pear flavor you just can’t get from store-bought.
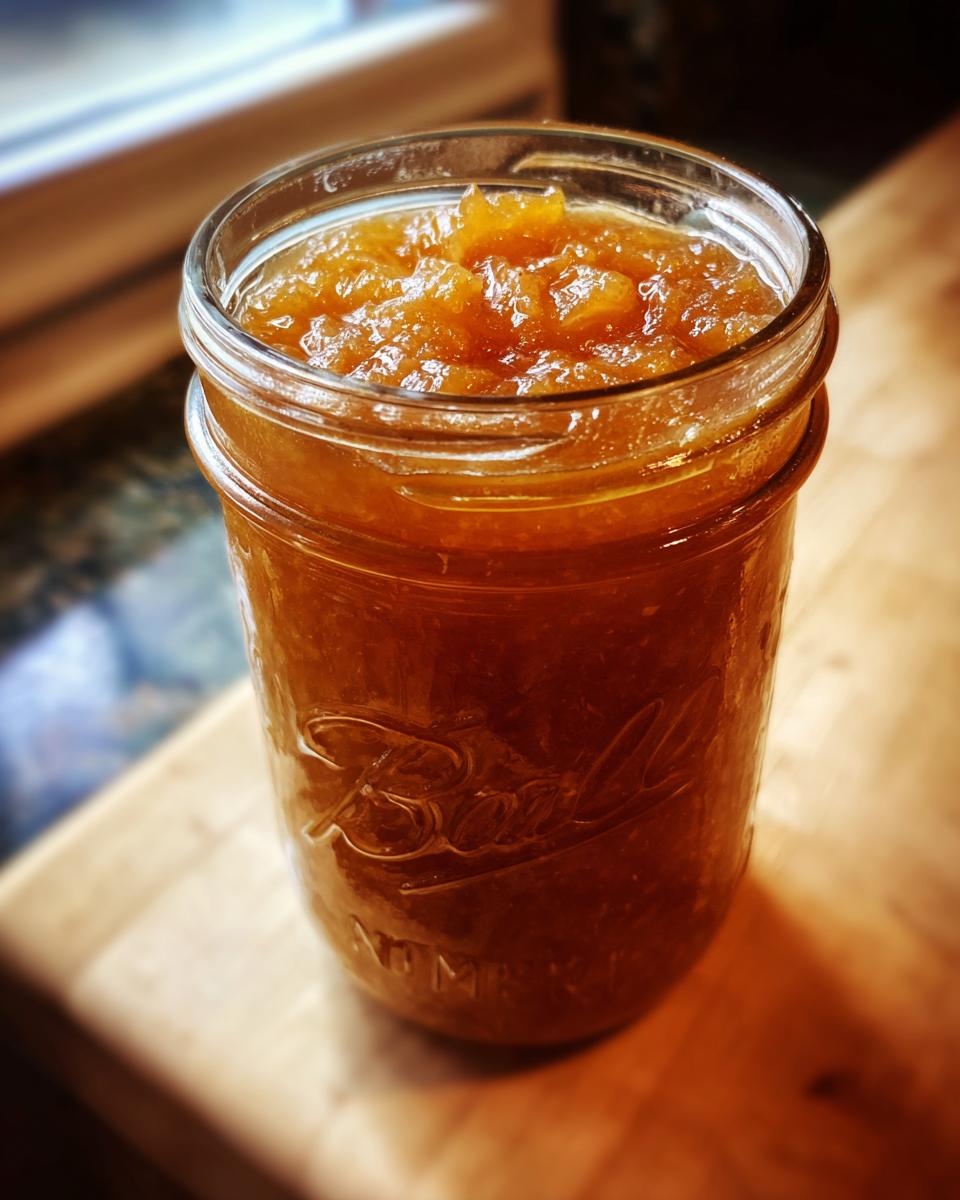
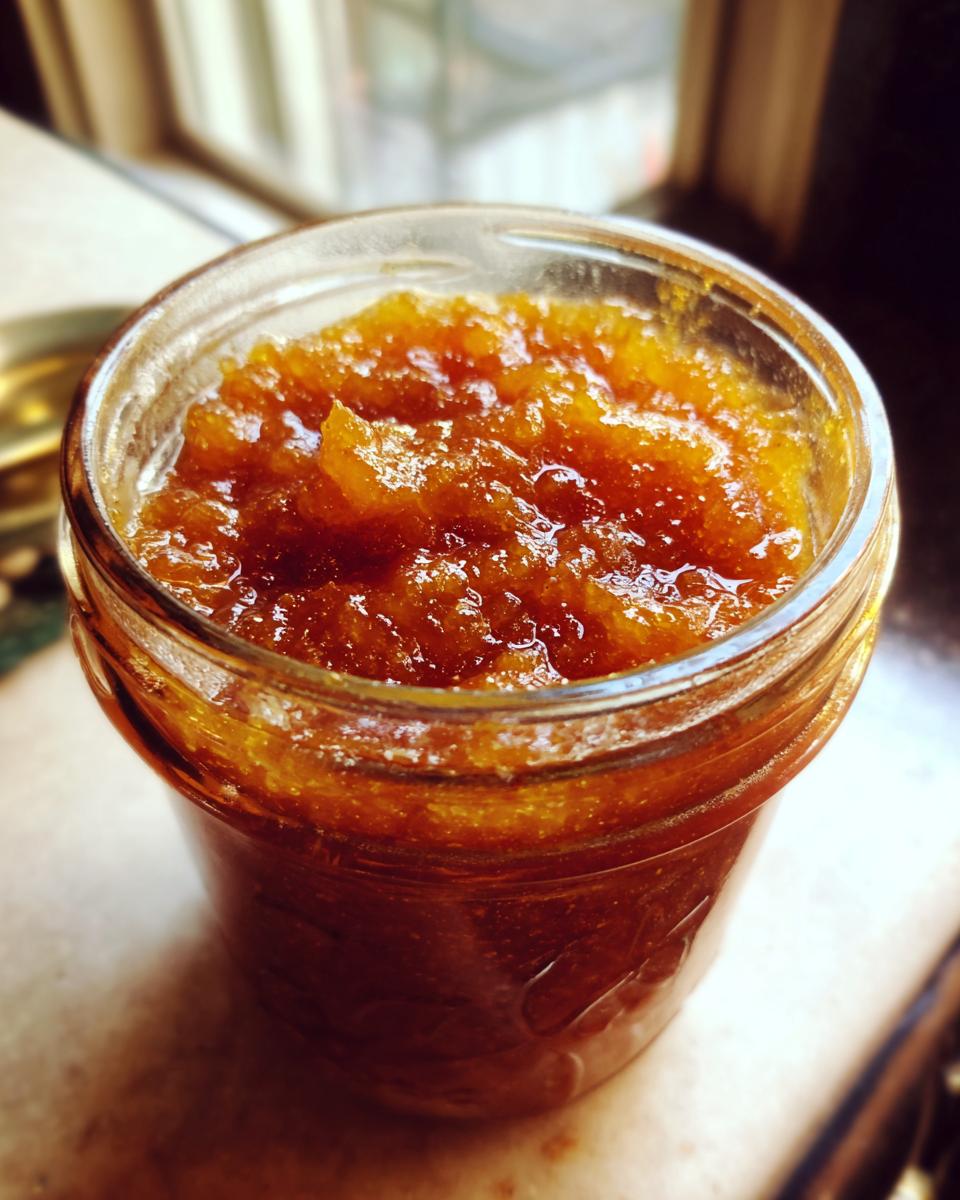
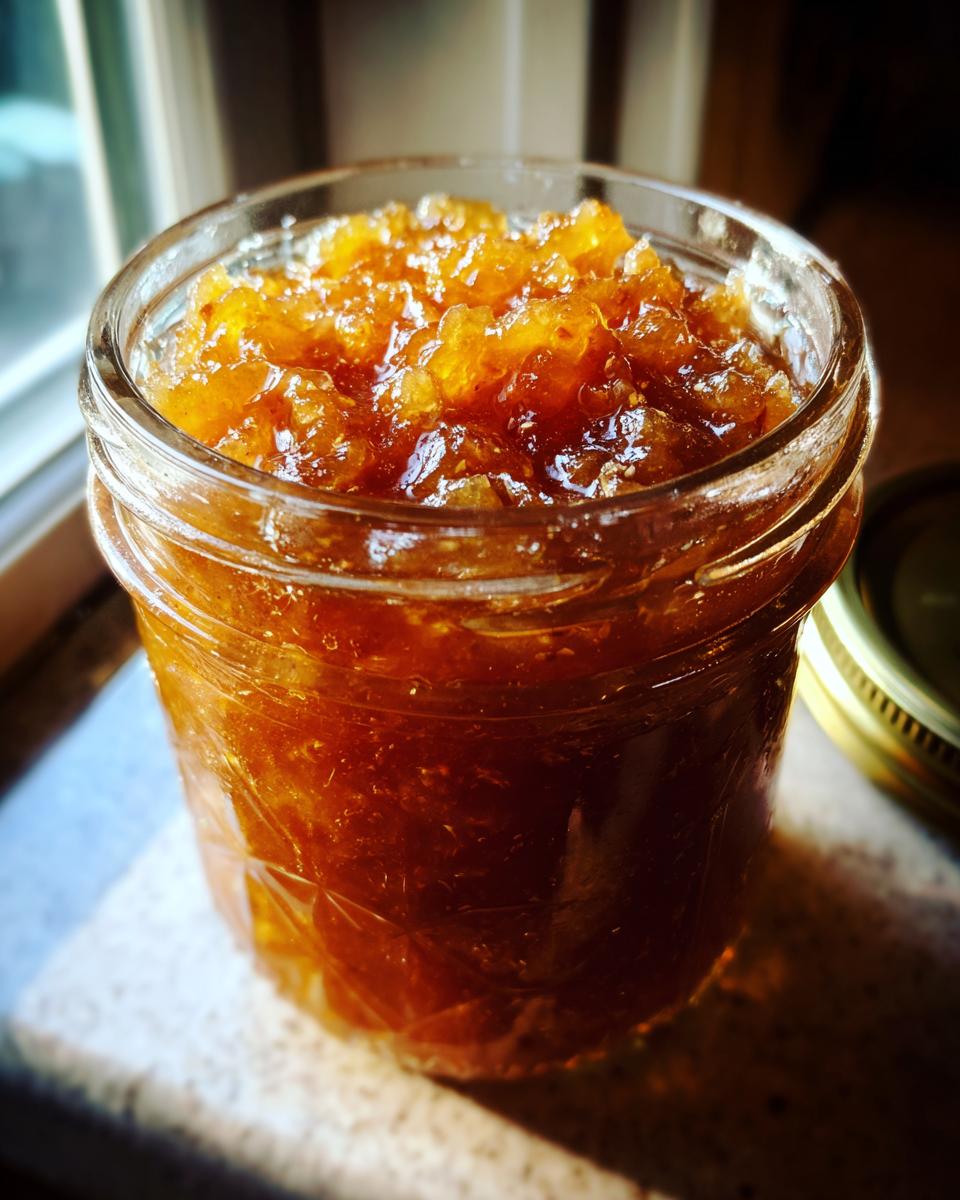
- Perfectly chunky – just like a classic, delightful pear jam should be!
- Safely preserved using simple water-bath canning, meaning tasty pantry staples for months!
- Absolutely giftable preserves – imagine these at holidays or as a special farmhouse kitchen treat!
Ingredients for Pear Preserves Without Pectin
Here’s what you’ll need for this lovely, chunky pear creation:
- 3 lbs ripe pears, peeled, cored, and chopped (make sure they’re nice and tender!)
- 2 cups granulated sugar (you can adjust this a little, but it’s key for preservation!)
- 1/4 cup fresh lemon juice (this is super important for safety and that bright flavor!)
- 1/2 cup water
Essential Equipment for Canning Pear Preserves
Alright, before we dive into making these gorgeous pear preserves, let’s make sure you’ve got your equipment ready. Having the right tools makes all the difference, and it’s super important for safe canning, you know? You’ll need a big, sturdy pot – one that can handle all those juicy pears and a good simmer. Make sure you have your tried-and-true canning jars ready to go, along with new lids and bands. And of course, the star of the show for safe preservation: a water-bath canner. It’s your best friend for keeping all this goodness shelf-stable!
Step-by-Step Guide to Making Pear Preserves
Alright, let’s get down to business and make some beautiful pear preserves! Following these steps carefully ensures not only a delicious result but also safe canning, which is so important to me. Think of your kitchen as a little canning workshop – happy, productive, and creating magic!
Preparing Your Water-Bath Canner and Jars
First things first, let’s get our canning station ready. I like to fill my big water-bath canner about halfway with water and bring it up to a simmer while I prep everything else. This gives it time to heat up nicely. Don’t forget to sterilize your jars, lids, and bands! I usually just pop my jars in the dishwasher on a sanitize cycle or give them a good scrub and a boil in some clean water. Clean lids and bands are a must for a good seal, so wash them well too.
Cooking the Pear Preserves
Now for the fun part! In your big pot, toss in those chopped pears, your sugar, that essential lemon juice, and the water. Give it a good stir. Let it sit for about 10 minutes; you’ll see the sugar start to get happy and a little syrupy. Cook this over medium heat, stirring now and then. You want those pears to get nice and soft and the mixture to start thickening up, which usually takes about 20-30 minutes. For that yummy chunky texture, take your spoon and mash some of those pear pieces against the side of the pot. Keep cooking and stirring until it’s nice and jammy – it should coat the back of your spoon. This can take another 15-20 minutes, so be patient with it! If you’re looking for other quick ideas for using up produce, check out these quick weeknight dinners!
Filling and Sealing the Jars
Once your pear preserves have reached that perfect thick, chunky consistency, it’s time to get them into the jars. Carefully ladle the hot preserves into your sterilized jars. Be sure to leave about 1/2 inch of space at the top – they call this ‘headspace,’ and it’s super important for a good seal! Wipe the rims of the jars really well with a damp cloth to make sure there’s no sticky stuff interfering with the lid. Pop on your sterilized lids and screw on the bands until they’re just fingertip tight. Not too tight, not too loose – just right!
Water-Bath Canning for Pear Preserves Safety
Now it’s time to put those jars in the canner for their safety bath. Carefully lower the filled jars into the simmering water, making sure they’re covered by about an inch or two of water. Bring the water back up to a rolling boil, then start your timer for 10 minutes. If you live at a higher altitude, you’ll need to add extra processing time, so be sure to check those guidelines! This step is what makes your preserves shelf-stable and safe to enjoy all year round.
Cooling and Checking for Seals
Once the 10 minutes are up, turn off the heat and let the jars sit in the hot water for another 5 minutes before carefully removing them with your jar lifter. Place them on a wire rack or a towel-lined counter, spaced a little apart, and let them cool completely for 12 to 24 hours. You’ll hear little *ping* sounds as they seal – it’s music to my ears! Once they’re cool, press the center of each lid. If it doesn’t flex up and down, it’s sealed!

Tips for Perfect Pear Preserves
Making pear preserves can feel like a little bit of kitchen magic, and I’ve picked up a few tricks over the years that I think you’ll find really helpful. It’s all about those small details that make a big difference in the final jar. Trust me, these tips will help you achieve that wonderful, homemade taste and texture every single time!
Choosing the Right Pears for Pear Preserves
When you’re picking out your pears, you want ’em ripe, but not mushy! Think firm-ripe. Varieties like Bartlett, Bosc, or Anjou work beautifully here. They have a lovely flavor and hold their shape just enough to give you that perfect chewy bite in your preserves without turning into applesauce.
Achieving the Perfect Chunky Texture
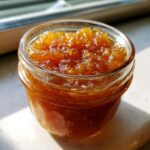
Now, for that chunky goodness! After your pears have softened while cooking, grab your potato masher or even just the back of your spoon. Gently mash about half of the pear pieces right there in the pot. Don’t go crazy and make it smooth; you just want to break down some of them so they create that lovely, rustic, chunky jam consistency. It’s the best of both worlds – soft, spreadable jam with delightful little pear bits!
Serving Suggestions for Your Homemade Pear Preserves
Oh, the possibilities are endless with these delicious pear preserves! They’re fantastic on a warm, fluffy biscuit straight from the oven – pure farmhouse kitchen heaven! Or, try spreading them on a cheese board alongside some sharp cheddar or creamy brie; the sweetness is just divine with cheese. They also make an amazing topping for vanilla ice cream, yogurt, or even stirred into oatmeal. You could even swirl a bit into your next batch of apple crumble or dollop some on a slice of warm cherry pie! And don’t forget, these pretty jars are such giftable preserves, perfect for sharing a taste of homemade goodness!
Storage and Reheating Instructions
Once your beautiful pear preserves have sealed, store those jars in a cool, dark place like a pantry. They’re shelf-stable like that! Once you open a jar, though, just pop it back in the refrigerator. It’ll stay delicious for several weeks that way!
Frequently Asked Questions About Pear Preserves
Got some burning questions about making these delicious pear preserves? I’ve got you covered! It’s totally normal to have a few queries, especially when you’re diving into canning. Hopefully, this clears things up so you can get back to making that wonderful chunky pear jam! If you have more questions, feel free to reach out on my contact page!
Can I make Pear Preserves without Pectin?
Oh yes, absolutely! This recipe is specifically designed for pear preserves without pectin. The natural pectin in the pears, along with the cooking time and sugar, helps them thicken up beautifully. So, don’t worry about adding any extra pectin for this old-fashioned style!
How Much Sugar is Needed for Pear Preserves?
In this recipe, we’re using 2 cups of sugar for about 3 lbs of pears. Sugar does more than just sweeten; it’s an important part of the preservation process, helping to create that lovely thick texture and ensuring shelf-stability. You *can* adjust it slightly, but keep in mind lowering it too much might affect the consistency and keeping quality of your pear preserves.
Is Lemon Juice Necessary for Pear Preserves Safety?
Yes, it really is! That 1/4 cup of lemon juice is super important for the safety of your pear preserves. It adds the necessary acidity that helps prevent the growth of bacteria during water-bath canning. It also brightens up the pear flavor beautifully, so don’t skip it!
Estimated Nutritional Information
Just so you know, the nutritional info can change a bit depending on your pears and exactly how much sugar you end up using. But as a general idea, a 2-tablespoon serving of these yummy pear preserves has about 70 calories, 0g fat, 0g protein, 18g carbs with 17g of that being sugar, and roughly 1g of fiber. Happy preserving!
PrintOld-Fashioned Pear Preserves
Make chunky, old-fashioned pear preserves using a water-bath canning method. This recipe focuses on natural sweetness and safe preservation techniques for a delicious pantry staple.
- Prep Time: 30 min
- Cook Time: 60 min
- Total Time: 90 min
- Yield: 4-5 pint jars 1x
- Category: Preserves
- Method: Canning
- Cuisine: American
- Diet: Vegetarian
Ingredients
- 3 lbs ripe pears, peeled, cored, and chopped
- 2 cups granulated sugar (adjust to taste)
- 1/4 cup lemon juice
- 1/2 cup water
Instructions
- Prepare your water-bath canner by filling it with water and bringing it to a simmer. Sterilize your canning jars, lids, and bands.
- Combine chopped pears, sugar, lemon juice, and water in a large pot.
- Stir well and let the mixture sit for about 10 minutes to allow the sugar to start dissolving.
- Cook over medium heat, stirring occasionally, until the pears soften and the mixture begins to thicken. This can take 20-30 minutes. Mash some of the pear pieces with your spoon for a chunkier texture.
- Continue to cook until the preserves reach your desired consistency, about 15-20 more minutes. The preserves should coat the back of a spoon.
- Carefully ladle the hot preserves into the sterilized jars, leaving 1/2 inch of headspace.
- Wipe the rims of the jars clean with a damp cloth. Place the lids on the jars and screw on the bands until fingertip tight.
- Process the jars in the simmering water-bath canner for 10 minutes (adjust for altitude if necessary).
- Remove the jars from the canner and let them cool on a wire rack for 12-24 hours. Check for a proper seal.
Notes
- For a smoother preserve, you can process the pears briefly in a food processor before cooking.
- Ensure your pears are ripe but not overly soft for the best texture.
- Store sealed jars in a cool, dark place. Refrigerate after opening.
Nutrition
- Serving Size: 2 tablespoons
- Calories: 70
- Sugar: 17g
- Sodium: 0mg
- Fat: 0g
- Saturated Fat: 0g
- Unsaturated Fat: 0g
- Trans Fat: 0g
- Carbohydrates: 18g
- Fiber: 1g
- Protein: 0g
- Cholesterol: 0mg