
Oh, that sound! You know the one—that perfectly clean, sharp *snap* when you break a piece of peanut brittle. It means you did everything right! For years, I chased that glorious crunch, and honestly, I ended up with sticky messes more often than I care to admit. But I finally cracked the code on how to nail that texture every single time. This is my absolutely reliable peanut brittle recipe designed specifically to give you that satisfying, glassy snap. As I always say here at MDLATDMM, a good recipe needs to work in a real kitchen, so I’ve tested this buttery, nutty candy until it was foolproof. Get ready for the very best peanut brittle ever!
- Why This Peanut Brittle Recipe Delivers the Perfect Snap
- Essential Ingredients for Classic Peanut Brittle Recipe
- Gathering Your Equipment for This Peanut Brittle Recipe
- Step-by-Step Buttery Peanut Brittle Instructions
- Tips for Success with Your Homemade Peanut Brittle Recipe
- Storage & Gifting Your Salty Sweet Brittle Snack
- Variations on the Classic Brittle Recipe
- Frequently Asked Questions About This Peanut Brittle Recipe
- Nutritional Estimate for This Peanut Brittle Recipe
Why This Peanut Brittle Recipe Delivers the Perfect Snap
Making brittle that snaps instead of turning chewy isn’t magic; it’s pure temperature control, truly! This classic crunchy candy recipe relies on a few key details that I wouldn’t skip for the world. If you follow these points, you’re halfway there to that amazing, shatterable texture you’re looking for.
- We need fresh baking soda. Seriously! Old soda won’t foam right when we add it at the very end. It’s what aerates the sugar mixture perfectly.
- Temperature is non-negotiable. You must use a thermometer; there’s no way around it for a reliable result in old fashioned candy making.
- We use enough butter to give it that rich, buttery flavor without sacrificing the structure.
The Science Behind Crunchy Candy Recipe Success
The entire goal here is hitting that hard crack stage. That sweet spot is between 300 to 305 degrees Fahrenheit. Once the syrup hits that mark, the water cooks entirely out, leaving behind pure, glass-like sugar crystals. If you stop heating short—say, at 280 degrees—you’re left with soft, sticky candy. That’s what makes it chewy! We want that high heat so our final product has that signature, satisfying crunch.
Essential Ingredients for Classic Peanut Brittle Recipe
Okay, let’s get down to brass tacks. This is a surprisingly simple formulation, which is why hitting those temperatures is so important—the ingredients are few, so each one counts! You’ll need just a handful of pantry staples to create this beautiful, classic homemade peanut brittle.
Here is what you need for a batch that yields about a pound of crunchy goodness. Make sure you grab unsalted butter; we control the salt separately because that affects the foaming reaction later!
- 2 cups granulated sugar
- 1 cup light corn syrup (Don’t skip this! It helps prevent crystallization.)
- 1 cup water
- 2 cups roasted, unsalted peanuts
- 2 tablespoons unsalted butter
- 1 teaspoon baking soda (Must be fresh!)
- 1 teaspoon vanilla extract
- 1 teaspoon salt
Seeing that baking soda on the list might seem odd for a candy recipe, but trust me, it’s the secret to that airy, crunchy texture. It’s what makes the whole thing expand beautifully when the heat hits it!
Gathering Your Equipment for This Peanut Brittle Recipe
Before you even think about turning on the stove—and trust me, you don’t want to be scrambling for these items mid-boil—we need to gather our tools. Candy making moves fast, and having everything ready is part of what makes this an easy brittle recipe instead of a stressful meltdown! You need sturdy tools for a heavy, hot mixture.
The big three items you must have are a large, heavy-bottomed saucepan, a silicon mat or a well-greased baking sheet, and, most importantly, the thermometer. Please, please, please don’t try to guess the temperature on this one. I learned that the hard way, and the result was basically peanut caramel, not brittle!
Candy Thermometer Guide Desserts: Getting the Right Tool
This is where we secure that perfect snap. A reliable candy thermometer is not optional for this classic peanut brittle recipe; it’s your co-pilot! You need one that clips securely to the side of your pot so the bulb hangs submerged in the syrup without touching the bottom. If the tip rests on the hot metal bottom, you’ll get a false, higher reading, and you risk scorching your sugar or, worse, overcooking the whole batch beyond redemption.
When you buy one, make sure it’s calibrated correctly, or at least know what adjustment you need to make. Guessing leads straight to chewy candy, which is just sad. We want shatteringly crisp! If you don’t have one yet, hop over to the store now because that 300-degree mark is the secret handshake for making great homemade candy.
Step-by-Step Buttery Peanut Brittle Instructions
This is where the action happens! Remember, candy making is a race against time once you hit those high temperatures, so have your sheet ready and don’t walk away from the stove for one second. We begin by combining the sugar, corn syrup, and water in that heavy saucepan. Get the heat to medium and just stir until you see every last crystal dissolve. Seriously, rub your fingers together; if you feel any graininess, keep stirring gently. Once smooth, that’s when the thermometer goes in, and you crank the heat up to medium-high to get it boiling.
I’ll never forget the first few times I tried this! I was terrified to watch the thermometer climb past 275°F. I’d pull it off the heat too soon, convinced it was burning, and ended up with soft, sticky goo. But when I finally trusted the cooking process and let it climb all the way to 302°F—wow! The sugar turned this incredible, deep amber color, and that’s when I knew I nailed the flavor profile. It’s totally nerve-wracking, but oh, so worth it!
Reaching the Hard Crack Stage Candy Tips
Once that beautiful syrup starts boiling vigorously, you must stop stirring! If you stir while it boils, you risk creating sugar crystals, and crystals mean grainy, unhappy brittle. Just let the bubbles do their thing until that thermometer hits 250°F—that’s the firm-ball stage. At this point, you can gently stir in those roasted peanuts—and I mean GENTLY, just enough to coat them so they don’t stick to the bottom. Then, back to watching the heat until you see 300 to 305°F. That’s your jackpot!
The Quick Finish: Adding Soda and Pouring the Peanut Brittle Recipe
The second you hit 305°F, yank that pot straight off the burner! Speed is essential now. Toss in the butter, salt, vanilla, and—here’s the fun part—the baking soda. Stir like crazy for about five seconds! The mixture will foam up like a mad scientist’s potion—that’s the baking soda activating! As soon as it’s lightly incorporated, immediately pour the whole foamy mess onto your prepared sheet. Do not scrape the pot; just let it flow wherever it wants to go. Resist the urge to spread it out! Let it cool completely at room temperature for at least 30 minutes, and then you can break your homemade peanut brittle into those fantastic, irregular shards.
Tips for Success with Your Homemade Peanut Brittle Recipe
Even the best peanut brittle recipe can trip you up if you ignore the little details. This is where I share all those little warnings I learned the hard way so you can have perfect results! Candy making can be moody, especially depending on the weather in your kitchen, so keep these points in mind when you commit to making this old-fashioned cookie recipes.
If you’ve ever made chewy brittle, I promise one of these tips will fix it next time! It’s all about maximizing that crunch factor and getting that lovely lift from the baking soda, just like we discussed with my old-fashioned cookie recipes.
-
Don’t Bother if It’s Humid:
This is my biggest plea! If it’s raining heavily or just plain muggy outside, put the candy making off. Sugar absorbs moisture straight from the air, and moisture equals chewiness. If the humidity is high, your brittle simply won’t set properly, no matter how high you bring the temperature. Save yourself the grief and try again tomorrow!
-
Baking Soda Freshness is Key:
The baking soda is what gives the brittle its internal structure—those tiny air bubbles that make it light and shatterable instead of a solid block. If your baking soda has been languishing in the door forever, go grab a new box. You need that chemical reaction to be vigorous.
-
Roasted Peanuts Only:
We use dry-roasted peanuts here. Raw nuts contain oils that can interfere with the sugar setting up correctly. Roasted ones are already dry and ready to go, giving you that perfect nutty flavor integration without any extra fuss or risk of an oily batch.
-
Don’t Touch That Pour:
When you pour that hot mixture onto the sheet, step back! Don’t use a spatula to spread it out or smooth the edges. Let gravity and surface tension do the work. If you start moving the hot sugar, you mess up the delicate bubble structure created by the baking soda, and you’ll end up with sticky spots where you moved it too much.
Storage & Gifting Your Salty Sweet Brittle Snack
Congrats! You’ve made it past the heat and the cooling, and now you have this glorious, golden, crunchy candy in front of you. The final step in nailing this peanut brittle recipe is ensuring it *stays* perfect. Nothing ruins a fantastic batch faster than storing it incorrectly and waking up to soft, chewy shards!
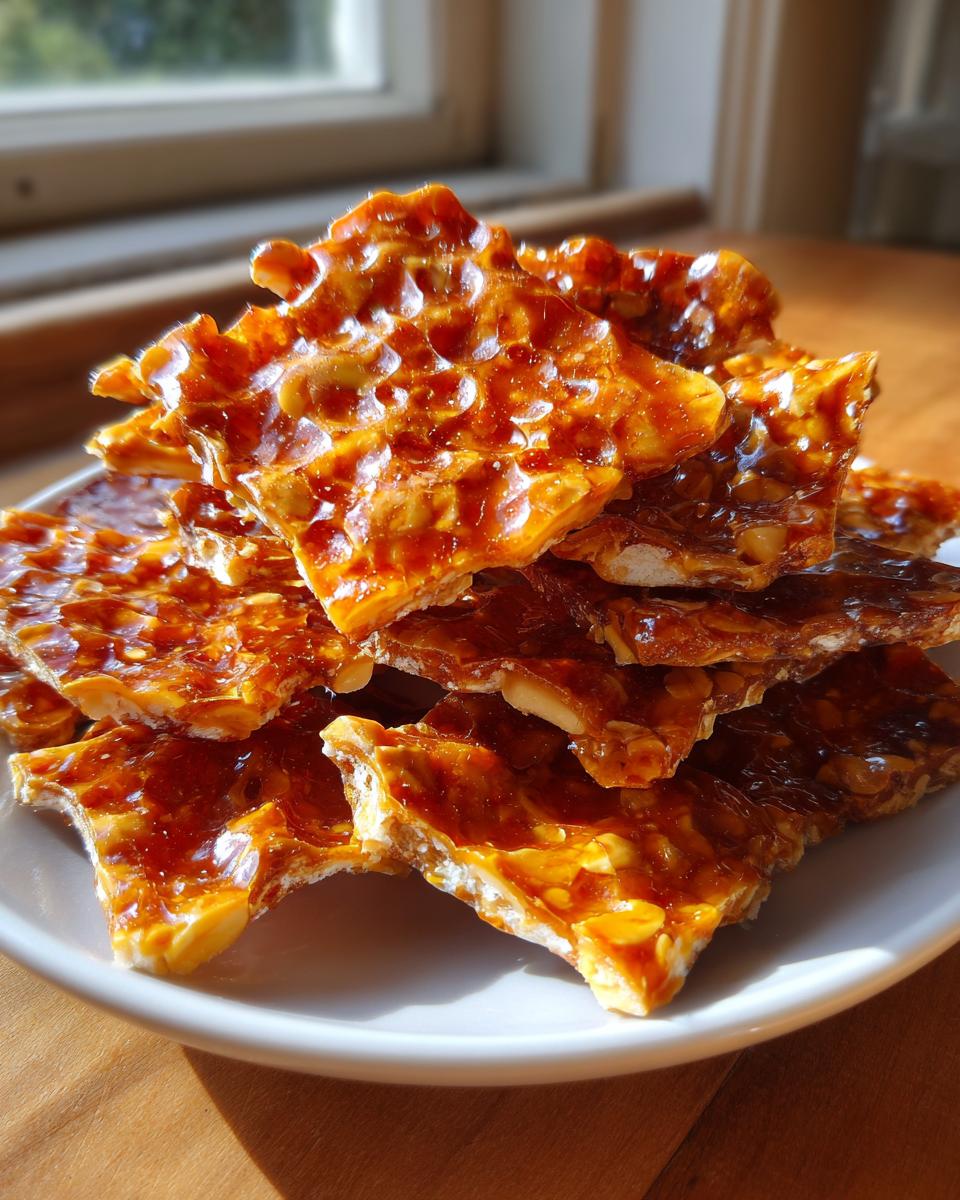
I mentioned earlier that the final break is part of the fun. Once it’s completely cool—and I mean room temperature, not even a hint of warmth—you take a sturdy knife or the back of a clean spoon and give it some encouragement. It should break easily into irregular pieces. Don’t worry about uniformity; those jagged edges are what make homemade treats look so irresistible.
Keeping the Crunch Sealed Tight
The enemy of perfect snap brittle is air and humidity. You want to store this immediately in an airtight container. If you have one of those vintage tins that seal really well, use it! Layering it is important: lay down a piece of parchment paper or wax paper on the bottom, then add a single layer of brittle, then another sheet of paper, and keep going. This prevents the pieces from sticking together, which can happen if any residual moisture gets trapped.
If you are making this stash for the holidays, remember, moisture loves sugar! Keep the container in a cool, dry pantry. Honestly, it stays amazing for at least two weeks this way, maybe longer, though I’ve never had a batch last that long because everyone snacks on it!
Making Homemade Brittle Gifts for the Holidays
This salty sweet brittle snack is practically made for gifting, especially when paired with homemade cranberry sauce or maybe my favorite Christmas jam recipe! For homemade brittle gifts, presentation matters, but keep the sealing tight. Once you have your lovely, broken pieces, place them into cute cellophane bags and tie them off with a bright ribbon. You can even add a little tag that says, “Warning: Extremely Snappy!”
If you’re packaging them up more than a day ahead of giving them away, try to keep the bags sealed in a larger Ziploc bag inside that airtight container until you are ready to hand them out. This extra barrier protects them from environmental humidity and ensures your friends get that crackly, buttery perfection that you worked so hard to achieve. You can find more great ideas for edible presents over at Recipes by Harlee!
Variations on the Classic Brittle Recipe
While I truly believe this simple combination of sugar, syrup, butter, and peanuts is the gold standard, a good peanut brittle recipe is easy to customize once you trust the temperature base. Remember, once you nail that 300-305°F hard crack stage, the syrup is ready for pretty much anything you want to toss in there!
I love shaking things up, especially around the holidays, though my family always demands this classic version. Trying variations is a fun way to use up leftover nuts you might have lying around. It’s all about making your own personalized from scratch nutty candy!
Here are a few swaps I’ve tested out that keep the structure perfect:
-
Switching Up the Nuts:
Peanuts are classic because they are budget-friendly and tasty, but you can absolutely use pecans or sliced almonds. If you use pecans, maybe try slicing them down a touch smaller, or if you use almonds, make sure they are slivered rather than whole. Just stick to nuts that are already roasted so you don’t add extra moisture to the mixture.
-
Adding Warmth:
A little spice goes a long way! Since we are focused on that buttery note, adding about half a teaspoon of ground cinnamon or a tiny pinch of cayenne pepper right when you add the vanilla extract gives a lovely warmth that contrasts beautifully with the sugar. This makes it feel a little more sophisticated than just a standard treat.
-
A Touch of Citrus:
This one is subtle, but oh so good. If you zest half an orange and stir that zest in right when you add the vanilla and baking soda, you get this bright, unexpected freshness that cuts through the sweetness. It makes the whole confection taste brighter. It’s a fantastic little addition if you’re serving this brittle alongside heavier holiday desserts!
See? It’s still just as quick, but you get a whole new experience out of your trusted, tested base recipe. Have fun experimenting!
Frequently Asked Questions About This Peanut Brittle Recipe
I get so many messages asking about the tricky parts of candy making, so let’s tackle the common snags right here! Even though this is my go-to easy brittle recipe, sometimes you need a little troubleshooting, especially when we talk about temperature.
My brittle ended up chewy instead of snappy! What did I do wrong?
Oh, friend, I’ve been there! Ninety-nine times out of a hundred, chewiness means you pulled the mixture off the heat too soon. You absolutely must reach 300 to 305°F—that’s the hard crack stage. If you stopped at 290°F, it’s going to be soft when it cools. Don’t panic, though! You can sometimes re-melt the chewy batch very gently and bring it back up to temperature, but honestly, sometimes starting over is faster. Stick to the thermometer next time!
Can I skip the corn syrup? I only want to use sugar for true old fashioned candy making.
Look, I totally get wanting the most classic approach, but I seriously advise against skipping the light corn syrup in this peanut brittle recipe. Corn syrup is an invert sugar, and its main job here is to stop the granulated sugar from crystallizing. If you only use regular sugar and water, you are highly likely to get a gritty or crystallized candy that won’t ever set right. The syrup is the insurance policy required for that beautiful, smooth glass texture we want.
Can I make this without a candy thermometer?
If you have a very trusted, very accurate instant-read thermometer *and* you use the cold water test (dropping a tiny bit of syrup into cold water to see if it forms hard, brittle threads), then maybe. But honestly? No. For this specific recipe, where we rely on hitting 305°F exactly, attempting it without a stable candy thermometer is inviting heartbreak. A good thermometer is worth every penny if you want that perfect crunch!
Can I make this ahead of time? How long does it stay crunchy?
Yes! This is one of the best parts about this homemade peanut brittle. As long as you store it correctly in a totally airtight container with layers of parchment paper (like I showed you earlier), it stays perfectly crunchy for at least two weeks, maybe more. Keep it in a cool, dry place. If you ever store leftovers from my old-fashioned quick breads, you know how important airtight sealing is!
Nutritional Estimate for This Peanut Brittle Recipe
Now, I know we aren’t exactly making this for health food status—it’s a nostalgic, buttery, crunchy holiday treat, right? But just like I always share the ingredient list clearly, I think it’s only fair to give you an idea of what’s in a serving of this glorious stuff. Transparency is important, even when we are talking about pure sugar and peanuts!
This information is based on my testing and the standard ingredient amounts I list above. Remember, because we are dealing with things like the exact brand of corn syrup or the natural fat content of the peanuts you choose, these numbers are always going to be estimates. Please treat this like a guide rather than a strict fact sheet!
Here’s a general breakdown for a one-ounce serving, which usually equals one or two nice, crisp pieces of homemade peanut brittle:
- Serving Size: 1 ounce
- Calories: 180
- Total Fat: 9g
- (Saturated Fat: 2g)
- Total Carbohydrates: 24g
- (Sugar: 20g)
- Protein: 4g
- Sodium: 45mg
See? Plenty of sugar to fuel your holiday celebrations, and a good little boost of protein from all those delicious peanuts. I find that knowing the details, even for something as simple and nostalgic as this classic brittle dessert, just makes the whole process feel more grounded in real cooking science. Enjoy responsibly, and try not to eat the whole batch in one sitting!
PrintClassic Old-Fashioned Peanut Brittle Recipe for the Perfect Snap

Make homemade peanut brittle with this reliable recipe. Follow these clear instructions and candy thermometer tips to achieve that satisfying, crunchy texture every time. This classic brittle is perfect for holiday candy or gifting.
- Prep Time: 10 min
- Cook Time: 25 min
- Total Time: 45 min
- Yield: About 1 pound 1x
- Category: Dessert
- Method: Stovetop Candy Making
- Cuisine: American
- Diet: Vegetarian
Ingredients
- 2 cups granulated sugar
- 1 cup light corn syrup
- 1 cup water
- 2 cups roasted, unsalted peanuts
- 2 tablespoons unsalted butter
- 1 teaspoon baking soda
- 1 teaspoon vanilla extract
- 1 teaspoon salt
Instructions
- Prepare a large baking sheet by lightly greasing it or lining it with a silicone mat. Set aside.
- Combine the sugar, corn syrup, and water in a heavy-bottomed, large saucepan. Stir over medium heat until the sugar dissolves completely.
- Insert a candy thermometer into the mixture, avoiding the bottom of the pan.
- Increase the heat to medium-high and boil the mixture without stirring. Watch the temperature closely.
- Continue boiling until the mixture reaches 250 degrees Fahrenheit (the firm-ball stage). This takes about 15 to 20 minutes.
- Add the roasted peanuts to the syrup mixture. Stir gently to coat them evenly.
- Continue cooking, stirring occasionally to prevent scorching, until the temperature reaches 300 to 305 degrees Fahrenheit (the hard crack stage). This is crucial for a perfect snap.
- Immediately remove the saucepan from the heat. Quickly stir in the butter, baking soda, vanilla extract, and salt. The mixture will foam up rapidly. Work fast.
- Pour the hot mixture onto the prepared baking sheet. Do not spread or scrape the pot; let the mixture flow naturally.
- Let the brittle cool completely and harden at room temperature, about 30 minutes. Do not touch or try to move it while warm.
- Once fully cooled and hard, break the brittle into irregular pieces. Store in an airtight container.
Notes
- Use a candy thermometer; guessing the temperature leads to chewy brittle.
- Ensure your baking soda is fresh; it is what creates the airy texture needed for a good crunch.
- For the best flavor, use dry-roasted peanuts.
- If you want a salty sweet brittle snack, consider using lightly salted peanuts instead of adding extra salt.
Nutrition
- Serving Size: 1 ounce
- Calories: 180
- Sugar: 20
- Sodium: 45
- Fat: 9
- Saturated Fat: 2
- Unsaturated Fat: 7
- Trans Fat: 0
- Carbohydrates: 24
- Fiber: 1
- Protein: 4
- Cholesterol: 0