
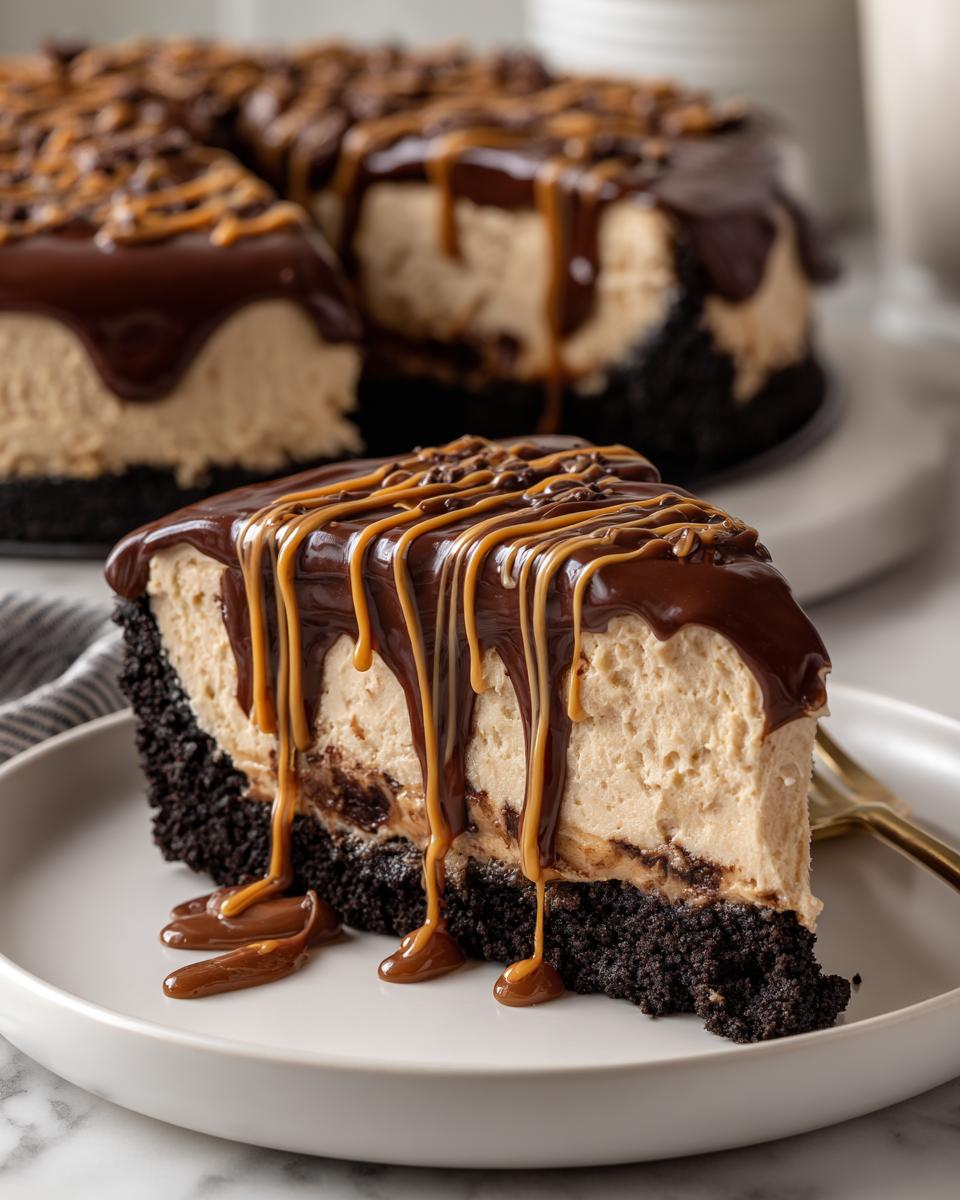
When that summer heat cranks up and the thought of turning on the oven makes you sweat before you even start mixing, I have the perfect solution for you! Forget the heat—we are diving headfirst into chill, creamy satisfaction. This recipe delivers maximum dessert impact with zero oven time. I’m talking about the ultimate easy no bake peanut butter pie, and trust me, the rich, chocolate Oreo crust sets it apart from everything else you’ve tried. For me, simple, rich, indulgent desserts like this are the taste of comfort. It reminds me that the best things in life don’t require a lot of fuss. You need this recipe saved in your bookmarks right now! You can find more simple, satisfying treats over at my delicious dessert recipes collection.
- Why This No Bake Peanut Butter Pie is Your New Favorite Quick Dessert No Oven
- Gathering Ingredients for the No Bake Peanut Butter Pie
- Step-by-Step Instructions for Your No Bake Peanut Butter Pie
- Tips for the Best No Bake Pie Success
- Variations on the Classic Peanut Butter Pie
- Make Ahead Dessert and Storage for Your No Bake Peanut Butter Pie
- Serving Suggestions for this Simple Peanut Butter Treat
- Frequently Asked Questions About Making a No Bake Peanut Butter Pie
- Estimated Nutritional Data for This No Bake Peanut Butter Pie
- Share Your No Bake Peanut Butter Pie Creations
Why This No Bake Peanut Butter Pie is Your New Favorite Quick Dessert No Oven
I truly believe this pie has everything you could ever want in a simple dessert. It screams indulgence but whispers, “I took twenty minutes, tops!” That’s the magic of a great creamy peanut butter dessert that doesn’t need an oven to shine. It’s perfect for those scorching summer days when you can’t bear the thought of turning on the stove for too long.
Speed and Simplicity: The Easy Peanut Butter Pie Recipe Advantage
You are looking at about 20 minutes of actual work here, folks. Seriously! Once the crust is pressed in, you are just mixing and folding. It really is the best no bake pie solution when you need something impressive fast. That chilling time is hands-off, which means you’re free to relax!
Indulgent Flavor Profile of Our Chocolate Peanut Butter Pie
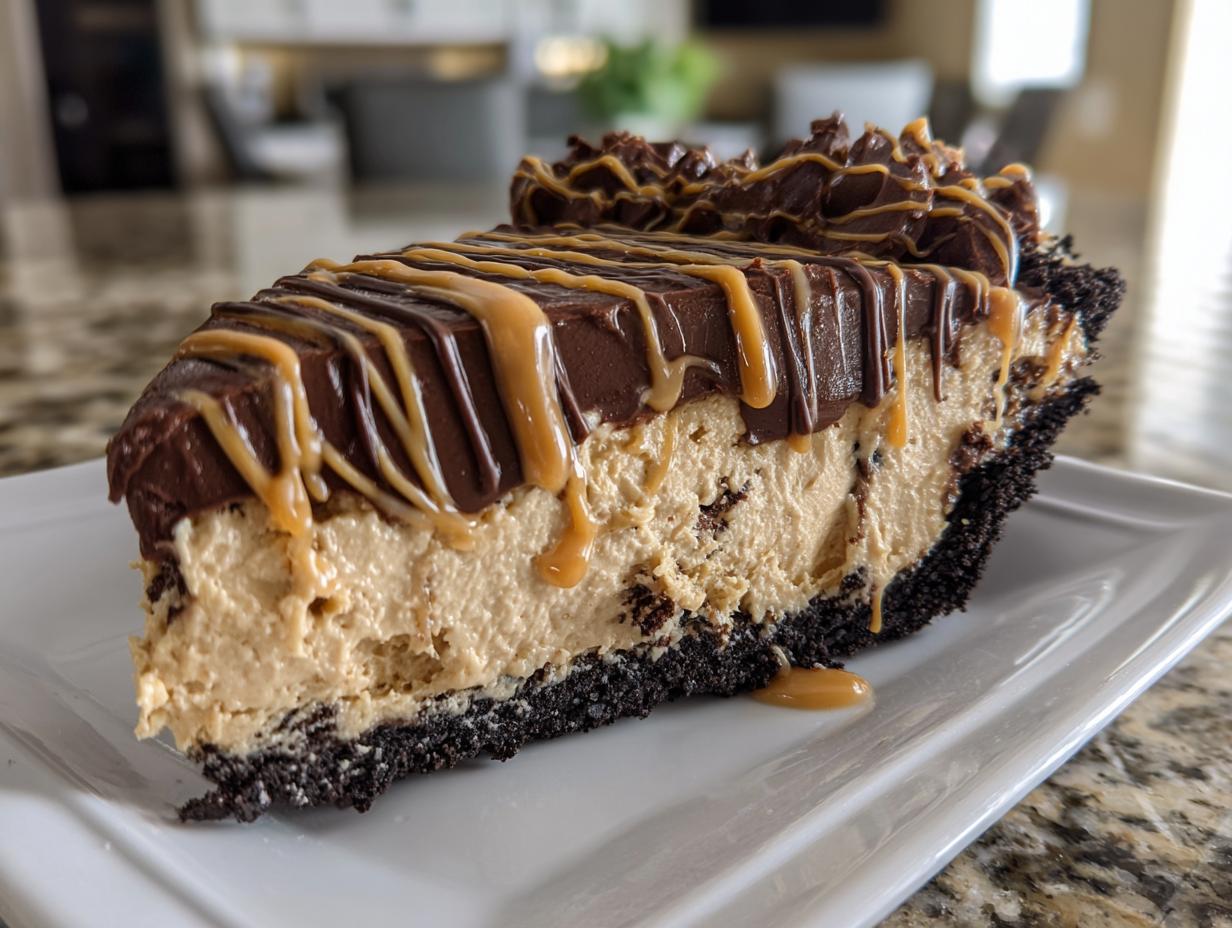
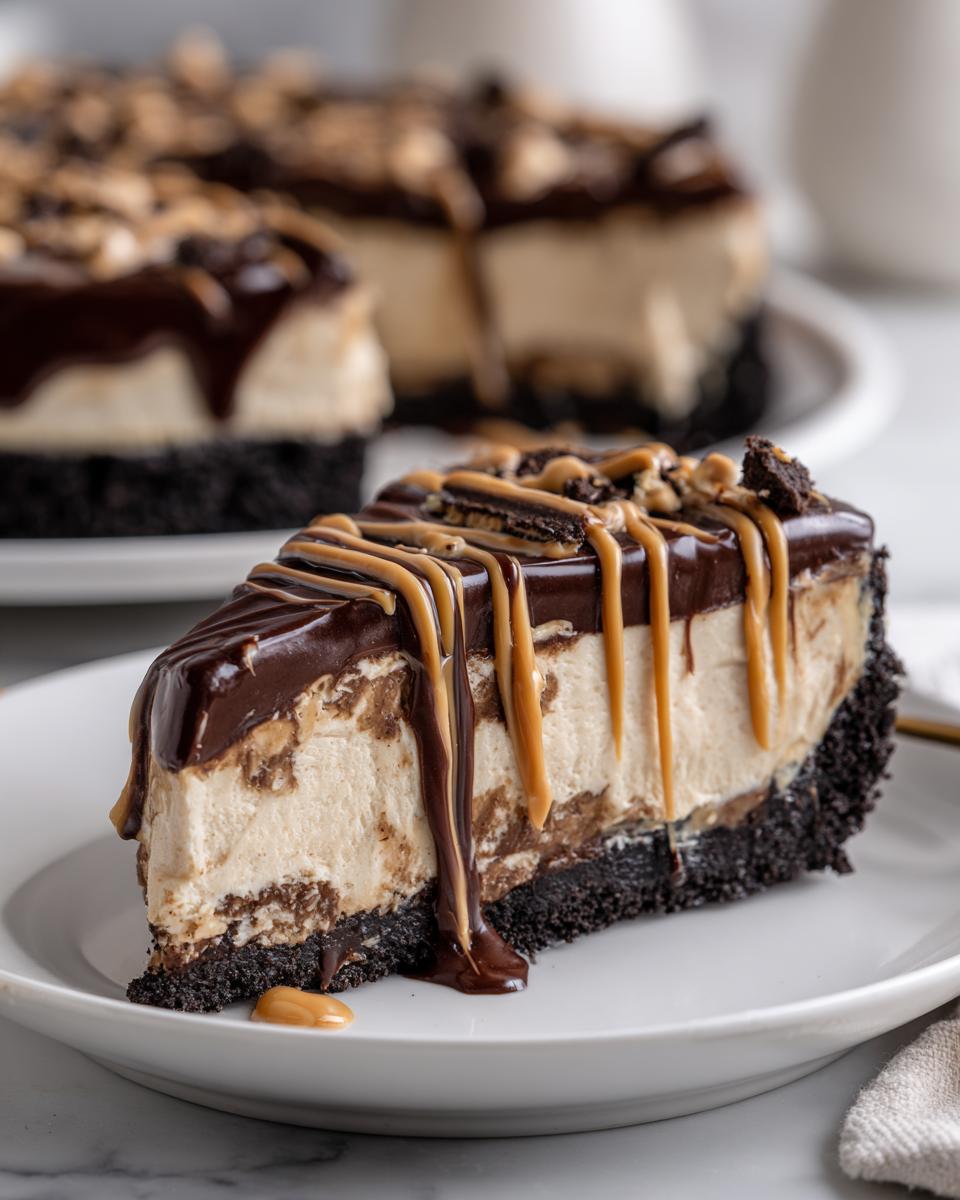
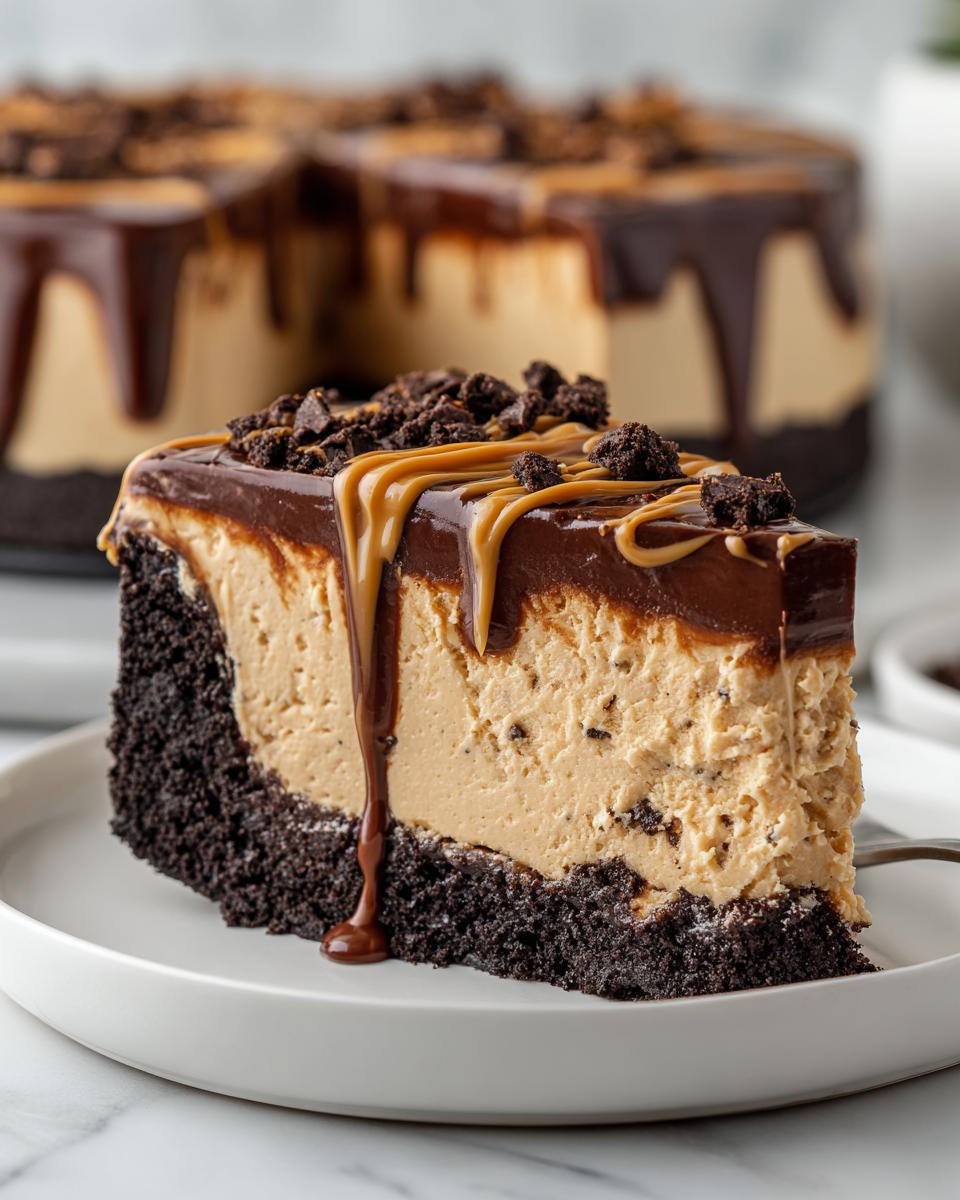
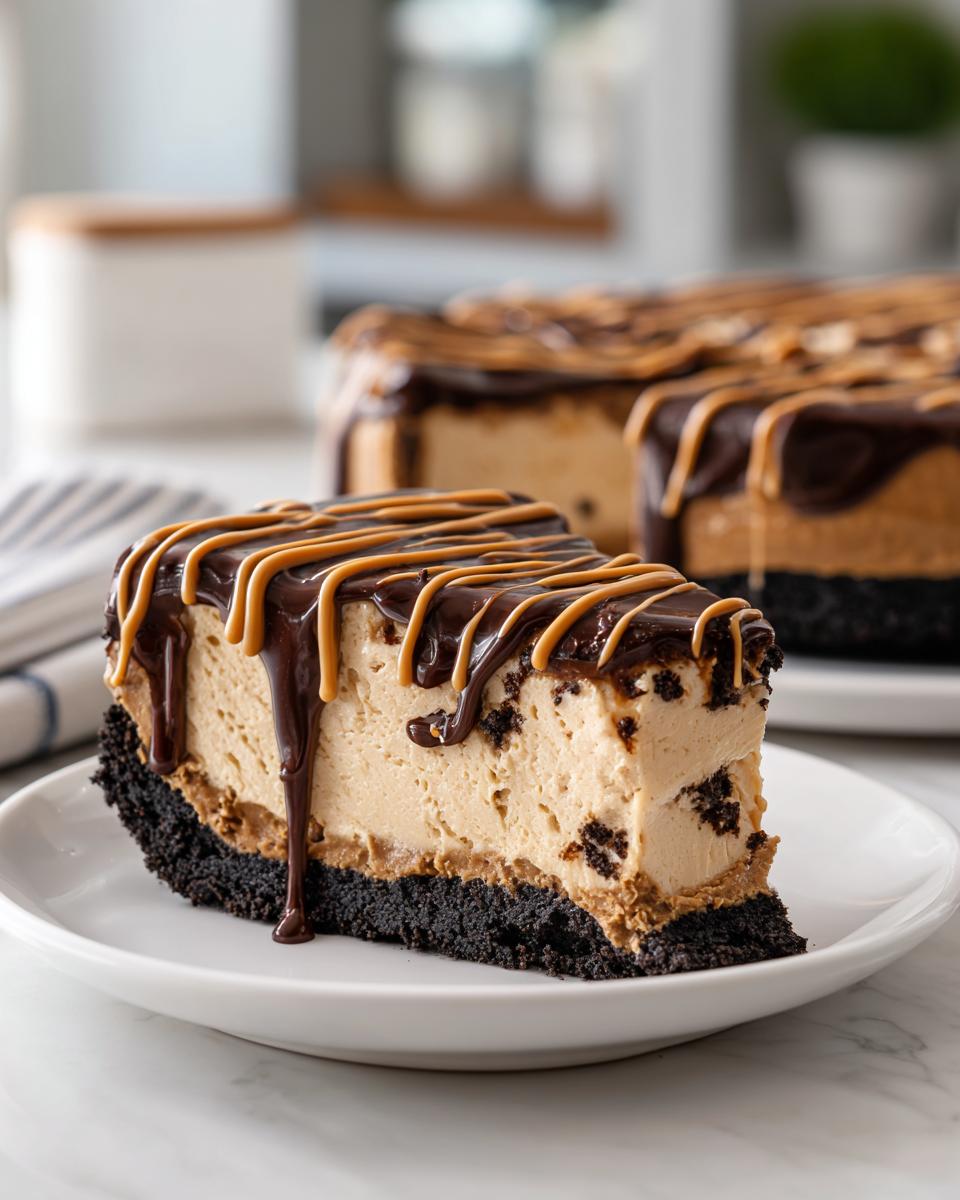
What makes this taste so rich? Well, the chocolate Oreo crust is just the beginning. It gives you that satisfying crunch against the velvety, fluffy peanut butter filling. We use cream cheese in the center, and trust me, that little bit of tang balances the sweetness perfectly. You get that incredible texture thanks to the cream cheese holding everything firm within the crunchy oreo crust pie recipe.
Gathering Ingredients for the No Bake Peanut Butter Pie
Okay, this is where we get organized! Since this is a no-bake magic show, having everything ready before you start mixing is the secret sauce. We aren’t baking, but we *are* layering richness, so the quality matters. When you shop, remember you’ll need your measuring cups ready for the crust, the filling base, and that gorgeous chocolate blanket on top. If you’re looking for another simple treat to pair this with, check out my ideas for easy peanut butter cookies for more inspiration!
Ingredients for the Chocolate Oreo Crust
This crust is non-negotiable, in my opinion. You need about 1 3/4 cups of those gorgeous chocolate sandwich cookie crumbs—that’s usually about 24 Oreos if you’re crushing them yourself. Then, melt 1/4 cup of good unsalted butter to bring those crumbs together. That’s it! Press this into your 9-inch pie dish; the cold helps it set up fast.
Ingredients for the Creamy Peanut Butter Dessert Filling
For the heart of our pie, you absolutely need your cream cheese to be completely softened—no sneaky cold lumps allowed! Grab one 8-ounce package. Then, grab 1 cup of your favorite creamy peanut butter, 1 full cup of powdered sugar for that smooth sweetness, and just 1 teaspoon of vanilla extract. The final component is a 12-ounce container of frozen whipped topping, and make sure that’s thawed out completely before you fold it in!
Ingredients for the Chocolate Ganache Topping
This is the grand finale topping. You simply need 1 cup of semi-sweet chocolate chips. Heat up 1/2 cup of heavy cream until it’s steaming, then pour it right over the chips until they melt into that shiny ganache. And if you’re feeling extra fancy—which, of course, you should be—keep about 1/4 cup more of creamy peanut butter ready for a decorative drizzle later.
Step-by-Step Instructions for Your No Bake Peanut Butter Pie
Alright, this is where the actual magic happens, and I promise you, it’s faster than ordering takeout! Since we aren’t firing up the oven, our timeline is all about assembly and chilling. Here is how we take those beautiful ingredients from the previous section and turn them into the best no bake pie you’ve ever seen. Remember, patience during the chill time is the only thing standing between you and pure peanut butter bliss. For more tips on quick, perfect pies, you can see why people love this one over at no bake peanut butter pie. If you’re looking to extend your no-bake repertoire, you absolutely must check out my recipe for no bake pumpkin cheesecake!
Creating and Chilling the Oreo Crust Pie Recipe
First things first, let’s secure that chocolate base. Mix those cookie crumbs and the melted butter together until everything looks like wet sand. Use the bottom of a measuring cup to really press that mixture firmly into your 9-inch pie dish. Get those sides nice and snug! Once it’s packed down tight, pop that whole dish straight into the freezer. It needs to firm up while we tackle the filling, so give it about 15 minutes chilling time while you get things mixed.
Assembling the Fluffy Peanut Butter Filling
When dealing with cream cheese, you have to treat it right! Put the softened cream cheese in your bowl first and beat it until it’s absolutely smooth—no graininess allowed! Then, mix in the 1 cup of peanut butter, the powdered sugar, and the vanilla. Keep mixing until it’s one creamy, delicious dream. Now for the airy lightness: take your thawed whipped topping and gently fold it into that peanut butter base. I mean gently! Overmixing here will knock all the air out, and we want this filling super fluffy, not dense.
Topping and Setting the Indulgent Peanut Butter Pie
Once the filling is settled into that cold crust, cover it up and send it back to the fridge for a good, long chill—at least 4 hours, okay? While that happens, make the chocolate topping. Heat your heavy cream until it’s just steaming hot, then pour it right over those chocolate chips. Let it sit, and then whisk until you have a smooth, glossy ganache. Spread that over your chilled pie, and if you held out, drizzle that reserved 1/4 cup of slightly warmed peanut butter over the top for a pretty swirl. Cover it loosely one last time and back into the fridge for at least 30 more minutes to let that chocolate topping set up before slicing. This method ensures your pie is firm enough to serve beautifully, which is so important for a make ahead dessert!
Tips for the Best No Bake Pie Success
Look, the recipe is simple, but I want this to be the absolute best no bake peanut butter pie you’ve ever made, so let’s talk about the little things that make a huge difference. These tips are the things I learned through trial and error in my own kitchen, and they keep this pie from turning into a puddle when you try to slice it. You want structure with your indulgence, right? I’ve got you covered, and you can check out my thoughts on another fantastic chilled recipe here: pecan cream pie. For more on fluffy texture, you might also enjoy reading about a very similar fluffy no-bake peanut butter pie recipe!
Achieving the Perfect **No Bake Peanut Butter Pie** Texture
My biggest piece of advice for the filling is about temperature. Your cream cheese has to be truly softened—room temperature, soft enough that your finger leaves a dent easily. If it’s even slightly cold, you’ll get those annoying little cheese lumps mixed into your beautiful peanut butter base! Also, please, don’t reach for the low-fat whipped topping here. We need the stability of the full-fat stuff to keep that creamy peanut butter dessert filling light and fluffy. Using the generic, airy stuff just won’t hold up to the weight of that chocolate topping!
Crust Variations: Graham Cracker or Extra Chocolate
If you’re out of Oreos or just really craving that classic diner flavor, swapping out the crust is easy. For a no bake peanut butter pie with a graham cracker base, use 1 1/2 cups of crumbs instead of the Oreos. Mix those crumbs with 2 tablespoons of regular granulated sugar before mixing in the melted butter. It just gives the crust a little extra sandy sweetness. And honestly, if you’re using graham crackers, throwing a tiny pinch of salt right into the crust crumbs wakes up all the flavors beautifully.
Variations on the Classic Peanut Butter Pie
This recipe for no bake peanut butter pie is so sturdy and delicious that you can really play around with the top layer. It’s fantastic as written, but sometimes you just need a little extra something, right? The beauty of this easy peanut butter pie recipe is how well it takes on extra flavors. If you’re making this for a serious peanut butter fanatic, you absolutely have to go for the Reese’s cups addition mentioned in the notes!
Instead of just a plain chocolate ganache, try heating up some of those classic Reese’s cups with the heavy cream until they melt together. It makes a richer, slightly saltier topping that is just divine. Or, keep the chocolate layer simple and then brutally chop up Reese’s cups—or even peanut butter stirred into chocolate chips—and pile those on top. It instantly turns this into an extra indulgent peanut butter pie fit for a party. For more fun creamy desserts that are totally adaptable, take a peek at my lemon cream cheese dump cake!
And listen, if chocolate isn’t your thing, skip the ganache completely! A thick layer of slightly warmed, drizzly peanut butter mixed with a splash of heavy cream for thinness, combined with straight-up whipped cream piled high? Perfection for a summer treat. You can see some other great takes on similar recipes by checking out this external guide on no bake peanut butter pie variations!
Make Ahead Dessert and Storage for Your No Bake Peanut Butter Pie
This is seriously one of my favorite things to make when I know I have a busy weekend coming up! Because this whole no bake peanut butter pie relies on chilling, it’s the definition of a perfect make ahead dessert. If you’re taking this to a potluck or serving it for the holidays—or honestly, just need something ready for Tuesday night—just make it totally the day before. I mean it; it tastes even better after it’s had a full night in the fridge for all those creamy layers to really meld together. For more ideas on desserts you can prep early, be sure to check out my whole section on make ahead dessert options!
Keep that dreamy pie covered tightly with plastic wrap or foil right in the refrigerator. Since it’s full of cream cheese and whipped topping, it needs that cold environment constantly. I find it stays perfectly fresh and delicious for up to four days. Don’t try leaving it out on the counter for too long, though! It needs to stay firm so when you go to slice it, you get that clean wedge that makes serving this easy peanut butter pie recipe so satisfying.
Serving Suggestions for this Simple Peanut Butter Treat
Now that you have this gorgeous, chilled piece of heaven, what do you serve it with? Since this no bake peanut butter pie is decadent, I always lean toward something that cuts through the richness a little bit. A sharp, black coffee is honestly the perfect partner here—the bitterness really sings next to that sweet peanut butter. If you need something fresh on the side, skip the heavy sauces and go for fresh raspberries or sliced strawberries.
This pie is my absolute go-to when I need an easy potluck dessert that travels well and disappears fast. If you are preparing for a big gathering, just keep it covered in the cooler until it’s time to serve. For more quick ideas that are perfect for weeknights or parties, I always keep my easy breakfast ideas category updated, too! You’ll be surprised how much overlap there is!
Frequently Asked Questions About Making a No Bake Peanut Butter Pie
I get so many messages asking about tweaking this recipe, which I absolutely love because it means you’re all making it! It’s such a reliable no bake dessert for summer, but sometimes little questions pop up. Here are some of the things folks ask me most often about getting the absolute most out of this easy peanut butter pie recipe. If you’re looking for something speedy during the week, these quick fixes can help you keep dinner chaos to a minimum. If you need more dinner inspiration after dessert, you can always check out my quick weeknight dinners page!
Can I use crunchy peanut butter in this easy peanut butter pie recipe?
Oh yes, you totally can! I personally stick to creamy because I crave that pure velvety texture in the filling, but using crunchy peanut butter just changes the experience a bit. You’ll get little pockets of peanut texture throughout the filling, which gives it an extra bite. It won’t affect how firm it sets up. If you were planning on making a simple cream cheese peanut butter pie without an Oreo crust, crunchy peanut butter adds a nice surprise crunch since you miss out on that texture from the cookies!
How long does the no bake chilled pie need to set?
This is the hardest part: waiting! The minimum chilling time you need to get clean slices is about 4 hours in the refrigerator. That’s enough time for the cream cheese and whipped topping to firm things up nicely. However, if you want the absolute firmest, most gorgeous sliceable texture—especially if you plan on taking it somewhere—cover it tightly and let it sit overnight. Seriously, the overnight chill makes the no bake chilled pie just heavenly.
What is the best way to cut a clean slice of this no bake peanut butter pie?
Trust me, you don’t want to pull one slice out and watch the rest collapse! The trick here is heat. Grab your sharpest, thinnest knife and dip the blade into a tall glass filled with very hot water. Wipe the knife completely dry immediately, then make your cut. Repeat that hot water dip and dry step before *every single cut*. It melts just enough of the surface layer—peanut butter and chocolate—so you get a beautiful, intact slice of that indulgent peanut butter pie to show off.
For more tips answered by other home cooks who love this recipe, I often refer folks over to see what they are saying about their successful bakes, like this great resource on the no bake peanut butter pie!
Estimated Nutritional Data for This No Bake Peanut Butter Pie
Now, I have to be completely upfront with you all—and this is something my grandmother always insisted on when sharing her recipes: these numbers are just guidelines! Since we are using commercial ingredients like specific brands of cream cheese or peanut butter, the final count can swing around a little bit. I always recommend treating this information as an estimate when you plan your week. The data below reflects the standard ingredients you see listed above for one generous slice of this incredible no bake peanut butter pie.
If you’re into balancing out dessert with some healthier options throughout the day, you might want to check out my thoughts on high-protein oats later for breakfast! But for now, let’s look at what’s in this piece of pure indulgence:
- Serving Size: 1 slice
- Calories: 450
- Fat: 30g (ooh, that’s the good stuff!)
- Saturated Fat: 12g
- Carbohydrates: 40g
- Sugar: 35g (It’s a treat, remember?)
- Protein: 10g
- Cholesterol: 45mg
This is why this easy peanut butter pie recipe is best reserved for special occasions, because wow, is it rich! But honestly, every single calorie is worth it when you taste that crunchy crust against that fluffy filling. If you are tracking macros or focusing on certain dietary needs, just remember that swapping out the Oreo for a graham cracker crust or using a lighter whipped topping will change these figures considerably.
Share Your No Bake Peanut Butter Pie Creations
Well, that’s it! You’ve made the best no bake pie in town, and now it’s time to enjoy it. This recipe, born from my own need to bring comfort back into my busy life, is really about connection. When you make something this delicious and simple, I want to know about it! My biggest joy here at MDLATDMM Recipes, which you can read more about on my About Page, is seeing how this food brings people together.
Please, I’m begging you, save this recipe and come back to tell me how it went! Drop a rating below—five stars if it made your week a little better! Did you stick to the chocolate Oreo crust or did you try those graham cracker variations we talked about? Did you drown it in Reese’s cups? I want all the details!
Take a picture of your beautiful, perfectly set slices and tag me on social media. Seeing your success with this incredibly easy dessert just fills my heart up. Happy baking—or should I say, happy *not* baking!
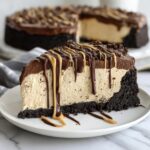
PrintThe Ultimate Easy No-Bake Peanut Butter Pie with Chocolate Oreo Crust
Make this rich, creamy peanut butter pie without turning on your oven. It features a simple chocolate Oreo crust and a fluffy peanut butter filling, making it a perfect quick dessert for any occasion.
- Prep Time: 20 min
- Cook Time: 0 min
- Total Time: 4 hr 20 min
- Yield: 8 servings 1x
- Category: Dessert
- Method: No Bake
- Cuisine: American
- Diet: Vegetarian
Ingredients
- 1 3/4 cups chocolate sandwich cookie crumbs (about 24 cookies)
- 1/4 cup unsalted butter, melted
- 1 (8 ounce) package cream cheese, softened
- 1 cup creamy peanut butter
- 1 cup powdered sugar
- 1 teaspoon vanilla extract
- 1 (12 ounce) container frozen whipped topping, thawed
- 1 cup semi-sweet chocolate chips
- 1/2 cup heavy cream
- 1/4 cup creamy peanut butter (for topping)
Instructions
- Prepare the crust: Mix the chocolate cookie crumbs and melted butter in a medium bowl until the crumbs are evenly moistened. Press the mixture firmly into the bottom and up the sides of a 9-inch pie dish. Place the crust in the freezer while you prepare the filling.
- Make the filling base: In a large bowl, beat the softened cream cheese until smooth. Add 1 cup of peanut butter, powdered sugar, and vanilla extract. Beat until the mixture is fully combined and creamy.
- Fold in the whipped topping: Gently fold the thawed whipped topping into the peanut butter mixture until no streaks remain. Do not overmix.
- Fill the crust: Spoon the peanut butter filling evenly into the chilled Oreo crust. Smooth the top with a spatula.
- Chill the pie: Cover the pie loosely with plastic wrap and refrigerate for at least 4 hours, or until the filling is firm.
- Prepare the chocolate topping: Place the chocolate chips in a small, microwave-safe bowl. Heat the heavy cream in a small saucepan until it just begins to simmer, or microwave until hot. Pour the hot cream over the chocolate chips and let stand for 5 minutes. Whisk until smooth to create a ganache.
- Add the final layer: Once the pie is firm, spread the chocolate ganache evenly over the top of the peanut butter filling.
- Add peanut butter swirls (optional): Warm the remaining 1/4 cup of peanut butter slightly so it is pourable. Drizzle it over the chocolate layer in a decorative pattern.
- Chill again: Return the pie to the refrigerator for at least 30 minutes to allow the chocolate topping to set before slicing and serving.
Notes
- For a graham cracker crust variation, substitute 1 1/2 cups of graham cracker crumbs for the Oreo crumbs and add 2 tablespoons of granulated sugar to the crust mixture.
- If you want an extra indulgent topping, melt a few Reese’s Peanut Butter Cups and drizzle them over the chocolate layer.
- This is a great make ahead dessert; it tastes best when chilled for 6 hours or overnight.
Nutrition
- Serving Size: 1 slice
- Calories: 450
- Sugar: 35
- Sodium: 250
- Fat: 30
- Saturated Fat: 12
- Unsaturated Fat: 18
- Trans Fat: 0
- Carbohydrates: 40
- Fiber: 2
- Protein: 10
- Cholesterol: 45