
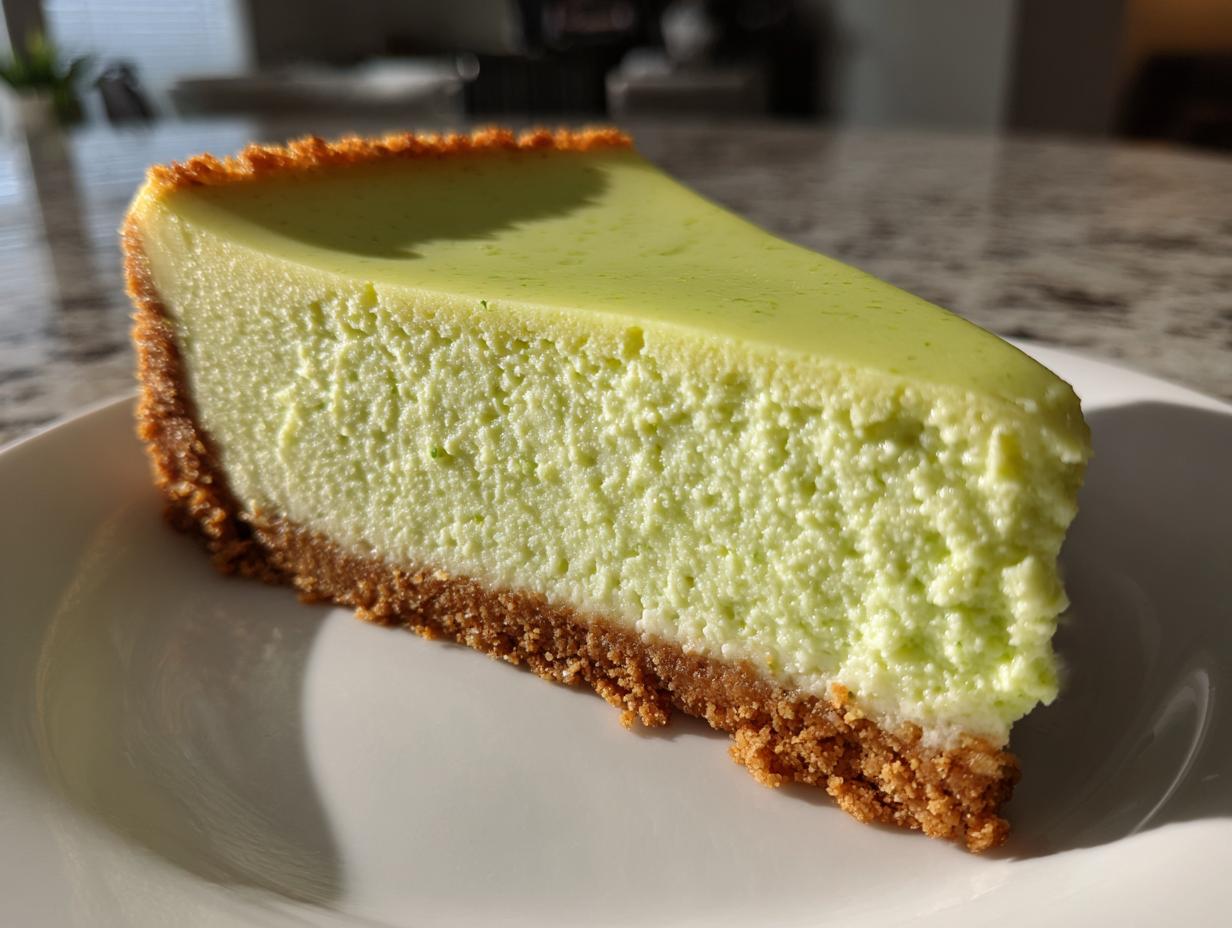
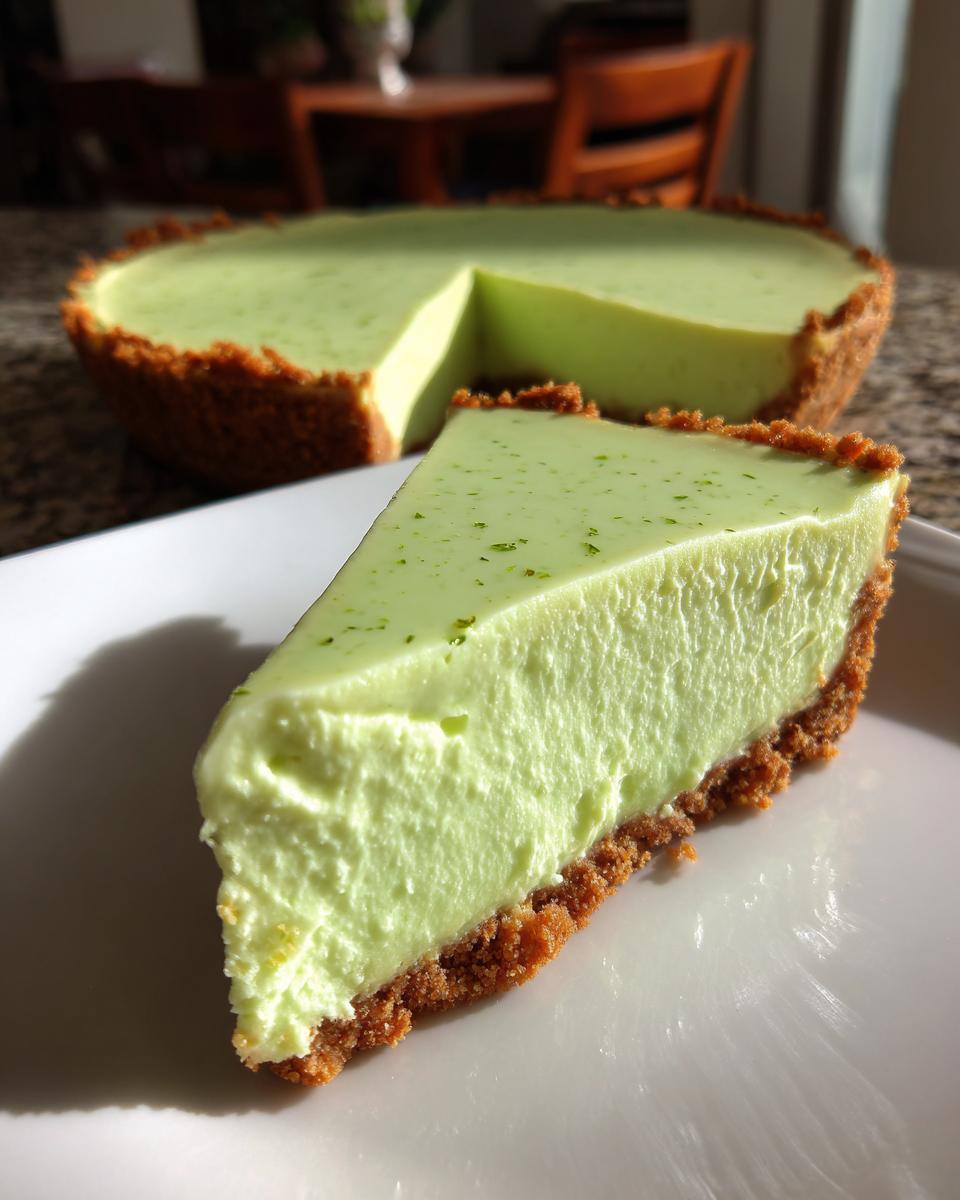
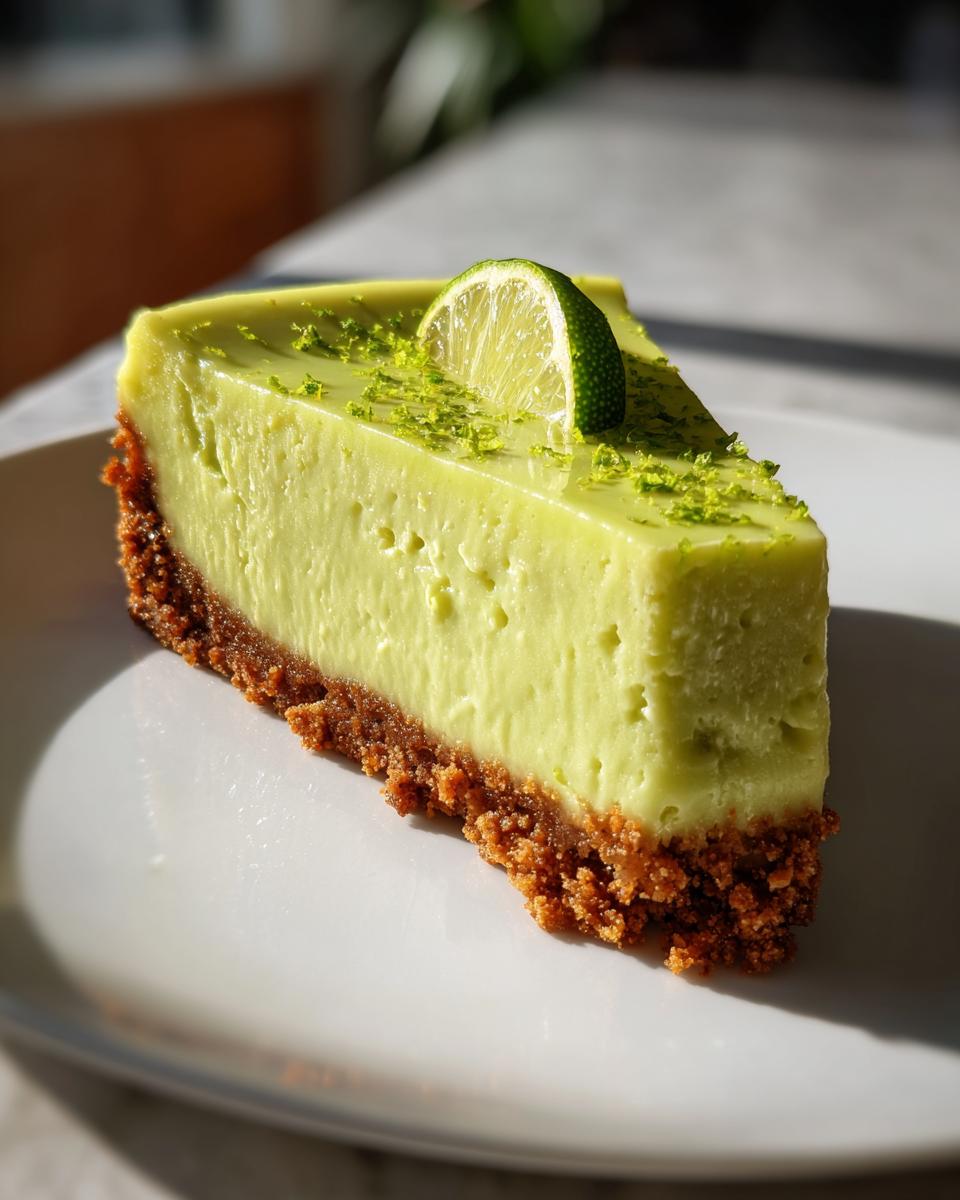
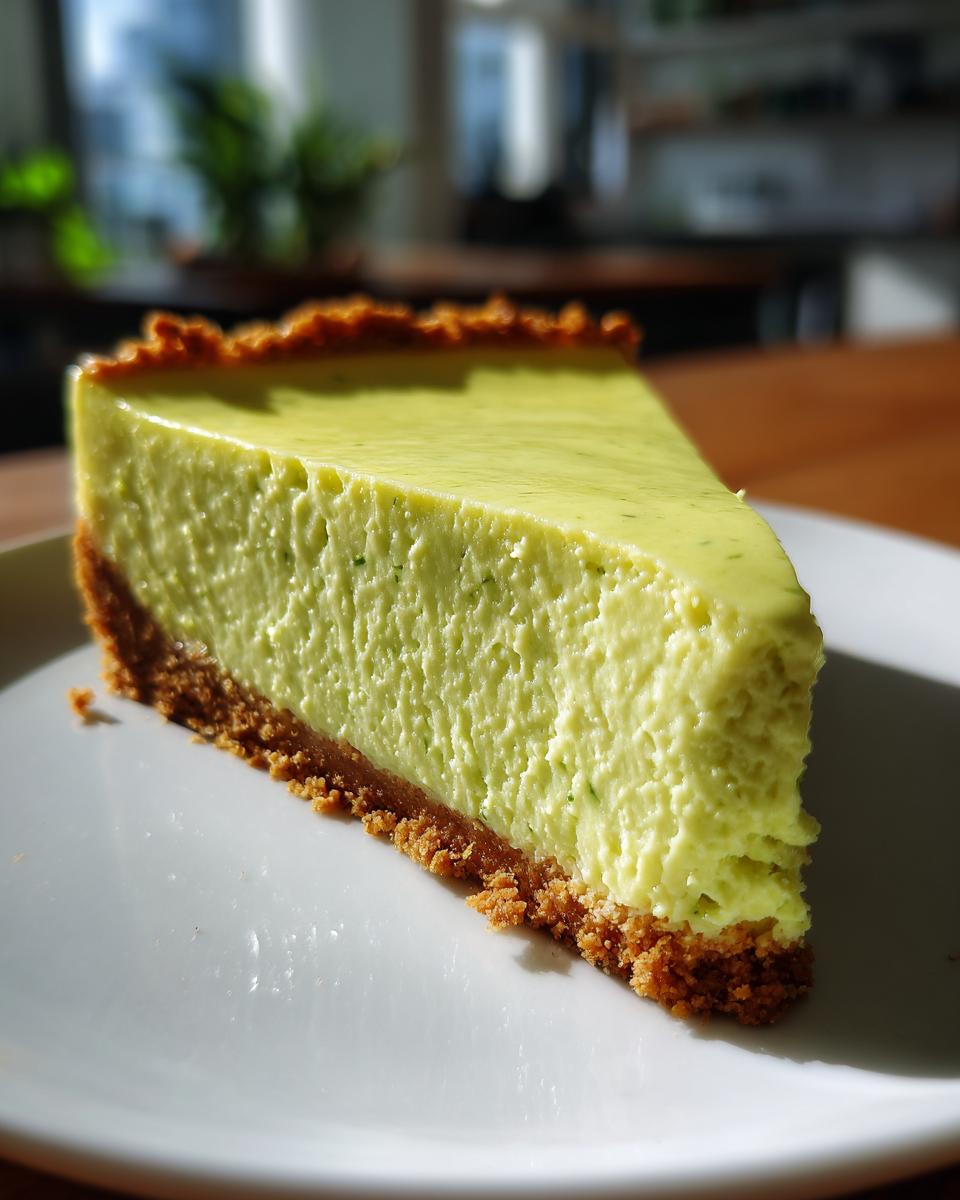
When summer rolls around, my kitchen starts craving anything bright and zesty, and honestly, nothing beats that first bite of a perfect citrus treat. Forget those overly sweet desserts you sometimes find; we’re making the ultimate creamy, baked **key lime cheesecake** here—the kind that makes you close your eyes because the balance between tartness and that rich sweetness is just right. When I was stuck in the city hustle, making something with that clean, tangy flavor was my little bridge back to comfort. This recipe is my tried-and-true way to get that authentic Florida flavor, complete with a buttery, crunchy graham cracker crust. Trust me, this is the one you’ll bookmark immediately.
- Why This Baked Key Lime Cheesecake is Your New Favorite Tropical Cheesecake Recipe
- Gathering Ingredients for Your Creamy Key Lime Cheesecake
- Step-by-Step Instructions for the Perfect Key Lime Cheesecake
- Tips for Success with Your Homemade Cheesecake Flavor
- Baked vs No Bake Cheesecake: Making the Right Key Lime Dessert Choice
- Serving Suggestions for Your Refreshing Dessert Ideas
- Storage and Reheating Instructions for Key Lime Cheesecake
- Frequently Asked Questions About Making Key Lime Cheesecake
- Share Your Tangy Tart Sweet Treat Experience
Why This Baked Key Lime Cheesecake is Your New Favorite Tropical Cheesecake Recipe
What makes this recipe the absolute best? It’s all about that texture contrast, honestly. You get this beautiful, thick, and unbelievably creamy filling that just melts in your mouth. It truly deserves the title of a top-tier **Tropical Cheesecake Recipe**. Plus, the crust! That buttery graham cracker crunch underneath provides the perfect foil for that sharp, bright lime flavor. It hits every note you want in a **Tangy Tart Sweet Treat**.
Achieving The Best Lime Cheesecake Flavor
You simply cannot cheat when it comes to the lime here. I know bottled juice is easy, but trust me, using fresh key lime juice gives you that true, electric zing. We manage to balance that amazing tartness with the richness of the cream cheese perfectly here. That’s the secret to making this the Best Lime Cheesecake you’ve ever tried.
Gathering Ingredients for Your Creamy Key Lime Cheesecake
Okay, before we get messy, we need to talk about what we’re putting into this beauty. For a cheesecake to bake up perfectly, ingredients matter a bunch! You’ll need three full blocks of cream cheese, and they absolutely *must* be softened—I mean soft enough to almost squish through your fingers. Plus, make sure you have those graham cracker crumbs ready for the base, and don’t forget the fresh key lime juice. Get everything measured out now; it makes the mixing process so smooth.
Ingredient Notes and Substitutions for Key Lime Cheesecake
Let’s discuss the lime situation, because this is crucial for that authentic flavor. If you can find actual key limes, please use them! That little bit of extra tart magic is unbeatable for our **key lime cheesecake**. If you’re stuck with regular limes, use their juice, but I really need you to compensate by adding a little extra zest. Also, remember what I said about the cream cheese: room temperature is the golden rule. Cold cream cheese means lumpy batter, and we don’t want any lumps in our smooth dessert!
Step-by-Step Instructions for the Perfect Key Lime Cheesecake
Alright, gather your tools! We’re tackling the main event now: getting this beautiful, tangy filling into that buttery base. The key to avoiding cracks and getting that melt-in-your-mouth texture is being gentle during the mixing and using the water bath—don’t skip that part, seriously! We preheat to 325°F, but the magic really happens during the slow cool-down after baking. This whole process ensures your cheesecake comes out looking like a bakery masterpiece.
Preparing the Graham Cracker Crust Dessert Base
First things first, mix those graham cracker crumbs, 1/4 cup of sugar, and the melted butter until it feels like wet sand. Press this mixture down really firmly into the bottom of your 9-inch springform pan. Then, we pop it in the oven for just about 10 minutes to set everything up. Once it’s done, pull it out and let that Graham Cracker Crust Dessert cool just a touch before we pour the filling over it.
Mixing The Best Key Lime Filling
This step is where technique counts! Grab your electric mixer, but keep it on low speed mostly. You need to beat the cream cheese until it is completely lump-free and super smooth *before* you add anything else. Next, slowly mix in the rest of your sugar and flour, just until combined. When you add those three eggs, you must add them one at a time, mixing only until the yolk disappears. If you overmix once the eggs are in, you’re whipping air in, which causes cracks later. We want smooth, dense, not airy!
Baking Your Key Lime Cheesecake Using a Water Bath
A water bath is my non-negotiable trick for a creamy texture—it steams the cheesecake gently. First, wrap the outside bottom of your springform pan tightly in heavy-duty foil; you need a good seal so no water leaks in. Set that pan inside a larger roasting pan. Once your filling is settled in, carefully pour hot water into the larger pan until it comes halfway up the sides of the cheesecake pan. This gentle environment keeps this lovely Citrus Cheesecake from baking too fast and cracking!
Tips for Success with Your Homemade Cheesecake Flavor
Now that we’ve babied this baby through the oven, we need to talk about the finish line! Achieving that perfect, crack-free surface and that truly rich **Homemade Cheesecake Flavor** means respecting the cooling process. Never pull the cheesecake straight from the heat! The one-hour slow cool inside the turned-off oven, with the door cracked, is non-negotiable; it lets the cake relax gently, which prevents those big unsightly cracks. You want edges that look set, but the very center should still wobble just a bit, like firm Jell-O.
Once it’s out, let it cool completely on the counter. I know you want to cut into it right away, but patience here is your reward! The intense chilling time—at least six hours, but honestly, overnight is better—is what transforms that wobbly center into the dense, creamy texture we crave. If you’re topping it with whipped cream, make sure you use cream cheese frosting or plain whipped cream, not something heavy, just before serving. For more insights on getting that superior texture, check out this great bake from friends over at Cook Salty.
Baked vs No Bake Cheesecake: Making the Right Key Lime Dessert Choice
I get asked all the time: should I bake it or just chill it? Honestly, it depends on what kind of afternoon you’re planning! This baked **key lime cheesecake**, while needing that oven time and the water bath dedication, gives you unmatched density. It’s rich, it’s sturdy, and it has that slightly deeper, caramelized flavor from the baking process. That’s why I always reach for this one when I need an impressive party dessert.
Now, if you’re in a huge rush or it’s scorching hot outside and you really don’t want to turn on the oven, the no-bake route is phenomenal too! The no-bake version is softer, lighter, and feels maybe a little more like a mousse, which is perfect for the term **Key Lime Dessert**. If you want a super fast option, check out this recipe for one of the best no-bake lime desserts out there. But for the absolute classic texture we associate with cheesecake, stick with this baked recipe and maybe try a pie next time, like my favorite pecan cream pie for a different texture profile!
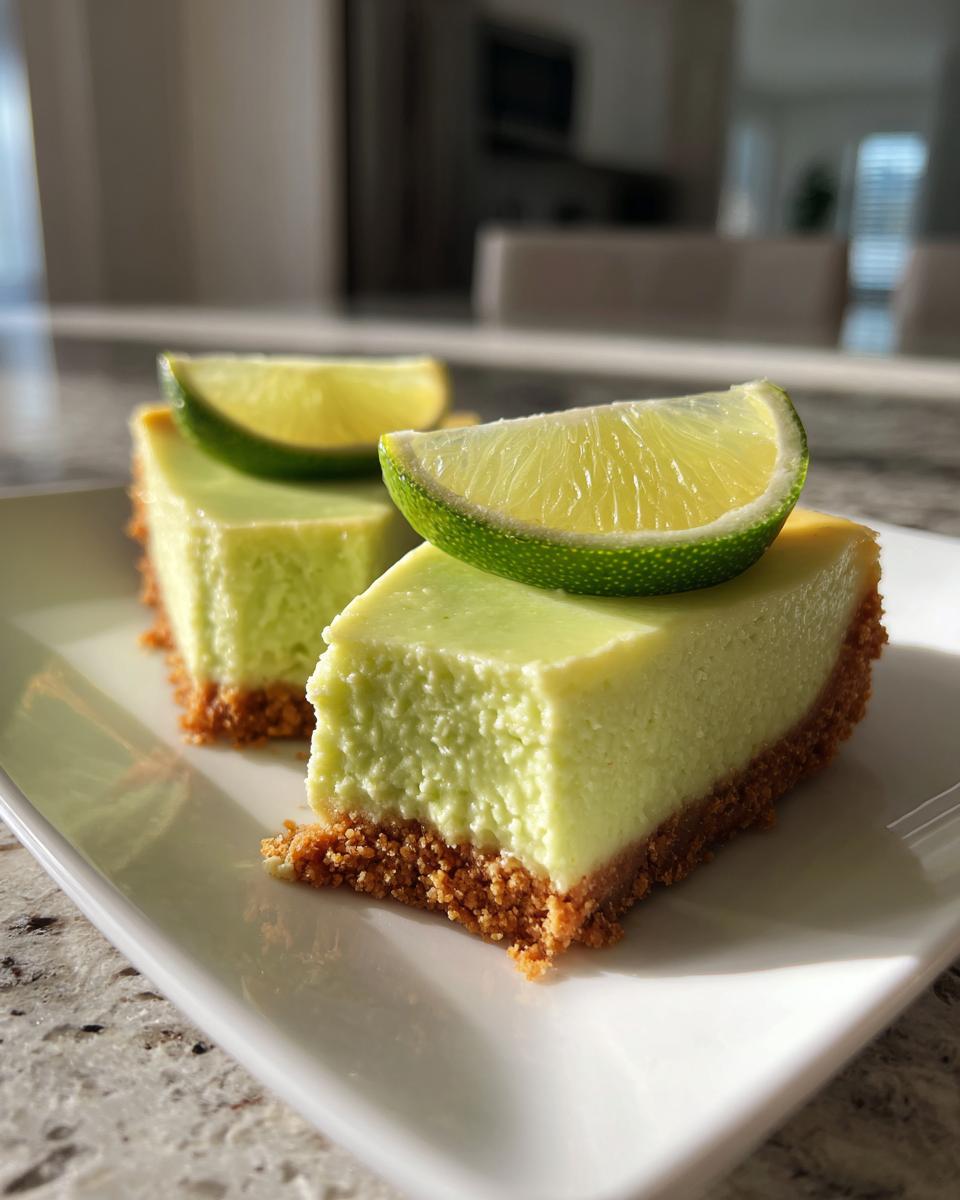
Serving Suggestions for Your Refreshing Dessert Ideas
Once this gorgeous **key lime cheesecake** is perfectly chilled, it’s time for the fun part: making it look incredible on your dessert platter! I keep the toppings really simple because that bright lime flavor should shine. A big cloud of fresh whipped cream dusted with a little extra lime zest is just stunning. For a real tropical twist—which reminds me of my spicy coconut chicken curry—a small dollop of lightly sweetened coconut cream is amazing.
Creating Individual Mini Cheesecakes
If you’re hosting a party and want something easy for people to grab without slicing, adapting this for individual servings is so simple! Line a standard muffin tin with paper liners, pour the batter in, and bake them. You’ll need to knock off about 10 to 15 minutes from the baking time. These mini versions are fantastic for portion control—or pretending to practice portion control!
Storage and Reheating Instructions for Key Lime Cheesecake
The hard part is over, but now we have to talk about patience! For this **key lime cheesecake**, you really need to respect the chilling time. Six hours is the absolute minimum, but I promise you, waiting until the next day is worth every second. That overnight chill sets everything up perfectly so you get those clean slices.
When storing leftovers—if you even have any!—wrap the entire cake tightly with plastic wrap, or pop the entire springform base into an airtight container. It stays great in the fridge for about four days. If you’re looking for other make-ahead comforts, my pumpkin banana bread does wonderfully when wrapped tightly, too. Seriously though, I’ve never had to reheat this cheesecake; it should always be served cold!
Frequently Asked Questions About Making Key Lime Cheesecake
I know you’ve put so much love into making this, so let’s cover any last-minute worries you might have about the final result. Getting that balance of texture and that signature zing takes a little trial and error, but don’t stress! I’ve collected the questions I get asked the most about this **key lime cheesecake** so you can serve up a truly satisfying dessert.
Can I use regular limes instead of key limes in this recipe?
This is the million-dollar question for any citrus dessert! Yes, you absolutely can use regular Persian limes if you can’t track down key limes. But you need to know the difference: regular limes are sharper and a little less floral. Since key limes are smaller and just pack more concentrated punch, I always suggest increasing the lime zest by maybe a quarter teaspoon if you substitute the juice. That extra zest really helps bring the intensity back up so you still get that wonderful tartness in your finished **Citrus Cheesecake**.
What is the best way to get a truly creamy cheesecake texture?
Creaminess is life when it comes to cheesecake! There are two big secrets here. First, make sure your cream cheese is actually room temperature soft—if you see any little white lumps when you start, stop and wait longer! Second, and this is huge: once you add those eggs, you must mix as little as possible. If you beat the eggs into the batter on high speed, you are essentially making meringue inside your cake, which causes it to puff up and then inevitably crack and get dry. Low speed, just until combined, keeps the texture silky smooth, even when you’re making an Easy Summer Cheesecake like this one!
Share Your Tangy Tart Sweet Treat Experience
Now that you’ve brought a taste of the tropics right into your own kitchen, I can’t wait to hear about it! Seriously, seeing your success stories keeps my passion for straightforward home cooking alive. Please take a moment to rate this recipe down below, and if you have any tweaks or just want to share a picture of your gorgeous **key lime cheesecake**, drop a comment or tag me on social media. We’re all in this journey together, keeping those classic flavors thriving!
Making Our Chewy Chocolate Chip Cookies Next?
If you loved the ease and reward of this cheesecake, you absolutely must try my recipe for chewy chocolate chip cookies next. They are the perfect follow-up to a bright citrus dessert!
PrintCreamy Baked Key Lime Cheesecake with Graham Cracker Crust

You will make this creamy, tangy Key Lime Cheesecake featuring a buttery graham cracker crust. This recipe delivers the bright citrus flavor you want in a classic baked dessert.
- Prep Time: 25 min
- Cook Time: 65 min
- Total Time: 8 hours 30 min
- Yield: 10 servings 1x
- Category: Dessert
- Method: Baking
- Cuisine: American
- Diet: Vegetarian
Ingredients
- 1 1/2 cups graham cracker crumbs
- 1/4 cup granulated sugar (for crust)
- 6 tablespoons unsalted butter, melted
- 3 (8 ounce) packages cream cheese, softened
- 1 1/2 cups granulated sugar (for filling)
- 1/4 cup all-purpose flour
- 1 teaspoon vanilla extract
- 1/2 teaspoon lime zest
- 1/2 cup fresh key lime juice
- 3 large eggs
Instructions
- Preheat your oven to 325 degrees Fahrenheit. Wrap the outside bottom of a 9-inch springform pan with heavy-duty aluminum foil.
- Prepare the crust: Mix graham cracker crumbs, 1/4 cup sugar, and melted butter in a bowl until combined. Press the mixture firmly into the bottom of the prepared springform pan. Bake for 10 minutes. Remove from oven and let cool slightly.
- Prepare the filling: In a large bowl, beat the softened cream cheese with an electric mixer until smooth. Gradually beat in the 1 1/2 cups sugar and flour until just combined.
- Mix in the vanilla extract, lime zest, and key lime juice until smooth. Scrape down the sides of the bowl.
- Add the eggs one at a time, mixing on low speed after each addition until just incorporated. Do not overmix the batter.
- Pour the filling over the cooled crust in the springform pan.
- Bake using a water bath: Place the foil-wrapped springform pan inside a larger roasting pan. Carefully pour hot water into the roasting pan until it reaches halfway up the sides of the springform pan.
- Bake for 55 to 65 minutes, or until the edges are set and the center has a slight jiggle.
- Turn off the oven, crack the oven door open slightly, and let the cheesecake cool inside the oven for 1 hour. This prevents cracking.
- Remove the cheesecake from the water bath and foil. Cool completely on a wire rack.
- Chill the cheesecake in the refrigerator for at least 6 hours, or preferably overnight, before serving. Remove the springform ring before slicing.
Notes
- For the best tangy flavor, use fresh key lime juice rather than bottled juice.
- If you prefer individual servings, you can use this recipe to make mini cheesecakes in a muffin tin lined with paper liners. Adjust baking time accordingly.
- For a smoother texture, let your cream cheese sit at room temperature for at least one hour before starting.
Nutrition
- Serving Size: 1 slice
- Calories: 450
- Sugar: 35g
- Sodium: 300mg
- Fat: 28g
- Saturated Fat: 17g
- Unsaturated Fat: 11g
- Trans Fat: 0.5g
- Carbohydrates: 42g
- Fiber: 1g
- Protein: 7g
- Cholesterol: 120mg