
Oh, the joy of a garden overflowing with fresh tomatoes! If you’ve ever found yourself with more ripe goodies than you know what to do with, you’re going to *love* this homemade salsa recipe. It’s a tested water-bath method that’s specifically designed for us gardeners who want to preserve that summer beautiful flavor safely. Seriously, it’s a game-changer for keeping that sweet garden bounty around long after the last frost. We’ve perfected it to give you that satisfying chunky texture and, best of all, you can totally tweak the spice level to your heart’s content. Think of it as bottling sunshine and a little bit of heat, just like Maddie did when she first rediscovered the magic of home cooking and preserving!

- Why You'll Love This Homemade Salsa Recipe
- Ingredients for Your Chunky Garden Salsa
- Essential Equipment for Canning Homemade Salsa
- Step-by-Step Guide to Making Water Bath Tomato Salsa
- Tips for the Perfect Spicy Garden Salsa
- Ingredient Notes and Substitutions for Homemade Salsa
- Frequently Asked Questions About Safe Canning Salsa
- Nutritional Information for Homemade Water-Bath Salsa
- Share Your Homemade Salsa Creations!
Why You’ll Love This Homemade Salsa Recipe
Trust me, you are going to FLIP for this salsa recipe. Here’s why:
- It’s super easy to whip up, even if you’re new to canning.
- The flavor is just fantastic – all those fresh, garden-y notes!
- It’s tested and safe for water bath canning, so you can feel good about preserving it.
- You can totally change up the heat level to make it just perfect for your taste buds.
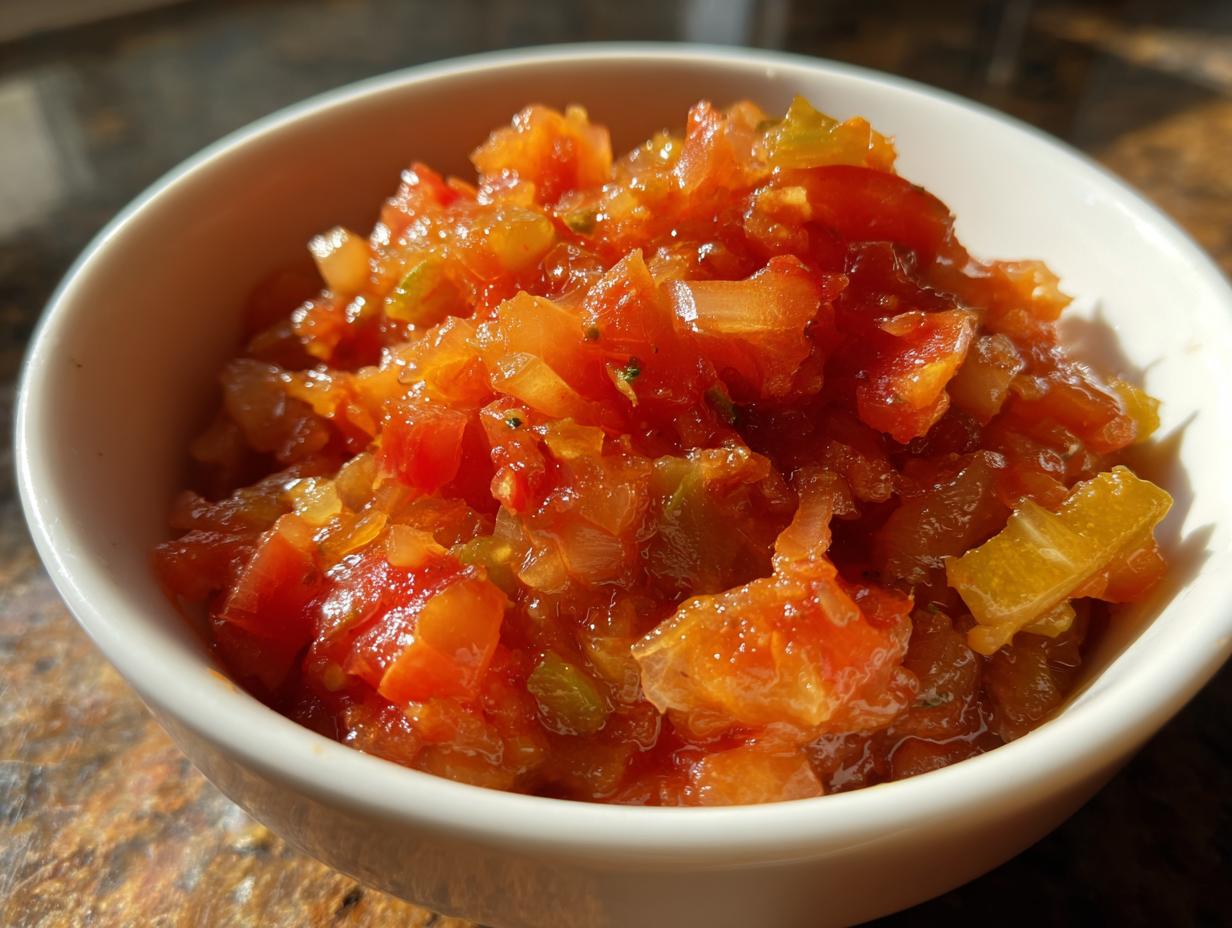
Ingredients for Your Chunky Garden Salsa
Alright, let’s talk about what you’ll need to get this amazing salsa into jars! It’s pretty straightforward, but using fresh, quality ingredients makes all the difference. Promise me you’ll use the good stuff!
Here’s the rundown for your delicious homemade salsa:
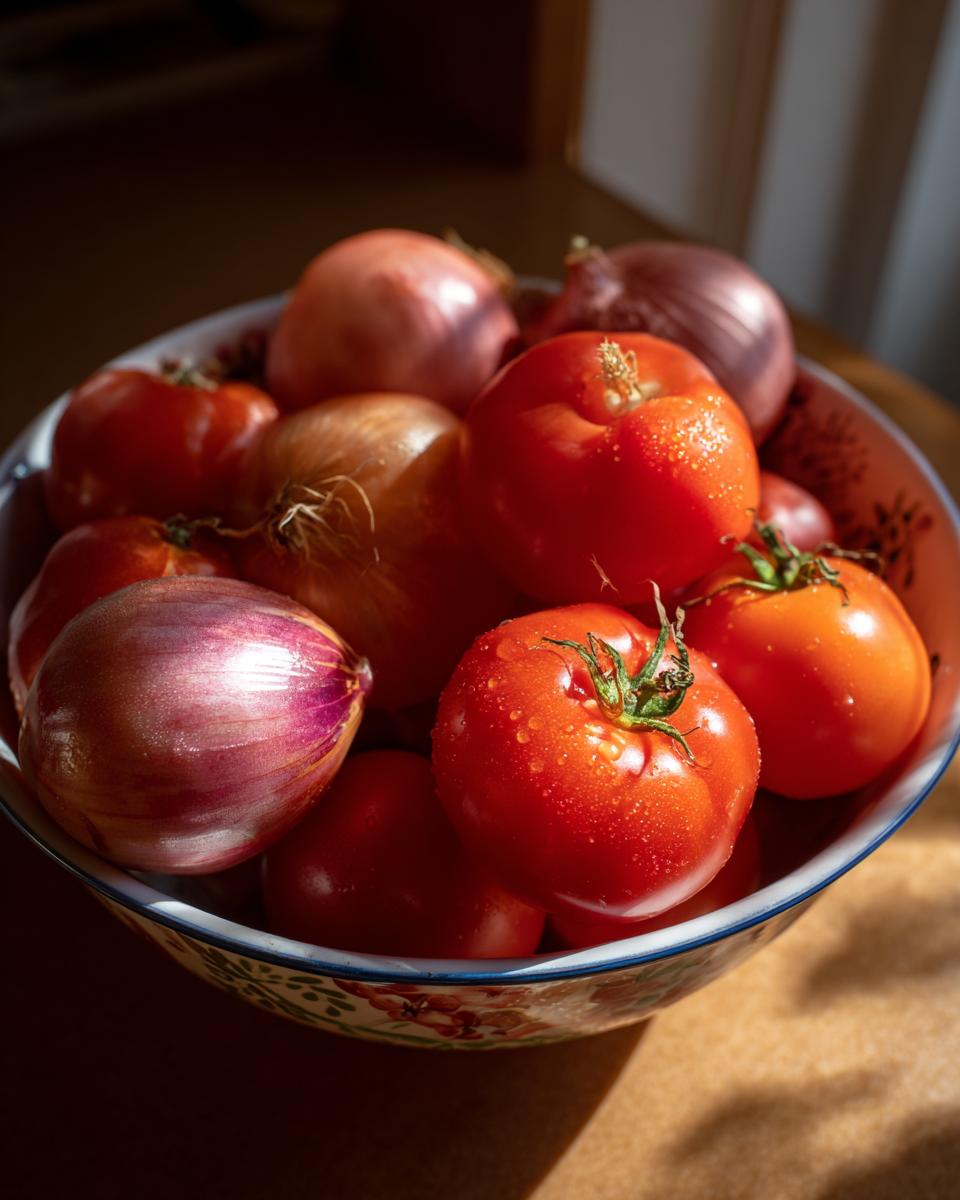
- 6 cups of ripe tomatoes, peeled, cored, and chopped up (this is roughly about 3 pounds of tomatoes, give or take!)
- 1 cup of chopped onions – usually about one medium onion works perfectly.
- 1/2 cup of chopped green bell peppers – grab about one medium pepper for this.
- 1/4 cup of chopped jalapeño peppers – I usually go for about 2 small ones, but definitely remove the seeds if you don’t want it *too* spicy!
- 2 cloves of garlic, all minced up nice and fine.
- 1/2 cup of distilled white vinegar – make sure it’s at least 5% acidity for safe canning!
- 1 teaspoon of salt – it just brings all those flavors together.
- 1/2 teaspoon of ground cumin – for that perfect salsa earthiness.
- 1/4 teaspoon of cayenne pepper (this is totally optional, but if you like it hot, go for it!)
Essential Equipment for Canning Homemade Salsa
Okay, before we dive into the deliciousness, let’s talk tools! Having the right gear makes this whole process so much smoother, trust me. You’ll want to have your water bath canner ready to go. Plus, make sure you’ve got your canning jars, new lids, and the rings handy. A big, non-reactive pot is key for cooking down all those yummy ingredients. Oh, and a ladle for filling those jars and a funnel can be super helpful too!
Step-by-Step Guide to Making Water Bath Tomato Salsa
Alright, home cooks and garden pals, let’s get this delicious homemade salsa canned up so you can enjoy it all year long! It’s not as scary as it sounds, promise. We’ll take it step-by-step, just like we do everything else around here.
Preparing Your Canning Station
First things first, get your water bath canner filled with water and set it on the stove to start simmering. You want it ready to go. Make sure your canning jars are hot – either run them through the dishwasher on a hot cycle or let them sit in that simmering canner water. Have your new lids and rings right there with you!
Combining and Cooking the Salsa
Now, grab that big non-reactive pot. Toss in your chopped tomatoes, onions, bell peppers, jalapeños, and that lovely minced garlic. Add in your white vinegar – remember, it’s got to be at least 5% acidity, that’s super important for safe canning! Toss in the salt, cumin, and that optional cayenne if you’re feeling brave. Stir it all up, bring it to a boil over medium-high heat, then cut the heat back and let it simmer for a good 10 minutes. Stir it often so nothing sticks!
Filling and Sealing the Jars
Okay, this is where the magic happens! While the salsa is simmering away, carefully ladle the *hot* salsa into your *hot* jars. Make sure you leave about a half-inch of space at the top – that’s your headspace. If you see any air bubbles, gently poke them out with a non-metallic utensil. Wipe those jar rims super clean with a damp cloth, then pop on the lids and screw on the rings. Just fingertip tight, don’t crank on them!
Processing in the Water Bath
Gently place your filled jars into that waiting canner. Make sure the water covers the jars by at least an inch or two. Put the lid on your canner and let it come back up to a rolling boil. Once it’s boiling, set your timer for 15 minutes. If you live at a higher altitude, you’ll need to add a few extra minutes – it’s important for safety!
Cooling and Checking Seals
When your timer goes off, carefully lift those jars out of the canner using your jar lifter and place them on a towel-lined counter or cutting board. Don’t touch them! Let them sit undisturbed for 12 to 24 hours. You’ll hear them ping as they seal. Once they’re completely cool, check that the lids are firm and haven’t popped up. That’s how you know your water bath tomato salsa is ready for the pantry!
Tips for the Perfect Spicy Garden Salsa
Alright, let’s chat about making this spicy garden salsa absolutely perfect every single time. Honestly, the best part about preserving your own garden goodies is getting it *just* right for your family. So, here are a few little secrets I’ve picked up along the way!
First off, ingredient quality is king, right? Use the ripest, freshest tomatoes you can find – they’ll give you the best flavor and color. If you want it chunkier, just give everything a rough chop. If you’re more into a smoother texture, you can pulse your tomatoes and veggies in a food processor a few times *before* cooking, but seriously, don’t go crazy and make it mush! For the heat, it’s all about those jalapeños. Keep the seeds in for a fiery kick, or remove them for a milder salsa. And always, always double-check that vinegar has at least 5% acidity – it’s non-negotiable for safe canning. Happy preserving!

Ingredient Notes and Substitutions for Homemade Salsa
Okay, let’s dive into the nitty-gritty of what makes this homemade salsa recipe work so well, and what you can do if you need to switch things up a bit. Understanding these key ingredients is super important, especially when you’re canning!
That distilled white vinegar isn’t just for flavor; it’s your best friend for safety in canning. Make absolutely sure it’s at least 5% acidity! If you don’t have white vinegar, apple cider vinegar can work in a pinch, but it might give your salsa a slightly different color and a tiny bit of a fruity tang. For the tomatoes, any ripe, flavorful variety works, but Roma or paste tomatoes tend to be less watery, which is great for a thicker salsa. And for the peppers, feel free to get creative! Poblano peppers add a lovely mild flavor, or if you’re super brave, some habaneros will seriously crank up the heat!
Frequently Asked Questions About Safe Canning Salsa
Got questions about making your own safe canning salsa? I totally get it! Canning can seem a little intimidating at first, but once you get the hang of it, it’s so rewarding. Here are some common things people ask:
Can I use different types of tomatoes for this homemade salsa?
Oh, for sure! While Roma or paste tomatoes are great because they’re less watery, any ripe tomato will work. Just make sure they’re good and flavorful!
How do I adjust the spice level in this canned salsa recipe?
It’s super easy! For more heat, just use more jalapeños and think about leaving some of the seeds in. For less spice, remove all the seeds and membranes, or use fewer peppers altogether.
What if my salsa is too thick or too thin for canning?
If it’s too thin, just let it simmer a little longer uncovered to let some liquid evaporate. If it’s too thick, you can stir in a tablespoon or two of water or even some tomato juice while it’s cooking.
How long is this homemade salsa safe to store?
When canned properly using the water bath method, your homemade salsa should be good in a cool, dark pantry for at least a year, but honestly, it usually tastes best within the first 6-8 months!
Nutritional Information for Homemade Water-Bath Salsa
Okay, so thinking about the numbers! A serving of this delicious homemade water-bath salsa (about 1/4 cup) is pretty darn healthy. We’re looking at roughly 25 calories, with about 6g of carbs and 1g of fiber. You also get a little protein, and hopefully not too much sodium, depending on how you salt it. Remember, these are just estimates, and the exact numbers can change based on the tomatoes and veggies you use!
Share Your Homemade Salsa Creations!
Alright, now it’s your turn to shine! I’d absolutely LOVE to hear how your homemade salsa turned out. Did you make it spicy? Did you stick to the chunky texture? Leave a comment below, give it a star rating if you’re feeling generous, and don’t forget to tag me on social media if you share any photos – I can’t wait to see your delicious creations!
PrintHomemade Water-Bath Salsa
A tested water-bath salsa recipe for gardeners, offering a chunky texture and customizable spice level, perfect for canning.
- Prep Time: 20 min
- Cook Time: 25 min
- Total Time: 45 min
- Yield: About 4-5 pint jars 1x
- Category: Preserves
- Method: Water Bath Canning
- Cuisine: American
- Diet: Vegetarian
Ingredients
- 6 cups peeled, cored, and chopped ripe tomatoes (about 3 lbs)
- 1 cup chopped onions (about 1 medium)
- 1/2 cup chopped green bell peppers (about 1 medium)
- 1/4 cup chopped jalapeño peppers (about 2 small, seeds removed for less heat)
- 2 cloves garlic, minced
- 1/2 cup distilled white vinegar (5% acidity)
- 1 teaspoon salt
- 1/2 teaspoon ground cumin
- 1/4 teaspoon cayenne pepper (optional, for extra heat)
Instructions
- Prepare your water bath canner by filling it with water and bringing it to a simmer. Have your canning jars, lids, and rings ready.
- In a large non-reactive pot, combine the chopped tomatoes, onions, green bell peppers, jalapeño peppers, and minced garlic.
- Add the vinegar, salt, cumin, and cayenne pepper (if using).
- Stir all ingredients together.
- Bring the mixture to a boil over medium-high heat, stirring occasionally.
- Reduce heat and simmer for 10 minutes, stirring frequently.
- While the salsa simmers, ladle hot salsa into hot canning jars, leaving 1/2 inch headspace. Remove air bubbles.
- Wipe jar rims clean and place lids and rings on jars. Tighten rings fingertip tight.
- Process filled jars in the simmering water bath canner for 15 minutes (adjust for altitude if necessary).
- Remove jars from canner and let them cool on a towel-lined counter for 12-24 hours. Check seals before storing.
Notes
- For a smoother salsa, you can pulse the ingredients in a food processor before cooking, but do not over-process.
- Adjust the amount of jalapeño peppers and cayenne pepper to control the spice level.
- Ensure your vinegar has at least 5% acidity for safe canning.
- Always follow proper water bath canning procedures to ensure safety.
Nutrition
- Serving Size: 1/4 cup
- Calories: 25
- Sugar: 4g
- Sodium: 200mg
- Fat: 0g
- Saturated Fat: 0g
- Unsaturated Fat: 0g
- Trans Fat: 0g
- Carbohydrates: 6g
- Fiber: 1g
- Protein: 1g
- Cholesterol: 0mg