
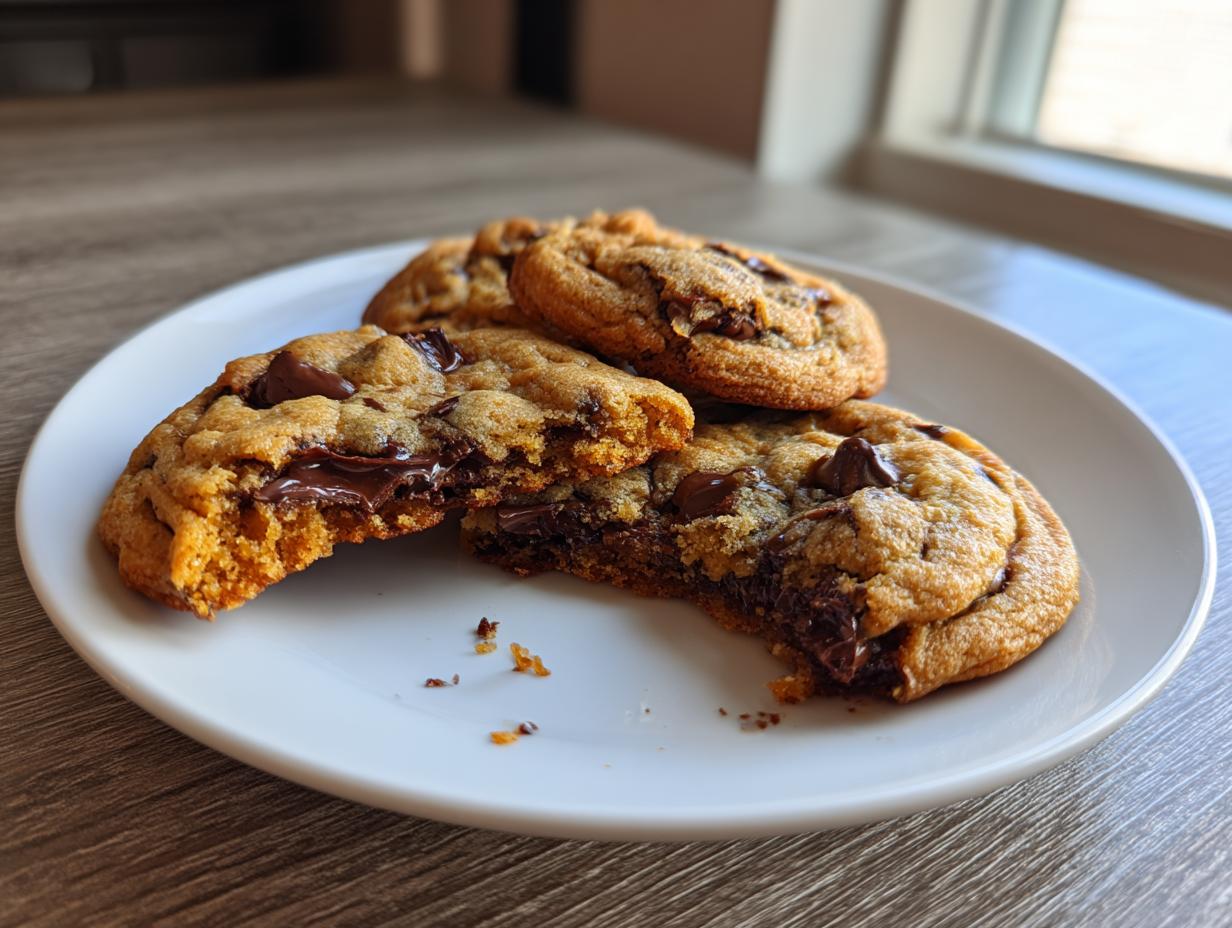
Oh, that smell! You know the one. That warm, melted vanilla and brown sugar scent that immediately stops you in your tracks? That’s the smell of true happiness, and it can only come from perfect homemade chocolate chip cookies. I spent years chasing that elusive texture—the ones that are impossibly thick, perfectly chewy in the center, yet have those lovely, delicate crispy edges, just like you get from the best bakeries.
I’m Maddie, and trust me, I’ve made my share of flat, sad, greasy cookie mistakes. But that’s why I’m so excited to share what I finally landed on: The Ultimate Bakery-Style, Thick, and Chewy Homemade Chocolate Chip Cookie Recipe. This isn’t just another recipe; it’s a culmination of every tweak and trick me and my family tested to make sure you get cookie perfection, easily, every single time you bake from scratch.

We believe in reliable results here at MDLATDMM, which means if you follow these steps, you’re getting that bakery experience right in your own kitchen. Grab your favorite apron; we’re making cookie magic! You can see similar dedication to quality in other trusted recipes, like the wonderful ones shared by Diana, but I promise you, this one is truly foundational for any cookie lover. For more classic versions while you bake, check out our guide on Classic Chocolate Chip Cookies.
- Why This Recipe Delivers the Best Homemade Cookies (Cookie Perfection)
- Gathering Ingredients for Your Homemade Chocolate Chip Cookies
- Step-by-Step Instructions for Bakery Style Cookies
- Tips for Success with Chewy Chocolate Chip Cookies
- Storage and Reheating for Your Homemade Chocolate Chip Cookies
- Serving Suggestions for Classic Chocolate Chip Cookies
- Frequently Asked Questions About Homemade Chocolate Chip Cookies
- Estimated Nutrition for These Soft Baked Cookies
- Baking From Scratch: Share Your Homemade Chocolate Chip Cookies Experience
Why This Recipe Delivers the Best Homemade Cookies (Cookie Perfection)
If you’re tired of cookies that spread out into thin, crunchy coasters, then I’m so glad you found this recipe! What sets these apart as truly the Best Homemade Cookies is the focus on texture. Everyone talks about gooey centers, but I needed that satisfying, substantial bite—that’s what makes them Cookie Perfection.
When I first moved to the city, all my attempts at recreating Mom’s cookies resulted in flat discs. I realized I was missing the key structural elements. After countless soggy batches, I finally cracked the code, balancing the sugars and fats just so. These cookies hold their shape beautifully!
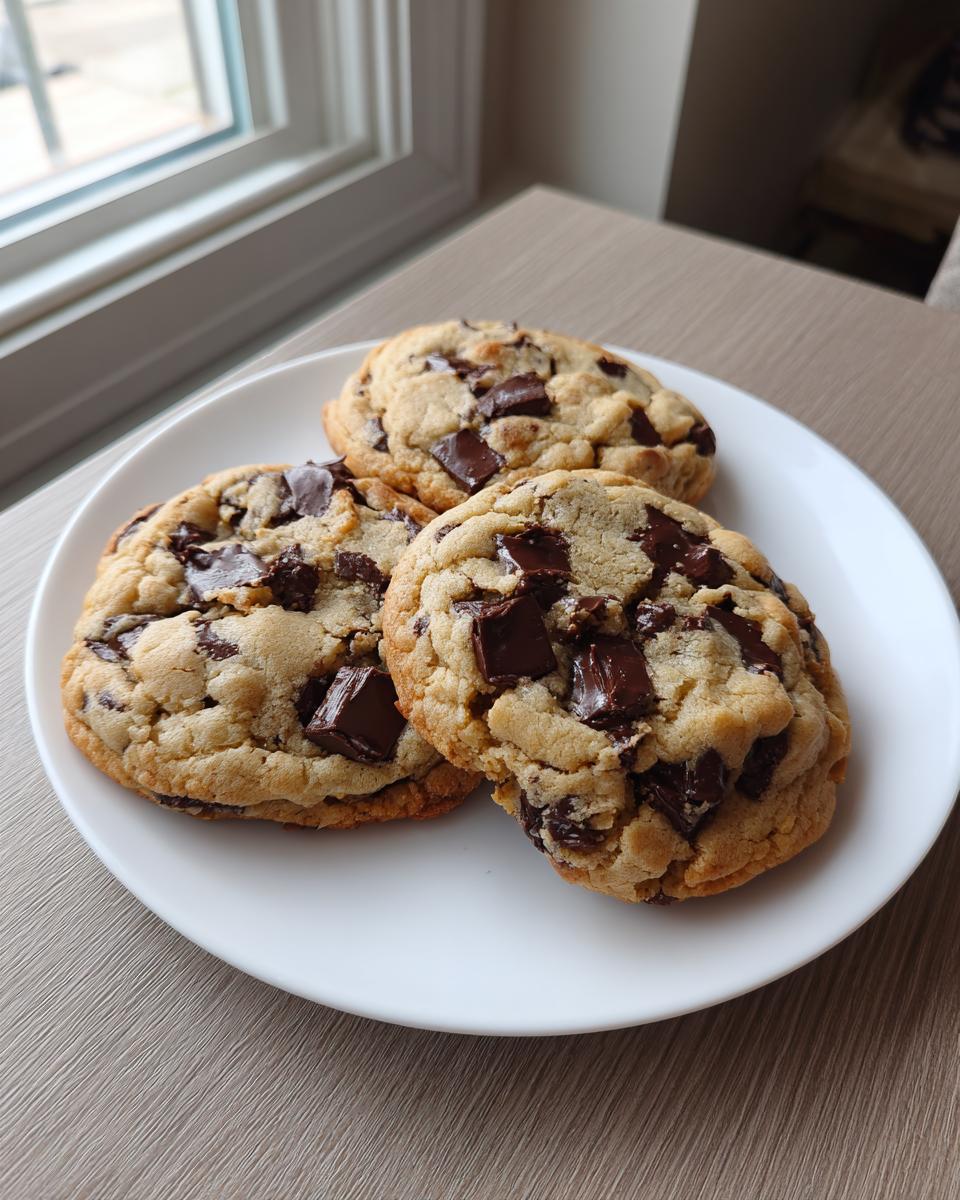
Achieving Thick Chocolate Chip Cookies Every Time
Don’t skip the little push! After you drop your dough onto the sheet, gently use the back of a spoon or your thumb to press the top of the dough ball down just a little. This doesn’t flatten it, but it encourages those lovely thick sides to rise up around the chocolate instead of spreading out wide. Trust me on this trick for incredibly Thick Chocolate Chip Cookies. You can also read more about preventing spread in my guide to Chewy Chocolate Chip Cookies.
Gathering Ingredients for Your Homemade Chocolate Chip Cookies
Okay, let’s talk ingredients. This is where the foundation for your amazing homemade chocolate chip cookies is laid. When I say ‘softened butter,’ I mean it—it should yield slightly when you press it, but absolutely not be greasy or melted! We need that structure. You’ll need two sticks of unsalted butter, both sugars measured precisely (that packed light brown sugar versus the white sugar is crucial for chewiness), and exactly two large eggs. Don’t eyeball these. Baking is chemistry until it becomes instinct, so measure now!
For the flour, make sure you spoon it lightly into your measuring cup and level it off. We whisk the flour and baking soda together separately. And those chocolate chips? Two full cups of semi-sweet are in the base recipe, but you can absolutely mix in some milk chocolate chips too, if you like a little extra gooeyness when they melt. This simple list delivers the most intense buttery flavor.
Ingredient Notes and Substitutions for Homemade Chocolate Chip Cookies
My number one instructional note, which I hammered home earlier, is that butter needs to be softened—not cold, not melted! Room temperature eggs whisk in much better too, so pull those out alongside the butter. This helps everything emulsify beautifully during the creaming phase.
Here’s a little tip if you ever run out of brown sugar but have molasses: you can make a decent substitute. For every three-quarters cup of brown sugar needed, just use three-quarters cup of white sugar and add about 2 tablespoons of molasses, mixing it into the butter before adding the sugar. It mimics the moisture and flavor depth. It’s not always perfect, but it keeps us going when we’re deep into a batch of from scratch cookies!
Step-by-Step Instructions for Bakery Style Cookies
Look at this! We only need about 27 minutes—total—for these amazing treats, which is fantastic for those times you need Quick Chocolate Chip Cookies! First things first, get that oven preheated to 375°F (190°C). We use parchment paper on our baking sheets; it’s my secret weapon for cleanup, which, let’s be honest, is the worst part of baking. If you’re making a big batch, I highly recommend checking out how Handle the Heat preps their cookie sheets for beautiful results. And while you wait for the oven to heat up, maybe snag the recipe for my Pumpkin Snickerdoodle Cookies for next week!
Next, we tackle the wet ingredients. That softened butter, the granulated sugar, and the packed brown sugar all go into the bowl. You mix those until they are genuinely light and fluffy—this step is so important for the structure, I have a dedicated section on it below. Then, eggs in one at a time, making sure they incorporate fully before the vanilla goes in. Don’t rush this part; it’s what makes them bakery style!
In a separate bowl, whisk together the flour and baking soda. The golden rule comes now: gradually add that dry mix to your wet ingredients, turning the mixer down low. You want to mix only until you see just a few streaks of flour left. If you overmix here, you activate too much gluten, and hello flatness! Once just combined, take the mixer off, grab your spatula, and stir in those two cups of chocolate chips by hand. Dollop rounded tablespoons of that glorious dough onto the parchment. Remember that tip about pressing them down just a bit for thickness?
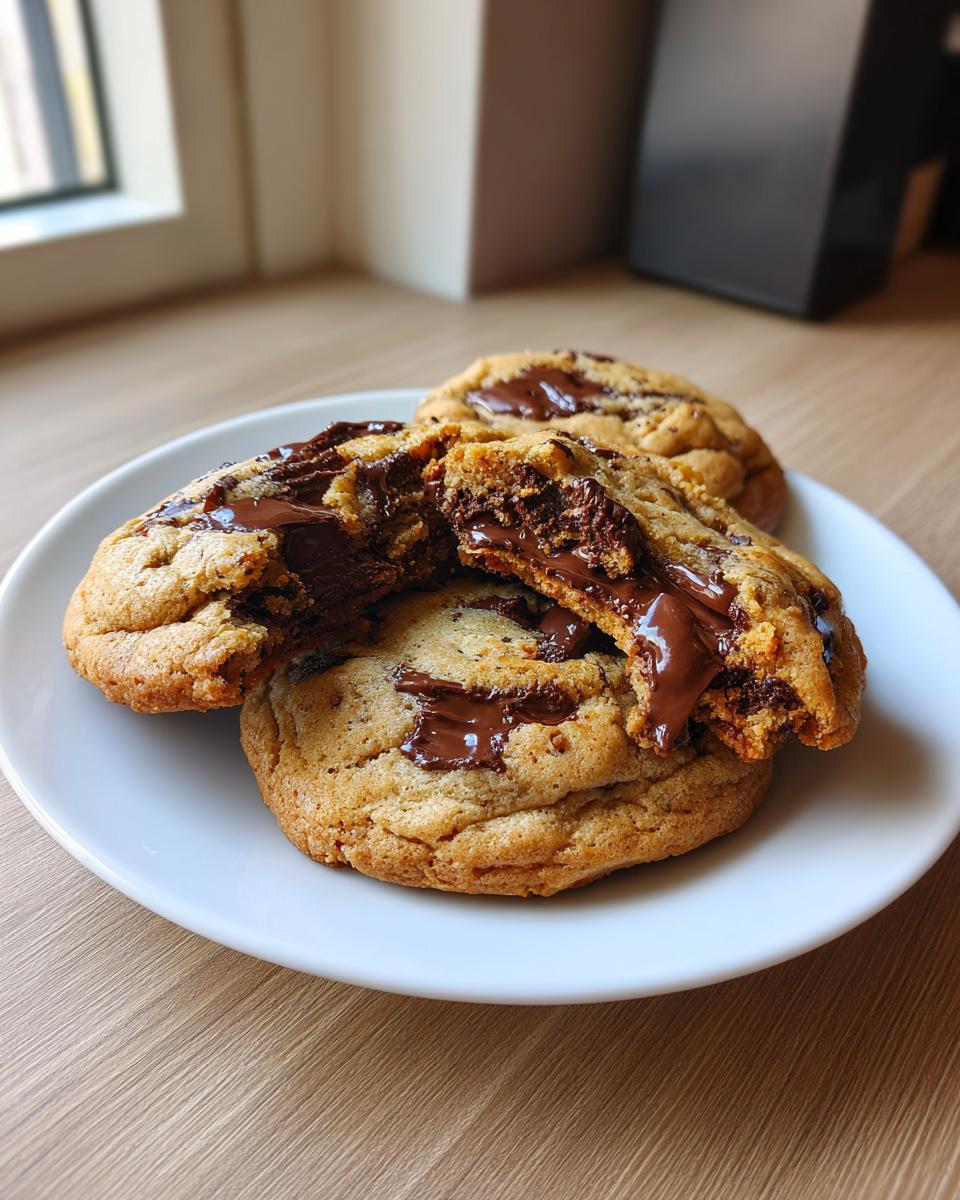
Bake them for 9 to 12 minutes. You’re looking for edges that are starting to look golden brown, but I insist you pull them out when the very center still looks slightly soft or even a tiny bit underdone. They keep cooking outside the oven! Let them rest on the hot sheet for a full five minutes—this lets the structure set—before moving them over to a wire rack to finish cooling. And just like that, you are done with the hard part!
The Creaming Process: Building Flavor in Your Homemade Chocolate Chip Cookies
This is the very soul of getting those dreamy, thick homemade chocolate chip cookies! When you cream that softened butter with the granulated and brown sugars, you are literally whipping tiny pockets of air into the fats. These air bubbles are what expand in the heat of the oven, giving our cookies that beautiful lift and that soft, pillowy interior we’re aiming for. I beat mine until it genuinely looked pale yellow and felt airy, almost like whipped frosting. Give this step a solid three to four minutes of beating—it makes all the difference between a dense brick and a cloud-like cookie!
Tips for Success with Chewy Chocolate Chip Cookies
Getting those perfect Chewy Chocolate Chip Cookies—the ones that barely leave the tray because you want to eat them all right now—really just comes down to a few simple commandments. These are my biggest Chocolate Chip Cookie Secrets that ensure chewiness and thickness every time. First, and I absolutely cannot stress this enough, do not let your butter melt! Softened only! Melted butter means flat cookies, and we don’t do flat cookies here.
Second, use the mix of white and brown sugar we talked about. Brown sugar brings moisture because of that molasses content, which is your friend for chewiness. Finally, if you have the patience—and I know it’s hard when they smell this good—chilling the dough for even 30 minutes makes a huge difference in preventing spread. If you’re interested in other ways to keep your baked goods moist, my Pumpkin Banana Bread guide has some great pointers too! For more advanced texture tips, check out what Dishicious suggests.
Storage and Reheating for Your Homemade Chocolate Chip Cookies
The biggest test for any cookie batch is how they taste tomorrow, right? To keep these homemade chocolate chip cookies soft—and trust me, they really want to stay soft!—store them in an airtight container at room temperature. To really lock in that gooey texture though, you can place a small slice of sandwich bread in the container with the cookies. The cookies gently absorb moisture from the bread, keeping them tender.
If you need to revive a cookie for that perfect moment, heating one up for about 10 to 15 seconds in the microwave is my personal favorite trick. It melts those chocolate chips instantly, giving you that first-bite satisfaction all over again. It’s almost as satisfying as pulling them fresh from the pan! For other sweet storage ideas, you can check out my recipe for Pumpkin Dip with Cool Whip.
Serving Suggestions for Classic Chocolate Chip Cookies
Now that you’ve achieved cookie perfection, how should you enjoy these glorious Classic Chocolate Chip Cookies? Honestly, eating one straight off the cooling rack feels mandatory. But if you must pair them, milk is non-negotiable! I keep a cold pitcher ready specifically for this purpose. For the grown-ups, dip your cookie into a strong cup of coffee; the slight bitterness really lets the buttery sweetness shine through.

And if you want to go all-in on dessert, you absolutely must make an ice cream sandwich! A scoop of vanilla bean between two slightly warm cookies is pure heaven. These cookies pair wonderfully with just about anything that needs a sweet accompaniment, unlike something savory like the Apple Cider Braised Pork Shoulder!
Frequently Asked Questions About Homemade Chocolate Chip Cookies
Why did my cookies turn out flat instead of thick?
This is the number one question I get! Usually, it comes down to melted butter or forgetting to use enough brown sugar. If your butter is too soft, or if you used all white sugar instead of the brown/white mix we use here, the cookie dough won’t have the structure to hold up while baking. Remember what I said—if you skip the slight press on top, they’ll try to spread too much! If you want more insights into achieving chewiness, this guide on Chewy Chocolate Chip Cookies might help you out.
Can I skip chilling the dough? I need these cookies *now*!
I totally get the urgency! We designed this to be a relatively quick recipe, but chilling for at least 30 minutes is what guarantees those perfect, tall, Bakery Style Cookies. If you skip it entirely, they will spread much more. If you’re in a real pinch, try chilling just the dough balls on the tray for 15 minutes while the oven reaches temperature. It’s better than nothing!
What is the best type of chocolate for maximum gooeyness?
For the absolute best results, I use semi-sweet chips mixed with some chopped milk chocolate bars. That mix of sugars melts differently and gives you pockets of deep dark flavor alongside that creamy milk chocolate softness. Don’t just stick to one type; the variety makes these Melt in Your Mouth Cookies even better! If you have a favorite recipe for something completely different, you might enjoy my notes on my Bacon Cheeseburger Soup for dinner!
Can I use self-rising flour instead of all-purpose flour and baking soda?
Nope, I wouldn’t recommend it for this specific recipe. We need control over the leavening agents to get that specific thick texture we’re aiming for. Self-rising flour already has salt and leavener mixed in, and the amount is often too much for a recipe that relies heavily on creaming butter for lift. Stick to the all-purpose flour and the teaspoon of baking soda listed! Consistency is key for these Simple Chocolate Chip Recipe lovers.
Estimated Nutrition for These Soft Baked Cookies
I know, I know! When you’re busy baking up a storm, nobody is usually thinking about the nutritional breakdown, but since you asked, I pulled the numbers for you! Remember, since these are from scratch cookies, these values are based on using standard ingredients in the proportions listed and delivering about 24 cookies total.
So, for one of these glorious, melt-in-your-mouth treats, we’re looking at roughly 200 calories. That sounds pretty good for something this rich, right? You’ll get about 12 grams of total fat, which is necessary for that buttery taste, and about 24 grams of carbohydrates coming from the sugars and flour. The protein count is low, just around 2 grams, but that’s okay because these are meant to be pure indulgence!
If you’re watching sodium or cholesterol, the numbers are also listed below. Seriously, don’t stress too much over this part; the joy of a fresh, warm cookie outweighs any minor calorie count. You deserve this! If you want another satisfying, easy dish, you should look at my Creamy Coconut Chicken Curry—it’s comfort food done fast!
- Serving Size: 1 cookie
- Calories: 200
- Fat: 12g
- Carbohydrates: 24g
- Protein: 2g
- Sugar: 18g
Baking From Scratch: Share Your Homemade Chocolate Chip Cookies Experience
Whew! You made it! Now you have a cooling rack full of the most perfect, thick, bakery-style homemade chocolate chip cookies imaginable. I truly hope you take a moment to just breathe in that incredible aroma of vanilla and melted chocolate. That’s the smell of a successful afternoon of baking from scratch, and I want to hear all about it!
Please, please, please leave a comment below once you’ve had a chance to try them out. I absolutely live for hearing about your results. Did you manage to get them thick and chewy? Did the centers stay soft? Every little detail helps me, and it helps other bakers decide if this is their next must-make dessert!
If you took any pictures of your beautiful batches—maybe you stacked them high or dunked one in a big glass of milk—tag me on social media! Seeing your triumphs keeps me motivated to keep testing and refining these classic American recipes here at MDLATDMM. For more inspiration on hearty, comforting meals that you can also make at home, take a peek at my famous recipe for the Meatloaf with Glaze. Happy baking, and thank you so much for trusting me with your cookie journey!
PrintThe Ultimate Bakery-Style, Thick, and Chewy Homemade Chocolate Chip Cookies
Follow this straightforward recipe to make bakery style chocolate chip cookies at home. These cookies are thick, chewy, and have soft centers with slightly crisp edges.
- Prep Time: 15 min
- Cook Time: 12 min
- Total Time: 27 min
- Yield: 24 cookies 1x
- Category: Dessert
- Method: Baking
- Cuisine: American
- Diet: Vegetarian
Ingredients
- 1 cup (2 sticks) unsalted butter, softened
- ¾ cup granulated sugar
- ¾ cup packed light brown sugar
- 2 large eggs
- 1 tablespoon vanilla extract
- 2 ¼ cups all-purpose flour
- 1 teaspoon baking soda
- ½ teaspoon salt
- 2 cups semi-sweet chocolate chips
Instructions
- Preheat your oven to 375°F (190°C). Line baking sheets with parchment paper.
- In a large bowl, cream together the softened butter, granulated sugar, and brown sugar until the mixture is light and fluffy.
- Beat in the eggs one at a time, mixing well after each addition. Stir in the vanilla extract.
- In a separate medium bowl, whisk together the flour and baking soda.
- Gradually add the dry ingredients to the wet ingredients, mixing on low speed until just combined. Do not overmix.
- Stir in the chocolate chips by hand.
- Drop rounded tablespoons of dough onto the prepared baking sheets, spacing them about 2 inches apart. For thicker cookies, gently press the dough balls slightly flatter on top.
- Bake for 9 to 12 minutes, or until the edges are golden brown and the centers look slightly underbaked.
- Let the cookies cool on the baking sheet for 5 minutes before transferring them to a wire rack to cool completely.
Notes
- For the best chewy texture, use room temperature eggs and softened (not melted) butter.
- Chilling the dough for 30 minutes before baking helps prevent spreading and results in thicker cookies.
- Use a mix of semi-sweet and milk chocolate chips for deeper flavor.
Nutrition
- Serving Size: 1 cookie
- Calories: 200
- Sugar: 18g
- Sodium: 100mg
- Fat: 12g
- Saturated Fat: 7g
- Unsaturated Fat: 5g
- Trans Fat: 0g
- Carbohydrates: 24g
- Fiber: 1g
- Protein: 2g
- Cholesterol: 30mg