

Oh, that smell! You know the one, right? That incredible waft of cinnamon and sweet apples that just screams ‘fall is here!’ For me, it always takes me right back to my grandma’s kitchen on a chilly Sunday afternoon, probably with a chicken pot pie bubbling away. That’s the magic of true home cooking, and my homemade apple butter recipe is pure bottled comfort. It’s rich, it’s velvety, and it’s loaded with all those warm spices that just make your soul happy. Forget the stuff from the store; nothing beats the flavor that comes from simmering it low and slow until it’s just perfect.
- Why This Homemade Apple Butter Recipe Is a Fall Favorite
- Choosing the Best Apples for Homemade Apple Butter
- Gathering Your Spiced Ingredients for Homemade Apple Butter
- Slow Cooker Apple Butter: The Easiest Method
- Stovetop Apple Butter: A Richer, Deeper Flavor
- Canning and Storing Your Homemade Apple Butter
- Serving Suggestions for Your Spiced Apple Spread
- Frequently Asked Questions about Homemade Apple Butter
- Estimated Nutritional Information
Why This Homemade Apple Butter Recipe Is a Fall Favorite
Honestly, there are a few things that make this recipe a total winner every single year. It’s not just about the amazing taste, though that’s a huge part of it! Here’s why I think you’ll love it too:
- So Easy! Whether you use a slow cooker or the stovetop, the method is super forgiving. You basically just let it do its thing.
- Incredible Flavor: Cooking it low and slow really deepens those apple flavors and marries them perfectly with the spices. It’s so much richer than anything from a jar!
- Super Versatile: I mean, who doesn’t love a good spread? This apple butter is amazing on biscuits, toast, yogurt, or even as a sweet condiment for your holiday meal.
- Perfect for Gifting: Seriously, a jar of this homemade goodness makes the most heartfelt gift. Everyone loves receiving something made with love.
Choosing the Best Apples for Homemade Apple Butter
Okay, so picking the right apples is actually a pretty big deal when you’re making homemade apple butter. You don’t just grab any old apple! I’ve found that using a mix of sweet and tart varieties is the secret sauce. It gives you this amazing depth of flavor that you just can’t get with a single type. Think of it like making a perfect sauce or stew – a blend brings out the best in all the ingredients. For this recipe, I usually grab a few pounds of something sweet and juicy like Fuji, Gala, or my absolute favorite, Honeycrisp. Then, I balance that out with a couple of tart Granny Smiths. That tartness really cuts through the sweetness and adds that little zing. As for peeling them, it’s totally up to you! I usually leave the skins on because they have so much good stuff in them, and they give the butter a richer color. If you want it super smooth, go ahead and peel them, but honestly, I think the skins add character.
Sweet vs. Tart Apples: Finding Your Perfect Blend
When you combine sweet apples with their natural sugars and the crisp, bright flavor of tart ones, you get an apple butter that’s complex and perfectly balanced. The sweet apples give you that wonderful mellow fruitiness, while the tart ones provide a nice counterpoint, preventing it from tasting *too* sweet or one-dimensional. It’s this balance that makes it so delicious on pretty much anything!
Gathering Your Spiced Ingredients for Homemade Apple Butter
Alright, time to talk about what goes *into* this dreamy apple butter! It’s pretty straightforward, but these are the ingredients that really make it sing. You’ll need about 6 pounds of those lovely apples we talked about earlier. Then, for the sweetness, we’ll use 2 cups of sugar. You can totally go with regular granulated sugar, but if you want a really deep, rich flavor, trust me on using brown sugar – it adds this amazing caramelized note! Plus, you’ll want the spices: 1 tablespoon of cinnamon is essential, then about 1 teaspoon of allspice, half a teaspoon of cloves, and a pinch (like, a tiny pinch!) of nutmeg. And to get things going, we’ll add half a cup of apple cider or even just plain water. That little bit of liquid helps everything start to break down beautifully.
Sweetener Options: Granulated vs. Brown Sugar
So, about that sugar! While regular granulated sugar works just fine and gives you that classic apple butter taste, using brown sugar is a game-changer. It has more molasses, which makes the whole thing taste richer, darker, and just that much more complex. You’ll notice a lovely difference in color and flavor!
The Warm Spice Blend for Your Apple Butter
These spices are the heart and soul of apple butter, right? Cinnamon is the star, giving it that cozy, familiar warmth. Allspice adds a hint of something extra, almost peppery and sweet all at once. Cloves bring a deep, pungent warmth, and nutmeg gives it that subtle, grounding aroma. Don’t be afraid to play around with the amounts a little if you love spices! You can always add a tiny bit more cinnamon or even a smidge of ginger if you’re feeling adventurous, just like the recipe notes suggest.
Slow Cooker Apple Butter: The Easiest Method
Okay, confession time: the slow cooker is my best friend when it comes to making slow cooker apple butter. Seriously, it doesn’t get much easier than this! You just toss your prepared apples (remember, washed, cored, and cut up – skins on or off, your call!) into your slow cooker. Then, add that little bit of apple cider or water. Pop the lid on and set it to low. This is where the magic happens over the next 8 to 10 hours. Go about your day, run errands, take a nap – the slow cooker does all the heavy lifting! It gently cooks those apples down until they’re super soft and falling apart. If you notice it getting a bit dry during the day, just add another splash of cider. Once they’re all mushy and lovely, you’ll mash ’em up. I usually use a potato masher right in the pot, but an immersion blender works wonders for a smoother consistency. Then, stir in all those delicious spices and your sugar. Now, you’ll let it cook uncovered on high for another couple of hours, or until it’s nice and thick. You’re looking for it to mound up on your spoon without running right off. It’s a patient process, but so worth it! And when it’s time to preserve all this goodness, remember to check out these handy tips on how to can your own food; it’s super important for keeping it safe and tasty on the shelf.
Achieving the Perfect Texture in Your Slow Cooker Apple Butter
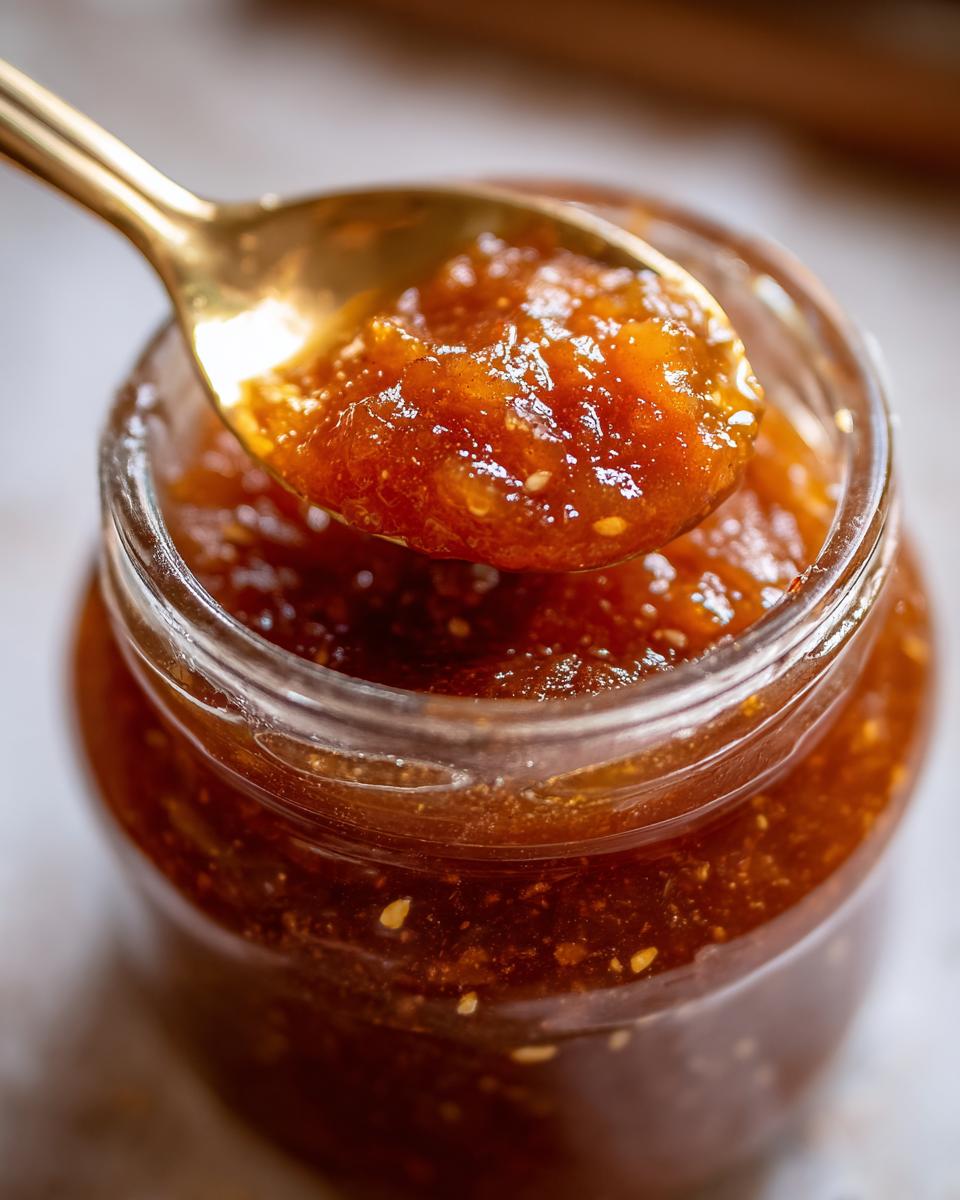
As it’s thickening up in the slow cooker, you’ll want to keep an eye on it. When those apples are super soft, I like to mash them right in the pot. If you’re aiming for a super smooth apple butter, like the kind you’d find at a fancy farmer’s market, an immersion blender is your best friend. Just be careful of splatters! Some folks even swear by pressing it all through a food mill, but honestly, a good mash or blend usually does the trick for me. The big visual cue that it’s ready? It’ll get thick. Like, really thick. It should hold its shape on a spoon for a few seconds, not just slide right off. That’s how you know it’s perfectly spreadable and ready for canning or just spooning onto your favorite biscuit!
Stovetop Apple Butter: A Richer, Deeper Flavor
Now, if you don’t have a slow cooker handy, or if you just prefer being a little more hands-on in the kitchen, making stovetop apple butter is absolutely the way to go! Honestly, I sometimes think the stovetop method really bumps up that flavor even more because you have a bit more control over the heat consistency. The biggest thing to remember here is to use a really nice, heavy-bottomed pot. Trust me, your apple butter will thank you for it because it helps distribute the heat evenly and makes a huge difference in preventing scorching. You’ll start just like with the slow cooker: get your prepared apples and that little bit of cider or water into the pot. Bring it to a simmer over medium-low heat. You’ll need to stir this one a bit more often than the slow cooker version – maybe every 20-30 minutes at first. As it starts to break down and thicken up, you’ll want to stir it more frequently, like every 10-15 minutes. This is the part that takes patience, usually a good couple of hours, but watching it transform into this deep, gorgeous apple butter right on your stovetop is super rewarding. Once it’s nice and thick, you’ll mash or blend those apples, stir in your sugar and spices, and just keep cooking and stirring until it’s exactly the consistency you love!
Tips for Preventing Scorching on the Stovetop
The absolute key here is temperature control and constant vigilance! Keep the heat on a steady medium-low – you want it simmering gently, not boiling like crazy. Stir often, especially as it gets thicker. If you see any bits sticking to the bottom, gently scrape them up; those little bits carry a lot of flavor, but too many can make your butter taste burnt. A wooden spoon is your best friend for this – you can really feel what’s happening at the bottom of the pot.
Canning and Storing Your Homemade Apple Butter
Now that you’ve got this gorgeous, thick homemade apple butter, you’ll want to make sure it lasts! If you’re feeling ambitious and want to keep this deliciousness around for months (or even up to a year!), canning is the way to go. First things first, get your jars squeaky clean and sterilized – same goes for the lids and bands. You can find all the nitty-gritty details on proper canning over at how to can your own food; it’s super important to do it right. Ladle that hot apple butter into your prepared jars, leaving a little space at the top (about a quarter-inch, they call it headspace). Wipe the rims clean, pop on the lids, and screw them down just finger-tight. Then into a boiling water bath they go for about 10 minutes. After that, you let them cool undisturbed for a whole day. You’ll know they sealed properly if the lids are nice and firm!
Refrigerator and Freezer Storage for Apple Butter
If canning feels like a bit too much, no worries! You can totally store your apple butter in the fridge for about 3 weeks. Just make sure to use clean spoons to scoop it out. For even longer keeping, pop it into freezer-safe containers and it should last for a good 6 months or more. It’s perfect for having on hand whenever that craving strikes!
Serving Suggestions for Your Spiced Apple Spread
So, you’ve made this amazing, rich spiced apple spread, and now you’re wondering what to do with all of it? Oh, honey, the possibilities are endless! My absolute favorite way to enjoy it is warm, straight from the spoon, but since that’s not very practical all the time, I love slathering it on a flaky, buttery biscuit. It’s just the perfect combination of warm, sweet, and savory. But don’t stop there! It’s also fantastic on toast, swirled into yogurt or oatmeal for breakfast, or even spread on a cheese board next to some sharp cheddar or creamy brie. And for the holidays? Forget the store-bought cranberry sauce; a dollop of this on your Thanksgiving turkey or ham is pure magic!
Apple Butter for Biscuits: A Classic Pairing
When it comes to biscuits, you just can’t beat apple butter for biscuits. That warm, slightly tangy sweetness of the apple butter cuts through the richness of a freshly baked biscuit like nothing else. It’s a match made in heaven, truly. It’s that simple, comforting flavor combination that just feels like home.
Gifting Your Homemade Apple Butter
Seriously, a jar of this apple butter makes one of the most thoughtful holiday food gifts. Forget those impersonal store-bought items! Just grab some cute little jars, maybe tie a ribbon around the top with a piece of twine, and pop on a pretty handmade label with the name and maybe the date. It’s such a personal touch that people really appreciate. Imagine your friends and family opening up a jar of homemade goodness – pure joy!
Frequently Asked Questions about Homemade Apple Butter
Got questions about making this delicious autumn treat? I’ve got answers! It’s pretty straightforward, but here are a few things folks often wonder about our homemade apple butter.
How to Thicken Runny Apple Butter
If your apple butter seems a little too thin after cooking, don’t panic! Just keep cooking it uncovered over low heat, stirring more often, until it reaches that perfect, thick, mounded consistency. Sometimes it just needs a little more time to let that extra moisture evaporate.
Shelf Life of Uncanned Apple Butter
For the apple butter you store in the fridge, you’re looking at about 3 weeks of deliciousness. Just make sure you’re using a clean spoon every time you dip in to avoid introducing any unwanted yuckiness. It’s different from properly canned apple butter, which lasts way longer!
Estimated Nutritional Information
Just so you know, these numbers are approximate, since everything can vary a little based on exactly what apples you use and how much sugar you add in. But, for a typical 2-tablespoon serving of this lovely homemade apple butter, you’re looking at around 60 calories. It’s mostly natural sugars from the fruit and added sweetener, so about 15g of sugar. You’ll find it’s basically fat-free (0g), with very little sodium (around 5mg) and a gram or so of fiber. Protein and cholesterol are pretty much non-existent here. So, enjoy it guilt-free!
PrintHomemade Apple Butter
A rich, velvety apple butter simmered low and slow, perfect for fall and holiday gifting.
- Prep Time: 30 min
- Cook Time: 10-14 hours
- Total Time: 14.5 hours
- Yield: 6-8 cups 1x
- Category: Preserves
- Method: Slow Cooker or Stovetop
- Cuisine: American
- Diet: Vegetarian
Ingredients
- 6 pounds apples (a mix of sweet and tart varieties like Fuji, Gala, Honeycrisp, and Granny Smith)
- 2 cups granulated sugar (or brown sugar for deeper flavor)
- 1 tablespoon ground cinnamon
- 1 teaspoon ground allspice
- 1/2 teaspoon ground cloves
- 1/4 teaspoon ground nutmeg
- 1/2 cup apple cider or water
Instructions
- Wash and core the apples. You can peel them if you prefer a smoother texture, or leave the skins on for added color and nutrients. Cut the apples into quarters.
- Place the apple pieces in a slow cooker or a large, heavy-bottomed pot. Add the apple cider or water.
- Cook on low in the slow cooker for 8-10 hours, or on the stovetop over medium-low heat, stirring occasionally, until the apples are very soft and have broken down. If using the stovetop, you may need to add a little more liquid if it becomes too dry.
- Once the apples are soft, mash them with a potato masher or an immersion blender until you reach your desired consistency. For a very smooth butter, you can press the cooked apples through a food mill or sieve.
- Stir in the granulated sugar, cinnamon, allspice, cloves, and nutmeg.
- Continue to cook, uncovered, stirring frequently, until the apple butter has thickened to your liking. This can take another 2-4 hours in the slow cooker on high, or 1-2 hours on the stovetop. It should be thick enough to mound on a spoon without dripping off immediately.
- While the apple butter is cooking, prepare your canning jars if you plan to preserve it. Sterilize your jars and lids according to standard canning procedures.
- Once thickened, ladle the hot apple butter into the prepared jars, leaving about 1/4 inch of headspace. Wipe the rims clean, place the lids on, and screw on the bands fingertip tight.
- Process the jars in a boiling water bath for 10 minutes (adjust for altitude if necessary). Remove the jars and let them cool undisturbed for 12-24 hours. Check seals before storing.
- Alternatively, you can store the apple butter in the refrigerator for up to 3 weeks or freeze it for longer storage.
Notes
- For a richer flavor, consider using brown sugar instead of granulated sugar.
- You can adjust the spices to your preference. Add a pinch of ground ginger for extra warmth.
- If you don’t have a slow cooker, the stovetop method works well. Just be sure to stir frequently to prevent scorching.
- Apple butter can be stored in the refrigerator for up to 3 weeks or frozen for longer storage.
- Properly canned apple butter will last for up to a year in a cool, dark place.
Nutrition
- Serving Size: 2 tablespoons
- Calories: 60
- Sugar: 15g
- Sodium: 5mg
- Fat: 0g
- Saturated Fat: 0g
- Unsaturated Fat: 0g
- Trans Fat: 0g
- Carbohydrates: 16g
- Fiber: 1g
- Protein: 0g
- Cholesterol: 0mg