
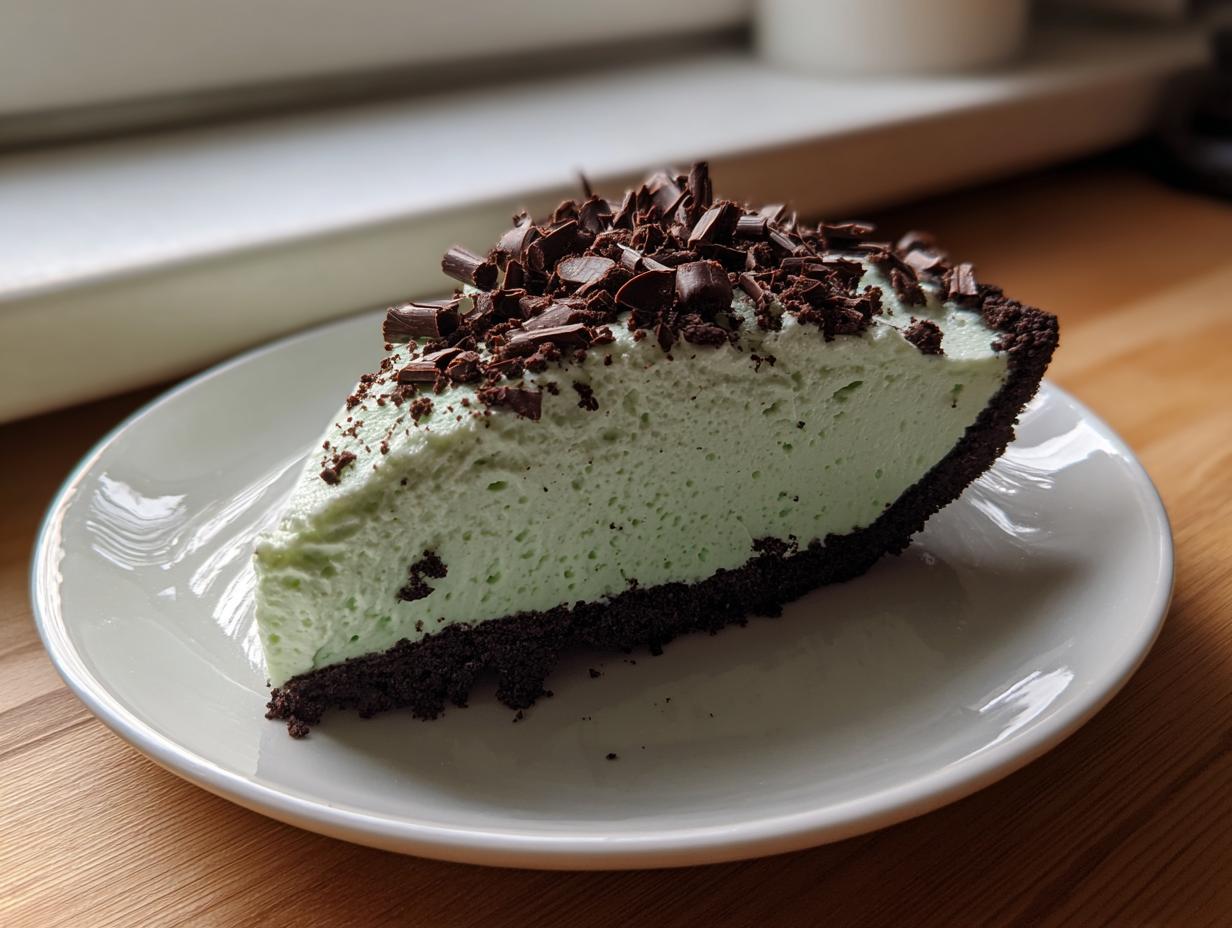
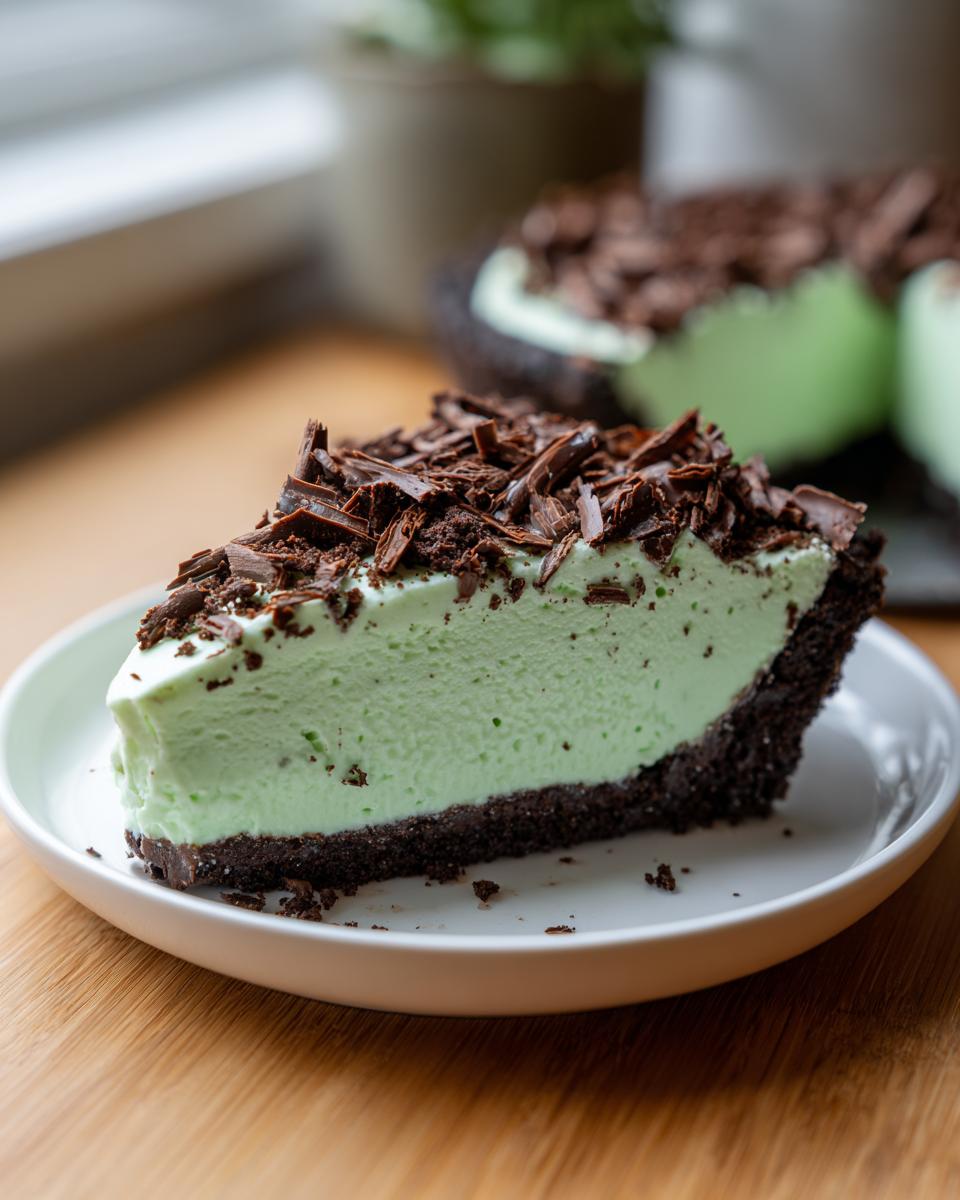
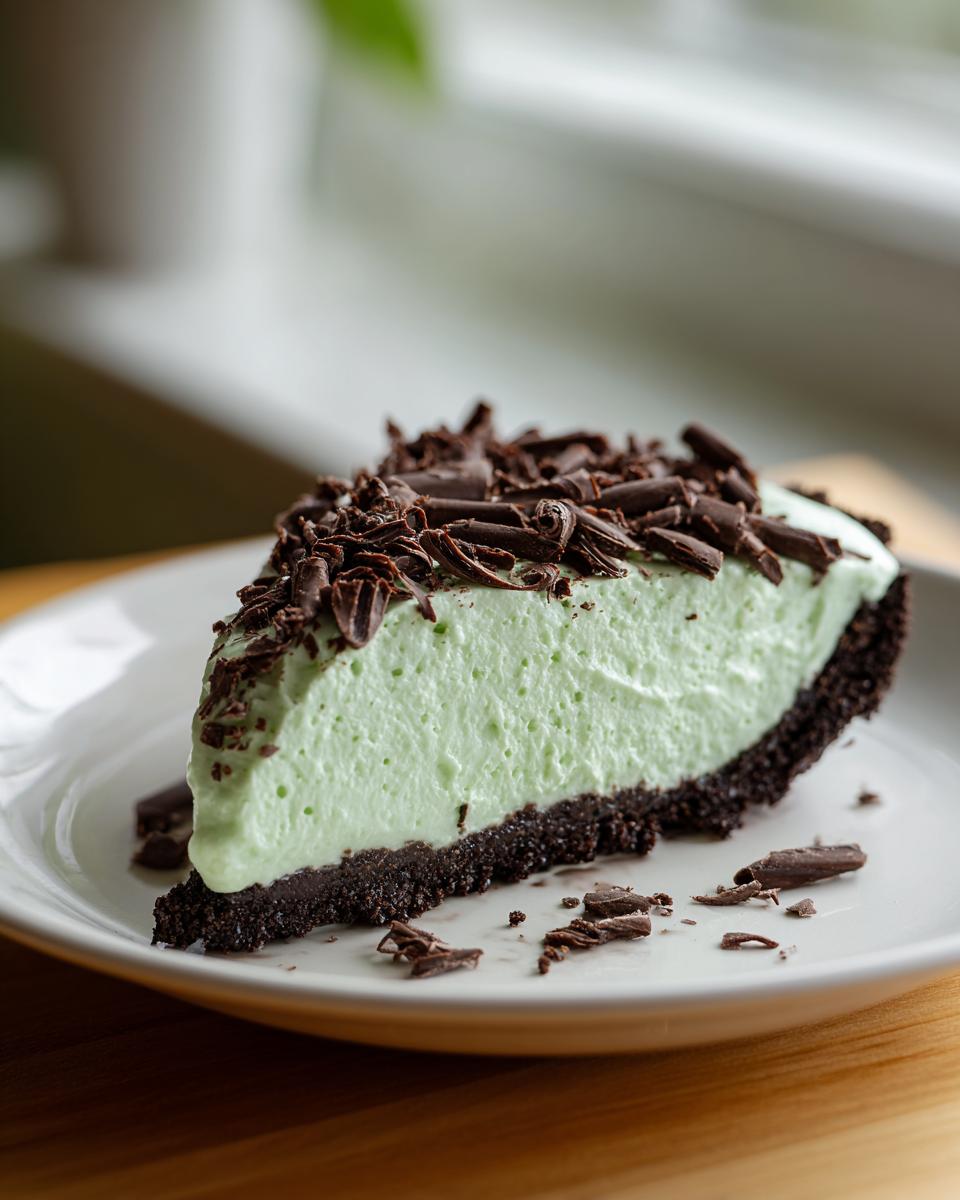
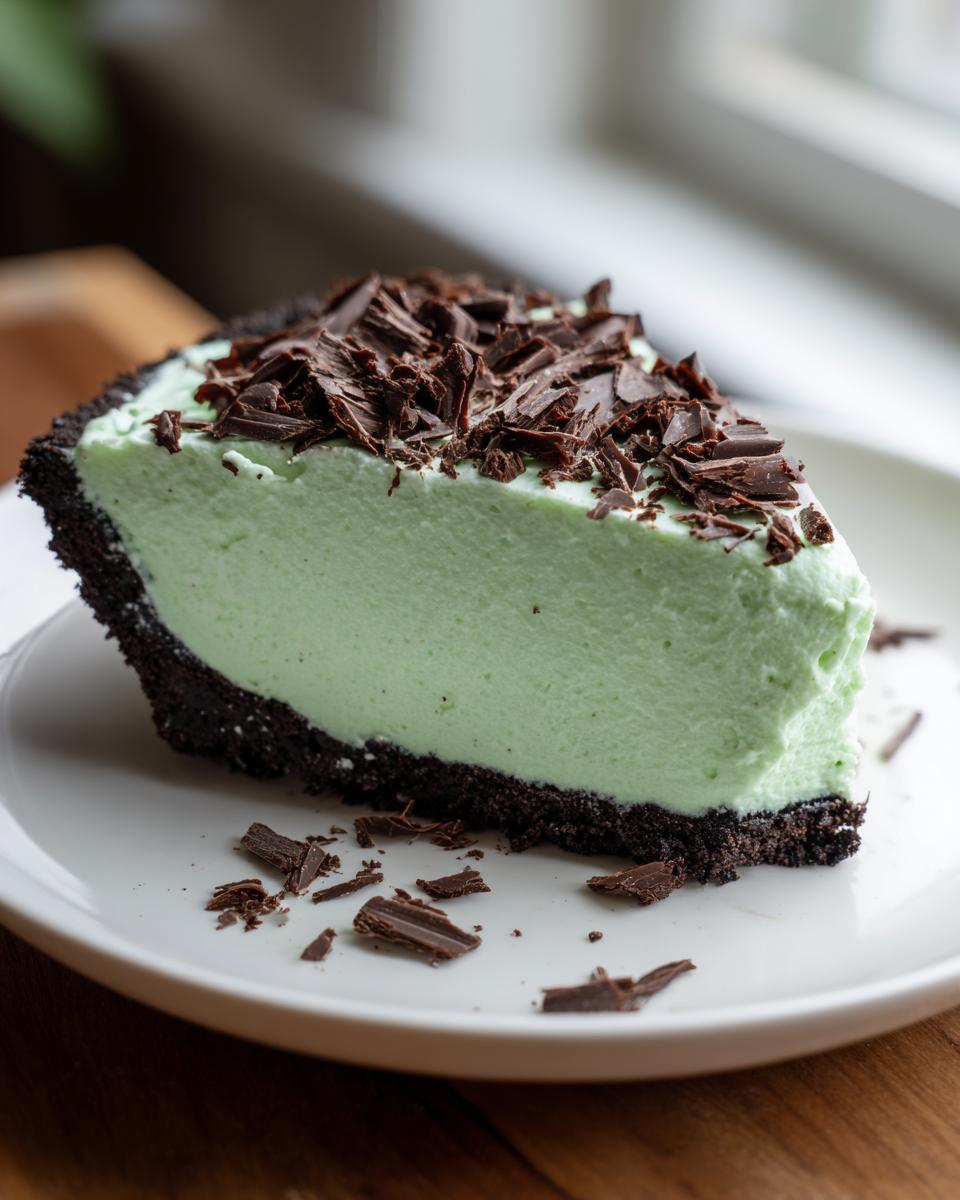
You know those weeks when you’re running on fumes, but you still want to bring something truly special to the table? I totally get it. When I’m too tired to even think about turning on the oven, I reach for this dream of a dessert. Forget fussiness; this is pure, satisfying comfort in pie form. We’re talking about the grasshopper pie of your dreams: intensely creamy, perfectly minty, and loaded with chocolate goodness, all thanks to a simple press-in crust. This recipe is living proof that the best American classics can be utterly simple and totally show-stopping when you need a quick, refreshing treat for a potluck or just because!
- Why This No-Bake Grasshopper Pie is Your New Favorite Creamy Mint Dessert
- Essential Ingredients for the Best Grasshopper Pie
- Step-by-Step Instructions for Your No Bake Grasshopper Pie
- Tips for the Perfect Creamy Grasshopper Pie Texture
- Ingredient Notes and Substitutions for Your Mint Chocolate Pie Recipe
- Serving Suggestions for This Refreshing Summer Pie
- Storage and Make Ahead Pies Instructions for Grasshopper Pie
- Frequently Asked Questions About Making Grasshopper Pie No Bake
- Nutritional Estimates for This Easy Mint Chocolate Pie
Why This No-Bake Grasshopper Pie is Your New Favorite Creamy Mint Dessert
Honestly, I keep this recipe tucked away for emergencies—the kind where you need a dessert fast but want it to taste like you spent all day fussing over it. This is the definition of a grasshopper pie no bake wonder!
- No Oven Ever: Seriously, not a single preheat required. Perfect when your kitchen is already too hot!
- Lightning Fast Prep: You can mix this filling up in about 15 minutes flat before it needs to chill.
- Incredibly Creamy Texture: It sets up beautifully, giving you that lush, melt-in-your-mouth experience every time.
- Perfectly Versatile: It works just as well for St. Patrick’s Day celebrations as it does for a simple, creamy mint dessert on a hot summer night.
Essential Ingredients for the Best Grasshopper Pie
Okay, this is where we talk about what goes into this magic! Since this is a no-bake grasshopper pie, the quality of your foundational elements really matters. Everything needs to be ready to go—the cream cheese has to be truly soft, and if you’re using the frozen stuff, make sure that whipped topping is completely thawed but still cold. We’re building layers of creaminess here, so pay attention to those temperatures!
You have a choice to make right up front: do you want the spiked grown-up version, or the kid-friendly one? The crème de menthe is optional, and you can substitute that sharp mint flavor with just extract if you need to keep things alcohol-free. I’ve included everything you might need below, including the options for a homemade topping if you don’t like relying on the store-bought stuff, giving you lots of flexibility for your final mint chocolate pie recipe.
For the Oreo Crust Pie Recipe
This crust is so easy, it almost feels like cheating. You just need the crumbs and the fat to hold it all together. Don’t skimp on pressing this down firmly!
- 1 1/2 cups chocolate cookie crumbs (you’ll need about 30 of those thin sandwich cookies), crushed finely.
- 6 tablespoons unsalted butter, melted down until it’s just liquid gold.
For the Creamy Mint Chocolate Pie Filling
This is the heart of the pie where the mint meets the chocolate magic. Remember, the Cool Whip needs to be thawed, but if you choose to whip up heavy cream yourself, keep that heavy cream in the fridge right until the last second!
- 8 ounces cream cheese, make sure it is fully softened to room temperature!
- 1 cup powdered sugar (this keeps it smooth, unlike granulated sugar).
- 1/2 cup cold milk.
- 1 teaspoon vanilla extract—don’t leave this out; it deepens everything!
- 1/2 teaspoon mint extract.
- 1/4 cup crème de menthe liqueur (Optional! This is for the boozy kick).
- Green food coloring (Optional, but let’s be real, a little color makes it fun).
- For Homemade Topping (If skipping Cool Whip): 1 cup heavy cream, very cold, and 1/4 cup powdered sugar.
If you’re looking for other amazing ways to use thawed whipped topping, check out this recipe for pumpkin dip; it uses that same light texture! Pumpkin Dip with Cool Whip
Step-by-Step Instructions for Your No Bake Grasshopper Pie
Alright, time to put this gorgeous grasshopper pie together! Since this is a real showstopper meant to be easy, we are moving fast. Remember, we are not cooking anything, but we do need plenty of chill time, so plan ahead, just like you would for a wonderful no-bake pumpkin cheesecake.
Creating the Oreo Crust Base
Grab that 9-inch pie plate you pulled out earlier. Mix those chocolate cookie crumbs and the melted butter together really well. You want every crumb to be coated so it sticks! Then, press that buttery mixture into the bottom and all the way up the sides of the plate. Be sure to pack it tight—a sturdy crust is what prevents a crumbly mess later. Pop this into the freezer right away while we get that minty filling ready. It needs to be super cold!
Mixing the Mint Filling Components
First things first: beat that softened cream cheese with the powdered sugar until it’s completely smooth. No lumps allowed, trust me! Once that’s looking fluffy, slowly mix in your cold milk, vanilla, mint extract, and, if you’re having an adult party, the crème de menthe. Now, if you want that signature bright green color, add just a drop or two of food coloring until you like the shade. The last step here is the most important: gently fold in that thawed whipped topping. Fold, don’t beat! We need it light and airy, so stop mixing the second you don’t see any white streaks left. This is key for that creamy mint dessert texture!
Chilling and Finishing the Frozen Grasshopper Pie
Pour that gorgeous pale green filling right into your frozen Oreo crust and smooth the top out. Now it waits. Cover it loosely with plastic wrap. If you want a softer, chilled slice (more like a mousse), let it sit in the fridge for at least six hours. If you’re aiming for a true frozen grasshopper pie texture, pop it in the freezer for about three to four hours. Heads up: If you decided to make your own topping instead of using Cool Whip, you whip that heavy cream and powdered sugar to stiff peaks separately, and only spread it on top right before you serve it. Trust me on that one; don’t mix it in too early! For more easy dessert ideas like this that require zero cooking, you might want to peek at this recipe!
Tips for the Perfect Creamy Grasshopper Pie Texture
I’ve messed this up enough times over the years to know exactly where things can go sideways, so let me save you some trouble! Achieving that truly decadent, smooth texture in your grasshopper pie is all about controlling the chaos. This isn’t a baked cake; the texture is entirely reliant on how you handle the cold ingredients.
The first, and I mean the absolute first, rule is the cream cheese. If it’s even slightly firm when you start, you are going to end up with tiny, annoying cheese chunks in your beautiful mint filling. Pull it out early! It needs to be soft enough that your finger leaves an easy indent—no wrestling with it necessary.
Next up is the folding part, especially when incorporating the Cool Whip or your homemade topping. This is where people usually go wrong when making a no bake cool whip pie. You have to fold gently, like you’re tucking in a baby or folding very delicate laundry. If you beat it in with the electric mixer, you knock all the air right out. That air is what makes the filling light and creamy, not dense like pudding. Stop mixing the second the last streak of white disappears. Trust me, it’ll blend more as you gently spread it into the crust!
Finally, think about how you want to serve it. Do you want a soft, sliceable slice of heaven, or something that feels almost like ice cream? That’s the difference between chilling and freezing. If you want that soft, melt-in-your-mouth texture everyone loves in a creamy mint dessert, stick to the refrigerator for at least six hours. If you’re looking for that super firm, frozen grasshopper pie experience—maybe because it’s a scorching July day—you need a solid three to four hours in the freezer. Both are fantastic, but don’t confuse the two timings!
If you’re looking for another highly rated recipe focused on creamy textures, this mint cheesecake pie recipe is another winner that stays wonderfully smooth!
Ingredient Notes and Substitutions for Your Mint Chocolate Pie Recipe
I’ve gotten so many emails asking about tweaking this recipe, which tells me you all love flexibility—and I love making sure everyone can get a slice of this amazing grasshopper pie! Don’t worry if you’re missing one specific item; this is home cooking, not a science lab, but we do need to respect the chemistry that makes this pie set up right.
The biggest question I always get relates to the alcohol. That 1/4 cup of crème de menthe gives a beautiful depth of flavor, but if you’re baking for a crowd that includes kids or folks who just don’t want the booze, you can totally skip it. When you ditch the liqueur, you need to bump up that mint flavor a little so it doesn’t taste flat. I found that increasing the mint extract from 1/2 teaspoon up to a solid 3/4 teaspoon is the perfect swap for an alcohol-free bite. That gives you all the minty punch without the liquor!
Then there’s the whole whipped topping situation. Cool Whip is lightning fast and unbelievably stable, which is why I list it first for a classic no bake cool whip pie feel. But sometimes, I want something richer, or maybe I just don’t have that frozen tub on hand. If you want to go the homemade route, you absolutely can!
If you choose to make your own topping (“heavy cream and 1/4 cup powdered sugar” from the list), remember these key things: First, the heavy cream must be ice cold, and second, you need to whip it by itself until stiff peaks form. Don’t try to blend it into the cream cheese yet! You fold that homemade whipped cream into the mint base in the very last step, just as gently as you would the Cool Whip. This keeps all that lovely air trapped in there so you get that incredibly light, creamy mint dessert texture we are aiming for.
Oh, and one last tip for the crust: if you’re out of Oreos, you can certainly use different chocolate wafers or even vanilla wafers, but just know that the signature dark chocolate flavor in the base will fade. It will still be delicious, but you lose a little bit of that high contrast between the crust and the bright green filling in the final chocolate mint pie recipe.
Serving Suggestions for This Refreshing Summer Pie
Even though this grasshopper pie is absolutely perfect all on its own, sometimes you want to dress it up a little bit, right? I love making a dessert table look amazing, even when the main dish was a no-heat miracle! The deep chocolate and bright mint flavors really pair well with simple, slightly acidic, or intensely chocolatey things. Forget complicated sauces; we’re sticking with easy prep here.
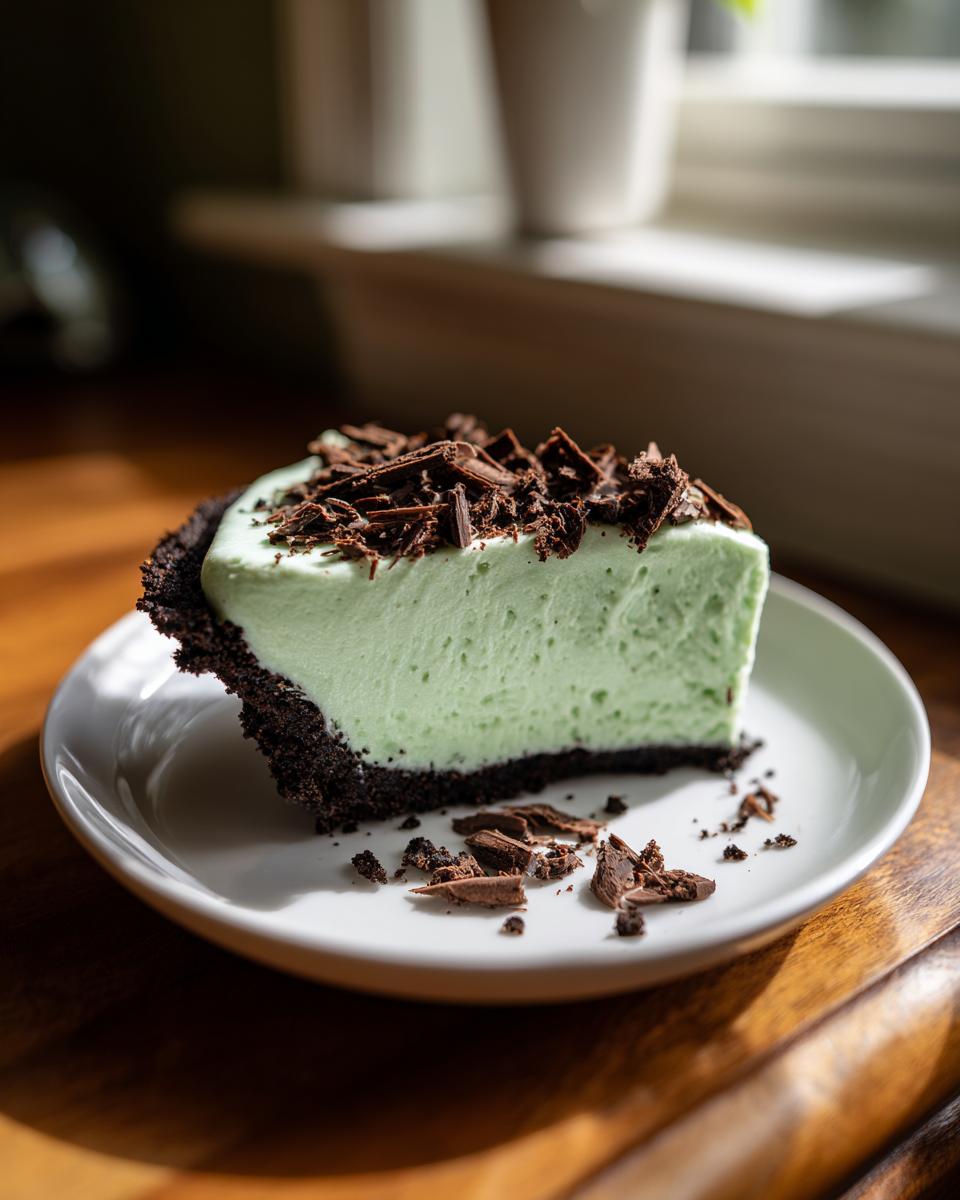
For the garnish, you already know we have the chocolate chips sprinkled on top—that’s non-negotiable in my book! But if you want to elevate it just slightly before serving, try adding a thin layer of chocolate shavings right over the top. Use a vegetable peeler on a good quality dark chocolate bar; the curls look so elegant! A little dusting of powdered sugar over the top of the shavings adds this beautiful wintery (or festive!) look, even if it’s 90 degrees outside.
When it comes to what to serve alongside this easy mint chocolate pie, think about cutting through that richness. A really simple bowl of fresh raspberries or sliced strawberries works wonders. The tartness of the berries is the perfect counterpoint to the sweet, creamy mint filling. No need for a fancy fruit sauce, just wash the berries and let them sit for ten minutes so they get nice and juicy.
If you’re serving a crowd and need another easy something to round out the table, these chewy chocolate chip cookies are always a huge hit. People love having a little variety, and it’s nice to have something firmer next to something so incredibly soft!
The main thing to remember when approaching a rich, cold dessert like this refreshing summer pie is that less is almost always more on the side dishes. You want the mint and chocolate to shine, so keep any accompaniments straightforward and bright!
Storage and Make Ahead Pies Instructions for Grasshopper Pie
This is honestly one of my favorite things about this classic grasshopper pie—it’s a champion of the make ahead pies category! Knowing you can whip this up the day before a big event, or even a couple of days prior, is such a lifesaver when your counter space is dedicated to savory dishes.
Because this pie relies on chilling (or freezing) to set, the storage method is crucial to maintaining that beautiful, creamy texture we worked so hard to achieve. You definitely don’t want your mint filling tasting like last night’s leftover roasted garlic!
Refrigeration for Chilled Pie Texture
If you prefer the slightly softer, more mousse-like texture where the pie is still easy to scoop, you’ll want to stick to refrigerator storage. Once the pie is fully set (after those required six hours in the cold), cover it loosely with plastic wrap. And I mean *loosely*—if you press the plastic right onto that whipped topping, you risk messing up the beautiful surface or pulling off chocolate shavings.
It will keep wonderfully in the fridge for about two to three days. If you find it loses some of its rigidity by day three, you can always pop it in the freezer for about 45 minutes just to firm it back up before serving. This works out great if you’re worried about it melting too quickly on the buffet table.
Freezing for True Frozen Grasshopper Pie
When you want that firmer, colder, almost ice-cream pie experience—the frozen grasshopper pie vibe—freezing is the way to go. Once the pie is set in the freezer for those 3 to 4 hours we talked about, it is solid and ready for long-term keeping.
For freezing longer than 24 hours, you need to wrap it up properly to protect it from freezer burn and any weird freezer odors. My trick is to cover it tightly first with a layer of plastic wrap, making sure that plastic touches the surface to keep air *away* from the filling. Then, wrap the entire pie plate tightly in a layer of aluminum foil. This double-wrapping technique is something I use for all my make ahead pies, like my cranberry cream pie, and it always works beautifully. It stays perfectly good in the freezer for up to a month!
When you’re ready to serve the frozen pie, take it out of the freezer about 15 to 20 minutes before slicing. This short thawing time lets it soften just enough so you can actually get a clean slice without cracking the crust. If you’re looking for another hearty make-ahead meal for your busy schedule, you might really love my recipe for Apple Cider Braised Pork Shoulder, which is best made the day before!
Keeping this mint chocolate pie stored correctly means you can stress less about dessert when hosting large gatherings! For more tips on keeping recipes fresh and ready to go, I always point people towards the great storage advice over at Lone Recipes when they are planning ahead.
Frequently Asked Questions About Making Grasshopper Pie No Bake
I know when I’m trying a new recipe, especially one that relies on setting time, I have a ton of little questions zooming around in my head. It’s the same for this grasshopper pie no bake wonder! Here are the things I get asked the most, so you can move forward with total confidence.
Can I make this grasshopper pie without crème de menthe?
Absolutely, you can! That’s the beauty of this recipe; it’s so adaptable to what you have on hand or who you’re serving. If you skip the liqueur—maybe you want a truly alcohol-free dessert or just ran out—you need to replace that mint intensity. As I mentioned back in the notes, just reach for the extract. I find that boosting the mint extract up to 3/4 of a teaspoon gives you that perfect, punchy mint flavor without needing that little bit of booze. It makes for a wonderful, bright chocolate mint pie recipe!
What is the difference between a chilled and frozen grasshopper pie?
This is a great question because it totally changes the eating experience! It really boils down to how long you let it chill and where you chill it. If you only put it in the refrigerator for six hours or more, you get a beautiful, soft, mousse-like filling. It’s rich, it’s creamy, and it slices easily—a true creamy mint dessert. If you want that super firm, almost ice-cream-like slice that feels extra refreshing on a hot day, that’s when you put it in the freezer for 3 to 4 hours to transform it into a frozen grasshopper pie. Both textures are amazing, but the chilling time is what dictates which one you get!
Can I use a different cookie for the oreo crust pie recipe?
Sure, go ahead and experiment! If you’re out of the chocolate sandwich cookies (Oreos or similar), graham crackers are an easy substitute. You’ll press the crust in the exact same way with the melted butter. However, I have to warn you: you lose that deep, dark chocolate flavor that really makes the contrast pop against the bright green filling in our standard oreo crust pie recipe. Vanilla wafers can also work, but again, you’re sacrificing that signature chocolate punch. For the best grasshopper pie experience, stick to chocolate cookies if you can!
If you ever need an alternative creamy recipe that doesn’t involve mint, I highly recommend checking out my recipe for Pecan Cream Pie; it’s rich in a completely different, wonderful way!
Nutritional Estimates for This Easy Mint Chocolate Pie
I always include this information, not because I’m obsessing over every single bite—we’re making comfort food here, after all!—but because I like to be transparent about what goes into our food. Since this is a no bake grasshopper pie made with ingredients like cream cheese and whipped topping, the numbers can vary depending on whether you use the full-sugar Cool Whip or opt for a homemade whipped cream version.
These estimates below are based on a standard slice using the ingredients listed, aiming for that perfect, sliceable texture. Remember, this is just to give you a ballpark idea; if you use a lighter cream cheese or skip the optional liqueur, your final numbers will shift a little! This is just a general guide for our wonderful easy mint chocolate pie.
- Calories: Roughly 380 per slice. That’s pretty decent for something this decadent!
- Fat: Around 25 grams, most of that coming from the cream cheese and the butter in that lovely cookie crust.
- Carbohydrates: Approximately 35 grams.
- Protein: About 4 grams per slice.
Honestly, when you make something this satisfying, like this creamy mint dessert, I try not to stress too much about the exact breakdown. Just know that it’s a delightful treat that tastes much more complicated than its prep time suggests. Enjoy every single marvelous, minty bite!
PrintEasy No-Bake Grasshopper Pie with Oreo Crust

Make this creamy, mint chocolate dessert without turning on your oven. This no-bake grasshopper pie uses simple ingredients for a refreshing treat perfect for gatherings.
- Prep Time: 20 min
- Cook Time: 0 min
- Total Time: 6 hr 20 min
- Yield: 8 servings 1x
- Category: Dessert
- Method: No-Bake/Chilling
- Cuisine: American
- Diet: Vegetarian
Ingredients
- 1 1/2 cups chocolate cookie crumbs (about 30 cookies)
- 6 tablespoons unsalted butter, melted
- 8 ounces cream cheese, softened
- 1 cup powdered sugar
- 1 (8 ounce) container frozen whipped topping (like Cool Whip), thawed
- 1/2 cup cold milk
- 1 teaspoon vanilla extract
- 1/2 teaspoon mint extract
- 1/4 cup crème de menthe liqueur (optional, for adult version)
- Green food coloring (optional, for color)
- 1 cup heavy cream, cold (for homemade topping)
- 1/4 cup powdered sugar (for homemade topping)
- 1/4 cup chocolate chips or shaved chocolate (for garnish)
Instructions
- Prepare the crust: Mix the chocolate cookie crumbs and melted butter in a bowl until the crumbs are evenly moistened. Press this mixture firmly into the bottom and up the sides of a 9-inch pie plate. Place the crust in the freezer while you prepare the filling.
- Make the cream cheese base: In a large bowl, beat the softened cream cheese and 1 cup of powdered sugar together until the mixture is smooth and light.
- Prepare the filling: Add the cold milk, vanilla extract, mint extract, and crème de menthe (if using) to the cream cheese mixture. Beat until just combined. If you want a greener color, add a few drops of green food coloring now.
- Fold in the topping: Gently fold in the thawed whipped topping until no streaks remain. Do not overmix.
- Fill the crust: Pour the mint filling into the chilled Oreo crust and spread it evenly.
- Chill or freeze: Cover the pie loosely with plastic wrap. Refrigerate for at least 6 hours, or freeze for 3 to 4 hours for a firmer, frozen grasshopper pie texture.
- Prepare topping (if using homemade): If you are not using Cool Whip, beat the cold heavy cream and 1/4 cup powdered sugar until stiff peaks form. Spread this over the chilled pie just before serving.
- Garnish and serve: Before serving, sprinkle the top with chocolate chips or shaved chocolate. Slice and serve cold.
Notes
- For a non-alcoholic version, omit the crème de menthe and increase the mint extract to 3/4 teaspoon.
- If you prefer a richer, homemade topping instead of Cool Whip, use the heavy cream and powdered sugar listed in the ingredients and whip it separately before folding it into the cream cheese base.
- This pie keeps well covered in the refrigerator for up to three days.
Nutrition
- Serving Size: 1 slice
- Calories: 380
- Sugar: 30g
- Sodium: 250mg
- Fat: 25g
- Saturated Fat: 14g
- Unsaturated Fat: 11g
- Trans Fat: 0.5g
- Carbohydrates: 35g
- Fiber: 1g
- Protein: 4g
- Cholesterol: 55mg