
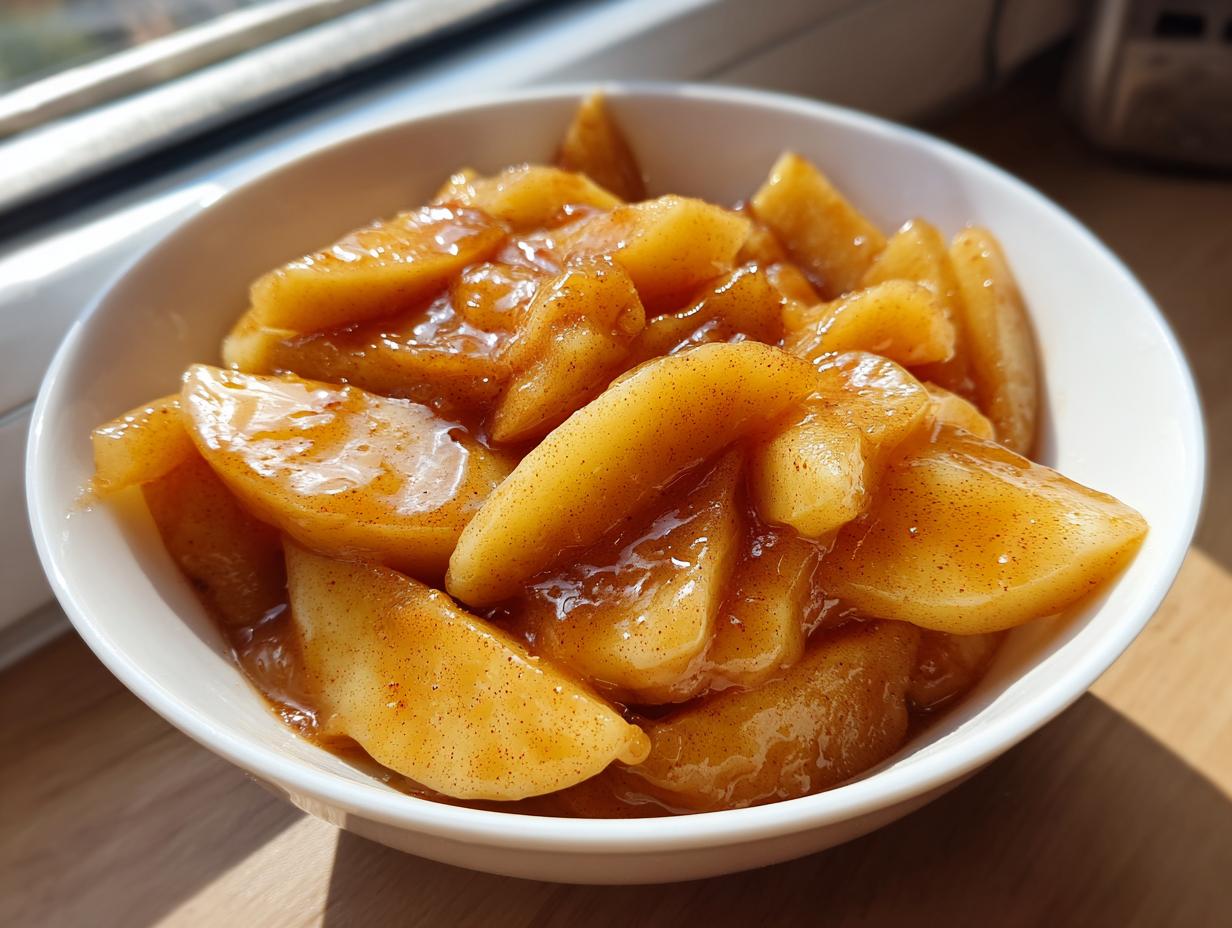
Honestly, once you smell cinnamon and brown sugar simmering on your stovetop, you’ll never look at that watery, sad jar of store-bought stuff again. That’s the magic of making your own apple pie filling from scratch! I’ve spent so much time trying to nail down those comforting, reliable flavors from my childhood kitchen, and trust me, this Homemade Apple Pie Filling Recipe is the one. We’re ditching complicated baking processes for a super Easy Stovetop Apple Pie Filling that comes together in about 30 minutes. It yields the Best Apple Pie Filling because it’s thick, sweet, and perfectly spiced—ready to go straight into your crust or over your stack of pancakes!
- Why This Homemade Apple Pie Filling Recipe is Your New Favorite
- Gathering Ingredients for the Best Apple Pie Filling
- How to Make Easy Apple Pie Filling on the Stovetop
- Finishing Touches for Your Stovetop Apple Pie Filling
- Tips for Success When Making Apple Filling for Pies
- Versatile Ways to Use This Apple Pie Filling
- Storing Your Homemade Apple Pie Filling
- Frequently Asked Questions About Apple Pie Filling
- Nutritional Snapshot of This Sweet Apple Filling Using Brown Sugar
Why This Homemade Apple Pie Filling Recipe is Your New Favorite
Why mess around when you can have the absolute best result so fast? This Stovetop Apple Pie Filling is my go-to because it absolutely nails the texture we all dream about. No more runny messes under your top crust!
- It’s genuinely quick—we’re talking cooked and ready in about 15 minutes on the stove.
- We use dark brown sugar, which gives such a rich, molasses depth you can’t get anywhere else.
- It produces that fantastic, Thick Apple Pie Filling consistency that clings perfectly to every slice.
- The best part? This Quick Apple Topping works for everything. Check out more delicious dessert recipes here!
Gathering Ingredients for the Best Apple Pie Filling
Getting the right stuff ready is half the battle, and precision here builds the trust needed for the Best Apple Recipe. We aren’t using any weird chemical thickeners; everything comes from simple pantry staples. You’ll need a mix of apples for the ultimate flavor balance—Granny Smiths for that needed edge, and something sweet like Honeycrisp to keep things rounded out.
Make sure you have 6 large apples ready to go. For things like apple cinnamon muffins, you can cheat a bit, but for this apple pie filling, the fresh cut matters!
Apple Selection and Preparation Guidance
Look, this is where many people lose the texture fight. You absolutely need a mix! I usually go half tart (Granny Smith is my favorite here) and half slightly sweeter (Honeycrisp holds its shape beautifully). The most important part of prepping them is the slice. Make sure your apple slices are uniform, about 1/4-inch thick. If they are too thin, they turn to mush; too thick, and they stay hard. Uniform slices mean uniform tender apple texture in your final apple filling for pies.
How to Make Easy Apple Pie Filling on the Stovetop
Okay, the prep work is done, now comes the magic on the heat! This stovetop method is why this recipe beats any canned product. I’ve had batches go terribly wrong when I tried to rush the apples into the oven too soon, ending up watery and sad. Don’t rush the initial softening; it’s key to getting that tender apple texture we want in our apple pie filling. This is the fastest way to get the Best Apple Recipe going!
Combining Apples and Spices for Flavorful Apple Pie Filling
First up, grab your big saucepan. Dump in all those perfectly sliced apples, both brown and white sugars, the water, cinnamon, nutmeg, and allspice—everything but the cornstarch and butter! Give it a really gentle toss until every apple slice is coated in that gorgeous sugar mix. Now, turn the heat to medium. We let this simmer, stirring every so often, for about 5 to 7 minutes. You’ll see the sugar melt and the apples start getting just a tiny bit soft. This initial simmer builds the base for the sweet apple filling, making sure the spices really bloom.
Achieving That Perfect Thick Apple Pie Filling Consistency
This is where we lock in the texture, so pay attention! In a separate tiny bowl—and I mean tiny—whisk your cornstarch and lemon juice together until it’s completely smooth. That’s your slurry, and if you don’t whisk it first, you get lumps, which nobody wants! When the apples are looking slightly softer after that initial simmer, pour that cornstarch slurry in smoothly. You must stir constantly now as the mixture returns to a simmer. Keep stirring until the whole thing gets glossy and thickens up significantly—usually just 2 to 4 minutes. That beautiful, gooey coating means you’ve got a truly Thick Apple Pie Filling that won’t leak out everywhere when you bake. If you want to use this same technique for a cobbler, remember to keep the apples a little less cooked!

Finishing Touches for Your Stovetop Apple Pie Filling
We are so close! The sauce is thick, the apples are tender, and that amazing cinnamon aroma is filling my entire kitchen. We just have two final, super important steps to complete this Stovetop Apple Pie Filling, and these really elevate it from “good” to “the absolute Best Apple Pie Filling ever.”
First, take the pot completely off the heat—I mean, move it to a cold burner. Now, drop in your 2 tablespoons of unsalted butter. Don’t even think about skipping this! Adding the butter off the heat makes it melt slowly into the sauce, creating this beautiful, glossy shine on the filling. It doesn’t just look better; it adds a richness that plain sugar and apples just can’t replicate. Swirl it gently until it’s totally incorporated. If you want to see other amazing recipes like this one, check out this great homemade apple pie filling with brown sugar recipe!
The last step is perhaps the hardest part for an impatient cook like me: cooling! You must let your apple pie filling cool down completely before you even think about pouring it into a pie crust. If you put hot filling into a cold or room-temperature crust, the butter in the pastry will melt instantly, and you lose all that flaky structure you worked for. If you are in a serious rush, you can spread it out onto a baking sheet to speed up the cooling, but honestly, waiting is worth it for that perfect seal and texture.
Tips for Success When Making Apple Filling for Pies
You know, even with the best intentions, sometimes things go sideways in the kitchen, right? I remember one batch of this apple pie filling where I got lazy and used only soft Golden Delicious apples because that’s all I had left. Oh, folks, it was soup! The apples completely disintegrated into a sticky paste—no tender slices left at all. That’s why sticking hard to that mix of tart and sweet apples mentioned in the recipe notes is so key for that perfect structure.
Here are a few things I’ve learned over the years to ensure this remains the Best Apple Recipe you try all fall:
- The Apple Mix Matters Most: Seriously, don’t skip the advice on using a blend. Tart apples like Granny Smith provide the structure and tang, while sweeter ones balance that out. Keep your slices consistent at 1/4-inch; this ensures everything cooks evenly in that sweet glaze.
- Storage is Simple: If you make a huge batch of this Homemade Apple Pie Filling Recipe for meal prep, it keeps beautifully. Store it in an airtight container in the fridge for up to a week. I often make a triple batch just so I have a Quick Apple Topping ready to go!
- Adjusting for Toppings: If you’re not using this for a full pie, but maybe spooning it over waffles or braised pork, you want it a little runnier. If you want a looser consistency—more of a Quick Apple Topping—just knock back the cornstarch from 2 tablespoons down to 1.5 tablespoons. It’s that easy to customize!
Follow those little tricks, and you’ll never have to settle for less than perfect, juicy apple filling again!
Versatile Ways to Use This Apple Pie Filling
I know you came here to make the Best Apple Pie Filling, but honestly, the best secret about this recipe is that it’s too delicious to hide under a crust once in a while! Making a big batch of this Brown Sugar Apple Filling means you’re set for days of dessert inspiration. It’s the perfect foundation for so many things, not just the classic Thanksgiving pie. Think about how easy it makes breakfast or quick snacks!
This truly is the ultimate Apple Filling for Desserts. I love spiking my morning waffles with a scoop of this warm goodness—it makes such a fantastic Quick Apple Topping. You can also use the leftovers to make an amazing apple crisp topping recipe, or swirl it right into your batter when you make cinnamon rolls. Seriously, every time I finish a batch of this from scratch apple filling, I look around my kitchen wondering what else I can pour it over. Don’t let this amazing, gooey apple filling just sit in the fridge waiting for pie day. Go wild with it! If you need even more simple ideas, check out this guide on easy homemade apple pie filling for usage inspiration.
Storing Your Homemade Apple Pie Filling
Now that you’ve made this incredible apple pie filling, the last thing you want to do is waste a drop of it! The good news is that because this stovetop apple pie filling recipe cooks down beautifully and has that perfect touch of acid from the lemon juice, it stores like a dream. This makes it fantastic for meal prepping ahead of time, which saves so much stress right before a big holiday baking day.
The main goal here is to contain that glorious spice and moisture. You definitely cannot just leave it sitting out, and you shouldn’t even store it in the pot you cooked it in, as that can sometimes affect the taste over time. You need an airtight container, just like you would use for leftovers.
Here’s the simple rundown for longevity:
- Cool Completely: I drilled this in before, but I have to say it again! Make sure your apple filling is chilled all the way down to room temperature, at minimum, before sealing the container. Putting warm filling into plastic or glass containers can create condensation, which leads to soggy fruit and shorter shelf life. Wait until it’s cool enough to handle comfortably.
- Airtight is Essential: Transfer the completely cooled sweet apple filling into a clean, airtight glass container. Glass is always my preferred choice for storing cooked fruit, though a good quality plastic container works too, as long as the lid seals tight.
- Refrigeration Time: In the refrigerator, this homemade mixture stays wonderfully fresh for about a week. That’s plenty of time to bake a pie, add some to your oatmeal, or use it as a topping!
I haven’t tested freezing this specific ratio yet, but generally, the cornstarch binder holds up pretty well to a quick freeze if you need to keep it longer than a week. Just thaw it overnight in the fridge and give it one good stir before using it in your next pie crust or as a quick apple topping!
Frequently Asked Questions About Apple Pie Filling
It’s funny, even after I break down every single step for the Best Homemade Apple Pie Filling Recipe, people still have questions! That’s totally fair; baking is chemistry, and we want perfection, especially when dealing with that gooey apple filling texture. I’ve gathered the ones I get asked the most about texture, storage, and ingredients right here for you.
Can I use frozen apples for this apple pie filling recipe?
Oh, this one comes up a lot, especially when the craving hits mid-winter! I strongly, strongly recommend using fresh apples for this stovetop apple pie filling. Frozen apples have already been processed and hold a lot more internal water. If you use frozen, your final product ends up almost certainly too watery, even with the cornstarch. You won’t get that beautifully thick apple pie filling we are aiming for. If you absolutely must use frozen, you’ll need to thaw them out completely and drain off as much liquid as possible before cooking them down, and you might even need to bump that cornstarch up by another half teaspoon.
What if my filling isn’t thick enough, even after cooling?
This is the panic moment, isn’t it? It usually means the cornstarch didn’t come to a full boil, or maybe your apples just released way more juice than mine did that day. Don’t throw it out! If your gooey apple filling is runny immediately after cooking, keep simmering it until it bubbles vigorously for a minute. If it’s thin even after cooling, the fix is pretty simple: make a small, extra slurry. Whisk 1 teaspoon of cornstarch with 1 tablespoon of cold water. Then, return your filling to a small saucepan, slowly whisk in the new slurry, and bring it to a simmer just until it thickens up again. It’s an easy fix for saving your apple filling for desserts!
Can I use this recipe commercially—like for canning?
This is a great question for people obsessed with making large batches of brown sugar apple filling! Because this recipe is designed for quick stovetop use and relies on cornstarch as a thickener, it isn’t technically safe for traditional water-bath canning methods on its own. Cornstarch breaks down during long processing times. If you plan on canning large amounts for later, you’d need to look into a recipe specifically designed for pressure canning, which uses more acid. For the fridge, though, you are good to go for about a week, as noted in the storage section, making it a perfect homemade pie ingredient prep item.
Is this the best recipe if I want a very tart filling?
It leans sweet because of the brown sugar, which I love, but if you want a punchier flavor, absolutely! This Homemade Apple Pie Filling Recipe is incredibly adaptable. To make it much more tart, you can easily cut the total sugar (granulated plus brown) by about 1/4 cup, and use 100% tart apples like Granny Smith. The lemon juice helps balance that out, but if you want a real wake-up call in your spiced apple filling, add a tiny, tiny pinch of citric acid along with your spices. It wakes up the cinnamon beautifully!
How long does this apple filling keep for meal prepping?
For this cooked stovetop version, you get about 7 days in the fridge stored properly in an airtight container. If you are making it specifically to use as a quick apple topping for breakfast items throughout the week, that’s perfect. I wouldn’t push the refrigerated shelf life much past a week, though, because the apples start losing that *just-cooked* tenderness.
Nutritional Snapshot of This Sweet Apple Filling Using Brown Sugar
I always try to keep things real in the kitchen, and that means being honest about what’s in the food we love! While I’m not a nutritionist—I’m just a passionate home cook who loves reliable recipes—I can give you the estimated breakdown for a standard serving of this Sweet Apple Filling Using Brown Sugar. Remember, these numbers are just estimates, based on dividing the final yield by the suggested serving size, assuming you used standard grocery store ingredients.
When you are making something delicious like this homemade apple pie filling, it’s good to have a picture of what you’re serving up, even if it’s just a tiny slice of information!
- Serving Size: About 1/2 cup
- Calories: 210 (Not too bad for a treat!)
- Sugar: 35g (That sweet goodness comes from the brown sugar!)
- Fat: 3g
- Sodium: 5mg (Very low, which is great!)
- Carbohydrates: 46g
- Protein: 0g
Again, these are just estimates, especially since the size of your apples can really throw the final numbers off. If you use less sugar or lean heavily on tart apples with less fructose, your numbers will shift slightly. But for a general idea of what this flavorful apple pie filling brings to your comfort food desserts, this should give you a good baseline!
PrintEasy Stovetop Apple Pie Filling with Brown Sugar
Make this quick, homemade apple pie filling on the stovetop. It results in tender apple slices in a sweet, spiced glaze, perfect for pies, crisps, or topping breakfast items.
- Prep Time: 15 min
- Cook Time: 15 min
- Total Time: 30 min
- Yield: About 6 cups 1x
- Category: Dessert Component
- Method: Stovetop
- Cuisine: American
- Diet: Vegetarian
Ingredients
- 6 large apples (like Granny Smith or Honeycrisp), peeled, cored, and sliced 1/4-inch thick
- 3/4 cup packed brown sugar
- 1/4 cup granulated sugar
- 1/4 cup water
- 2 tablespoons cornstarch
- 1 teaspoon ground cinnamon
- 1/4 teaspoon ground nutmeg
- 1/8 teaspoon ground allspice
- 1 tablespoon lemon juice
- 2 tablespoons unsalted butter
Instructions
- Combine the sliced apples, brown sugar, granulated sugar, water, cinnamon, nutmeg, and allspice in a large saucepan. Toss gently to coat the apples evenly.
- Cook the mixture over medium heat, stirring occasionally, until the sugar dissolves and the apples begin to soften slightly, about 5 to 7 minutes.
- In a small bowl, whisk together the cornstarch and lemon juice until smooth. This creates a slurry.
- Pour the cornstarch slurry into the apple mixture. Stir constantly as the mixture returns to a simmer.
- Continue to cook, stirring frequently, until the filling thickens significantly and becomes glossy, about 2 to 4 minutes. The apples should be tender but still hold their shape.
- Remove the saucepan from the heat. Stir in the butter until it melts completely, which adds richness and shine to your apple pie filling.
- Allow the homemade apple pie filling to cool completely before using it in a pie crust or storing it.
Notes
- For the best texture, use a mix of tart and sweet apples. This apple filling recipe works well with Granny Smith, Honeycrisp, or Fuji apples.
- This thick apple pie filling stores well in an airtight container in the refrigerator for up to one week.
- If you are using this as a quick apple pie topping for pancakes or waffles, you may prefer a slightly looser consistency; reduce the cornstarch to 1.5 tablespoons.
Nutrition
- Serving Size: 1/2 cup
- Calories: 210
- Sugar: 35
- Sodium: 5
- Fat: 3
- Saturated Fat: 2
- Unsaturated Fat: 1
- Trans Fat: 0
- Carbohydrates: 46
- Fiber: 3
- Protein: 0
- Cholesterol: 6