
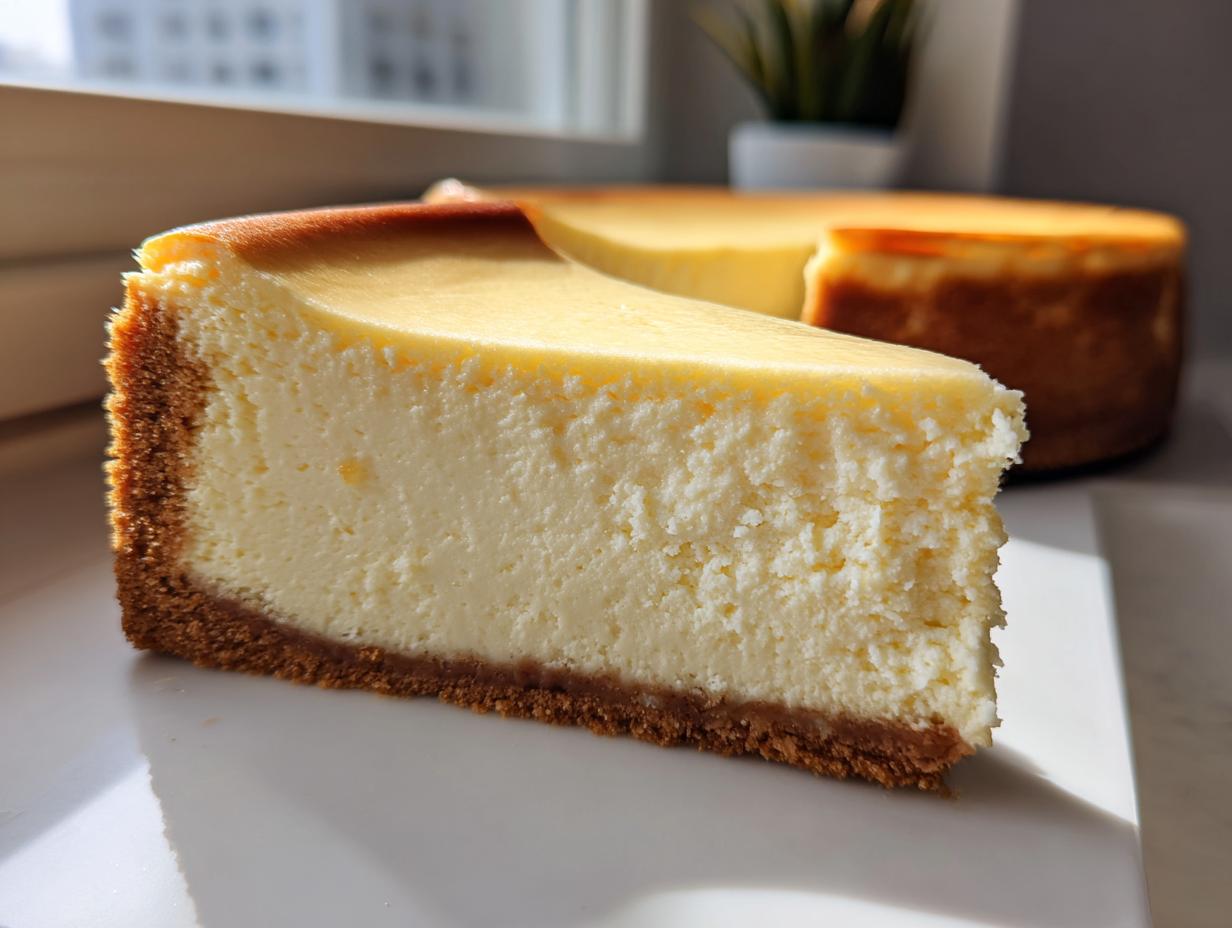
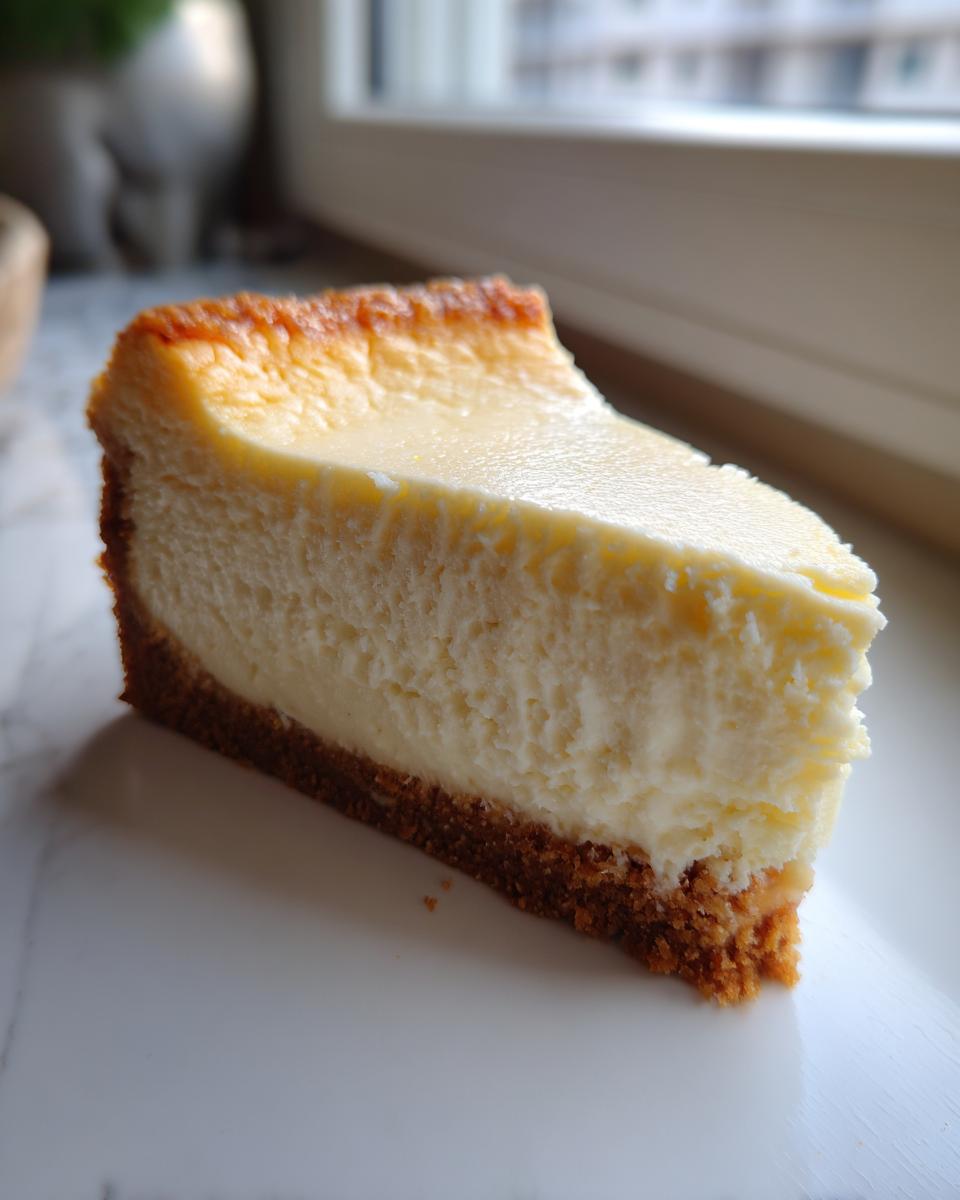
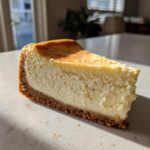
When you think of the ultimate decadent dessert, doesn’t your mind instantly go to that towering, impossibly smooth slice of cheesecake? I totally get it. I spent way too many years being absolutely terrified of making one because everyone says they crack or sink if you look at them wrong! Well, banish that fear right now, because I have perfected the absolute best, easy, no-crack New York style baked cheesecake recipe you’ll ever find.
Trust me, I’m not a professional chef; I’m just like you, finding joy in bringing those classic home recipes to life. That’s why this specific cheesecake recipe is streamlined for success. We skip the overly fussy water bath that plagues so many beginners. This method, refined through careful testing to ensure clarity and consistency—just like Maddie taught us—guarantees you get that famous rich, creamy texture every single time. Get ready to make the creamiest dessert you’ve ever attempted!
- Why This is the Best Easy Cheesecake Recipe for Beginners
- Ingredients for Your Creamy Cheesecake Recipe
- Step-by-Step Instructions for the Perfect Baked Cheesecake Recipe
- Tips for Achieving a Truly Creamy Cheesecake Recipe
- Storage and Serving Suggestions for Your Homemade Cheesecake
- Variations on This Classic Cheesecake Recipe
- Frequently Asked Questions About This Cheesecake Recipe
- Estimated Nutritional Data for This Cheesecake Recipe
- Share Your Homemade Cheesecake Success
- Estimated Nutritional Data for This Cheesecake Recipe
- Share Your Homemade Cheesecake Success
Why This is the Best Easy Cheesecake Recipe for Beginners
Listen, if you’ve avoided making cheesecake because you think it requires professional gear or secret oven tricks, I hear you! That’s exactly why I obsessed over making this version the ultimate New York cheesecake recipe that actually works for regular folks making simple dessert ideas on a Tuesday night.
The biggest win here? No water bath! Seriously, wiping down a steamy oven is not how I want to spend my afternoon. My method focuses on gentle mixing and slow cooling, which is the secret handshake for achieving that legendary, smooth, creamy texture without that dreaded surface crack. This is truly the most reliable easy cheesecake recipe out there, designed specifically to deliver a stunning, no crack cheesecake guaranteed.
You get that dense, slightly tangy perfection that shouts ‘bakery quality’—but you did it yourself with ease. It’s the perfect stepping stone into the world of rich, rich dessert making.
Ingredients for Your Creamy Cheesecake Recipe
Okay, we are gearing up to mix! I can’t stress this enough: the secret sauce to getting that super smooth, decadent, creamy cheesecake texture starts right here with your prep work. Don’t feel lazy if you forget to pull everything out early—it’s worth setting an alarm!
For this to work like magic, everything for the filling needs to be at absolute room temperature. If your cream cheese is cold, you will get lumps, and we simply can’t have that drama in our lovely dessert. Let those eggs and that cream cheese sit out for at least an hour before you even think about turning on the mixer.
For the Graham Cracker Crust
This takes like two minutes flat, but it sets the foundation for our whole beautiful creation. We want a nice, buttery crunch that holds together!
- 1 1/2 cups graham cracker crumbs (I usually crush up about 10 full sheets by hand—it’s therapeutic!)
- 1/4 cup granulated sugar (just a little something to hold it together)
- 6 tablespoons unsalted butter, melted (don’t substitute this, butter is key!)
For the Rich Cheesecake Filling
This is where the luxury happens. Remember, room temperature ingredients! This ensures that heavenly classic cheesecake recipe texture.
- 3 (8 ounce) packages full-fat cream cheese, softened (Only use full-fat, please! Skip the light stuff if you want the real deal.)
- 1 1/2 cups granulated sugar
- 1 teaspoon vanilla extract (use the good stuff!)
- 1/4 teaspoon salt
- 4 large eggs, room temperature (No excuses here, warm eggs blend effortlessly!)
Step-by-Step Instructions for the Perfect Baked Cheesecake Recipe
Here’s where we put all that prep work to good use! Following these baking steps closely is what elevates this from just another dessert to your go-to sweet treats guide. I remember the first time I tried baking one without a water bath—I was so nervous the top would look like the surface of the moon, but by slowing the cooling time, it came out flawlessly smooth. It was a big moment for my homemade cheesecake journey!
Preparing the Crust and Pan
First, get your oven warmed up to 325°F (160°C). This is important! Now, grab that 9-inch springform pan. Since we are skipping the water bath, we need to foil-wrap the outside bottom really well—I use heavy-duty foil and go around twice. This prevents any accidental seepage, because honestly, wet crusts are the worst!
For the graham cracker crust, just toss those crumbs, the sugar, and the melty butter together until they look like wet sand. Press that firmly into the bottom of your foiled pan. Pop it into the oven for just 10 minutes. That little bake sets it just enough so it doesn’t turn soggy when we pour the filling in. Cool it down slightly while we work on the filling magic.
Mixing the Creamy Cheesecake Filling
Grab that bowl with your room-temperature cream cheese. Beat it first! I need it totally silky smooth, scraping down the sides a couple of times. Once you’re sure there are zero lumps, you can stream in the sugar, vanilla, and salt. Mix just until combined.
Now, the egg step—this is the most critical moment for the no crack cheesecake result. Add those four eggs *one at a time*. Beat on low speed, and I mean low! You just want it mixed enough that you can’t see the yellow yolk floating around anymore. Stop the mixer the second the egg disappears. Adding too much air here is what causes trouble later on, so be light-handed. Pour that beautiful batter over your slightly cooled crust. Give the pan a gentle tap or two on the counter to let any big bubbles escape.
Baking and Slow Cooling: The Secret to This Cheesecake Recipe
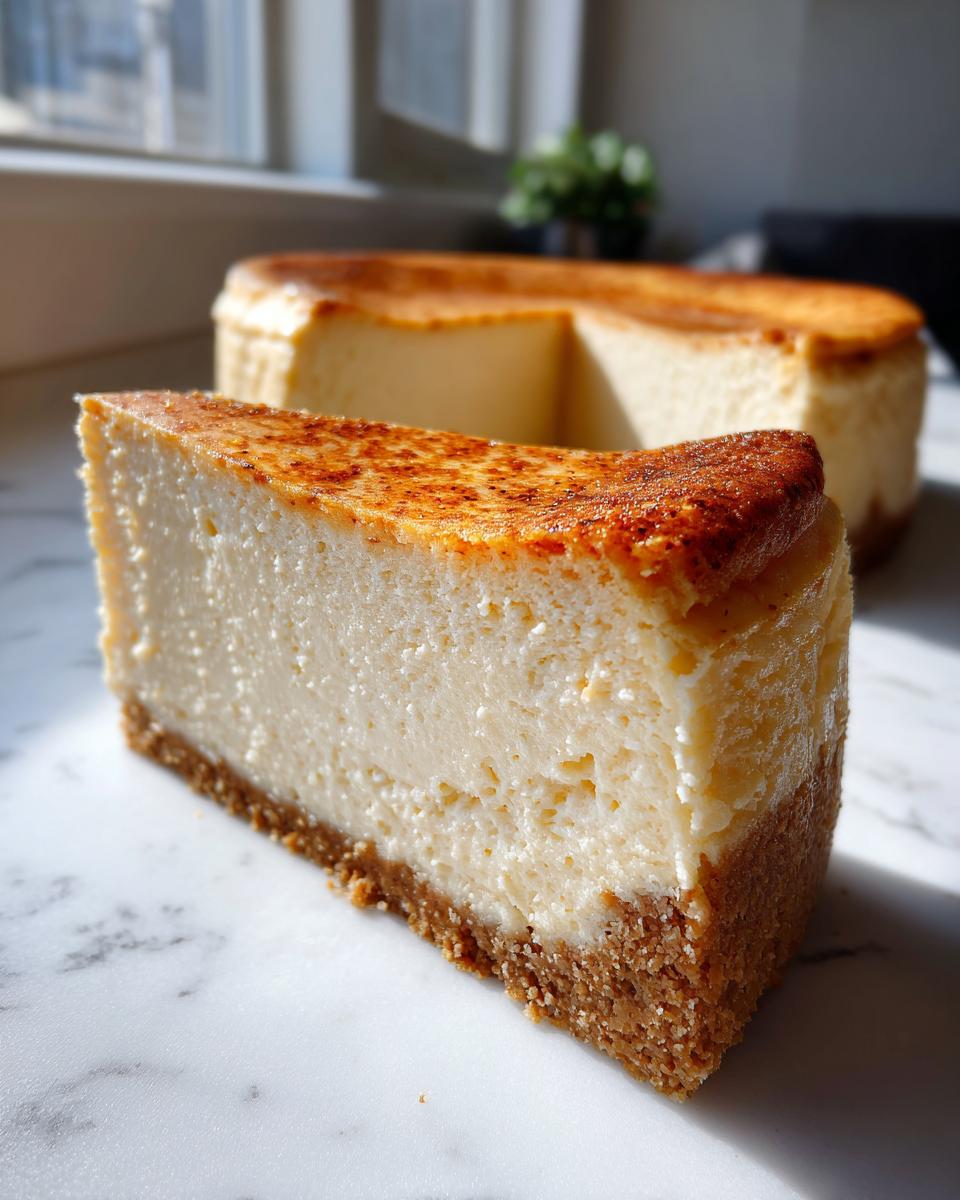
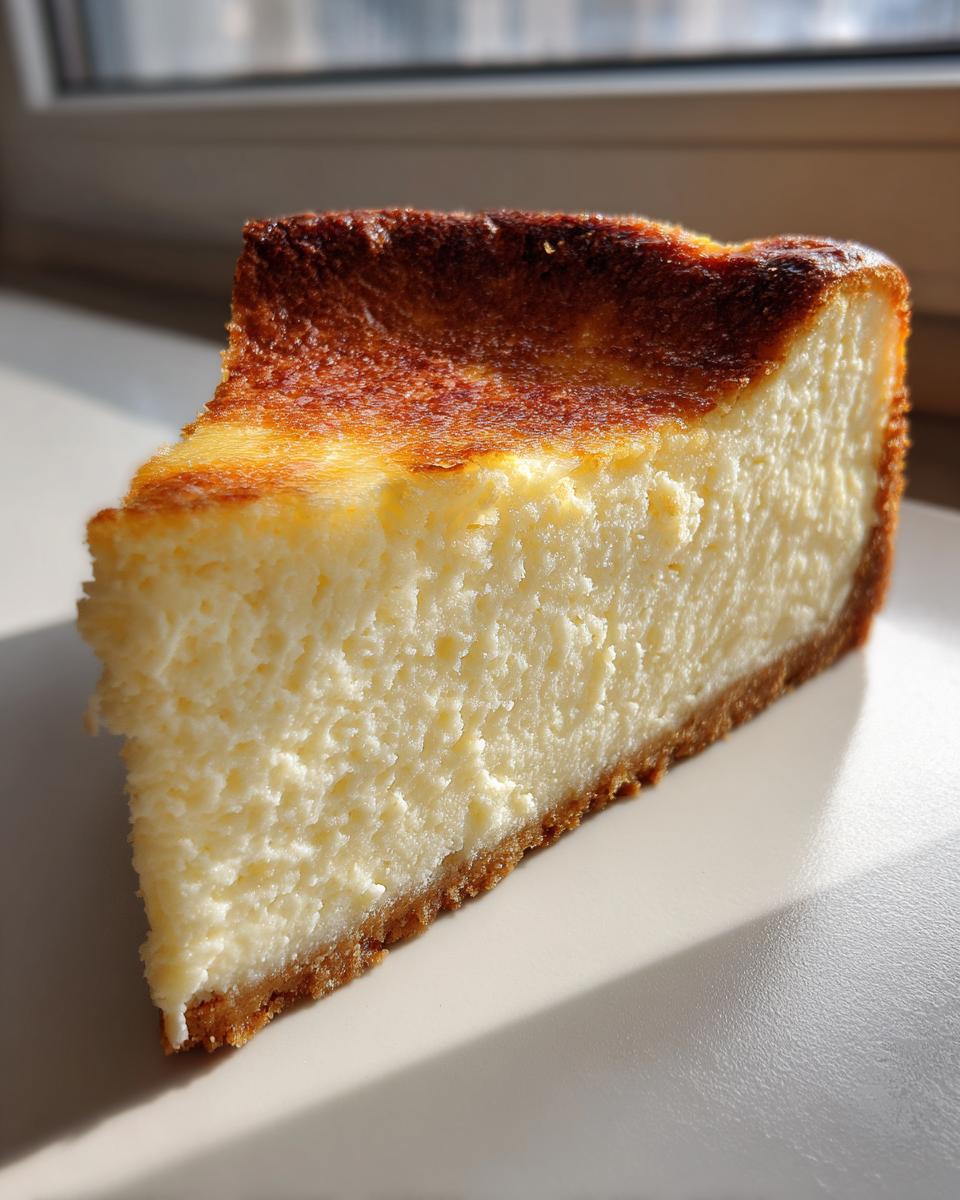
Carefully slide the pan into the oven without jiggling it! Bake this whole cheesecake recipe for about 55 to 65 minutes. You’ll know it’s close when the edges look solid, but the very center (maybe a two-inch circle) still has a gentle jiggle when you nudge the pan. Resist the urge to poke it with a toothpick right now!
Once that wobble is just right, turn the oven OFF. Do not open the door! Prop the oven door open just a tiny bit—I slide a wooden spoon in there to keep it ajar. You need to let this cheesecake cool down slowly over the next hour right inside the warm oven. This slow transition—this is what stops the cheesecake from shrinking suddenly and cracking. Once it’s warm, but not hot, take it out to cool completely on the counter before chilling.
Tips for Achieving a Truly Creamy Cheesecake Recipe
We talked about the slow cooling, which is huge for keeping things pretty, but let’s zoom in on the texture because that’s really what matters most when you’re looking for that perfect creamy dessert experience.
The number one thing I cannot emphasize enough is ingredient temperature. If your cream cheese isn’t completely soft—I mean easily smashable with a fork soft—it will fight you when you try to mix it! Lumps equal stress, and lumpy batter means your beautiful cheesecake won’t be as smooth as silk.
And please, try not to scrape down the bowl after you add the eggs! I know it feels wrong; we usually scrape everything down, right? But scraping after the eggs introduce extra air pockets that we worked so hard to avoid during the mixing phase. Just mix gently until the last egg is incorporated, pour it, and let the oven—and the cooling process—do the rest of the serious work for you. That’s how we lock in that incredible, dense, creamy cheesecake flavor without any sinking!
Storage and Serving Suggestions for Your Homemade Cheesecake
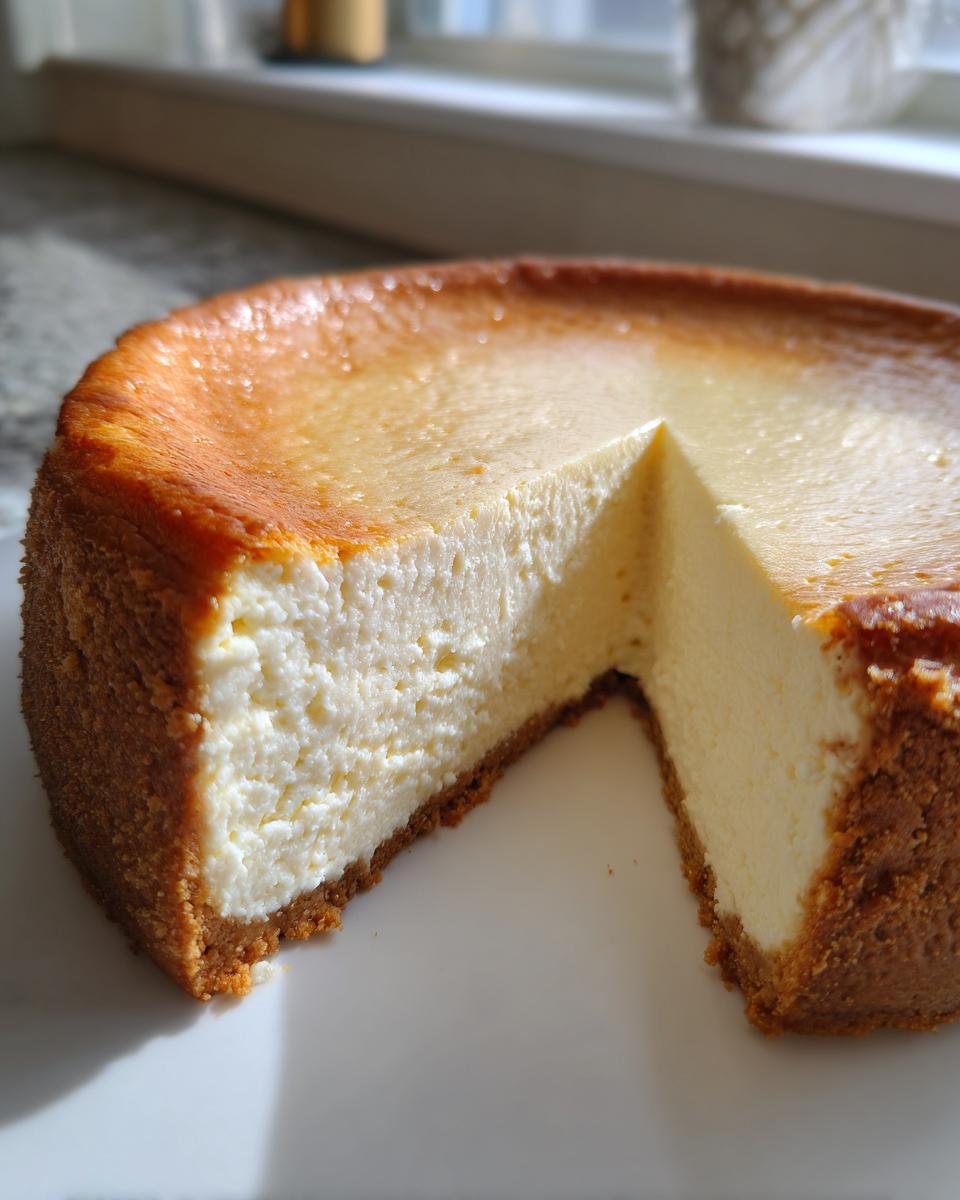
Now that you’ve successfully navigated the baking process, you have to wait—I know, the hardest part! You absolutely must chill this beauty for a minimum of six hours, but overnight is always better with a proper homemade cheesecake. This chilling time is essential because it allows the texture to completely set up perfectly. Don’t rush it!
Once chilled, run a thin, sharp knife gently around the edges before releasing the springform ring. Keep leftovers (if you have any!) covered loosely in the fridge. This dense dessert pairs wonderfully with something bright, like a simple cherry topping or just a light dusting of fresh lemon zest. Easy peasy!
Variations on This Classic Cheesecake Recipe
Even though mastering the easy cheesecake recipe is the first goal, once you nail that perfect creamy base, you can have so much fun dressing it up! Don’t feel like you have to eat it plain, even though it’s fantastic that way. Think of this dense base as your canvas for creating incredible gourmet dessert masterpieces.
For a little pop of brightness against the richness of this classic cheesecake recipe, try adding the zest of one whole lemon right into the filling mix when you add the vanilla. It’s so refreshing! Or, if you’re feeling extra indulgent, top your chilled cheesecake with a drizzle of dark chocolate ganache. Seriously, who can say no to that?
Fruit sauces are also heavenly. A tart raspberry or salted caramel sauce poured right over the top before slicing makes it look like you slaved away for hours. See? Simple comfort food made adaptable for any celebration!
Frequently Asked Questions About This Cheesecake Recipe
I know you have questions! Even when a recipe looks foolproof, we home cooks always have those little ‘what if’ moments. I’ve gathered the ones I get asked most often about making this specific classic cheesecake recipe so you can bake with total confidence.
Don’t worry if you’re missing a piece of specialty equipment, either. We can usually figure out a workaround for most things in the home kitchen!
Can I substitute light cream cheese in this recipe?
Oh, please don’t! I really wouldn’t advise it for this specific recipe. To get that signature dense, unbelievably rich texture that makes this a true New York style cheesecake—the kind that folds beautifully in your mouth—you have to use full-fat cream cheese. Light versions have more water and less fat, which messes with the structure and honestly, they just don’t taste as luxurious when baked.
Can I make this a No Bake Cheesecake Recipe instead?
That’s a totally different kind of delight! This recipe is fundamentally designed for baking. The heat activates the structure of the eggs to give you that tall, slightly tart, dense crumb. A no bake cheesecake recipe relies on gelatin or whipped cream to set up firm in the fridge. If you truly need no-bake, you’ll want to find a dedicated recipe, because swapping methods here will result in a soupy mess rather than a perfectly creamy cheesecake.
What if I don’t have a springform pan? Can I still use this cheesecake recipe?
It’s tough without one, because you simply can’t get a regular cake pan off a set cheesecake without cutting it up! If you absolutely must bake without one, try using an 8-inch or 9-inch round cake pan, but line the bottom and sides heavily with parchment paper, leaving a big overhang on two opposing sides. You use those paper ‘slings’ to lift the whole thing out once it’s completely chilled. It’s fiddly, but way better than destroying your simple dessert!
How do I know when my baked cheesecake is done?
This is the second most asked question after cheating the cracks! Don’t rely just on a toothpick on this one. When you carefully nudge the side of the springform pan—gently, don’t shake it!—the outer two inches should look set and firm, but the very center still needs to have a slight, soft wobble. Think of it like a Jell-O mold that’s almost stiff. That little bit of wobble means it will continue to firm up beautifully as it cools slowly in the turned-off oven, which is key for this amazing beginner cheesecake recipe.
I forgot to wrap the foil—will it leak?
If you forgot the heavy-duty foil around the bottom, don’t panic, but definitely don’t place it directly into a hot water bath now! If you’re baking it without any extra liquid like we are, you might be okay, especially if your pan is new and seals well. But if you notice water anywhere near the foil during the bake, it means the crust is getting wet, and that’s just a tragedy. Next time, set a reminder! For this time, just keep an eye on it, and maybe have a dry towel handy just in case you need to quickly slide the pan out onto a dry sheet pan halfway through.
Estimated Nutritional Data for This Cheesecake Recipe
Okay, I know we eat cheesecake for pure joy, not for counting carbs, but sometimes it’s helpful to see what’s what! Keep in mind that since this is a rich dessert made with full-fat ingredients, the numbers are definitely indulgent, but totally worth it for that creamy result. These figures are calculated based on a 12-slice yield, so your slice might look a little different than mine!
- **Serving Size:** 1 slice
- **Calories:** Around 450 (Wowza!)
- **Fat:** About 30g (That’s where all that creamy richness lives!)
- **Carbohydrates:** Approximately 38g
- **Protein:** About 8g
It’s an honest breakdown for one glorious slice of homemade homemade cheesecake.
Share Your Homemade Cheesecake Success
Now it’s your turn to wow me! Honestly, telling me how your cheesecake turned out is half the fun for me. Did you achieve that pristine, smooth top? Did you manage to skip the water bath successfully? I want to hear every detail about your experience making this cheesecake recipe.
Please leave a rating below—it helps other nervous bakers know they can conquer this dessert too! And if you added any fun toppings, like a quick cream cheese frosting twist or a special sauce, share that inspiration too! Happy baking!
Estimated Nutritional Data for This Cheesecake Recipe
Okay, I know we eat cheesecake for pure joy, not for counting carbs, but sometimes it’s helpful to see what’s what! Keep in mind that since this is a rich dessert made with full-fat ingredients, the numbers are definitely indulgent, but totally worth it for that creamy result. These figures are calculated based on a 12-slice yield, so your slice might look a little different than mine!
- Serving Size: 1 slice
- Calories: Around 450 (Wowza!)
- Fat: About 30g (That’s where all that creamy richness lives!)
- Carbohydrates: Approximately 38g
- Protein: About 8g
It’s an honest breakdown for one glorious slice of homemade cheesecake.
Share Your Homemade Cheesecake Success
Now it’s your turn to wow me! Honestly, telling me how your cheesecake turned out is half the fun for me. Did you achieve that pristine, smooth top? Did you manage to skip the water bath successfully? I want to hear every detail about your experience making this cheesecake recipe.
Please leave a rating below—it helps other nervous bakers know they can conquer this dessert too! And if you added any fun toppings, like a quick drizzle of something amazing or a special fruit sauce, share that inspiration too! We are all learning together in the digital kitchen, and seeing your perfect, creamy results makes my day. Happy baking, and congratulations on mastering the no-crack technique!
PrintEasy, No-Crack New York Style Baked Cheesecake
Follow this simple recipe to make a rich, creamy New York style cheesecake without needing a water bath. This recipe focuses on preventing cracks for beginner success.
- Prep Time: 20 min
- Cook Time: 65 min
- Total Time: 7 hours 25 min
- Yield: 12 servings 1x
- Category: Dessert
- Method: Baking
- Cuisine: American
- Diet: Vegetarian
Ingredients
- 1 1/2 cups graham cracker crumbs
- 1/4 cup granulated sugar (for crust)
- 6 tablespoons unsalted butter, melted
- 3 (8 ounce) packages full-fat cream cheese, softened
- 1 1/2 cups granulated sugar (for filling)
- 1 teaspoon vanilla extract
- 1/4 teaspoon salt
- 4 large eggs, room temperature
Instructions
- Preheat your oven to 325°F (160°C). Wrap the outside bottom of a 9-inch springform pan tightly with heavy-duty aluminum foil.
- Prepare the crust: Mix graham cracker crumbs, 1/4 cup sugar, and melted butter until combined. Press the mixture evenly into the bottom of the prepared springform pan. Bake for 10 minutes. Remove and let cool slightly.
- Prepare the filling: In a large bowl, beat the softened cream cheese with an electric mixer on medium speed until completely smooth. Scrape down the sides.
- Gradually add the 1 1/2 cups of sugar, vanilla extract, and salt. Beat until just combined. Do not overmix.
- Add the eggs one at a time, beating only until each egg is incorporated. Stop mixing as soon as the last egg is blended in. Overmixing adds air, which causes cracks.
- Pour the filling over the cooled crust. Gently tap the pan on the counter a few times to release any large air bubbles.
- Bake for 55 to 65 minutes. The edges should look set, but the center 2 inches should still have a slight wobble when gently nudged.
- Turn off the oven, but leave the cheesecake inside with the oven door propped open slightly (use a wooden spoon). Let it cool slowly in the turned-off oven for 1 hour. This slow cooling prevents cracking.
- Remove the cheesecake from the oven and let it cool completely on a wire rack at room temperature.
- Once cool, cover the pan loosely with plastic wrap and chill in the refrigerator for at least 6 hours, or preferably overnight, before serving.
Notes
- Use room temperature ingredients for the filling to ensure a smooth, lump-free texture.
- Do not open the oven door during the initial baking time.
- For the best creamy texture, avoid scraping down the sides of the bowl after adding the eggs.
Nutrition
- Serving Size: 1 slice
- Calories: 450
- Sugar: 35g
- Sodium: 300mg
- Fat: 30g
- Saturated Fat: 18g
- Unsaturated Fat: 12g
- Trans Fat: 0.5g
- Carbohydrates: 38g
- Fiber: 1g
- Protein: 8g
- Cholesterol: 120mg