
That craving for something crisp, tangy, and bursting with garlic and dill flavor hits hard, doesn’t it? Forget long waiting times; I’m sharing my absolute favourite way to make dilly beans: the refrigerator pickles method! Trust me, this is the best refrigerator dilly beans recipe you’ll find because it’s quick, guarantees a stunning crunch, and requires zero complicated canning. I’m Maddie Thompson, and like I always say, my kitchen expertise comes from a real-world stove, not a pastry school. I’ve taken my grandmother’s approach to preserving—meaning reliable, honest flavors—and adapted it perfectly for your busy life. You’ll have snappy, perfect pickles ready in no time!
- Why This Refrigerator Dilly Beans Recipe Works for You
- Gathering Ingredients for Your Dilly Beans
- Step-by-Step Instructions for Perfect Dilly Beans
- Tips for Success with Your Spicy Dilly Beans
- How to Serve and Enjoy Your Tangy Snack Recipes
- Storage and Shelf Life for Homemade Dilly Beans
- Frequently Asked Questions About Dilly Beans
- Nutritional Estimate for Dilly Beans
- Share Your Homemade Dilly Beans Creations
Why This Refrigerator Dilly Beans Recipe Works for You
When you need a tangy snack *right now*, you just can’t wait for water bath processing or long cellar times. That’s why this method for dilly beans is my go-to. We are bypassing the long canning steps entirely to get you the best flavor with maximum crunch right from the fridge! It’s all about making your preserving efforts worthwhile.
- It’s fast! You can be setting these jars in the fridge in under 30 minutes.
- The texture is unbeatable—we get that perfect snap every single time.
- You get to customize your flavor profile right in the jar, choosing exactly how garlicky or spicy you want them.
Ready Fast: The Refrigerator Pickles Advantage
Look, sometimes you just need to get those garden beans preserved before they turn rubbery. This recipe is fantastic because it taps into the joy of quick pickled vegetables without any big canning setup. You just boil the brine, pour, chill, and wait 24 hours. It’s the easiest way to preserve green beans I promise you’ll ever try.
Achieving the Ultimate Crunchy Pickled Beans
Here’s my pro tip—the snap comes from two things: fresh beans and that screaming hot brine. Always start with beans that have been picked recently; if they’re floppy, they’ll be floppy pickles. Secondly, make sure your vinegar brine is at a full, rolling boil when you pour it over everything in the jar. That hot shock helps set that crisp texture immediately. That’s how we ensure you get truly crunchy pickled beans!
Gathering Ingredients for Your Dilly Beans
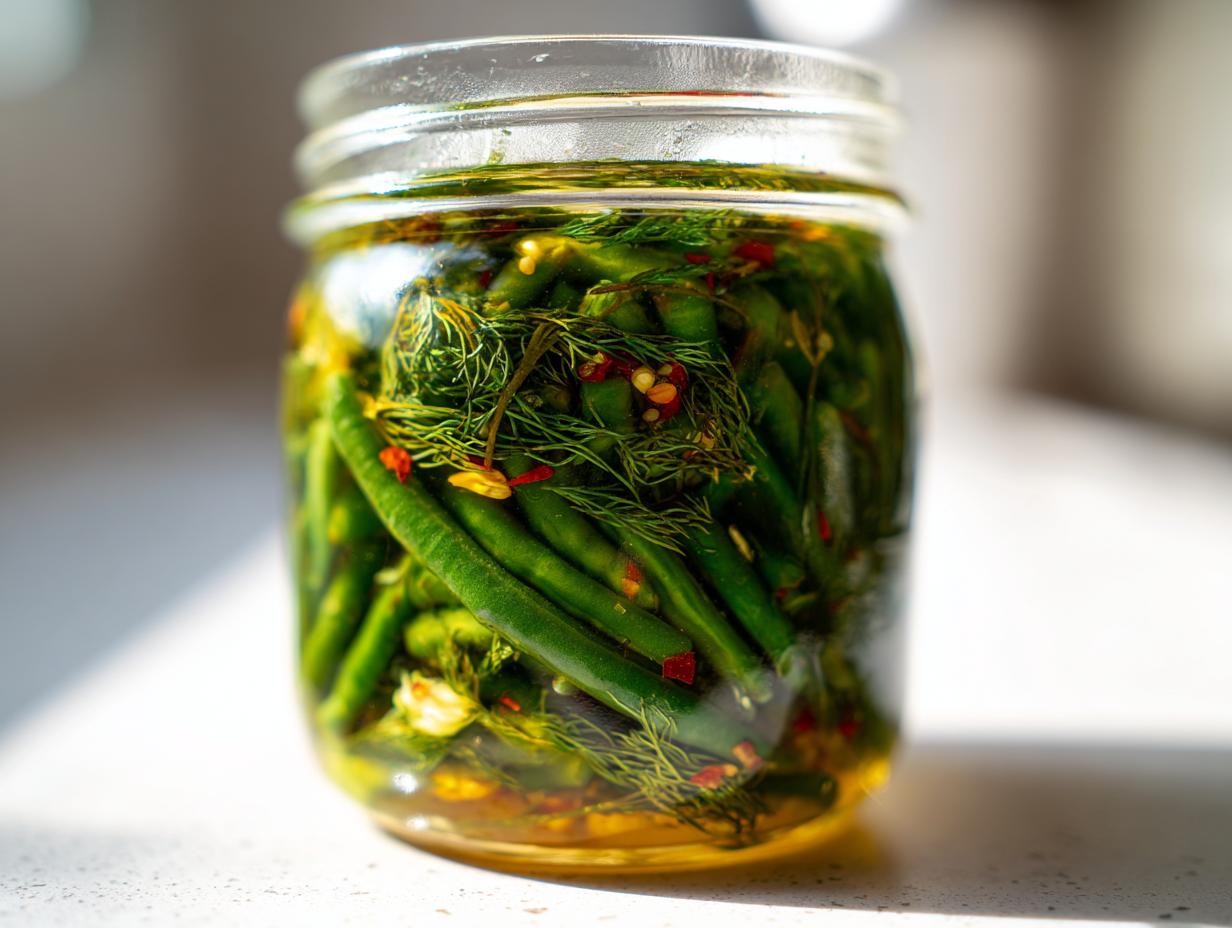
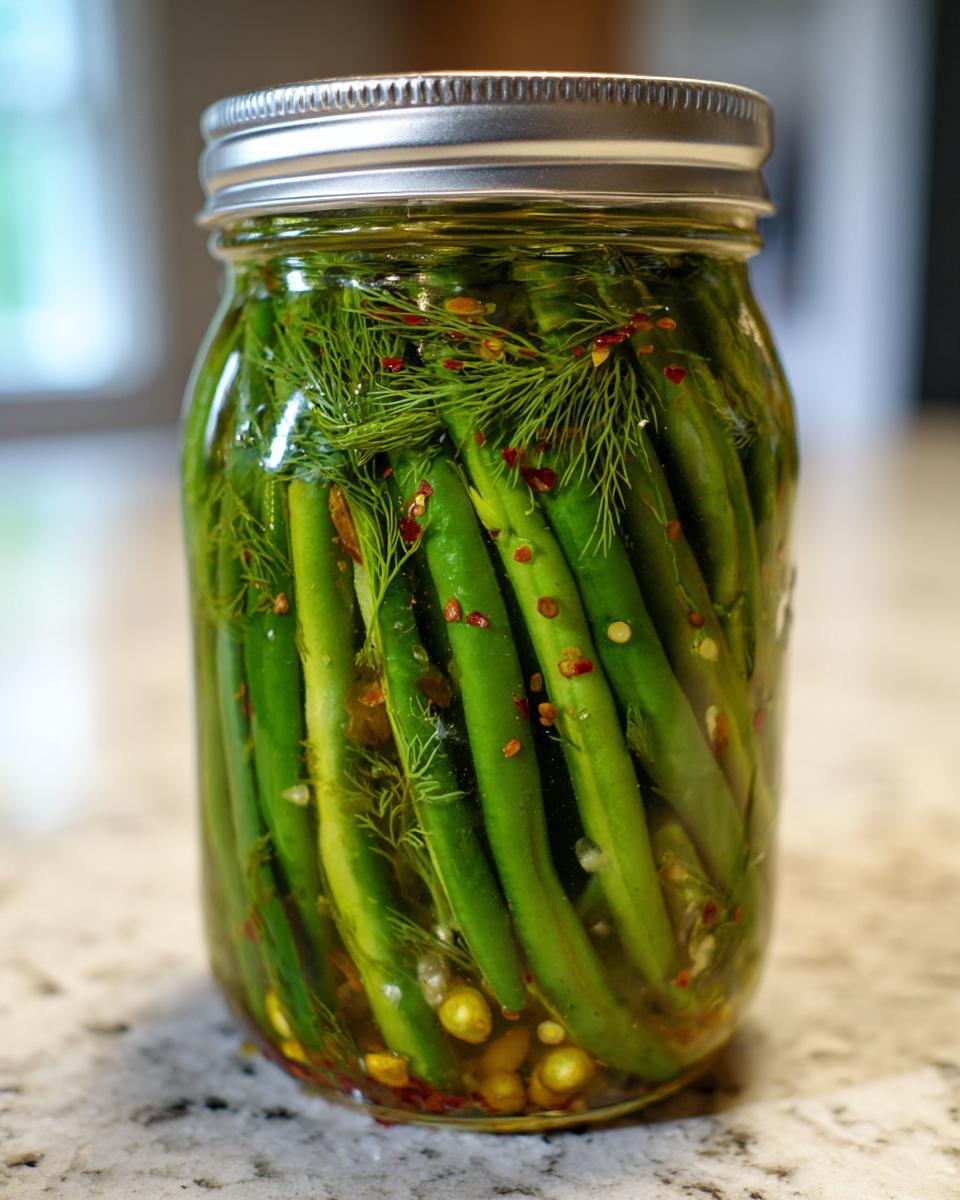
Alright, let’s get our jars ready! The real beauty of these dilly beans is that they use super basic pantry staples alongside the freshest veggies you can find. Clarity is key here, so please double-check your vinegar acidity—we need 5% for the right tang. Everything listed below goes straight into those jars. If you’re using that link I mentioned for inspiration, you’ll see that these measurements are spot on for reliable results every time. Check out this great resource for more info on these refrigerator dilly beans recipe spicy pickled green beans.
- 2 pounds fresh green beans, ends trimmed
- 4 cups water
- 2 cups white vinegar (5% acidity)
- 2 tablespoons pickling salt
- 1 tablespoon granulated sugar
- 8 cloves garlic, peeled and smashed
- 4 large fresh dill heads or 4 teaspoons dried dill seed
- 1 teaspoon red pepper flakes (optional, for spicy dilly beans)
- 1/2 teaspoon black peppercorns
Ingredient Notes and Substitutions
If you can’t find those big, gorgeous heads of fresh dill, please don’t stress! Dried dill seed works perfectly, you just need about four times the amount by volume compared to the heads. Also, listen closely: you absolutely must use pickling salt. Regular table salt has additives that can make your brine cloudy and strip that wonderful color from the beans. If you’re serious about your garlic dill beans, go ahead and smash an extra two cloves per quart jar; it truly delivers a punch!
Step-by-Step Instructions for Perfect Dilly Beans
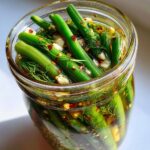
Okay, this is where the magic really happens, and I promise, it’s easy peasy! We’re proving right here that making dilly beans that taste like they’ve been pickling for weeks can actually be done in about twenty minutes of active time. The process relies on applying the hot brine to the cold flavors, which sets everything up perfectly for those easy homemade pickles. Grab your clean quart jars, because we’re diving in!
Preparing the Beans and Flavorings
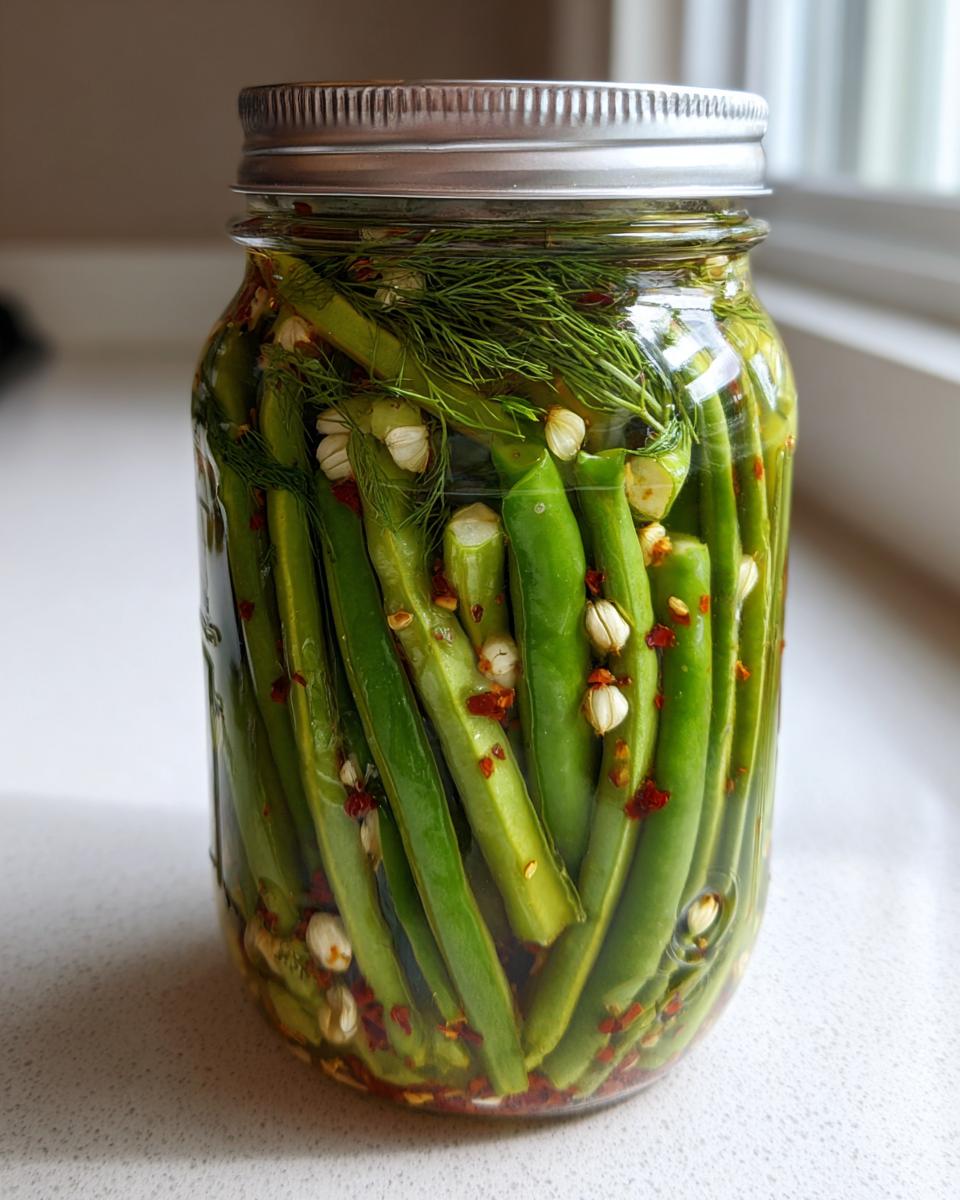
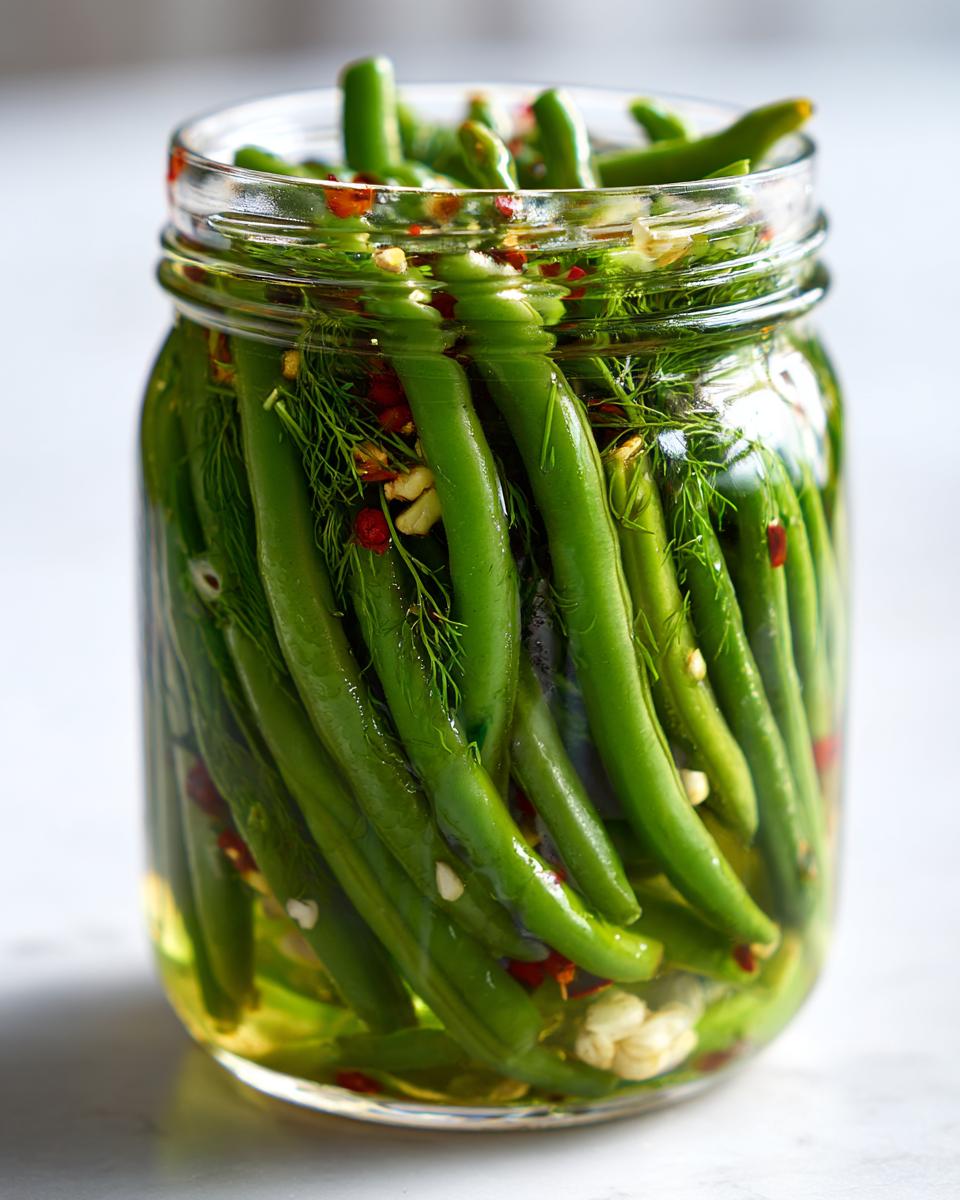
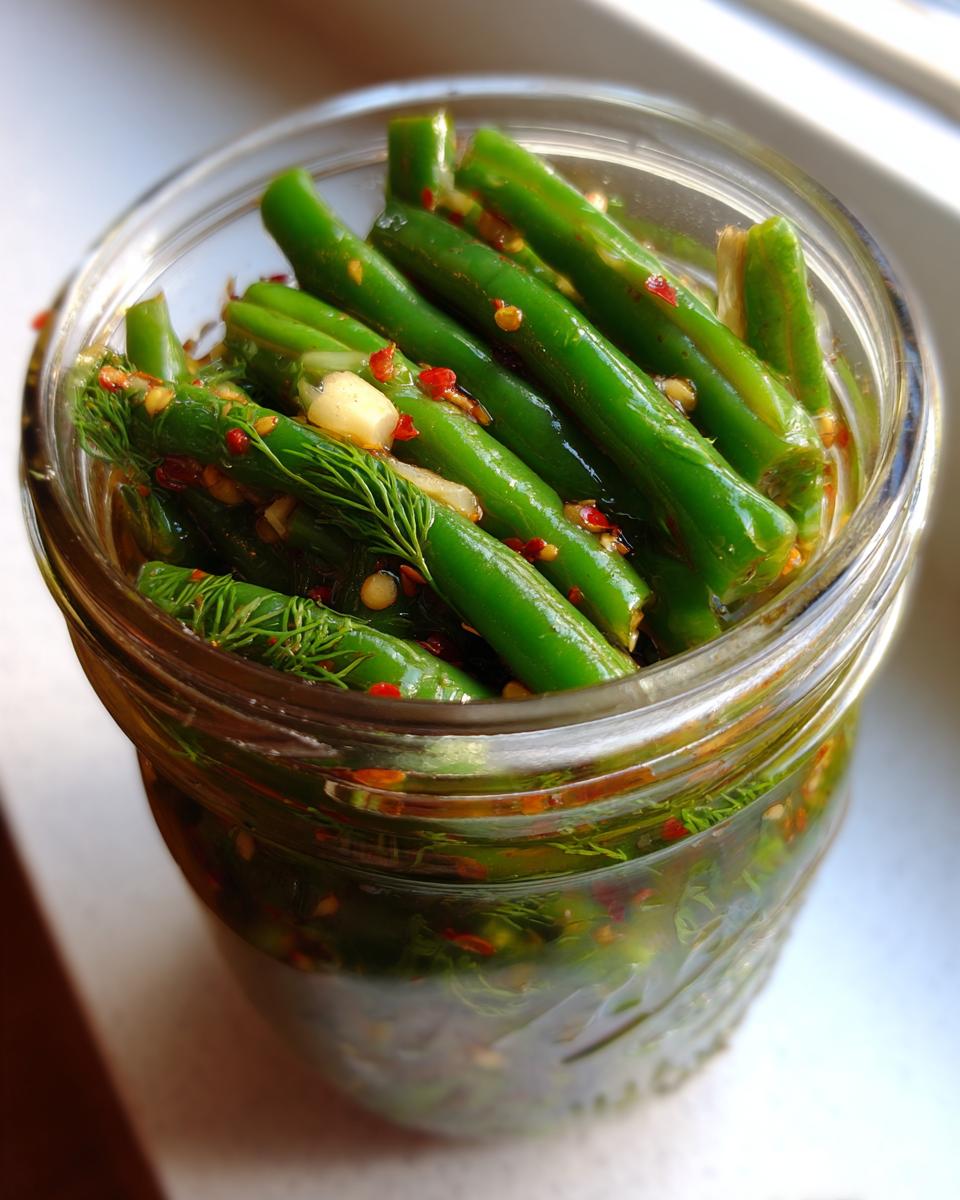
First things first, wash those green beans like they owe you money! Trim off the little ends—you know, the tough, stemmy bits. If you like shorter pickles, feel free to chop your beans into 2-inch segments; I usually leave mine whole. Now, let’s talk flavor essentials: smash those garlic cloves—just give them a good whack with the flat of your knife! Divide the garlic, the dill heads (or seeds), peppercorns, and any red pepper flakes you’re using evenly between your two jars. This ensures that both jars end up being beautifully balanced garlic dill beans.
Making and Applying the Hot Vinegar Brine
You need a saucepan for this—don’t try to microwave it! Combine your water, vinegar, pickling salt, and sugar. Turn the heat up and bring that mixture to a rolling boil. Keep stirring until you can’t see any grains of salt or sugar left. That brine needs to be piping hot when it hits the beans! Carefully pour that hot liquid over the goodies in your jars. Make absolutely sure the beans are covered and leave about a quarter-inch of space at the top—that’s your headspace requirement. Don’t forget to wipe the rims clean before sealing; crusty rims make bad seals, even if we aren’t canning today!
Cooling and Refrigeration for Best Dilly Beans Flavor
Once your lids are finger-tight, you need to let them chill out on the counter for about an hour. This lets the internal temperature drop safely before they hit the fridge. If you try to rush them into the cold area immediately, you risk messing with that initial crispness we worked so hard to achieve. Now for the hardest part: waiting! You *can* sneak a taste after 24 hours, but truly, these dilly beans hit their peak, tangy, snappy flavor around day three or four. You might want to check out how I make my garlic butter steak while you wait; it pairs great with these!
Tips for Success with Your Spicy Dilly Beans
Now that you know the basic method for killer dilly beans, let’s talk about dialing in that flavor and texture. Since we are friends here, I want to make sure you get the snapiest, tangiest results possible. Whether you want to ramp up the heat or save your summer bean haul for winter, I’ve got the tricks up my sleeve!
Making Spicy Dilly Beans Variations
If you like a little fire in your pickles, absolutely crank up the heat! We put in a teaspoon of red pepper flakes initially to give you a nice background warmth, which makes these wonderfully spicy dill pickles. But if you happen to have some great fresh peppers on hand, try substituting! I love slicing one or two jalapeños very thinly and throwing those right into the jar along with the garlic. Be cautious though; thicker slices mean more lingering heat. If you’ve got my recipe for candied jalapenos, you know I’m obsessed with adding heat, and these beans are no exception!
Long-Term Preservation: Water Bath Canning Green Beans
The beauty of this brine recipe is that it’s totally robust enough for shelf storage if you need to preserve a massive haul of green beans. If you want to skip the refrigerator entirely and make shelf-stable jars, you can definitely do that! After you’ve sealed those jars (wipe those rims!), you need to process them using a boiling water bath. Just reduce the time mentioned in our notes—process those sealed jars for a full 10 minutes. That extra step turns your refrigerator pickles recipe into certified jars of canning green beans! To learn more about preserving traditions, take a peek at this great guide for pickled green bean recipe details.
How to Serve and Enjoy Your Tangy Snack Recipes
Wow, you made them! Now what? Honestly, the hardest part about making these dilly beans is resisting eating the entire jar before anyone else gets a chance. They are way more versatile than just snacking, though. They bring such a sharp, needed contrast to rich foods. I love piling them up on a summer charcuterie board right next to some creamy cheese and salty prosciutto. They are simply perfect for snacking or as a side dish to anything grilled!
Dilly Beans as a Cocktail Garnish Recipes
If you see me making a Bloody Mary, you know what’s sticking out of the glass instead of a sad little celery stalk! My favorite use has to be as a garnish for cocktails. Those spicy garlic ones are divine floating in a Caesar or a Bloody Mary—the brine leaks a tiny bit into the drink, making it even better. They are definitely top-tier cocktail garnish recipes material. While you’re thinking about dips, you should totally try my tzatziki sauce for a cool counterpoint!
Storage and Shelf Life for Homemade Dilly Beans
Okay, now that we have these glorious, crunchy dilly beans ready to go, we need to talk about keeping them perfect! The storage plan changes a bit depending on whether you went the ultra-fast refrigerator route or took the time for a full water bath processing. Honestly, for the refrigerator pickles, you’re going to want to eat them so fast that remembering where you stored them might be your biggest issue!
If you kept them in the fridge, remember that the brine is mostly preserving them for flavor development rather than long-term sterilization. They will stay wonderfully crisp and tangy for a good month, but even up to two months in the cold, they should be perfectly fine. Just make sure the beans stay submerged under that vinegar brine. Always use a clean fork when grabbing one out—we don’t want any introduction of outside bacteria!
Now, if you took the time to process them using the water bath technique so you could have shelf-stable jars of pickled green bean recipe goodness, well, that’s different. Once those jars are properly sealed from the canner, you can store them anywhere cool and dark, like a pantry or a cupboard. They are good for at least a year unopened. Once you pop open a canned jar, treat it like a refrigerator pickle and keep the leftovers cold!
Frequently Asked Questions About Dilly Beans
I get so many questions about these snappy little wonders, which tells me you’re excited to start making your own dilly beans! It’s totally normal to have a few questions when trying out a new preserving technique, even for something as quick as these refrigerator pickles. Don’t worry about the little details—we’ll iron them out so you can get back to making those irresistible tangy snack recipes.
Can I use fresh dill instead of dill heads for my dilly beans?
You sure can! If you have fresh dill weed (the feathery fronds), it gives a lovely, bright, herbaceous note to the brine. However, the dill heads—which hold the seeds—give a much deeper, slightly more pungent dill flavor that experts associate with classic pickled green bean recipe goodness. If you use just the fronds, you might need to use a bit more, or maybe supplement with some dried dill seed, just to make sure that dill flavor really shines through!
Why are my pickled green bean recipe results not crunchy?
Ah, the dreaded soft bean! This happens for a few reasons, but usually, it’s fixable next time. First, were your beans fresh? Old beans have already lost their snap potential. Second, did you pour that brine over them while it was at a true rolling boil? The heat helps lock in the texture. If you only chilled them (refrigerator method), they should be crunchy. If you over-processed them in a canner for a long time, that heat can sometimes soften them up too much. Keep it quick, and they stay snappy!
What is the difference between these and standard vinegar brine vegetables?
That’s a great question for distinguishing between pickle types! Essentially, any vegetable preserved in a vinegar-water-salt mixture is a form of vinegar brine vegetables. What makes ours specifically dilly beans is the *heavy* emphasis on dill. We pack those jars with dill heads or seeds, making the dill flavor the star, rather than just a background note you might find in a generic vegetable pickle. That dill is what gives them their iconic name and flavor profile!
If you want to see some other simple ways to bring comfort food favorites to your modern table, check out my tips on easy weeknight dinners while these glorious pickles chill!
Nutritional Estimate for Dilly Beans
I always get questions about what exactly goes into these tasty jars, and while I’m not a certified nutritionist—I’m just a home cook balancing flavor with reality!—I do provide estimates so you know what you’re snacking on. Keep in mind these numbers are based on the exact ingredients listed above, using standard brands for the salt and vinegar. Realistically, your sodium might vary a tiny bit depending on your saltiness preference, but this gives you a fantastic baseline for these wonderful dilly beans.
- Serving Size: 5 beans
- Calories: 10
- Sugar: 1 gram
- Sodium: 290 mg
- Fat: 0 grams
- Protein: 0 grams
- Cholesterol: 0 mg
As you can see, they are super low-calorie and virtually fat-free, making them a fantastic, flavorful way to sneak in a little extra vegetable goodness. They pack a bit of sodium because, hey, they’re pickles! But paired with everything else they add to a meal, they are totally worth it.
Share Your Homemade Dilly Beans Creations
Now that your refrigerator is stocked with jars of crunchy, amazing dilly beans, I absolutely have to hear about them! Taking the time to make something from scratch, especially something as satisfying as a great pickle, deserves a celebration. Your success is what keeps me testing recipes and sharing my kitchen secrets here at MDLATDMM.
Did you try them plain? Did you go wild with the red pepper flakes to make those spicy versions I love? Or did you really lean into the smashed garlic for that intense punch? Please, come back and tell me all about it in the comments below. Don’t be shy—let the world know how easy it is to make these incredible, tangy snacks!
If you loved this pickled green bean recipe as much as my family does, do me a huge favor and hit that share button! Sharing means more people can easily recreate these staples in their own kitchens. And hey, if you want to know more about my journey and why I believe in approaching cooking with care, you can always pop over to my About Me page. Happy pickling, friend!
PrintQuick & Easy Refrigerator Dilly Beans (Spicy Garlic Pickled Green Beans)
Make these crunchy, tangy dilly beans right in your refrigerator. This easy recipe requires no canning and delivers snappy, garlicky, and optionally spicy pickled green beans ready fast.
- Prep Time: 20 min
- Cook Time: 5 min
- Total Time: 25 min
- Yield: 2 quarts 1x
- Category: Appetizer
- Method: Refrigerator Pickling
- Cuisine: American
- Diet: Vegetarian
Ingredients
- 2 pounds fresh green beans, ends trimmed
- 4 cups water
- 2 cups white vinegar (5% acidity)
- 2 tablespoons pickling salt
- 1 tablespoon granulated sugar
- 8 cloves garlic, peeled and smashed
- 4 large fresh dill heads or 4 teaspoons dried dill seed
- 1 teaspoon red pepper flakes (optional, for spicy dilly beans)
- 1/2 teaspoon black peppercorns
Instructions
- Prepare the green beans by washing them thoroughly and trimming the tough ends. You can leave the beans whole or cut them into 2-inch pieces.
- Pack the green beans tightly into two clean, quart-sized (32 oz) mason jars, leaving about 1/2 inch of headspace at the top.
- In a medium saucepan, combine the water, vinegar, pickling salt, and sugar. Bring the mixture to a rolling boil over high heat, stirring until the salt and sugar dissolve completely. This is your vinegar brine.
- Divide the flavorings evenly between the two jars: place 4 smashed garlic cloves, 2 dill heads (or 2 teaspoons dill seed), 1/2 teaspoon peppercorns, and half of the red pepper flakes (if using) into each jar.
- Carefully pour the hot vinegar brine over the beans in each jar, ensuring the beans are completely submerged. Leave 1/4 inch headspace.
- Tap the jars gently on the counter to release any trapped air bubbles. Add more brine if necessary to maintain the headspace.
- Wipe the rims clean with a damp cloth. Seal the jars with lids and bands, tightening them to finger-tight.
- Let the jars cool on the counter for about an hour. Once cool, place the jars in the refrigerator.
- Wait at least 24 hours before eating. For the best flavor and crunch, allow the dilly beans to chill for 3 to 5 days before serving. They are ready to eat immediately as refrigerator pickles.
Notes
- For long-term storage, process these jars using a boiling water bath method for 10 minutes after sealing, adjusting time for altitude.
- If you love garlic, add an extra 2 cloves per quart jar for a true garlic dill beans experience.
- These crunchy pickled beans are excellent additions to charcuterie boards or as a garnish for Bloody Mary cocktails.
- The beans should remain crisp for up to 2 months in the refrigerator.
Nutrition
- Serving Size: 5 beans
- Calories: 10
- Sugar: 1
- Sodium: 290
- Fat: 0
- Saturated Fat: 0
- Unsaturated Fat: 0
- Trans Fat: 0
- Carbohydrates: 2
- Fiber: 1
- Protein: 0
- Cholesterol: 0