
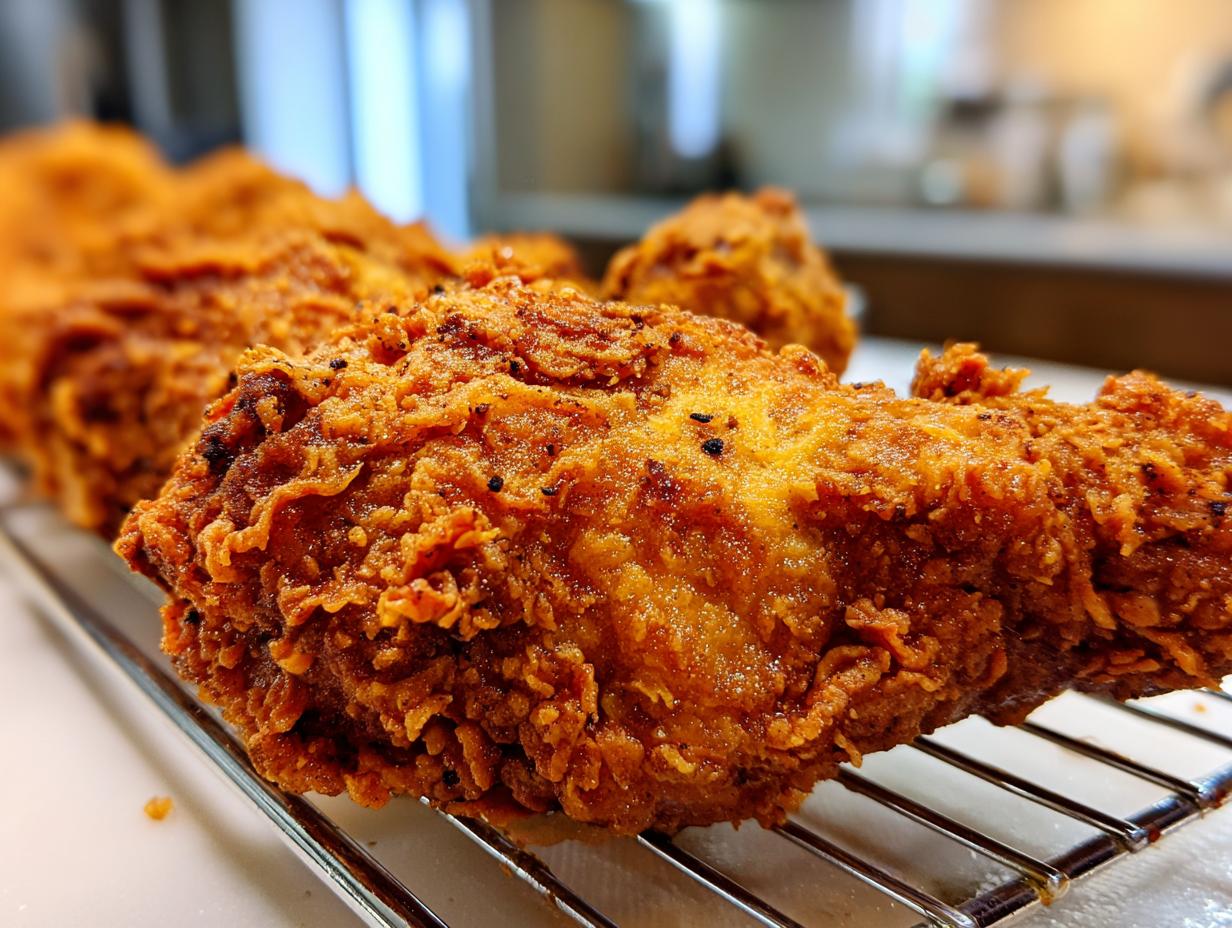
There’s something about the sound—that sizzle as the chicken hits the hot oil—that just transports me straight back to my childhood kitchen. If you are dreaming of the absolute best homemade fried chicken, the kind with that thick, craggy, golden crust that shatters when you bite into it, but the inside stays completely juicy and tender, then you’re in the right place. That quest for perfection, the ultimate Southern Style Fried Chicken, is what drives me here at MDLATDMM Recipes. I’ve spent years testing these traditional methods, ditching all the fussy stuff, just to make sure you can achieve that restaurant-quality homemade fried chicken experience right on your own stovetop.
- Why This Is the Best Fried Chicken Recipe You Will Make
- Ingredients for Classic Southern Fried Chicken
- Step-by-Step Instructions for Perfect Fried Chicken
- Tips for Making Truly Crispy Fried Chicken
- Variations on Classic Fried Chicken
- Serving Suggestions for Your Homemade Fried Chicken
- Storage and Reheating Instructions for Crispy Fried Chicken
- Frequently Asked Questions About Making Fried Chicken
- Share Your Best Fried Chicken Experience
Why This Is the Best Fried Chicken Recipe You Will Make
I promise you, once you try this technique, you won’t go back to your old way of making fried chicken. It’s all about hitting those two non-negotiables: that loud, crunchy crust and meat that practically melts in your mouth. I’ve got the simple steps that guarantee the Crispy Fried Chicken experience you crave. If you’re looking for quick options after this, check out my weeknight dinners, but trust me, this one is worth the wait!
The Secret to Extra Crispy Chicken Coating
No flimsy crusts here! We rely on two things: a good, thick dredge and letting that coated chicken rest for thirty minutes. That rest time is critical. It lets the flour soak up just enough buttermilk, turning it into that craggy, delicious surface that results in truly Extra Crispy Chicken when it hits the oil.

Achieving Tender and Juicy Chicken Every Time
The buttermilk bath we use isn’t just for flavor, you guys. The acid in the buttermilk breaks down tough fibers, meaning you get unbelievably Juicy Chicken that stays tender even after frying. Coupled with keeping that oil absolutely steady, we seal in all those lovely juices!
Ingredients for Classic Southern Fried Chicken
Okay, let’s talk components! For this fried chicken to be legendary, we need the right parts. Please, please skip the boneless, skinless stuff for this classic version—we need bone-in, skin-on pieces for that rich flavor and moisture. Everything listed here goes straight into the marinade or the coating. Don’t eyeball the seasonings; this is where the Southern magic happens!
- 3 lbs bone-in, skin-on chicken pieces (thighs, drumsticks, breasts)
- 4 cups buttermilk
- 2 tablespoons hot sauce
- 2 teaspoons salt
- 1 teaspoon black pepper
- 1 teaspoon paprika
- 1 teaspoon garlic powder
- 1 teaspoon onion powder
- 3 cups all-purpose flour
- 1/2 cup cornstarch
- 1 teaspoon baking powder
- Vegetable oil or shortening, for frying
Step-by-Step Instructions for Perfect Fried Chicken
This is where the magic truly locks in! Listen, making amazing fried chicken isn’t just throwing things into a pan; it’s a method. Follow these steps closely, and I guarantee you’ll have fried chicken so good people will ask for the secret. After the lengthy marinade, which you absolutely can’t skip if you want the best flavor, we move on to the coating process which is everything for texture. If you ever need a comforting side dish to go with what you make here, I highly recommend my recipe for easy family dinner ideas!
Marinating for Maximum Tenderness in Your Fried Chicken
First things first: the soak! In a big bowl—a non-reactive one, please—whisk up your buttermilk, the hot sauce (yes, it helps tenderize!), salt, pepper, and all those lovely powders for seasoning. Get every piece of chicken completely submerged. Then, cover it up and stick it in the fridge. You must let this sit for at least four hours. Ideally, though, make it the day before! Seriously, 12 to 24 hours in that bath gives you the most wonderfully Juicy Chicken possible.
Dredging Technique for Extra Crispy Fried Chicken
Okay, time for the crust! Get your flour mixture ready in a wide dish. Pull the chicken right out of the marinade—don’t pat it dry, we want that excess milky coating to stick. Now, the trick for that signature crunch: dip it into the flour and press that powder firmly all over. For the ultimate crunch, dip it *back* into the buttermilk for just a second, and then dredge it a second time, pressing hard the second time around! This double layer is how we get that Extra Crispy Chicken coating. Once done, set that coated chicken on a wire rack for 30 minutes. Don’t skip the rest!

Oil Temperature and Frying the Southern Style Fried Chicken
This part is critical for safety and success. You need a heavy pan, like a Dutch oven, with about two inches of oil—vegetable or shortening works best for that classic taste. Heat it up to exactly 325°F (160°C). If it’s cooler, your Southern Style Fried Chicken gets greasy; too hot, and that beautiful crust burns before the inside cooks. Work in batches so you don’t crowd the pan and drop the oil temperature. Fry thighs and drumsticks for maybe 12 to 15 minutes, flipping them gently until they are deep golden brown. Remember, the goal is internal temp of 165°F, not just color!
Tips for Making Truly Crispy Fried Chicken
I cannot stress enough how disappointing it is to pull out your hard-earned batch of golden chicken only to have the crust turn soft five minutes later. When I was first trying to master this, I used to lay the pieces right on paper towels, and by the time I sat down to eat, the bottom layer was just miserable! That was a disastrous breakthrough moment, believe me. Now, I know exactly How to Make Fried Chicken Crispy and keep it that way until the last bite. For more ways to use up your chicken cooking experiments, you should check out my tips for forgotten chicken and rice!
Why Resting the Coated Fried Chicken Matters
Remember that 30-minute rest we talked about after you’ve dredged everything? That’s not just for show, folks. That time lets the flour mixture fully hydrate from the buttermilk clinging to the chicken. When the flour is slightly wet but still heavily coated, it gets really sticky. This makes the crust bond tight to the meat, so when it hits that hot oil, it won’t just flake right off!
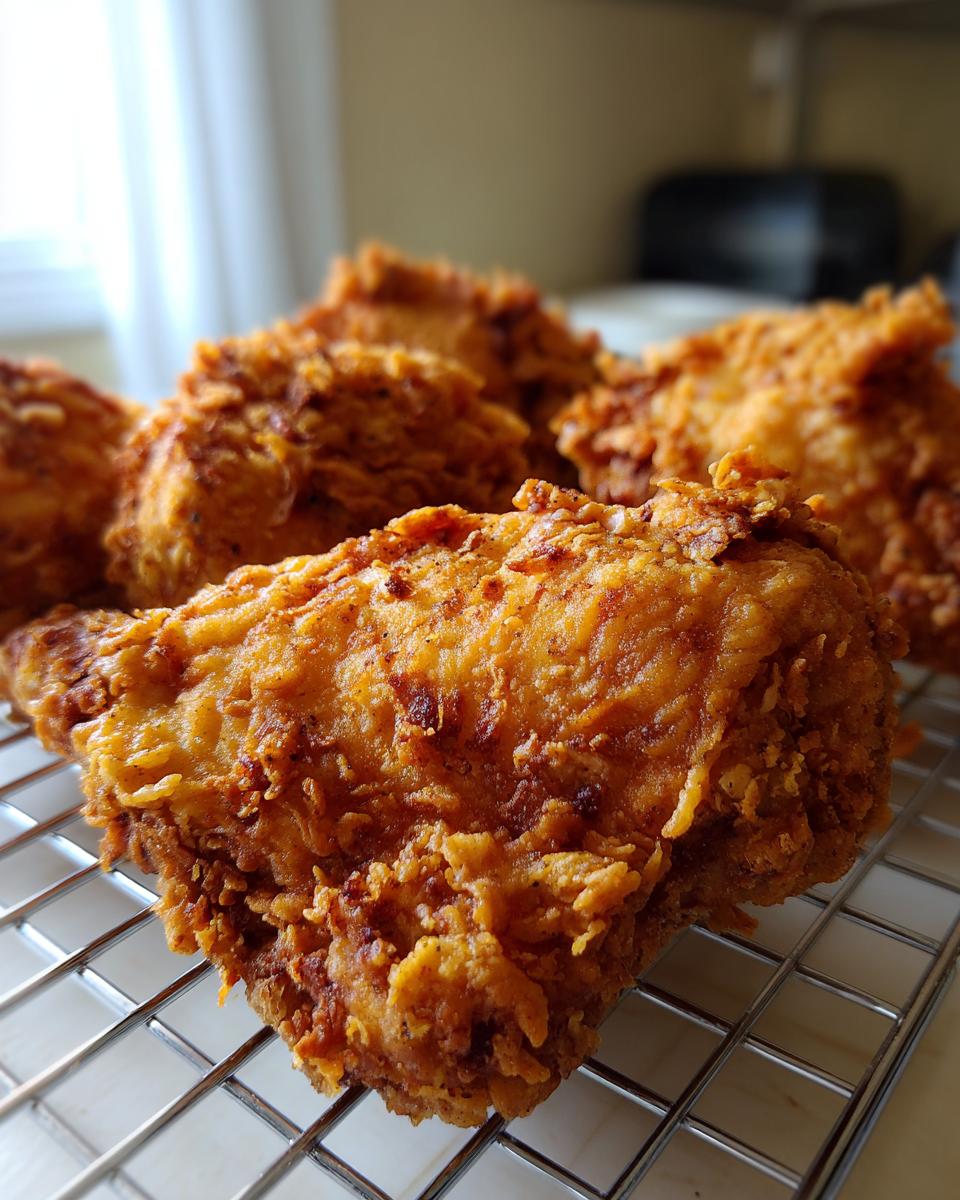
Draining Oil Correctly for Maximum Crunch
Listen to me: never—ever—drain your freshly fried chicken on paper towels if you want crunch. The towels trap the steam rising off that hot crust, and steam equals sogginess, plain and simple. Instead, pull the chicken straight out onto a wire rack that is sitting over a baking sheet. The excess oil drips away underneath, and air circulates all around the chicken. This keeps that beautiful, crackly exterior firm until you serve it up. If you want to see another great method, check out what my friends over at The Girl Inspired recommend!
Variations on Classic Fried Chicken
While I stand by this classic Southern Style Fried Chicken because it’s just pure comfort food gold, I know sometimes you want to tweak things! This base recipe is really sturdy, which means it takes seasoning changes like a champ. Don’t feel like you have to stick to the same spice profile every time. In fact, if you’re trying to mimic some of those fast-food favorites, a few small additions to the standard flour dredge can get you close to that Restaurant Style Fried Chicken you might be craving.
For a saltier, more peppery kick—something closer to that famous spicy crust—just double the black pepper in your dry flour mix and maybe add just a tiny pinch of cayenne powder. If you are aiming for a ‘fried steak’ feel—what folks sometimes call Country Fried Chicken, though that usually involves gravy—make sure your dry mix has a bit more salt and maybe a pinch of dried thyme. Trust me, this simple seasoned flour mixture for your fried chicken gives you so much room to play around! If you’re eating leftovers later, turn them into a quick meal using my chicken broccoli rice casserole recipe.
Serving Suggestions for Your Homemade Fried Chicken
Whew! Now that you have this perfect, crispy, gorgeous chicken cooling on the rack, you realize you can’t just eat it standing over the sink, right? Nope! This magnificent bird deserves a proper spread. When I think about what to serve with my Southern Style Fried Chicken, my mind immediately goes to big, hearty, nostalgic dishes. Making this dish is all about leaning into those genuine, American Comfort Food Classics.
You absolutely need something cool and tangy to cut through all that rich, hot crust. A big bowl of creamy coleslaw is mandatory. No arguments! And what goes better with crispy chicken than something soft to soak up all those delicious pan drippings? I always make my garlic parmesan mashed potatoes when I’m making a batch of this; my kids go bananas for them.
Don’t forget the biscuits! Soft, fluffy, homemade buttermilk biscuits are the only way to round out the plate. You need something to wipe the plate clean! Trust me, planning the whole meal around this incredible fried chicken makes the effort so much more rewarding.
Storage and Reheating Instructions for Crispy Fried Chicken
Even if I try my hardest, there are almost never leftovers when I make a big batch of this crunchy goodness! But when there are, figuring out how to revive that amazing crust is the real challenge, right? Freezing this chicken is never going to work if you want that signature, shatteringly Crispy Fried Chicken texture back. We need gentle heat, not steam. If you’ve been working on your wings lately, my recipe for air fryer chicken wings might give you some ideas on how to reheat this, too!
The microwave is an absolute no-go zone for reheating fried foods; it just turns everything steamy and soft instantly. A soggy crust is the enemy of a happy Southern cook, so we absolutely use the oven or even better, the air fryer, to bring that crunch back to life.
The Best Way to Store Leftover Fried Chicken
When you put the leftovers away, the technique you use for draining them earlier pays off big time here. Make sure any remaining pieces are completely cool after they’ve drained on the wire rack. Then, you’re going to store them in an airtight container, but without crowding them if you can help it. If you layer them, place a piece of parchment paper between the layers. This buys you a little time before the moisture starts settling in, but honestly, this chicken is best eaten the next day!
Reviving the Crispiness in the Oven
If you’re doing a larger batch, the oven is your trusted friend. Preheat your oven—and this is key—to about 375°F (190°C). Place the chicken pieces directly on a wire rack set on top of a baking sheet. Skip the foil! The rack allows the hot air to circulate completely around the piece, heating the inside while crisping up the coating on the bottom. Let them heat through for about 10 to 15 minutes, depending on the thickness of the piece. You want it hot and crackly again.
Quick Crisp-Up in the Air Fryer
If you have an air fryer, this is my top recommendation for perfection! It’s fast and truly revives that crunch better than anything else. Set your air fryer to around 350°F (175°C), pop the pieces in without overlapping (you might need two small batches), and let them run for about 5 to 8 minutes. Give them a little shake halfway through. When you pull them out, they honestly taste almost as good as fresh-off-the-skillet amazing.
Frequently Asked Questions About Making Fried Chicken
I know people have a bunch of little hang-ups when it comes to making fried chicken at home, especially around getting that crispiness just right. Sometimes you look at a recipe and think, “Wait, what if I…?” Here are the major questions I get asked all the time about texture, safety, and making sure your Southern Style Fried Chicken comes out picture-perfect!
Can I bake this Southern Style Fried Chicken instead of frying?
Oh, honey, I get why you ask! Frying takes effort, and sometimes you want an easier clean-up. You absolutely *can* bake this—it falls into the realm of air fryer chicken wings territory if you use that appliance, or just the oven. But I need to be honest: you won’t get the same coating. The texture changes completely; it won’t have that amazing, craggy, shatteringly crisp crust we worked so hard for with the buttermilk and double-dredge. If you must bake it, make sure you spray both sides, top and bottom, liberally with oil to help the outside dry out and brown instead of just drying up bland.
What is the best oil to use for homemade fried chicken?
This is where we rely on fat science. For achieving that perfect heat stability and classic taste, you need an oil with a high smoke point. That’s why my recipe calls for vegetable oil or shortening! They can handle the 325°F heat we need without breaking down or burning too fast. Canola oil works great too. What you want to avoid are oils like extra-virgin olive oil; they just can’t handle the high heat needed to get that crunchy exterior on your homemade fried chicken!
How do I know when my fried chicken is fully cooked?
Color is deceiving, you know? You can have a crust that looks perfectly dark golden brown, but the inside near the bone could still be pink if your oil wasn’t quite hot enough or if you crowded the pan. For me, there is only one way to guarantee safety and tenderness: a meat thermometer. Stick one into the thickest part of the meat, avoiding the bone, and the internal temperature must register 165°F (74°C). That’s the magic, safe number. Do not guess; get that reading! That ensures your juicy chicken is safe to eat and perfectly cooked through, giving you the best fried chicken results possible.
Share Your Best Fried Chicken Experience
Whew! We made it through the entire process of creating the crunchiest, juiciest Southern fried chicken, and frankly, I’m hungry just thinking about it! This recipe is all about bringing that feeling of connection and handmade love to your kitchen, just like Maddie talked about in the story of how this site started. I truly hope this becomes a staple Comfort Food Classic for your family gatherings.
Now, I’d absolutely love to hear what you think! Did you manage to get that shatter on the crust? Did it stay juicy? Don’t keep these culinary secrets to yourself! Hop over to the contact page and let me know how it turned out, or even better, drop a rating below this recipe. Sharing our cooking successes and teaching each other tips—that’s what this community is all about. Happy frying, my friends!
PrintGrandma’s Crispy Southern Fried Chicken
Make classic Southern fried chicken that is juicy inside and has a golden, crunchy coating. This recipe focuses on traditional methods for restaurant-quality results at home.
- Prep Time: 30 min
- Cook Time: 35 min
- Total Time: 4 hours 35 min
- Yield: 4 servings 1x
- Category: Dinner
- Method: Deep Frying
- Cuisine: American Southern
- Diet: None
Ingredients
- 3 lbs bone-in, skin-on chicken pieces (thighs, drumsticks, breasts)
- 4 cups buttermilk
- 2 tablespoons hot sauce
- 2 teaspoons salt
- 1 teaspoon black pepper
- 1 teaspoon paprika
- 1 teaspoon garlic powder
- 1 teaspoon onion powder
- 3 cups all-purpose flour
- 1/2 cup cornstarch
- 1 teaspoon baking powder
- Vegetable oil or shortening, for frying
Instructions
- In a large bowl, combine the buttermilk, hot sauce, salt, pepper, paprika, garlic powder, and onion powder. Mix well.
- Submerge the chicken pieces completely in the buttermilk mixture. Cover the bowl and refrigerate for at least 4 hours, or preferably overnight, to tenderize the meat.
- In a separate shallow dish, whisk together the flour, cornstarch, and baking powder.
- Remove the chicken pieces from the marinade, letting excess buttermilk drip off, but do not wipe them dry.
- Dredge each piece of chicken thoroughly in the flour mixture, pressing the coating firmly onto the chicken to create a thick layer. For extra crispiness, dip the floured chicken back into the buttermilk briefly and then dredge a second time in the flour mixture.
- Place the coated chicken on a wire rack and let it rest at room temperature for 30 minutes before frying. This helps the coating adhere.
- Pour enough oil or shortening into a deep, heavy-bottomed skillet or Dutch oven to reach a depth of about 1.5 to 2 inches. Heat the oil to 325°F (160°C).
- Carefully place the chicken pieces into the hot oil, ensuring not to overcrowd the pan. Fry in batches.
- Fry drumsticks and thighs for about 12 to 15 minutes, turning occasionally, until deep golden brown and cooked through (internal temperature of 165°F or 74°C). Breast pieces may require slightly less time.
- Remove the chicken from the oil and place it on a clean wire rack set over a baking sheet to drain excess oil. Do not place on paper towels, as this can steam the crust and make it soggy.
- Serve the crispy, juicy chicken immediately.
Notes
- For the best flavor and tenderness, allow the chicken to marinate in the buttermilk for a full 12 to 24 hours.
- Maintain the oil temperature between 315°F and 330°F (157°C to 165°C) for consistent cooking and crispness. If the oil is too cool, the chicken absorbs too much grease; if too hot, the crust burns before the inside cooks.
- If you prefer a copycat style, increase the amount of paprika and add a pinch of dried thyme and sage to the flour mixture.
Nutrition
- Serving Size: 1 piece
- Calories: 450
- Sugar: 2
- Sodium: 650
- Fat: 28
- Saturated Fat: 8
- Unsaturated Fat: 20
- Trans Fat: 0.5
- Carbohydrates: 15
- Fiber: 1
- Protein: 30
- Cholesterol: 110