
Have you ever wanted a dessert that pulls off the ultimate magic trick? I’m talking about combining two icons into one glorious bite! That’s exactly what we’ve done here with the ultimate dessert fusion: the creme brulee cheesecake. Forget complicated French techniques; this recipe delivers that impossibly creamy vanilla bean cheesecake texture right next to that satisfying, crisp crackle you know and love, but we’re making it easy in bar form. As Maddie always emphasizes on her journey to bring reliable home cooking to everyone, consistency is key. Trust me, this version is foolproof for your next special occasion!
- Why This Creme Brulee Cheesecake Recipe Works for Home Cooks
- Ingredients for Easy Creme Brulee Cheesecake Bars
- How to Make Creme Brulee Cheesecake
- Tips for Success with Your Creme Brulee Cheesecake Recipe
- Variations: Mini Creme Brulee Cheesecakes and Easy Creme Brulee Cheesecake Bars
- Storage and Serving Suggestions for Your Decadent Cheesecake Recipes
- Frequently Asked Questions about Creme Brulee Cheesecake
- Estimated Nutritional Data for Creme Brulee Cheesecake Bars
- Share Your Homemade Creme Brulee Cheesecake Creations
Why This Creme Brulee Cheesecake Recipe Works for Home Cooks
When you see a dessert like this, you might think, “Wow, that’s way too fancy for my Tuesday night.” But that’s exactly why I love putting this spin on the classic creme brulee cheesecake! It looks like it took all day and special skills, but honestly, we’ve simplified it for the real-world kitchen. It’s all about huge flavor payoff with manageable steps. You get to look like a baking superstar without breaking a sweat!
- It delivers incredible visuals—that crackled top is pure theatre!
- We format it as bars, which means way easier serving than a whole round cake.
- The flavor combination is just next level decadent.
Achieving the Perfect Texture Contrast in Your Creme Brulee Cheesecake
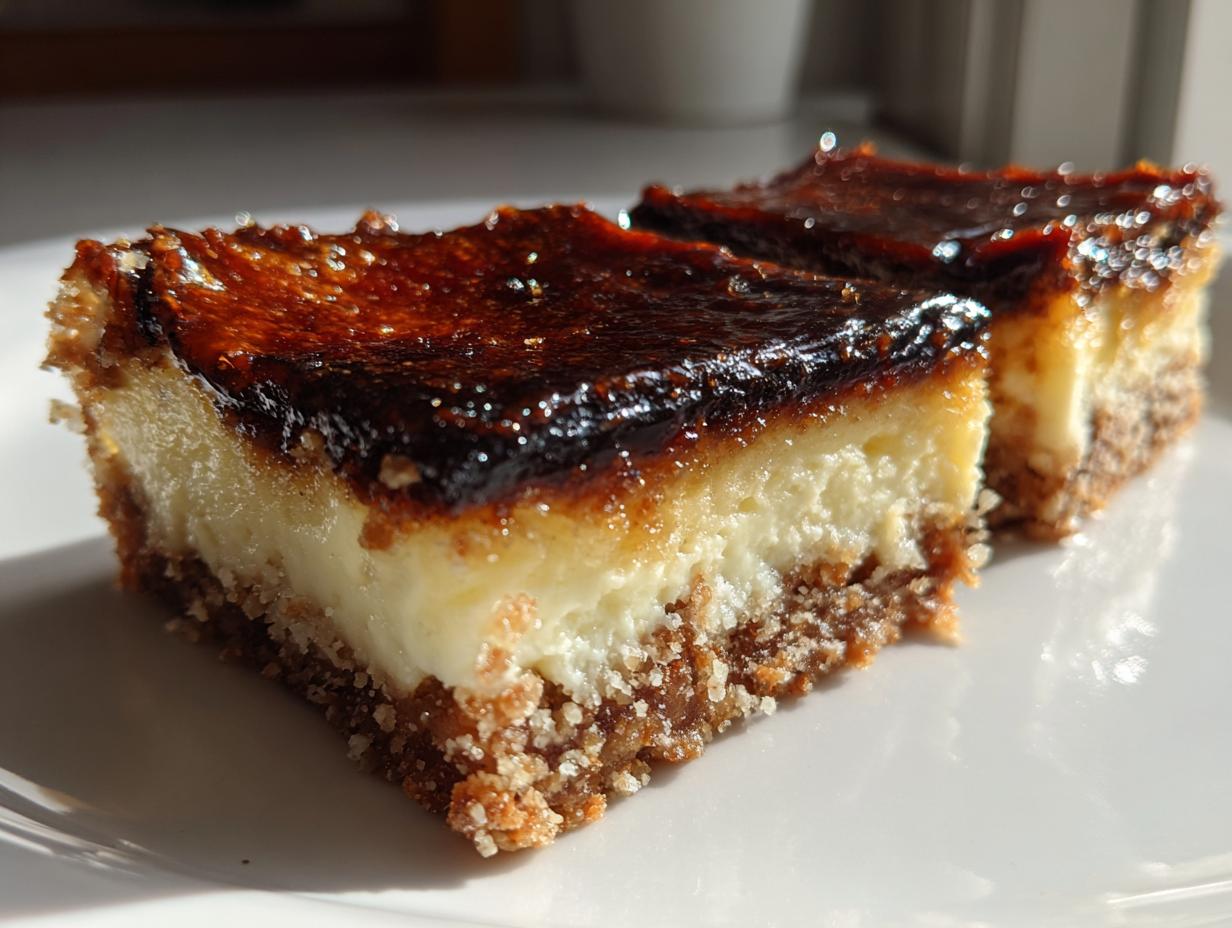
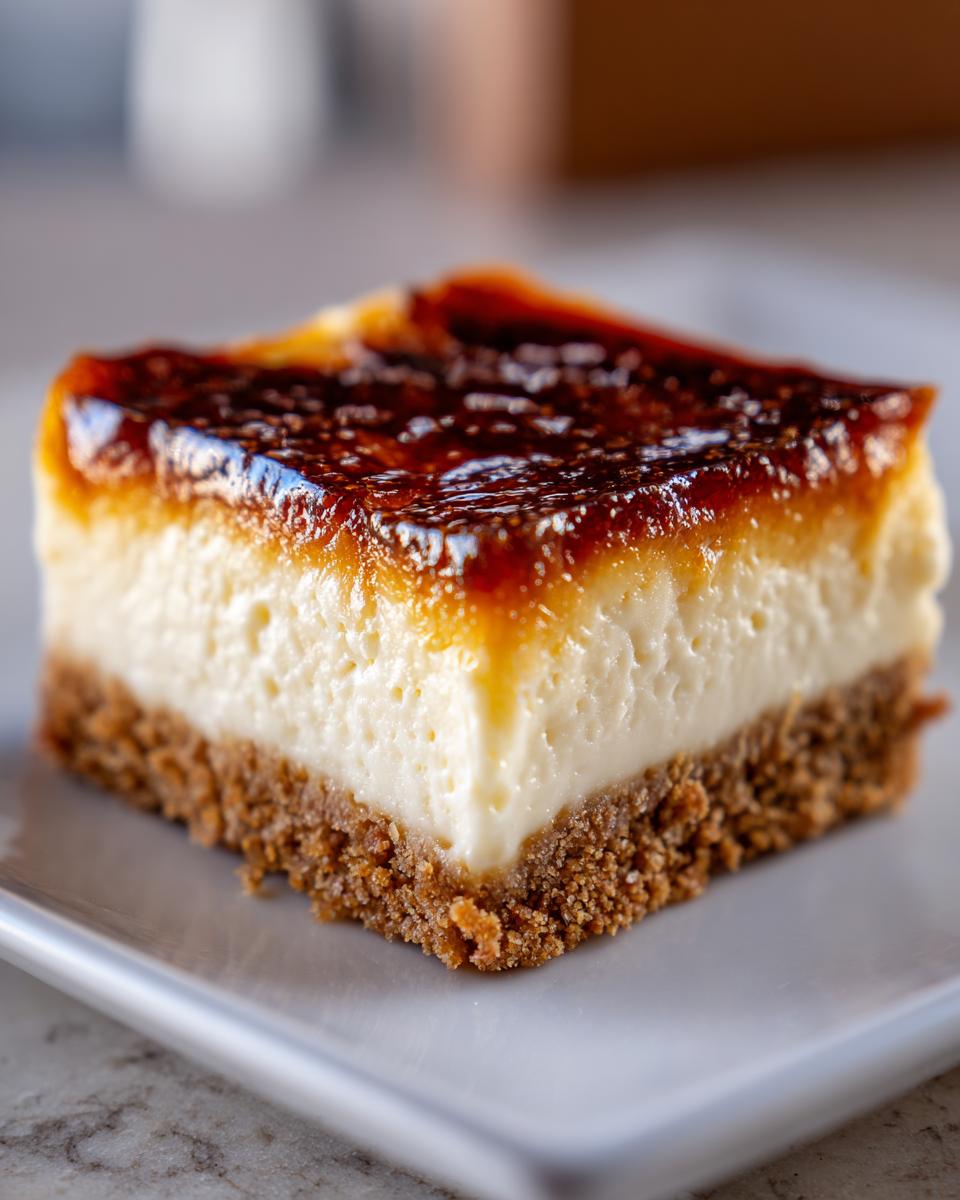
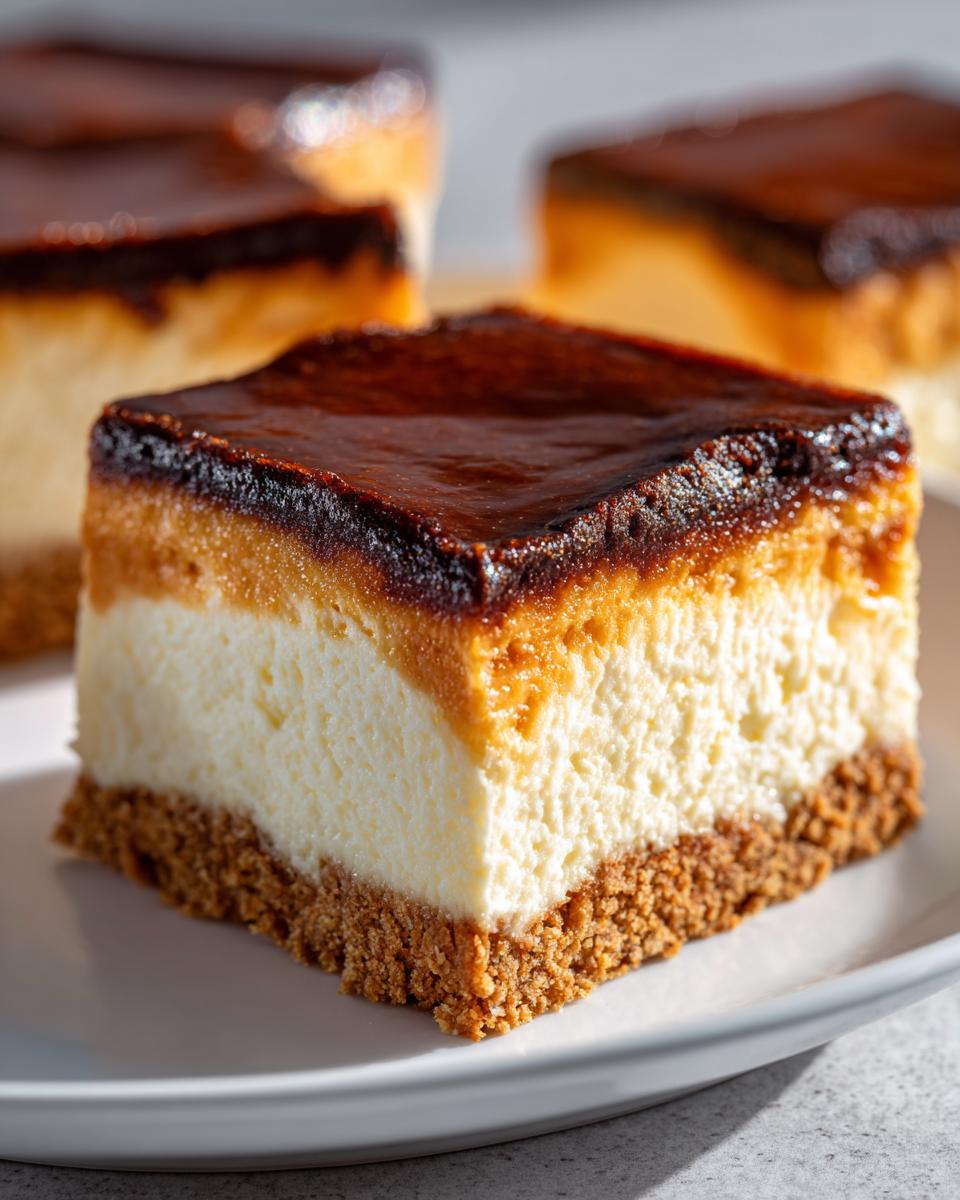
The whole point of a spectacular creme brulee cheesecake is that amazing textural surprise, right? You want that filling underneath to be unbelievably smooth, rich, and creamy—like velvet. Then, *BAM*, you hit that perfectly set, shatteringly crisp caramelized sugar crust. Getting those two completely different elements to play nicely together is the real secret sauce, and this recipe nails that balance every single time. It’s truly the best of both worlds!
Making Dessert Fusion Recipes Accessible
I know the term “dessert fusion recipes” can sound intimidating, like you need five different types of specialized sugar. But we’re keeping things super straightforward here! By developing this as easy creme brulee cheesecake bars instead of a giant, delicate round cake, we ditch the anxiety. You bake it flat, chill it firm, and then slice neatly. This bar format is much more forgiving for beginners, making this gourmet idea totally achievable for you!
Ingredients for Easy Creme Brulee Cheesecake Bars
Okay, let’s talk supplies! Because we are aiming for that perfect, rich vanilla bean dessert that doesn’t fight you in the kitchen, clear ingredient lists are everything. Nothing ruins a baking mood faster than realizing you’re missing one tiny thing. I always lay everything out first—my version of mise en place—which helps with checking these measurements twice! You’ll notice we have three distinct sections here. If you want a truly dependable baked vanilla cheesecake, you must respect those chilling times later, but starting with perfect measurements is step one!
For the Graham Cracker Crust
- 1 1/2 cups graham cracker crumbs
- 1/4 cup granulated sugar
- 6 tablespoons unsalted butter, melted
For the Baked Vanilla Cheesecake Filling
This assembly is what gives you that amazing creamy texture!
- 16 ounces cream cheese, softened (and I mean really soft!)
- 1 cup granulated sugar
- 1/4 cup all-purpose flour
- 1 teaspoon vanilla extract
- 1/2 teaspoon vanilla bean paste (Don’t skip the paste, it gives awesome color!)
- 3 large eggs
For the Caramelized Sugar Topping Dessert
This is the crunchy finale for your caramelized sugar topping dessert!
- 1/2 cup granulated sugar, for topping (you need clean, plain white sugar for the best torch effect!)
How to Make Creme Brulee Cheesecake
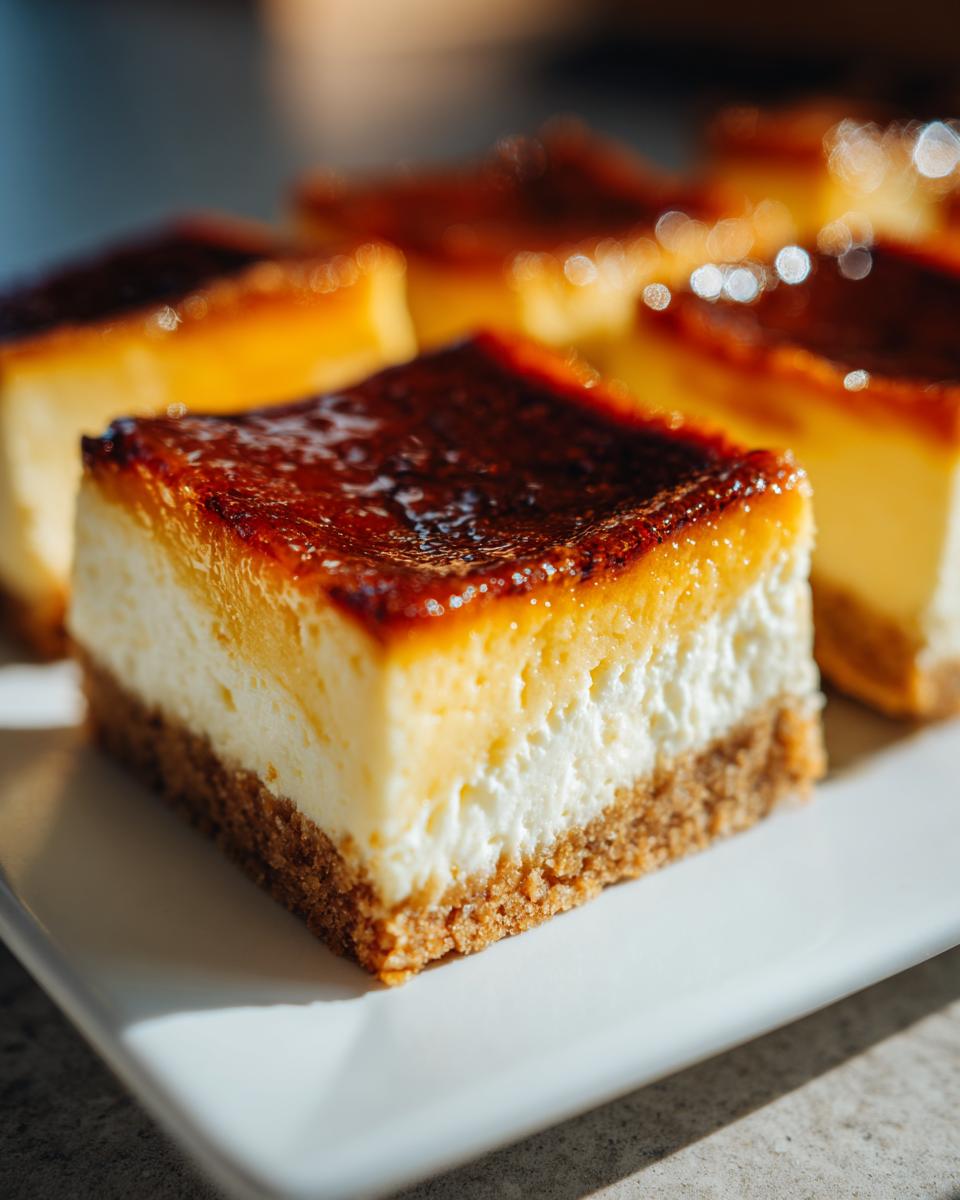
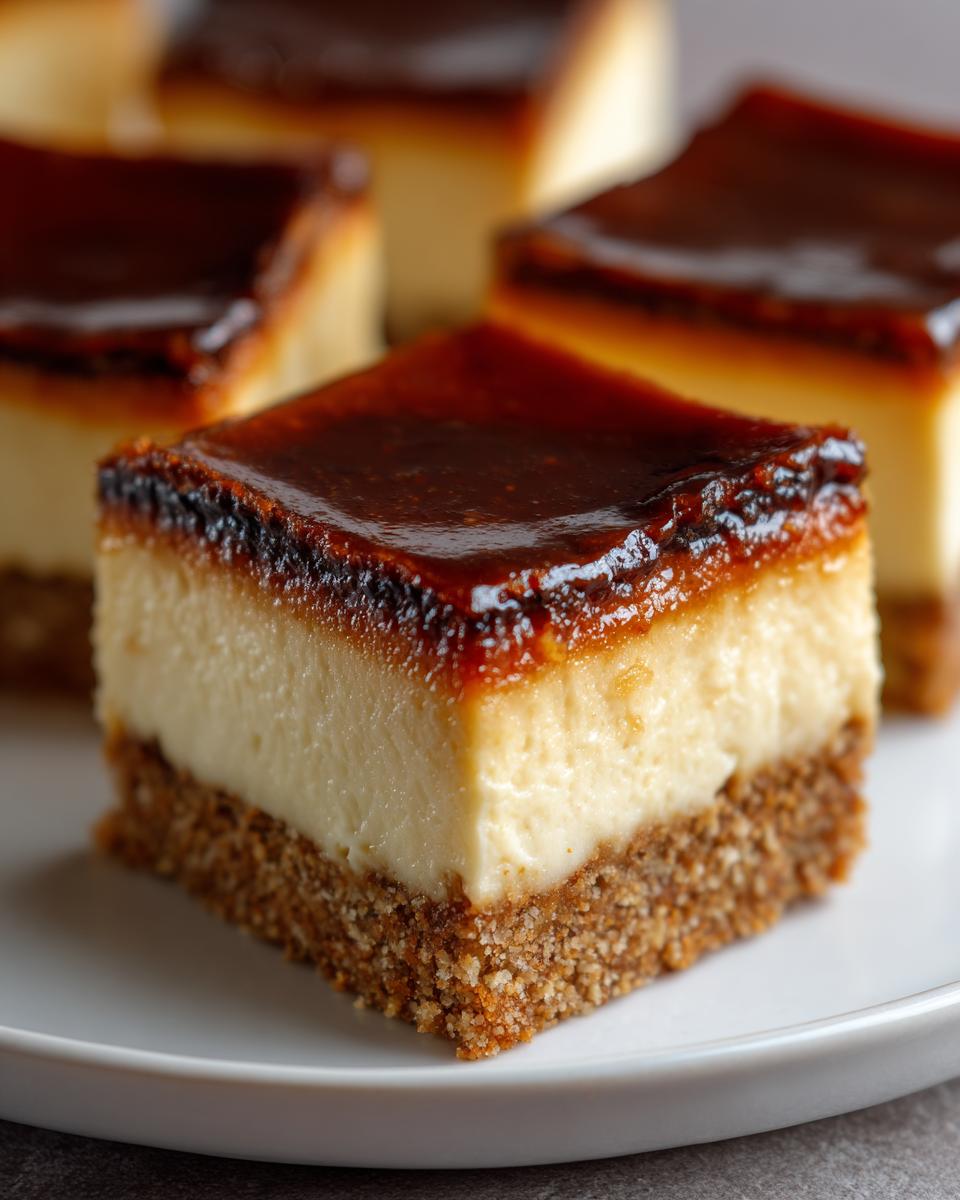
Now for the fun part! Following these steps will give you that perfect creme brulee cheesecake every time. Don’t worry about the multiple steps; they flow logically, and the crucial chilling stage is totally worth the wait. Get your 8×8 inch pan ready with parchment paper overhang—this is your secret weapon for easy removal later. We’re talking about getting these made, baked, and chilled so they are ready for their sweet, sugary moment of glory!
Preparing the Crust and Baking the Base
Start by setting your oven to 325°F (160°C). That’s a pretty low and slow setting, which is perfect for cheesecake; we don’t want any sudden shocks that cause cracks! For the base, just toss those graham cracker crumbs, the 1/4 cup of sugar, and your melted butter together until it all looks like damp sand. Press it down *firmly*—you want a good sturdy base here—into that lined pan. Pop it into the oven for exactly 10 minutes. When it comes out, just set it aside to cool off a bit while you whip up the creamy center.
Creating the Creamy Dessert Ideas Filling
This is where we build those incredible creamy dessert ideas! Grab your largest mixing bowl. Beat that softened cream cheese until it’s absolutely lump-free, then slowly mix in the 1 cup of sugar until combined. Next, whisk in your flour, vanilla extract, and that beautiful vanilla bean paste. Here is my biggest tip—and this is important for beginners: Add your three eggs one at a time. Mix *just* until the yellow disappears after each egg. Seriously, stop mixing the second it’s incorporated! Overbeating the eggs introduces too much air, and that’s how you get cracks on your gorgeous baked surface.
Baking and Chilling the Creme Brulee Cheesecake
Gently pour that gorgeous, air-bubble-free batter right over your cooled crust. Bake it for about 35 to 40 minutes. You’ll know it’s done when the edges look set, but the very center still has a tiny bit of wobble when you gently nudge the pan. Resist the urge to rush! This next part is vital: Turn the oven off completely. Prop the door open just a hair, and let the cheesecake hang out inside for a full hour. This gradual cooling prevents major temp shocks. After the oven rest, pull it out, let it come to room temperature on the rack, and *then* send it to the fridge for at least four hours, but trust me, chilling overnight makes these creme brulee cheesecake bars slice like a dream.
Applying the Cheesecake with Torch Topping
Once your cheesecake bars are thoroughly chilled—seriously, they need to be cold—we get to the fun bit! Sprinkle that final 1/2 cup of sugar evenly across the entire top surface. You want an even dusting, not clumps! Now, grab your kitchen torch. Move the flame slowly and steadily over the sugar. It melts fast and turns that beautiful amber color, creating your required cheesecake with torch topping. Work quickly so you don’t melt the cold cheesecake underneath! If you absolutely don’t have a torch, you can place them under the broiler, but you have to stand right there and watch it like a hawk because it goes from perfect to burnt shockingly fast—one or two minutes, max!
Tips for Success with Your Creme Brulee Cheesecake Recipe
When you’re making something as special as this creme brulee cheesecake recipe, the little details really separate a good dessert from a show-stopping one. In my experience, success comes down to treating your ingredients right before they even hit the mixer. I’ve learned tricks over the years that make the entire *how to make creme brulee cheesecake* process less stressful, especially when you are aiming for that perfect, firm sliceable bar.
The Importance of Room Temperature Ingredients
Seriously, don’t get lazy about this! If your cream cheese is straight from the fridge, you’re going to end up with little clumps in your filling, no matter how fancy your mixer is. Room temperature cheese blends smoothly with the sugar and eggs, creating that perfectly uniform, decadent cheesecake recipes texture we want. If the cream cheese is pliable—you can press into it easily—you’re ready to go! This simple step prevents graininess, a huge win for any rich vanilla bean dessert.
Mastering the Caramelization Process
This payoff moment—the crackle—needs quick action. Whether you’re using your kitchen torch or the broiler, you are working against the cold cheesecake underneath. If the sugar stays hot too long, it melts the top layer of the cheesecake, making everything soupy. Keep the torch moving in tight, quick circles about three inches above the sugar layer. If you’re using the broiler, stick the pan on the highest rack and check it every fifteen seconds. You want that amber color fast, then immediately pull it out to let it set. That crisp, hard shell is non-negotiable!
Variations: Mini Creme Brulee Cheesecakes and Easy Creme Brulee Cheesecake Bars
You know, one thing I love about developing dessert fusion recipes is adapting them! Since this main recipe gives us the best easy creme brulee cheesecake bars, it’s super sliceable and great for parties. But maybe you need something even more portion controlled, or maybe you just want to skip the slicing entirely! That urge for portion controlled cheesecake bites is totally real when you’re entertaining.
If you’re ready to tackle the individual route, making mini creme brulee cheesecakes is so much fun! You can use a standard 12-cup muffin tin and line it with those nice sturdy paper liners or, even better, use silicone baking cups. You’ll bake them for slightly less time—start checking around 18 to 20 minutes. The great news is that the chilling and torching process stays exactly the same! Sometimes I think the mini ones look even more impressive when you present them all neatly arranged on a platter.
If you wanted to make *actual* full round creme brulee cheesecake instead of bars, just use a 9-inch springform pan. You might need to adjust the baking time up slightly, maybe by 5 or 10 minutes, but remember that slow cool-down in the turned-off oven is still essential to keep everything smooth and crack-free. No matter the shape, you’re getting that signature creamy vanilla bean goodness topped with that satisfying *crack*!
For quick tips on getting these individual versions done, you can check out some great ideas for mini creme brulee cheesecakes elsewhere, but honestly, just treat the batter the same as you did for the bars, and you’ll be golden!
Storage and Serving Suggestions for Your Decadent Cheesecake Recipes
One of the best parts about these decadent cheesecake recipes is knowing we can totally make them ahead of time! This is why they are such incredible impressive dinner party desserts. Baking ahead removes so much stress on party day. Since you want that beautiful caramelized top to be perfectly crisp when it hits the table, timing that final sugar sprinkle is key for your creme brulee cheesecake.
Preparing the Creme Brulee Cheesecake Ahead of Time
You should bake and chill the bars completely before you even think about the sugar. Once fully chilled, wrap those bars up tightly—I use plastic wrap followed by a layer of foil—and keep them in the fridge. They last wonderfully for up to three days this way! Wait until your guests are seated, or maybe just 15 minutes before you plan on serving, to lay out that final layer of sugar and torch it. That lovely ‘crack’ sound is best heard right when everyone takes their first bite!
Pairing This Rich Vanilla Bean Dessert
Because the creme brulee cheesecake bar is so rich and intensely flavored with that vanilla bean richness, it really doesn’t need much else! If you’re serving it after a big meal, sometimes a tiny sprinkle of fresh raspberries or thinly sliced strawberries on the side adds a perfect little welcome burst of acidity. Honestly, though, a strong, piping hot cup of black coffee alongside is my go-to pairing. It cuts through the richness beautifully!
Frequently Asked Questions about Creme Brulee Cheesecake
I always get so many questions after people try a tricky fusion dessert like this! It’s natural; we’re combining two of the best things in the dessert world, so we need to make sure we cross every ‘T’ and dot every ‘I’. Don’t stress if you have questions—that’s why I put this little section together based on what I usually hear about the best cheesecake recipes for beginners. Hopefully, this helps you nail that perfect crackle!
Can I skip the chilling time for this creme brulee cheesecake recipe?
Oh, I wish you could, honey, but please don’t! Chilling is non-negotiable here, truly. If you try to slice the cheesecake when it’s even slightly warm, it will turn into a sloppy mess, and you will absolutely ruin that beautiful graham cracker crust line. We need those bars firm, cold, and structurally sound so they can hold up to slicing and that final sugar application. A minimum of four hours is required, but if you followed my advice and let your creme brulee cheesecake recipe sit in the fridge overnight like I do, the slices will be perfect little squares!
What is the best way to get a perfectly crisp cheesecake with torch topping?
The secret to that beautiful, shard-like crunch is temperature contrast! The colder the cheesecake surface is, the faster the sugar melts and hardens into that glass-like shell, and the less time its heat has to transfer down into the cream cheese layer. Make sure your bars have been chilled until they are absolutely ice-cold. If you are using a kitchen torch, keep it moving! You want to see it bubble and turn amber quickly, then pull the torch away right before the flame touches the sugar too hard. A dry, cold surface is your best friend for that perfect snap!
Can I use brown sugar topping crust instead of white sugar?
That’s an interesting thought! You certainly *could* try to use a brown sugar topping crust, but I advise against it for the caramelizing step. Traditional crème brûlée calls for pure white granulated sugar for a reason—it melts evenly and creates that super hard, crisp shell faster. Brown sugar has molasses in it, which means it will smoke faster, taste slightly more burnt, and often remain a bit chewy or soft rather than providing that satisfying crack when you tap it with a spoon. Keep the white sugar for the top, and you’ll get the authentic texture!
Estimated Nutritional Data for Creme Brulee Cheesecake Bars
Alright, let’s be real: this is an indulgent treat! We aren’t expecting this amazing creme brulee cheesecake bar to be diet food, but I always like to give you an idea of what you’re diving into. Since we are dealing with a handcrafted recipe using real butter and cream cheese, keep in mind these numbers are just estimates based on the ingredients we used. If you make adjustments—like using different crackers in the crust—your final counts will shift, of course!
This data is calculated per single bar serving size. Remember, these are a small indulgence, perfect for making ahead for a gathering!
- Serving Size: 1 bar
- Calories: Approximately 350
- Total Fat: Around 22g
- Protein: About 6g
- Total Carbohydrates: Roughly 33g
- Total Sugar: Approximately 30g
See? It’s rich, it’s satisfying, and that deliciousness is definitely worth it every once in a while. Enjoy knowing exactly what you’re eating while you savor that perfect crackle!
Share Your Homemade Creme Brulee Cheesecake Creations
Now that you’ve conquered the ultimate dessert fusion—the creme brulee cheesecake—I absolutely must see what you’ve made! Baking is a shared joy, and seeing your perfectly set bars with that shiny, crackled top makes my whole week. I know you nailed the challenge of that creamy vs. crisp contrast.
Please take a picture! I want to hear all about your experience. Seriously, leave a comment below and tell me about the moment you cracked that sugar for the first time—was it a clean snap or a satisfying crunch? Your feedback helps me and the whole MDLATDMM community feel confident tackling even the fanciest-sounding recipes. If you loved this and found it surprisingly simple, let me know!
Head over to our contact page or tag me on social media if you share a photo. Every comment and rating really helps us keep making reliable, delicious home cooking recipes like this one accessible to everyone. Happy baking, sweet friend!
PrintEasy Crème Brûlée Cheesecake Bars
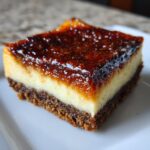
Make this dessert fusion featuring a creamy vanilla bean cheesecake filling on a graham cracker crust, topped with a crisp, caramelized sugar layer.
- Prep Time: 20 min
- Cook Time: 40 min
- Total Time: 5 hours 0 minutes
- Yield: 16 bars 1x
- Category: Dessert
- Method: Baking
- Cuisine: American
- Diet: Vegetarian
Ingredients
- 1 1/2 cups graham cracker crumbs
- 1/4 cup granulated sugar
- 6 tablespoons unsalted butter, melted
- 16 ounces cream cheese, softened
- 1 cup granulated sugar
- 1/4 cup all-purpose flour
- 1 teaspoon vanilla extract
- 1/2 teaspoon vanilla bean paste
- 3 large eggs
- 1/2 cup granulated sugar, for topping
Instructions
- Preheat your oven to 325°F (160°C). Line an 8×8 inch baking pan with parchment paper, leaving an overhang for easy removal.
- Prepare the crust: Mix graham cracker crumbs, 1/4 cup sugar, and melted butter until combined. Press the mixture firmly into the bottom of the prepared pan. Bake for 10 minutes. Remove and let cool slightly.
- Prepare the cheesecake filling: In a large bowl, beat the softened cream cheese with 1 cup sugar until smooth. Mix in the flour, vanilla extract, and vanilla bean paste. Beat in the eggs one at a time, mixing just until combined after each addition. Do not overmix.
- Pour the cheesecake batter over the cooled crust. Bake for 35 to 40 minutes, or until the edges are set and the center has a slight jiggle.
- Turn off the oven, prop the door open slightly, and let the cheesecake cool inside for 1 hour. Remove from the oven and cool completely on a wire rack. Chill in the refrigerator for at least 4 hours, or preferably overnight.
- Prepare the topping: Once the cheesecake is fully chilled, sprinkle the remaining 1/2 cup of sugar evenly over the top surface.
- Use a kitchen torch to melt and caramelize the sugar until it forms a hard, amber crust. Work quickly to avoid heating the cheesecake layer too much.
- Let the caramelized topping cool and harden for about 10 minutes before slicing into bars.
Notes
- For the best texture, chill the cheesecake overnight before torching the sugar topping.
- If you do not have a kitchen torch, you can place the bars under a hot broiler for 1 to 2 minutes, watching constantly to prevent burning.
- This recipe makes impressive dinner party desserts that you can make ahead of time.
Nutrition
- Serving Size: 1 bar
- Calories: 350
- Sugar: 30g
- Sodium: 180mg
- Fat: 22g
- Saturated Fat: 13g
- Unsaturated Fat: 9g
- Trans Fat: 0.5g
- Carbohydrates: 33g
- Fiber: 1g
- Protein: 6g
- Cholesterol: 75mg