
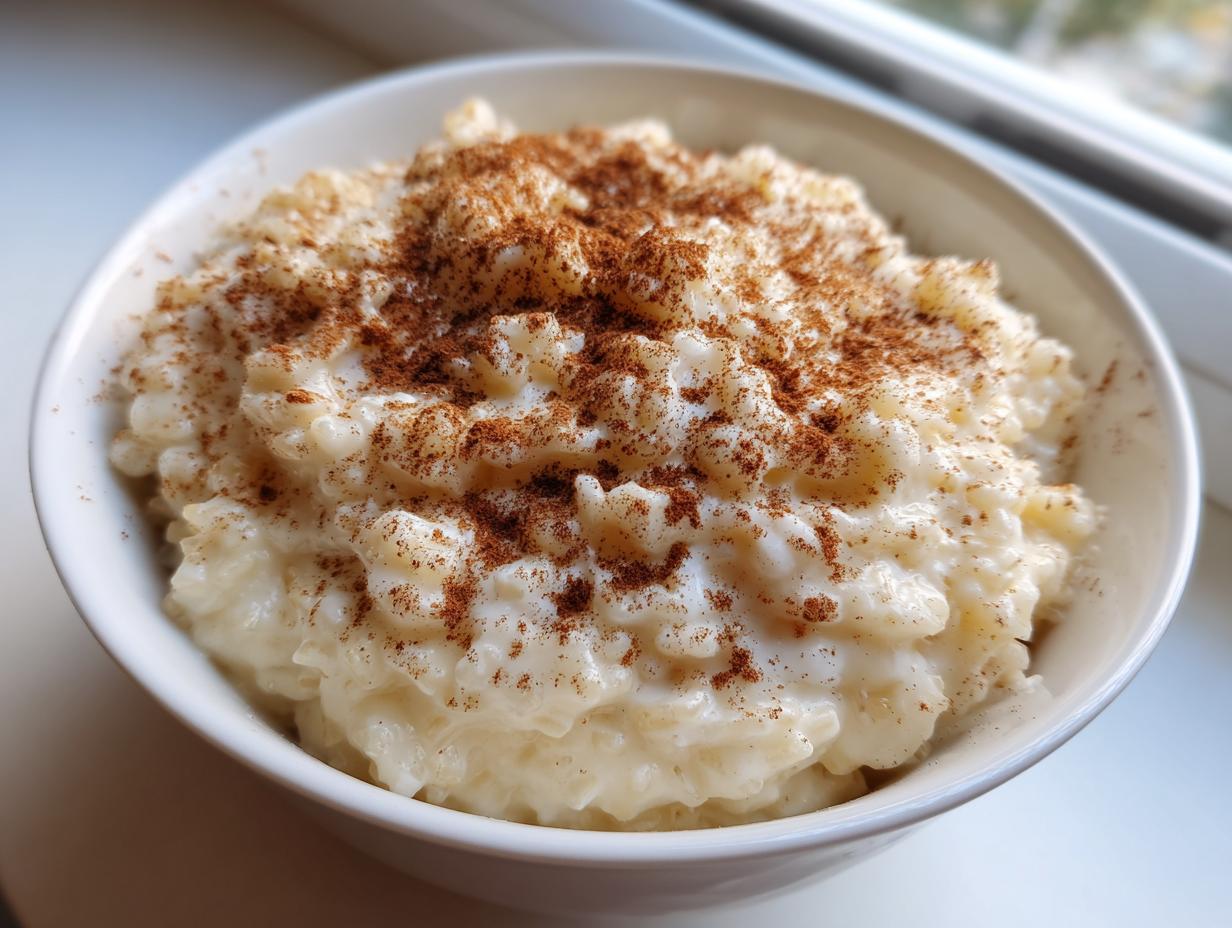
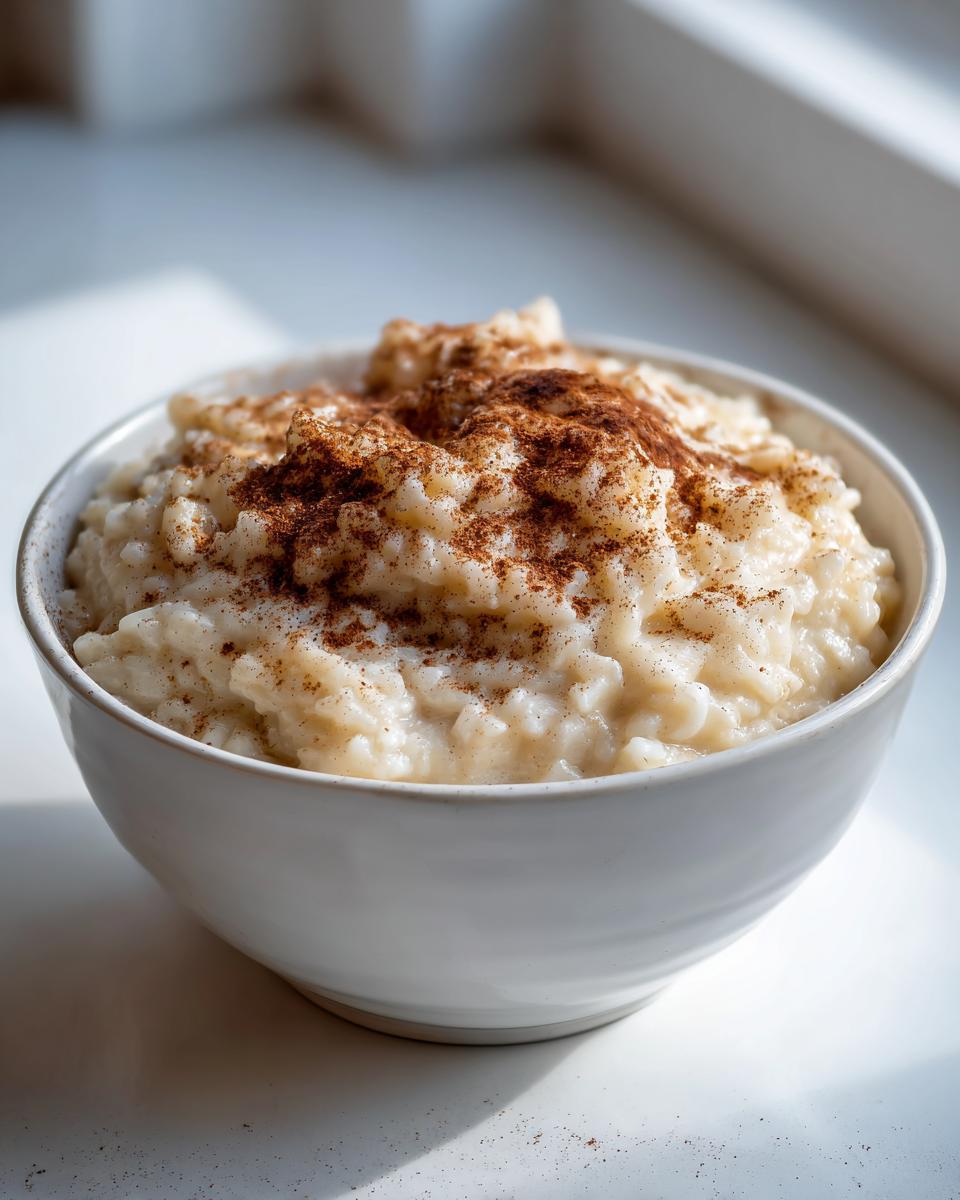
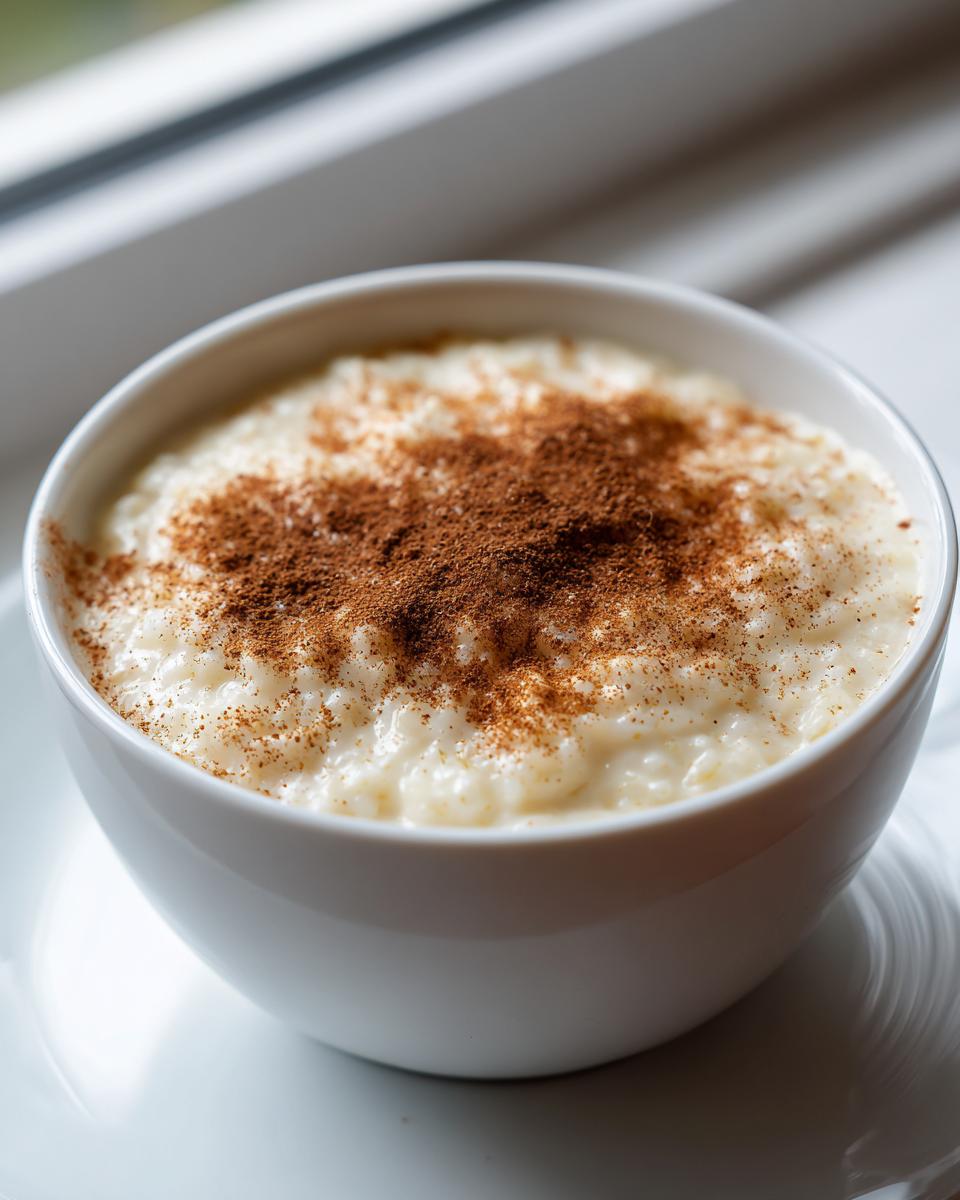
If you’re anything like me, there are days when only the deepest kind of comfort food will do—something that smells like your childhood kitchen and feels like a warm hug. That’s why I’m sharing what I think is the very best dish for those moments: my absolutely perfect, Old-Fashioned Creamy Stovetop Rice Pudding. Forget those thin, overly sweet versions; this is the real deal. It’s rich, silky, and unbelievably simple, made primarily with just five core ingredients. This traditional rice pudding recipe instantly transports me back to my grandmother’s house the second that vanilla and cinnamon start blooming in the steam. Trust me, this easy homemade pudding is about to become a staple in your house too.
- Why This Old Fashioned Rice Pudding is Your New Comfort Dessert Staple
- Gathering Ingredients for Your Simple 5 Ingredient Dessert
- Mastering the Stovetop Rice Pudding Technique for Ultimate Creaminess
- Finishing Touches: Flavoring Your Vanilla Cinnamon Pudding
- Tips for the Best Rice Pudding Texture Every Time
- Serving and Storing Your Homemade Pudding
- Frequently Asked Questions About Old Fashioned Rice Pudding
- Nutritional Estimates for This Classic Dessert Recipes
- Share Your Comfort Dessert Ideas
Why This Old Fashioned Rice Pudding is Your New Comfort Dessert Staple
When you’re searching for that best rice pudding texture, the secret isn’t complicated ingredients; it’s patience and technique. Unlike a baked version that can turn dry or gummy, keeping this classic on the stovetop gives us all the control we need to achieve that impossibly creamy, almost velvety finish. It’s pure nostalgia in a bowl, and I promise, once you try this, you won’t look back. We’ve even linked to another amazing old-fashioned take for extra inspiration! You can see another popular version here, but stick with mine for the silkiness!
Key Features of Our Creamy Rice Pudding Recipe
- It’s truly an easy homemade pudding, requiring only 5 core ingredients to start.
- The stovetop method guarantees that wonderfully rich, creamy rice pudding recipe texture without needing eggs or a fussy oven bake.
- This is pure, nostalgic sweet treat vibes—it tastes exactly like the comfort desserts we remember from happy family gatherings.
Gathering Ingredients for Your Simple 5 Ingredient Dessert
The great thing about making this old fashioned rice pudding? You probably have almost everything you need sitting in your pantry right now. Seriously, this recipe hinges on simplicity so we can focus on that heavenly creamy texture. Resist the urge to swap things out wildly, though, because these five components work beautifully together.
- 1 cup short-grain white rice (Arborio or medium-grain works well)
- 4 cups whole milk
- 1/2 cup granulated sugar
- 1 teaspoon vanilla extract
- 1/4 teaspoon ground cinnamon (plus extra for topping)
Ingredient Notes and Substitutions for Perfect Rice Pudding
When you are aiming for that best rice pudding texture—the kind that coats your spoon—the rice you choose makes a huge difference. You really should stick to short-grain or Arborio rice. Why? Those starchy little guys release their starch slowly as they cook in the milk, which creates that natural thickness we absolutely crave. If you use long-grain rice, you’ll end up with rice floating in milk, not a true, cohesive pudding!
Also, under the notes, I mentioned adding heavy cream. If you want to transform this from great to unbelievably decadent, use 3 1/2 cups of whole milk and swap in 1/2 cup of heavy cream. That extra fat content takes the richness up tenfold, making it feel incredibly luxurious, even though it’s still technically uncomplicated.
Mastering the Stovetop Rice Pudding Technique for Ultimate Creaminess
Okay, now we get down to the real magic for this creamy rice pudding recipe. The instructions look simple, but the time and stirring are non-negotiable if you want that amazing texture. We aren’t talking about making quick leftovers here; we are crafting an ultimate comfort dessert that tastes deep and slow-cooked. Remember, consistency is king in this game, so pay close attention to how things look on the stove. If you want the creamiest result possible, you have to treat the rice gently!
Step 1: The Initial Soak and Gentle Simmer
First things first: we need to coax the rice into softening up a bit before we even turn the heat on. Combine your rice and all four cups of whole milk in a heavy saucepan—and please make sure it’s heavy-bottomed! That helps stop scorching magic from happening. Let that sit on the counter for a good 30 minutes. This initial soak is key because it gives the rice a head start absorbing liquid. After the soak, set the heat to medium and get it stirring often. We want it to come to a gentle simmer, nothing too violent. I always watch closely here!
Step 2: Achieving the Right Stovetop Rice Pudding Consistency
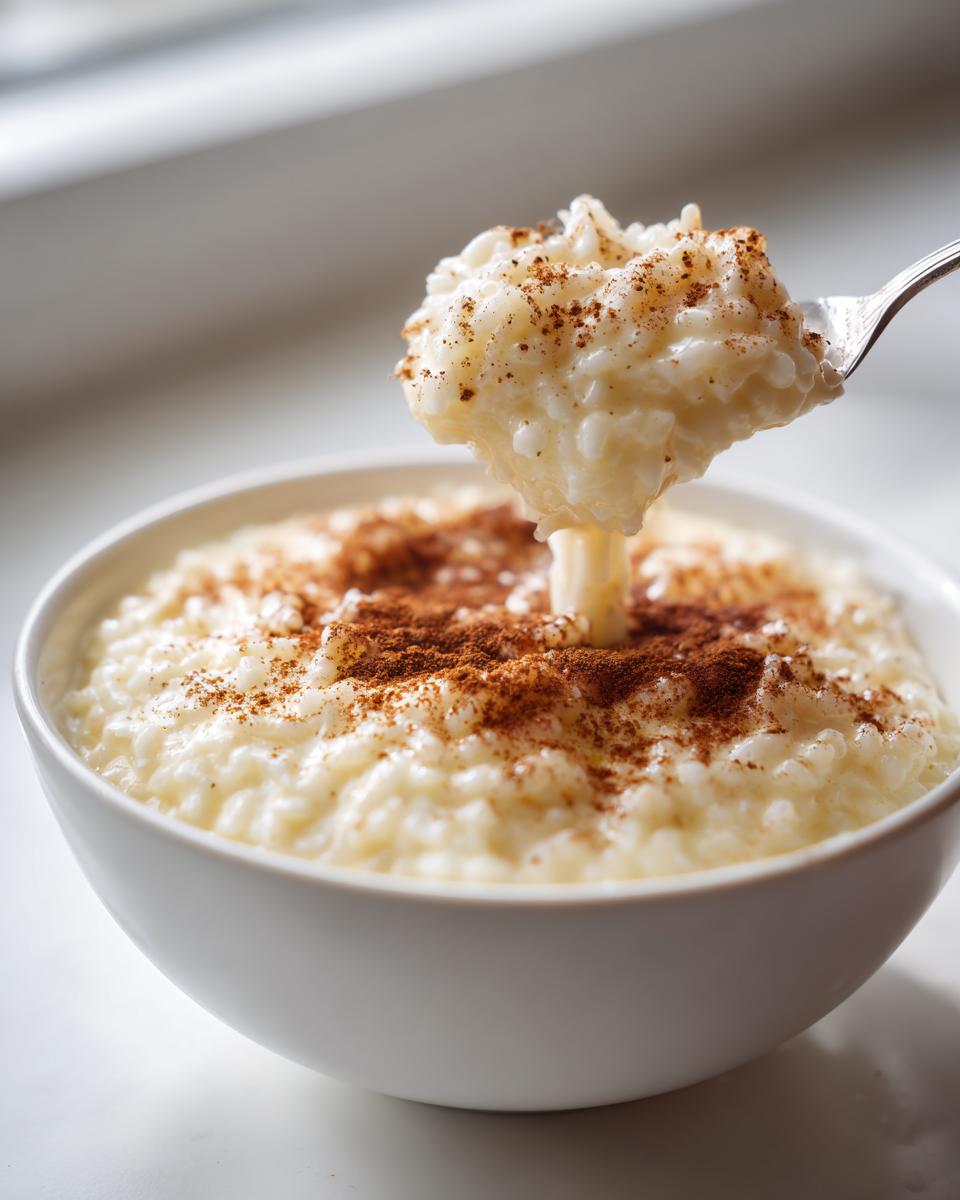
Once it starts bubbling gently, turn that heat way down to low. This is where you step away but don’t wander too far! You need to keep stirring regularly—maybe every couple of minutes—for 45 to 60 minutes. You are looking for the liquid to reduce significantly and the grains to become soft and plump. The rice pudding shouldn’t be gluey; it should be thick enough that when you pull your spoon across the bottom of the pan, it takes a moment for the milk to flow back together. If it looks like it’s seizing up too fast—oops, too hot, maybe?—just splash in a tiny bit more milk to keep things flowing. You can check out some truly wonderful tips on achieving max creaminess right over here for more creamy insights.
Don’t forget to check out this easy stovetop guide as you cook for extra reassurance if you need it!
Finishing Touches: Flavoring Your Vanilla Cinnamon Pudding
This is the part where the magic really settles, and your kitchen starts smelling exactly like heaven. Once the rice is perfectly tender, take the whole saucepan right off the heat. Seriously, pull it off! We don’t want to cook the vanilla—it’s too delicate. Stir in your sugar until every grain dissolves, then drop in that lovely teaspoon of vanilla extract. Honestly, the scent of the cinnamon already in there mingling with the warm vanilla? It instantly transforms this into such a nostalgic sweet treat for me.
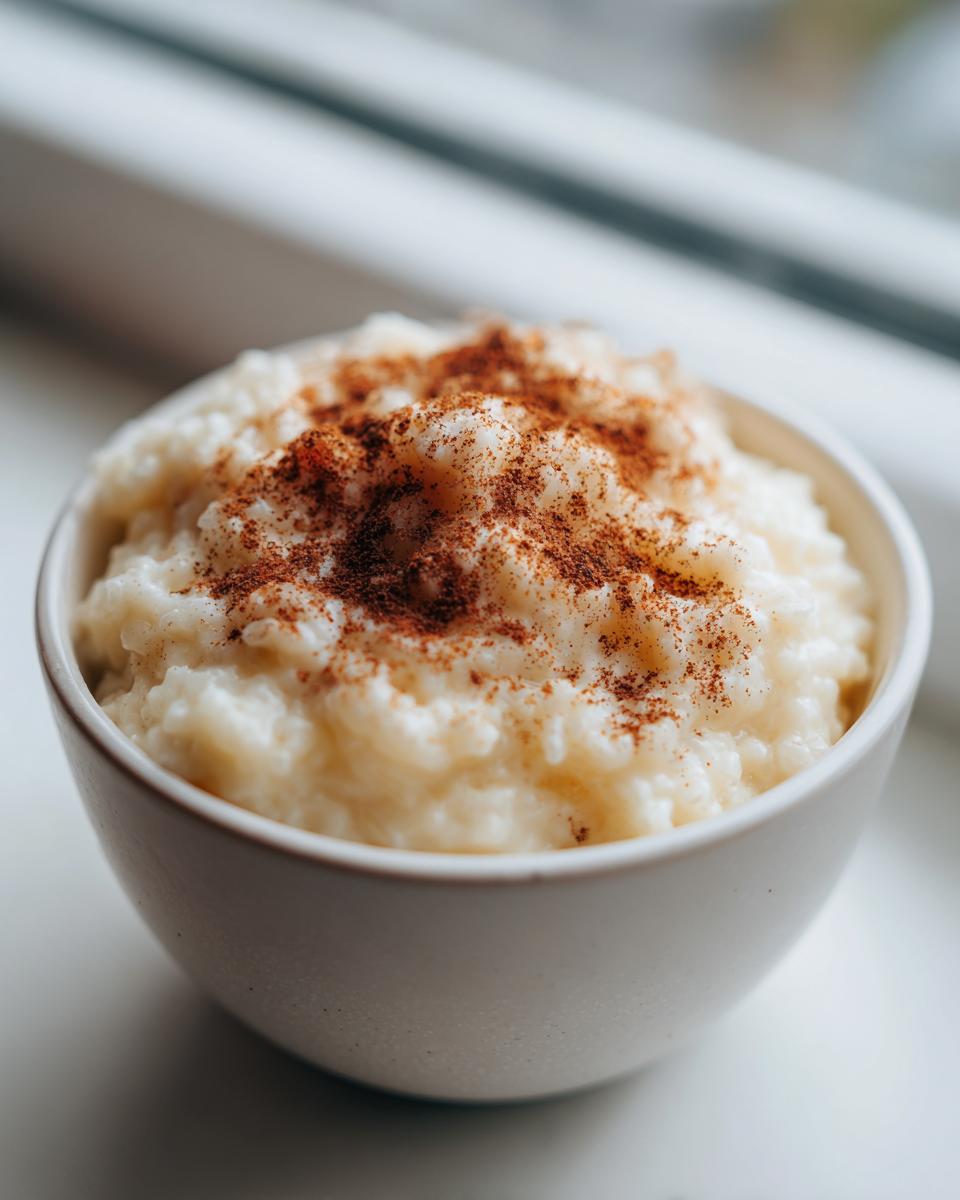
My favorite thing to do is grab the cinnamon shaker and hit the top layer right before serving. That burst of spice on top of the creamy mixture is just everything. If you love a strong cinnamon punch, don’t be shy when you sprinkle it on top of your finished vanilla cinnamon pudding.
Tips for the Best Rice Pudding Texture Every Time
We’ve gone over the cooking, but achieving that perfect, dream-like texture in your creamy rice pudding recipe sometimes requires just a little extra finesse. Since I want everyone making this to feel like they’ve mastered an old classic, here are a few extra little secrets I’ve picked up over the years that go beyond the main instructions. These little nudges ensure your pudding is luxurious, never gummy, and always just right, whether you’re serving it warm or chilled.
- Never Stop Stirring Near the End: I know I say to stir often, but during the final 15 minutes, I mean *constant* stirring. Those starches are ready to stick to the bottom and burn, which gives the whole batch an off-flavor. Don’t let that happen! Keep that wooden spoon moving.
- The Magic Thickness Test: Don’t wait until it looks like paste to take it off the heat. Remember, this old fashioned rice pudding will thicken up considerably as it cools down, especially if you chill it later. Pull it off the burner when it still feels slightly looser than you think is perfect.
- Working with Leftover Cooked Rice: Sometimes life moves fast and you need an easy homemade pudding, like, yesterday! If you have leftover cooked rice (plain, unsalted, or lightly salted works), you can absolutely use it! Just skip that 30-minute soak. Combine the cooked rice, milk, and sugar, bring it gently to a simmer, and you only need about 20 minutes of cooking time total before stirring in the vanilla. Check out this recipe variation if you’re in a hurry.
- The Cream Boost: As I mentioned before, even if you use only milk in the initial recipe, reserving a splash of heavy cream to stir in right at the very end—after the sugar is dissolved—gives the pudding a final, wonderful mouthfeel that screams ultimate comfort dessert. It’s worth keeping a little carton around just for this!
Serving and Storing Your Homemade Pudding
One of the best things about this creamy rice pudding is how flexible it is! Do you crave a warm pudding dessert right this second? Go for it! Ladle it out right after stirring in the vanilla—that rich, steamy warmth is heaven on a cold evening. However, if you’re looking for an easy win later in the week, this is a fantastic make-ahead dessert. Chilling completely firm it up almost like a heavy custard, which some people actually prefer!
Make Ahead Dessert Planning for Rice Pudding
If you chill your pudding, just remember that it tightens up a lot from room temperature. When you go to reheat leftovers, you usually need to add a splash of milk or cream for every serving you warm up. Pop it in the microwave for about 30 seconds, give it a good stir with that splash of milk, and boom—it returns to that smooth texture you loved right after cooking. You can keep this stored airtight in the fridge for about three to four days, though honestly, it rarely lasts that long in my house. Check out the creamy scoop inspiration over at Emily’s site for serving ideas!
Frequently Asked Questions About Old Fashioned Rice Pudding
Is this stovetop rice pudding technique better than baked rice pudding?
That’s a great question that gets right to the heart of texture! For me, yes, the stovetop method is superior for achieving true creaminess. Baked versions often rely heavily on eggs to set, which can sometimes give you a texture that’s more like a firm casserole. My old fashioned rice pudding stays softer and silkier because we are cooking it slowly in milk on the stove. It’s our easy homemade pudding secret weapon for that classic, soft grain feel.
Can I substitute the whole milk with anything else?
Whole milk is vital for richness, but I know people try alternatives. If you simply must cut back, remember my note about swapping 1/2 cup for heavy cream—that’s the best way to keep the decadence. Using skim milk will significantly reduce the final creamy result because you lose too much fat content during that long cooking time. If you’re looking for a baked rice pudding alternative that uses evaporated milk, that’s a different kind of recipe entirely; here, stick to whole milk for the stovetop!
Why is my cooled rice pudding suddenly so thick?
Don’t panic! That’s completely normal magic happening as it cools. Think of it: all that starch is settling in for a nap. When it cools down, the pudding firms up a lot more than when it was hot and churning away on the burner. If you plan on eating it chilled, this is perfect! If you want a looser texture later, just remember my tip: stir in a splash of milk or cream when reheating it. You can see how serious others are about getting the recipe right over at Allrecipes, which shows how much people care about this dessert!
Can I add raisins or other fruit if I want more than 5 ingredients?
Absolutely, you can customize it beyond the five basics! If you want to add raisins, I highly recommend soaking them in hot water for about 10 minutes first, then draining them well before stirring them in during the last 15 minutes of cooking. This stops them from sucking moisture out of your beautiful creamy rice pudding later on. Dried cranberries or chopped dried apricots are also wonderful additions for a little tang!
Nutritional Estimates for This Classic Dessert Recipes
Now, listen up—I am NOT a nutritionist! I’m sure you know that the joy of this classic dessert recipe isn’t found in counting macros, but I always get asked about the basics, so I ran the numbers for you based on the ingredients. Remember, these figures are just estimates for one serving size (about 1 cup) and they depend hugely on the exact milk and sugar you use.
If you stick right to the five core ingredients we used for this comfort dessert idea, here is what you can generally expect per serving. If you add that heavy cream, the fat and calorie counts will naturally jump up a little, but wow, is it worth it!
- Serving Size: 1 cup
- Calories: 320
- Total Fat: 7g (Saturated Fat: 4g)
- Carbohydrates: 58g
- Protein: 10g
- Sugar: 25g (This is where the comfort comes from!)
- Sodium: 85mg
This really highlights why this old fashioned rice pudding works so well as a balanced indulgence—it has a good hit of protein from the milk but still gives you that gorgeous, lightly sweet fix!
Share Your Comfort Dessert Ideas
I just poured my heart into making this recipe for you, and now I’d love to hear what magic you made in your kitchen! Did you enjoy this old fashioned rice pudding warm in a big bowl, or did you chill it down for a firmer treat? Please leave a rating below and tell me your favorite topping—more cinnamon, maybe?
If this classic brought you some joy tonight, please share it with a friend who needs a little dose of creamy comfort! You can read more lovely dessert ideas over at Recipe Council or check out Delish for more easy cooking inspiration!
PrintOld-Fashioned Creamy Stovetop Rice Pudding

This recipe delivers the ultimate comfort dessert: an old-fashioned rice pudding with a wonderfully creamy texture, made simply on the stovetop with just five core ingredients. It tastes like home.
- Prep Time: 5 min
- Cook Time: 60 min
- Total Time: 65 min
- Yield: 4 servings 1x
- Category: Dessert
- Method: Stovetop
- Cuisine: American
- Diet: Vegetarian
Ingredients
- 1 cup short-grain white rice (Arborio or medium-grain works well)
- 4 cups whole milk
- 1/2 cup granulated sugar
- 1 teaspoon vanilla extract
- 1/4 teaspoon ground cinnamon (plus extra for topping)
Instructions
- Combine the rice and milk in a heavy-bottomed saucepan. Let the mixture soak for 30 minutes off the heat to help the rice absorb some liquid initially.
- Place the saucepan over medium heat. Stir frequently to prevent the rice from sticking to the bottom. Bring the mixture to a gentle simmer.
- Reduce the heat to low once simmering. Continue to cook, stirring often, for 45 to 60 minutes. The pudding is done when the rice is tender and the mixture has thickened to your desired creamy consistency. If it thickens too fast, add a splash more milk.
- Remove the saucepan from the heat. Stir in the sugar and vanilla extract until fully dissolved. The pudding will thicken more as it cools.
- Serve the rice pudding warm, or chill it completely for a firmer texture. Sprinkle with extra cinnamon before serving.
Notes
- For an extra rich flavor, substitute 1/2 cup of the whole milk with heavy cream.
- This classic rice pudding is delicious served warm right away or chilled for several hours.
- If you use leftover cooked rice, reduce the cooking time significantly, usually to about 20 minutes after adding the milk and sugar.
Nutrition
- Serving Size: 1 cup
- Calories: 320
- Sugar: 25g
- Sodium: 85mg
- Fat: 7g
- Saturated Fat: 4g
- Unsaturated Fat: 3g
- Trans Fat: 0g
- Carbohydrates: 58g
- Fiber: 1g
- Protein: 10g
- Cholesterol: 25mg