
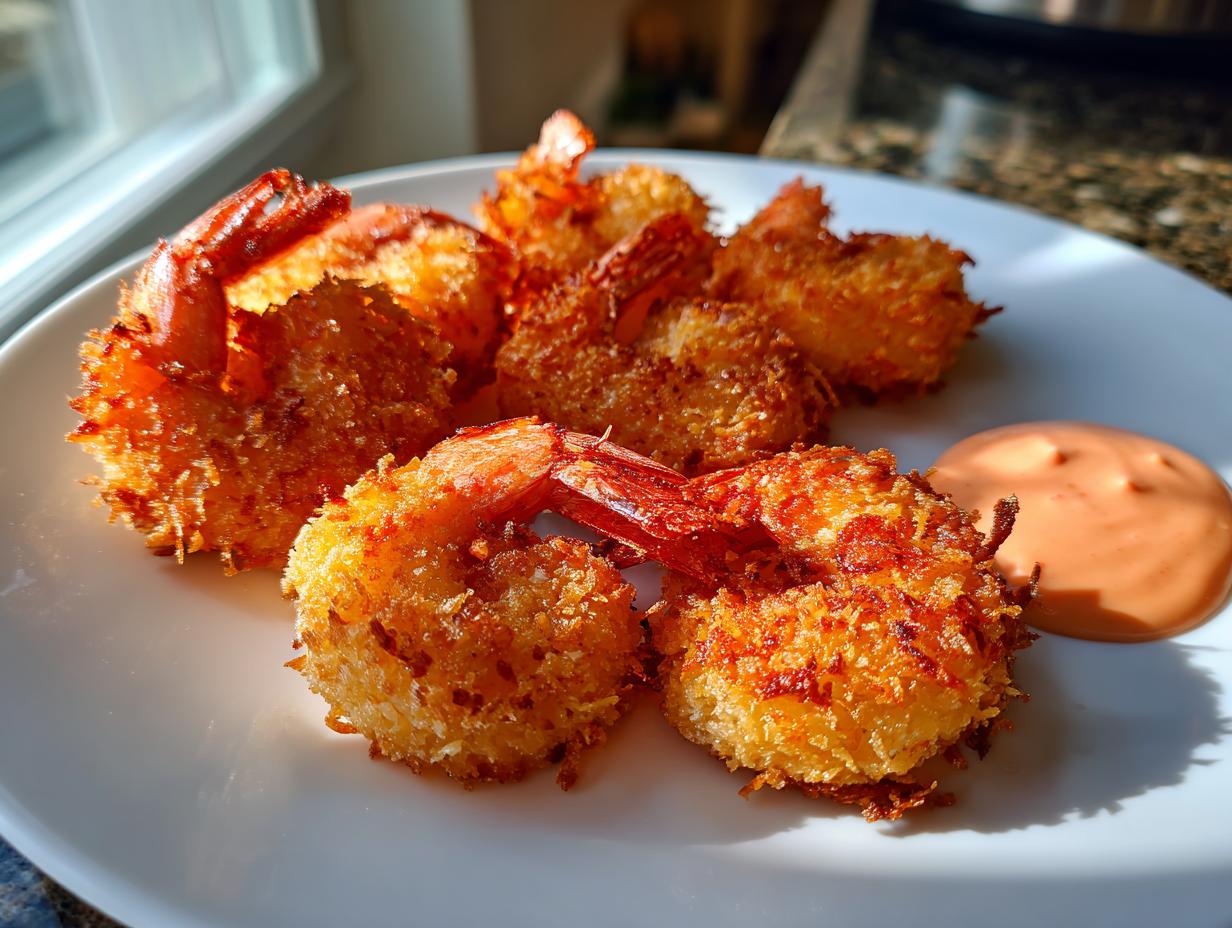
Oh my goodness, are you ever craving an appetizer that just screams “vacation” but actually tastes better than what you get at that fancy seafood place? I know I am, especially on a busy weeknight when I need a quick seafood appetizer fix. Forget those soggy, disappointing versions you sometimes find! I’m sharing my absolute best coconut shrimp recipe today. We’re talking restaurant style crunch here—that audible snap when you bite in—paired with a simple, balanced sweet chili mayo dip. Here at MDLATDMM, Maddie Thompson is committed to making these beloved classics reliable for your real-life kitchen. Trust me when I say this crispy coconut shrimp will be your new go-to party snack.

- Why This Crispy Coconut Shrimp Recipe Works (Expert Tips)
- Ingredients for Perfect Coconut Shrimp and Dipping Sauce
- Step-by-Step Instructions for Crispy Coconut Shrimp
- Making Healthy Coconut Shrimp: Air Fryer and Baked Options
- Tips for Success with Your Homemade Coconut Shrimp
- Serving Suggestions for Tropical Shrimp Appetizer
- Storage and Reheating Instructions for Leftover Coconut Shrimp
- Frequently Asked Questions About Coconut Shrimp Recipe
- Estimated Nutritional Data for This Coconut Shrimp
- Share Your Crispy Coconut Shrimp Creations
Why This Crispy Coconut Shrimp Recipe Works (Expert Tips)
We are focused on one thing with this batch: C-R-U-N-C-H. If you’re hunting for that specific, audibly crunchy texture that makes you feel like you snagged the last piece at a buffet, you’ve come to the right place. I spent way too long trying to get that perfect golden exterior on my coconut shrimp without it being oily or heavy. The answer, I realized, wasn’t just frying; it was what we coated them with.
The Secret to Restaurant Style Coconut Shrimp Crunch
This is where we separate the good from the genuinely great. You can’t just use coconut flakes, you’ll never get the right hold or structure. My secret weapon comes from mixing sweetened flaked coconut with Panko breadcrumbs. Panko gives you those huge, irregular air pockets that crisp up like tiny glass shards when they hit the hot oil. That combination is the ticket to achieving that coveted restaurant style coconut shrimp texture. It locks in the flavor and keeps the shrimp inside tender and juicy!
Achieving Perfect Golden Fried Shrimp
The biggest mistake people make when frying any breaded item is rushing the oil. If your oil isn’t hot enough, the coating soaks up grease like a sponge, and you end up with sad, soggy shrimp. You absolutely need a thermometer, and you must keep that oil steady at 350°F (175°C). Also, please work in small batches! Overcrowding the pot immediately drops the temperature. We want them golden brown in just a few minutes, not pale and greasy because we tried to cook all 20 pieces at once.
Ingredients for Perfect Coconut Shrimp and Dipping Sauce
Okay, now for the good stuff. You need quality components to make great coconut shrimp. I’ve written down all the exact measurements I use, because when you’re aiming for that top-tier crunch, guessing just won’t cut it! I always prepare my station before I even look at the shrimp itself. And don’t forget that dipping sauce! It’s what makes every bite pop. If you want some extra inspiration on the dip portion, check out what my friends over at Ellery’s site are doing, because their take on the sauce is fantastic, too. They have a great approach for balancing the sweet and the heat.
For the Homemade Coconut Shrimp
- 1 pound large shrimp, peeled and deveined, tails on or off (your preference!)
- 1/2 cup all-purpose flour
- 2 large eggs, lightly beaten
- 1 cup sweetened flaked coconut
- 1/2 cup Panko breadcrumbs
- 1/4 teaspoon salt
- 1/4 teaspoon black pepper
- Vegetable oil, for frying (we need about 2 inches deep in the pot)
For the Sweet Chili Mayo Dipping Sauce
- 1/2 cup mayonnaise
- 1/4 cup sweet chili sauce
- 1 teaspoon Sriracha (totally optional if you like a little kick!)
- 1 teaspoon lime juice
Step-by-Step Instructions for Crispy Coconut Shrimp
You made it past the ingredients, which is half the battle! Now it’s time to bring this beautiful coconut shrimp to life. Since the shrimp cooks so fast, everything needs to be ready to go ahead of time. I promise you, this whole party shrimp appetizer comes together faster than you might think—we’re talking about 3 minutes per batch in the oil! We follow a really specific breading order, which is what stops the coating from falling right off into the fryer. If you’ve ever made garlic parmesan shrimp, you know how important prepping that station is!
Setting Up the Breading Station for Crunchy Shrimp Recipe
First things first: grab three shallow dishes. This is essential for even coating! Take some paper towels and pat your shrimp absolutely dry. This is important—if they are wet, nothing sticks, and you’ll have mushy spots instead of crunch. Dish one gets the flour. Dish two gets the lightly beaten eggs. For dish three, we mix that star player, the Panko breadcrumbs, right in with your sweetened coconut, salt, and pepper. Mix that coating thoroughly!
Now, work with one shrimp at a time. Dredge it gently in the flour, tapping off any extra. Next, a quick dip in the egg, letting the excess drip away. Finally, press that shrimp firmly into the coconut mixture. Make sure it’s totally married to that coating before setting it aside on your clean plate. We want maximum coverage for our final product!
Frying Your Coconut Shrimp to Golden Perfection
Time for the sizzle! Pour your vegetable oil into your pot—make sure you have at least two inches deep so the shrimp gets submerged. Set your heat to medium-high and get that oil heating up until it hits 350°F (175°C). If you don’t have a thermometer, don’t guess; it’s the only way to guarantee that beautiful golden color. Working in small batches, gently lower your coated coconut shrimp into the hot oil. They only need about 2 to 3 minutes per side. Once they are deeply golden brown everywhere, pull them out immediately with a slotted spoon and set them on a rack to drain. They are ready to go when they look perfectly golden!
Making Healthy Coconut Shrimp: Air Fryer and Baked Options
Sometimes you want that incredible tropical flavor of coconut shrimp but you just don’t want the deep fryer involved, am I right? I totally get it. Luckily, we have fantastic options for making a lighter version that keeps things crisp or swaps crunch for creamy comfort. These variations still deliver that awesome flavor profile we love, making them perfect party appetizers or a fabulous coconut-crusted fish substitute if you want to switch things up! We’re covering the air fryer method for crispness and a saucy buffet version.
Quick Air Fryer Coconut Shrimp Instructions
If you own an air fryer, this is your best route for achieving a genuinely crispy exterior without submerging anything in oil. It brings you that fantastic healthy coconut shrimp experience! Once you have your shrimp all breaded up just like we did for the frying method, the air fryer does the hard work. Spray those coated shrimp lightly—and I mean lightly, just enough to encourage browning—with your favorite cooking spray.
Pop them into the basket, making sure they aren’t piled on top of each other. We need that air circulation! Cook them at 380°F (195°C) for about 8 to 10 minutes total. Make sure you flip them carefully halfway through so both sides get that beautiful golden-brown color. You can see another great air fryer coconut shrimp recipe example over at Vera’s site if you need a visual guide!
Creating Buffet Style Coconut Shrimp (Creamy Variation)
Now, if you’re looking for that rich, decadent flavor sometimes served at big gatherings—the one where the shrimp is swimming in sauce—we do things differently. This isn’t a crunchy shrimp recipe; this is pure comfort food. For this buffet style coconut shrimp, you skip the entire flour/egg/Panko dredging process. Instead, you make a rich sauce base using coconut milk, a little sugar, maybe some ginger, and you simmer your shrimp right in it until everything thickens up beautifully.
It’s super impressive on a platter next to some steamed rice. It’s less about the crisp shell and more about that cozy, sweet, creamy coating you get. My mom sometimes calls this style ‘lazy shrimp’ because it’s so simple to bring together!
Tips for Success with Your Homemade Coconut Shrimp
I want you to have the best results possible when you make this—it’s too delicious to mess up! Even though this recipe is straightforward, a few small details can make the difference between good homemade coconut shrimp and, well, the best you’ve ever tasted. I learned these tricks over many messy weekends trying to perfect timing and texture. Remember, cooking is about trial and error, but I’m trying to save you a little bit of that trial!
If you’re doing a big batch for a party, I highly suggest trying a little swap in your coating mix just to see how much crunch you can pack in there. When I make a big spread, maybe alongside this amazing coconut rice, I’ll often replace half of the standard flaked coconut with heavily crushed cornflakes.
I know it sounds wild, but cornflakes give a sturdier, lighter crunch than even Panko sometimes, and they brown beautifully. Make sure you crush them fine—you still want pieces, not dust! You just mix them right into the coconut and Panko mixture in that third dish. It makes the coating extra sturdy and super satisfying.
Another huge piece of advice that applies to every breaded item? Don’t let those coated pieces sit around too long before frying or baking. The moisture from the egg and shrimp starts to soften the coating right away. Once you’ve gotten everything breaded, you should move forward with your cooking method as quickly as you can. If you absolutely must wait, place them on a wire rack in the fridge for just 15 minutes to really set up before they hit the oil.
And finally, keep tasting that dipping sauce! The lime juice and Sriracha measurements are just starting points. Maybe your sweet chili sauce is sweeter than mine, or maybe you want a real fiery kick. Taste it before you serve it, adjust that acidity or heat level, and that final element will just tie the whole tropical appetizer together perfectly.
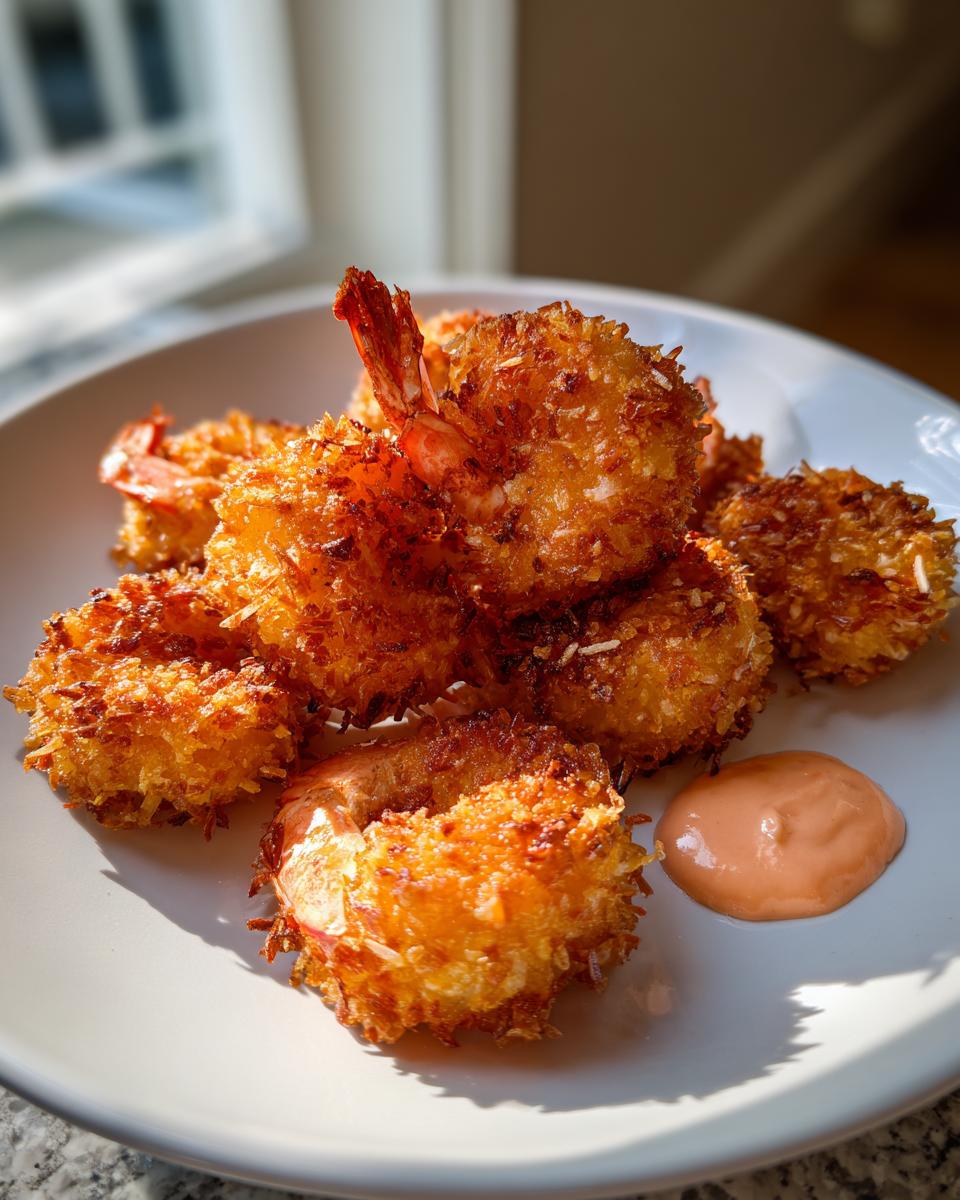
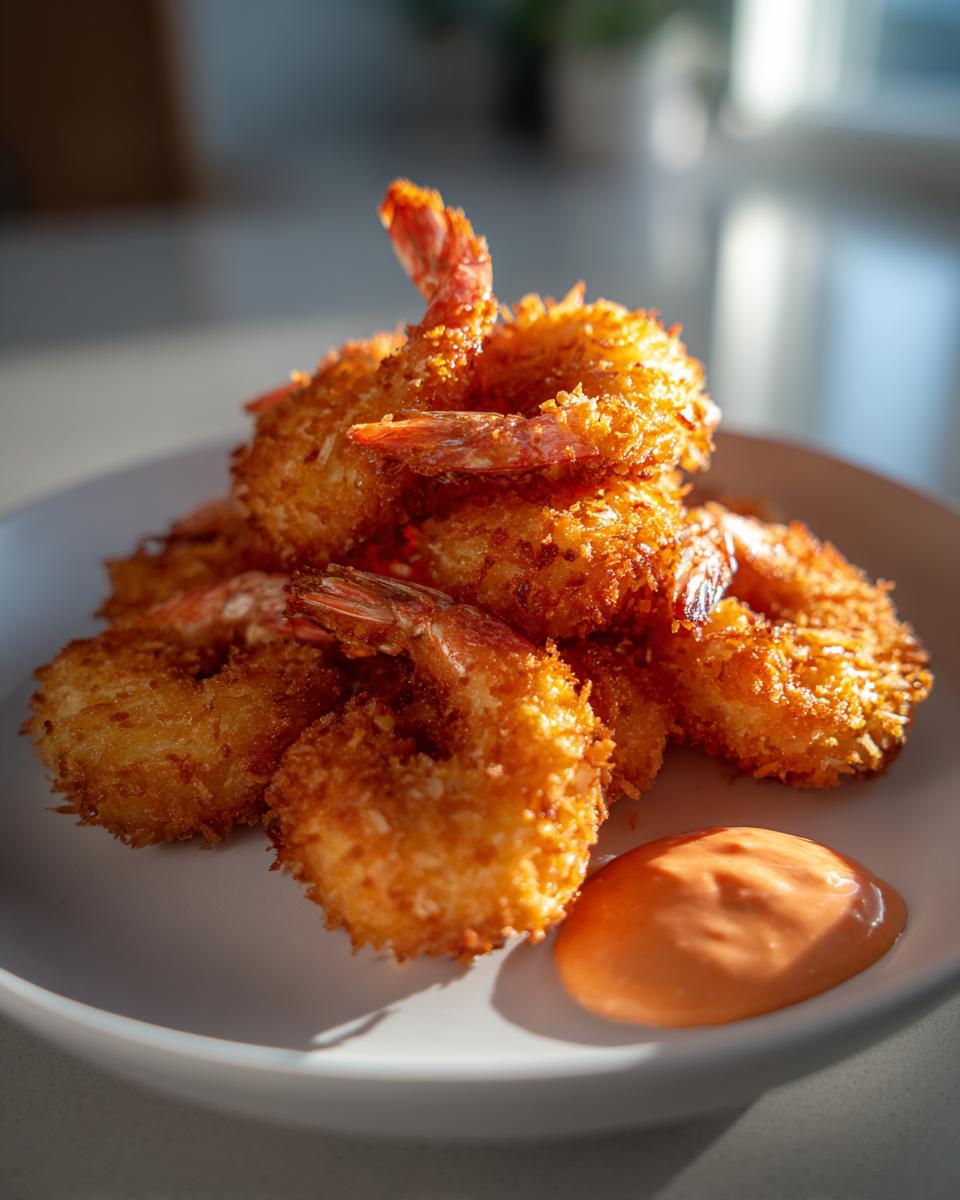
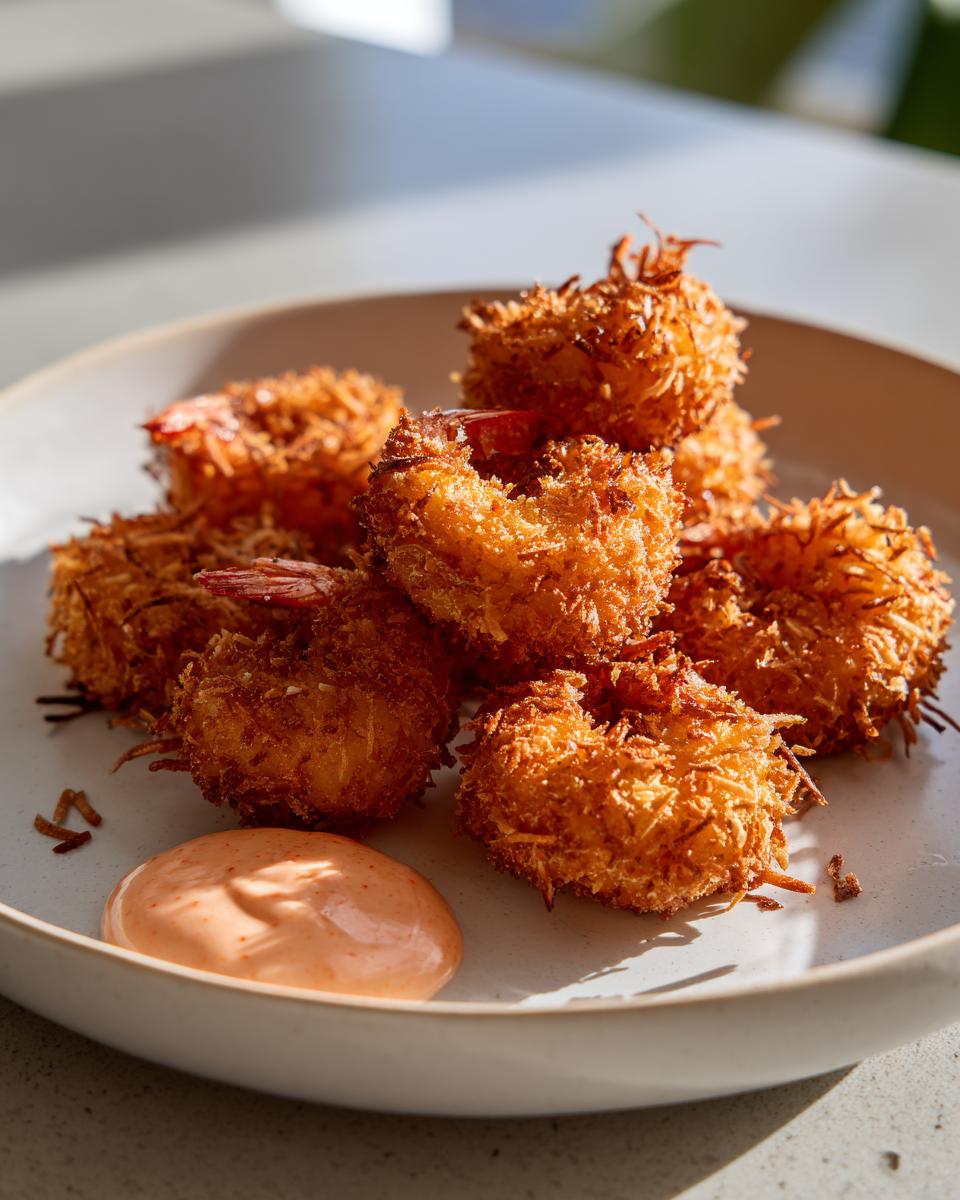
Serving Suggestions for Tropical Shrimp Appetizer
What’s the point of digging into the best coconut shrimp ever if you don’t have the perfect thing to serve alongside it, right? Honestly, this dish is versatile. It’s fantastic as a standalone appetizer for a crowd—seriously, it disappears fast at any party—but it also makes a wonderful, lighter main course when you pair it with something zingy.
For parties, keep it simple. I usually serve these golden beauties right on a big platter with bowls of that sweet chili mayo and maybe some extra lime wedges scattered around. That’s it! People grab them with toothpicks and they are happy. They look so beautiful piled up, it adds a real tropical flair to the spread.
If you’re transforming this into a quick shrimp dinner, you’ll want a simple green element to cut through the richness of the coconut coating. I love serving it over a bed of lightly dressed mixed greens with some slices of fresh mango or pineapple tossed in. It keeps the whole meal feeling bright and fresh.
But my favorite way to make it a real meal, especially when I’m feeling a little extra, is to serve the shrimp alongside something creamy that can soak up the extra dipping sauce. I highly recommend making a simple lemon garlic orzo, like the one I shared in this shrimp orzo recipe. The slight tanginess of the lemon in the pasta is the perfect counterpoint to the sweet, crunchy shrimp. Plus, who doesn’t love a good seafood appetizer that can double as dinner?
Storage and Reheating Instructions for Leftover Coconut Shrimp
Oh, the age-old question: what do you do when you have perfectly fried, crispy shrimp staring back at you the next day? If you’re lucky enough to have any leftovers of this amazing appetizer, you definitely want to store them correctly so that lovely Panko/coconut crunch isn’t totally lost to the fridge air. When I have extras, I try to keep them far away from anything moist, because moisture is the enemy of crunch!
The number one rule is this: do not store them in an airtight container right away. You need to let them cool down completely on the wire rack after frying until all the steam escapes. Once they are completely cool—and I mean stone cold—you can transfer them to a rigid container. I try to lay them out in a single layer if I can, separated by a sheet of parchment paper. This stops them from sticking together and crushing that beautiful coating.
Now, reheating is the tricky part. Don’t even think about the microwave! That will turn your beautiful crunchy shrimp recipe into rubbery sadness. The best way to bring back some of that glorious crispness is going back to dry heat. You want to reheat them in a regular oven or an air fryer. Set your oven to about 375°F (190°C) and spread them out on a baking sheet. Pop them in for maybe 5 to 7 minutes. They should heat all the way through quickly, and the dry heat will help revitalize some of that fantastic outer texture.
If you’re using your air fryer, set it to around 350°F (175°C). They’ll only need about 4 minutes, flipping once halfway through. This method is seriously the fastest way to revive leftovers. They won’t be *exactly* as perfect as they were fresh from the oil, but they will be delightfully crispy and definitely miles better than any microwave attempt!
Frequently Asked Questions About Coconut Shrimp Recipe
I know you’re going to love making this recipe, but sometimes questions crop up mid-prep! It happens to me all the time, especially when I’m trying a new technique or ingredient combo. I gathered the questions I get most often about achieving that perfect coconut shrimp recipe finish. If you’re worried about timing or texture, chances are the answer is right here!
Can I freeze the coconut shrimp before cooking?
Yes, you absolutely can! Freezing is a busy cook’s best friend, especially when planning for big party shrimp recipes. Once you have done all the breading steps—flour, egg, and the Panko/coconut mix—lay those raw, coated shrimp out in a single layer on a parchment-lined baking sheet. Pop the whole tray into the freezer for about an hour until they are rock solid. Then, you can transfer them to a sealed freezer bag. When you’re ready to cook, move them straight from the freezer to the hot oil (you might need to cook them a minute or two longer!), or follow the instructions for the air fryer method!
What is the best oil temperature for frying the shrimp?
Listen, this is the difference between an appetizing, golden treat and something greasy that slides right off the shrimp. You need that oil stable at 350°F (175°C). If it’s lower, the coating marinates in the oil before it has a chance to set up, leading to sogginess. If it’s too high, the coating burns before the shrimp inside even warms up! Keeping that temperature consistent is why we fry in small batches—it lets the oil recover its heat, ensuring every piece gets that perfect, satisfying crunch that makes this a genuinely crunchy shrimp recipe.
Can I use regular breadcrumbs instead of Panko for coconut shrimp?
You technically *can*, but I’d really push you toward the Panko, especially if you’re aiming for that deep-fried texture. Regular breadcrumbs are super fine, almost like flour dust. When they fry, they create a very dense, flatter crust that can sometimes feel heavy. Panko flakes are airy, much larger, and irregular, which is what gives standard coconut shrimp its signature large, light, and audibly crisp coating.
If Panko is all you have, you can try pulsing the regular crumbs briefly in a food processor to break them up just a little bit. But honestly, for this recipe, hitting the store for Panko is a worthwhile investment for the texture you’ll achieve!
Estimated Nutritional Data for This Coconut Shrimp
Now, let’s talk fuel for all that flavor! Because this is a deep-fried appetizer—even though it’s loaded with tropical sweetness—the numbers are a little higher than if we were just steaming the shrimp, naturally. I always feel better knowing what I’m putting into my body, even when I’m indulging in a fantastic party shrimp recipe like this one. When I ran the numbers based on the full ingredient list, here’s what we are looking at per serving, which is generally about 5 shrimp pieces with some extra dip mixed in.
Keep in mind, these values are my best estimates based on standard grocery store ingredients and portion sizes. If you use low-fat mayo or skip a little of the dipping sauce, your numbers will shift! Everything looks pretty balanced, though, especially for a starter that packs so much satisfaction.
- Serving Size: 5 shrimp
- Calories: 380
- Fat: 22g (with 14g Saturated)
- Carbohydrates: 28g
- Protein: 18g
- Sugar: 12g
- Sodium: 450mg
See? Not too shabby for something this incredibly delicious! The protein is great, which helps keep you satisfied. I always remind folks, especially if you’re serving these as part of a larger meal or alongside an easy dinner idea, that everything should be enjoyed in moderation. Don’t let the numbers stop you from enjoying true comfort food!
Share Your Crispy Coconut Shrimp Creations
Now that you have the secrets to making truly stellar, crispy homemade coconut shrimp, I really, really want to see what you whip up! Seriously, seeing your photos is the best part of my whole day. Did you manage to get that perfect golden color? Did the sweet chili mayo turn out perfectly tangy?
Don’t be shy! Head down to the comments section below and drop a rating. Let me and everyone else know how your attempt at this easy coconut shrimp recipe went. Tell me if you tried the air fryer and how crisp it got, or if you went classic deep-fried! Your feedback helps me keep tweaking and improving these recipes for all of us home cooks.
If you post a picture on Instagram or Pinterest, tag me! I love seeing how you serve these up for your parties or quick seafood dinners. It’s all about building this community where we share the joy of making simple, amazing food together. If you want to check out more about why I started this whole journey making recipes reliable for real people, you can always read more about my philosophy over on the About Page!
Happy cooking, and I can’t wait to hear about your delicious, crunchy results!
PrintCrispy Restaurant Style Coconut Shrimp with Sweet Chili Mayo Dip

You can make restaurant-quality crispy coconut shrimp at home. This recipe uses a Panko coating for maximum crunch and includes instructions for a simple, balanced sweet chili mayo dipping sauce. It is a perfect appetizer for parties or a quick seafood dinner.
- Prep Time: 20 min
- Cook Time: 10 min
- Total Time: 30 min
- Yield: 4 servings 1x
- Category: Appetizer
- Method: Frying
- Cuisine: American/Tropical
- Diet: Vegetarian
Ingredients
- 1 pound large shrimp, peeled and deveined, tails on or off
- 1/2 cup all-purpose flour
- 2 large eggs, lightly beaten
- 1 cup sweetened flaked coconut
- 1/2 cup Panko breadcrumbs
- 1/4 teaspoon salt
- 1/4 teaspoon black pepper
- Vegetable oil, for frying (about 2 inches deep)
- For the Sweet Chili Mayo Dip:
- 1/2 cup mayonnaise
- 1/4 cup sweet chili sauce
- 1 teaspoon Sriracha (optional, for heat)
- 1 teaspoon lime juice
Instructions
- Prepare the shrimp: Pat the shrimp completely dry using paper towels. This step helps the coating stick and promotes crispiness.
- Set up a standard breading station with three shallow dishes. Place the flour in the first dish. Whisk the eggs in the second dish. In the third dish, combine the flaked coconut, Panko breadcrumbs, salt, and pepper. Mix well.
- Dredge each shrimp first in the flour, shaking off any excess. Dip the floured shrimp into the egg mixture, letting excess drip off. Finally, press the shrimp firmly into the coconut-Panko mixture, ensuring it is fully coated. Place the coated shrimp on a clean plate or baking sheet.
- Prepare the dipping sauce: In a small bowl, whisk together the mayonnaise, sweet chili sauce, Sriracha (if using), and lime juice until smooth. Set aside.
- Heat the oil: Pour vegetable oil into a deep, heavy-bottomed pot or Dutch oven to a depth of about 2 inches. Heat the oil over medium-high heat until it reaches 350°F (175°C). Use a thermometer to check the temperature.
- Fry the shrimp: Working in batches to avoid overcrowding the pot, carefully place the coconut shrimp into the hot oil. Fry for 2 to 3 minutes per side, until they are golden brown and cooked through.
- Remove the shrimp from the oil using a slotted spoon and place them on a wire rack set over a paper towel-lined baking sheet to drain excess oil.
- Serve the crispy coconut shrimp immediately with the prepared sweet chili mayo dip.
Notes
- For an air fryer coconut shrimp option, spray the coated shrimp lightly with cooking spray and air fry at 380°F (195°C) for 8 to 10 minutes, flipping halfway, until golden. This is a healthier coconut shrimp alternative.
- If you prefer a buffet style coconut shrimp that is saucy rather than crispy fried, you can skip the breading and frying steps and simmer the shrimp in a creamy coconut sauce made from coconut milk, ginger, and a touch of sugar.
- To make the coating extra crunchy, substitute half of the flaked coconut with crushed cornflakes.
Nutrition
- Serving Size: 5 shrimp
- Calories: 380
- Sugar: 12
- Sodium: 450
- Fat: 22
- Saturated Fat: 14
- Unsaturated Fat: 8
- Trans Fat: 0.1
- Carbohydrates: 28
- Fiber: 2
- Protein: 18
- Cholesterol: 145