
Oh, for the love of all things sweet and nostalgic! There are certain old-school American desserts that just hit differently, right? They transport you straight back to childhood celebrations or maybe watching an old movie. For me, nothing beats the showstopper that is the Boston Cream Pie. Yes, I know, it’s technically a cake, but that’s part of its charming, complicated history!
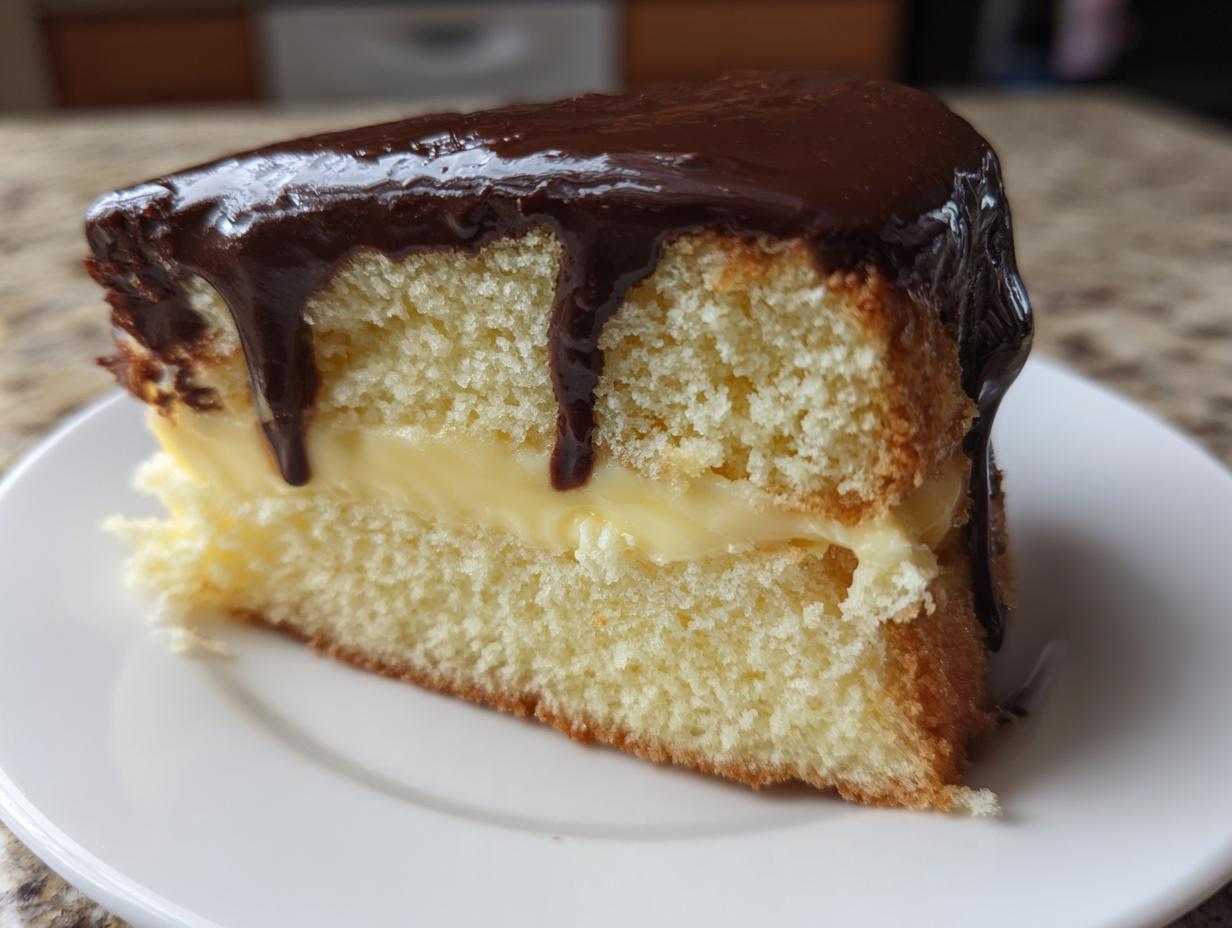
This isn’t just any recipe; this is my deep, deep dive into making the Classic Boston Cream Pie completely from scratch. We’re talking soft, fluffy sponge cake, a rich, velvety vanilla custard filling, and that impossibly shiny chocolate glaze on top. When I spent those weeks recreating these time-honored flavors, I promised myself I’d turn this into a rock-solid From Scratch Cake Recipe that just *works*.
Here at MDLATDMM, Maddie Thompson is all about bringing heritage recipes into your real kitchen, making sure every ‘pinch’ and ‘dash’ translates perfectly. If you’ve ever had your homemade custard split or your vanilla cake turn out dry, trust me, I fixed those issues here. Get ready to create a Traditional American Dessert that tastes like it came right from the best bakery downtown!
- Why This Homemade Boston Cream Pie Recipe Works Every Time
- Ingredients for the Classic Boston Cream Pie
- How to Prepare the Best Boston Cream Pie
- Tips for a Bakery-Quality Boston Cream Pie
- Variations on the Traditional Boston Cream Pie
- Storage and Reheating for Your Boston Cream Pie
- Frequently Asked Questions About Boston Cream Pie
- Estimated Nutritional Data for this Decadent Cream Pie
- Share Your Homemade Boston Cream Pie Creations
Why This Homemade Boston Cream Pie Recipe Works Every Time
The magic of making a perfect Boston Cream Pie from scratch really boils down to three main components working together beautifully. We’re not skimping on quality anywhere, and that’s why this version always gets rave reviews. When you pull the components together, you get that famous slice of heaven that just melts in your mouth.
This recipe focuses ruthlessly on texture and flavor. You can check out some gorgeous examples of these pies online here, but I promise ours has that homemade loving touch!
Achieving Soft Cake Layers
The foundation has to be impeccable. We are aiming for a truly Fluffy Sponge Cake—tender, moist, and sturdy enough to hold the filling without collapsing. My biggest secret for that soft texture? You must stop mixing the batter right when the last streak of flour disappears. Overmixing develops gluten, and gluten means tough cake, which is the opposite of what we want for this Easy Layer Cake Recipe.
Foolproof Vanilla Custard Filling Dessert
I know what you’re thinking: custard is scary. But I’ve made developing the Vanilla Custard Filling so simple you’ll feel like a pastry chef! The cornstarch is crucial here, as it ensures a stable, velvety texture that won’t run everywhere when you slice it. Learning How to Make Custard Filling that sets perfectly is easier than you think, provided you bring it to that rolling boil for a full minute. Remember, chilling is non-negotiable for this Pastry Cream Dessert to firm up properly!
Ingredients for the Classic Boston Cream Pie
Okay, let’s get down to business. You can’t make a Best Boston Cream Pie without the right building blocks! Since we are going completely From Scratch Cake Recipe here, the quality of what goes into the layers matters a lot. Baking is chemistry, but it’s also about flavor, so don’t substitute the real dairy if you can help it.
We’re keeping things traditional here, focusing on those soft cake layers, a super-stable Vanilla Custard Filling, and a chocolate topping that gets perfectly glossy. I’ve broken down exactly what you need for each part below. Trust me, having everything measured out before you touch the mixer makes this whole process feel calm instead of chaotic!
For the Vanilla Sponge Cake
This is our base—it needs to be tender but strong enough to hold that creamy center. We want a beautiful Fluffy Sponge Cake:
- 1 3/4 cups all-purpose flour
- 1 1/2 cups granulated sugar
- 1 tablespoon baking powder
- 1/2 teaspoon salt
- 1/2 cup unsalted butter, softened (make sure it’s actually soft, not melted!)
- 2 large eggs
- 1 teaspoon vanilla extract
- 3/4 cup whole milk
For the Vanilla Pastry Cream Filling
This filling needs to set up beautifully, thanks in large part to the cornstarch, which is the secret helper in our Pastry Cream Dessert. Nothing ruins a slice faster than runny cream!
- 1/2 cup granulated sugar
- 1/4 cup cornstarch (this is what firms things up!)
- 1/4 teaspoon salt
- 2 large egg yolks (save those whites for meringue later!)
- 1 1/2 cups whole milk
- 2 tablespoons unsalted butter
- 1 teaspoon vanilla extract
For the Chocolate Ganache Topping
This is how we get that beautiful, smooth, dark appeal that screams Bakery Style Dessert. The little bit of corn syrup is optional, but if you want that extra mirror shine, go for it!
- 4 ounces semi-sweet chocolate, finely chopped (use good quality chocolate!)
- 1/2 cup heavy cream
- 1 tablespoon light corn syrup (optional, for shine)
How to Prepare the Best Boston Cream Pie
Now that we have all our gorgeous ingredients lined up, it’s time to put them to work! We are going to tackle this in stages: cake first, then the filling, and finally, the assembly and that gorgeous chocolate finish. Remember, patience is key, especially with the chilling times, but the payoff is a Decadent Cream Pie that’s totally worth the wait. If you’ve ever worked with cream cheese frosting, you know chilling is important; the logic is the same here!
It’s a good idea to make the filling while the cakes are starting to cool down, which saves you time. You can find some other great tips on balancing textures in my post about carrot cake cream cheese frosting, because texture control is everything!
Baking the Fluffy Sponge Cake Layers
First things first: preheat that oven to 350°F (175°C). Make sure your two 8-inch cake pans are nicely greased and floured—don’t skip this! In a large bowl, whisk together your dry ingredients: flour, sugar, baking powder, and salt. Now, add that softened butter. Mix it slowly until it looks like coarse crumbs. This initial step prevents over-mixing later!
In a separate bowl, quickly whisk your eggs, milk, and vanilla. Then, gradually add the wet stuff to your crumbs. Mix on low speed only until everything is *just* combined and smooth. I mean it—stop as soon as you don’t see flour streaks anymore! Overmixing here is the #1 killer of Soft Cake Layers. Pour the batter evenly into your pans and bake for about 25 to 30 minutes. They are done when a toothpick comes out clean. Let them chill out in the pans for 10 minutes, then flip them onto a wire rack to cool completely. Seriously, they need to be totally, 100% cool before moving on.
Making the Velvety Vanilla Custard Filling
This is our Vanilla Custard Filling Dessert component! Grab a medium saucepan. Whisk your sugar, cornstarch, and salt together first—this prevents clumps later on. Then whisk in those egg yolks until it looks like a smooth paste. Now, slowly pour in the milk while whisking constantly. Get it all incorporated!
Cook this over medium heat and stir, stir, stir! It will start getting thick, and that’s good. Keep going until it comes to a full, rolling boil, and then keep it boiling for a solid minute while stirring like crazy. Take it off the heat and immediately whisk in the butter and vanilla until everything melts and smooths out. Pour this gorgeous mixture into a shallow bowl, and here’s the vital step for a successful Boston Cream Pie: press plastic wrap right down onto the surface of the cream. This stops it from forming that awful skin while it chills in the fridge for at least two hours until it’s firm.
Assembling Your Boston Cream Pie
Okay, the moment of truth! Make absolutely sure your cake layers are fully cool and your pastry cream is firm and chilly. If the cream is warm or soft, the whole thing will slide apart. Place your first layer on your serving plate.
Carefully spread that completely chilled custard evenly across the cake. Don’t smoosh the edges too much! Then, gently set your second cake layer right on top. If you look closely at how others have nailed the Classic Boston Cream Pie, you can see how pristine the layers are—that’s all down to chilling!
You can grab some great inspiration for presentation right here.
Creating the Glossy Chocolate Ganache Topping
This topping finishes the masterpiece! Put your finely chopped chocolate in a heatproof bowl. In a small saucepan, heat the heavy cream and corn syrup (if you’re using it for that extra professional shine) until it just starts to simmer around the edges. Don’t let it boil over!
Pour that hot cream right over the chocolate. Don’t touch it for five full minutes—this lets the ambient heat do its job melting things gently. After five minutes, start whisking slowly from the center outwards until you have a smooth, dark, glossy topping. Let the ganache sit out for about 10 minutes to cool down just slightly. It needs to still be pourable, but thick enough to coat the back of a spoon before you gently pour it over the center of your assembled Boston Cream Pie, letting it drip tantalizingly down the sides.
Tips for a Bakery-Quality Boston Cream Pie
We’ve done the heavy lifting to get this Boston Cream Pie looking like a Bakery Style Dessert, but sometimes tiny things can go wrong, right? That’s why I always keep a few emergency fixes in my back pocket, just like I do for my famous chocolate chip cookies—you need solutions!
Maddie’s commitment here is to make sure your baking is foolproof. If you’re curious about other recipes that require that same level of texture control, take a peek at my guide on chewy chocolate chip cookies!
Troubleshooting Common Boston Cream Pie Issues
If your custard filling looks too loose after chilling, don’t panic! Dump it back into a clean bowl and whisk it vigorously—sometimes it just needs that mechanical agitation to bring back its creamy structure. If, however, your chocolate ganache cracks when you try to slice it? That usually means it was too thick when you poured it on. For next time, or if you want to try to save it now, gently warm up a tablespoon of heavy cream and drizzle it over the cracked areas; it will smooth right out.
For more expert wisdom on avoiding disaster, checking out this advice here can be super helpful!
Variations on the Traditional Boston Cream Pie
While I absolutely adore making this Classic Boston Cream Pie the traditional way—it’s the best, hands down—I know sometimes life calls for something a little different or quicker! If you love the flavors but maybe don’t have the time for full layers, don’t worry. We can play with these components a bit while still honoring that amazing taste profile.
If you enjoy branching out into similar flavors, like my spiced loaves, you can check out my pumpkin banana bread for more ideas on adapting standard cake formats!
Boston Cream Pie Cupcakes Variation
You can totally shrink this down! For Boston Cream Pie Cupcakes Variation, just use your standard cupcake liners, fill them about two-thirds full, and bake for less time—maybe 18 to 20 minutes. Once they cool, core the center gently, pipe in some of that chilled pastry cream—it’s so easy with a piping bag!—and top with a little dab of the chocolate glaze. They look adorable and taste exactly like the big showstopper!
Boston Cream Poke Cake Inspiration
If you want something wonderfully simple, think about a Boston Cream Poke Cake. You bake the cake layer in a 9×13 pan, poke holes all over it while it’s warm (don’t be shy with the holes!), and then pour vanilla pudding right over the top so it soaks in. After it chills, you spread the chocolate ganache on top. It’s a very easy way to get that creamy, pudding-soaked texture!
If you want to see a cupcake version that’s already perfected, you should look at this amazing recipe for Boston Cream Pie Cupcakes!
Storage and Reheating for Your Boston Cream Pie
Alright, you’ve made this masterpiece—the *ultimate* Classic Boston Cream Pie—and you have leftovers (if you’re lucky!). Since this beauty is loaded with that rich, homemade vanilla custard filling, storage is super important. We don’t mess around when it comes to food safety or keeping that filling nice and stable!
Because we’re using dairy and eggs in the custard, this definitely needs to live in the fridge. Don’t leave it sitting out on the counter for more than maybe an hour while you’re enjoying dessert. A sealed container or a cake dome works best to keep that beautiful chocolate ganache topping from picking up any weird fridge smells.
This Traditional American Dessert keeps well for about three days when refrigerated. The cake layers stay surprisingly soft, but they will absorb moisture from the filling over time, which isn’t always a bad thing if you like a really moist cake!
Here is my big tip on serving: always pull your slice out of the fridge about 20 to 30 minutes before you plan to eat it. The filling and the chocolate topping firm up quite a bit when they are super cold. Letting it warm up just slightly lets you appreciate the true velvet texture of that custard and keeps that soft sponge cake from feeling too dense. You don’t “reheat” this dessert—you let it gently come back to life on the counter!
Frequently Asked Questions About Boston Cream Pie
It’s true, once you try making this dessert from scratch, you’ll have a million little questions pop up about the finer details. That’s what the FAQ is for! I’ve pulled the questions I get most often about getting this Classic Boston Cream Pie just right. Making a fantastic cake doesn’t have to be confusing, I promise!
If you need some inspiration for general layer cake structures that hold up well, you can always check out my tips on an easy layer cake recipe, too.
Is Boston Cream Pie technically a pie or a cake?
Nope, it is totally a cake! Even though it has “Pie” right in the name, it’s historically recognized as America’s first official dessert, and nope, it’s not a pie. It’s a yellow sponge cake layered with pastry cream and topped with chocolate glaze. Why the name? Well, back in the 1800s when it was invented in Boston, “pie” was just a general, catch-all term for almost any sweet dish baked in a round dish. Go figure! But we know the truth: this is a spectacular cake!
Can I use instant pudding instead of homemade Vanilla Custard Filling?
If you’re just looking for something quick, sure, you *can* use instant pudding, but let’s be honest—if you’re going through the trouble of making the scratch cake and the ganache, why stop there? Instant pudding is going to give you a much lighter, almost airy texture, and it won’t have that deep, rich, egg-y flavor that makes this whole thing special. For the Best Boston Cream Pie experience, stick to the recipe and master that full Homemade Vanilla Custard Filling. It sets up so much better for slicing!
How far in advance can I make this Traditional American Dessert?
This is the best part about having a multi-component dessert: you can break up the work! You can absolutely make the cake layers a day ahead of time. Just wrap them tightly in plastic wrap once fully cooled and keep them at room temperature. The pastry cream filling *must* be made the day before so it has time to fully chill and set up—at least 6 hours, but overnight is better.
The tricky part is the chocolate topping. The ganache is best made just 30 minutes before you plan to pour it so it has that beautiful, luscious consistency. If you’re planning ahead, assemble the whole thing the morning of serving. You can get extra tips on planning your baking schedule from the experts over here. Good luck!
Estimated Nutritional Data for this Decadent Cream Pie
Okay, let’s talk numbers for a second. I know we bake for love and comfort here at MDLATDMM, but we also have to be realistic about what goes into celebrating with this incredibly Decadent Cream Pie. Please remember, this is just an estimate based on USDA averages for the ingredients listed in the recipe.
Since we are making this entirely from scratch—using real butter and whole milk for that rich pastry cream—the numbers are certainly higher than a store-bought version. But hey, you deserve the real deal, right? This data is based on dividing the whole recipe into 8 generous servings.
- Serving Size: 1 slice
- Calories: 450
- Sugar: 45g (Yes, it’s a treat!)
- Fat: 24g
- Saturated Fat: 14g
- Carbohydrates: 55g
- Protein: 6g
There’s a bit of cholesterol in there from the two egg yolks in the custard, which is totally normal for a Vanilla Custard Filling Dessert made the traditional way. Think of this Boston Cream Pie as a wonderful, indulgent moment—not an everyday bake—and enjoy every single layer!
Share Your Homemade Boston Cream Pie Creations
Whew! You made it! You took on a Classic Boston Cream Pie from scratch, and I bet it looks absolutely incredible sitting on your counter right now. Seriously, I am so proud of you for diving into this Traditional American Dessert!
Here at MDLATDMM, Maddie Thompson really believes that food tastes best when shared, and that is why community feedback is so important to us. We want to see your showstoppers! Did you manage that perfect chocolate drip? Did your sponge stay perfectly fluffy?
Don’t be shy! Head down to the comments below and let me know how your baking adventure went. If you have a second, leave a star rating for the recipe so other home bakers know what to expect. And hey, if you took a gorgeous picture of your finished Boston Cream Pie, please tag us on social media so I can swoon over it!
We love seeing how you bring these heritage recipes into your modern kitchens. It keeps the tradition alive! If this recipe inspired you, maybe check out some more simple, comforting bakes in my collection of delicious dessert recipes—I think you’ll enjoy them just as much!
PrintClassic Homemade Boston Cream Pie Recipe

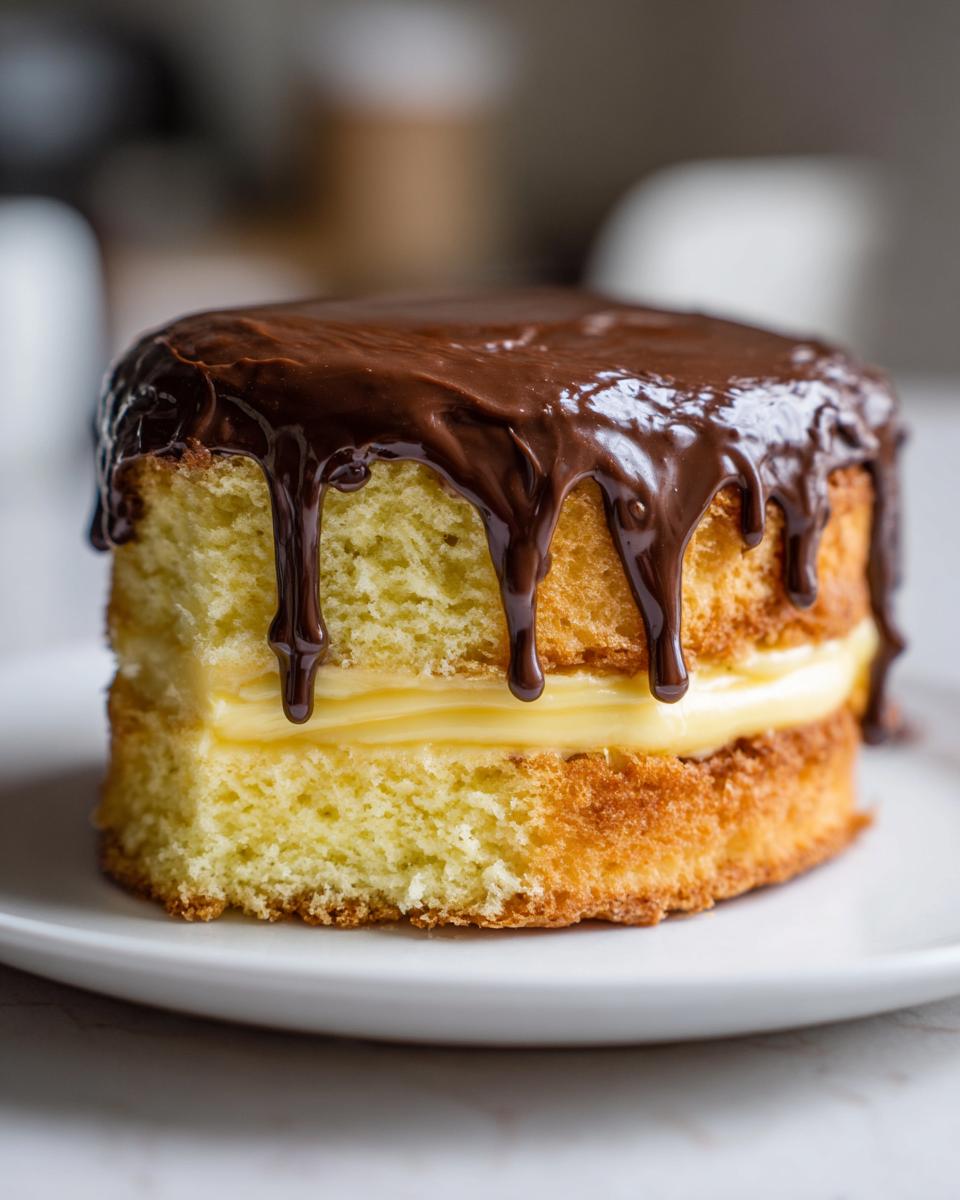
Make the iconic Boston Cream Pie from scratch. This recipe delivers soft vanilla sponge cake layers, rich vanilla pastry cream filling, and a glossy chocolate ganache topping for a bakery-style dessert.
- Prep Time: 45 min
- Cook Time: 30 min
- Total Time: 3 hours 15 min
- Yield: 8 servings 1x
- Category: Dessert
- Method: Baking
- Cuisine: American
- Diet: Vegetarian
Ingredients
- For the Vanilla Sponge Cake:
- 1 3/4 cups all-purpose flour
- 1 1/2 cups granulated sugar
- 1 tablespoon baking powder
- 1/2 teaspoon salt
- 1/2 cup unsalted butter, softened
- 2 large eggs
- 1 teaspoon vanilla extract
- 3/4 cup whole milk
- For the Vanilla Pastry Cream Filling:
- 1/2 cup granulated sugar
- 1/4 cup cornstarch
- 1/4 teaspoon salt
- 2 large egg yolks
- 1 1/2 cups whole milk
- 2 tablespoons unsalted butter
- 1 teaspoon vanilla extract
- For the Chocolate Ganache Topping:
- 4 ounces semi-sweet chocolate, finely chopped
- 1/2 cup heavy cream
- 1 tablespoon light corn syrup (optional, for shine)
Instructions
- Prepare the Cake: Preheat your oven to 350°F (175°C). Grease and flour two 8-inch round cake pans.
- In a large bowl, whisk together the flour, sugar, baking powder, and salt.
- Add the softened butter and mix on low speed until the mixture resembles coarse crumbs.
- In a separate bowl, whisk the eggs, vanilla extract, and milk together. Gradually add the wet ingredients to the dry ingredients, mixing until just combined and smooth. Do not overmix.
- Divide the batter evenly between the prepared pans. Bake for 25 to 30 minutes, or until a toothpick inserted into the center comes out clean.
- Let the cakes cool in the pans for 10 minutes before inverting them onto a wire rack to cool completely.
- Prepare the Vanilla Pastry Cream: In a medium saucepan, whisk together the sugar, cornstarch, and salt.
- Whisk in the egg yolks until smooth. Gradually whisk in the milk until fully incorporated.
- Cook over medium heat, stirring constantly, until the mixture thickens significantly and comes to a boil. Continue boiling and stirring for 1 minute. Remove from heat.
- Stir in the butter and vanilla extract until the butter is melted and the cream is smooth.
- Pour the pastry cream into a shallow bowl. Press plastic wrap directly onto the surface of the cream to prevent a skin from forming. Chill in the refrigerator for at least 2 hours, or until completely cold and firm.
- Assemble the Pie: Once the cakes are cool and the cream is chilled, place one cake layer on your serving plate.
- Spread the chilled pastry cream evenly over the first cake layer.
- Top with the second cake layer.
- Prepare the Chocolate Ganache: Place the chopped chocolate in a heatproof bowl.
- Heat the heavy cream and corn syrup (if using) in a small saucepan until it just begins to simmer around the edges. Do not boil.
- Pour the hot cream mixture over the chocolate. Let it sit undisturbed for 5 minutes.
- Whisk gently until the mixture is smooth and glossy. Let the ganache cool slightly, about 10 minutes, until it thickens enough to coat the back of a spoon but is still pourable.
- Pour the warm ganache over the top center of the assembled cake, allowing it to drip naturally down the sides.
- Chill the finished Boston Cream Pie for at least 1 hour before slicing and serving.
Notes
- For the best texture, ensure your cake layers are completely cool before adding the chilled pastry cream.
- If your pastry cream seems too stiff after chilling, whisk it vigorously for a minute to restore a smooth, velvety texture before spreading.
- If you want a very smooth glaze, strain the ganache before pouring it over the cake.
Nutrition
- Serving Size: 1 slice
- Calories: 450
- Sugar: 45
- Sodium: 250
- Fat: 24
- Saturated Fat: 14
- Unsaturated Fat: 10
- Trans Fat: 0.5
- Carbohydrates: 55
- Fiber: 2
- Protein: 6
- Cholesterol: 110