
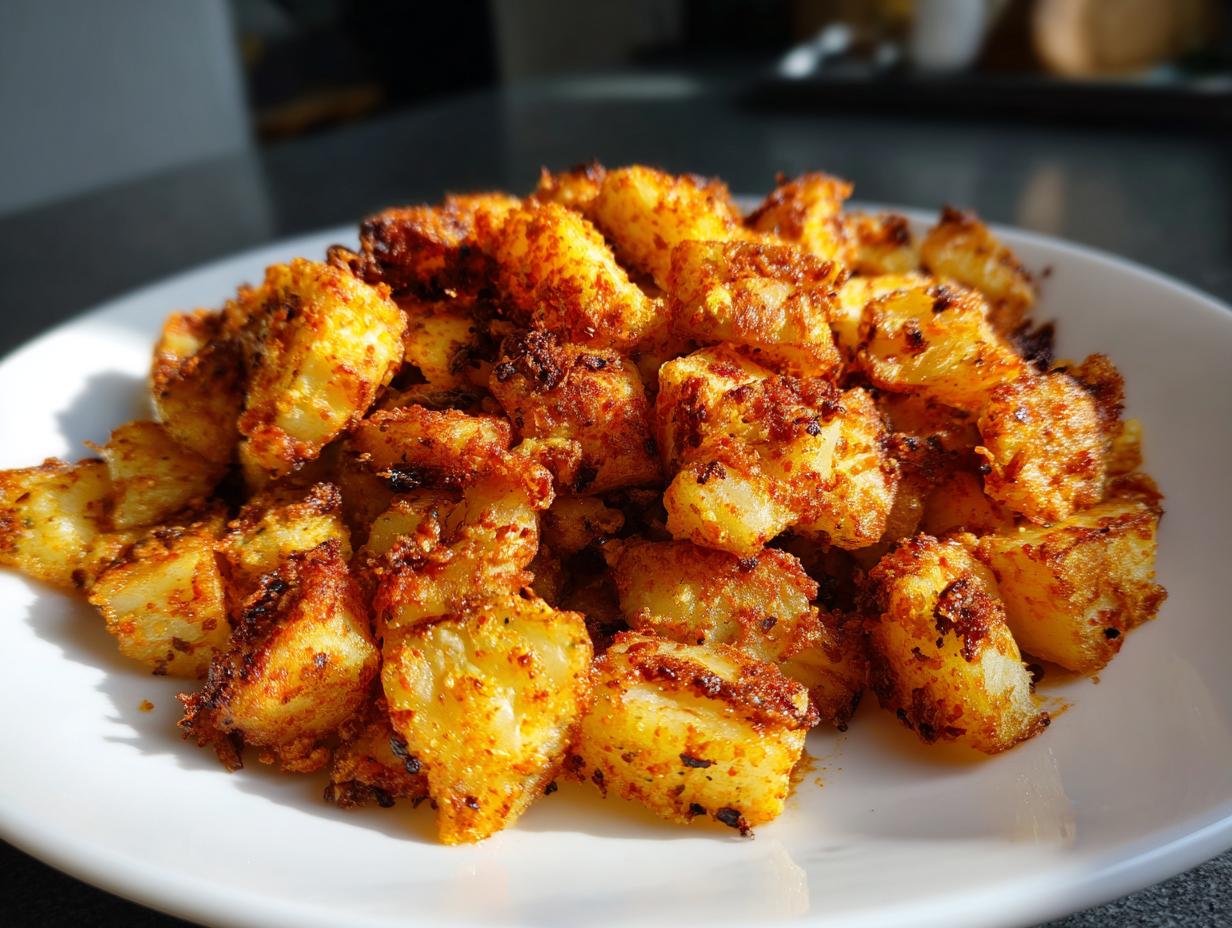
Oh my gosh, have you ever tried to make potatoes for breakfast only to end up with sad, soggy cubes swimming in oil? It’s the worst! I’ve been there a million times, especially when I crave that perfect savory side for a big brunch. That’s why I am so excited to share this guide, because we are cracking the code on getting genuinely **crispy breakfast potatoes**—you know, the crunchy outside, fluffy inside kind we all dream about.
Forget one single method! In my kitchen (which is definitely not professional, just honest and full of love like my grandma taught me), we cover everything. I’m walking you through the trusty **Skillet** method, the hands-off **Oven-Roasted** technique, and my current obsession, the **Air Fryer** method. Trust me when I say these simple seasonings transform humble potatoes into the very best morning side dish.
- Why You Will Make the Best Breakfast Potatoes Every Time
- The Best Potatoes for Breakfast and Essential Ingredients for Flavorful Morning Potatoes
- Mastering the Prep: Steps Before Cooking Your Breakfast Potatoes
- Method 1: The Ultimate Crispy Skillet Breakfast Potatoes
- Method 2: Perfectly Golden Brown Potatoes Morning Side via Oven Roasting
- Method 3: Quick Breakfast Side Dishes Using the Air Fryer Breakfast Potatoes Recipe
- Tips for Success: Achieving Fluffy Inside Crispy Outside Potatoes
- Serving Suggestions and Variations for Your Flavorful Morning Potatoes
- Storage and Reheating Instructions for Make Ahead Breakfast Potatoes
- Frequently Asked Questions About Perfect Breakfast Potatoes
- Sharing Your Ultimate Breakfast Potatoes Creation
Why You Will Make the Best Breakfast Potatoes Every Time
I promise these aren’t just *another* potato recipe. When you follow the simple prep, you’re guaranteed success, whether it’s your first time cooking or you’re a total pro. Here’s why this guide is different:
- You nail that crucial crispy-on-the-outside texture we all crave.
- Total versatility! You choose the method that fits your morning—skillet, oven, or air fryer.
- The seasoning blend is simple, reliable, and packed with flavor every single time.
The Best Potatoes for Breakfast and Essential Ingredients for Flavorful Morning Potatoes
Okay, let’s get real about potatoes. If you want those seriously **Crispy Breakfast Potatoes**, you absolutely have to start with the right spud. I’ve messed around with Yukon Golds and even reds, but nothing beats the starchy goodness of a classic Russet potato. These are truly the **Best Potatoes for Breakfast** because that high starch count is what creates that gorgeous, fluffy interior when it cooks down.
For this recipe, we are keeping the classic flavors front and center. You’ll need about 3 pounds of those beautiful Russets, diced up nice and neat into half-inch cubes. We mix that with 3 tablespoons of good olive oil—or avocado oil if you prefer something with a higher smoke point. Then comes the magic seasoning blend: salt, pepper, garlic powder, paprika for that warm color, and onion powder. If you want a little extra flair, a tiny bit of dried oregano never hurt anyone!
Ingredient Notes and Substitutions for Your Breakfast Potatoes
Listen, I’m all about flexibility, but let’s talk technique versus substitution. First rule: Do not peel them! The skin has texture, and that texture helps them crisp up nicely. We want every single cube coated, but here’s the real secret for guaranteed crunch: you must dry those potatoes completely after rinsing. They basically act like little sponges for oil, and water is the enemy of crispiness!
If you’re out of olive oil, use avocado oil—it handles the heat well for roasting or skillet work. And don’t stress too much if you skip the optional diced onion or bell pepper; they add great flavor for a brunch dish, but the base potato magic happens with the spices. Remember to always season generously; these potatoes need that pop of flavor to become truly **Flavorful Morning Potatoes**.
We want to make sure you have success, so check out this guide for even more inspiration on how to get those perfect golden edges: making perfect crispy breakfast potatoes is always worth the effort!
Mastering the Prep: Steps Before Cooking Your Breakfast Potatoes
Okay, listen up because this might be the most important part of the whole process, even more important than the actual cooking! We need to treat these potatoes right before they even see the pan or the oven. First, after you dice them up into those even half-inch pieces, you’ve got to give them a good rinse under cold water.
Why rinse? Simple: we need to wash off that sneaky excess starch. If you skip this, your potatoes steam instead of sizzle, and nobody wants that! Once they look clean, you absolutely, positively have to dry them. I mean *bone dry* using a clean kitchen towel. If they are still damp, you won’t get those glorious **Crispy Breakfast Potatoes** we planned on. Trust me on this drying step; it’s the difference between golden perfection and sad, limp sides. After that critical drying session, we toss them with the oil and spices, and then we’re ready to cook. You can even prep them up to a day ahead—just keep those seasoned cuties in the fridge! If you need some more great ideas for the morning, check out my easy breakfast inspiration.
Method 1: The Ultimate Crispy Skillet Breakfast Potatoes
If you want to truly earn the title of ‘King or Queen of the Morning,’ you have to try the skillet method. This is where the magic happens on the stovetop, but you need the right setup! Grab your heaviest pan—I’m talking solid cast iron if you have it. That heavy bottom holds heat beautifully, which is the secret to getting that deep sear we are aiming for.
First things first: don’t overcrowd the pan! This is the number one mistake people make with **Easy Skillet Breakfast Potatoes**. You need space between those cubes so the moisture can escape and they can actually brown. Heat your pan over medium-high heat *before* you add the oil, then add your seasoned potatoes in a single layer. Seriously, leave them alone for about 8 to 10 minutes. Resist the urge to poke! You are creating that beautiful golden crust right now.
Once that bottom layer is perfectly brown, give them a gentle toss. Reduce the heat slightly to medium, put a lid on them, and let them cook through for another 10 minutes. This steams the inside just enough to get them fluffy. Then, uncover them and cook, stirring occasionally, until all sides are perfectly brown. It takes a bit longer than the oven, maybe 20 minutes total cooking time, but that crust? Absolutely worth it. If you love one-pan meals like this, you must see my steak bites and potatoes recipe!
This classic method always delivers, but if you want to check out another genius taking on skillet potatoes, this recipe is great: skillet breakfast potatoes.
Method 2: Perfectly Golden Brown Potatoes Morning Side via Oven Roasting
Now, if you’re making breakfast for a whole crowd—maybe it’s a big weekend brunch, or you are meal prepping so you don’t have to cook all week—the oven is your very best friend. This is where we whip up the best **Oven Roasted Potatoes Breakfast** style, hands-off and totally reliable.
First, crank that oven way up! We are going for 425°F (220°C). High heat is crucial for moisture evaporation, which means crispiness, my friends. Spread those seasoned potatoes out onto a baking sheet—and I mean a single layer! If they are piled up, they steam, and we already talked about how much we hate soggy potatoes! Toss them with your oil and spices, and slide them in.
You’ll roast them for about 20 minutes, and then comes the magic move: you have to take them out and flip them. Just use a spatula and give every single cube a turn to make sure all sides get that beautiful exposure to the heat. Pop them back in for another 15 to 20 minutes. When they come out, they are perfectly **Golden Brown Potatoes Morning Side** material. This method lets you handle everything else on your breakfast plate while the oven does the heavy lifting for our batch of **breakfast potatoes**.
For a foolproof roasting guide that nails the timing, this recipe is fantastic: crispy breakfast potatoes recipe using the oven.
Method 3: Quick Breakfast Side Dishes Using the Air Fryer Breakfast Potatoes Recipe
If you need something lightning fast or you’re just making breakfast for two, the air fryer is our new best friend for amazing **Air Fryer Breakfast Potatoes Recipe** results. This is definitely the quickest way to get those incredibly **Simple Seasoned Potatoes** on the table, often finishing faster than even the skillet method if you stick to smaller batches!
Just like with the oven, preheating is essential here. Set your air fryer to 400°F (200°C). Remember that little room in the basket is what makes the difference between crispy and steamed. You absolutely must cook these in a single layer or in small batches. If you pile them high, the air can’t circulate, and you lose the crunch factor we worked so hard to achieve during prep!
Toss those seasoned cubes with oil, load ’em up gently, and let it run. The cooking time is usually around 15 to 20 minutes. The critical part? Shake that basket every five minutes. Seriously, set a timer if you have to! Shaking ensures every side gets direct contact with that hot air, giving you those glorious golden edges we look for. It’s such a reliable way to produce **Quick Breakfast Side Dishes**!
To see another take on getting perfect texture using this appliance, take a peek at this guide on crispy air fryer breakfast potatoes.
Tips for Success: Achieving Fluffy Inside Crispy Outside Potatoes
We’ve talked methods, but now let’s focus purely on the texture goal: those beautiful **Fluffy Inside Crispy Outside Potatoes**. Achieving this balance is less about magic and more about knowing a few crucial science-y tricks, which my family has passed down for years.
If you are the kind of person who likes to plan ahead—and honestly, who doesn’t love a solid make-ahead breakfast potatoes option?—try par-boiling. Dice your potatoes, boil them gently for about five minutes until they just start to get tender, then drain them super well and let them dry completely. That initial boiling softens the inside starch, guaranteeing fluffiness while the outside gets extra rough, which helps it crisp up beautifully later!
Also, think about finishing touches. If you are using fresh herbs, like rosemary or thyme, don’t toss them in at the very beginning, especially in the skillet or oven. They’ll just burn up before the potato is done. Wait until the last five minutes of cooking—that’s when you add them so their fragrance really blooms and you get that fresh, vibrant flavor coating your **Simple Seasoned Potatoes**.
Serving Suggestions and Variations for Your Flavorful Morning Potatoes
We’ve made these glorious **breakfast potatoes**; now, how do we serve them? They are the absolute foundation for any amazing morning meal. Obviously, you can’t go wrong pairing them with crispy bacon and perfectly runny eggs. They make such a fantastic base for any **Brunch Potato Recipes**!
But don’t stop there! If you want to kick the flavor up a notch, try switching out the paprika for smoked paprika—it gives them this deep, almost BBQ-like flavor that is so unexpected. Or, for a heartier plate, toss in some mushrooms or even chopped bell peppers right alongside the potatoes when roasting. If you want a fully loaded breakfast experience, these potatoes would be amazing under my chicken broccoli casserole. Seriously amazing!
Storage and Reheating Instructions for Make Ahead Breakfast Potatoes
So, you made a huge batch of **breakfast potatoes** because, frankly, who can stop at one serving? Smart move! If you are planning on having **Make Ahead Breakfast Potatoes**, this is how you keep them good until tomorrow. Once they are completely cooled down, you just store them in an airtight container in the fridge. They’ll be good for about three to four days.
The reheating trick is crucial if you want that crunch back. Please, please do not microwave them! That just brings back the steam and makes them soft again. The best way to revive the crispness is to pop them back into a 400°F oven or, even better, throw them into the air fryer for about 5 to 7 minutes. They’ll come out golden and perfect again!
Frequently Asked Questions About Perfect Breakfast Potatoes
I know you might still have a few burning questions once you look at all those methods! Don’t worry, I totally get it. It took me weeks of testing to stop getting those sad, mushy sides. Here are the answers to the things I always get asked about making the best breakfast potatoes.
Can I use sweet potatoes instead of Russets?
You absolutely can, but be warned that the texture will change completely! Russets are high in starch, which gives us that wonderfully dry, crispy crust and fluffy center. Sweet potatoes have more sugar and less starch, so they tend to caramelize faster and stay softer. If you use them, reduce the cooking time in the oven or skillet slightly, and they will be a delicious, sweeter alternative to our classic **Simple Seasoned Potatoes**.
Why do my potatoes always end up soggy and wet?
Nine times out of ten, sogginess comes down to two things: not enough starch removal, or not drying them thoroughly after rinsing. That water turns to steam in the pan, and steam prevents browning. Make sure you rinse until the water is clear, and then dry them aggressively with a clean towel. Also, never overcrowd the pan—if the potatoes are touching too much, they steam each other instead of crisping!
Can I prep these the night before? I hate morning chaos!
I totally support making life easier, especially on weekends! Yes, you can definitely prep ahead. The best way for **Make Ahead Breakfast Potatoes** is to dice them, rinse them, dry them, and then toss them with the oil and seasonings. Store them tightly covered in the fridge. The next morning, just let them sit on the counter for about 20 minutes to warm up slightly before putting them into the air fryer or oven. They cook up beautifully!
How do I get them extra golden and flavorful without adding more fat?
The color comes from the spices, especially the paprika, so don’t skimp there! The best way to enhance the flavor without just adding more oil is to finish them with fresh ingredients right at the end. Toss in some fresh garlic right near the very end of cooking, or sprinkle with fresh herbs like chives or parsley once they hit the plate. That bright finish really makes those **Flavorful Morning Potatoes** pop!
Sharing Your Ultimate Breakfast Potatoes Creation
Well, that’s it! We have covered the skillet, the oven, and the air fryer—three ways to guarantee you master those perfectly crisp beauties. Now that you’ve made your batch of incredible **breakfast potatoes**, I really want to hear about it!
Was the cast iron skillet the winner for you, or did you find the oven method was best for feeding a crowd? Let me know down in the comments below which cooking style you preferred and how they turned out. I read every single comment!
If you’re proud of how golden and fluffy they became, please snap a picture! Tag me on social media so I can see your success. It genuinely makes my day to see you bringing these comforting, honest meals to your own table. If you have any lingering questions even after all that troubleshooting, you can always reach out directly via my contact page. Happy cooking, and I hope you have the best breakfast ever!
PrintThe Ultimate Guide to Ultra-Crispy Breakfast Potatoes (Skillet, Oven, and Air Fryer)

Make perfectly crispy breakfast potatoes every time. This guide shows you simple methods—skillet, oven-roasted, or air fryer—to achieve golden-brown potatoes that are fluffy inside and crunchy outside, the perfect side for any morning meal.
- Prep Time: 15 min
- Cook Time: 25 min
- Total Time: 40 min
- Yield: 6 servings 1x
- Category: Breakfast Side
- Method: Multiple (Skillet, Oven, Air Fryer)
- Cuisine: American
- Diet: Vegetarian
Ingredients
- 3 lbs Russet potatoes, diced into 1/2 inch cubes
- 3 Tbsp olive oil or avocado oil
- 1 tsp salt
- 1/2 tsp black pepper
- 1 tsp garlic powder
- 1 tsp paprika
- 1/2 tsp onion powder
- 1/4 tsp dried oregano (optional)
- 1/4 cup diced onion (optional)
- 1/4 cup diced bell pepper (optional)
Instructions
- Prepare the potatoes: Wash and dice the potatoes into uniform 1/2 inch cubes. Do not peel them for maximum crispiness.
- Rinse the diced potatoes under cold water until the water runs clear. This removes excess starch. Dry them thoroughly using a clean kitchen towel or paper towels. Complete drying is key for crispiness.
- Season the potatoes: In a large bowl, toss the dried potatoes with the olive oil, salt, pepper, garlic powder, paprika, and onion powder. If using, add the diced onion and bell pepper now.
- Choose your method:
- Skillet Method: Heat a large, heavy-bottomed skillet (cast iron works best) over medium-high heat. Add the potatoes in a single layer, avoiding overcrowding. Cook for 8-10 minutes without stirring until the bottom is golden brown. Stir gently, reduce heat to medium, cover, and cook for another 10 minutes. Uncover and cook, stirring occasionally, until all sides are golden and crispy, about 15-20 minutes total cook time.
- Oven-Roasted Method: Preheat your oven to 425°F (220°C). Spread the seasoned potatoes in a single layer on a large baking sheet. Roast for 20 minutes, flip the potatoes, and roast for another 15-20 minutes until golden brown and crisp.
- Air Fryer Method: Preheat the air fryer to 400°F (200°C). Place the seasoned potatoes in the air fryer basket in a single layer or small batches. Cook for 15-20 minutes, shaking the basket every 5 minutes, until they reach your desired level of crispiness.
- Serve immediately as a flavorful morning side dish with eggs or bacon.
Notes
- For make ahead breakfast potatoes, you can par-boil the diced potatoes for 5 minutes, drain, and dry them completely before seasoning and cooking using your preferred method. Store raw, seasoned potatoes in the refrigerator for up to 24 hours.
- Russet potatoes yield the best fluffy inside/crispy outside texture due to their high starch content.
- For extra flavor, add fresh rosemary or thyme during the last 5 minutes of cooking.
Nutrition
- Serving Size: 1 cup
- Calories: 220
- Sugar: 1
- Sodium: 350
- Fat: 10
- Saturated Fat: 1.5
- Unsaturated Fat: 8.5
- Trans Fat: 0
- Carbohydrates: 32
- Fiber: 3
- Protein: 4
- Cholesterol: 0