
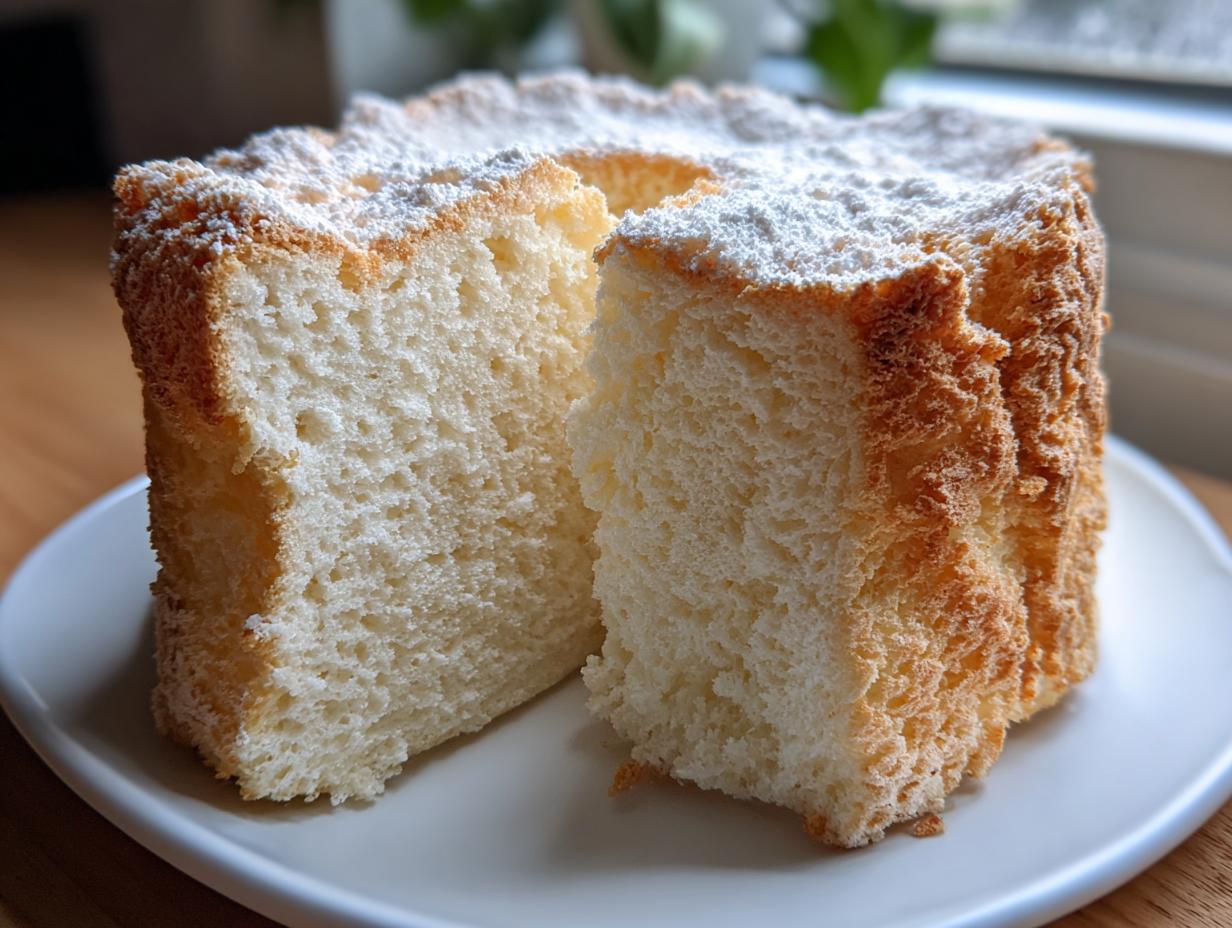
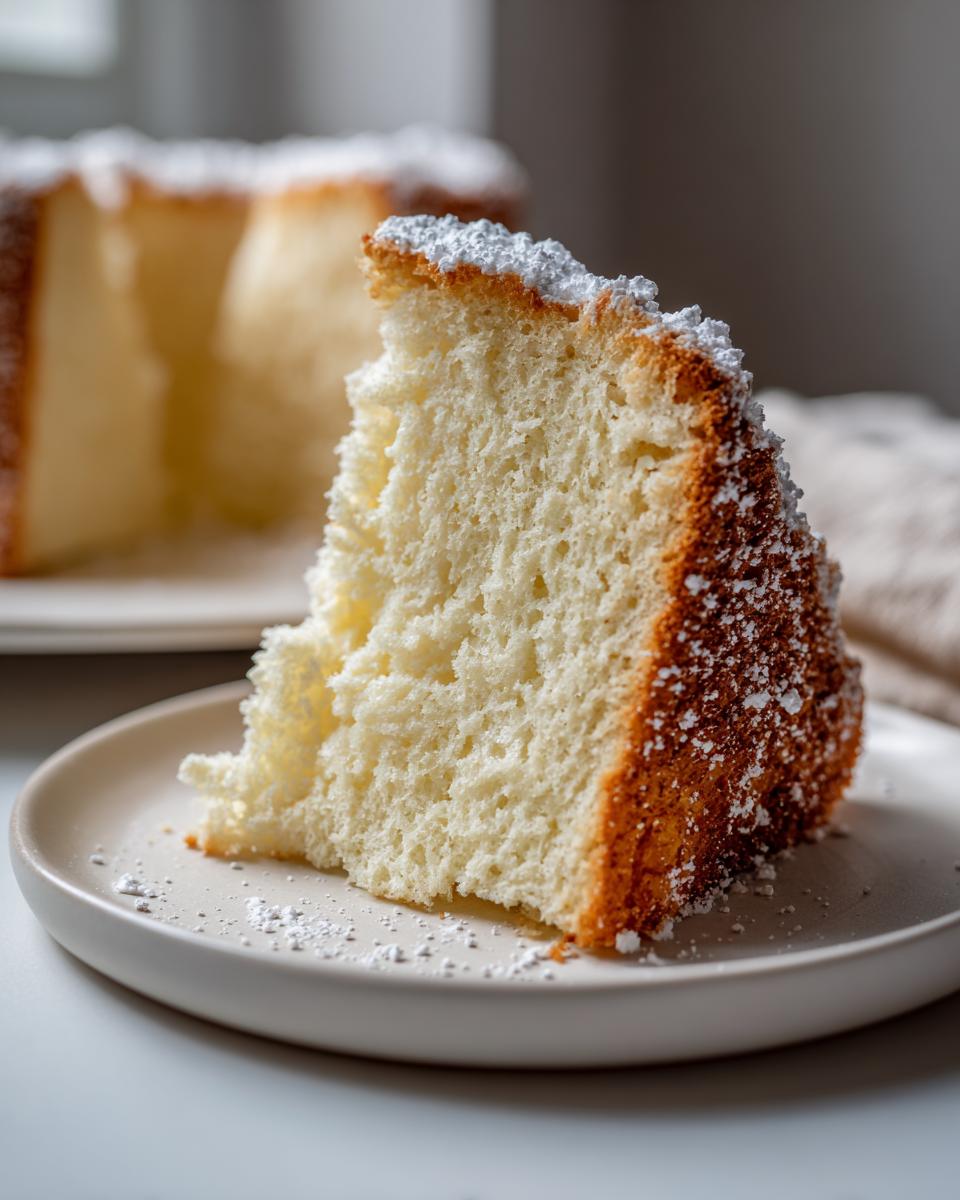
Oh, don’t you just crave something light sometimes? When the weather gets warm or you need a truly elegant finish for a dinner party, heavy cakes just don’t cut it. That’s why I absolutely adore this angel food cake recipe. It’s pure nostalgia for me; recreating this classic white cake brought me right back to my grandmother’s quiet, comforting kitchen when I felt most burnt out in the city. Forget heavy butter and oil—this cake is a miracle made entirely of air and sugar! Trust me, when you get the egg whites just right, you’ll achieve that signature, perfectly light and airy texture that you just can’t beat in a homemade cake from scratch.
- Why This Homemade Angel Food Cake Recipe is a Keeper
- Ingredients Needed for the Best Angel Food Cake
- Step-by-Step Instructions: How to Bake Angel Food Cake Perfectly
- Tips for Success When Making a Classic White Cake
- Variations on the Traditional Angel Food Cake
- Angel Food Cake Pairing Ideas for Serving
- Storage and Reheating Instructions for Angel Food Cake
- Frequently Asked Questions About Baking Angel Food Cake
- Sharing Your Homemade Cake From Scratch Experience
Why This Homemade Angel Food Cake Recipe is a Keeper
I’ve tried dozens of light desserts over the years, but nothing beats this classic. This homemade angel food cake stands apart because it focuses entirely on technique, which is how we ensure that beautiful, cloud-like result. It’s the perfect fat free dessert, relying on those perfectly beaten egg whites instead of any heavy ingredients.
- It’s naturally fat-free, which is amazing for a celebratory treat.
- The texture is so incomparably light and airy cake recipe perfect.
- It uses just a handful of simple, pantry-friendly ingredients.
We rely on precision here, not additions, to create that stunning height. You can see how gorgeous the professional version looks when you check out these light and fluffy recipe ideas.
The Secret to a Fluffy Egg White Cake Texture
The absolute biggest secret for any successful fluffy egg white cake is preparation. You cannot rush the egg whites, and you cannot introduce any sneaky grease! Your bowl and your whisk attachments must be sparkling clean—I mean, absolutely pristine. Any hint of fat or yolk will keep your whites from achieving that necessary volume.
Also, make sure those egg whites are at room temperature before you even start! They whip up so much higher and faster when they aren’t straight out of the fridge. That’s where the lightness comes from, folks!
Ingredients Needed for the Best Angel Food Cake
Gathering your ingredients for this angel food cake is almost as easy as making it! We are dealing with a very short list here, which I love because it keeps things focused. Remember that because this is a no butter cake recipe, you need to pay close attention to what you *do* have. Before you beat anything, make sure your egg whites are ready to go. You can find some great checklists like the one over at the bakery-style version.
Here’s what you’ll need—and yes, everything must be measured exactly right for this delicate structure to hold up!
1 ½ cups egg whites (from about 12 large eggs), room temperature
1 ½ teaspoons cream of tartar
1 teaspoon vanilla extract
½ teaspoon almond extract
1 cup granulated sugar, divided
¾ cup cake flour, sifted
¼ cup confectioners’ sugar (for dusting)
Ingredient Notes and Substitutions for Your Angel Food Cake
Let’s talk about those egg whites for a moment. For the absolute best volume in this whipped egg white cake, use eggs that are maybe a few days old rather than super fresh ones. Older eggs break down better when whipped! And please, do not swap the cake flour for all-purpose flour unless you absolutely must, because cake flour is finely milled and handles those delicate whipped whites much better.
Since this cake is naturally fat-free, you can’t sneak in any butter or oil for moisture; the structure depends on pure meringue. If you want a little extra something, folding in well-drained crushed pineapple is a great trick for a subtle flavor boost without messing up the ‘no fat’ status.
Step-by-Step Instructions: How to Bake Angel Food Cake Perfectly
Okay, here’s where the magic happens! Baking a truly light and airy cake recipe like this angel food cake demands a little focus, but honestly, I consider the mixing part the most therapeutic part of my week. Preheat your oven right away to 350°F (175°C), and remember the golden rule: do not grease that 10-inch tube pan, ever! I know it feels wrong, but the batter needs that dry surface to climb up the sides as it bakes.
We move through this process methodically. When it comes time to add the specialized flour and sugar mix, you must be incredibly gentle. We’re talking slow, deliberate folding motions. If you mix it too fast or hard, you deflate all that beautiful air we worked so hard to build up in the meringue. Once it’s in the oven (35 to 40 minutes), we move immediately to cooling, which is just as important as mixing! If you want to see a gorgeous example, check out this other classic angel food cake.
If you’re looking for more inspiration on quick baking methods, sometimes I turn to recipes like this cream cheese wonder, but for this classic, we stick to tradition.
Mastering the Whip: Achieving Stiff Peaks for Your Angel Food Cake
This is the foundation, friends! Get your room-temperature egg whites and cream of tartar into that super clean bowl. Start slow until you see soft peaks, like puffy clouds gathering. Then, you slowly stream in that first measure of granulated sugar while you crank the mixer up high! We need stiff, glossy peaks—meaning when you lift the whisk, the peak should stand straight up without flopping over, and the meringue should look shiny, not dull. If it looks sloppy, your cake won’t have the strength to support itself later. Seriously, whip those whites until you feel confident!
Crucial Cooling Technique for Your Angel Food Cake Pan Secrets
Listen closely: As soon as that cake is done and passes the spring-back test, you flip that pan upside down! This is essential for achieving those angel food cake pan secrets that keep it from shrinking into a rubbery hockey puck. Invert the pan immediately onto its little cooling feet, or balance the central tube safely over the neck of a sturdy bottle. It needs to hang there, gravity pulling it down slightly, for at least an hour and a half—or until it’s totally cool to the touch. If you try to take it out early, all that beautiful structure collapses under its own weight. I promise, waiting is the hardest part, but it protects your fluffy dream!
Tips for Success When Making a Classic White Cake
Even though this is a classic white cake relying on egg whites, a couple of little habits I picked up will save you heartbreak. The first tip cycles back to cleanliness, but it’s worth repeating: check your bowl one more time before adding the whites. If you used a sponge to wash it, wipe it down with a little vinegar or lemon juice just to be sure no soap residue is lurking. That residue absolutely kills the foam!
Secondly, once the flour mixture is ready, you have to resist the urge to stir vigorously. That folding needs to be patient and deliberate. We’re trying to gently incorporate the dry matter without knocking the air out. Think light, sweeping motions. You want to see streaks of flour disappear slowly, not instantly. For a fantastic visual guide on getting that perfect texture, you should definitely check out this article on achieving heavenly results.
Finally, once it’s out of the oven, go straight to the cooling rack—upside down! Don’t wait even a minute. That quick inversion is the ultimate pro move for this recipe.
Variations on the Traditional Angel Food Cake
Now, while I absolutely adore this pure, classic white cake version of the angel food cake just the way the recipe is written—it’s so wonderfully light and pure—I know sometimes you want to shake things up a bit! The great news is that this base is a canvas waiting for your creativity. If you want to dip into those fun, colorful trends floating around, like making a soft pink version for a baby shower, you can easily add a few drops of food coloring right when you add the vanilla and almond extracts.
You can also incorporate other flavors if you drain them unbelievably well. Remember that crushed pineapple addition I mentioned in the notes? It works beautifully, adding a little tropical moisture. Or maybe you want to skip the traditional round tube pan? You certainly can bake this in a loaf pan for a different presentation:
For loaf pan baking, check out the great guide on creating an angel food cake loaf. Just remember that since loaf pans are deeper, you might need to check the cake a few minutes early to make sure it doesn’t brown too much on top before the center is done!
Creating a Simple Holiday Dessert or Summer Fruit Desserts Base
This impossibly light texture makes it the MVP of any gathering, especially when you pair it with seasonal flavors. Forget fussy ice cream cakes; this is the perfect easy base for your summer fruit desserts. We love slicing this cake thick and layering it with mounds of fresh, macerated strawberries and lightly sweetened whipped cream. It feels like eating a cloud!
And if you’re looking to make a showstopper that looks incredibly complex but is actually super easy, this cake is perfect for building layered dessert situations. Think about thinly slicing the cake and layering it elegantly in a large glass bowl with pudding, fresh berries, and whipped topping. It creates that beautiful, distinct presentation, and because the cake is so sturdy when cooled properly, it holds those layers up without turning soggy immediately. It turns into such a fantastic, built-up dessert!
Angel Food Cake Pairing Ideas for Serving
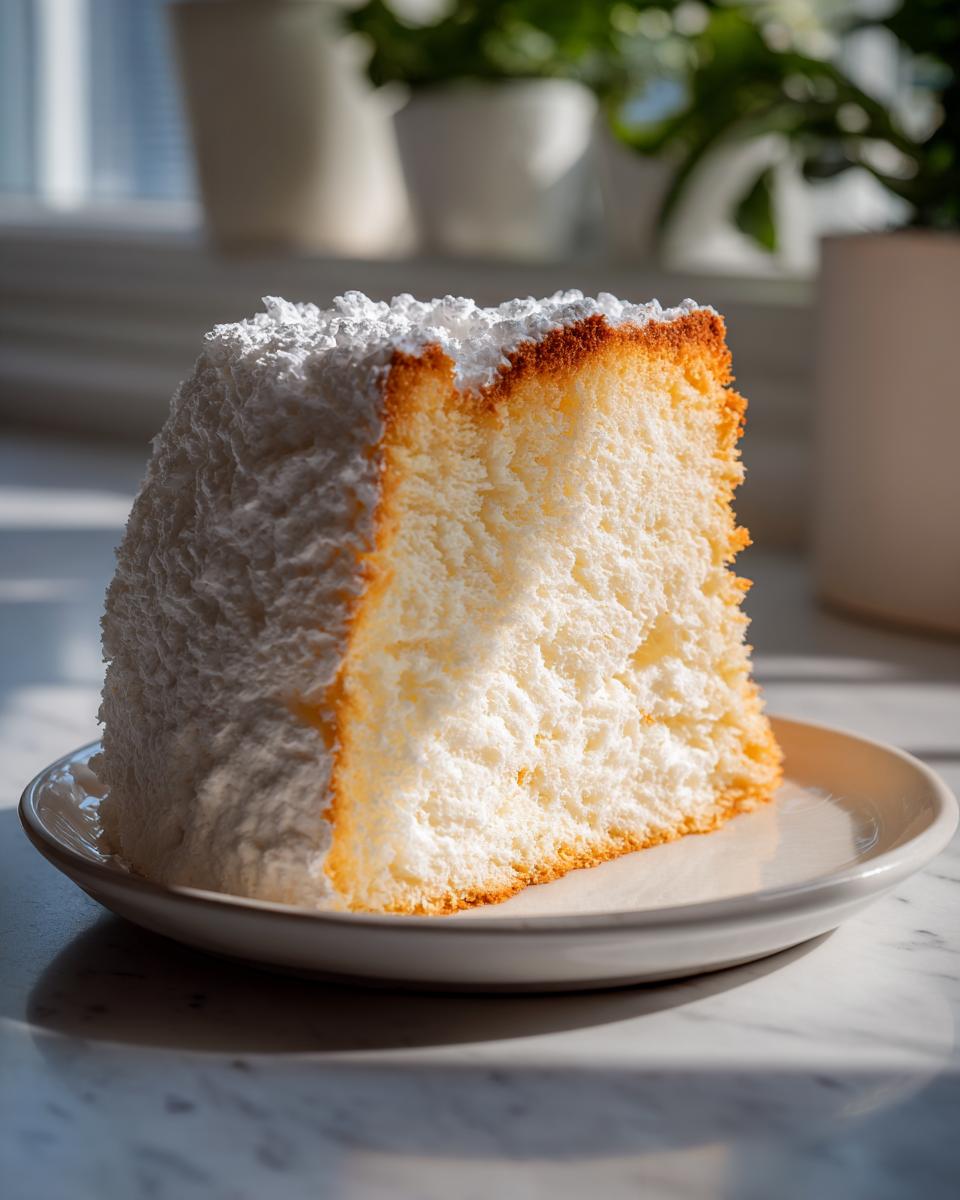
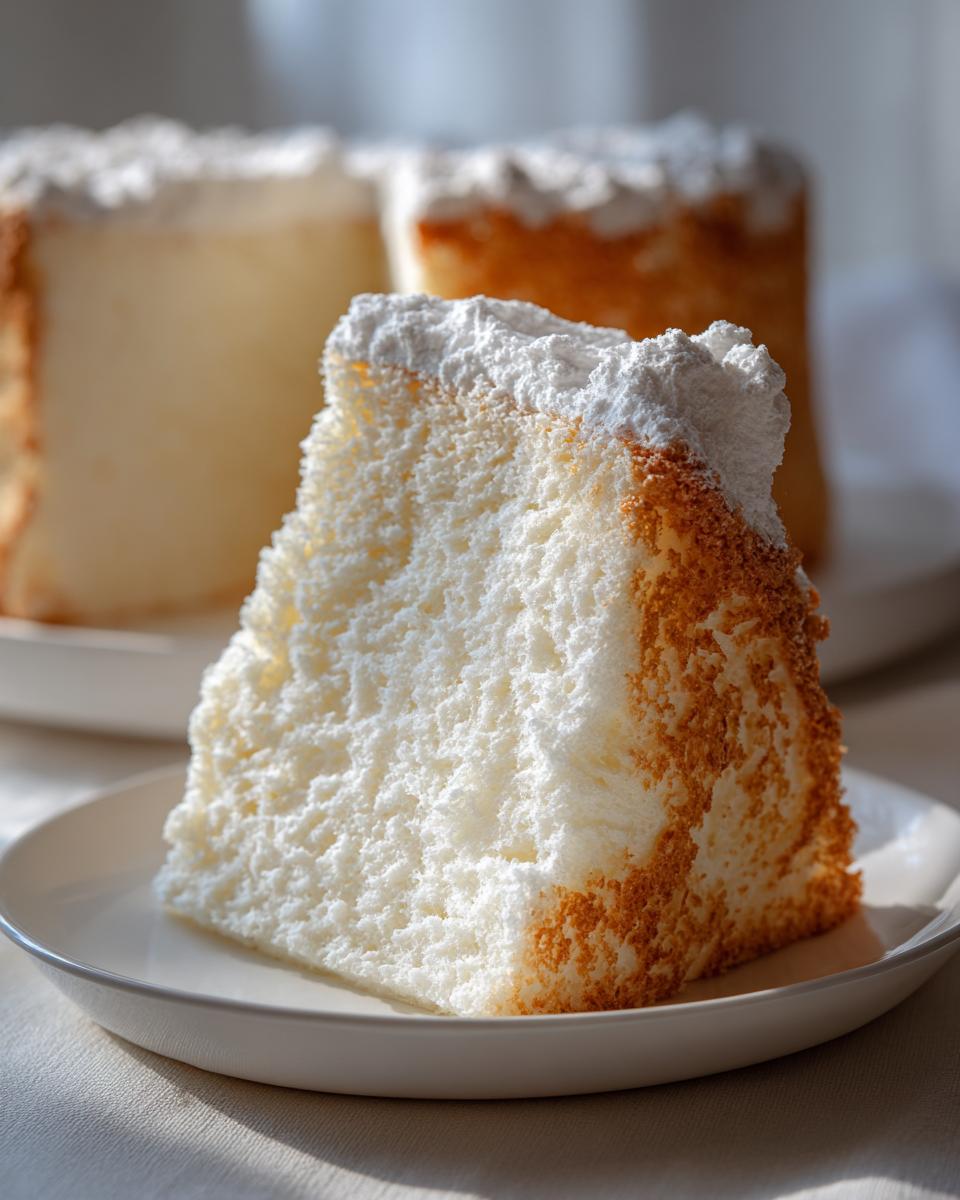
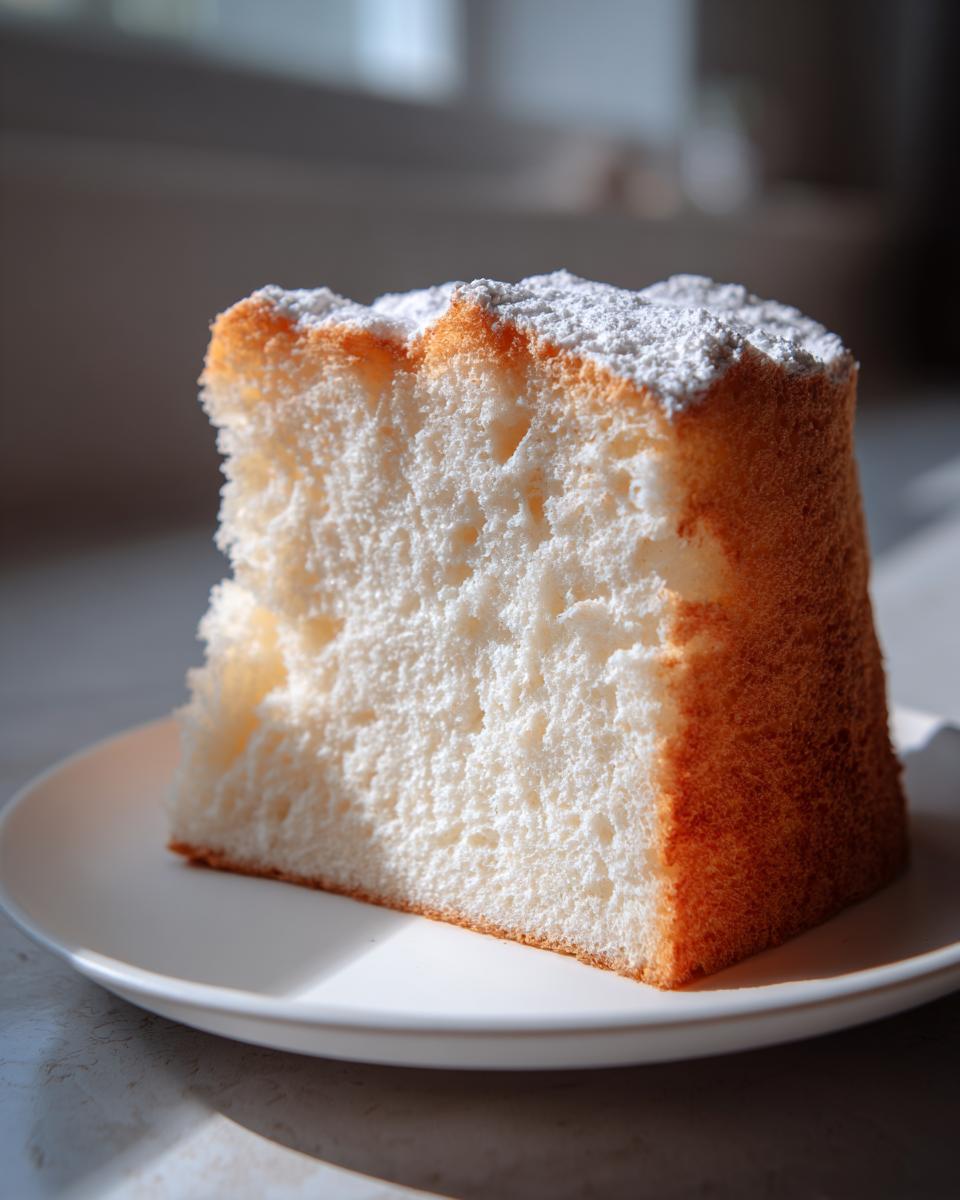
Since this cake is so wonderfully light and airy—truly the definition of a light celebratory cake—you don’t want heavy toppings weighing it down. The best thing you can do is let the cake shine! My absolute favorite way to serve this is by slicing it thick and serving it with tons of fresh fruit. We’re talking heaps of sliced strawberries or raspberries over the top.
Seriously, nothing beats angel food cake with fresh berries and just a slight drizzle of softly sweetened whipped cream. It keeps the whole experience feeling fresh and clean on your palate. If you’re looking for other fruit ideas that pair nicely with that vanilla almond flavor, I sometimes play around with warm cherry sauce, similar to what I use on my cranberry cobbler, but served chilled over the slices! It’s delightful.
Storage and Reheating Instructions for Angel Food Cake
Because this gorgeous angel food cake is naturally fat-free, it acts differently than your standard butter cake when it comes to storage, which is good news! You definitely want to avoid putting it in the fridge if you can help it. Why? Cold temperatures tend to dry out meringue-based cakes really fast, making them chewy.
The best way to keep it fresh for a couple of days is to leave it completely intact (still on its stand, upside down if you can manage it, or just sitting normally on a plate) and tent it loosely with plastic wrap or place it under a large cake dome. Keep it in a cool, dry spot at room temperature. It really should last beautifully for three days just like that!
Frequently Asked Questions About Baking Angel Food Cake
I know sometimes the technical side of baking this whipped egg white cake can feel like walking a tightrope. So let me clear up a few things I hear all the time about making this recipe the easiest easy angel food cake tutorial ever! It’s all about avoiding those little pitfalls that can deflate the final product.
Can I use a regular round cake pan for this angel food cake recipe?
Oh, please don’t try it! The short answer is no, you really can’t. The beauty of this cake—the reason it climbs so high and stays light and airy—is the ungreased, specialized angel food cake pan, or tube pan. It has those little feet that let you invert it for cooling, which is crucial. A standard greased pan won’t give the batter those dry surfaces it needs to cling to as it bakes, and without that grip, the whole thing will just collapse in the middle while it cools. It needs that structure!
Why is my whipped egg white cake dense instead of fluffy?
Two major suspects usually cause a dense whipped egg white cake. First, you didn’t whip your egg whites long enough initially, so they didn’t reach those stiff, glossy peaks we talked about. If the peaks are soft, the cake won’t hold its impressive structure. The second reason is over-folding! When you introduce the flour and sugar mix, you have to be so gentle. If you stir or mix too vigorously, you are essentially popping all those lovely air bubbles you spent 10 minutes creating. Go slow and fold it until *just* combined, even if you spy one tiny streak of flour!
If you want to learn more about the philosophy behind why these delicate techniques matter so much in my kitchen, head over to my About Page. I explain why precision matters in heritage recipes!
Sharing Your Homemade Cake From Scratch Experience
Now that you’ve made this gorgeous cake from scratch, I desperately want to hear about it! Did you achieve that perfect airy texture? Please leave me a comment or a star rating below telling me how your angel food cake turned out—especially if you tested out a fun variation!
If you snapped a photo of your beautiful slices paired with berries, tag me! I love seeing these simple, comforting recipes find a new home on your countertop. For general kitchen questions, feel free to reach out via my contact page. Happy baking!
PrintThe Best Homemade Classic Angel Food Cake Recipe

Make a light, airy, and fluffy Angel Food Cake from scratch. This fat-free dessert relies on perfectly whipped egg whites for a classic, tender texture perfect for pairing with fresh berries.
- Prep Time: 20 min
- Cook Time: 40 min
- Total Time: 180 min
- Yield: 10 servings 1x
- Category: Dessert
- Method: Baking
- Cuisine: American
- Diet: Low Fat
Ingredients
- 1 ½ cups egg whites (from about 12 large eggs), room temperature
- 1 ½ teaspoons cream of tartar
- 1 teaspoon vanilla extract
- ½ teaspoon almond extract
- 1 cup granulated sugar, divided
- ¾ cup cake flour, sifted
- ¼ cup confectioners’ sugar (for dusting)
Instructions
- Preheat your oven to 350°F (175°C). Do not grease your 10-inch tube pan (angel food cake pan).
- In a large, clean, grease-free bowl, combine the egg whites and cream of tartar. Beat with an electric mixer on medium speed until soft peaks form.
- Gradually add ½ cup of the granulated sugar, one tablespoon at a time, while continuing to beat on high speed until stiff, glossy peaks form. This step is key for a light and airy cake.
- Gently beat in the vanilla extract and almond extract.
- In a separate small bowl, combine the remaining ½ cup of granulated sugar with the sifted cake flour. Mix this dry mixture gently with a whisk to ensure no lumps remain.
- Sift about one-quarter of the flour-sugar mixture over the meringue. Gently fold it in using a large spatula, cutting down the middle and sweeping up the side of the bowl. Repeat this process with the remaining flour-sugar mixture in three more additions, folding carefully to keep the air in the meringue.
- Gently spoon the batter into the ungreased tube pan. Run a knife through the batter to break up any large air pockets.
- Bake for 35 to 40 minutes, or until the top springs back lightly when touched.
- Immediately invert the pan onto its cooling feet or over the neck of a bottle. You must cool the cake completely upside down to prevent collapse. This takes about 1.5 to 2 hours.
- Once completely cool, run a thin knife around the edges of the pan to release the cake. Dust the top lightly with confectioners’ sugar before serving.
Notes
- Use only fresh, room-temperature egg whites for the best volume when whipping.
- Ensure your mixing bowl and whisk attachments are completely free of any grease or egg yolk residue.
- For a variation, you can fold in ½ cup of crushed pineapple (well drained) or a few drops of pink food coloring with the extracts.
- This cake pairs wonderfully with fresh berries and lightly sweetened whipped cream for a simple holiday dessert.
Nutrition
- Serving Size: 1 slice
- Calories: 150
- Sugar: 28
- Sodium: 50
- Fat: 0
- Saturated Fat: 0
- Unsaturated Fat: 0
- Trans Fat: 0
- Carbohydrates: 35
- Fiber: 0
- Protein: 4
- Cholesterol: 0