
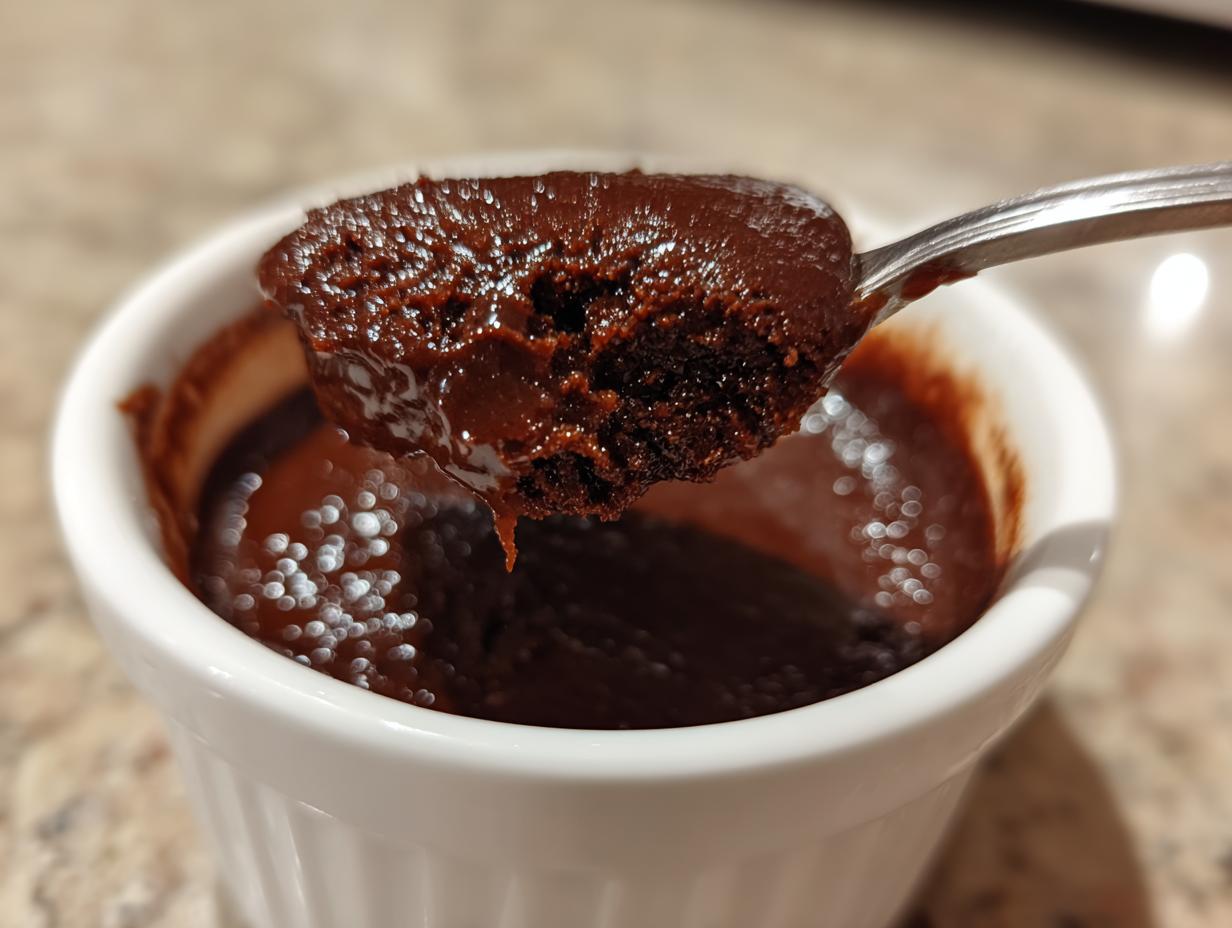
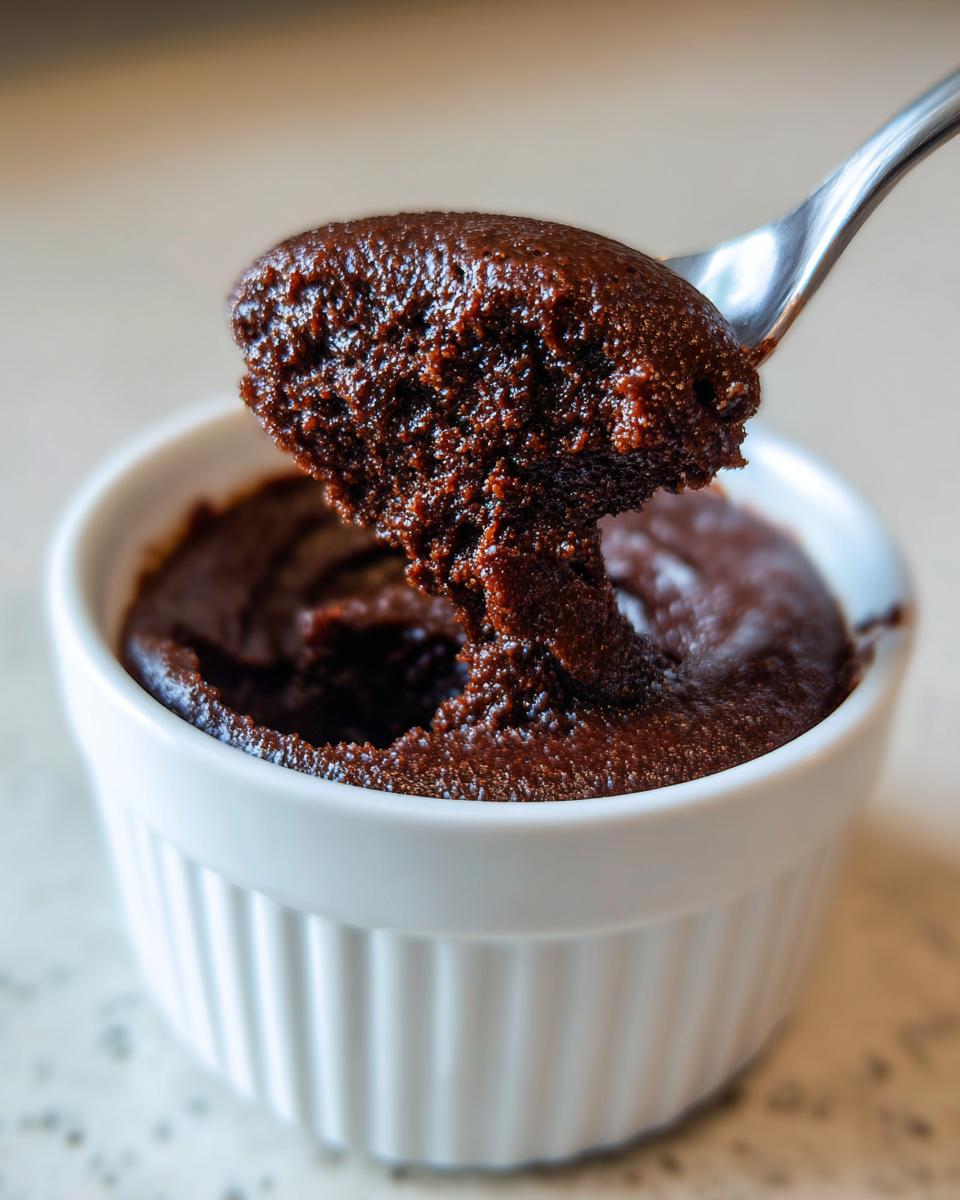
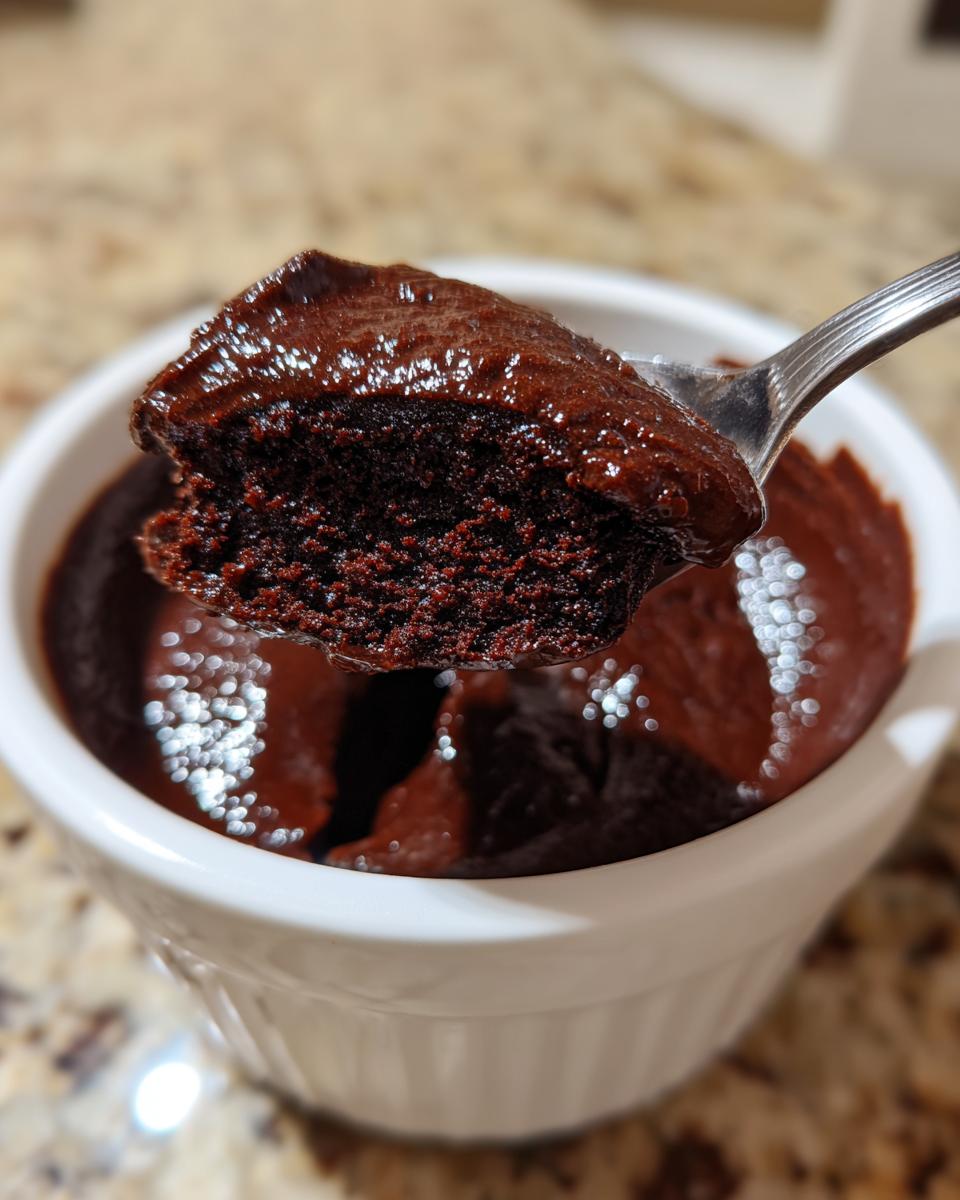
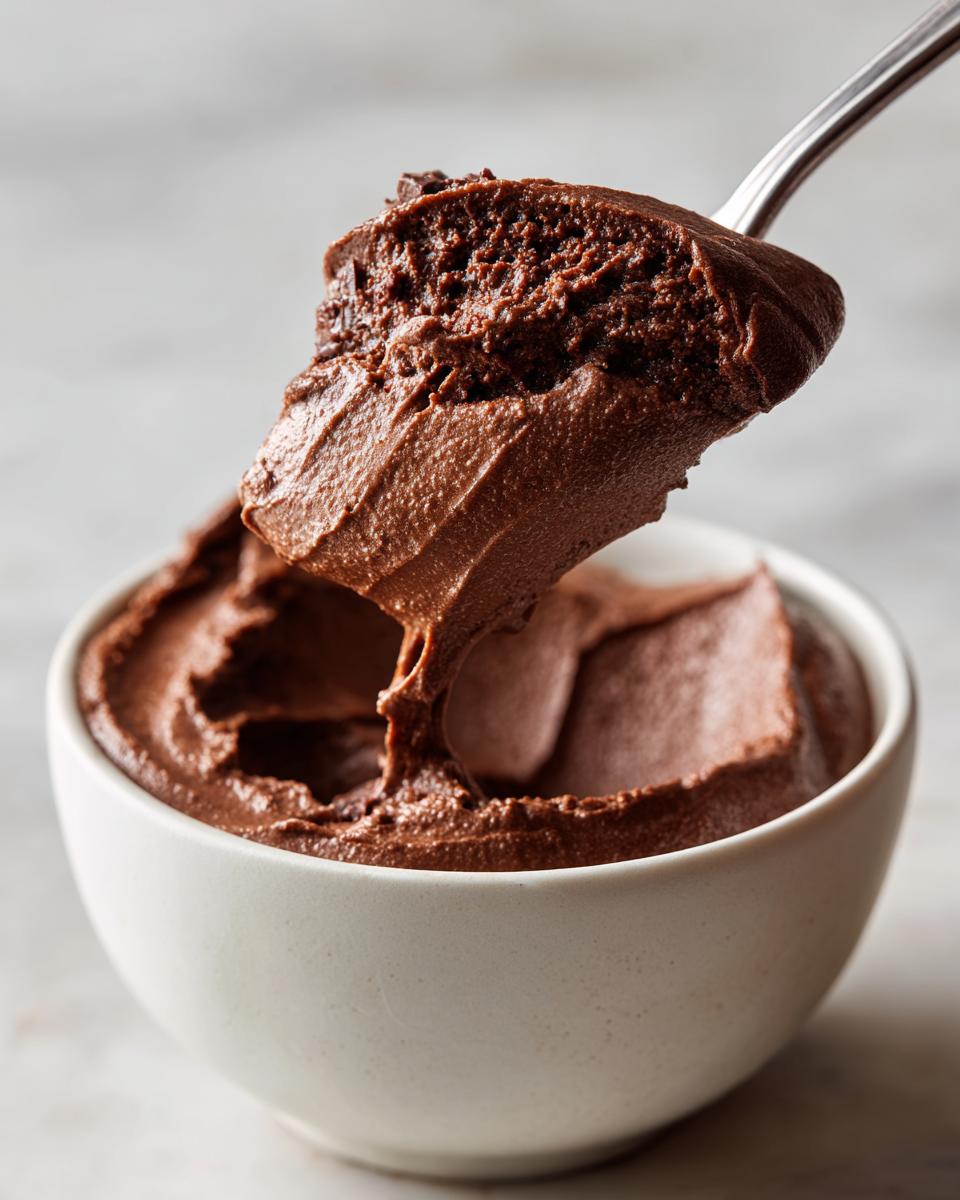
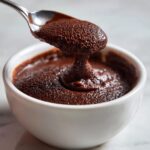
There is just something magical that happens when you slide a spoonful of rich, dark chocolate pudding into your mouth, isn’t there? Forget those grainy, overly sweet boxes you bought as a kid—that’s not what we do here at MDLATDMM Recipes. Back home, my connection to food started with the simple, honest flavors my grandmother knew how to create, and that’s what I brought to this recipe when I dusted off my apron. Trust me when I say this is the absolute best creamy, easy, homemade chocolate pudding from scratch you’ll ever need. It’s quick enough for a Tuesday night, but decadent enough for any special occasion. Making this dessert is my way of keeping that heritage alive in my own busy kitchen.
- Why This Is the Best Chocolate Pudding Recipe You Will Ever Make
- Ingredients for Rich Chocolate Pudding From Scratch
- How to Prepare Velvety Smooth Pudding: Step-by-Step Instructions
- Tips for Success Making This Simple Pudding Recipe
- Serving Suggestions for Your Classic Comfort Dessert
- Storage and Reheating Instructions for Homemade Chocolate Pudding
- Frequently Asked Questions About Making Chocolate Pudding
- Estimated Nutritional Data for This Indulgent Chocolate Dessert
- Share Your Experience with This Easy Chocolate Dessert
Why This Is the Best Chocolate Pudding Recipe You Will Ever Make
I’ve tested dozens of recipes trying to nail this classic, and I truly believe this is the best chocolate pudding recipe you’ll ever stumble across. Why? Because it ditches the dreaded box mix for incredible depth of flavor and an unbelievably satisfying texture. We’re aiming for that luxurious, velvety smooth pudding that melts perfectly on your tongue. That’s the homemade difference, my friends! This method is one of my absolute favorites from my collection of delicious dessert recipes.
This recipe makes cooking feel simple again. I promise you won’t feel stressed trying to pull this off after a long day.
Achieving That Creamy Homemade Pudding Texture
The secret to that amazing mouthfeel isn’t magic; it’s science mixed with a little bit of elbow grease! Boxed versions rely on gums, but we use the power duo of cornstarch and tempered egg yolks. The cornstarch gives us body, and the yolks add richness and stability. Whisking them in properly ensures you get a wonderfully creamy homemade pudding every time, not a lumpy mess.
A Quick Stovetop Dessert Ready in Minutes
Yes, it’s homemade, but it’s also lightning fast! The prep is about 10 minutes, and the cook time is barely 15. You seriously have a quick stovetop dessert that tastes like it simmered all afternoon, but it’s ready to chill before you even finish cleaning up the counters. It’s honestly shocking how fast this rich flavor comes together!
Ingredients for Rich Chocolate Pudding From Scratch
When we talk about making no box mix chocolate pudding, we have to respect the ingredients! Because this is from scratch, every item on this list does heavy lifting to create that intense flavor and smooth texture. Don’t panic about the list; it uses pantry staples, I promise. Stick to these exact measurements, and you’re halfway to dessert heaven. We’re building layers of chocolate richness here, so quality matters!
- 1/4 cup unsweetened cocoa powder
- 1/2 cup granulated sugar
- 1/4 teaspoon salt
- 3 tablespoons cornstarch (our thickening hero)
- 2 cups whole milk (don’t skimp on the fat!)
- 2 large egg yolks (separated—don’t forget them!)
- 2 tablespoons unsalted butter, cut up
- 1 teaspoon vanilla extract
You can find a great breakdown of budget-friendly basics that work well for this on articles like the one found over at Budget Bytes, but trust me, using good butter makes all the difference here.
Ingredient Notes and Substitutions for Silky Chocolate Recipe
The butter is added right at the end, and that’s key. It melts in off the heat, giving the pudding body and a beautiful, almost shiny finish—it’s what makes it feel so luxurious. And please, don’t skip that vanilla extract; it helps the chocolate really sing! If you want to deepen that flavor—and I highly recommend this for an indulgent chocolate dessert—you can swap out 1/4 cup of the whole milk for strong brewed coffee. It just intensifies the cocoa notes!
Also, quick note: this recipe yields four standard servings, but if you are making this just for chocolate pudding for two, use two large, beautiful glasses, and you’ll have two very happy people!
How to Prepare Velvety Smooth Pudding: Step-by-Step Instructions
Okay, this is where the magic happens on the stovetop! Getting that velvety smooth pudding requires a little attention, but trust me, it’s so worth the minimal effort. We need to cook out that raw starch taste from the cornstarch, but we certainly don’t want to scramble our eggs—that’s the delicate balance!
First, whisk the dry ingredients separately, then slowly add the milk until it’s completely smooth. Heat this medium temperature, stirring constantly until it bubbles vigorously. That constant movement is your insurance policy against lumps. Once it bubbles, keep going for a solid minute—this step is non-negotiable for texture!
Once you pull that hot base off the heat, things move fast. We need to add the yolks back in without shocking them. This whole process builds the richness you just can’t get from a packet. You can check out some other delicious dessert recipes that rely on gentle heat management right here, but this pudding is a masterclass in stovetop control!
The Crucial Tempering Step for Perfect Chocolate Pudding
This tempering part throws people off, but it’s honestly the easiest way to make the richest chocolate pudding! When the milk base is hot, you need to introduce the egg yolks slowly so they don’t seize up into little scrambled bits. Take about half a cup of that hot liquid—very slowly—and drizzle it into your beaten yolks while whisking like crazy. You are gently raising the temperature of the yolks.
Once they look happy and warm, pour that tempered mixture right back into the saucepan with the rest of the pudding. Then, return it to low heat just to thicken up again for a minute or two. Remember: after the yolks go in, we don’t boil it anymore!
Chilling for the Ultimate No-Fuss Chocolate Treat
Once the pudding is thick and gorgeous, stir in that vanilla and butter right off the heat for shine and flavor. Now comes the chilling part to turn it into a perfect no-fuss chocolate treat. Pour it into your containers—I love little jars for this!—and here is the big secret: you must press plastic wrap directly onto the surface of the pudding itself.
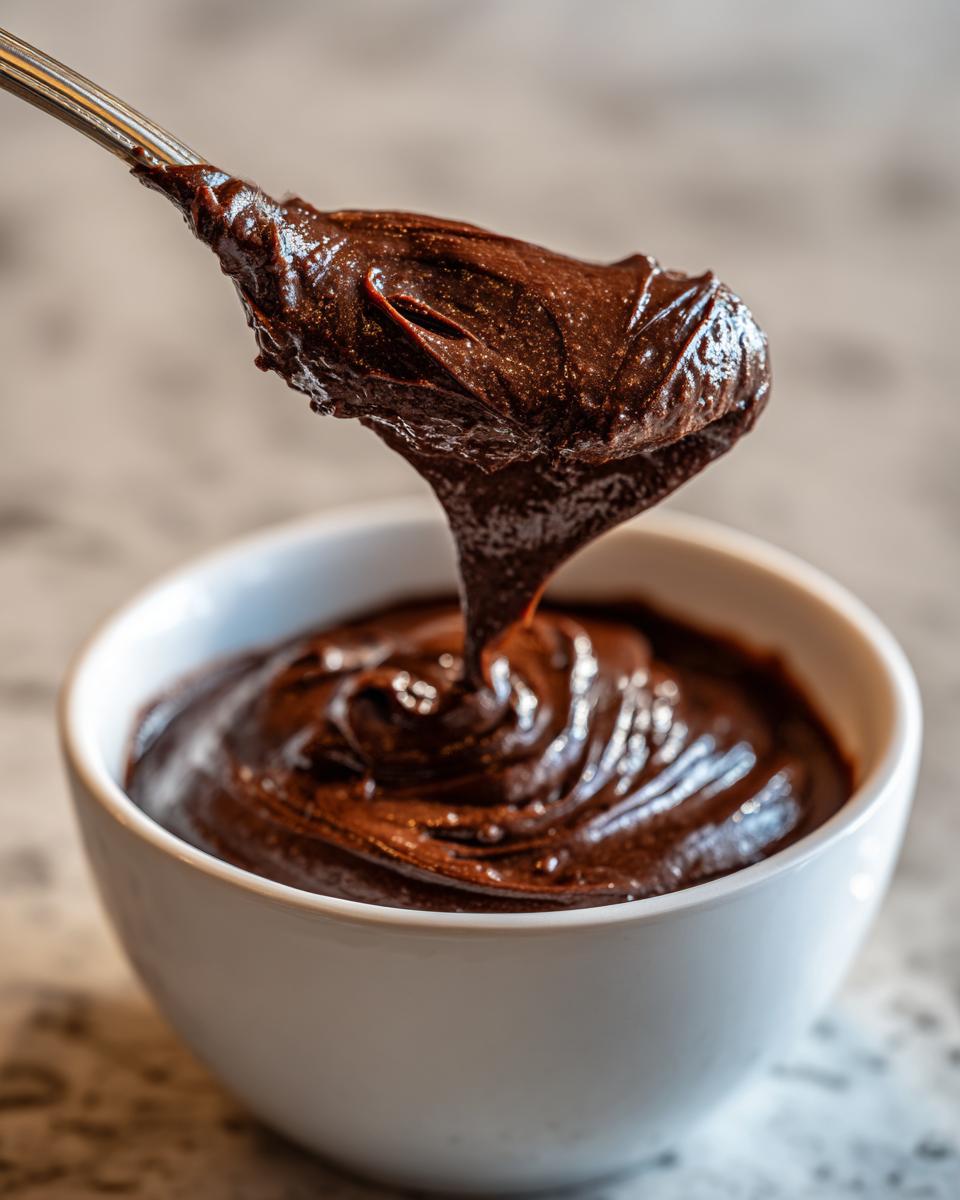
If you leave a gap, you get that rubbery skin that nobody wants. Chill it for at least two hours, but honestly, four is better. This gives the cornstarch time to fully set into that dense, creamy delight we aim for.
Tips for Success Making This Simple Pudding Recipe
Even though this is a simple pudding recipe, I’ve learned a few things the hard way so you don’t have to! My biggest spectacular failure happened when I was feeling impatient after adding the egg yolks back in. I had it on medium heat, thinking I could rush the thickening process. Well, I ended up with beautiful, luxurious chocolate puddles filled with tiny, cooked bits of egg. Talk about heartbreaking!
So here’s what I swear by: always use medium-low heat after tempering, and stir, stir, stir! If you find little lumps starting to form before the chilling stage, don’t panic—just grab an immersion blender and buzz it until it’s perfectly smooth right before you pour it into your dishes. That trick basically saves any rushed batch. You can check out others who have perfected the art of making this dessert over at Unfold Recipes, but this immersion blender tip is pure Maddie magic!
If you ever need another easy baking confidence booster, check out my other delicious dessert recipes—they all follow the same ‘simple but effective’ rule!
Serving Suggestions for Your Classic Comfort Dessert
Once this dreamy, rich dessert has chilled up and set beautifully, half the fun is figuring out how to present it! Remember, we are aiming for that ultimate classic comfort dessert experience, but with a little bit of modern flair. I absolutely love serving this in small, individual mason jars or cute little glass ramekins. It makes portion control easy, and honestly, it just looks elegant!
For toppings, keep it simple or go all out, your choice! A dollop of freshly whipped cream is non-negotiable for me—it adds a lightness that contrasts perfectly with the dense pudding. A little grating of dark chocolate over the top is elegant, but sprinkling on some raspberries or strawberries gives you that perfect pop of color and acidity you need. If you’re looking for more ideas after enjoying this, definitely check out my collection of delicious dessert recipes for pairing inspiration!
Storage and Reheating Instructions for Homemade Chocolate Pudding
Now, I know you’re going to want to save some of this creamy goodness for later, right? Luckily, this stovetop pudding stores beautifully! Make sure you cover it super tight. That plastic wrap pressed directly onto the surface is still the hero here, even in the fridge, because it locks in moisture and completely stops that skin from forming. It stays wonderfully fresh for about three to four days.
If you *must* reheat it—and I usually just eat it cold, honestly—be super gentle. Whisk it lightly over very low heat, or even just warm a small portion in the microwave for 15 seconds at a time. Boiling it will totally break down that wonderful texture we worked so hard to create, turning it watery instead of thick and silky!
Frequently Asked Questions About Making Chocolate Pudding
When I first started playing around with this stovetop recipe, I had a ton of questions, and I’m betting you do too! Here are the things folks ask me most often about achieving that perfect batch of chocolate pudding. Don’t hesitate to drop a comment below if I missed your burning question!
Can I make this chocolate pudding recipe vegan?
You totally can adjust this! To make this recipe vegan, swap the whole milk for a creamy plant-based alternative like oat or soy milk. You’ll want to skip the egg yolks entirely—just increase the cornstarch slightly (maybe add an extra half teaspoon) to help with the thickness, or use a small amount of agar-agar as an egg replacer!
Why is my chocolate pudding lumpy even after cooling?
Lumps are the enemy, right? Usually, lumps happen because the dry ingredients weren’t fully incorporated before the heat went on, or you didn’t whisk vigorously enough when adding the milk initially. If you use an immersion blender right before chilling, you can usually smooth out minor lumps, but pre-mixing well is the key to avoiding this.
How do I get the richest chocolate pudding flavor?
For the absolute best flavor, I always recommend using high-quality, unsweetened cocoa powder—Dutch-processed if you have it, as it’s less acidic and deeper tasting. My favorite trick, which I mentioned earlier, is swapping out a quarter cup of the milk for strong, cooled brewed coffee; it really brings out the depth in the cocoa without tasting like coffee at all!
Is this considered a weeknight dessert idea?
Absolutely! Because the cooking part takes under 15 minutes, I count this as one of my top weeknight dessert ideas. Once it’s chilling, you don’t have to worry about it. It’s much faster than baking something that needs hours to cool completely. You deserve a treat without the fuss!
If you’ve tried this out, check out more delicious dessert recipes that are just as easy to manage!
Estimated Nutritional Data for This Indulgent Chocolate Dessert
Because we are turning simple ingredients into such an indulgent chocolate dessert, I always like to give you a peek at the numbers. Please remember, because I’m a home cook and not a lab technician, these figures are just an estimate based on the exact ingredients listed (using whole milk and butter). The brand of cocoa powder or sugar you use can shift things a little!
Here’s the breakdown per serving (this recipe makes 4):
| Component | Amount (Approx.) |
|---|---|
| Calories | 285 |
| Total Fat | 12g |
| Carbohydrates | 40g |
| Sugar | 35g |
| Protein | 7g |
If you’re looking to lighten this up, using 2% milk instead of whole milk will instantly shave off a couple of grams of fat!
Share Your Experience with This Easy Chocolate Dessert
Now that you’ve whipped up this unbelievably creamy homemade pudding, I really, truly want to hear about it! Did you top it with the fresh berries I mentioned, or did you go for that classic whipped cream swirl? You know how much I love seeing your kitchen successes. Please, take a moment to leave a star rating right below this section. It helps other cooks know what you thought of this easy chocolate dessert!
And if you snapped a picture while you were spooning it into those cute little jars, please share it on Instagram and tag me! It always makes my day to see the kindness and comfort of home cooking spreading around. If you had any weird hiccups, or maybe even a brilliant idea for a next-level topping, drop a comment in the box below. I read every single one, and I love building this community right alongside you. If you need to get in touch directly about anything else, you can always reach me over at the contact page!
PrintBest Creamy & Easy Homemade Chocolate Pudding from Scratch
Make rich, velvety smooth chocolate pudding on the stovetop. This easy recipe skips the box mix and delivers a classic comfort dessert that is ready in minutes.
- Prep Time: 10 min
- Cook Time: 15 min
- Total Time: 25 min
- Yield: 4 servings 1x
- Category: Dessert
- Method: Stovetop
- Cuisine: American
- Diet: Vegetarian
Ingredients
- 1/4 cup unsweetened cocoa powder
- 1/2 cup granulated sugar
- 1/4 teaspoon salt
- 3 tablespoons cornstarch
- 2 cups whole milk
- 2 large egg yolks
- 2 tablespoons unsalted butter
- 1 teaspoon vanilla extract
Instructions
- In a medium saucepan, whisk together the cocoa powder, sugar, salt, and cornstarch until combined.
- Gradually whisk in the whole milk until the mixture is smooth.
- Place the saucepan over medium heat. Cook, stirring constantly with a whisk, until the mixture thickens and begins to bubble. This takes about 5 to 8 minutes.
- Once boiling, continue to cook and whisk for 1 minute to cook out the cornstarch taste. Remove the pan from the heat.
- In a small bowl, whisk the egg yolks lightly. Temper the yolks by slowly whisking about 1/2 cup of the hot pudding mixture into the yolks.
- Pour the tempered yolk mixture back into the saucepan, whisking constantly.
- Return the saucepan to medium-low heat. Cook, stirring constantly, for 1 to 2 minutes until the pudding thickens again. Do not allow it to boil after adding the yolks.
- Remove from heat. Stir in the butter and vanilla extract until the butter is fully melted and incorporated.
- Pour the pudding into individual serving dishes or a single bowl. Press plastic wrap directly onto the surface of the pudding to prevent a skin from forming.
- Chill in the refrigerator for at least 2 hours, or until completely cold and set.
Notes
- For an extra indulgent treat, top the chilled pudding with homemade whipped cream or fresh berries before serving.
- This recipe makes a perfect portion for two people if you use larger serving bowls, or four standard servings.
- If you want a deeper chocolate flavor, substitute 1/4 cup of the milk with 1/4 cup of strong brewed coffee.
Nutrition
- Serving Size: 1 serving
- Calories: 285
- Sugar: 35
- Sodium: 180
- Fat: 12
- Saturated Fat: 7
- Unsaturated Fat: 5
- Trans Fat: 0
- Carbohydrates: 40
- Fiber: 2
- Protein: 7
- Cholesterol: 110