
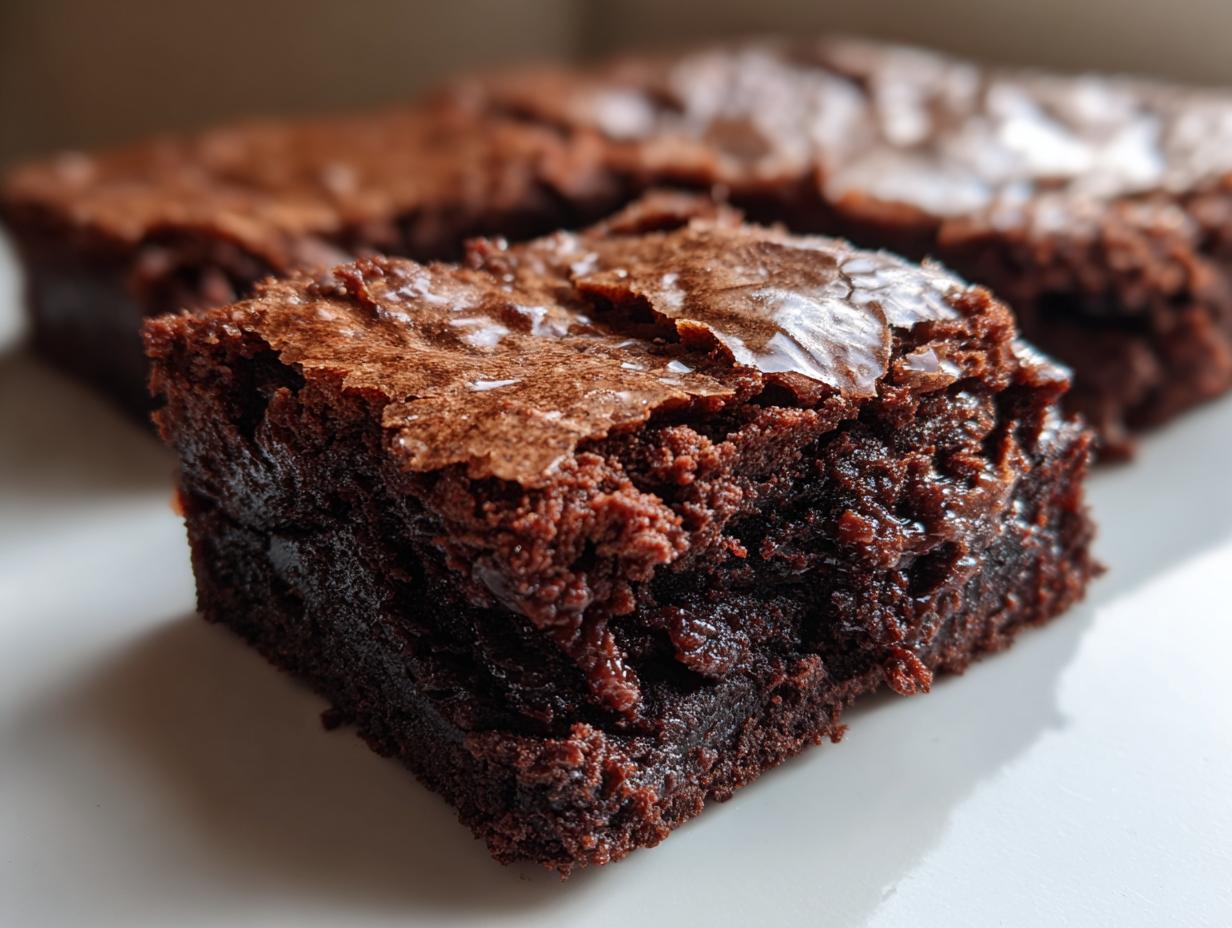
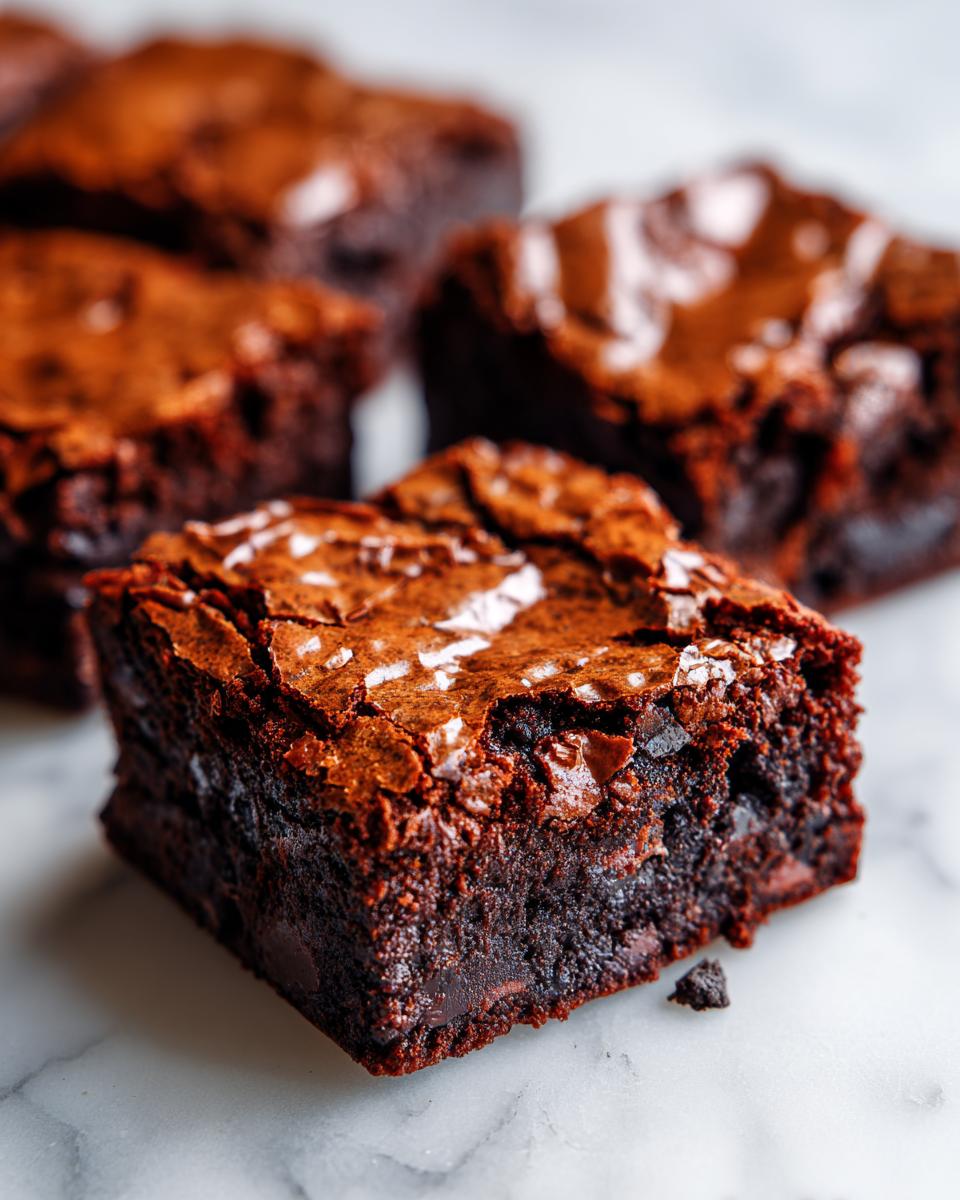
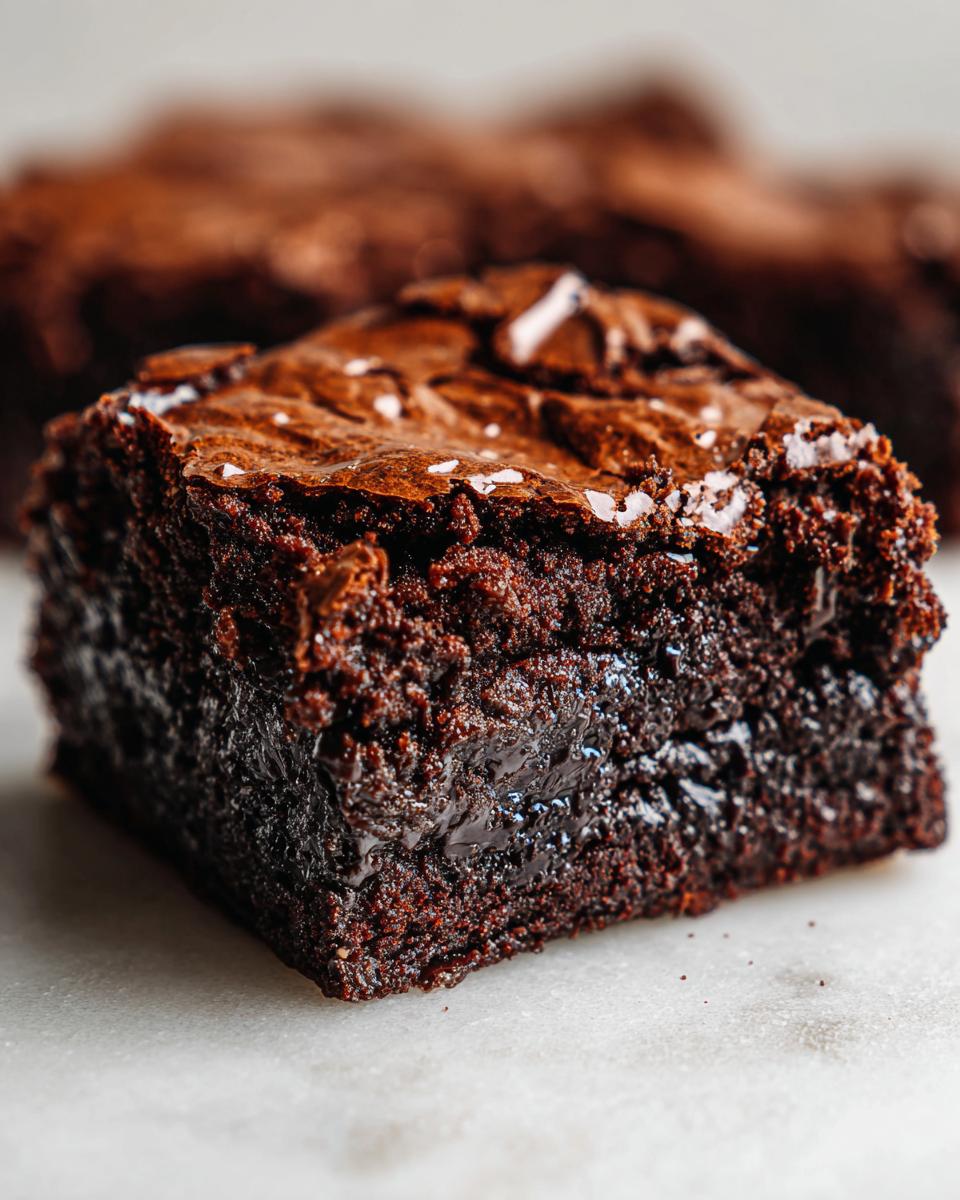
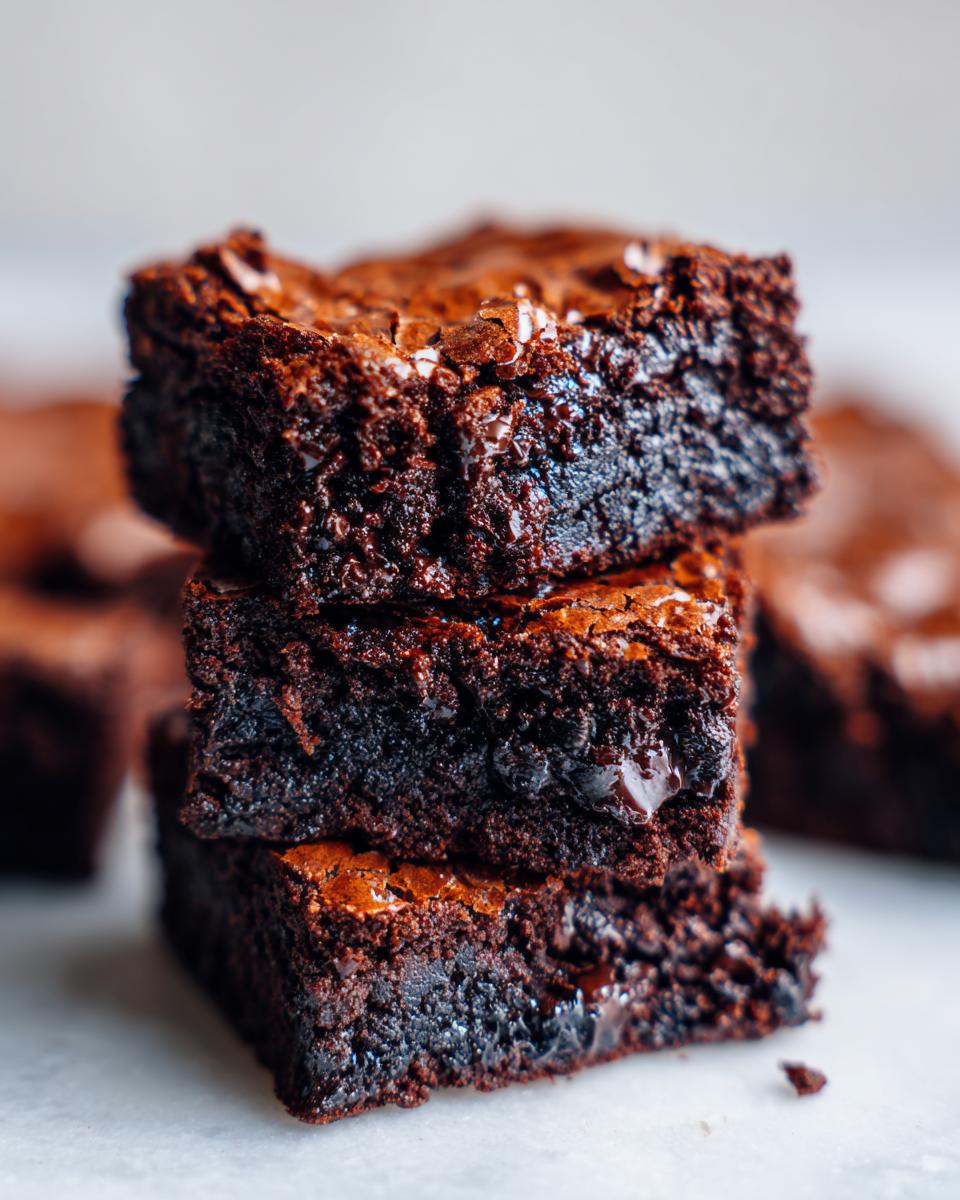
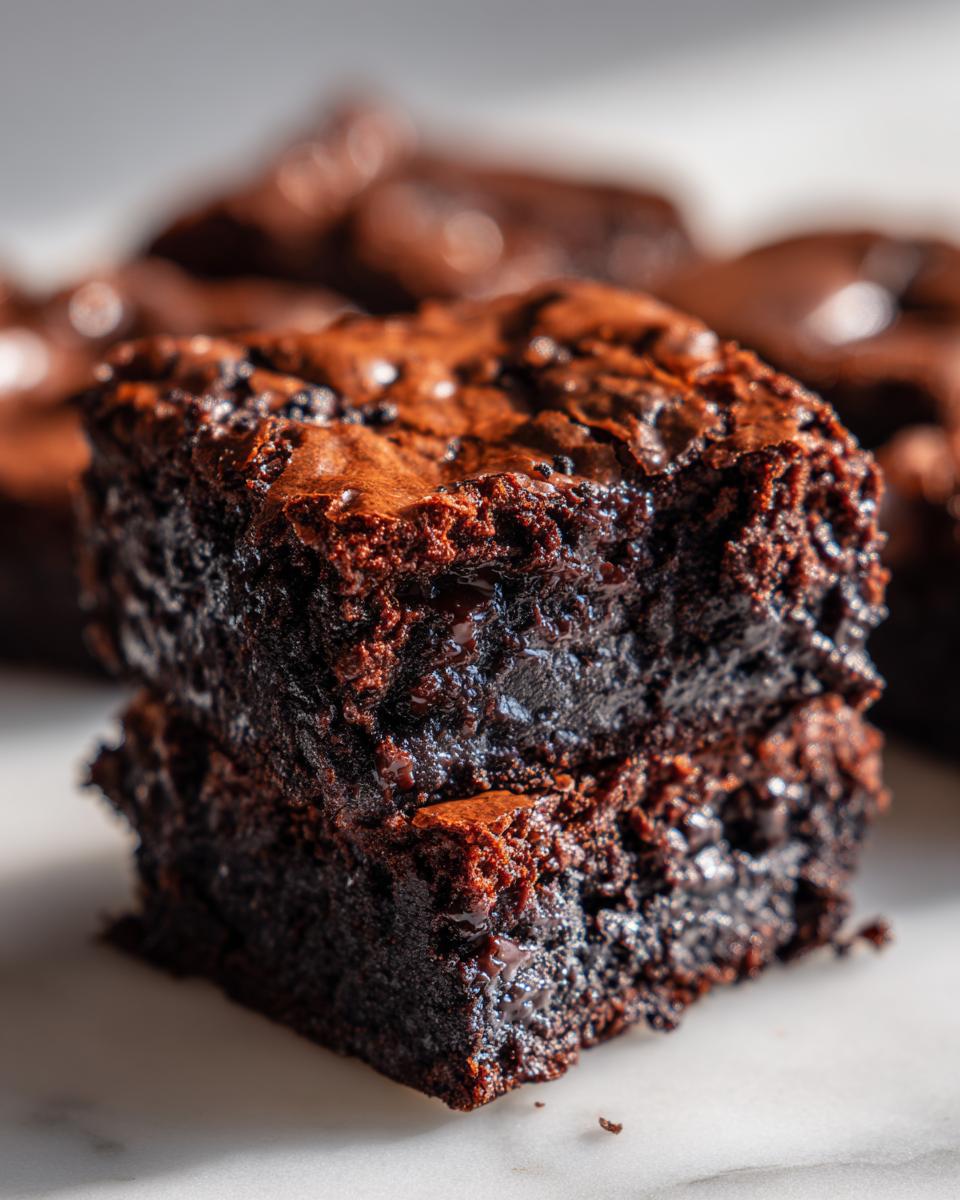
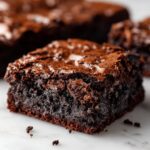
Oh my gosh, if you are having that deep, dark chocolate craving that only something truly decadent can fix, stop what you are doing right now. You don’t need a mix, you need these brownies! I spent ages fussing in the kitchen—just like I do with all my favorite American classics—to nail the perfect balance for these oreo brownies. Trust me when I say these are the ultimate combination: intensely fudgy, perfectly chewy, and topped with that gorgeous, shiny, crackly skin you only dream about. These homemade brownies from scratch are exactly why I started this whole thing; they bring that honest-to-goodness comfort right back to your counter. If you love making treats like this, you absolutely have to check out my full list of delicious dessert recipes!
- Why You Will Make These oreo brownies Again and Again
- Gathering Ingredients for Your Homemade Brownies From Scratch
- Achieving the Perfect Crackly Top on Your oreo brownies
- Step-by-Step Instructions for Chewy oreo brownies
- Tips for Success with Brownies Loaded with Cookies
- Ingredient Notes and Substitution Ideas for Your oreo brownies
- Storing and Serving Your Decadent Chocolate Treats
- Frequently Asked Questions About Cookies and Cream Brownies
- Sharing Your Favorite oreo brownies Creation
Why You Will Make These oreo brownies Again and Again
Honestly, once you try these, you’ll be tossing out that box mix for good. I developed these because I wanted something that checked off every single box for the ultimate chocolate bar. They’re totally foolproof, which is what we all need!
- They nail that perfect texture you’re hunting for: incredibly fudgy in the middle but satisfyingly chewy around the edges.
- Hello, gorgeous! We’re creating that sought-after, paper-thin, shiny, crackly top that screams professional quality.
- They are genuinely homemade brownies from scratch, beating any box mix you’ve ever tried, hands down.
- Prep time is lightning fast! We’re talking less than 15 minutes of active time, which is a lifesaver when a craving hits.
- They’re loaded up with whole and crushed Oreos, making them the ultimate cookies and cream brownies experience.
- These are the definition of decadent chocolate treats—rich, dense, and exactly what a chocolate lover needs.
See? If that doesn’t convince you to preheat your oven, I don’t know what will!
Gathering Ingredients for Your Homemade Brownies From Scratch
The secret to moving past those dusty boxes in the pantry lies entirely in the quality of what you start with. These oreo brownies are completely made from scratch, and when you use good ingredients, you can taste the difference in that rich, chocolatey base! This isn’t complicated; it’s just about using real things to make simple homemade desserts that truly sing.
Here is exactly what you need for your batch of chewy oreo brownies. Make sure your eggs are at room temperature, that just helps everything combine smoothly!
- 1 cup unsalted butter (we need this melted!)
- 1 cup granulated sugar
- 1 cup packed light brown sugar
- 4 large eggs
- 1 tablespoon vanilla extract
- 1 cup all-purpose flour
- ¾ cup unsweetened cocoa powder
- ½ teaspoon salt
- ½ teaspoon baking powder
- 1 cup semi-sweet chocolate chips
- 12 Oreo cookies, roughly chopped or left whole (I like a mix!)
That’s it! You probably have almost everything you need right now for this easy chocolate dessert.
Achieving the Perfect Crackly Top on Your oreo brownies
Okay, let’s talk about that shiny, papery, crackly top that separates a good brownie from the best brownie recipe ever. It’s not luck, I promise! This is where being super intentional during the initial mixing steps pays off huge. Most people just dump everything in and stir, but for that glorious crust on our oreobrownies, we have to build structure early.
The trick happens immediately after melting your butter. We are essentially creating a sugar syrup when we whisk the granulated sugar and the brown sugar into that warm fat. Heat helps the sugar crystals dissolve beautifully. Then, when we whisk in the eggs, we’re incorporating air while keeping the mixture warm enough to stay liquid but cool enough not to cook. That foamy, glossy mixture you get before adding the flour? That’s literally the scaffolding for your shiny top!
The Role of Sugar and Butter in oreo brownies
When sugar dissolves properly into melted butter and is then agitated with the eggs, it creates this very thin, slightly fragile meringue-like layer on the surface as the brownie bakes. As the brownie puffs up in the oven, this thin top layer dries out first and cracks, forming that signature look. If you use cold butter and cream it slowly, you get a cakey crumb, which is nice, but *not* for these fudgy bars. We need melted butter and hot sugar action for that perfect glass-like finish. If you want even more details on how sugar works in baking, you might want to check out my notes on making soft and chewy chocolate chip cookies!
Step-by-Step Instructions for Chewy oreo brownies
Okay, let’s get baking! Because this is such an easy recipe, you don’t need a stand mixer or anything fancy—just a saucepan and a whisk. Remember, these are quick prep dessert ideas that deliver maximum reward! We’re aiming for that dense, gooey texture, so follow these steps closely. If you need some ideas for speeding up weeknight meals outside of dessert time, I share a few of my favorite quick weeknight dinners over here!
Preparing the Pan and Oven
First things first, let’s get organized! You want everything ready before the butter melts because things move fast once we start incorporating the sugar.
- Set your oven rack to the middle position and preheat it to 350°F (175°C).
- Grab your 9×13 inch baking pan. Line it completely with parchment paper—this is crucial! Make sure the parchment hangs over two opposite sides like little handles.
- Lightly grease the parchment paper itself, just a tiny bit, to make absolutely sure nothing sticks while baking.
Creating the Fudgy Brownie Batter Base
This is where the magic for the fudgy texture and that crackly top really begins. We are using melted butter here, not softened butter, which is key for that gooey center!
- Place your butter in a medium saucepan and melt it completely over low heat. Take it off the heat as soon as it’s liquid.
- Whisk in both the granulated sugar and the brown sugar right away until everything looks smooth and uniform.
- Now, whisk in the eggs, one at a time. Make sure the first egg is fully incorporated before adding the second one. Follow this up with the vanilla extract. Keep whisking gently until the mixture looks thicker and a little lighter in color.
- In a separate bowl—don’t skip this—whisk together your dry stuff: the flour, the cocoa powder, the salt, and the baking powder.
- Gently fold the dry ingredients into your wet mixture. I mean *gently*! Stop mixing the second you don’t see any more white streaks of flour. Seriously, overmixing is the death of a gooey brownie recipe!
Folding in the Cookies and Baking
We are almost done mixing! Resist the urge to stir the batter vigorously after adding the cookies, or you’ll just get chocolate dust instead of those beautiful cookie chunks.
- Fold in your chocolate chips and about three-quarters of your chopped Oreos. Don’t crush them too fine; we want recognizable cookie pieces in these brownies loaded with cookies.
- Pour all that glorious batter into your prepared pan and use a spatula to spread it out evenly across the bottom.
- Take the reserved Oreo pieces and just scatter them lovingly over the top layer of the batter.
- Bake for 28 to 32 minutes. You’re looking for the edges to look firm and set. When you test it with a toothpick near the center, it should come out with moist crumbs attached—not wet batter dripping off!
- This last part is important for texture: once they are done, leave them alone! Let them cool completely in the pan on a wire rack. You can lift them out using the parchment overhang once they’re cool. Slicing them warm makes them smeary and messy!
Tips for Success with Brownies Loaded with Cookies
Now that you know the mixing secrets, let’s talk execution. Remember those notes I included? They are my personal guarantees for these cookies and cream brownies! Always slightly underbake them by about two minutes if you are chasing that super fudgy, almost-gooey center. It makes the difference between a baked good and a true chocolate experience.
And please, oh please, heed my warning about cooling! When I first tried this recipe, I was too impatient because they smelled so amazing. I tried to lift the still-warm bar out of the pan using the parchment paper handles, and the whole thing folded in half. It was edible, yes, but it looked like a chocolate puddle! Cooling completely ensures those beautiful layers of cookie and fudge set up right. After that disaster, I learned that patience makes the difference between a messy fail and an irresistible baked good.
Ingredient Notes and Substitution Ideas for Your oreo brownies
I know people always wonder about swapping things out, especially the Oreos! For these rich chocolate bites, I really prefer chopping mine roughly. When you use a mix of whole and crushed pieces, you get that fantastic, gooey surprise of a big cookie chunk mixed with the soft, melty cookie crumbs throughout the batter. It’s way more interesting than just dust.
If you happen to have Double Stuf Oreos on hand, absolutely use those! They add a little extra filling richness to our oreo brownies, and who doesn’t want more of that creamy center? That’s my favorite tweak to make them even more decadent.
Now, about the fat: the butter is non-negotiable if you want that fudgy texture that defines the best brownie recipe ever. Butter holds flavor and creates the right density when melted down like we do here. If you absolutely must use an oil substitute, you can, but please know that you will lose that rich, dense structure. Oil tends to make things cakey faster, and we are aiming for chewy brownie territory here, not a quick bread!
Storing and Serving Your Decadent Chocolate Treats
These oreo brownies are delicious right after cooling, but honestly? They are even better the next day! Store them by layering the squares between sheets of parchment paper in an airtight container at room temperature for about four days. If it’s super warm where you are, the fridge works too, but remember that chilling actually enhances that chewy texture we worked so hard for!
If you chill them, just remember to let them sit on the counter for about 30 minutes before slicing or eating. They are fantastic with a tall glass of milk or paired with some of my other easy chocolate desserts.
Frequently Asked Questions About Cookies and Cream Brownies
I get so many lovely questions after people try these—which tells me you’re all succeeding in making some amazing rich chocolate bites! Here are a few things I hear most often about achieving perfection with these cookies and cream brownies.
Can I make these oreo brownies ahead of time?
Oh yes, you absolutely should! I firmly believe these are even better the next day. Life gets busy, right? Having these party dessert recipes ready the day before a gathering is a huge win. The flavors meld beautifully overnight, and the structure sets up perfectly, making cutting them into neat squares much easier. I usually bake them up, let them cool completely, wrap them tightly, and store them on the counter. They’re perfect for baking for chocolate lovers anytime!
How do I get the fudgiest texture possible?
The fudgiest texture comes from two main places, and we covered both in the steps! First, make sure you spend time whisking that warm butter and both sugars together before adding the eggs—that agitation is non-negotiable for a crackly top brownies and that dense fudge layer underneath. Second, when you test them for doneness, pull them out when the toothpick still has moist crumbs attached. If the toothpick comes out clean, you’ve gone too far into cake territory and lost some of that luscious goo factor!
Are these considered Gooey Brownie Recipe standard?
That’s a great question! People often use ‘gooey’ and ‘fudgy’ interchangeably, but I define these as definitively fudgy brownie recipe standard. They are ultra-dense and rich, not gooey like an underbaked lava cake. When cooled properly, they are wonderfully chewy and hold their shape great, making them perfect dessert bars with Oreos. If you’re looking for something that borders on underbaked, pull them out about three minutes earlier, but I love them firm enough to eat standing up!
Sharing Your Favorite oreo brownies Creation
I truly hope you loved making these brownies as much as I love perfecting them for you! Seriously, when you bake up a batch of these ultimate oreo brownies, do me a favor and come back here to leave a rating. If they lived up to the hype, let everyone know by giving them 5 stars—you’ll be shouting that this is the Best Brownie Recipe Ever!
It always makes my day to see your creations out in the world. Snap a photo and share it! I love seeing how you decorated yours or the glorious crackly tops you achieved.
And since you’ve mastered the Oreo chip-in, I’m already dreaming up what we should bake next. What other cookie would you love to see mashed up into a decadent bar? Tell me below!
If you’re curious about my journey and why I obsess over these classic recipes, you can always read more about me and my philosophy here on MDLATDMM Recipes!
PrintUltimate Fudgy Oreo Brownies with a Shiny, Crackly Top
Make these made-from-scratch Oreo brownies for a rich, dense, and chewy chocolate dessert. This recipe delivers a gorgeous, shiny, crackly crust and is packed with whole and crushed Oreos for the best Cookies and Cream Brownies.
- Prep Time: 15 min
- Cook Time: 30 min
- Total Time: 45 min
- Yield: 16 servings 1x
- Category: Dessert Bars
- Method: Baking
- Cuisine: American
- Diet: Vegetarian
Ingredients
- 1 cup unsalted butter
- 1 cup granulated sugar
- 1 cup packed light brown sugar
- 4 large eggs
- 1 tablespoon vanilla extract
- 1 cup all-purpose flour
- ¾ cup unsweetened cocoa powder
- ½ teaspoon salt
- ½ teaspoon baking powder
- 1 cup semi-sweet chocolate chips
- 12 Oreo cookies, roughly chopped or left whole
Instructions
- Preheat your oven to 350°F (175°C). Line a 9×13 inch baking pan with parchment paper, leaving an overhang on the sides for easy removal. Lightly grease the paper.
- In a medium saucepan over low heat, melt the butter completely. Remove from heat.
- Whisk the granulated sugar and brown sugar into the melted butter until combined.
- Whisk in the eggs one at a time, mixing well after each addition. Stir in the vanilla extract. This mixing step helps create the crackly top.
- In a separate bowl, whisk together the flour, cocoa powder, salt, and baking powder.
- Gradually add the dry ingredients to the wet ingredients, mixing only until just combined. Do not overmix.
- Fold in the chocolate chips and most of the chopped Oreos, reserving a few pieces for the top.
- Pour the batter into the prepared pan and spread evenly. Scatter the remaining chopped Oreos over the top of the batter.
- Bake for 28 to 32 minutes. The edges should look set, and a toothpick inserted near the center should come out with moist crumbs attached, not wet batter.
- Let the brownies cool completely in the pan on a wire rack before lifting them out using the parchment overhang.
- Cut into squares. These are the best brownie recipes with Oreos when served at room temperature or slightly chilled.
Notes
- For an extra fudgy texture, slightly underbake by about two minutes.
- To achieve the shiny, crackly top, make sure you whisk the sugar and butter mixture well before adding the eggs.
- You can use Double Stuf Oreos for more cookie flavor in your homemade Oreo brownies.
Nutrition
- Serving Size: 1 square
- Calories: 310
- Sugar: 30
- Sodium: 150
- Fat: 18
- Saturated Fat: 10
- Unsaturated Fat: 8
- Trans Fat: 0
- Carbohydrates: 35
- Fiber: 2
- Protein: 4
- Cholesterol: 65