
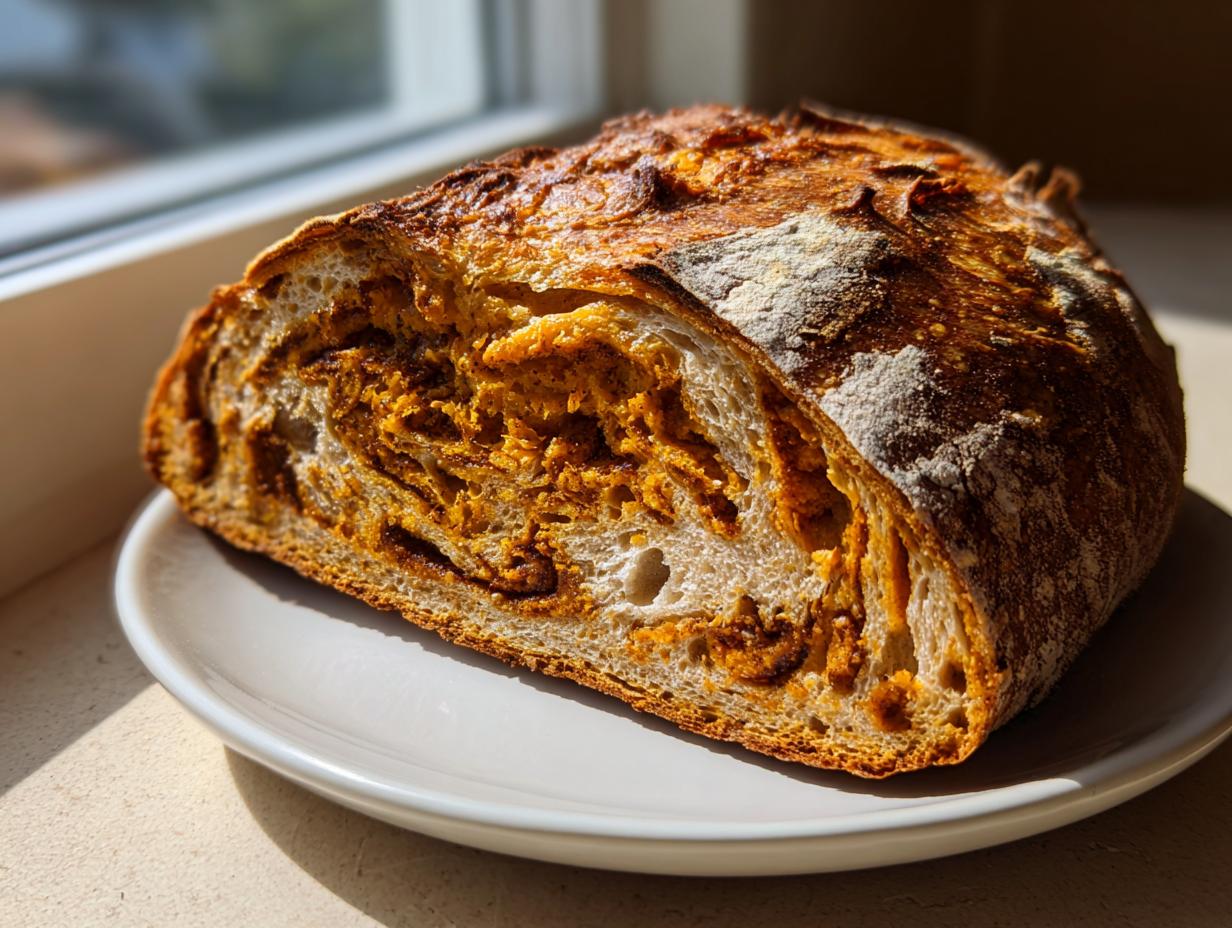
There is just something about the smell of fall, isn’t there? It hits you first in the kitchen—that warm, heady mix of cinnamon, spice, and yeasty tang that promises comfort. When I first started playing with my sourdough starter during the harvest season, I knew I had to create something truly special. Forget dry, yeasted pumpkin loaves! This Cinnamon Swirl **pumpkin sourdough** is the best of both worlds: the open, artisan crumb you love from a good long ferment, married with the tender, moist texture that only real pumpkin puree can give. Trust me, after testing this design—especially nailing that decadent cinnamon swirl—this beauty is going straight to the top of my ‘must-bake-every-year’ list. It’s robust, it’s flavorful, and it comes out perfect every single time.
- Why This Cinnamon Swirl Pumpkin Sourdough Loaf is Your New Favorite Autumn Sourdough Baking Project
- Gathering Ingredients for Your Artisan Pumpkin Bread
- Step-by-Step Instructions for the Best Pumpkin Sourdough Starter Recipe Integration
- Baking Your Rustic Sourdough Variations: Oven Setup for Pumpkin Sourdough
- Tips for Success When Making This Moist Sourdough Loaf
- Serving Suggestions for Cozy Fall Breakfast Bakes
- Storage and Reheating Instructions for Leftover Pumpkin Sourdough
- Frequently Asked Questions About Sourdough Pumpkin Spice Loaf
- Share Your Homemade Fermented Pumpkin Bake Experience
Why This Cinnamon Swirl Pumpkin Sourdough Loaf is Your New Favorite Autumn Sourdough Baking Project
I’ve made a lot of bakes over the years, but this pumpkin sourdough loaf hits different, especially when the weather starts to turn crisp. It’s not just some holiday gimmick; it’s genuinely the best way to enjoy that incredible sourdough tang alongside deep fall spice. Why is it my absolute favorite autumn project?
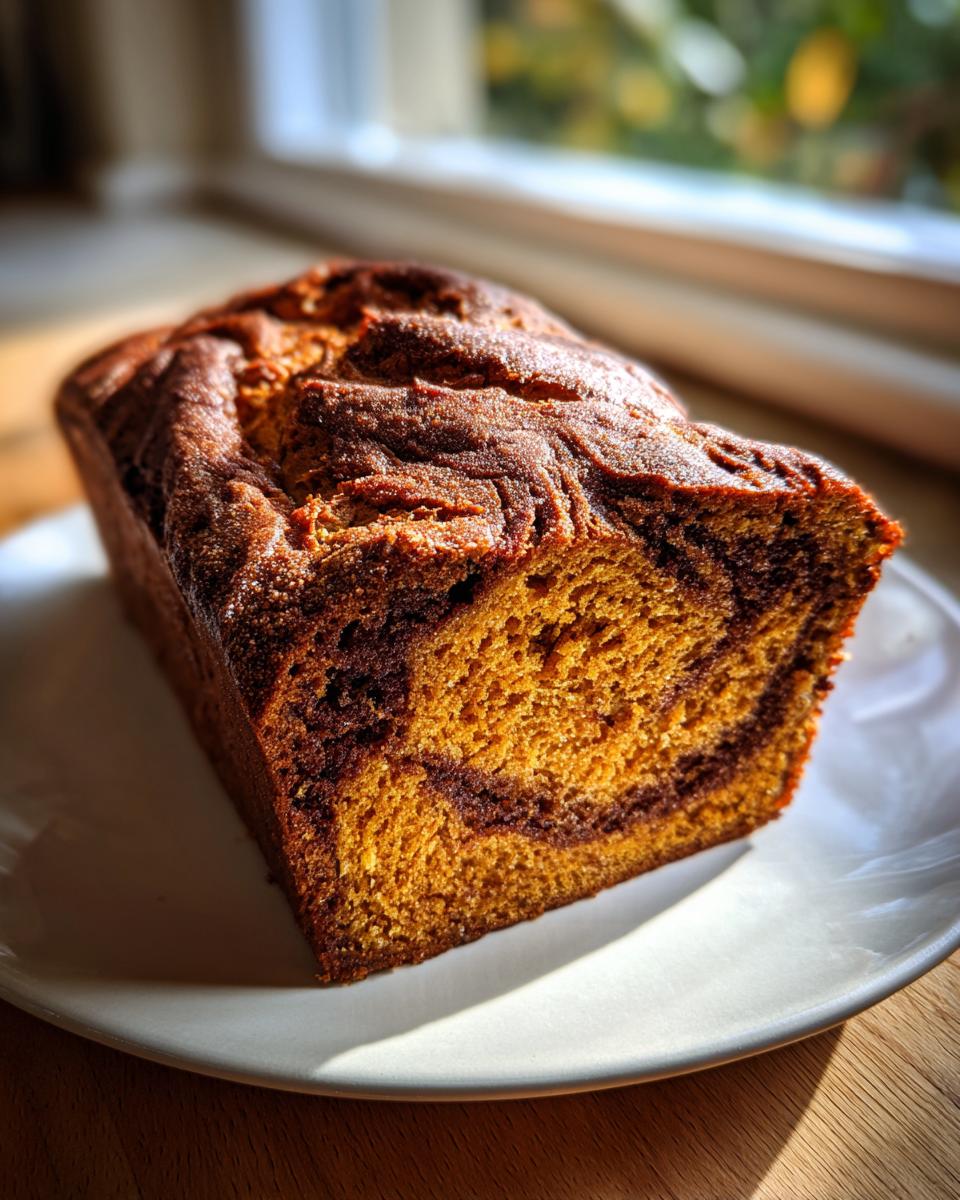
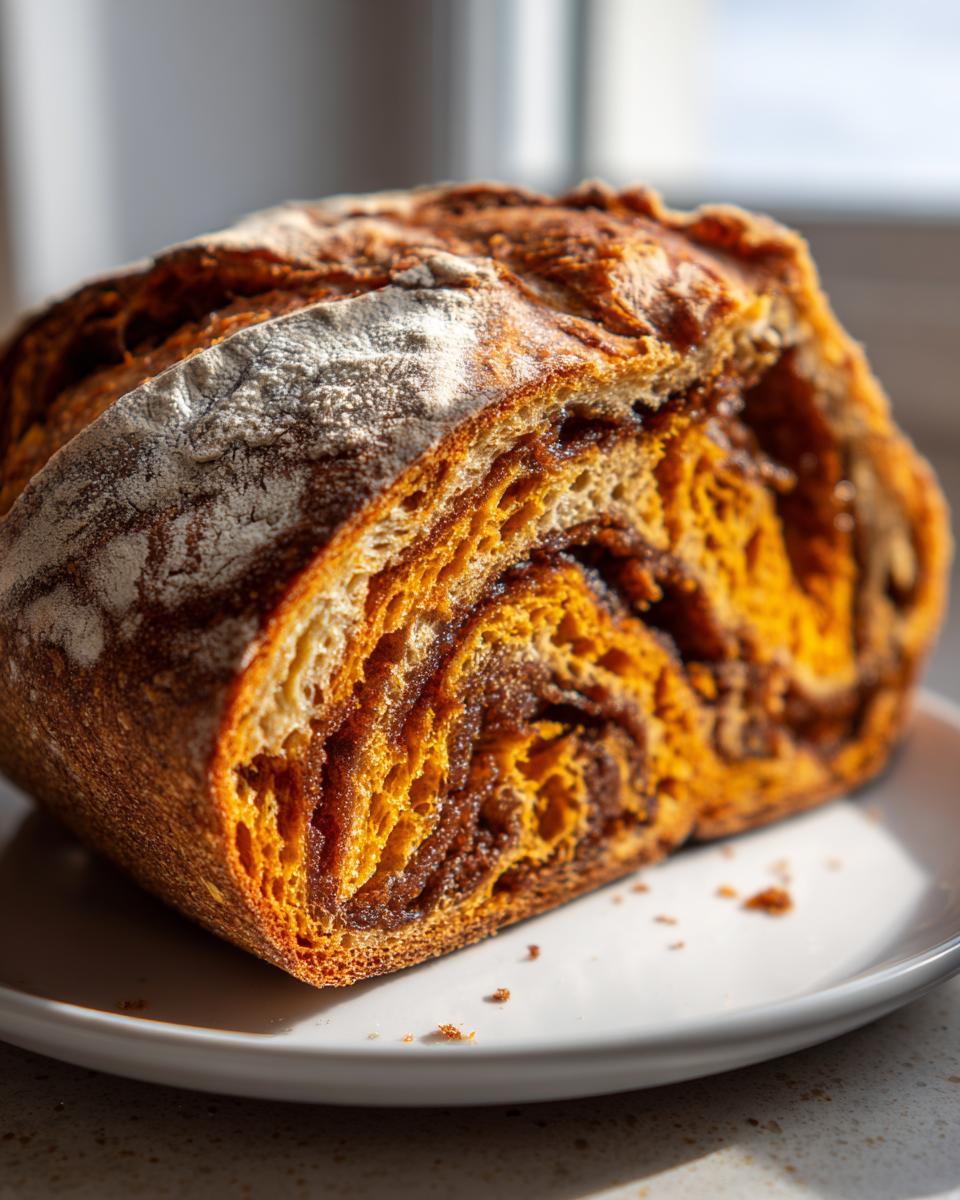
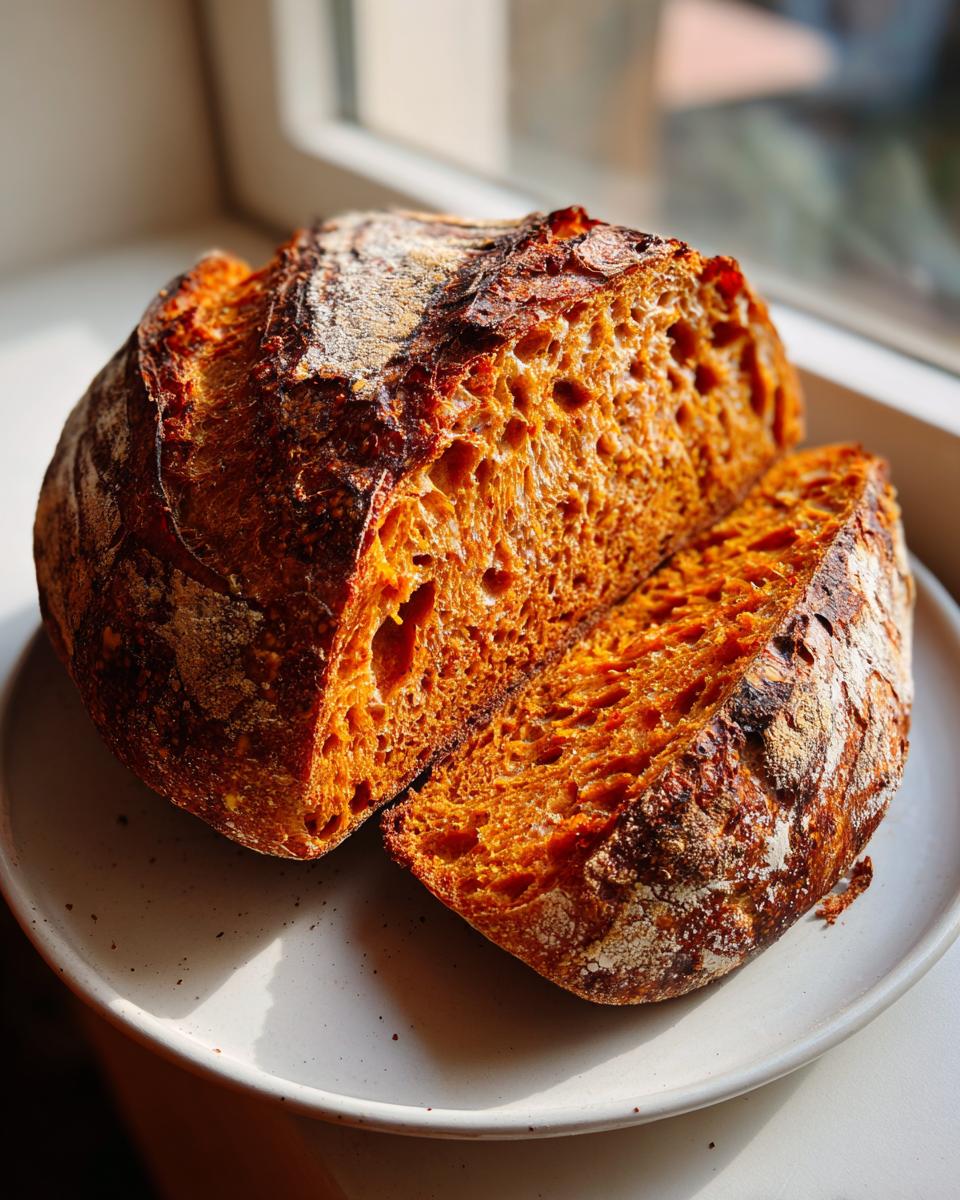
- It looks stunning! That ribbon of cinnamon sugar running through the finished loaf is just gorgeous. It makes for a really impressive holiday centerpiece.
- The flavor profile is balanced—tangy, subtly sweet from the pumpkin, and spiced just right. It’s not overly sugary like some quick breads are.
- It delivers on the one thing everyone wants: moisture!
If you want a loaf that truly sings this season, this is the one you need to try. You can see how popular this style is when you look at other great cooks who are trying versions out, like the fantastic recipe over at Sweet Pumpkin Sourdough!
Achieving the Perfect Moist Sourdough Loaf Texture
Listen, the number one complaint I hear about pumpkin bread? It’s dry. Not this loaf. By swapping out some of the water content for pure pumpkin puree, we lock in so much moisture during the long fermentation and bake. It keeps the crumb tender enough that you don’t feel like you’re chewing cardboard. This pumpkin sourdough stays soft for days, I promise.
Incorporating Sourdough Discard for Extra Flavor
You see that optional 50 grams of sourdough discard? Don’t skip it if you have some lying around! It’s one of my favorite Sourdough Discard Recipes because that leftover starter adds a deep, complex tang that cuts through the richness of the pumpkin and brown sugar. It gives the loaf a more mature, artisanal flavor profile. It’s pure resourcefulness, and it tastes amazing.
Gathering Ingredients for Your Artisan Pumpkin Bread
Okay, let’s talk supplies! Getting the right ingredients is half the battle when you want a baker’s quality loaf at home. I learned early on that substituting low-quality flour or using pumpkin pie filling just gums up the delicate sourdough process. We want that perfect, slightly rustic, yet wonderfully tender crumb, and that starts right here. This recipe is a fantastic way to use up any leftover puree you might have from other baking projects, like my pumpkin banana bread!
I always double-check my measurements before I even think about waking up my starter. If you’re looking for some other fantastic artisan takes, check out the work folks are doing over at Amy Bakes Bread!
Dough Components for the Pumpkin Sourdough Loaf
For the main dough structure, we need solids and liquids to come together just right. Using a high-quality bread flour here is really important—it gives the gluten network something strong to hold onto during all those stretches and folds.
- 100g active sourdough starter (make sure she’s bubbly!)
- 350g warm water
- 500g bread flour
- 100g pumpkin puree (and please, make sure it’s just puree, not the canned pie filling that already has spices and sugar baked in!)
- 10g fine sea salt
- 50g sourdough discard (optional, but I really suggest it for that extra tang)
Ingredients for the Cinnamon Swirl Filling
This is where the *magic* happens. You want this mixture ready to go right after your last stretch and fold so you can seal that flavor right inside the dough.
- 100g brown sugar
- 1 tablespoon ground cinnamon
- 2 tablespoons softened butter (make sure it’s actually soft, not melted, so it spreads nicely!)
Step-by-Step Instructions for the Best Pumpkin Sourdough Starter Recipe Integration
Now for the fun part—bringing all those glorious ingredients together! Making this pumpkin sourdough is a bit more hands-on than a plain loaf because we need to capture that cinnamon swirl perfectly, but stick with me; it’s totally worth the effort. Before we even start stretching, make sure your active starter is fed and happy. If you’ve made my quick bread before, you know how much flavor the spice adds, but here we let the sourdough do most of the heavy lifting!
Mixing, Autolyse, and Building Strength in Your Pumpkin Sourdough
First, get that active starter stirring into the warm water until it dissolves. Then, dump in your flour, pumpkin puree, and salt. Mix it up until it’s just a shaggy mass. If you’re using that optional discard, mix it in right now! Cover that bowl and let it rest for 30 minutes—that’s the autolyse, giving the flour a head start absorbing that pumpkin moisture. After that rest, we start building structure with four sets of stretch and folds, spaced exactly 30 minutes apart. Don’t rush those folds; they develop the strength your final loaf needs for that big oven spring.
Creating and Incorporating the Cinnamon Swirl into the Dough
Right after the fourth and final set of folds, it’s swirl time! This technique is similar to what you see in gorgeous bakes shared by folks like those at Cooks Kitchen NY. Gently stretch your dough out into a rough rectangle on your lightly floured counter. Spread that softened, buttery cinnamon sugar mixture evenly across the whole surface. Now, here’s the trick: roll the dough up tightly, starting from the long edge, like you’re rolling up a sleeping bag. Try to keep that roll as snug as you can to trap those layers of spice inside!
Bulk Fermentation, Shaping, and Cold Proofing the Pumpkin Sourdough
Once swirled, gently tuck the dough into an oiled bowl and let it bulk ferment. Depending on how warm your kitchen is, this could take three to five hours. You’re looking for about a 30 to 50 percent volume increase, not a huge doubling! Once ready, gently shape it into a tight round—we want surface tension for scoring. Pop that shaped loaf, seam-side up, right into your floured banneton basket. The final, critical step before baking is the cold proof in the fridge for 12 to 18 hours. This long chill time is where the sourdough flavor deepens beautifully.
Baking Your Rustic Sourdough Variations: Oven Setup for Pumpkin Sourdough
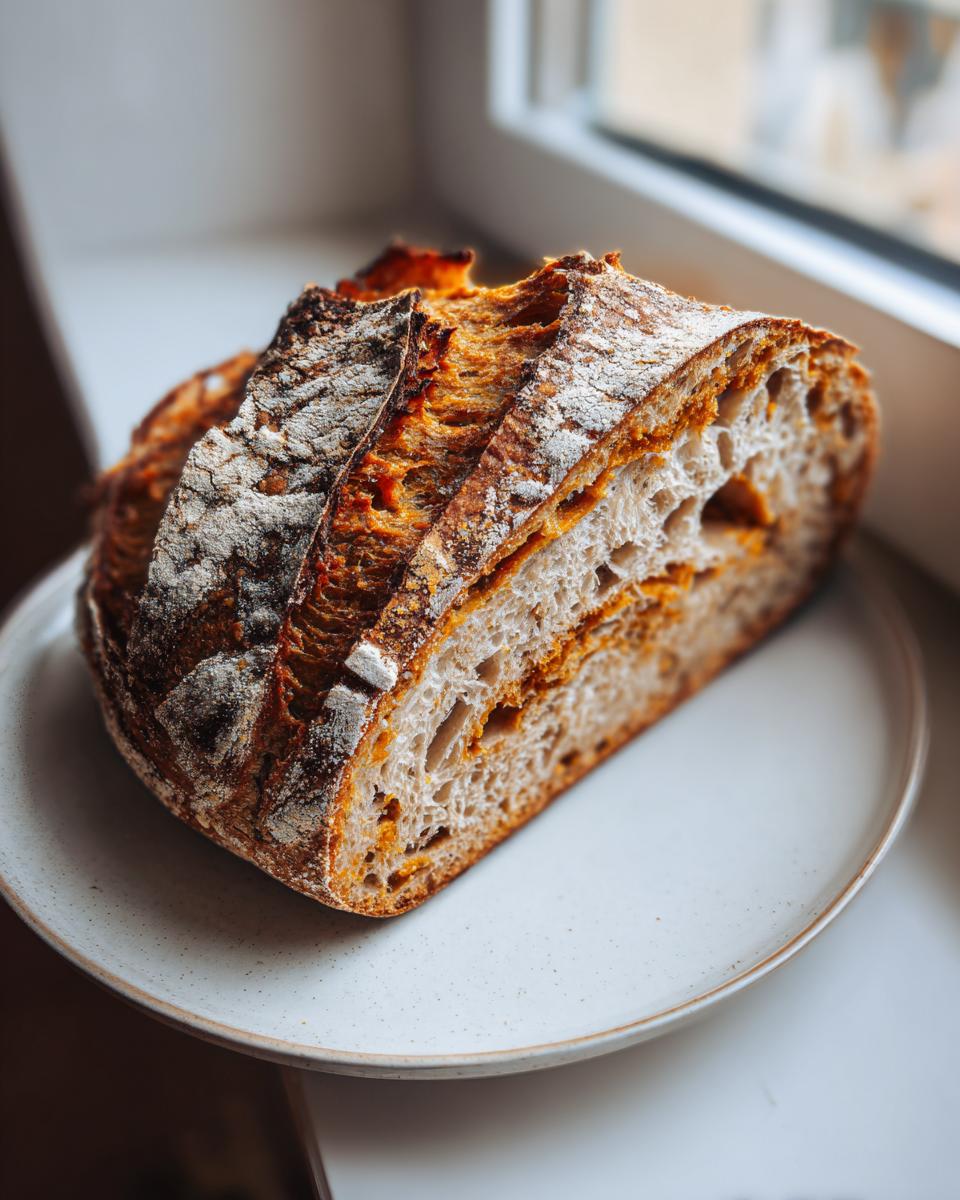
Getting the bake right is crucial for achieving that beautiful artisan crust we all chase, especially with a wetter dough like this pumpkin sourdough! Because this is a wetter, richer loaf, we need serious heat to set the crust immediately. Forget the baking stone for now; we are going straight for the Dutch oven method because it’s the absolute best way to trap steam. This trapped steam keeps the crust soft initially, allowing the loaf to expand fully before that golden shell sets hard.
First things first: preheat that oven and the Dutch oven inside it. Seriously, you need to let it get scorching hot for at least 45 minutes at 500°F (260°C). I’ve messed this up before, trying to rush it, and trust me, you get a flat, sad loaf. Patience here pays off massively.
Once the oven is ready, carefully take your cold dough out of the fridge and gently turn it out onto a piece of parchment paper. You should still feel how cold and firm it is from the proofing—if it’s too warm, scoring becomes a nightmare! Score the top surface quickly just before you drop it into the hot pot. If you’re interested in what makes a starter strong enough to handle this kind of heat shock, you can always review my notes on sourdough starter care.
Now, here are the critical baking times that ensure a moist final product:
- Bake the loaf covered inside that screaming hot Dutch oven for 20 minutes exactly at 500°F (260°C). That steam works its magic!
- After 20 minutes, it’s time to get the color. Carefully remove the lid (watch out for that steam!) and immediately drop the temperature down to 450°F (232°C).
- Let it continue baking uncovered for another 20 to 25 minutes. You’re looking for a deep, rich, mahogany brown crust. Don’t be scared of color; that color equals flavor!
Remember that final, essential step? You have to let this loaf cool completely on a wire rack. If you slice into this warm pumpkin sourdough, all that beautiful steam escapes, and your moist crumb turns gummy. Wait for it—that beautiful swirl deserves the wait!
Tips for Success When Making This Moist Sourdough Loaf
Look, I’ve thrown out loaves before. Don’t feel bad if you have too. Sourdough is forgiving on flavor, but it can be sassy about structure! My biggest early failure with these types of dense, rustic bakes, like my date nut bread, was trying to score it before it was fully chilled. Trying to slice a warm, pumpkin-infused dough is guaranteed to lead to a sticky mess and a pancake loaf. Resist the urge to peek!
When I finally got this whole process down—especially getting that beautiful bloom without tearing the swirl—it was because I started respecting the cooling phase exactly as much as the bulk fermentation. I know other bakers talk about getting amazing results using quick tips found elsewhere, like the ones discussed on Gek Buzz, but for artisan work, patience is key!
The Importance of Complete Cooling for Your Pumpkin Sourdough
I know the whole house smells incredible when that loaf comes out, but you absolutely must let it cool completely—and I mean *completely*—before cutting into it. When you pull the bread from the Dutch oven, the starches inside are still very wet, held together by steam. If you cut it now, that steam rushes out, and poof! You’ve just sucked the necessary moisture right out of your crumb, turning that gorgeous, tender texture into something dense and gummy. Leaving it on the wire rack allows that internal steam to redistribute evenly throughout the loaf structure. It sets the final crust and guarantees that soft, moist bite you’re looking for in your pumpkin sourdough.
Serving Suggestions for Cozy Fall Breakfast Bakes
So, you’ve waited the agonizing 4 hours for that loaf to cool—now what? This pumpkin sourdough is honestly great just sliced thick and eaten plain, but when you’re ready to elevate your breakfast spread, you have to get creative. This bread is designed for cozy fall mornings!
The sweet, spiced nature of the cinnamon swirl means it pairs perfectly with creamy textures. Forget plain butter; try a slightly softened block of cream cheese right out of the fridge. The cool tang cuts the sweetness beautifully. Or, if you’re feeling extra festive, treat it like toast for your morning coffee. You absolutely must try it toasted alongside my apple cinnamon muffins sometime—the spices just harmonize perfectly. It really makes having a spread of Cozy Fall Breakfast Bakes feel special, even on a Tuesday.
Storage and Reheating Instructions for Leftover Pumpkin Sourdough
The best part about this loaf holding so much moisture is that it actually lasts really well! We want to keep that tender crumb intact, so never put your finished pumpkin sourdough loaf in the refrigerator—it speeds up staling, which is the opposite of what we want for a harvest bread.
Keep the cooled loaf tightly wrapped in plastic wrap or tucked inside a resealable bag at room temperature. It should stay perfectly fresh this way for three to four days. If you know you won’t get through it that fast, slicing it before freezing is the ticket. Lay those slices out on a tray to freeze solid first, then stack them up in a freezer bag. Check out the beautiful, moist results others get when they follow the steps over at Kings Cook!
When you’re ready for a slice, you just pop it straight from the freezer into the toaster—no need to thaw it first. That sudden blast of heat brings back that wonderful crust texture immediately. It’s the perfect simple way to enjoy this rustic sourdough variation all season long.
Frequently Asked Questions About Sourdough Pumpkin Spice Loaf
I know when I embark on a complicated bake, especially one that uses my precious starter, I always have a list of nagging little questions. I’ve gathered up the ones I hear most often about this Sourdough Pumpkin Spice Loaf! We want your experience to be smooth and delicious, avoiding any pitfalls that could lead to a dense or poorly risen loaf. I’ve been down those roads, and they are no fun! Before you start mixing, take a peek at these answers—they really help nail the process down.
If you’re looking at making other wonderful fall treats later on, you should definitely check out my recipe for pumpkin snickerdoodle cookies!
Can I use fresh pumpkin instead of puree in this pumpkin sourdough recipe?
Oh, that’s a great question about using fresh pumpkin! You absolutely *can*, but you have to treat it carefully. Fresh pumpkin tends to hold a lot more water than the canned stuff, even once cooked down. If you roast and mash your own pumpkin, you need to cook it until it’s quite dry—much drier than you think. If you add too much moisture to this pumpkin sourdough dough, your bulk fermentation will run wild, and your final loaf structure will suffer. I’d recommend cooking it down slowly, stirring often, until it has a thick, almost paste-like consistency before you measure out your 100 grams.
What is the best way to achieve a visible cinnamon swirl in my artisan pumpkin bread?
This is all about surface coverage and sealing it in tight! To get that beautiful ribbon—that hallmark of a great artisan pumpkin bread—you need two things. First, make sure that butter for the swirl mixture is truly soft and spreadable; if it’s cold, it will tear the dough when you try to smooth it out. Second, after you sprinkle the sugar mixture on, roll the dough up like a jelly roll, making sure the final seam is pinched and tight. That pressure is what separates the layers during the bake. If you roll it loosely, the cinnamon sugar just mixes in rather than swirling!
How long does bulk fermentation take for this Fall Harvest Bread Recipe?
This is the trickiest part of all sourdough, and it’s highly dependent on your kitchen environment! I mentioned 3 to 5 hours in the instructions, but that’s a big window! If your kitchen is warm—say, 75°F or higher—it might only take 3 hours to see that 30-50% rise. If your house is cooler, like the drafty old farmhouse I grew up in, you might need closer to 5 or even 6 hours. You have to watch the dough, not the clock! Your dough should feel airy and jiggly, not stiff. That’s how you know your Fall Harvest Bread Recipe is ready for the next step.
Share Your Homemade Fermented Pumpkin Bake Experience
Whew! We made it through the folds, the shaping, and the agonizing cooling period! Now that you’ve crafted your own beautiful, rustic pumpkin sourdough loaf, I really want to hear about it. This is the part of home baking I love the most—seeing how this recipe translates into different kitchens across the country.
Did you manage to get that perfect ribbon swirl? I always get so excited when I see photos of other bakers successfully capturing that beautiful spice layer inside their loaf. And how did you serve it? Did you enjoy it plain, or did you try slicing it thick and topping it with sweet cream cheese like I suggested? If you’ve moved on to making other pumpkin delights like my pumpkin bars, let me know which one is your new favorite fall winner!
Please take a minute to drop a comment below. Rate the recipe, tell me how your starter performed, and share any little tweaks you made that worked out brilliantly for you. Your feedback truly helps me continue testing and refining these heritage recipes for everyone. Happy baking!
PrintCinnamon Swirl Pumpkin Sourdough Loaf: A Moist Fall Bake

Create a tender, moist artisan loaf combining the tang of sourdough with warm pumpkin spice and a decadent cinnamon swirl. This recipe is perfect for your autumn baking projects.
- Prep Time: 45 min
- Cook Time: 45 min
- Total Time: 14 hours 15 min
- Yield: 1 loaf 1x
- Category: Bread
- Method: Baking
- Cuisine: American
- Diet: Vegetarian
Ingredients
- 100g active sourdough starter
- 350g warm water
- 500g bread flour
- 100g pumpkin puree (not pie filling)
- 10g fine sea salt
- 50g sourdough discard (optional, for extra tang)
- For the Swirl: 100g brown sugar, 1 tablespoon ground cinnamon, 2 tablespoons softened butter
Instructions
- Mix the active starter and warm water in a large bowl until combined.
- Add the flour, pumpkin puree, and salt to the mixture. Mix until a shaggy dough forms. If using discard, mix it in now.
- Perform a 30-minute rest period (autolyse).
- Begin the stretch and fold process: perform four sets of stretch and folds, spaced 30 minutes apart, to build dough strength.
- For the swirl, mix the brown sugar and cinnamon together. Spread the softened butter over the dough surface after the final set of folds. Sprinkle the cinnamon sugar mixture evenly over the dough. Roll the dough up tightly to incorporate the swirl.
- Place the dough in a lightly oiled bowl, cover, and allow for bulk fermentation at room temperature until it has increased in volume by about 30-50% (this can take 3-5 hours depending on your kitchen temperature).
- Gently shape the dough into a tight boule or oval. Place it seam-side up in a floured banneton basket.
- Cold proof the dough in the refrigerator for 12-18 hours.
- Preheat your oven to 500°F (260°C) with a Dutch oven inside for at least 45 minutes.
- Carefully turn the cold dough out onto parchment paper. Score the top surface as desired.
- Bake the loaf inside the Dutch oven, covered, for 20 minutes at 500°F (260°C).
- Reduce the oven temperature to 450°F (232°C), remove the lid, and continue baking for another 20-25 minutes until the crust is deep golden brown.
- Cool the loaf completely on a wire rack before slicing to keep the crumb moist.
Notes
- Using pure pumpkin puree provides the best flavor and moisture balance for this artisan loaf.
- If you are new to sourdough, you can omit the sourdough discard, though it adds a pleasant depth of flavor.
- This loaf is excellent toasted with cream cheese for a cozy fall breakfast.
Nutrition
- Serving Size: 1 slice
- Calories: 320
- Sugar: 12g
- Sodium: 350mg
- Fat: 5g
- Saturated Fat: 2g
- Unsaturated Fat: 3g
- Trans Fat: 0g
- Carbohydrates: 60g
- Fiber: 3g
- Protein: 10g
- Cholesterol: 0mg