
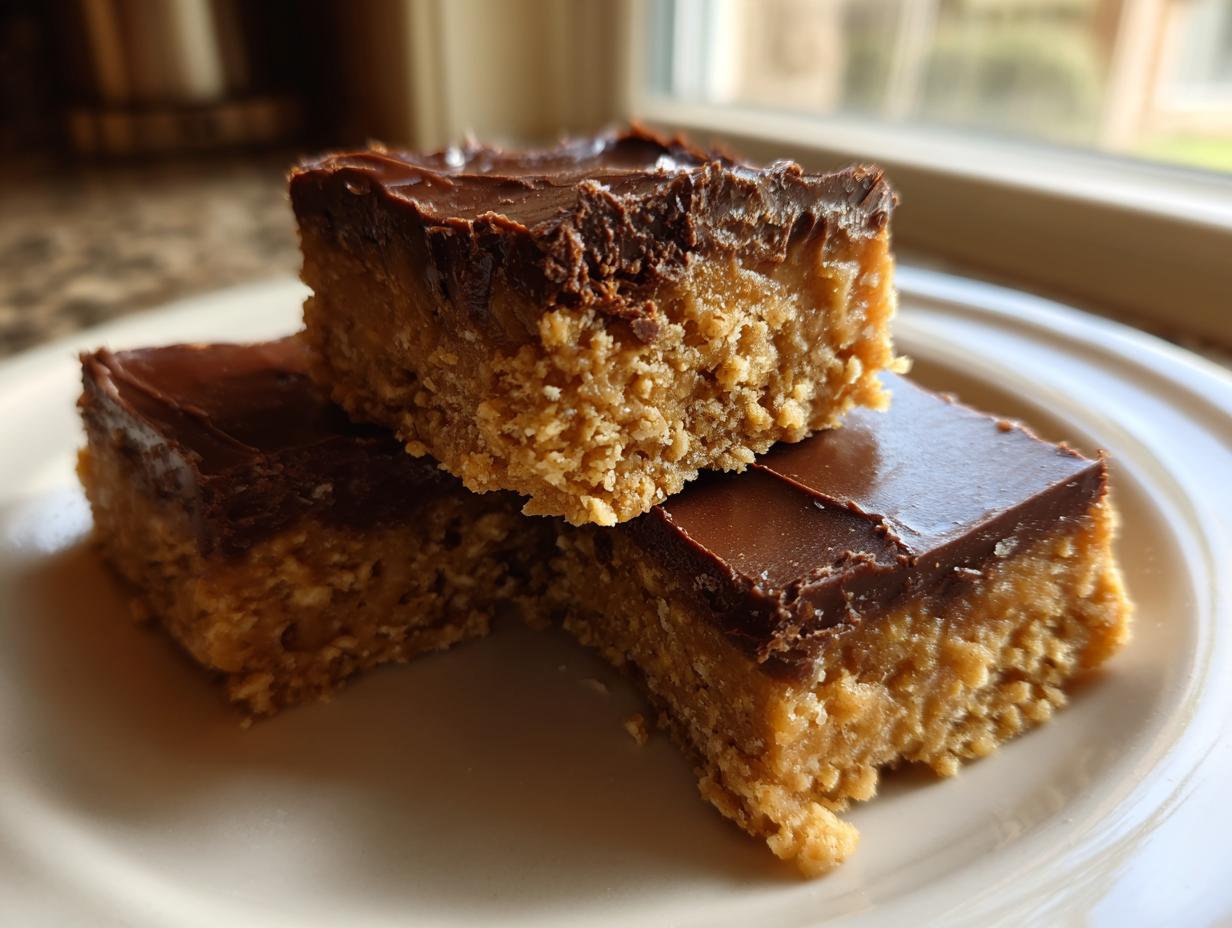
Are you having one of those days where only something rich, creamy, and unapologetically sweet will fix it? I completely understand. When those cravings hit, you don’t want to wait around for an oven to preheat. That’s why I am so thrilled to share what I consider the absolute best solution: these Easy No-Bake Chocolate Peanut Butter Bars.
Honestly, these simple **peanut butter bars** are my go-to when I need a massive hit of comfort dessert without the fuss. We’re talking about a thick, chewy peanut butter base hidden under a silky blanket of chocolate topping. As I’ve often said here at the site, my commitment, coming from a genuine home cook background, is to give you reliable recipes that work without stressing you out. This recipe delivers that nostalgic satisfaction perfectly, and you won’t have to turn on your oven once!
- Why You Will Make These Easy Peanut Butter Bars Again and Again
- Gathering Ingredients for Your Homemade Peanut Butter Bars
- Step-by-Step Instructions for No Bake Peanut Butter Bars
- Tips for Making the Best Peanut Butter Bars
- Storage and Make-Ahead Tips for Peanut Butter Dessert Ideas
- Variations on Classic Peanut Butter Bars
- Frequently Asked Questions About Peanut Butter Bars
- Nutritional Estimate for These Simple Sweet Treats
- Share Your Homemade Peanut Butter Bars Experience
Why You Will Make These Easy Peanut Butter Bars Again and Again
Look, I get it. Life is busy, but cravings don’t keep office hours. That’s why these treats are going straight into your favorite recipe folder, I promise. They hit that perfect spot between being totally decadent and ridiculously simple. If you’re after those deeply satisfying, **creamy peanut butter desserts** that just melt in your mouth, listen up!
-
Perfectly No Bake Peanut Butter Bars
This is the best part—zero oven time! Seriously, you can make these on the hottest summer day, and your kitchen stays cool. This means instant gratification with no waiting for baking cycles, which is perfect for when you need emergency dessert duty.
-
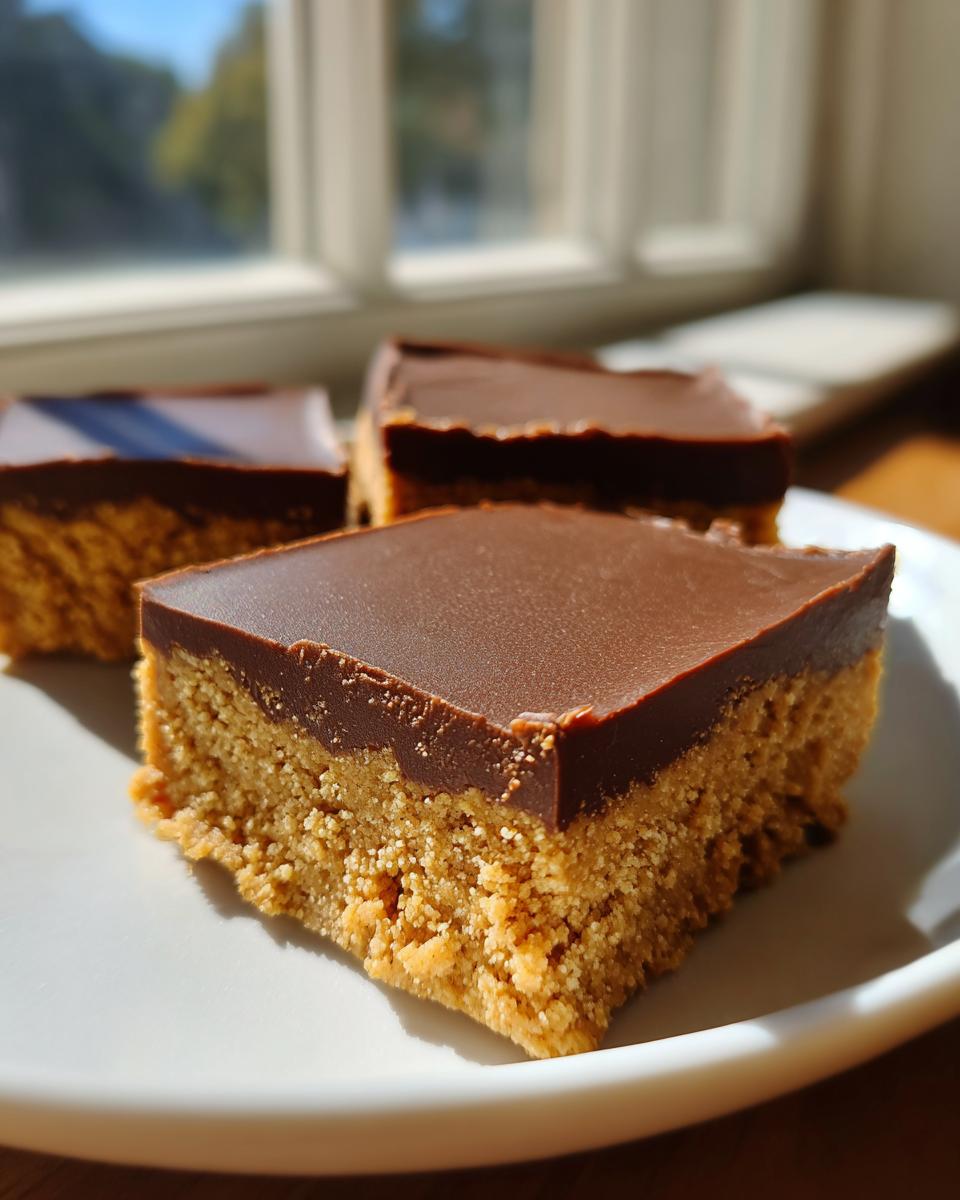
Rich and Creamy Bars Texture
That base layer is thick, slightly chewy, and deeply flavorful. But it’s the topping that seals the deal! That smooth, chocolate-blanket finish makes these hands-down the **Best Peanut Butter Bars** you’ll ever take the time to make. It’s pure indulgence, folks.
-
Minimal Prep Time for Quick Dessert Bars
My goal here was speed. We are talking about 15 minutes of active mixing time before they go into the fridge. That makes them ideal **Quick Dessert Bars** for last-minute potlucks or when you need a sweet ‘thank you’ gift fast. You can find more super fast recipes like this one over here if you’re feeling ambitious!
Gathering Ingredients for Your Homemade Peanut Butter Bars
Okay, since these are no-bake, the quality of what you put in really matters! Because we aren’t using the oven to hide any funny flavors, these bars rely entirely on the natural richness of the peanut butter and the sweetness of the sugar. Trust me when I say using good, creamy peanut butter makes a huge difference between a good bar and a truly memorable one. Don’t substitute the butter with anything other than the real stuff here; it adds that necessary richness that makes these bars feel decadent.
We’re keeping it super simple, which is why this recipe is such a lifesaver! You should have everything you need in your pantry right now—except maybe the graham cracker crumbs, but crushing a sleeve of crackers only takes two minutes. Remember, we need two different amounts of peanut butter for two different jobs, so make sure you have enough on hand!
Ingredients for the Peanut Butter Base
- 1 cup creamy peanut butter (This is the main star for the base!)
- 1 cup powdered sugar
- 1/2 cup unsalted butter, softened (It must be soft, not melted, for creaming!)
- 1 1/2 cups graham cracker crumbs
Ingredients for the Silky Chocolate Topping
- 1 cup semi-sweet chocolate chips
- 1/4 cup creamy peanut butter (This blends with the chips to keep the topping smooth and soft)
Step-by-Step Instructions for No Bake Peanut Butter Bars
Alright, this is where the magic really happens, and it’s shockingly fast! Because we aren’t using the oven, these **No Oven Dessert Recipes** are truly your friend on a busy day. We mix, press, melt, and chill. That’s it! Just follow my lead, and within a couple of hours, you’ll be slicing into those gorgeous, layered creations. I always recommend getting the pan ready first so you aren’t scrambling when the base mixture is ready to go.
Preparing the Pan and the Peanut Butter Base
First things first, grab that 8×8 inch pan. You absolutely must line it completely with parchment paper, making sure you leave a nice overhang on two sides. These overhangs are your handles later when you need to lift the entire block out—trust me, you’ll thank me for this step later! Once that’s done, we tackle the base. In a medium bowl, combine the main cup of peanut butter, all that lovely powdered sugar, the slightly softened butter, and those graham cracker crumbs. You need to mix this until it looks like a thick, uniform dough. Then, press it down into your prepared pan. Do this firmly! Use the bottom of a measuring cup to really pack it in there so you get a sturdy foundation for our topping.
Creating the Chocolate Peanut Butter Topping
Now for the best part: chocolate! Take your chocolate chips and the reserved 1/4 cup of peanut butter and toss them into a microwave-safe bowl. Here is a critical, expert tip for smooth topping: Do *not* just blast it on high power. Microwave in 30-second bursts, and stir really well in between each burst. If you overheat chocolate, it seizes up, and nobody wants a crumbly, grainy topping on these perfect **peanut butter bars**. Keep stirring until it’s silky smooth—no lumps allowed!

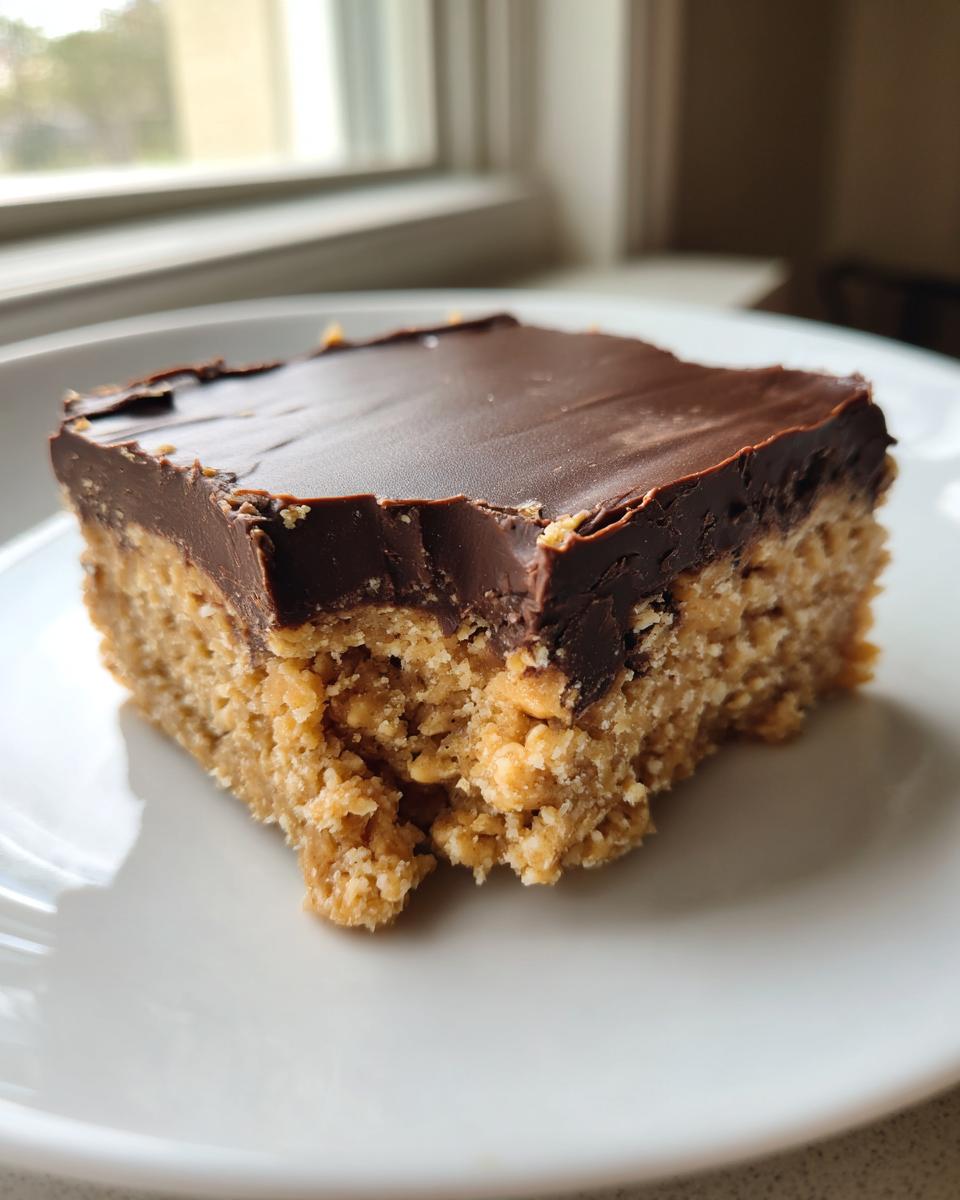
Assembling and Chilling Your Peanut Butter Bars
Once your chocolate topping is perfectly melted and glossy, gently pour it right over that chilled, firm peanut butter base. Use a spatula to evenly spread it right to the edges—no bare spots allowed! Now, you have to be patient; this is the hardest step for me! Pop the whole pan into the refrigerator and let it chill for a minimum of 2 hours until the chocolate is completely set and firm to the touch. If you’re in a real pinch (and you’re looking for *really* quick dessert bars), pop it in the freezer for about 30 minutes instead. Once firm, use those parchment overhangs to lift the whole slab out and cut it into 16 squares. Then, stand back and admire your handiwork!
Tips for Making the Best Peanut Butter Bars
You know, making a batch of these **Easy Peanut Butter Bars Recipe** is so simple, but a few little tricks are what take them from good to absolutely legendary. Because there’s no baking involved, every single measurement and temperature detail counts big time. I’ve tested these endlessly to figure out the tiny things that make the biggest difference, especially when trying to get that perfect, satisfying texture!
The structure of these bars relies heavily on having the right consistency in the base and the topping. If you follow the main steps perfectly, you’ll be set, but these extra insights from my kitchen trials will really put you over the top!
Achieving Reese’s Style Bars Flavor
If you are anything like me, you probably grew up thinking that iconic orange and brown candy bar was the absolute apex of peanut butter desserts. My best tip for getting that very specific, addictive flavor in these **peanut butter bars** is paying close attention to the peanut butter in the base!
You definitely want to use a creamy peanut butter that has a slightly higher oil content. This helps keep the base incredibly soft and slightly fudge-like rather than dry or crumbly. The stabilized kind you find on most grocery shelves works perfectly for this purpose. If you go too natural with the really oily stuff, the base can sometimes get a little too greasy or soft—which is fine if you’re aiming for fudgy, but if you want that classic, solid texture, stick to the one that stays creamy on its own.
Quick Chill Method for Peanut Butter Bars
Patience is a virtue, especially when waiting for chocolate to set, but I know that’s not always realistic! When you need these **quick chocolate dessert bars** ready in minutes for an unexpected gathering, you can totally use the freezer trick. Remember how I mentioned wrapping the parchment paper around the sides?
Use those handles to lift the entire slab out of the pan once the chocolate is poured on. Pop the whole thing into the freezer for just about 30 minutes. This hardens that chocolate top layer much faster than the fridge will. Trust me, they will firm up enough to cut beautifully! You can check out more of my delicious dessert recipes while you wait for them to chill!
Storage and Make-Ahead Tips for Peanut Butter Dessert Ideas
One of the best things about these **peanut butter bars**—besides the fact that they require zero baking!—is how wonderfully they keep. Seriously, these are practically the definition of **Easy Make Ahead Treats**. They get better overnight, which is fantastic news if you’re preparing for a party or just want snacks ready for the week.
Because this recipe relies on softened butter and creamy peanut butter to hold the structure, temperature control is everything for longevity and texture. You don’t want them rock hard, but you also don’t want them turning into puddles on the serving tray.
Storing Your Creamy Peanut Butter Desserts
You should always store these bars in an airtight container. I prefer keeping mine right in the refrigerator. Honestly, they stay perfectly good, tasting rich and fresh, for a solid 4 to 5 days when kept cool like this. The cold keeps that chocolate layer nice and firm, which is exactly how I love them!
Speaking of temperature, I always tell people that these **Creamy Peanut Butter Desserts** taste their absolute best when served slightly chilled. If you take them straight from the fridge, the base is firm but still gives nicely when you bite into it, and the chocolate has that satisfying snap. If you leave them out on the counter for maybe 15 minutes before serving a big batch, that’s also fine, but don’t let them sit out for hours, especially if your kitchen runs warm.
Can you freeze them? Yes, you absolutely can! If you know you won’t get to them within five days, wrap the squares tightly (I double-wrap them to protect against freezer burn) and pop them in the freezer. They last great for up to two months frozen. Just pull them out about an hour before you plan to eat them, and they’ll thaw beautifully back to that ideal, slightly chilled state!
Variations on Classic Peanut Butter Bars
Even though these **peanut butter bars** are pretty much perfect right out of the box, I always love seeing how people like to tweak things to make them their own. Since the base is so simple and forgiving, it’s the perfect canvas for creativity! We aren’t doing anything complex here—no baking required, remember? We are just swapping a few things around to keep things interesting for when you need to make the same **Peanut Butter Squares** recipe for the third time this month!
When you’re making these for a potluck and everyone expects you to bring something slightly different than last time, these quick modifications are lifesavers. Plus, they are all simple swaps that won’t require an extra trip to the store.
Chocolate Topping Swaps
The recipe calls for semi-sweet chocolate chips, which gives you that classic, balanced sweetness that pairs so well with the salty peanut butter. But if that’s not your favorite, feel free to change it up! If you love a richer, slightly bittersweet flavor, swap those semi-sweet chips for dark chocolate chips. Wow, does that deepen the flavor!
On the flip side, if you are making these for a serious sweet tooth crowd—maybe little kids who haven’t developed a taste for bitter yet—milk chocolate chips melt down beautifully and make the topping extra creamy and sweet. Honestly, you can even mix half and half if you can’t decide! Just make sure whatever you choose melts smoothly when combined with that extra bit of peanut butter.
Adding Texture to Peanut Butter Bars
The base layer in this recipe is intentionally smooth and dense because of the graham cracker crumbs, but sometimes you just need a little crunch in your life, right? This is super simple to incorporate right before you press the base into the pan.
Try folding in about 1/4 cup of finely chopped peanuts right into the peanut butter mixture along with the crumbs. It adds a nice little nutty bite! Another great addition is tossing in a handful of mini chocolate chips. They won’t melt into the base, but they give you these lovely little pockets of extra chocolate when you bite through the bottom layer. If you want to see how other people modify their bar recipes, you can check out some fantastic ideas over at this site!
Frequently Asked Questions About Peanut Butter Bars
It’s so common for people to have questions when they’re trying out a new no-bake recipe, especially when they want those amazing, **creamy peanut butter desserts** to turn out just right. I’ve collected the questions I get asked the most about these **peanut butter bars**! We want to make sure you have all the best insights for making that perfect batch.
Can I use natural peanut butter in these peanut butter bars?
That is such a good question, especially since natural peanut butter is so popular now! I really, really suggest you stick with a stabilized, creamy peanut butter for these. Natural peanut butter separates, right? If you use it, the excess oil can leach out into the graham cracker base, making your bottom layer feel greasy or way too soft, even after chilling.
If you only have the natural kind, you’ll have to stir *a lot* to incorporate the oil fully, and even then, the bars might struggle to hold their shape when you cut them. A good, standard creamy peanut butter keeps everything firm and perfectly textured for these **Easy Peanut Butter Bars Recipe**!
What is the difference between these and Lunch Lady Bars Recipe?
Ah, the famous **Lunch Lady Bars Recipe**! That’s classic comfort food. The biggest difference is usually the texture and the number of layers. Traditional Lunch Lady Bars often involve a baked or chewy oatmeal-based bottom layer, sometimes with a middle layer of peanut butter frosting, and then the chocolate top. It’s more complex!
What we have here is a much simpler, totally no-bake approach. Our base uses graham cracker crumbs for structure, and we skip an extra frosting step by melting the peanut butter right into the chocolate topping. So, while the flavor profile is very similar—sweet, salty, peanut butter, chocolate—ours is much faster to assemble as one of the best **Quick Dessert Bars** around. You can see another round-up of simple recipes here if you need more easy ideas!
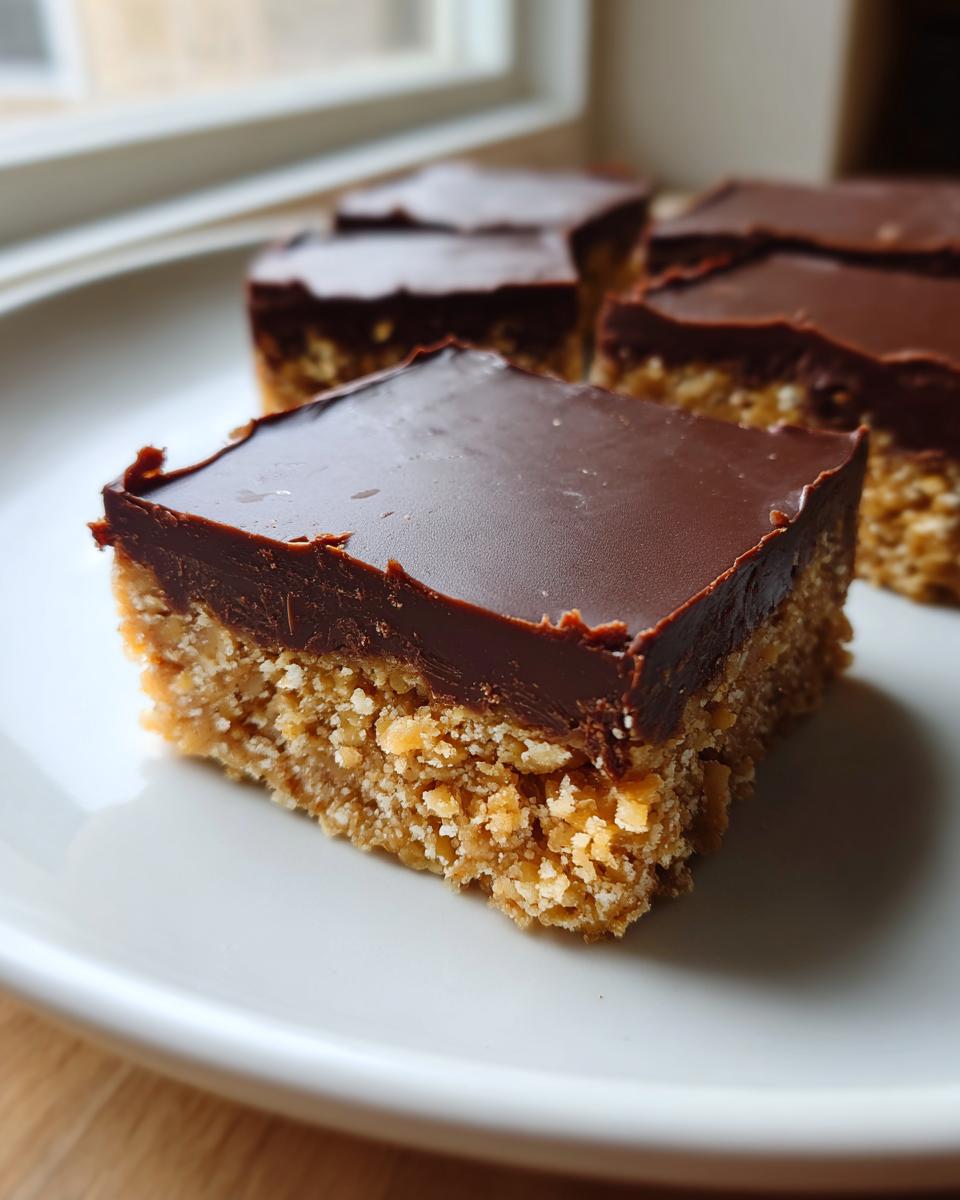
How do I get a perfectly smooth chocolate layer on my peanut butter bars?
This is all about temperature management, darling! You need two things to line up perfectly for that glassy, smooth finish on top. First, make sure your chocolate topping mixture is fully liquid and gorgeous *before* you pour it. Stir it really thoroughly after those short microwave bursts until there are zero lumps. Second, and this is crucial: your peanut butter base needs to be completely set and cold before the chocolate touches it. If the base is still warm or soft, the warm chocolate will melt it slightly, causing it to streak or sink in unevenly.
Pour the smooth chocolate onto the firmly chilled base, and then let everything set undisturbed in the fridge. That combination guarantees that unbelievably smooth finish!
Nutritional Estimate for These Simple Sweet Treats
I always like to give you a little peek at what you’re working with when you enjoy these decadent bars. Now, before you run off thinking I’m suddenly a nutritionist—whoa there! I am just a passionate home cook, not a registered dietitian. These figures are just based on the standard amounts listed in the recipe and the general estimates for those ingredients. The exact values for calories, fat, and sugar in your final **peanut butter bars** will definitely change based on the specific brands of peanut butter, butter, and chocolate chips you use.
Keep this in mind—these are rich, wonderful treats meant for enjoying, not for counting every micro-gram! If you are making these for a gathering, they are fantastic **Simple Sweet Treats** that disappear fast. Here is the breakdown based on 16 servings:
- Serving Size: 1 bar
- Calories: 250
- Sugar: 18g
- Sodium: 110mg
- Fat: 17g
- Saturated Fat: 5g
- Unsaturated Fat: 12g
- Trans Fat: 0g
- Carbohydrates: 23g
- Fiber: 1g
- Protein: 7g
- Cholesterol: 10mg
So go ahead and enjoy one (or two!) of these fantastic **No Bake Peanut Butter Bars**! Just remember this is an estimate, as my kitchen doesn’t have a fancy lab setup, just lots of love and butter!
Share Your Homemade Peanut Butter Bars Experience
Now that you’ve whipped up a batch of these super easy, **creamy peanut butter desserts**, I really want to hear how they turned out for you! Honestly, telling me about your experience is one of the best parts of running this site. It helps me know that the recipes I’m testing and perfecting here at home are truly working in *your* kitchen too.
Did you try the freezer trick to set them fast? Did you tweak the chocolate topping? Don’t keep those amazing results to yourself!
- Did you give these the official five-star rating? Pop down below and let me know how many stars you think these **No Bake Peanut Butter Bars** deserve! Every rating helps other home cooks feel confident trying them out next time.
- Snap a picture of your glorious, stacked squares! Tag me on social media so I can see your beautiful layers. Seeing your creations makes my day and keeps my passion for sharing these classic American treats going strong.
- Have a question that didn’t get answered in the FAQ? Drop it in the comments! I try my very best to answer everyone who stops by. If you’re looking to connect directly about recipe tweaks or feedback, you can always reach me through my Contact Page too.
Happy baking—or, well, happy *no-baking*! Enjoy every single rich, decadent bite of those **Homemade Peanut Butter Bars**!
PrintEasy No-Bake Chocolate Peanut Butter Bars
Make dessert simple with these easy no-bake peanut butter bars. They are creamy, rich, and ready fast for a sweet treat that everyone enjoys.
- Prep Time: 15 min
- Cook Time: 0 min
- Total Time: 2 hours 15 min
- Yield: 16 servings 1x
- Category: Dessert
- Method: No Bake
- Cuisine: American
- Diet: Vegetarian
Ingredients
- 1 cup creamy peanut butter
- 1 cup powdered sugar
- 1/2 cup unsalted butter, softened
- 1 1/2 cups graham cracker crumbs
- 1 cup semi-sweet chocolate chips
- 1/4 cup creamy peanut butter (for topping)
Instructions
- Line an 8×8 inch baking pan with parchment paper, leaving an overhang for easy removal.
- In a medium bowl, mix together the 1 cup of peanut butter, powdered sugar, softened butter, and graham cracker crumbs until fully combined into a thick dough.
- Press this mixture firmly and evenly into the bottom of the prepared pan. This forms your peanut butter base.
- In a microwave-safe bowl, combine the chocolate chips and the 1/4 cup of peanut butter. Microwave in 30-second intervals, stirring well after each, until the mixture is smooth and melted.
- Pour the melted chocolate mixture over the peanut butter base and spread it evenly to cover the entire surface.
- Refrigerate the bars for at least 2 hours, or until the chocolate topping is firm.
- Use the parchment paper overhang to lift the bars from the pan. Cut into squares before serving.
Notes
- For a Reese’s Style Bar flavor, use a creamy peanut butter with a high oil content in the base mixture.
- Chill these bars in the freezer for 30 minutes if you need them ready quickly.
- These bars taste best when served slightly chilled.
Nutrition
- Serving Size: 1 bar
- Calories: 250
- Sugar: 18g
- Sodium: 110mg
- Fat: 17g
- Saturated Fat: 5g
- Unsaturated Fat: 12g
- Trans Fat: 0g
- Carbohydrates: 23g
- Fiber: 1g
- Protein: 7g
- Cholesterol: 10mg