
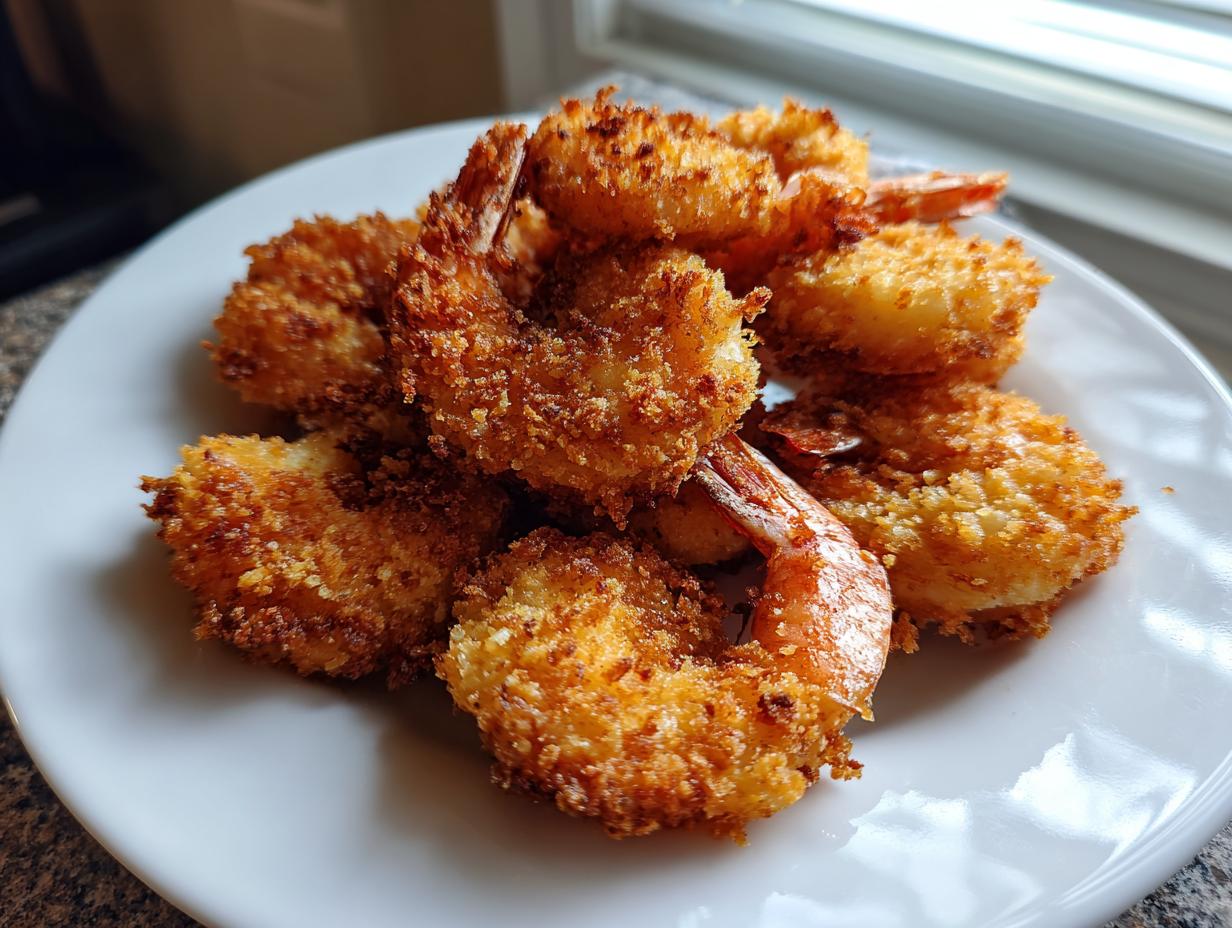
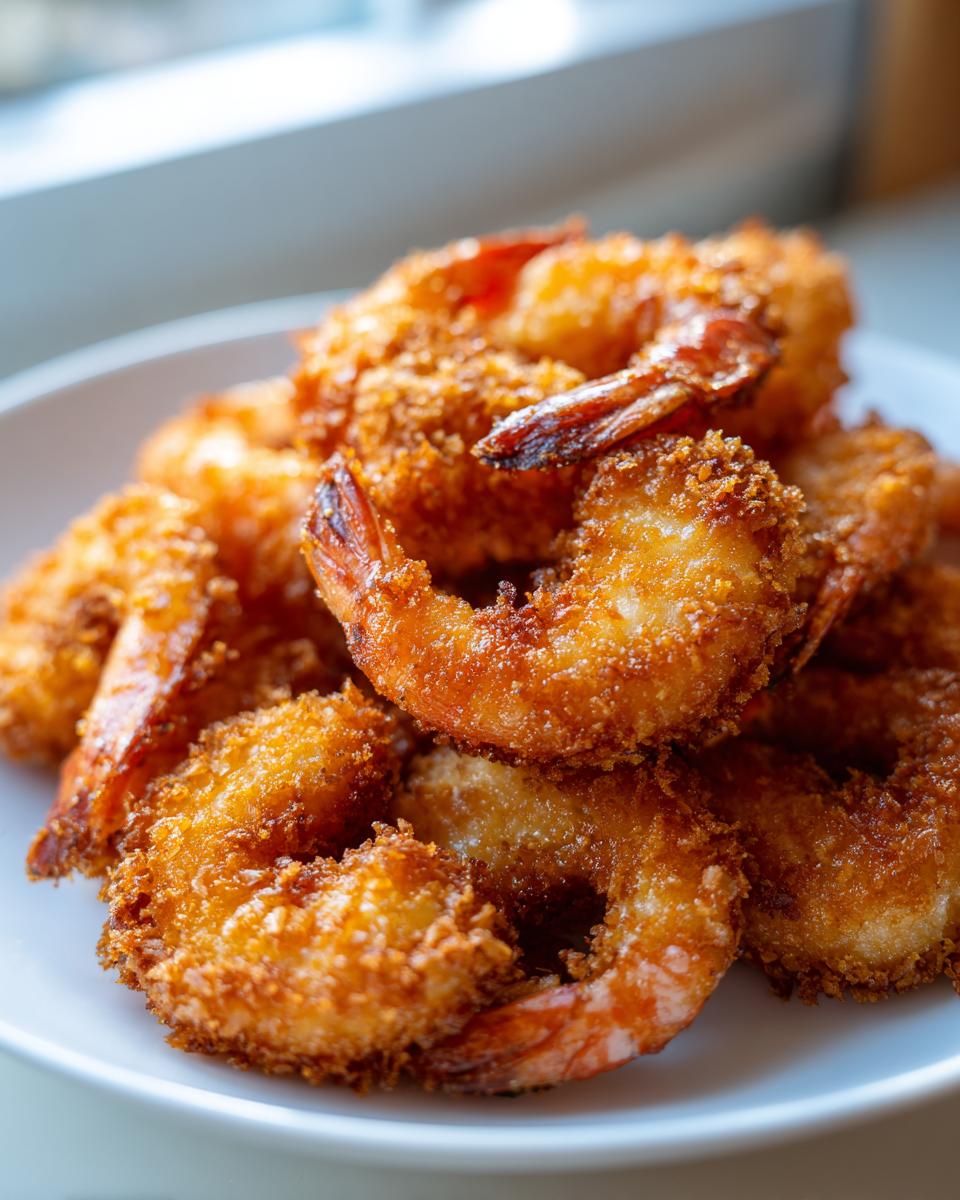
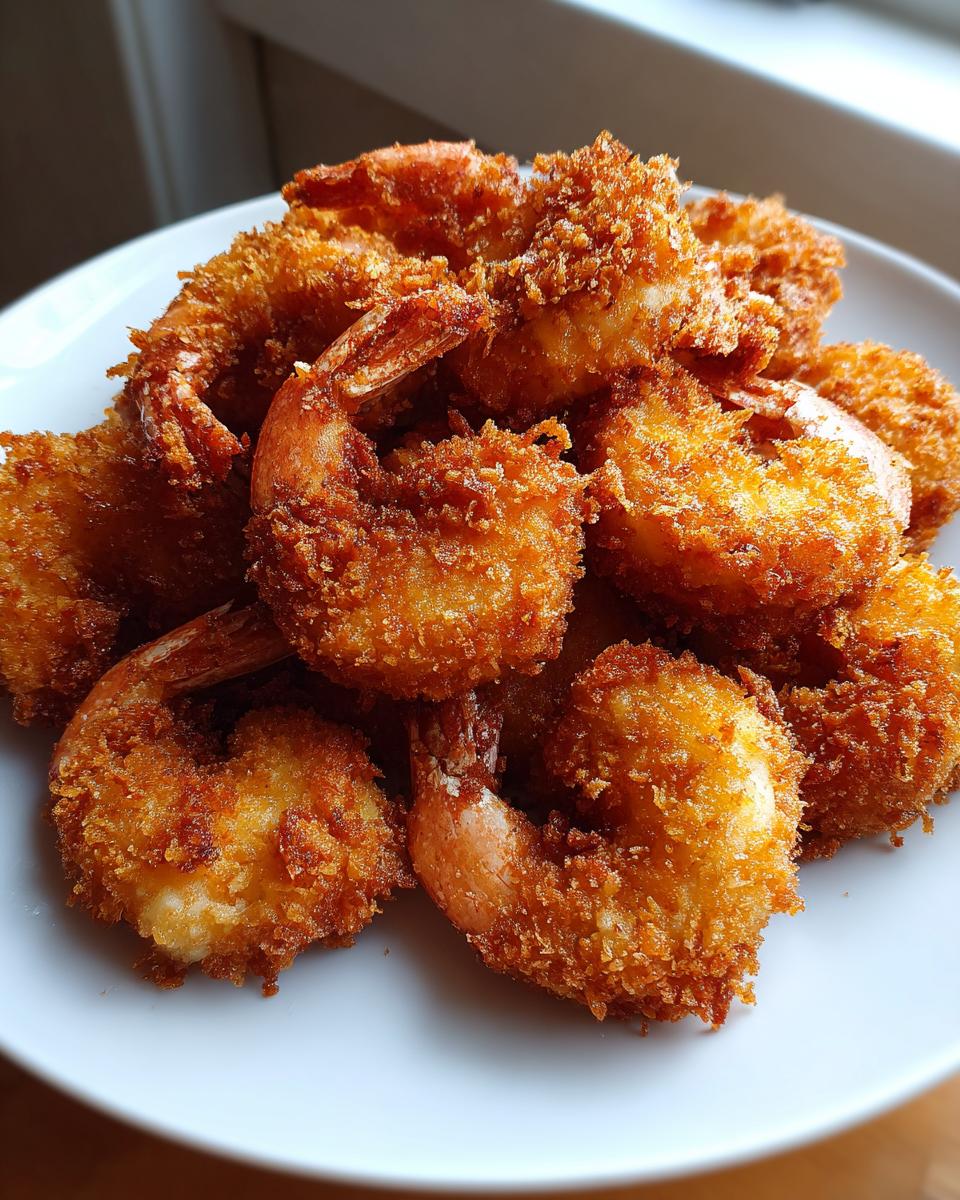
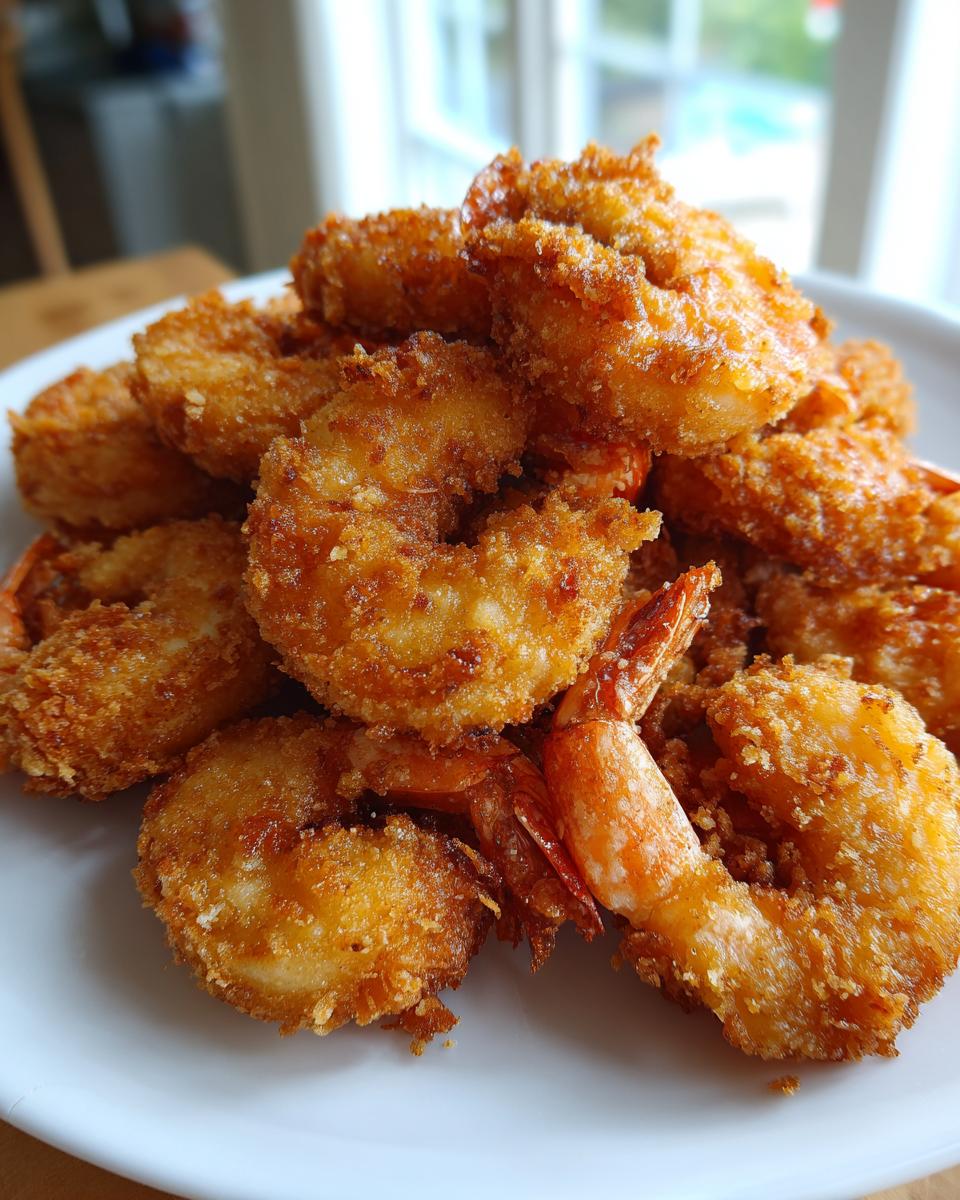
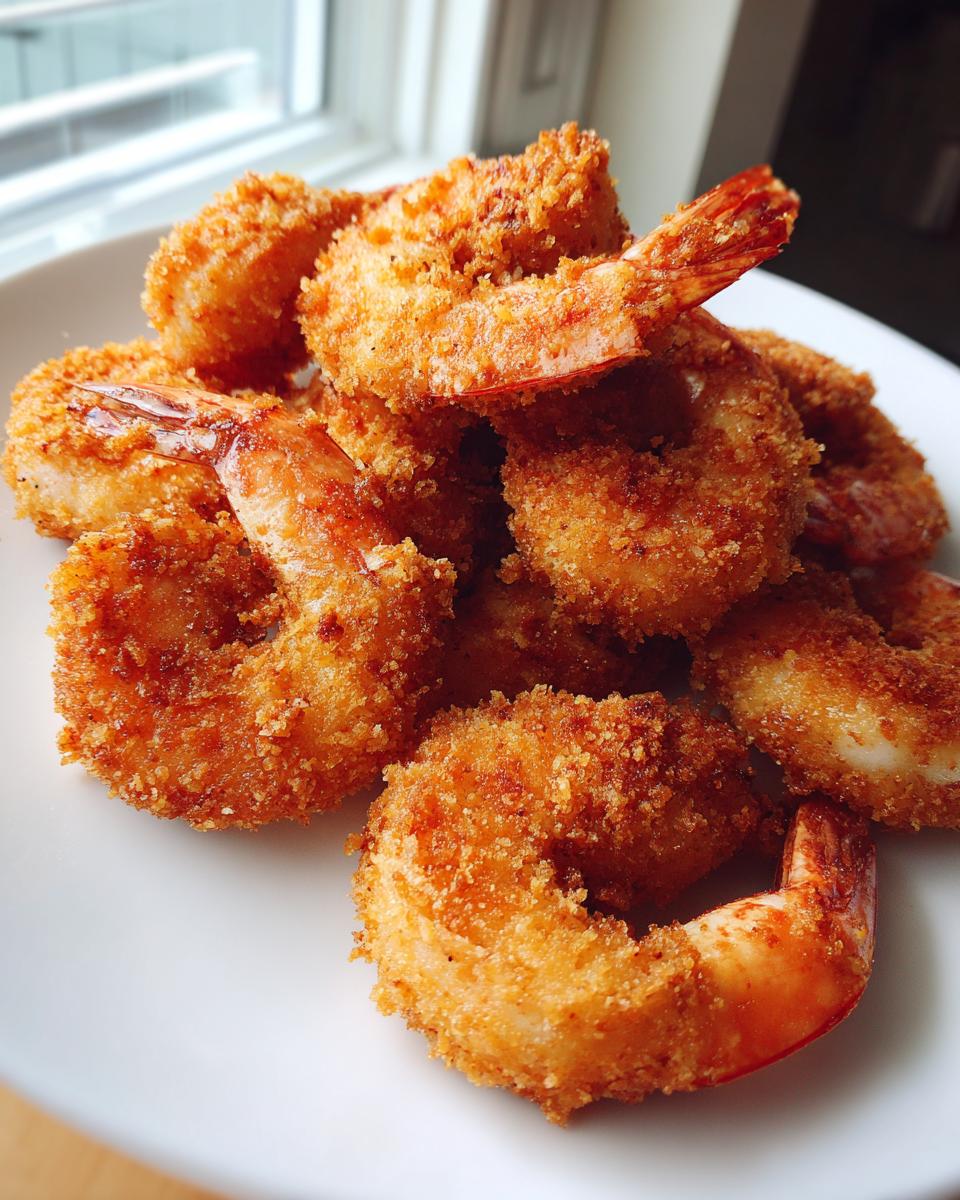
There is just nothing that says comfort and warm memories quite like true Southern cooking, is there? When I was feeling burned out in the city, craving something real and honest, it was the memory of perfectly seasoned shrimp that pulled me back to my roots. Forget those limp, oily restaurant versions! I worked hard testing and tasting until I nailed the technique for the best fried shrimp—the kind that comes out light, golden, and stays wonderfully crispy even after sitting out for a few minutes. This simple recipe for fried shrimp is the absolute ticket to bringing that authentic, satisfying flavor right into your own kitchen. Seriously, you are going to love how easy this is!
- Why This Crispy Fried Shrimp Recipe Works (Expert Tips)
- Ingredients for the Best Fried Shrimp
- Step-by-Step Instructions for Homemade Fried Shrimp
- Quick Fried Appetizer Variations and Air Fryer Fried Shrimp
- Serving Suggestions for Your Seafood Dinner Ideas
- Storing and Reheating Your Perfect Fried Shrimp
- Frequently Asked Questions About Making Fried Shrimp
- Estimated Nutritional Data for Fried Shrimp
- Share Your Homemade Fried Shrimp Experience
Why This Crispy Fried Shrimp Recipe Works (Expert Tips)
So, you want the secret to shrimp that’s shatteringly crisp on the outside and tender inside? It all comes down to two main things: the soak and the sizzle. We are aiming for that perfect golden fried shrimp look, and that means respecting the oil temperature above all else. But before the oil, we need our beautiful Southern Fried Shrimp coating to truly bond!
I’ve seen people try to cut corners here, but trust me, these steps are what elevate this from good shrimp to the shrimp. If you nail the seasoning combination and keep that oil steady, you’ve won half the battle. This is how we get that lovely crust that doesn’t fall off the minute you dunk it in sauce. You can peek at a few tried-and-true methods over at this great resource for comparison, but stick with my dredge and you’ll be set!
Achieving the Perfect Flavorful Shrimp Coating
Our flour mixture isn’t just salt and pepper, oh no! We pack in smoked paprika for color, oregano for that slight earthy tang, and a good pinch of Creole seasoning to give it that signature kick. When you dredge the shrimp, you have to physically press that flour mixture on. Smear it, pat it gently—whatever you do, make sure it adheres solidly. That pressed-on coating is what turns into your thick, crunchy shell for the fried shrimp.
Buttermilk: The Secret to Tender Fried Shrimp
The buttermilk bath might seem optional, or maybe you think you can skip it, but don’t you dare! The mild lactic acid in the buttermilk does two wonderful things: it adds a tiny bit of tanginess that brightens the whole flavor profile, and it tenderizes the surface of the shrimp proteins just enough. Crucially, it gives the dry flour that perfect amount of moisture in the right places so the coating sticks tight. It’s a non-negotiable step for real Southern Fried Shrimp!
Ingredients for the Best Fried Shrimp
Okay, let’s talk about what you actually need to pull this off. Making the best fried shrimp relies on having fresh, quality components so let’s keep it simple but focus on the details. You’ll need about two pounds of those nice, large shrimp. Make sure they are peeled and deveined, but leave those pretty tails on—they’re like little handles for dipping later! Remember, having them ready to go is key since the cooking time is so fast.
Once the shrimp are prepped, you need your wet mixture: eggs and buttermilk are the base, maybe a dash of hot sauce if you like a little kick. Then comes the star: the seasoned flour. Everything else hinges on that blend of spices giving us that authentic flavor you’d find at a good spot right on the coast. For frying, you absolutely must choose an oil with a high smoke point, like peanut oil or a good quality vegetable oil. Don’t skimp here; the oil is what guarantees that beautiful, non-greasy crust for your Southern Fried Shrimp. You can look up other great recipes showing ingredient variations here, like this one, but I promise this mix nails it every time!
Step-by-Step Instructions for Homemade Fried Shrimp
Alright, timing is everything here, which is why I always tell people to get all their ingredients near the stove before they even think about turning the heat on. We are moving fast once that oil gets hot! Getting the temperature right—that sweet spot of 350°F (175°C)—is how we guarantee that beautiful, non-greasy coating that makes the best fried shrimp. Watch that thermometer like a hawk!
A huge tip that I learned the hard way? Never, ever crowd the pan! If you drop too many shrimp in at once, the temperature plummets instantly, and you end up steaming your coating instead of frying it crisp. Work in small batches so that oil stays happy. When they come out, don’t let them sit on paper towels—that traps steam and makes them soggy again. Use a wire rack set over a baking sheet; that lets the extra oil drip away completely, keeping every piece perfectly snappy. You can check out some great visuals on the dredging process over at The Cozy Cook!
Prepping the Wet and Dry Mixtures for Fried Shrimp
First things first, whisk your eggs, buttermilk, and hot sauce until they look like one happy, pale yellow liquid. That’s your bonding agent! In a separate dish, mix every single dry spice and flour together really well. You want to make sure that color from the paprika and Creole seasoning is evenly distributed throughout the dredge. This thorough mixing guarantees you get that consistent, flavorful shrimp coating on every single piece.
Frying Technique for Crispy Fried Shrimp
Now, we take one of those prepped shrimp, give it a quick dip in the wet mixture, let the extra drip off, and then tuck it deep into the seasoned flour. Seriously press that flour on! Once coated, gently lower the shrimp into the 350°F oil. They only need about 2 to 3 minutes per side. You’re looking for that vibrant deep gold color. That quick fry time is essential for achieving crispy fried shrimp that stays juicy inside and avoids that awful rubbery texture.
Quick Fried Appetizer Variations and Air Fryer Fried Shrimp
Sometimes you need these beauties on the table in a flash, and honestly, I get it! While deep frying gives you that true seafood shack style shrimp experience, we definitely need speedier options sometimes, especially when serving them up as a quick fried appetizer. If you’re trying to cut down on oil but still want that crunch, you have to try the air fryer method mentioned in my notes. It’s fantastic!
To make the Air Fryer Fried Shrimp variant, just spray that coated shrimp lightly with cooking spray—don’t soak it, just a light mist—and pop it into your air fryer basket at about 380°F for maybe 8 to 10 minutes total. Flip them halfway through! They crisp up beautifully.
Now, if crunch is your absolute main goal and you don’t mind a tiny bit more coating work, you can always double-dip your fried shrimp. After the first flour dredge, dunk it back into the wet mix, and then hit it with flour one last time. That builds up a seriously thick, crunchy shell that holds up really well. I found a couple of tips on streamlining these variations over at Lazy Meal Prep that might help you organize your time perfectly!
Serving Suggestions for Your Seafood Dinner Ideas
Now that you’ve got the most incredible, crispy fried shrimp imaginable, the next big question is: what are we eating with it? This recipe is so versatile it works perfectly as a simple, hearty snack or as the centerpiece of a full Seafood Dinner Ideas spread. I love keeping things classic and Southern when I serve these up.
You absolutely need something cool and tangy to cut through that rich, salty crunch. My go-to side is always creamy coleslaw—it just balances everything so well. Pair it with a few homemade hushpuppies if you’re feeling ambitious, or some simple seasoned fries if you’re keeping it quick. Don’t forget the main actor in the dipping scene!
Speaking of dipping, the sauce you choose really defines the whole meal. Are you a classic cocktail sauce person? Or maybe you prefer creamy tartar sauce? I always put out both because everyone has strong opinions! For a fun twist on the Best Dipping Sauces for Shrimp, try mixing a little horseradish right into your ketchup base. You can find some fun ideas and plating inspiration over at Liam Jayne for your next gathering!
Storing and Reheating Your Perfect Fried Shrimp
If you manage to have any leftovers—which is honestly rare around my house once this fried shrimp hits the table—you’ll want to treat them gently so they don’t turn into sad, soggy shells. Putting them straight in the fridge is fine, but don’t even think about the microwave! Microwaving steamed the crust right away, and we just can’t have that.
The absolute best way to bring that crunch back is using dry heat. Set your oven to about 375°F, lay the shrimp on a wire rack set over a baking sheet (just like when you first pulled them out to drain!), and heat them for about 5 to 7 minutes. That dry heat revitalizes the coating perfectly. Or, if you are using the air fryer (which I highly recommend for reheating!), hit them at 360°F for just 3 or 4 minutes. You can find some excellent tips on managing your leftovers from Miss in the Kitchen if you need a visual guide! Store them tightly sealed in the fridge for up to two days.
Frequently Asked Questions About Making Fried Shrimp
It’s funny how even with the clearest instructions, questions always pop up! That’s totally normal when you’re aiming for something as specific as true crispy fried shrimp. I’ve gathered a few of the ones I get asked most often about achieving that perfect texture and flavor.
Why is my fried shrimp always soggy instead of golden?
Nine times out of ten, sogginess comes down to one thing: oil temperature! If your oil isn’t hot enough when the shrimp go in—it needs to be exactly 350°F—the coating soaks it up like a sponge before it has a chance to crisp. Also, make sure you aren’t overcrowding the pan! Work in small batches so the oil stays hot enough to flash-fry the crust immediately. You can check out some foolproof tips on temperature management here!
What is the absolute best oil to use for the best fried shrimp?
For this kind of high-heat frying, you need an oil with a high smoke point that won’t impart weird flavors. I swear by peanut oil because it gives that hint of depth that reminds me of great seafood shack style shrimp. Vegetable oil works perfectly well too if you have allergies! Just avoid olive oil or butter, since they burn too easily. Keeping your oil clean between batches also helps maintain that beautiful golden fried shrimp color!
Can I use frozen shrimp instead of fresh for homemade fried shrimp?
Yes, you certainly can use frozen, but you absolutely must thaw them completely first. Seriously, they need to be totally thawed because any ice crystals hitting that hot oil will drop the temperature and make your coating gummy. Pat them super dry afterward—I mean *super* dry—before they ever see the buttermilk. If they’re damp, the coating won’t stick right for your Buttermilk Fried Shrimp!
Can this recipe be adapted for Air Fryer Fried Shrimp?
Yes, it’s one of my favorite ways to make an easy shrimp recipe when I’m cooking for just myself and don’t want to deal with a big pot of oil! Just follow the steps for the wet and dry coating, spray the coated shrimp lightly with cooking spray, and air fry at 380°F for about 9 minutes, flipping halfway through. It won’t be quite as deeply flavored as the deep-fried version, but it’s wonderfully crispy!
Estimated Nutritional Data for Fried Shrimp
Now, when you’re making something this delicious, you know there’s going to be a little indulgence involved! I always want to be upfront about what’s in our favorite dishes here at MDLATDMM. Keep in mind that these numbers are just estimates based on the ingredients listed in this fried shrimp recipe for a serving size of about six shrimp. This is hearty, old-fashioned cooking, but knowing the facts helps!
For a single serving, you’re looking at roughly 350 calories, packing about 24 grams of protein while keeping the carbs low. It sits around 18 grams of total fat. This is real food, friends, meant to be enjoyed fully!
Share Your Homemade Fried Shrimp Experience
I truly hope this recipe has brought that wonderful taste of a coastal picnic right into your home! I’d be so grateful if you could pop down below and let me know what you thought. Did you go with cocktail sauce or tartar?
If you loved these juicy, snappy bites, please give the recipe five stars! And don’t forget to save this Easy Shrimp Recipe so you can make these perfect beauties again soon. You can see how others have styled theirs over at An Organized Chaos! Happy cooking—sending you all warm wishes from my kitchen!
PrintCrispy Southern Fried Shrimp Recipe
Follow these steps to make **best fried shrimp** with a light, golden crust that stays **crispy** and never greasy. This **Southern Fried Shrimp** recipe uses a simple buttermilk and seasoned flour dredge for maximum flavor.
- Prep Time: 15 min
- Cook Time: 10 min
- Total Time: 25 min
- Yield: 4 servings 1x
- Category: Dinner
- Method: Deep Frying
- Cuisine: American
- Diet: Low Fat
Ingredients
- 2 pounds extra large shrimp, peeled and deveined, tail on
- 2 large eggs
- 2 tablespoons buttermilk
- 1 tablespoon hot sauce (optional)
- 1 cup all-purpose flour
- 1 teaspoon salt
- 1 teaspoon black pepper
- 1 teaspoon garlic powder
- 1 teaspoon smoked paprika
- 1/2 teaspoon oregano
- 1/2 teaspoon onion powder
- 1/2 teaspoon Creole seasoning
- Peanut oil or vegetable oil, for frying
Instructions
- In a medium bowl, whisk together the eggs, buttermilk, and hot sauce until combined. Set aside.
- In a shallow dish, combine the flour, salt, pepper, garlic powder, paprika, oregano, onion powder, and Creole seasoning. Mix well to create your **flavorful shrimp coating**.
- Heat about 2 inches of oil in a large, heavy-bottomed skillet or Dutch oven to 350°F (175°C). Use a thermometer to monitor the temperature; maintaining this heat is key to **golden fried shrimp**.
- Dip the shrimp first into the wet mixture, allowing excess to drip off.
- Dredge the shrimp thoroughly in the seasoned flour mixture, pressing gently to make sure the coating adheres well. Place the coated shrimp on a wire rack while you finish coating the rest.
- Carefully place the shrimp into the hot oil, working in batches so you do not overcrowd the pan. Do not let the oil temperature drop too low.
- Fry the shrimp for 2 to 3 minutes per side, turning once, until they are golden brown and cooked through.
- Remove the **crispy fried shrimp** from the oil and place them immediately on a clean wire rack set over a baking sheet to drain excess oil. Do not place them on paper towels, as this can make them soggy.
- Serve immediately with your favorite dipping sauces, such as cocktail or tartar sauce, for a true **seafood shack style shrimp** experience.
Notes
- For an **Air Fryer Fried Shrimp** alternative, spray the coated shrimp lightly with cooking spray and air fry at 380°F for 8-10 minutes, flipping halfway through.
- If you prefer a thicker crust, you can double-dip the shrimp: dip in the wet mixture, coat in flour, dip back into the wet mixture, and coat again in the flour.
- This recipe is perfect for a **quick fried appetizer** or a main **seafood dinner idea**.
Nutrition
- Serving Size: 6 shrimp
- Calories: 350
- Sugar: 1
- Sodium: 650
- Fat: 18
- Saturated Fat: 3
- Unsaturated Fat: 15
- Trans Fat: 0
- Carbohydrates: 25
- Fiber: 1
- Protein: 24
- Cholesterol: 180