
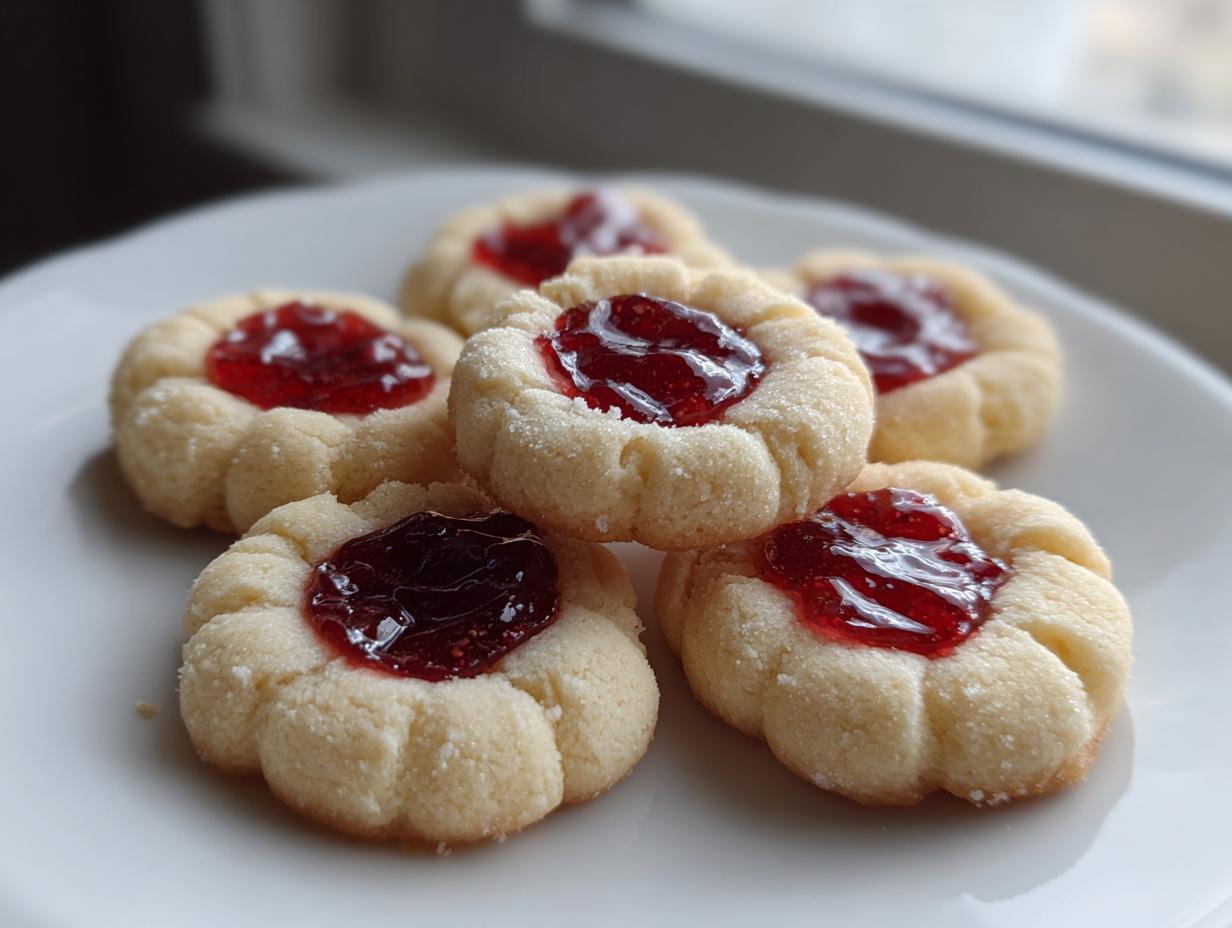
Oh, the aroma of a truly amazing homemade cookie! If you grew up like me, those buttery, tender bites filled with sweet jam just transport you straight back to the kitchen counter, watching someone you love carefully press their thumb into soft dough. Forget those store-bought versions; we’re making the real deal today! Welcome to my absolute favorite recipe: The Ultimate Classic Raspberry Thumbprint Cookies: Buttery Shortbread & Perfect Jam Center. I’m Maddie, and after years of testing (and yes, some totally flat cookie failures!), I perfected this recipe to guarantee you get that signature melt in your mouth texture every single time, plus the trick to keeping that jam snug in the center. This isn’t just another cookie recipe; it’s a tested standard made with the same care I put into my grandmother’s pot pie. You deserve a perfect batch of raspberry thumbprint cookies on the first try!
- Why You Will Love These Classic Raspberry Thumbprint Cookies
- Essential Ingredients for Perfect Raspberry Thumbprint Cookies
- Pro Tips for Making Buttery Shortbread Cookies and Perfect Raspberry Thumbprint Cookies
- Step-by-Step Instructions for Easy Thumbprint Cookies
- Finishing Touches: Glazing and Dusting Your Homemade Thumbprints
- Variations on Classic Thumbprint Cookies
- Storage and Keeping Your Raspberry Thumbprint Cookies Fresh
- Frequently Asked Questions About Raspberry Thumbprint Cookies Recipe
- Estimated Nutritional Data for These Raspberry Thumbprint Cookies
Why You Will Love These Classic Raspberry Thumbprint Cookies
Honestly, I can’t imagine a holiday tray without these beauties sitting right in the middle. They are everything you want a homemade cookie to be—simple enough for a weeknight treat but gorgeous enough for gifting. They hit all the right notes:
- That Buttery Perfection: Because this is structurally a shortbread base, the texture is unbelievable. They truly crumble beautifully and just melt away when you eat them. Forget dry cookies; these are pure comfort.
- So Easy to Make: Seriously, if you can cream butter and sugar, you can nail these. No fancy techniques needed for these easy thumbprint cookies!
- Holiday Ready: These look incredibly festive, especially when dusted with a little powdered sugar or drizzled. They are a staple in my collection of holiday cookie recipes for a reason!
- The Perfect Indent: We focus on technique so that jam stays right where it belongs—in the center—making them visually stunning.
Essential Ingredients for Perfect Raspberry Thumbprint Cookies
The secret to achieving those signature melt in your mouth cookies is using the right building blocks. Since this dough is basically a high-quality shortbread, you can’t skimp on the main players here. Everything listed below is essential for the structure and flavor of these raspberry thumbprint cookies recipe.
Butter is number one, absolutely! You must use unsalted butter, and it needs to be softened—not melted, just soft enough to leave an easy fingerprint. This helps us cream those essential air pockets in later. For the liquids, we keep it classic: just an egg yolk for richness and a splash of vanilla. If you want to lean into that nutty flavor sometimes found in almond raspberry cookies, you can add a dash of almond extract, but the vanilla shines here too!
Here is exactly what you need for about two dozen cookies. And just a heads up—if you ever need an amazing recipe to use up leftover jam, look at my blueberry jam spread; it’s a game-changer!
- 1 cup unsalted butter, softened—this is crucial!
- 1/2 cup granulated sugar (for structure)
- 1 large egg yolk (just the yolk keeps the dough tender)
- 1 teaspoon vanilla extract
- 1/4 teaspoon almond extract (optional, for flavor variation)
- 2 cups all-purpose flour
- 1/4 teaspoon salt
- 3/4 cup seedless raspberry jam (I recommend seedless for the smoothest indentation)
- 1/4 cup powdered sugar (for dusting, optional)
- 1/2 cup confectioners’ sugar mixed with 1-2 teaspoons milk (for glaze, optional)
Pro Tips for Making Buttery Shortbread Cookies and Perfect Raspberry Thumbprint Cookies
Before we even get to the mixing bowl, we have to talk technique. This is where we transform simple flour and butter into those gorgeous, crumbly buttery shortbread cookies that just dissolve in your mouth. My number one rule, learned the hard way? Temperature is everything!
You absolutely must chill this dough. If the dough is too warm when you’re rolling it, it spreads out like a sad pancake in the oven. We want them tall and proud! Chilling for at least 30 minutes firms up that butter, which ensures you get a beautifully thick cookie structure. I usually let mine sit a little longer if the kitchen feels warm.
When it comes time to make the indentations, don’t just poke lightly! You need to press down firmly to create a solid little well for the jam. If you only press halfway, the heat around the edges will cause the dough to puff up and swallow your jam whole. For the best results, I use the rounded bottom of an actual teaspoon measure—it makes a lovely, even depression.
Ingredient Notes and Substitutions for Raspberry Jam Filled Cookies
Okay, let’s talk jam. I strongly suggest using seedless raspberry jam here. If you use jam with big raspberry chunks, they can sometimes poke through the bottom of your cookie during baking, which leads to sticky messes and cookies sticking to the pan. Trust me on the seedless!
If you saw the almond extract listed, that’s my favorite little secret kick to make these feel elevated—it really complements the raspberry beautifully, turning them into those fancy almond raspberry cookies people rave about. But if you’re looking for other thumbprint cookie variations, feel free to swap it out for lemon extract, or use apricot or fig jam instead. Just keep the quantity small, usually 1/2 teaspoon is plenty!
If you enjoyed the technique tips here for these shortbread bases, you should check out how I keep things tender in my melt in your mouth whipped shortbread cookies, too. It’s all about the fat ratio!
Step-by-Step Instructions for Easy Thumbprint Cookies
Alright, let’s get baking! I promise these easy thumbprint cookies come together so smoothly once the dough is chilled. We’re starting with the wet ingredients first, where we build that beautiful, creamy base that leads to that delicious, buttery texture. Grab your stand mixer or a trusty hand mixer for this part.
First up, we cream the softened butter and the granulated sugar until it actually looks fluffy—kind of pale yellow. Don’t rush this mixing step; it’s what helps these cookies bake up light, not dense! Next, we toss in the egg yolk and those extracts. Make sure they are just blended in before you move on.
Now for the dry stuff—the flour and salt mixed in a separate bowl. We only add this in gradually to the wet ingredients while mixing on low speed. Seriously, stop mixing as soon as you see a soft dough form around the paddle. Overmixing is the enemy of shortbread, trust me! Once it’s just combined, wrap that gorgeous dough up tightly and get it into the fridge for at least 30 minutes. That chill time is non-negotiable if you want them to hold their shape!
When the dough is ready, preheat your oven to 350°F (175°C) and line those baking sheets with parchment paper. Parchment saves so much scrubbing later! Roll your dough into little balls, about an inch wide—I use a small cookie scoop to keep them uniform. Then, you make that crucial indentation. Press down firmly with your thumb or the back of a measuring spoon until you’ve made a nice, deep pocket ready for the jam. Pop about half a teaspoon of that seedless raspberry jam in there, but be gentle not to spill over the sides!
If you want to see how folks who skip the chilling step sometimes end up with spread-out cookies, you can peep at some of the other approaches over at Tasty Daily Eats, but I stick to chilling every single time!
Baking and Cooling the Raspberry Thumbprint Cookies
Once they are loaded up on the pan, they go into that 350°F oven for about 12 to 15 minutes. You aren’t looking for a deeply browned cookie here! The sign that they are perfect is when the edges look just *lightly* golden brown. The centers should still look pale, almost soft. That’s how you know you’ve got that melt-in-your-mouth texture coming through.
This next part is tough but important: let them cool on the baking sheet for about five minutes after they come out. If you try to move these delicate raspberry thumbprint cookies straight to that wire rack, they might fall apart! After those five minutes, gently move them over. They need to cool completely before you even think about dusting or glazing them, otherwise, everything will just melt into a sticky puddle. For more general tips on baking things perfectly like my chewy chocolate chip cookies, check out my baking guide!

Finishing Touches: Glazing and Dusting Your Homemade Thumbprints
Now that your raspberry thumbprint cookies are completely cool—and I mean *completely* cool, they need to be room temperature or they’ll just get messy—it’s time to make them look as good as they taste! You have two wonderful options here, depending on how much extra sweetness you want to add to your buttery shortbread cookies.
For a classic, simple look that lets that beautiful, deep raspberry color shine, just grab some powdered sugar and dust it lightly over the tops using a fine-mesh sieve. It’s quick, easy, and looks so charming—perfect for a simple dessert cookie where you want the filling to be the star.
If you want to go the extra mile, especially for those beautiful holiday cookie recipes, whip up that simple glaze I mentioned! You just need confectioners’ sugar and a tiny bit of milk. If you want a little kick, add a drop of almond extract to that mix to make a beautiful drizzle for your thumbprint cookies with glaze. You can see how I handle thick frostings for my carrot cake frosting, but for this, keep the glaze quite thin so it drizzles beautifully rather than glopping on top. If you’re looking for an example of a great drizzle, those folks over at Your Recipe Guide have a lovely presentation!
Variations on Classic Thumbprint Cookies
While the classic recipe is truly unbeatable, that buttery shortbread base is just begging to be customized! I love swapping things up, especially when I’m making large batches for cookie swaps. It’s fun to offer a few different flavors, and everyone gets excited when they see the variety.
My favorite way to change things up is by making cheesecake thumbprint cookies. It’s ridiculously easy—you just mix about 2 ounces of softened cream cheese into the dough right when you’re creaming the butter and sugar. It gives the dough a barely-there tang that pairs wonderfully with the raspberry jam. It’s a real winner!
If you’re looking for that nutty boost, try my suggestion for almond raspberry cookies. I already put 1/4 teaspoon of almond extract in the dough for the standard recipe, but if you really want that flavor to sing, double it in the dough and then swap the powdered sugar for the almond glaze I described earlier. They become so sophisticated and perfect for gifting. That’s the beauty of using one reliable recipe for so many different thumbprint cookie variations—you just tweak one small element!
Storage and Keeping Your Raspberry Thumbprint Cookies Fresh
One of the best parts about these raspberry thumbprint cookies being a shortbread recipe is that they actually keep incredibly well! Unlike some delicate cutout cookies, these homemade thumbprints stay wonderfully tender for days. They’re fantastic for making ahead, which is a real lifesaver when you’re managing all those big holiday cookie recipes.
The key to keeping that buttery shortbread texture pristine? Airtight containers are your best friend. I always stack mine with a layer of wax or parchment paper between the cookies so they don’t stick together, especially if you decided to add that glaze or extra dusting of sugar. You don’t need to refrigerate them—in fact, I highly suggest you don’t!
Room temperature is perfect for these simple dessert cookies. If you chill them, the butter firms up too much, and you lose that magical ‘melt in your mouth’ quality we worked so hard to achieve. Kept in a sealed container on the counter, they are usually perfect for about four to five days. They never last that long in my house, honestly, but they should stay delicious! If you want an expert’s take on how long other treats last, you can check out the fantastic tips over at Feed Grump!
Frequently Asked Questions About Raspberry Thumbprint Cookies Recipe
You’ve got the recipe, but maybe you’re still nervous about the final product, or perhaps you’re planning ahead for your big holiday baking marathon. That’s totally normal! I’ve tried to answer the most common things I hear from folks when they try these raspberry thumbprint cookies recipe for the first time. Don’t worry if your first few look a little funny; baking takes practice!
Why are my cookies spreading out instead of staying puffy?
Oh gosh, this is the number one issue with buttery shortbread cookies! It almost always comes down to the temperature of your dough. If the dough is too warm when you roll the balls and make the indent, the fat melts too quickly in the oven, and they spread flat! You must chill that dough for the full 30 minutes, maybe even 45 if your kitchen is toasty. If they start feeling too soft while you’re rolling them, pop the whole batch back in the fridge for 10 minutes. That chilling step is the MVP for keeping them thick and beautiful.
Can I use fresh raspberries instead of jam for these cookies?
That’s a great question regarding raspberry jam filled cookies! While fresh raspberries sound lovely, they really don’t work well here, and I wouldn’t recommend it for this specific recipe. Fresh berries release a huge amount of liquid when baked, so they would steam the dough instead of sitting neatly in the center. That steam destabilizes the shortbread, making it soggy underneath the jam. We need that concentrated sweetness and texture from the jam! Also, fresh berries have seeds that can make that thumbprint indentation messy.
Can I make these raspberry thumbprint cookies ahead for holiday cookie recipes?
Absolutely, yes! Baking ahead is how I survive the busy baking for holidays season. You can bake the cookies completely, let them cool, and store them in an airtight container at room temperature for up to a week. They actually taste amazing on day two! If you wait to add the powdered sugar dusting or the glaze, even better; just store them plain and decorate right before you package them up for gifting. They hold up so well, which is why they are one of my favorite simple dessert cookies to rely on.
How can I make sure the jam doesn’t bubble over the sides?
This is all about portion control! When you fill that little thumbprint well, you want to be conservative. It’s tempting to scoop a big dollop in there, but the jam will expand as it heats up. Try filling it only about halfway up the side of the indentation, not right to the very top edge. If you happen to see a tiny bit of jam sneaking up over the edge during baking, don’t worry too much—a quick dusting of powdered sugar once they cool will hide almost anything! If you are curious about other easy recipes you can make ahead, have a peek at my guide to easy cookie recipes on the site!
Estimated Nutritional Data for These Raspberry Thumbprint Cookies
Now, listen, I am Maddie, not a registered dietitian! This information is really just a helpful guide based on the ingredients I use when I make these classic thumbprint cookies. Because we use real butter and sugar for that incredible flavor and melt in your mouth cookies texture, they aren’t exactly diet food, but oh my goodness, they are worth it!
The estimates below are based on one cookie serving, assuming you get 24 cookies total, and they do not include the optional powdered sugar dusting or glaze. If you decide to drizzle on that sweet almond glaze, your sugar and calorie counts will definitely tick up a bit, so just keep that in mind when you’re enjoying these wonderful raspberry thumbprint cookies!
- Serving Size: 1 cookie
- Calories: Around 120
- Fat: About 7 grams (mostly that lovely butter!)
- Saturated Fat: Roughly 4 grams
- Carbohydrates: About 14 grams
- Sugar: Roughly 10 grams
- Protein: 1 gram
- Cholesterol: About 25 mg
This is just an estimate tied directly to the ingredients in my very specific raspberry thumbprint cookies recipe. If you use a different brand of jam or decide to make the cheesecake thumbprint cookies variation by adding cream cheese, your numbers will shift a bit. Enjoy them responsibly, knowing you made something absolutely wonderful from scratch!
PrintThe Ultimate Classic Raspberry Thumbprint Cookies: Buttery Shortbread & Perfect Jam Center
Bake these classic raspberry thumbprint cookies for a buttery, tender treat with a sweet jam center. This easy shortbread recipe works every time and is perfect for holiday baking or simple snacking.
- Prep Time: 20 min
- Cook Time: 15 min
- Total Time: 65 min
- Yield: 24 cookies 1x
- Category: Dessert
- Method: Baking
- Cuisine: American
- Diet: Vegetarian
Ingredients
- 1 cup unsalted butter, softened
- 1/2 cup granulated sugar
- 1 large egg yolk
- 1 teaspoon vanilla extract
- 1/4 teaspoon almond extract (optional, for flavor variation)
- 2 cups all-purpose flour
- 1/4 teaspoon salt
- 3/4 cup seedless raspberry jam
- 1/4 cup powdered sugar (for dusting, optional)
- 1/2 cup confectioners’ sugar mixed with 1-2 teaspoons milk (for glaze, optional)
Instructions
- In a large bowl, cream together the softened butter and granulated sugar until light and fluffy.
- Beat in the egg yolk, vanilla extract, and almond extract, if using, until just combined.
- In a separate bowl, whisk together the flour and salt. Gradually add the dry ingredients to the wet ingredients, mixing on low speed until a soft dough forms. Do not overmix.
- Wrap the dough in plastic wrap and chill in the refrigerator for at least 30 minutes. This step helps create the melt in your mouth texture.
- Preheat your oven to 350°F (175°C). Line baking sheets with parchment paper.
- Scoop the chilled dough into balls, about 1 inch in diameter. Roll each ball lightly in your hands.
- Use your thumb or the back of a small measuring spoon to press a deep indentation into the center of each dough ball. This creates the perfect well for the jam.
- Fill each indentation with about 1/2 teaspoon of raspberry jam. Do not overfill, as the jam may bubble over.
- Place the cookies on the prepared baking sheets, leaving about 2 inches between them.
- Bake for 12 to 15 minutes, or until the edges are lightly golden brown. The centers should remain pale.
- Remove the cookies from the oven and let them cool on the baking sheet for 5 minutes before transferring them to a wire rack to cool completely.
- If desired, dust the cooled cookies with powdered sugar or drizzle with the simple almond glaze.
Notes
- For the best indentation, chill the dough thoroughly. If the dough softens while rolling, return it to the refrigerator for 10 minutes.
- If you want almond raspberry cookies, add 1/2 teaspoon of almond extract to the dough and use an almond glaze on top.
- For cheesecake thumbprint cookies, mix 2 ounces of softened cream cheese into the dough mixture with the butter and sugar.
- To achieve a beautiful presentation for holiday cookie recipes, use a small cookie cutter to cut out a small shape from the dough before making the thumbprint, and place the cutout on top of the jam.
Nutrition
- Serving Size: 1 cookie
- Calories: 120
- Sugar: 10
- Sodium: 45
- Fat: 7
- Saturated Fat: 4
- Unsaturated Fat: 3
- Trans Fat: 0
- Carbohydrates: 14
- Fiber: 0
- Protein: 1
- Cholesterol: 25