

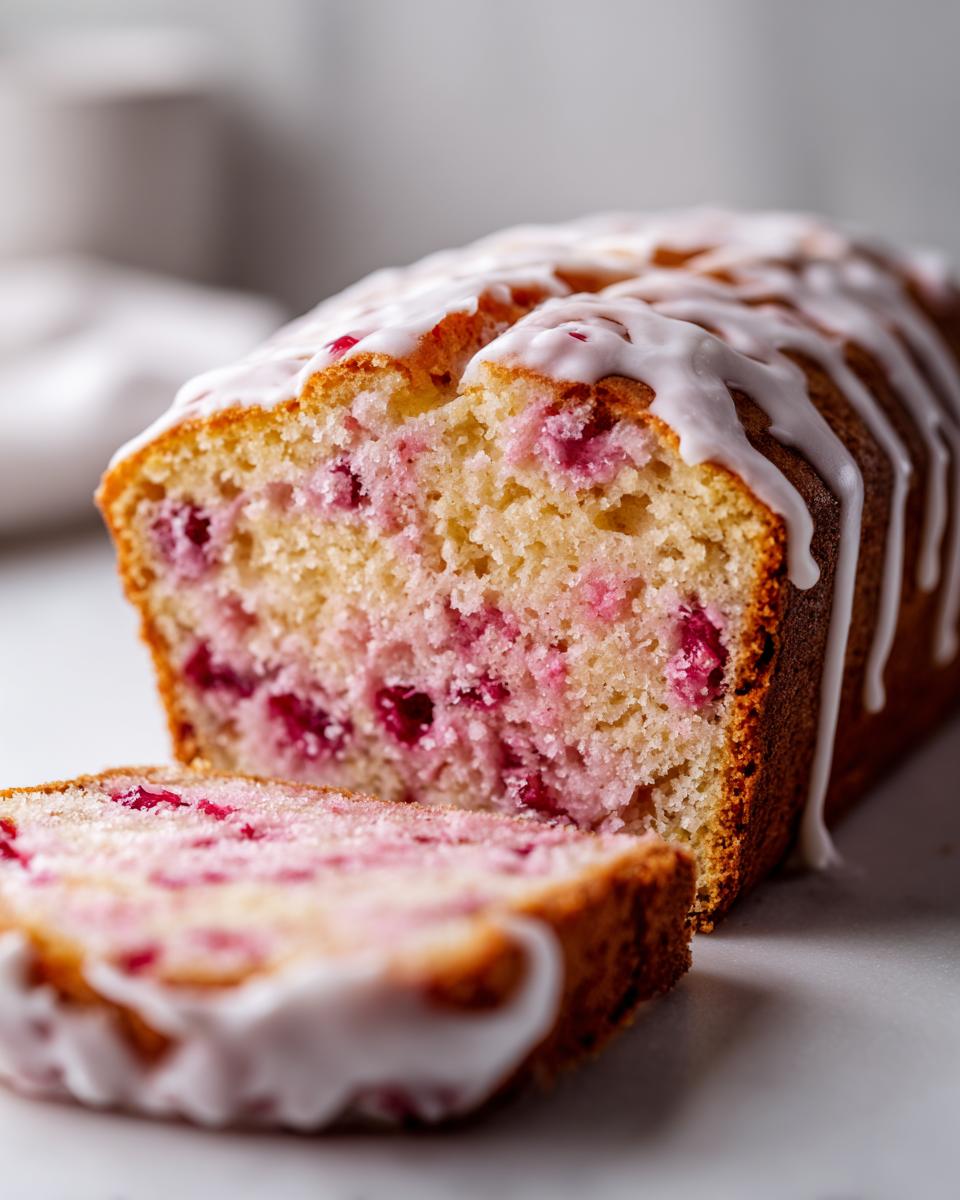
Sometimes, you just need a dessert that smells like childhood parties and looks like it came straight out of a 1950s cookbook, right? I’m Maddie, and when I crave that specific kind of sweet nostalgia, I bypass everything else for this Vintage Maraschino Cherry Cake. Believe me, there is nothing quite like biting into a slice of this ridiculously moist cherry cake, seeing that perfect, gentle pink hue shining through the crumb. This recipe isn’t fancy, but it pulls me right back to my grandmother’s kitchen, reminding me that the desserts we make from scratch hold the best memories. It’s just so straightforward, and it tastes like comfort.
- Why This Vintage Maraschino Cherry Cake is a Must-Bake (Best Cherry Cake Recipes)
- Gathering Your Ingredients for Homemade Cherry Cake
- Step-by-Step Instructions for the Easy Cherry Cake
- Tips for the Best Homemade Cherry Cake Results
- Serving Suggestions for Your Glazed Cherry Cake
- Storage and Reheating Instructions for This Cherry Cake
- Frequently Asked Questions About Vintage Cherry Cake
- Estimated Nutritional Data for This Cherry Cake
- Share Your Vintage Cherry Cake Baking Experience
Why This Vintage Maraschino Cherry Cake is a Must-Bake (Best Cherry Cake Recipes)
I think this is one of the absolute best cherry cake recipes out there because it hits that sweet spot—simple, deeply nostalgic, and still manages to be incredibly flavourful. It’s the kind of recipe you want when you are looking for Simple Baked Cherry Desserts that feel special without taking all day. Honestly, if you haven’t made a cake using the juice, you are missing out!
- It delivers a wonderfully Moist Cherry Cake texture that holds up beautifully.
- The prep is surprisingly quick; it uses standard pantry staples plus those bright little jarred cherries.
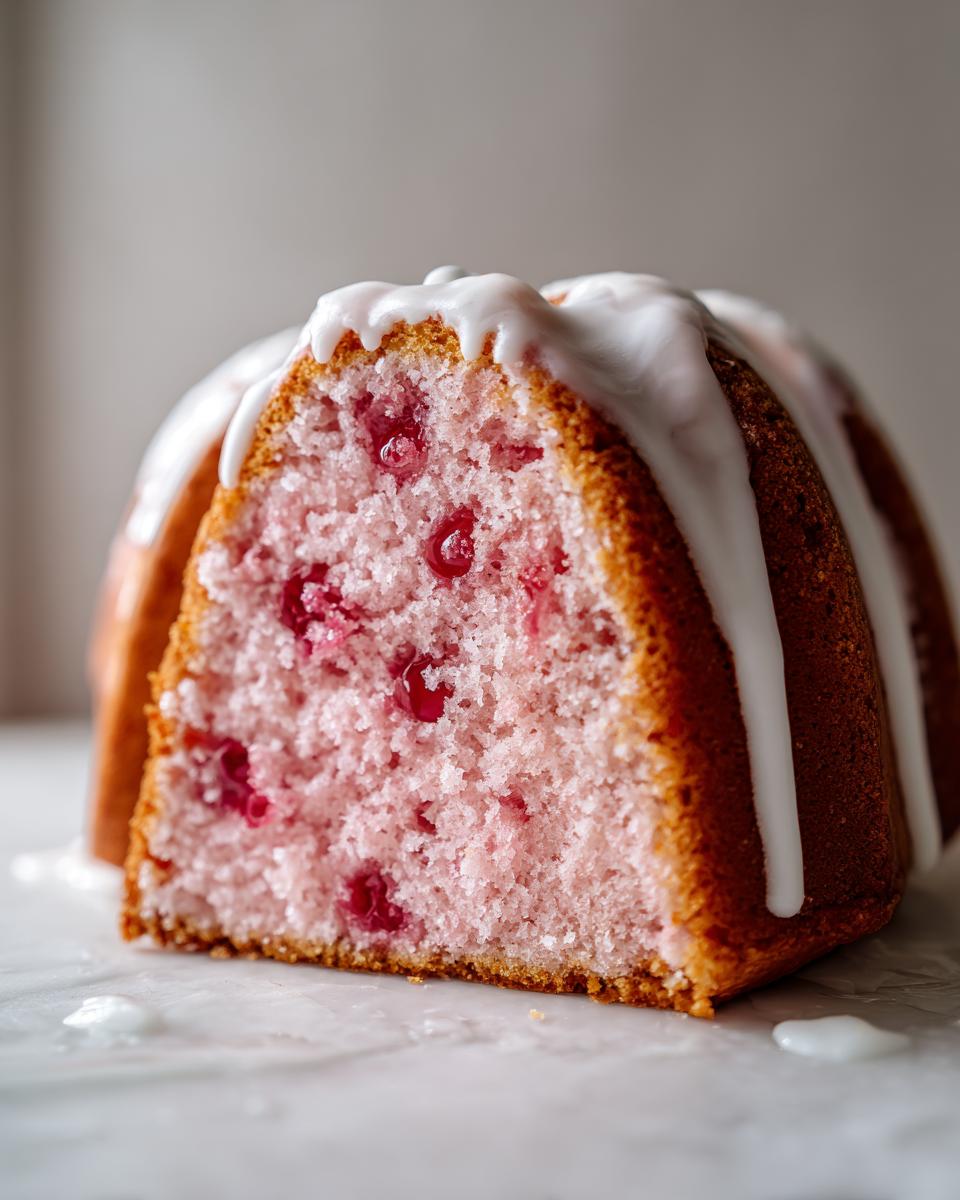
- It turns out a gorgeous, cheerful pink color without needing excessive artificial dyes.
Perfectly Moist Cherry Cake Texture
The secret to the moistness, beyond the butter and proper creaming we talked about earlier, is using that beautiful, bright maraschino cherry juice in place of some of the milk. It adds delicate moisture and a hint of flavor deep into the crumb. Because we aren’t using actual fresh cherries that can weigh things down, the texture stays light even though it’s rich.
The Nostalgic Appeal of Maraschino Cherry Cake
This style of cherry cake just screams vintage charm, doesn’t it? It reminds me of the cakes my mom’s friends used to bring to neighborhood potlucks decades ago. That specific sweetness from the maraschino cherries, paired with the vanilla, gives it a unique flavor profile that fresh cherries just can’t replicate. It’s pure, unashamedly retro happiness on a plate.
Gathering Your Ingredients for Homemade Cherry Cake
Okay, gathering our supplies is the next big step! You know I love getting organized before I start mixing; it just makes everything flow so much better, especially when we are aiming for that perfect homemade cherry cake result. This recipe truly shines when you respect the ingredient list. Don’t rush the prep work on the cherries—that makes a huge difference in the final outcome!
Here is what you’ll need for this classic slice of heaven. I’ve made sure this list is clear so your cherry cake comes out perfectly:
- 1 3/4 cups all-purpose flour
- 1 1/2 teaspoons baking powder
- 1/2 teaspoon salt
- 1/2 cup unsalted butter, softened (this is important!)
- 1 cup granulated sugar
- 2 large eggs
- 1 teaspoon vanilla extract
- 1/2 cup milk
- 1/2 cup maraschino cherry juice (make sure you save this right from the jar!)
- 1/2 cup chopped maraschino cherries, drained and patted dry (seriously, dry them well!)
- 1 cup powdered sugar (for glaze)
- 2 tablespoons maraschino cherry juice (for glaze)
Ingredient Notes and Substitutions for Your Cherry Cake Recipe
A few quick thoughts on what’s in that list. First, while you see recipes online for using fresh cherries, for this particular vintage style, sticking to the jarred maraschino cherries is crucial. They carry that signature sweetness and color we are aiming for. Fresh cherries bring too much water and a completely different tartness.
Also, about that butter: please use softened, unsalted butter. If you absolutely must substitute it, you could technically use a good quality vegetable oil—maybe about 7/16ths of what the butter calls for volume-wise—but I won’t lie, you lose some of that beautiful, traditional mouthfeel. Butter keeps this cake structurally superior, so if you can, grab the real stuff. It just builds a better foundation for whatever delicious cake you are making!
Step-by-Step Instructions for the Easy Cherry Cake
Now we get to the fun part—turning those ingredients into your incredibly Easy Cherry Cake! Since this is a quick, satisfying bake, we want to keep the steps moving along smoothly. Remember how I talked about organization earlier? It pays off big time here so we don’t accidentally rush the mixing.
First things first, get that oven preheated to 350°F (175°C). While it warms up, grab your 9-inch round pan (or 8×8 inch if you prefer a thick square) and make sure you grease and flour it really well. A little bit of prep goes a long way! If you’re interested in mastering essential baking foundations after this cake, you might want to check out my tips for chewy chocolate chip cookies—the creaming method is similar!
Mixing the Batter for a Moist Cherry Cake
We start by whisking the dry stuff—flour, baking powder, and salt—together in a small bowl. Set that aside. Now, move to your big bowl and cream that softened butter with the sugar until it looks whispery light. Beat in those two eggs individually, and don’t forget the vanilla! Next, you will mix your liquids: milk and the half cup of lovely cherry juice. This is where we alternate, which is vital for a moist cherry cake. Add a bit of the dry, then a bit of the wet, and keep alternating until everything is just incorporated—start and end with the dry ingredients. Stop mixing as soon as those streaks disappear! Seriously, overmixing this gorgeous cherry cake batter is the fastest way to lose that tenderness we worked so hard to create.
Baking Time and Cooling the Cherry Cake
Once you gently fold in those chopped, drained cherries, pour the batter into your prepared pan evenly. Pop it into that hot oven for about 30 to 35 minutes. You’re watching for that toothpick to come out clean from the center—that’s your sign. Don’t pull it out early! Once it’s done, let the cake sit in the pan for about 10 minutes. I know you’ll want to see it, but resist the temptation for that first 10 minutes! Then, flip it onto a wire rack to cool completely before we tackle the glaze.

Preparing the Simple Glaze for the Cherry Cake
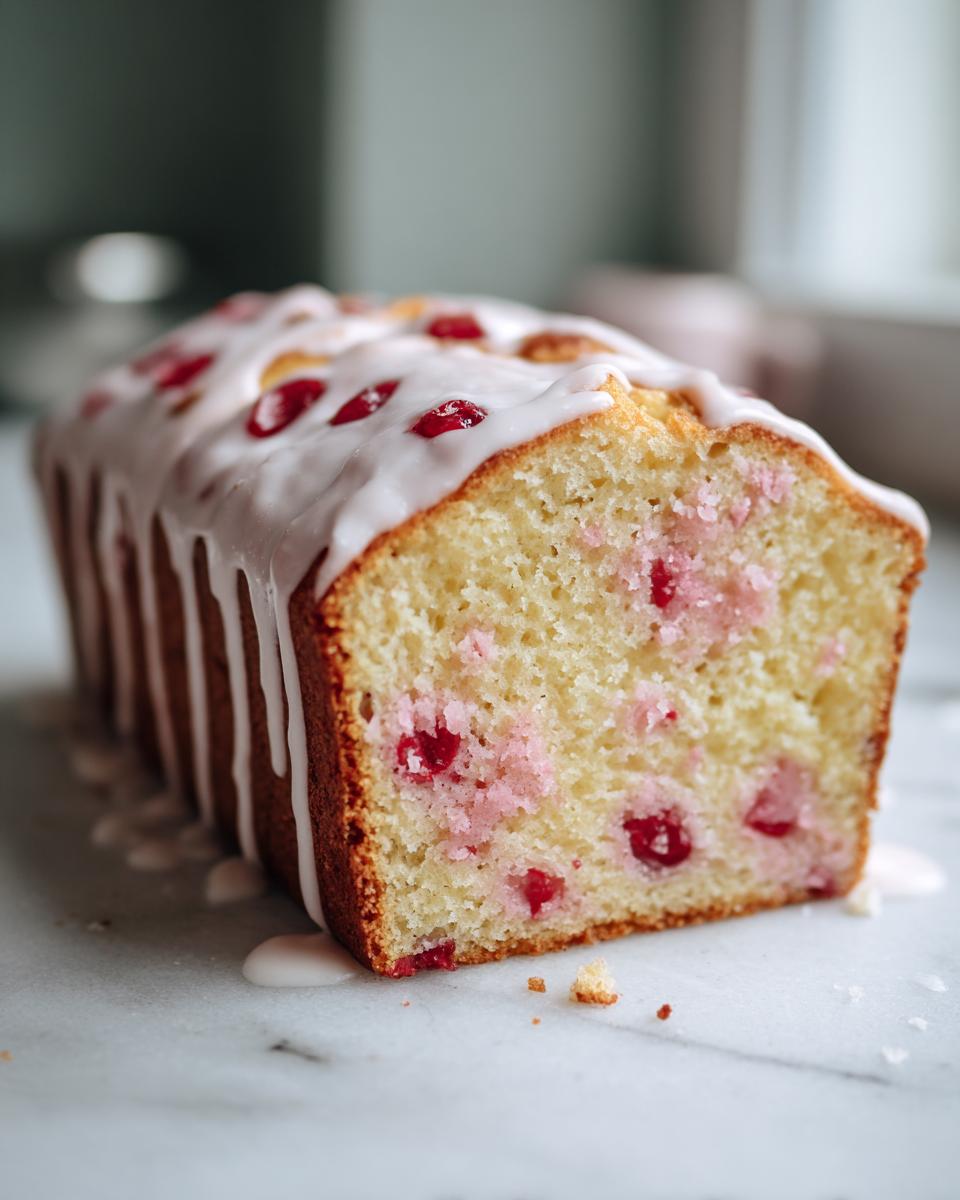
While the cake cools down—and it must be totally cool, or the glaze melts into nothingness—prepare the finishing touch. For your glaze, just whisk together the powdered sugar and the last 2 tablespoons of cherry juice until it’s totally smooth. If it looks too thick, add just a tiny splash more juice, but honestly, this vintage cherry cake glaze should be slightly thin so it drizzles nicely. Once the cake is cool to the touch, stream that gorgeous pink icing all over the top. That’s it! You did it!
Tips for the Best Homemade Cherry Cake Results
You’ve nailed the mixing and baking, which is fantastic! But to really elevate this into unforgettable territory—especially when making a from scratch cherry cake like this one—I have a few insider tricks. These little refinements are what make me proud to call this my favorite simple baked cherry dessert.
First up: that drying step for the cherries. I know it feels tedious, but patting those chopped maraschinos thoroughly dry with a paper towel is non-negotiable. If they’re wet, they sink to the bottom, and we want them suspended beautifully throughout the cake, not creating gummy pockets!
Also, don’t scoff at adding a tiny bit of coloring if you want that classic 1950s bubblegum pink. I usually add just one drop of red food coloring to the batter along with the vanilla. It really brings out the visual vibe of this cake!
Finally, for the topping: if your glaze is stiffening up before you finish drizzling, don’t panic! Just put a spoonful of extra cherry juice or even warm water into the glaze bowl and whisk until it loosens back up just slightly. A flowing glaze looks so much more elegant.
Serving Suggestions for Your Glazed Cherry Cake
Even the prettiest cake needs the right company on the plate! Since this Vintage Maraschino Cherry Cake has that distinct, sweet, and almost almond-like note that those jarred cherries bring, you want toppings or sides that either lean into that vintage flavor or offer a nice, clean contrast.
Honestly, I almost always serve this plain or with a small dollop of something cool. Simple vanilla bean ice cream is my absolute favorite pairing. The cold, creamy vanilla melts just slightly against the glaze, and it balances out the intense sweetness of the maraschino perfectly. It just tastes so comforting together.
For an afternoon treat, skip the ice cream and go straight for a cup of hot coffee. I find that a nice, slightly bitter black coffee cuts through that sugary glaze so nicely, letting the cherry flavor really pop without being overwhelming. If you are feeling extra fancy or serving this at a holiday brunch, a nice, crisp, unsweetened whipped cream works wonders too.
If you happen to have some of my spiced offerings on hand, this cake goes surprisingly well alongside something warm and autumnal. You could serve a small slice alongside a piece of pumpkin banana bread if you are doing a dessert buffet—the spice notes are totally different but they complement each other beautifully on the table!
Storage and Reheating Instructions for This Cherry Cake
So, you baked the perfect Vintage Maraschino Cherry Cake! Way to go! Now we need to make sure it stays just as wonderful—moist, pink, and delicious—for as long as possible. Luckily, because this is such a great homemade cherry cake, it keeps really well since we used that cherry juice in the batter.
If you managed to have any leftovers, which I highly doubt, the general rule for this glazed cherry cake is to keep it right on the counter, covered. Since it’s a simpler cake without a heavy cream cheese frosting, room temperature is actually its happy place. Make sure it’s covered tightly, maybe under a cake dome or wrapped loosely in plastic wrap so the glaze doesn’t stick to everything else.
It should stay perfectly fresh for about two full days at room temperature because of its good moisture content. If you live somewhere super hot and humid, you might need to put it in the fridge just to be safe, but if you do that, make sure you let a slice sit out for about 30 minutes before serving. Cold cake always tastes a little sad!
Reheating isn’t really necessary since this cake is meant to be enjoyed at room temperature or slightly cool, but if you absolutely want to revive a slice that’s been chilling, don’t use the microwave! That will make it spongy. Instead, wrap the slice gently in aluminum foil and pop it into a low oven—say, 300°F—for just five to seven minutes. It warms gently and reminds you of when it first came out of the oven!
Frequently Asked Questions About Vintage Cherry Cake
I get so many questions about this recipe because, let’s be real, recipes from back in the day sometimes need a little modern clarity! It’s great that so many of you are curious about adapting it. These are the things I hear most often when people start baking this gorgeous treat.
Can I make this a Cherry Layer Cake?
That’s a fantastic idea, especially if you’re making this for a birthday or a bigger gathering! Yes, you absolutely can turn this into a Cherry Layer Cake. The simplest way is to double the entire recipe and divide the batter evenly between two 8-inch or 9-inch round pans. Because you are baking two flatter layers instead of one deep cake, you will need to reduce the baking time slightly—check them around the 25-minute mark.
Just remember this: if you double the recipe and use deeper pans, like two 9-inch layers, you’ll need longer baking time, closer to 35–40 minutes total. If you decide to go this route and want an amazing topping, you might want to check out my recipe for carrot cake cream cheese frosting—it pairs surprisingly well with the sweet cherry notes!
Is this the same as a Christmas Cherry Cake?
Oh, that’s a super common point of confusion because there are so many traditions out there! The short answer is no, this isn’t the same as a traditional Newfoundland cherry cake you might see around Christmas. Those holiday versions, especially the Newfoundland ones, usually rely on dried or glacé cherries mixed into a denser loaf or pound cake, and they often look darker because of molasses or dried fruit.
This Vintage Maraschino version is lighter, often uses fresh eggs and milk for a fluffier crumb, and gets its brightness and signature pink color directly from the maraschino juice and cherries. They absolutely both scratch that itch for festive fruit baking, but they are distinctly different experiences flavor-wise!
I only have fresh cherries. Can I substitute them here?
You can, but you risk changing the fundamental character of this specific recipe. Fresh cherries are delicious, but they are much wetter and tarter than the processed maraschino cherries. If you use fresh, you absolutely MUST cook them down first or macerate them in sugar and then drain off *all* the excess liquid possible—and still, you might need to slightly reduce the milk in the batter because fresh fruit releases steam and moisture during baking.
For this particular cake, I really recommend sticking to the jarred kind to get that exactly right nostalgic flavor and the beautiful predictable baking time. It’s worth keeping the jar open for this simple baked cherry dessert!
How do I get that perfect vibrant pink color?
You know, the juice gives a lovely pale pink tint naturally, but if you want that real, eye-popping dessert color that screams “vintage,” a tiny bit of food coloring is your friend! I mentioned this above, but I’ll say it again here: adding just one or maybe two drops of red food coloring when you add the vanilla extract into the butter mixture makes a huge difference visually without affecting the taste one bit. It makes the cake look even more festive!
Estimated Nutritional Data for This Cherry Cake
I always feel it’s important to give you an idea of what you’re enjoying when you pull a slice of homemade goodness out of the oven! Because every oven, every measurement, and even the brand of butter you use can shift things just slightly, these numbers here are solid estimates based on how I prepared the recipe provided.
Keep in mind, measuring ingredients perfectly is key to getting close to this data, especially when dealing with sugar and fat content for a moist cherry cake. Consider this helpful guidance, not a strict medical readout!
- Serving Size: 1 slice
- Calories: 350
- Sugar: 45g (Yes, it’s a treat! We use sugar for moisture too.)
- Sodium: 210mg
- Fat: 15g
- Saturated Fat: 9g
- Unsaturated Fat: 6g
- Trans Fat: 0g
- Carbohydrates: 52g
- Fiber: 1g
- Protein: 4g
- Cholesterol: 65mg
It’s a happy number of calories for such a delicious, nostalgic bite! As I always say, everything in moderation, but when you’re looking for one of the Best Cherry Cake Recipes, you know a little bit of indulgence is required. Enjoy every single bite!
Share Your Vintage Cherry Cake Baking Experience
Baking, for me, is all about connection—connecting to the past and connecting with all of you right now! I sincerely hope you loved bringing this Vintage Maraschino Cherry Cake to life in your kitchen. It’s such a rewarding dessert because it’s simple but packs such a punch of happy memories.
If you made this recipe, I would absolutely adore hearing about it! Did you manage to get that perfect pale pink color? Did you serve it plain or try it with vanilla ice cream?
Please take a moment to leave me a rating right here on the recipe card. Five stars means I’ve done my job bringing you that comforting, classic flavor! Even more, if you snapped a picture of your beautiful finished cake, please tag me on social media!
Seeing your creations truly makes my day and reminds me why I share these treasured techniques. It shows me these old-school recipes still have a vibrant life today!
And hey, if you are looking for another easy, crowd-pleasing dessert that requires minimal fuss but maximum flavor delivery—maybe something for a holiday gathering or just a Tuesday treat—you should really check out my recipe for pumpkin dip with cool whip. It’s totally different but just as comforting!
Happy baking, everyone. Keep sharing the love in your kitchens!
PrintVintage Maraschino Cherry Cake
Make this moist, classic Vintage Maraschino Cherry Cake from scratch. This recipe uses maraschino cherries for a sweet, nostalgic flavor and a beautiful pink hue, perfect for celebrations.
- Prep Time: 15 min
- Cook Time: 35 min
- Total Time: 50 min
- Yield: 8 servings 1x
- Category: Dessert
- Method: Baking
- Cuisine: American
- Diet: Vegetarian
Ingredients
- 1 3/4 cups all-purpose flour
- 1 1/2 teaspoons baking powder
- 1/2 teaspoon salt
- 1/2 cup unsalted butter, softened
- 1 cup granulated sugar
- 2 large eggs
- 1 teaspoon vanilla extract
- 1/2 cup milk
- 1/2 cup maraschino cherry juice (from the jar)
- 1/2 cup chopped maraschino cherries, drained and patted dry
- 1 cup powdered sugar (for glaze)
- 2 tablespoons maraschino cherry juice (for glaze)
Instructions
- Preheat your oven to 350°F (175°C). Grease and flour one 9-inch round cake pan or an 8×8 inch baking pan.
- In a medium bowl, whisk together the flour, baking powder, and salt. Set this aside.
- In a large bowl, cream together the softened butter and granulated sugar until the mixture is light and fluffy.
- Beat in the eggs one at a time, mixing well after each addition. Stir in the vanilla extract.
- In a separate small bowl, mix the milk and the 1/2 cup of cherry juice.
- Alternate adding the dry ingredients and the wet ingredients to the butter mixture, beginning and ending with the dry ingredients. Mix until just combined; do not overmix.
- Gently fold in the chopped, drained maraschino cherries.
- Pour the batter into your prepared pan. Bake for 30 to 35 minutes, or until a toothpick inserted into the center comes out clean.
- Let the cake cool in the pan for 10 minutes before inverting it onto a wire rack to cool completely.
- While the cake cools, prepare the glaze: Whisk together the powdered sugar and the remaining 2 tablespoons of cherry juice until smooth.
- Drizzle the glaze over the cooled cake. Slice and serve this easy cherry cake.
Notes
- For an extra festive look, reserve a few whole maraschino cherries to place on top of the glaze before it sets.
- If you want a deeper pink color, add 1-2 drops of red food coloring to the batter.
- This recipe makes a wonderful moist cherry cake that keeps well at room temperature for two days.
Nutrition
- Serving Size: 1 slice
- Calories: 350
- Sugar: 45g
- Sodium: 210mg
- Fat: 15g
- Saturated Fat: 9g
- Unsaturated Fat: 6g
- Trans Fat: 0g
- Carbohydrates: 52g
- Fiber: 1g
- Protein: 4g
- Cholesterol: 65mg