
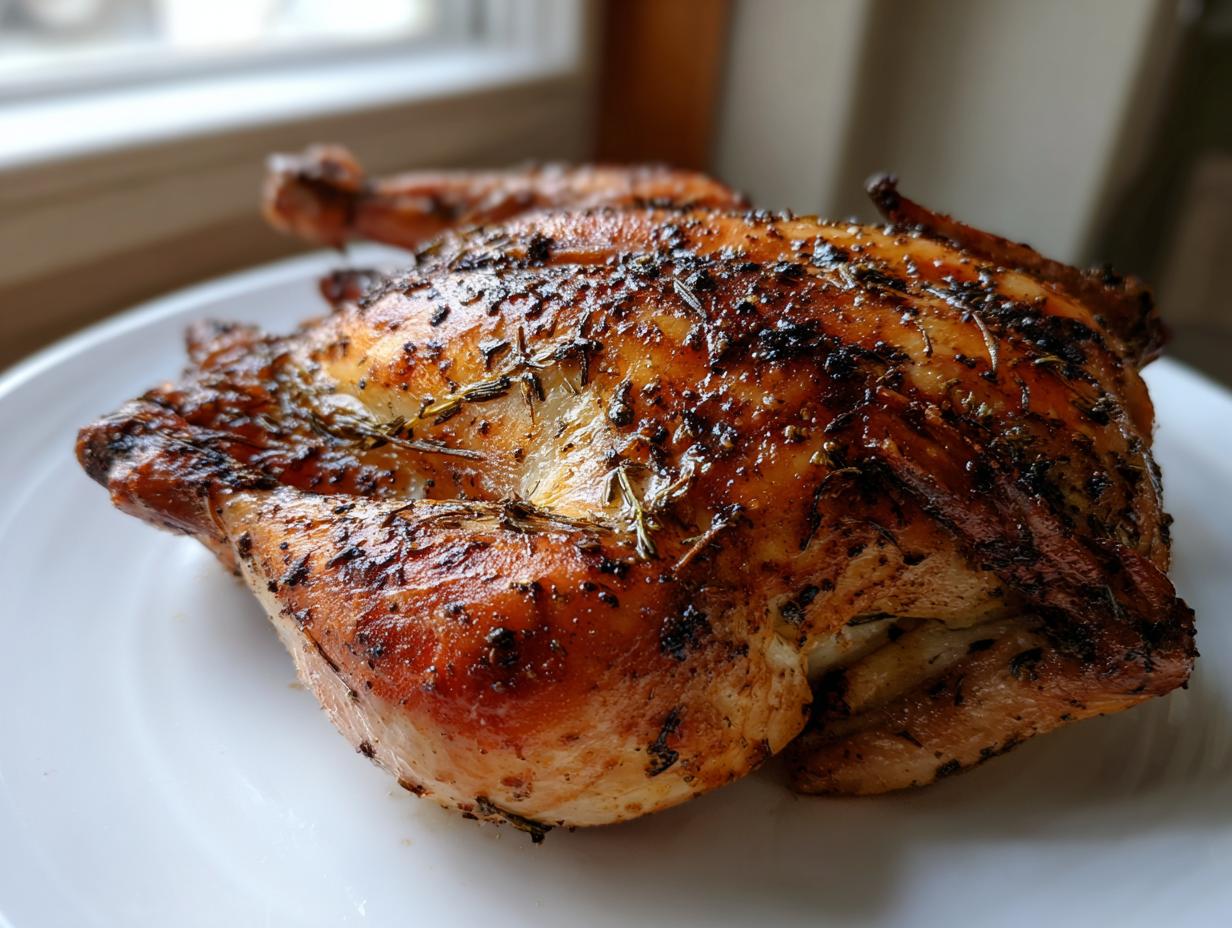
Are you tired of waiting what feels like two business days for a whole chicken to finally roast? Me too! If you want that perfectly bronzed, shatteringly crisp skin and meat so juicy it practically melts, you need to stop roasting it the old way. Forget everything you think you know about whole chicken; the absolute best way to achieve those results quickly is by learning the technique behind the spatchcock chicken. Here at MDLATDMM, we believe that even heritage dishes, like Maddie’s grandmother always insisted, need to fit into our busy modern lives while still tasting like pure comfort. This oven method is simple, reliable, and delivers a truly stunning *family favorite chicken dinner* in under an hour. For more on why simplicity rules in our kitchen, check out our story detailing Maddie’s culinary journey.
- Why This Oven Roasted Spatchcock Chicken Recipe Works Wonders
- Gathering Ingredients for Your Lemon Herb Spatchcock Chicken
- Essential Equipment for the Best Spatchcock Chicken Method
- Step-by-Step Instructions: How to Spatchcock a Chicken and Roast
- Tips for a Fast Roast Chicken Every Time
- Serving Suggestions for Your Weeknight Chicken Dinner
- Storage and Reheating Instructions for Spatchcock Chicken
- Frequently Asked Questions About Spatchcock Chicken
- Nutritional Snapshot of This Family Favorite Chicken Dinner
Why This Oven Roasted Spatchcock Chicken Recipe Works Wonders
Honestly, this whole technique is a total game-changer for weeknights. Who knew you could get something that looks this impressive on the table in less than an hour? When you flatten the chicken, you eliminate the classic roasting problem where the breast dries out waiting for the thighs to finish cooking. It’s pure magic, I tell you! If you’re looking for more speedy solutions, I’ve got my favorites listed over in the quick weeknight dinners section.
The combination of high heat and flat presentation gives you results that traditional roasting just can’t touch. It’s why this is immediately one of our most popular go-to meals!
- Cooks up to 50% faster than a regular roast chicken.
- Guarantees wonderfully crispy skin all over.
- Means you get truly juicy meat from breast to thigh every single time – check out my tips for melt-in-your-mouth chicken oven bliss!
Achieving the Crispiest Skin Chicken Roast
The key to that gorgeous, crackly texture everyone fights over is surface area! When we flatten the bird, the skin is directly exposed to the high heat of the 425°F oven. In a traditional roast, the sides and back shield themselves, but here? Every bit of that skin gets kissed by the heat, creating the ultimate crispy skin chicken roast. No floppy bits here, trust me!
The Secret to Juicy Whole Chicken Oven Results
See, the backbone is what causes the uneven cooking, right? When we remove it, the legs and thighs—which need higher temperatures—can actually splay out and cook perfectly alongside the breast meat. This means no more sad, dry white meat! Flattening it out ensures a consistent temperature exposure, which is essential for that amazing, juicy whole chicken oven result we all crave.
Gathering Ingredients for Your Lemon Herb Spatchcock Chicken
Before we get to the fun part of cutting out that backbone, we need to make sure our ingredients are ready to go! This Lemon Herb Spatchcock Chicken is all about simple, bright flavors that really make the natural taste of the chicken shine through. We aren’t using anything too fussy here, which is great for keeping this recipe quick.
Here is what you’ll need for the chicken and that gorgeous herb rub:
- 1 whole chicken (make sure it’s about 4–5 lbs—this size really helps hit that one-hour cook time!)
- 2 tablespoons olive oil
- 1 tablespoon dried rosemary
- 1 tablespoon dried thyme
- 1 teaspoon garlic powder
- 1 teaspoon onion powder
- 1 teaspoon salt
- 1/2 teaspoon black pepper
- 1 lemon, halved
Ingredient Notes and Substitutions
A few little notes from my kitchen to yours about why we choose what we choose here. Quality truly matters when the ingredient list is so short!
For the herbs, I’m sticking with dried rosemary and thyme because they hold up so well against the high oven heat without burning, giving you that deep flavor over the longer roast time. If you happen to have fresh herbs, absolutely use them! Just triple the amount if you’re using fresh leaves instead of dried. Also, remember that backbone we remove? Don’t toss it! Keep it in the freezer, and once you have a few saved up, you’ll have the base for the best chicken stock you’ve ever made.
Also, the size recommendation is important. If you get a chicken bigger than 5 lbs, it might need an extra 10 or 15 minutes in the oven, so always default to your thermometer instead of the clock when going bigger than 5 lbs!
Essential Equipment for the Best Spatchcock Chicken Method
Alright, before you dive in and start attacking that poor bird, we need to talk tools. You can’t wrestle a whole chicken flat with just any old knife, trust me on this one! Having the right gear makes transforming the bird into that perfectly flat shape—the key to success—so much easier. It really elevates this whole spatchcock chicken technique into something you’ll want to do every week.
Your must-haves are fewer than you might think, which is another bonus for a quick weeknight prep. You’re going to need these items ready to go:
- Sturdy Kitchen Shears: Seriously, this is non-negotiable. Trying to hack through the chicken’s rib bones with regular scissors is just asking for an injury or a mangled bird. You need good, heavy-duty shears (poultry shears work great!) to smoothly cut out the backbone.
- Rimmed Baking Sheet: This is where the chicken lives while it roasts. Make sure it has a slight lip or rim around the edge. We are going to line it too, so you’ll want enough space to accommodate foil or parchment paper.
- Aluminum Foil or Parchment Paper: This is my secret weapon for making cleanup almost nonexistent! Lining that baking sheet means you don’t get stuck scrubbing baked-on herbs and chicken juices later.
- Meat Thermometer: I know, I know, it’s more equipment, but if you want guaranteed juicy meat—the promise of the best spatchcock chicken method—you have to use a digital thermometer inserted into the thigh. It’s the only way to be 100% sure!
With those few items in hand, you are perfectly set up to execute this fast roast chicken like a total pro. Seriously, once you get comfortable with the cut, this becomes your go-to easy whole chicken recipe.
Step-by-Step Instructions: How to Spatchcock a Chicken and Roast
Okay, here is where the magic happens! Getting that chicken flat might sound aggressive, but trust me, it sets up the entire perfect cook. We’re going to move through this logically: first, get the oven hot, then make the necessary anatomical adjustments to the bird, and finally, season it up and get it cooking. Since speed is the goal here, make sure your oven is warming up to 425°F (220°C) before you even think about touching the chicken. You want that baking sheet ready and waiting!
This whole process is so much less intimidating than it looks, and once you know how to butterfly a chicken correctly, you won’t go back to traditional roasting methods.
Mastering How to Spatchcock a Chicken (The Cut)
First things first: place your chicken breast-side down on your cutting board—skin side on the board, back facing up. See that ridge running down the middle? That’s the backbone! Grab those sturdy kitchen shears and carefully cut right alongside one side of that backbone, all the way from the tail up to the neck area. Then, do the exact same thing on the other side. Remove that backbone completely—you can save it for stock or freeze it for later!

Now for the flattening part! Flip the chicken over so the breast side is facing up. Place the heel of your hand right over the center of the breastbone. Press down hard and fast, rock it a bit if you need to, until you hear a satisfying crack and the chicken lies completely flat. It’s totally safe! Don’t forget to tuck those wing tips under the body so they don’t burn while roasting.
Preparing and Roasting Your Spatchcock Chicken
Now that it’s flat and sitting skin-side up on your foil-lined baking sheet, it’s time for flavor! Take your herb rub—that mix of olive oil, rosemary, thyme, garlic, onion powder, salt, and pepper—and rub it all over every single surface. Really try to massage some of that herbaceous oil mixture under the breast skin, too; that’s where the juiciest flavor hides!
Toss those two lemon halves right into the cavity opening where the backbone used to be. Pop the tray into the hot oven and roast it for about 40 to 50 minutes. The absolute most important step when it comes out is letting it rest! Resist the urge to cut into it immediately; give it 10 minutes resting time before you carve. That rest lets all those delicious juices redistribute instead of running all over your cutting board.
Tips for a Fast Roast Chicken Every Time
We’ve talked about how the spatchcock trick automatically speeds things up, but I have a couple more tricks up my sleeve to make sure you hit that one-hour total time mark, which is perfect for a hectic evening. Remember, the beauty of learning how to spatchcock a chicken is that you get that roasted flavor without waiting forever. It’s efficiency meeting deliciousness!
If you ever want to switch gears and take this outside, don’t worry, you can absolutely use this method on the grill! Just set up your grill for medium-high heat, planning for about 375°F. You’ll cook it for closer to 30 to 40 minutes total, turning it once halfway through until you hit that magic temperature. For more ideas on cooking chicken fast outdoors, check out my foolproof tips for grilled chicken that comes out juicy and tender.
For oven roasting, the most important tip I can give you to ensure you hit that *roast chicken in one hour* mark is remembering that resting time we discussed. Don’t count that against the cook time! The 45 minutes in the oven plus the 10 minutes resting is the reliable window for a 4-pound bird.
Checking for Perfectly Cooked Chicken
This is the most serious part, okay? Forget tapping the skin or guessing by sight; if you want guaranteed safety and the best texture, you absolutely have to use a meat thermometer. It’s the secret weapon of every experienced cook!
You want to insert the thermometer into the thickest part of the thigh, avoiding any bone contact. The internal temperature needs to hit 165°F (74°C). When it hits that number, pull it out immediately! Overcooking by even five minutes can change that beautifully moist texture we worked so hard for. Trust the tool—it guarantees your *perfectly cooked chicken* every time.
Serving Suggestions for Your Weeknight Chicken Dinner
So, you’ve got this stunning, perfectly roasted chicken sitting there, all crispy and fragrant—now what goes with it? Since we were aiming for a weeknight chicken dinner, we need sides that are just as speedy or that can happily cook away on a lower rack while the chicken rests. That bright lemon and herb flavor profile really sings with simple, comforting partners!
I love keeping the sides bright and easy so the incredible chicken remains the star. If you’re serving this up, you absolutely must try my recipe for garlic parmesan mashed potatoes; they are pure silkiness and soak up all those lovely pan juices perfectly.
If you need something green that takes practically zero effort, honestly, steamed green beans tossed with a tiny bit of good butter and flaky salt are fantastic. If you want to roast veggies alongside the chicken (just keep them on a second sheet pan or the bottom rack), root vegetables like carrots or small potatoes work great because their roasting time is similar to the chicken’s.
Here are a few quick pairing ideas to round out your wonderful meal:
- Quick-Blanched Asparagus: Takes maybe five minutes in boiling water, then tossed with a squeeze of fresh lemon and pepper. So crisp!
- Simple Roasted Broccoli: Toss florets with olive oil and roast them right alongside the spatchcock chicken for the last 15 minutes of cooking time. They get slightly charred and yummy.
- A Simple Grain: Quinoa or couscous cooks in under 15 minutes on the stovetop and gives you something fluffy to hold all those savory juices.
The goal is to keep the whole experience quick, satisfying, and focused on that gorgeous lemon herb flavor we built into the skin!
Storage and Reheating Instructions for Spatchcock Chicken
Even though this amazing bird is usually gobbled up instantly, sometimes we get lucky enough to have leftovers! And when that happens, we want to make sure the next day’s meal showcases how great this spatchcock chicken was in the first place. The key to saving that crisp skin and tender meat is treating it right as soon as it cools down.
When you put your leftovers away, always let the chicken cool down a bit first—you don’t want to stick hot food directly into the fridge, as that can cause condensation, which is the ultimate enemy of crispiness. Once it’s cooled, store the pieces—I recommend separating the breast meat from the thighs and legs—in an airtight container. You can try to keep the skin intact, but honestly, I find it’s better to just plan on making the skin crispy again during reheating.
Here are my must-do methods for bringing those leftovers back to life so they taste almost as good as fresh:
Reheating Slices
If you just want a couple of slices of breast meat for a quick lunch salad or sandwich filler, don’t throw it in the microwave! It just tightens everything up and makes it chalky. Instead, I take the slices and place them in a small, oven-safe dish. I add just a splash—maybe a tablespoon—of chicken broth, water, or even just a little white wine around the bottom. Cover that whole dish tightly with foil and warm it gently in a low oven (around 300°F) until it’s just warmed through. The steam trapped by the foil is what keeps the meat tender and juicy!
Reviving a Larger Piece
If you have a larger piece, like an entire leg quarter or a big section of the breast still attached, you can try to recapture some of that crispy skin. After covering it tightly with foil and warming it at 325°F for about 15 minutes, take the foil off for the last 3 minutes. Keep your eye glued to the oven during those last minutes! That brief blast of dry heat can reactivate some of the crispiness without drying out all the moisture you just preserved with the initial covering.
Remember, you already have the juiciest bird possible thanks to the spatchcocking technique, so even if the skin softens slightly during storage, the meat underneath should still be fantastic!
Frequently Asked Questions About Spatchcock Chicken
I know you might have questions after learning this amazing technique—it’s a little different from the traditional roast chicken look we’re used to! But honestly, once you see how perfectly done the meat is, you’ll be asking yourself why you waited so long to learn this. I’ve pulled together the most common things people ask me when they first try out this method!
If you have a smaller chicken, say 3 pounds, you can absolutely use this recipe! You’ll just need to pull it out sooner. Cook time is always based on thickness, not just weight, but generally, you’re looking at removing about 5 to 10 minutes of cooking time for every pound under 4. I always say, trust the thermometer over the clock!
Can I make this spatchcock chicken recipe on the grill?
Yes, you totally can! If you’re heading outdoors, just treat your grill like an oven. Set it up for medium-high heat, aiming for roughly 375°F, and cook the flattened bird skin-side up. We’re looking at about 30 to 40 minutes total, and you’ll want to turn it once halfway through cooking. It adds a lovely smoky dimension, too!
What is the difference between spatchcocking and butterflied chicken cooking?
Oh, this is an easy one! Nothing! They are exactly the same thing. Spatchcocking is just the fancy, traditional name for the process of removing the backbone so you can flatten the chicken. So when you see recipes talking about butterflied chicken cooking, know that they are telling you to use the exact same technique we used here. It just lays flat to cook faster and more evenly.
Do I have to use lemon in the recipe?
You absolutely don’t have to! The lemon halves inside the cavity add a really nice, subtle brightness that complements the dried herbs, but if you don’t have one or just aren’t a huge fan of citrus, leave it out. You won’t mess up the meat cooking at all. If you skip the lemon, maybe rub a little extra of the olive oil and herb mix right on top of the breast meat for extra flavor protection!
What if I don’t have sturdy kitchen shears?
This is tough, so please be careful! If you absolutely cannot get your hands on proper poultry shears, you can try using the sharpest, heaviest chef’s knife you own, but I strongly warn you against it. You aren’t cutting through soft tissue; you are cutting through bone and cartilage, and that’s where knives slip and cut fingers. If you truly can’t get shears, it might be easier to ask your butcher to spatchcock a chicken for you when you buy it. Most grocery stores will do this for free!
Nutritional Snapshot of This Family Favorite Chicken Dinner
Okay, so we’ve established that this Oven Roasted Spatchcock Chicken is fast AND delicious. But for those of you who keep track, I wanted to provide a quick look at what you’re getting nutritionally when you sit down to this wonderful meal. Keep in mind, since this is a simple roast with a straightforward herb rub, it’s a fantastic, hearty base for any meal plan!
We developed this recipe to be straightforward, using quality fats like olive oil and not packing it with heavy sugars, which keeps the final numbers pretty manageable for a fantastic dinner. You can easily pair this with some roasted veggies—like my easy chicken broccoli casserole side dish, maybe without the cream soup if you’re cutting back, just saying!—to round things out.
Here are the estimated values based on one 1/6th serving of the whole chicken and rub mixture:
- Calories: 350
- Protein: 45g (Wow, look at all that gorgeous protein!)
- Total Fat: 18g
- Saturated Fat: 5g
- Carbohydrates: 1g
- Sugar: 0g
- Sodium: 350mg
I always tell people, when you are cooking whole foods like this, the nutrition tends to take care of itself! The sodium content primarily comes from the added salt in the rub, so remember, you can always dial that back if you need to watch your intake. It’s your kitchen, you’re in charge!
Because we skipped the heavy cream or thick glazes, this method keeps the focus purely on that glorious, flavorful meat. It’s transparency in the kitchen, the way Maddie likes it—real food, real ingredients, and reliable results!
PrintOven Roasted Spatchcock Chicken with Lemon Herb Rub
Make this spatchcock chicken for a fast, flavorful dinner. It yields juicy meat and perfectly crispy skin by roasting evenly in under an hour.
- Prep Time: 15 min
- Cook Time: 45 min
- Total Time: 60 min
- Yield: 4 servings 1x
- Category: Dinner
- Method: Oven Roasting
- Cuisine: American
- Diet: Low Fat
Ingredients
- 1 whole chicken (about 4–5 lbs)
- 2 tablespoons olive oil
- 1 tablespoon dried rosemary
- 1 tablespoon dried thyme
- 1 teaspoon garlic powder
- 1 teaspoon onion powder
- 1 teaspoon salt
- 1/2 teaspoon black pepper
- 1 lemon, halved
Instructions
- Preheat your oven to 425°F (220°C). Line a rimmed baking sheet with foil for easy cleanup.
- Place the chicken breast-side down on a cutting board. Locate the backbone running down the center of the chicken.
- Using sturdy kitchen shears, cut along both sides of the backbone to remove it completely. Discard the backbone or save it for stock.
- Flip the chicken over so it is breast-side up. Press down firmly on the center of the breastbone until you hear a crack and the chicken lies flat. This is spatchcocking.
- Tuck the wing tips under the body. Place the flattened chicken skin-side up on the prepared baking sheet.
- In a small bowl, mix together the olive oil, rosemary, thyme, garlic powder, onion powder, salt, and pepper to create the herb rub.
- Rub the herb mixture evenly all over the chicken, getting some under the skin of the breast if possible.
- Place the lemon halves inside the cavity opening.
- Roast for 40 to 50 minutes, or until a meat thermometer inserted into the thickest part of the thigh registers 165°F (74°C).
- Remove the chicken from the oven and let it rest for 10 minutes before carving.
Notes
- If you prefer grilling, cook over medium-high heat (about 375°F) for 30-40 minutes, turning once, until the internal temperature is reached.
- For extra crispy skin, you can place the chicken under the broiler for the last 1-2 minutes, watching closely to prevent burning.
- This method is a fast roast chicken technique that cooks faster than traditional roasting.
Nutrition
- Serving Size: 1 portion
- Calories: 350
- Sugar: 0
- Sodium: 350
- Fat: 18
- Saturated Fat: 5
- Unsaturated Fat: 13
- Trans Fat: 0
- Carbohydrates: 1
- Fiber: 0
- Protein: 45
- Cholesterol: 150