
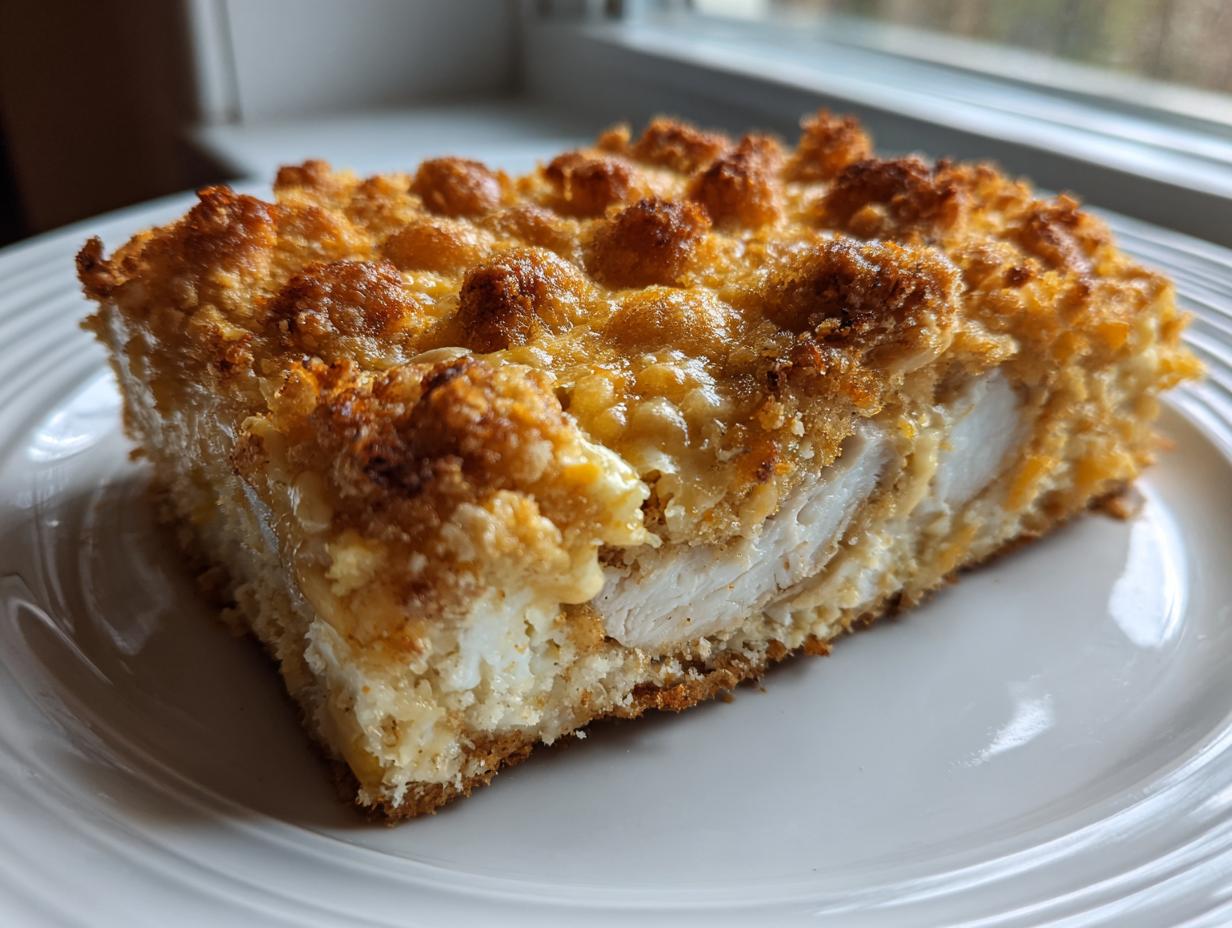
You know those nights? You just *need* comfort food, but you don’t want anything heavy or fussy. You want that perfect, satisfying snap when you bite in, followed by tender, juicy chicken that tastes like pure happiness. I totally get it. That craving for crunch and cheese is real! That’s precisely why I developed this recipe for **crispy cheddar chicken**.
This isn’t some fancy restaurant trick; this is my tried-and-true weeknight hero. Forget deep frying or juggling complicated stages. We’re using straightforward ingredients—simple seasonings, sharp cheddar, and those magical Ritz crackers—to get that unbelievably golden, crunchy coating while keeping the inside perfectly moist. It’s the kind of meal that proves the best American classics are the easiest to make right at home. Give this a try; it’s become a staple over on my quick weeknight dinners list!
- Why This Crispy Cheddar Chicken Recipe Works Every Time
- Ingredients for Your Crispy Cheddar Chicken
- Step-by-Step Instructions for Crispy Cheddar Chicken
- Expert Tips for Next-Level Crispy Cheddar Chicken
- Serving Suggestions for Your Crispy Cheddar Chicken
- Storing and Reheating Your Crispy Cheddar Chicken
- Frequently Asked Questions About Crispy Cheddar Chicken
- Nutritional Estimates for Crispy Cheddar Chicken
- Share Your Perfect Crispy Cheddar Chicken
Why This Crispy Cheddar Chicken Recipe Works Every Time
So many recipes promise crispiness, but they end up soggy or taste oily. That’s where this specific method shines! We are skipping the messy frying oil and heading straight to the oven. This method turns the dish into the ultimate **Comfort Food Chicken** because it’s easy, reliable, and tastes incredible. It’s a simple baked meal, but it delivers big flavor!
The magic here is using the melted butter as the glue that binds the savory cheddar and crackers right onto the protein. This baked coating sets up perfectly, locking down all that moisture which is exactly what we want for a super juicy interior. Seriously, this is one of my favorite easy family dinner ideas!
Achieving the Perfect Crunchy Chicken Coating
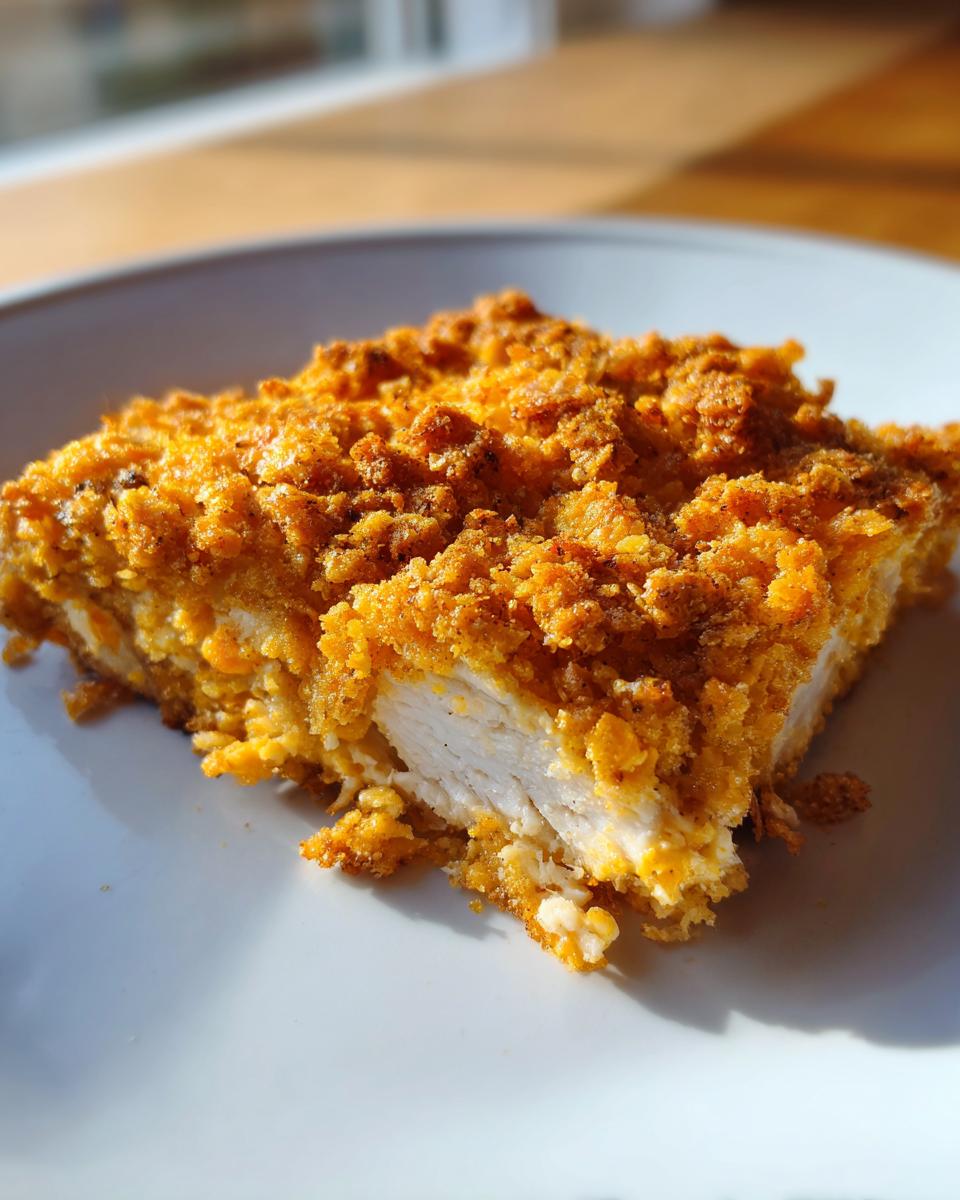
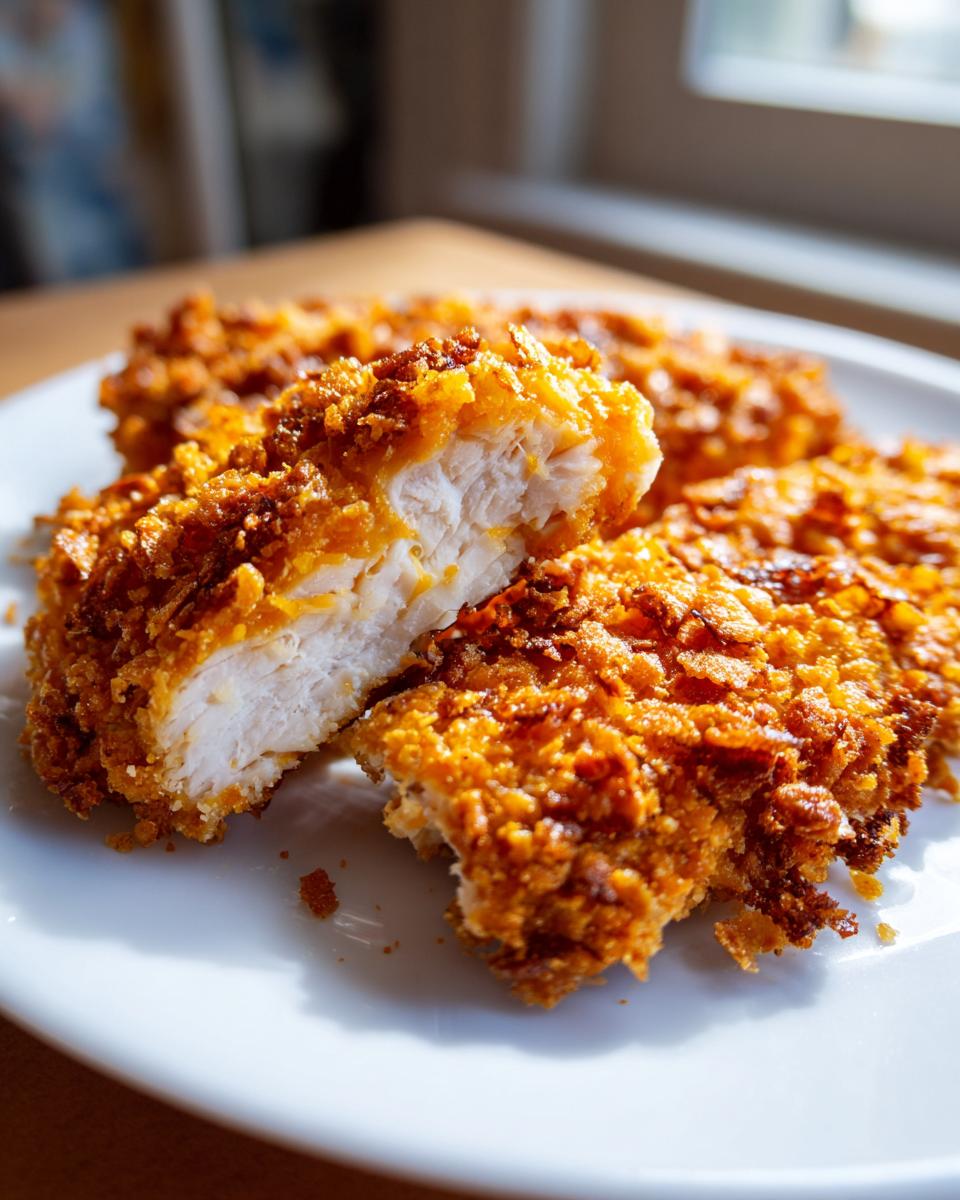
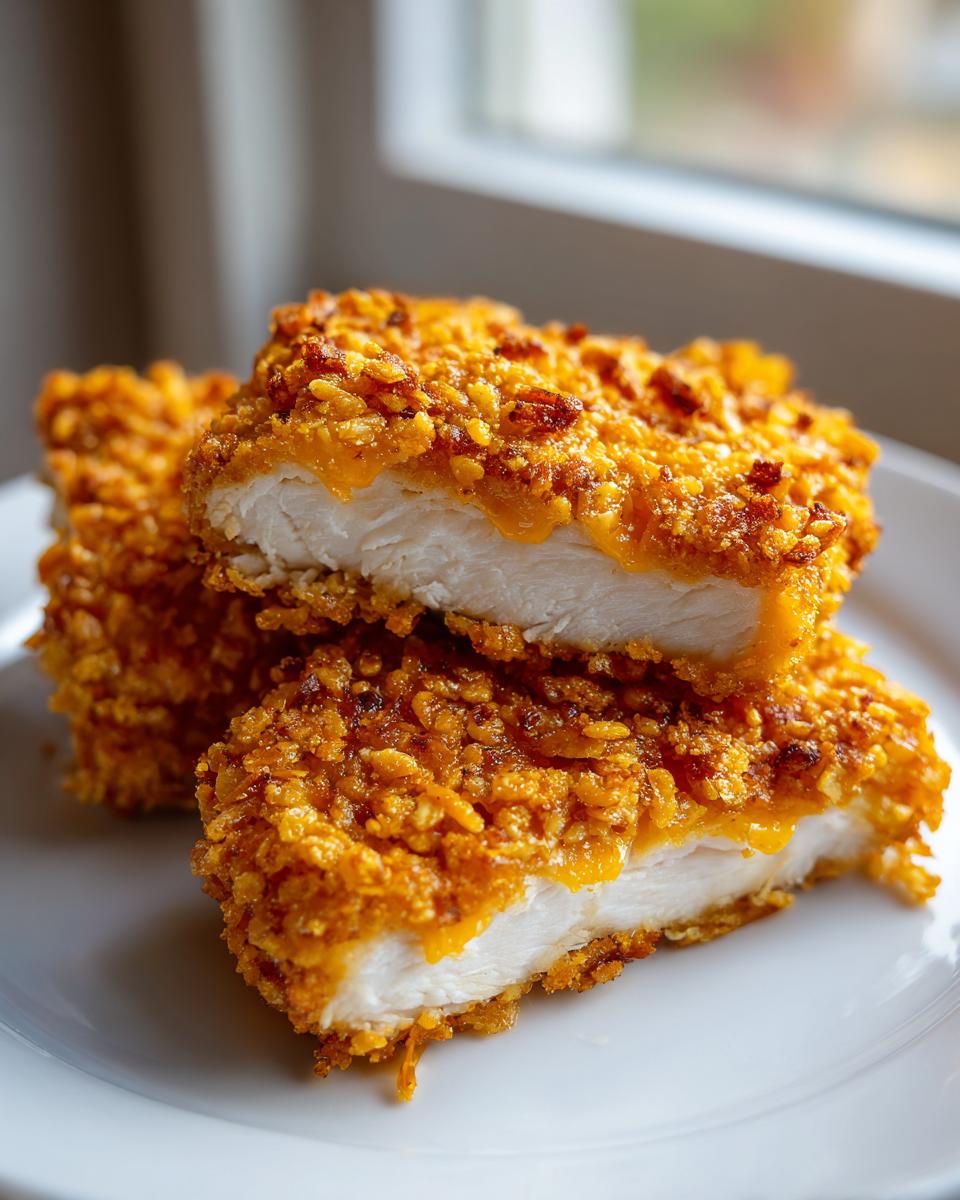
The combination of crushed Ritz crackers and Parmesan cheese creates an amazing texture—it’s lighter than traditional breadcrumbs but packs way more flavor. When you mix the sharp cheddar right in, you get that glorious cheesy stretch AND crunch.
My tip? After you dip the buttered chicken, really press that crumble mixture on! Don’t be shy. You want a thick, substantial **crunchy chicken coating**. Think of packing snow for a snowball—firm pressure makes sure it stays put while baking.
The Secret to Juicy Chicken Inside
It comes down to the coating process. That dip in the melted buttery sauce acts like a shield. As the chicken cooks at 400 degrees, that shield sets up, preventing the juices from evaporating out. It truly locks everything tight.
The *most* important part, though, is making sure your chicken pieces are uniform. Overbaked edges are the enemy of juiciness! You must pull this **cheddar crusted chicken** out the second it hits 165°F internally. Overbake it by even five minutes, and that tenderness is gone, no matter how good the crust is!
Ingredients for Your Crispy Cheddar Chicken
Alright, gather your stars! This list is short and sweet, which I always love for a weeknight throw-together meal where you want maximum impact for minimal effort. You only need about eight things total.
For the main part, grab four boneless, skinless chicken breasts. Then, for the coating, you’ll need?
- One full cup of crushed Ritz crackers—I mean, only the best crunch will do here!
- A half cup of lovely, sharp shredded cheddar cheese.
- A quarter cup of grated Parmesan for that salty punch.
- Seasonings: just a half teaspoon of garlic powder, plus salt and pepper to taste.
- And finally, a half cup of unsalted butter, melted down completely. If you’re feeling fancy, that Dijon mustard is my optional little secret for extra binding magic!
Prep time is quick, so once you have these laid out, we can get this **crispy cheddar chicken** coated and into the oven fast!
Step-by-Step Instructions for Crispy Cheddar Chicken
Okay, this is where we take those gorgeous ingredients and turn them into dinner heaven! You’ll be shocked how fast this comes together. This is truly one of the best **Easy Chicken Dinners** you’ll ever make, perfect for when you need **Simple Baked Meals** on the table quickly.
We preheat the oven first at a nice high temperature—400 degrees Fahrenheit—and make sure our baking dish is lightly greased. Don’t forget that step, or you’ll be scraping bits later!
Prep Work: Oven and Coating Assembly
First things first, grab a wide, shallow dish. We need to mix all our dry crispy elements: that crushed Ritz, cheddar, Parmesan, garlic powder, salt, and pepper. Take a fork and make sure everything is distributed evenly. You want the cheese and crackers mixed completely, trust me!
Now, pivot to your second bowl. This is for the binding stage. Melt that stick of butter. I like to whisk in that little bit of Dijon mustard here, too, just to give it some extra stickiness, but water works in a pinch if you’re out of mustard!
Coating and Baking the Crispy Cheddar Chicken
Now for the fun part! Take one piece of chicken at a time. Dip it completely into that melted butter mixture, letting any excess drip off just a tiny bit. Then, immediately press it firmly into the cracker and cheese crumb mixture.
You have to really cover that coating on there—press it down tight! Place the crusted chicken breasts in your prepared dish. They should go in snugly. Pop them straight into the hot oven for about 20 to 25 minutes. I always break out my instant-read thermometer for this step. Once the thickest part reads 165 degrees Fahrenheit, they are ready! After you pull them out, let them rest for five minutes before serving. That little rest time keeps them unbelievably juicy!
For more reliable cooking methods like this, check out my guide to juicy and tender grilled chicken once you’re ready for summer cooking, but for tonight, we’re baking gold!
Expert Tips for Next-Level Crispy Cheddar Chicken
Even though this recipe is built to be beginner-proof, there are always a few tricks I use that take this **cheddar crusted chicken** from good to absolutely unforgettable. These little details are what I learned by trial and error over many, many weeknights!
First up, we need to talk about the chicken itself, especially if you buy those extra-thick breasts they sell these days. If you have one piece that is one inch thick and another that is only a half-inch, guess what happens? You end up with dry, sad edges and a center that’s barely cooked!
Pounding Chicken for Uniform Cooking
My absolute favorite trick here is pounding the thicker chicken breasts to an even thickness, aiming for about three-quarters of an inch all over. Just grab a piece of plastic wrap, put the chicken under it, and use the flat side of a meat mallet—or even a heavy rolling pin!
It sounds intense, but it makes a huge difference in getting that beautiful, golden-brown crust to finish cooking at the exact same moment the interior is perfectly tender. It’s worth the extra two minutes of effort, I promise!
Boosting the Crunch Factor
If your kitchen is a bit cooler, or you just really, *really* love crunch (I do!), there’s one thing you can do right before it goes into the oven. After you’ve pressed that delicious coating on, take a can of cooking spray and give the tops of the chicken a very light misting.
Don’t drench it, just a quick little spray. This helps supercharge the fat component right on the exterior, encouraging that cheddar and cracker mixture to brown faster and crisp up intensely before the chicken underneath overcooks. It’s a little boost of confidence for your crust!
If you want more tips on how to get crispy coatings on things like shrimp, check out my baked garlic parmesan shrimp post—the coating principles are very similar!
Serving Suggestions for Your Crispy Cheddar Chicken
This golden, cheesy chicken is such a wonderful star, so we want sides that support it without competing too much! Since this is such a satisfying, rich **Comfort Food Chicken**, I usually balance it out with something bright or green. Steamed green beans tossed with a tiny splash of lemon juice work beautifully, or maybe some lightly roasted asparagus.
If you have little ones around—and this is definitely a winner for **Kid Friendly Chicken Meals**—you can’t go wrong with creamy mashed potatoes. Speaking of which, you absolutely have to try my recipe for Garlic Parmesan Mashed Potatoes alongside this! It makes for such a hug-in-a-bowl kind of dinner. Just keep the sides simple so that crispy cheddar crust really gets the attention it deserves!
Storing and Reheating Your Crispy Cheddar Chicken
This amazing **crispy cheddar chicken** actually holds up pretty well, which is a lifesaver for leftovers! If you have any baked goodness left, let it cool completely on a rack—this is important to stop residual steam from making the bottom soggy.
Once fully cooled, you need an airtight container. I try to avoid stacking the pieces if I can, but if you must, put a small piece of parchment paper between them. This keeps the crust separation minimal. Stored this way in the fridge, it should be great for about three days.
Now, when it comes to reheating, we have to fight the enemy: sogginess! Throwing this in the microwave will turn that beautiful crunch into soft sadness, so just don’t do it unless you are absolutely desperate. We need dry heat to bring that crunch back!
My favorite way, hands down, is using the air fryer. If you have one of those, just pop a piece in at 350 degrees Fahrenheit for about 5 to 7 minutes. It crisps up beautifully, almost brand new!
If you don’t have an air fryer, your standard oven works great too. You just set the oven to 350 degrees, lay the chicken on a baking sheet (maybe line it with foil or parchment just in case), and heat for about 10 to 12 minutes. Keep an eye on it after the 10-minute mark because that cheddar topping might brown a bit faster the second time around. This is how we maintain the integrity of that golden, cheesy top layer!

Frequently Asked Questions About Crispy Cheddar Chicken
I get so many messages about tweaks and troubleshooting for this recipe! It’s so popular as a **weeknight chicken dinner**, so making sure it works perfectly for everyone is my top priority. Here are some of the questions I hear most often about getting that perfect **cheddar crusted chicken**.
Can I make this crispy cheddar chicken ahead of time?
Yes, you absolutely can prep things ahead of time, which makes those busy evenings so much smoother. I recommend coating the chicken completely—the butter in the coating helps preserve it a bit—and then laying the prepared pieces on a baking sheet covered with parchment paper. Wrap that tightly and stick it in the fridge for up to 12 hours.
When you’re ready to bake, just add about 5 to 7 minutes onto the cooking time since the chicken will be cold going into the oven. If you baked it fully and have leftovers, please don’t use the microwave! You’ll lose the crunch. Reheat it in the oven or air fryer until hot, just like I mentioned before, to revive that signature crispness.
What cheese works best besides sharp cheddar?
Sharp cheddar is my go-to because those stronger flavors really cut through the richness of the butter and the crackers, which is essential for a truly memorable **crispy cheddar chicken**. However, if you don’t have sharp, you can absolutely substitute!
I’ve had great results mixing in Monterey Jack or a Colby blend. Keep in mind that milder cheeses like standard mild cheddar or Jack won’t give you that same assertive flavor kick, but they will melt beautifully and creamier. You might want to boost the garlic powder slightly if you go with a milder cheese to keep the flavor profile lively. It’s still a wonderful, **kid friendly chicken meal** either way!
How do I ensure the coating stays crispy if I use thicker chicken?
This goes back to making sure everything cooks evenly! If you have thick breasts that are taking forever to reach 165°F internally, the topping can sometimes look done long before the inside is cooked. If you see beautiful color but aren’t at temperature, turn your oven temperature down slightly—maybe down from 400 to 375 degrees F—and let it cook slower.
For a final blast of crunch, though, right when it hits that safe internal temperature, switch your oven to broil for just one or two minutes. You have to stand right there and watch it like a hawk! It gives that topping an incredible second crisp, but cheese can burn quickly, so don’t walk away from the oven during that final step. If you’re looking for more reliable meal ideas, check out my guide to traditional chicken noodle soup later this week!
If you want to check out another great, simple version that people love, this recipe form my friend over at Recipe by Diva is also fantastic!
Nutritional Estimates for Crispy Cheddar Chicken
Now, I know we cook for love and joy here at MDLATDMM, not necessarily for the numbers, but I always like to give you a ballpark idea of what’s in our food. Remember, these figures are just estimates based on the ingredients listed above—your specific butter, cheese, and chicken size will change things!
For one serving (one chicken breast), you are looking at approximately 450 calories. You get a whopping 40 grams of protein, which is fantastic! We’re seeing about 25 grams of fat and about 15 grams of carbohydrates in that delicious crust.
This is a rich dish, so those numbers reflect the cheesy topping and butter coating, but hey, it’s **Comfort Food Chicken**! As always, these estimates don’t account for the sides you might add, like potatoes or veggies.
Share Your Perfect Crispy Cheddar Chicken
And there you have it! My absolute favorite way to bring a perfectly crunchy, ridiculously cheesy, and wonderfully moist **crispy cheddar chicken** to the dinner table without needing a stand mixer or a deep fryer. I really hope this recipe brings that same comforting joy to your kitchen that it brings to mine.
I pour my heart into making sure these recipes translate perfectly from my memories into your real-world kitchen—that’s the whole point of MDLATDMM, right? We want to celebrate the simplicity and connection that home cooking offers.
So, after you make this, please come back and let me know how it went! Rate the recipe down below and leave a comment telling me if your kids loved it or how you adapted my butter-and-Ritz method. I genuinely read every single note, and your feedback helps me keep perfecting these cherished heritage dishes.
If you snap a picture of that glorious golden crust, tag me on social media! I absolutely love seeing your successes. If you want to check out another incredibly popular cheesy dish that people rave about, have a look at this delicious take on crispy chicken from Flavor Nectar—it’s also fantastic!
Happy cooking, friends. Don’t forget, if you ever need to get in touch or have specific recipe questions, my contact page is always open.
PrintCrunchy Baked Ritz Cracker Crusted Cheddar Chicken
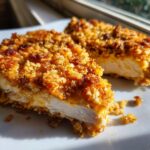
Make this easy, family-friendly chicken dinner featuring tender meat covered in a crispy, cheesy cheddar and cracker crust. It bakes to golden perfection.
- Prep Time: 15 min
- Cook Time: 25 min
- Total Time: 40 min
- Yield: 4 servings 1x
- Category: Dinner
- Method: Baking
- Cuisine: American
- Diet: Vegetarian
Ingredients
- 4 boneless, skinless chicken breasts
- 1 cup crushed Ritz crackers
- 1/2 cup shredded sharp cheddar cheese
- 1/4 cup grated Parmesan cheese
- 1/2 teaspoon garlic powder
- 1/4 teaspoon black pepper
- 1/4 teaspoon salt
- 1/2 cup (1 stick) unsalted butter, melted
- 1 tablespoon Dijon mustard (optional, for binding)
Instructions
- Preheat your oven to 400 degrees Fahrenheit. Lightly grease a baking dish.
- In a shallow dish, combine the crushed Ritz crackers, shredded cheddar cheese, Parmesan cheese, garlic powder, salt, and pepper. Mix these dry ingredients well.
- In a separate small bowl, melt the butter. If you want extra flavor and binding, stir the Dijon mustard into the melted butter.
- Dip each chicken breast first into the melted butter mixture, coating both sides lightly.
- Next, press the buttered chicken firmly into the cracker and cheese mixture, making sure to cover all sides with a thick, even layer.
- Place the coated chicken breasts in the prepared baking dish.
- Bake for 20 to 25 minutes, or until the internal temperature reaches 165 degrees Fahrenheit and the topping is golden brown and crispy.
- Let the chicken rest for 5 minutes before serving.
Notes
- For an extra crispy coating, you can lightly spray the tops of the crusted chicken with cooking spray before baking.
- If your chicken breasts are very thick, pound them to an even thickness (about 3/4 inch) so they cook uniformly.
- This dish pairs well with simple sides like steamed green beans or mashed potatoes for a complete comfort food meal.
Nutrition
- Serving Size: 1 breast
- Calories: 450
- Sugar: 2
- Sodium: 450
- Fat: 25
- Saturated Fat: 14
- Unsaturated Fat: 8
- Trans Fat: 0.5
- Carbohydrates: 15
- Fiber: 1
- Protein: 40
- Cholesterol: 110