
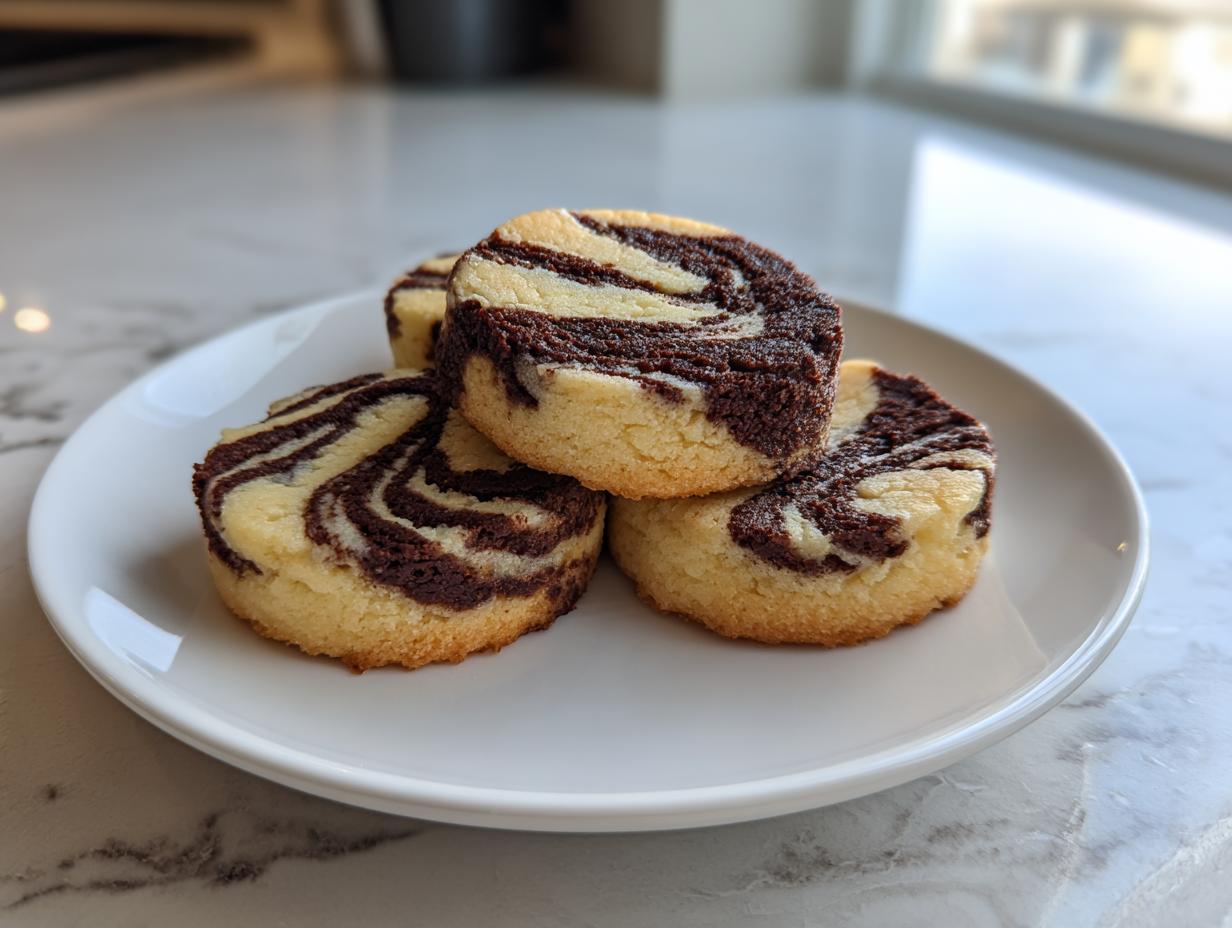
Doesn’t anything beat a cookie that looks way harder to make than it actually is? When you pull a tray of these breathtaking **pinwheel cookies** out of the oven, I guarantee people will stop in their tracks. Seriously! I absolutely love these Easy Slice-and-Bake Chocolate and Vanilla Pinwheel Cookies because they give you that incredible, crisp-edged swirl pattern with minimal fuss. Maddie here, and you know my mission: to take those gorgeous, time-honored recipes and break them down until they are foolproof for your everyday life. If you love a classic, buttery treat that looks magical—you might also want to check out my guide for chewy chocolate chip cookies as well!
We are focusing solely on simplicity here. Forget trying to shape intricate doughs by hand. This recipe is built around the best method for stunning results: the chill-and-slice technique. You mix two simple doughs—one rich vanilla sugary base and a chocolatey partner—layer them up, roll tight, and BAM! Perfect spirals, ready to bake whenever you need them. If you’re looking for reliable, approachable, and absolutely delicious **Layered Cookie Designs**, you’ve landed in the right spot.
- Why You Will Love These Easy Pinwheel Cookies
- Essential Ingredients for Perfect Pinwheel Cookies
- Achieving Perfect Swirls: How to Prepare Layered Cookie Designs
- Step-by-Step Instructions for Baking Your Pinwheel Cookies
- Tips for Making Festive Christmas Pinwheel Cookies
- Storage and Make Ahead Cookies Guidance
- Serving Suggestions for Your Visually Stunning Cookies
- Frequently Asked Questions About Pinwheel Cookies
- Share Your Homemade Holiday Treats
- Share Your Homemade Holiday Treats
Why You Will Love These Easy Pinwheel Cookies
I know your baking list, especially around the holidays, can look endless. That’s why these specific pinwheel cookies made it onto the permanent rotation—they deliver maximum visual impact for minimum daily stress. Trust me on this one:
- True Slice-and-Bake Simplicity: That’s the secret sauce! You mix the dough once (in two colors, yes, but it’s still one batch), form a log, and chill it solid. You can bake two cookies or thirty whenever you feel like it!
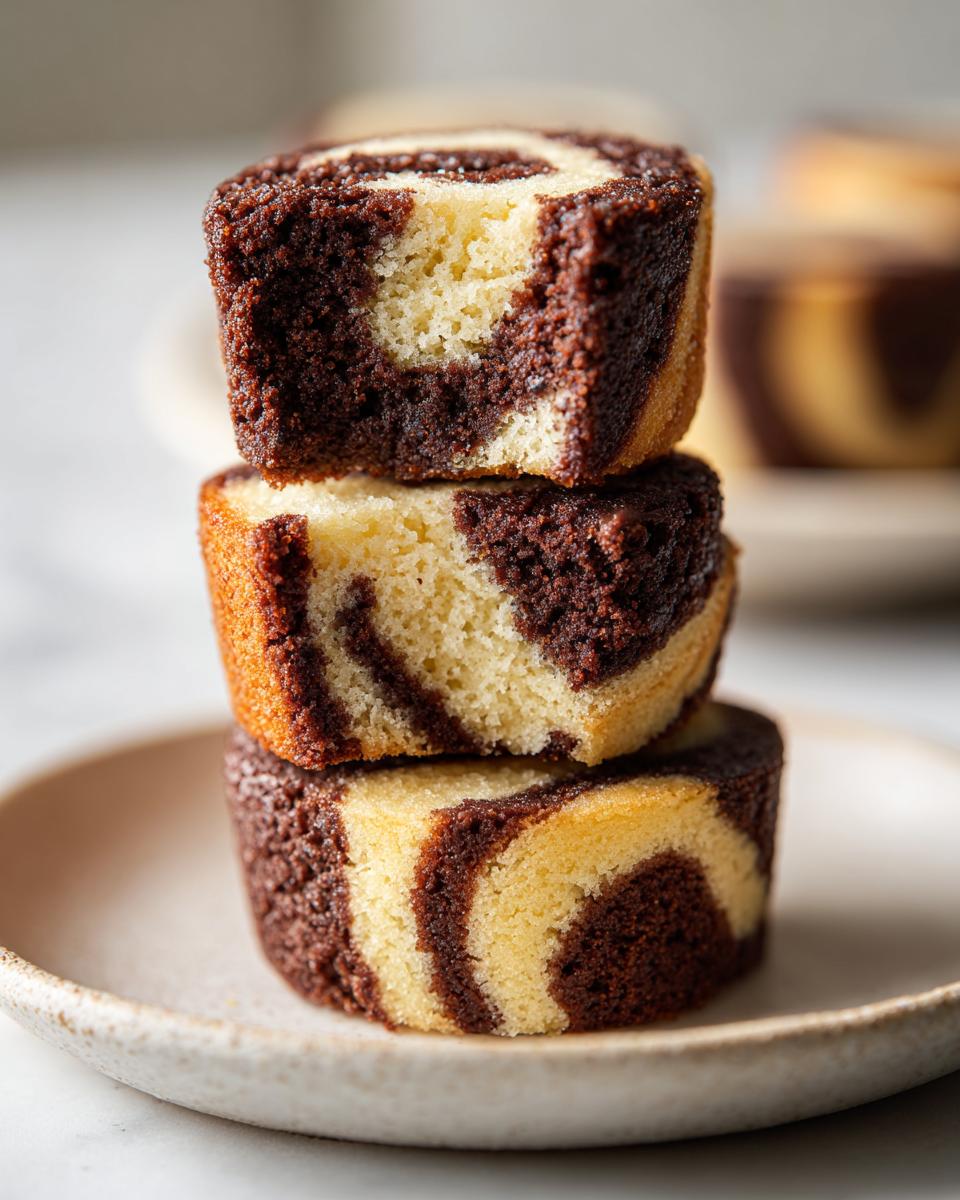
- That Buttery Texture: These aren’t thin, crispy wafers. We are aiming for a delicate, buttery sugar cookie that melts just a little in your mouth. That rich base is what makes the swirl so satisfying.
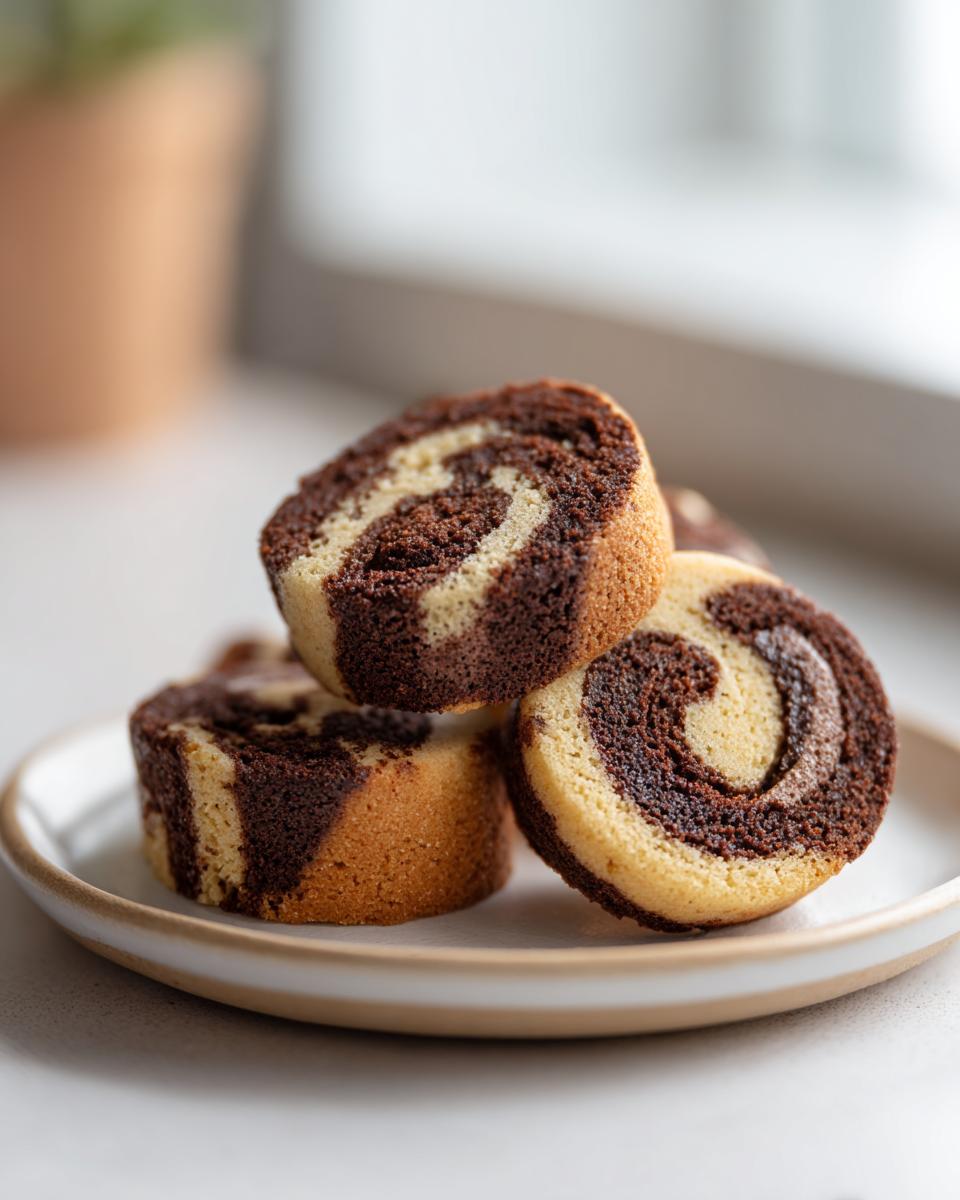
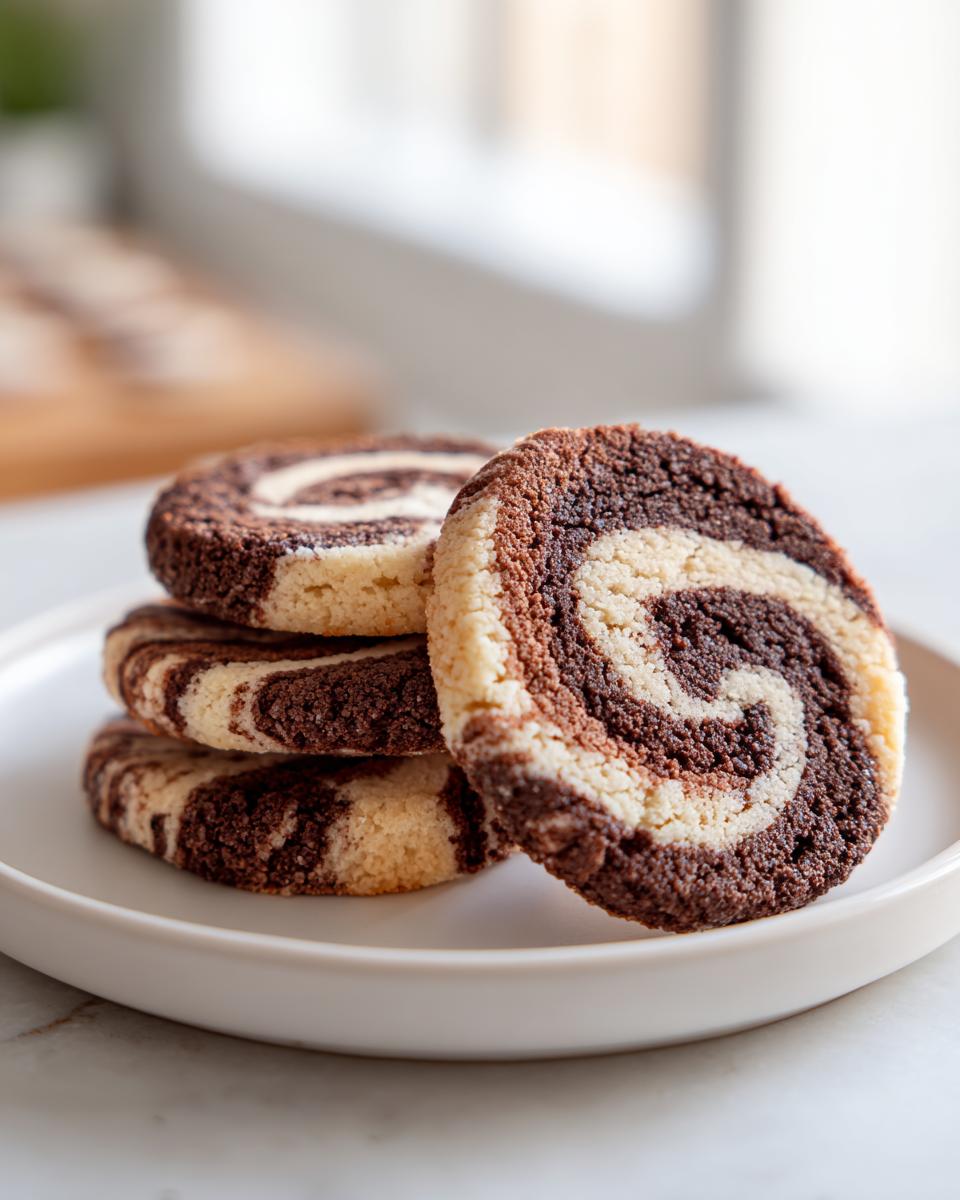
- Showstopper Swirls: Honestly, the visual appeal is unreal. Who needs fancy piping techniques when you can get these gorgeous, crisp-edged spirals just by rolling two sheets of dough together? They look like they came from a high-end bakery!
- Perfect for Holiday Cookie Baking: Because the dough freezes so well, these are my go-to when I’m getting a big dessert tray ready for a party or making gifts. They are truly the definition of Easy Christmas Cookies.
- Make-Ahead Magic: If you need to prepare weeks in advance, this recipe sings! I often have three or four logs chilling in the freezer just waiting for a cookie emergency.
Essential Ingredients for Perfect Pinwheel Cookies
When you are making slice-and-bake cookies, people always assume they can swap things out easily. But for these pretty swirl cookie recipes, we need to respect the dough; it’s a delicate balance between firm enough to hold that swirl and tender enough to bake soft! Here’s what you need on hand to make sure your two dough colors turn out just right. Don’t forget to check out my pumpkin banana bread recipe if you have some extra ripe bananas hanging around!
- 1 cup (2 sticks) unsalted butter that is perfectly softened—this is non-negotiable!
- 1 cup granulated sugar—we need this for that classic buttery base.
- 1 large egg, don’t use anything smaller or larger!
- 1 teaspoon quality vanilla extract.
- 3 cups all-purpose flour, leveled off carefully.
- 1 teaspoon baking powder (this gives just a whisper of lift).
- 1/2 teaspoon salt, because no baked good should ever be bland.
- 2 tablespoons milk, usually whole milk works best for richness.
- 1 tablespoon unsweetened cocoa powder for our chocolate swirl.
- 1/4 teaspoon brown or red food coloring (this is optional, but wow, does it make them festive for Christmas).
Ingredient Notes and Substitutions for Your Pinwheel Cookies
Let’s talk quality control, because this is where home cooks gain legendary status! Maddie’s tip? The butter has to be *just* right. If it’s too cold, it won’t cream properly, and those tiny air bubbles won’t incorporate right, meaning your cookies spread flat. If it’s even slightly melted, you’ll get greasy, wonky-looking layers.
You want it soft enough that you can gently press your finger into it and leave a deep mark, but it should still feel cool to the touch, not greasy or oily. That’s room temperature, folks!
Now, for substitutions: Can you use margarine? Technically, yes, but I wouldn’t recommend it for these buttery sugar cookies. Margarine has higher water content, and that extra water will cause your two dough layers to slide right off each other when you roll them up. You’ll end up with a chocolate cylinder next to a vanilla one instead of a beautiful swirl!
If you’re aiming for a different flavor profile entirely, swap the vanilla for almond extract, or maybe even peppermint extract during the winter months. Just remember, extracts are strong, so you might use a little less than the vanilla volume listed. A slight flavor change keeps these pinwheel cookies exciting year after year!
Achieving Perfect Swirls: How to Prepare Layered Cookie Designs
Okay, guys, this is the fun part—the assembly! Getting those gorgeous, tight spirals in your pinwheel cookies isn’t hard, but it absolutely requires precision. If your vanilla dough and your chocolate dough aren’t the same size and thickness, you’ll end up with a lumpy log instead of a beautiful spiral pattern. I use wax paper for everything here; it keeps things neat, and honestly, it saves my countertops from getting jammed up with sticky dough.
When your two doughs are mixed and ready, divide them perfectly in half. Roll each colored portion out separately between two sheets of wax paper or plastic wrap. You are aiming for a rectangle about 1/8 inch thick. I know, I know, chasing that 1/8 inch measurement sounds fussy, but it’s how you avoid a massive, thick cookie where the swirl gets lost. The dough should be thin enough that you can almost see your hand through it! If you’re whipping up doughs and need inspiration for other bakes, my apple cinnamon muffins are a great cozy alternative!
When they are both rolled out to roughly the same size, peel off the top layer of wax paper from both rectangles. Gently lay the chocolate dough directly on top of the vanilla dough. I just give them a very light press with my hands, making sure the edges match up as best as possible. Then, we roll! Start rolling tightly from one long edge. I mean *tightly*—use the bottom sheet of wax paper to help guide and tuck the dough in as you go. A loose roll means air gets trapped, and you get weird gaps when you bake them.
Once you have your beautiful log, wrap that plastic wrap around it super snuggly. Make sure it’s a nice, solid cylinder shape. Then, you slide it into the fridge. For more tips on visual cookie designs, you can check out some inspiration online, like what they do over at Cloudy Kitchen, though I think our results beat theirs, naturally!
The Critical Chilling Step for Slice and Bake Cookies
If you take one thing away from this entire recipe, please let it be this: DO NOT RUSH THE CHILL. Seriously, this dough log has to be rock solid before you even think about slicing it. I personally mandate a minimum of two hours in the refrigerator. If you try to slice soft dough, the colors bleed together, the log squishes out of shape, and you lose the beautiful contrast we worked so hard to achieve!
If you’re short on time, or if your kitchen is just really warm (mine gets toasty sometimes!), you can wrap that log and stash it straight into the freezer for about 30 to 45 minutes instead. You want the dough firm enough that your sharp knife glides through it like butter, leaving clean edges behind. If you start slicing and notice it getting mushy or sticking to the knife, stop immediately! Pop it back in the freezer for 15 minutes. Only perfect, firm slices lead to perfect pinwheel cookies.
I love that the chilling time means these are the ultimate Slice and Bake Cookies. After they bake, I’ll often wrap the remaining log back up and keep it ready for a weekend baking spree. It’s the best way to manage a big batch without overwhelming your oven!
Step-by-Step Instructions for Baking Your Pinwheel Cookies
Alright, the dough is chilled, it’s firm like marble—it’s time for the best part! We are moving from the messy stage to the glorious baking stage. Remember, with slice and bake cookies, baking is fast, but chilling is where the magic happens. Since you’ve been patient, these steps should be breezy. If you want to compare your results to another trusted bake, I always find Sally’s Baking Addiction has great visual guides when it comes to cookie structure, like her pinwheel cookie recipe!
First things first: get that oven warmed up! Preheat your oven to 375°F (190°C). This temperature is perfect for getting those crisp edges we love on our buttery sugar cookies without over-browning the centers. While it heats up, grab a couple of baking sheets and line them with parchment paper. Seriously, parchment paper is your best friend; nothing sticks, and cleanup takes literally five seconds. If you don’t have parchment, non-stick spray is fine, but you might get a bit more spread.
Now, take that firm dough log out of the plastic wrap. Remember how we struggled to make it tight? That effort pays off now as you slice it cleanly. Use a very sharp knife—a serrated knife designed for bread works wonders here—to slice the log into rounds about 1/4 inch thick. If the dough starts feeling soft or sticky while you’re cutting, just pop it back in the freezer for five minutes. We need those clean white and chocolate edges!

Arrange your lovely little pinwheel slices on the parchment-lined sheets. Because these cookies spread just a little bit to set their shape, give them space! I put mine about 2 inches apart. If you try to crowd them, they’ll bake into one giant cookie blob, and we definitely don’t want that!
They bake super fast because they are relatively thin. You’re looking at 8 to 10 minutes total. The visual cue is key here: the edges should just barely start turning light golden brown. If you let them go to a deep brown, they’ll be crunchier than we want. These are supposed to be a tender, buttery sugar cookie base, remember? If you’re loving how these are turning out, you might want to plan ahead with my classic chocolate chip cookies recipe for comparison next time!
Patience for three more minutes! Once you pull them out, don’t touch them! Let them cool right there on the hot baking sheet for about 5 minutes. This allows them to fully set up so they don’t break when you move them. After that 5-minute rest, carefully transfer the pinwheel cookies to a wire rack to cool completely. Waiting until they are totally cool is important before stacking them up, especially if you plan on dipping them in frosting later. Easy peasy, right?
Tips for Making Festive Christmas Pinwheel Cookies
This is where these pinwheel cookies really shine! If you’re baking for the holidays—whether it’s for a big cookie exchange or just to make your house smell amazing—a little color goes a long way. The base recipe already gives you that perfect chocolate and vanilla combination, which is classy, but when the holidays hit, we need some cheer!
To make these truly festive, you need to manipulate that second batch of vanilla dough. Remember when we divided the dough in step three of the recipe? Take half of that vanilla dough and toss in a few drops of food coloring. For classic Christmas cheer, I use vibrant red and bright green. Work the coloring in gently with your hands—it might feel a little sticky as you mix it, but keep massaging until the color is completely uniform. You don’t want streaks!
Once you have your red, green, and chocolate portions, you can get creative! You can stack them like a rainbow, or for the most stunning effect, roll them in strips. I usually do a thin layer of chocolate, a thin layer of red, and a thin layer of green right next to each other, press them gently together, and then roll it up tightly. When you slice them, you get these wild, beautiful, multicolored swirls. They look like edible stained glass!
I remember one year for my neighborhood cookie swap; I made these vibrant red and green ones, and they were gone in ten minutes flat. Everyone asked how I got the colors so sharp. The secret, if you can even call it that, is just making sure the food coloring is totally mixed in before you roll. It’s one of the most satisfying things about making these Christmas pinwheel cookies!
If you aren’t feeling the food coloring or if you prefer warm spices over chocolate, you can make a fantastic Snickerdoodle Pinwheel Variations! After you roll up your finished log—whether it’s just vanilla or chocolate and vanilla stacked—unroll a piece of wax paper and pour out about half a cup of cinnamon sugar onto it. Roll the wrapped log directly in the sugar until it’s coated evenly. When you slice and bake those, you get a beautiful, crunchy, spiced swirl. It pairs so well with my recipe for pumpkin snickerdoodle cookies if you need another holiday scent in the mix!
Honestly, whether you stick to the easy chocolate/vanilla or go full holiday color explosion, these are amazing alongside a slice of moist gingerbread cake.
Storage and Make Ahead Cookies Guidance
One of the biggest reasons these pinwheel cookies are in my top five recipes for any busy time of year is how incredible they are for planning ahead. Seriously, if you’re juggling school events or gearing up for major Holiday Cookie Baking, you need cookies that don’t demand your attention the day you need to serve them. This recipe gives you two amazing options for planning!
First, let’s talk about the baked ones. Once your swirl cookies are completely cool—and I mean *totally* cool, no residual warmth allowed—you store them in an airtight container at room temperature. Don’t try stacking them too high or pressing them together; they are fragile while they are still delicate. These buttery beauties stay wonderfully fresh for about 4 to 5 days this way. If you manage to have leftovers after that, they are still good, but they might have lost that perfect crisp edge.
But here’s the real game-changer: freezing the dough log! This is my favorite way to manage holiday baking chaos because it lets you spread the work out over several weeks. Once you’ve rolled that gorgeous chocolate and vanilla log tight in the plastic wrap, wrap it again in a layer of foil or place it inside a freezer-safe zip-top bag. It’s crucial that it’s wrapped tightly to avoid freezer burn, which will ruin the texture.
These logs keep perfectly in the freezer for up to three months. Three months! When you decide you need fresh, amazing pinwheel cookies, you don’t even have to thaw them completely. Just grab the log, slice off what you need (it might take a little more muscle when cutting from frozen!), and place the slices on your baking sheet. Because they are coming straight from cold storage, you’ll bake them right away at the same 375°F, but you need to add 1 to 2 extra minutes to the baking time to account for the initial thaw.
It means you can bake fresh batch after fresh batch all the way through December! It takes the pressure off completely. Having those logs ready saved my week last year when unexpected guests showed up right after I finished baking my turkey stuffing for Thanksgiving. Instant, homemade dessert!
Serving Suggestions for Your Visually Stunning Cookies
Once you have these beautiful pinwheel cookies cooling on the racks, the only real question left is: what do I serve them with? Because these are essentially a classic, buttery sugar cookie with chocolate notes, they are incredibly versatile. They are designed to be a star player on any holiday platter, but they need a few friends nearby to really shine!
My first rule for any good collection of Homemade Holiday Treats is variety in texture. These cookies are crisp on the edge and tender in the middle. So, when building your ultimate holiday selection, make sure you pair them with something completely different. They look so sharp next to a softer cookie, like a chewy peanut butter blossom, or maybe something rich and fudgy. They pull together an entire tray wonderfully.
When it comes to drinks, simple is often best. Since these already have a bit of vanilla and chocolate, a tall glass of cold milk is the classic, perfect choice—and you can’t argue with tradition there! If you’re looking for something warm, a simple black coffee cuts through that buttery richness beautifully. If you’re needing inspiration for the rest of your platter, I swear by my pecan cream pie recipe for something totally different but equally comforting.
These treats are absolute essentials for your Best Cookie Tray Recipes. Because they are sturdy and hold their distinct pattern so well, stacking them or arranging them doesn’t mess them up. They don’t crumble easily under the weight of a fudge brownie or a decorated shortbread cookie. They stay perfectly patterned, which keeps the whole presentation looking crisp and professional, even if you just threw them together last minute!
Also, don’t forget about dipping! While a thick glaze might cover up the swirl design, these look fantastic if you dip just one edge into melted white chocolate or dark chocolate. If you decide to dip, let that chocolate set up completely before moving them again. It adds another layer of flavor without masking that perfect swirl you worked so hard to create!
Frequently Asked Questions About Pinwheel Cookies
I always tell people that once you master the rolling part, everything else about these swirl cookie recipes is a breeze. But, I know baking problems pop up! Solving those little kitchen mysteries is what builds confidence, and I want you to feel totally successful when you pull these out.
Why are my swirls messy and bleeding together?
Oh, this is the number one problem folks run into with layered cookie designs. If your colors are bleeding into each other instead of staying in clean lines, it means your dough got too warm before baking. This usually happens during the slicing stage. The second the dough becomes soft, the colors start to migrate into each other. You absolutely must make sure that dough log is colder than cold before you slice it. If you see the colors start to look muddy while you’re cutting, stop! Throw the log back into the freezer for 10 minutes. That chill time is non-negotiable for sharp-looking pinwheel cookies.
Can I use different extracts besides vanilla and cocoa?
I love that you’re asking about flavor variations! Yes, you totally can experiment, but be mindful of concentration. Since we are asking the dough to hold up visually, sometimes adding too much liquid extract can make it too soft. For example, if you want to make a minty Christmas version, skip the cocoa powder in one half, and instead use a high-quality peppermint extract in that vanilla portion. Start small, maybe 1/2 a teaspoon, and taste the raw dough to see if it’s strong enough. You can always add more, but you can’t take it out!
How do I make these thinner to get more cookies?
If you are trying to maximize your yield for massive Holiday Cookie Baking spreads, you are thinking like a smart baker! To get thinner cookies, you need to roll the dough rectangles thinner than the recommended 1/8 inch. Aim for closer to 1/16th of an inch. You will get way more cookies out of the log, which is fantastic. The trade-off is that thinner cookies bake faster and get crispier edges faster, so watch them closely—they might only take 6 or 7 minutes rather than the 8 to 10 minutes listed. You might also find that extremely thin dough logs spread a little more during baking, so give them extra space on the sheet.
Are these considered good Make Ahead Cookies?
Absolutely! As I shared earlier, these are probably my favorite make ahead cookies because the dough freezes like a dream. The best advice I can give is to prepare the dough logs over the weekend when you have time, wrap them tightly, and tuck them away. Then, whenever you realize you need homemade treats—maybe for a last-minute neighbor drop-off or a surprise after-school snack—you just slice and bake. It’s the easiest way to look like you spent all day baking when you actually spent five minutes slicing!
How do these cookies hold up next to my lemon cream cheese dump cake?
That is such a great question! They balance beautifully on a dessert table. The dump cake is going to be soft, warm, and possibly saucy, which is divine. These pinwheel cookies snap back and offer that crisp, buttery, slightly snappy texture. They provide the necessary structure and contrast to the softer desserts. I always recommend having both a soft element and a crisp element on any good dessert platter to keep things interesting!
Troubleshooting Common Pinwheel Cookie Issues
Let’s talk about spreading. If your beautiful, chilled, perfectly rolled cookies flatten out into thin discs that lose all definition, there are usually two culprits, regardless of how pretty your swirl is. First, too little flour in the original dough causes this—make sure you are leveling your flour correctly when measuring, don’t scoop straight from the container!
The second, and more common reason, is not enough fat staying solid during baking. This circles back to that chilling step. If the dough log wasn’t *firmly* chilled, the butter melts too fast when it hits the hot oven air. To fix this, try placing the arranged, uncooked slices on the baking sheet and chilling the *entire sheet* for 15 minutes in the freezer before baking. This blast of cold shocks the butter into staying put long enough for the structure to set. It’s a trick I use when I’m making these for a high-temperature holiday event!
Share Your Homemade Holiday Treats
I truly hope you have as much fun making these pinwheel cookies as I do! They are one of my favorite Family Baking Projects because everyone loves rolling the log before it goes into the fridge. When you give them a try, I really want to know what color combinations you went with—did you stick to classic chocolate and vanilla, or did you dive deep into the festive red and green?
Let me know how they turned out by leaving a rating below, or drop a comment telling me your favorite way to serve these. If you post a photo of your perfect swirls online, please tag me! Sharing our results brings the whole joy of homemade food to life. Happy baking, friends!
Share Your Homemade Holiday Treats
I truly hope you have as much fun making these pinwheel cookies as I do! They are one of my favorite Family Baking Projects because everyone loves rolling the log before it goes into the fridge. When you give them a try, I really want to know what color combinations you went with—did you stick to classic chocolate and vanilla, or did you dive deep into the festive red and green?
Let me know how they turned out by leaving a rating below, or drop a comment telling me your favorite way to serve these. If you post a photo of your perfect swirls online, please tag me! Sharing our results brings the whole joy of homemade food to life. You can always get in touch with me directly via my contact page to share your baking victories! Happy baking, friends!
PrintEasy Slice-and-Bake Chocolate and Vanilla Pinwheel Cookies
Make stunning, buttery pinwheel cookies with simple chocolate and vanilla dough layers. This slice-and-bake recipe creates perfect, crisp-edged swirls ideal for holiday trays or everyday treats.
- Prep Time: 30 min
- Cook Time: 10 min
- Total Time: 2 hours 40 min
- Yield: 3 dozen cookies 1x
- Category: Dessert
- Method: Baking
- Cuisine: American
- Diet: Vegetarian
Ingredients
- 1 cup unsalted butter, softened
- 1 cup granulated sugar
- 1 large egg
- 1 teaspoon vanilla extract
- 3 cups all-purpose flour
- 1 teaspoon baking powder
- 1/2 teaspoon salt
- 2 tablespoons milk
- 1 tablespoon unsweetened cocoa powder
- 1/4 teaspoon brown or red food coloring (optional, for festive colors)
Instructions
- In a large bowl, cream together the softened butter and sugar until light and fluffy. Beat in the egg and vanilla extract.
- In a separate bowl, whisk together the flour, baking powder, and salt. Gradually add the dry ingredients to the wet ingredients, mixing until just combined. Add the milk.
- Divide the dough evenly into two separate bowls.
- In the first bowl, mix in the cocoa powder until the dough is uniformly chocolate colored. If using food coloring for festive versions, add a few drops to the second bowl and mix until the color is even.
- Place each dough portion between two sheets of wax paper. Use a rolling pin to roll each dough into a rectangle approximately 1/8 inch thick. The rectangles should be roughly the same size.
- Carefully peel the top layer of wax paper off each dough rectangle. Place the chocolate dough rectangle directly on top of the vanilla dough rectangle. Gently press them together.
- Starting with one long edge, tightly roll the layered dough into a compact log. Wrap the log tightly in plastic wrap.
- Chill the dough log in the refrigerator for at least 2 hours, or until firm enough to slice cleanly. This step is key for clean swirls.
- Preheat your oven to 375°F (190°C). Line baking sheets with parchment paper.
- Remove the chilled log from the plastic wrap. Use a sharp knife to slice the log into rounds about 1/4 inch thick.
- Place the cookie slices about 2 inches apart on the prepared baking sheets.
- Bake for 8 to 10 minutes, or until the edges are lightly golden. Do not overbake.
- Let the cookies cool on the baking sheet for 5 minutes before transferring them to a wire rack to cool completely.
Notes
- For sharp, defined swirls, chill the dough thoroughly. If the dough gets too soft while slicing, return it to the freezer for 15 minutes.
- To make festive Christmas pinwheel cookies, divide the vanilla dough into two portions. Color one portion red and the other portion green before layering.
- If you want a Snickerdoodle variation, roll the finished dough log in cinnamon sugar before wrapping and chilling.
- These are excellent make ahead cookies; the dough logs can be frozen for up to 3 months. Slice directly from frozen, adding 1-2 minutes to the baking time.
Nutrition
- Serving Size: 1 cookie
- Calories: 135
- Sugar: 9
- Sodium: 75
- Fat: 7
- Saturated Fat: 4
- Unsaturated Fat: 3
- Trans Fat: 0
- Carbohydrates: 17
- Fiber: 0
- Protein: 2
- Cholesterol: 25