
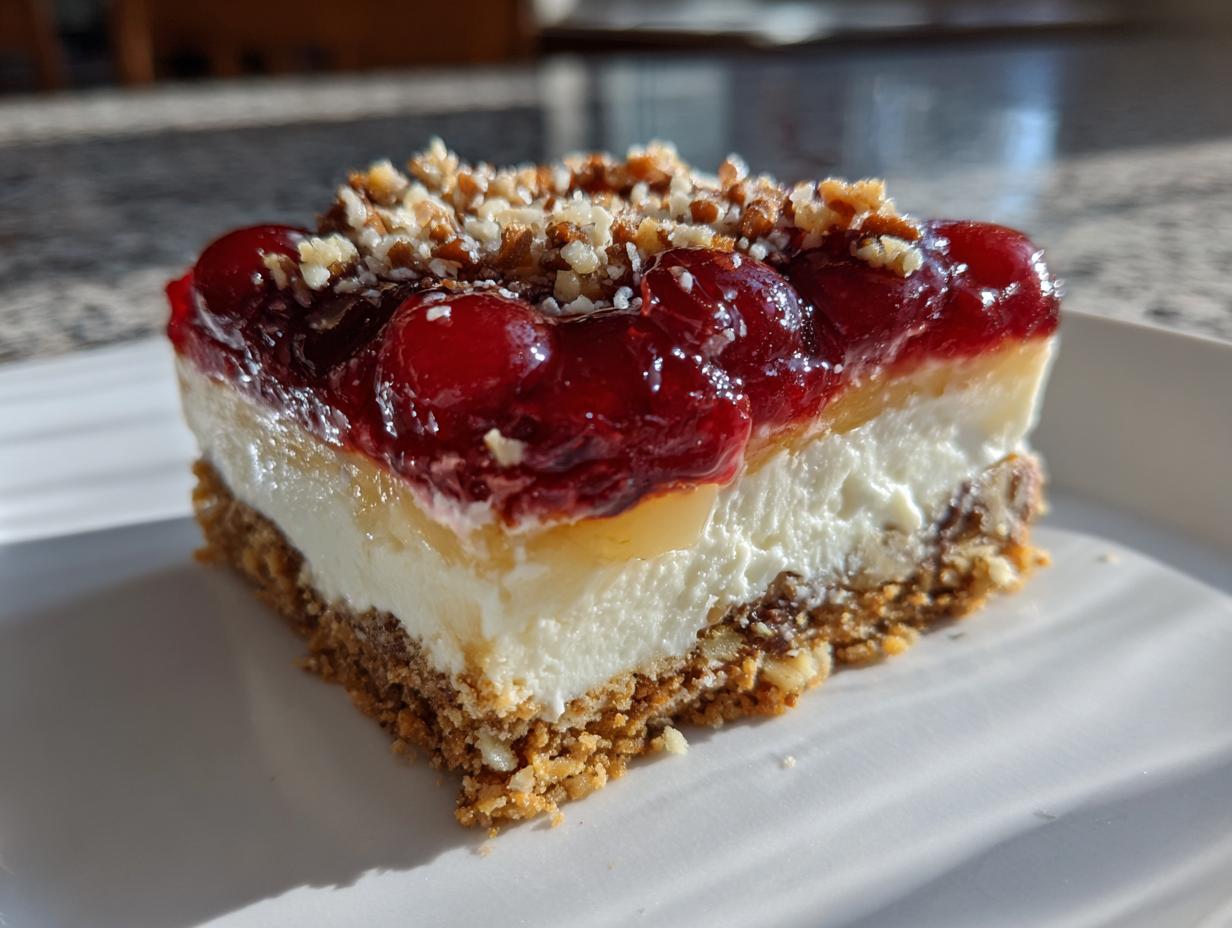
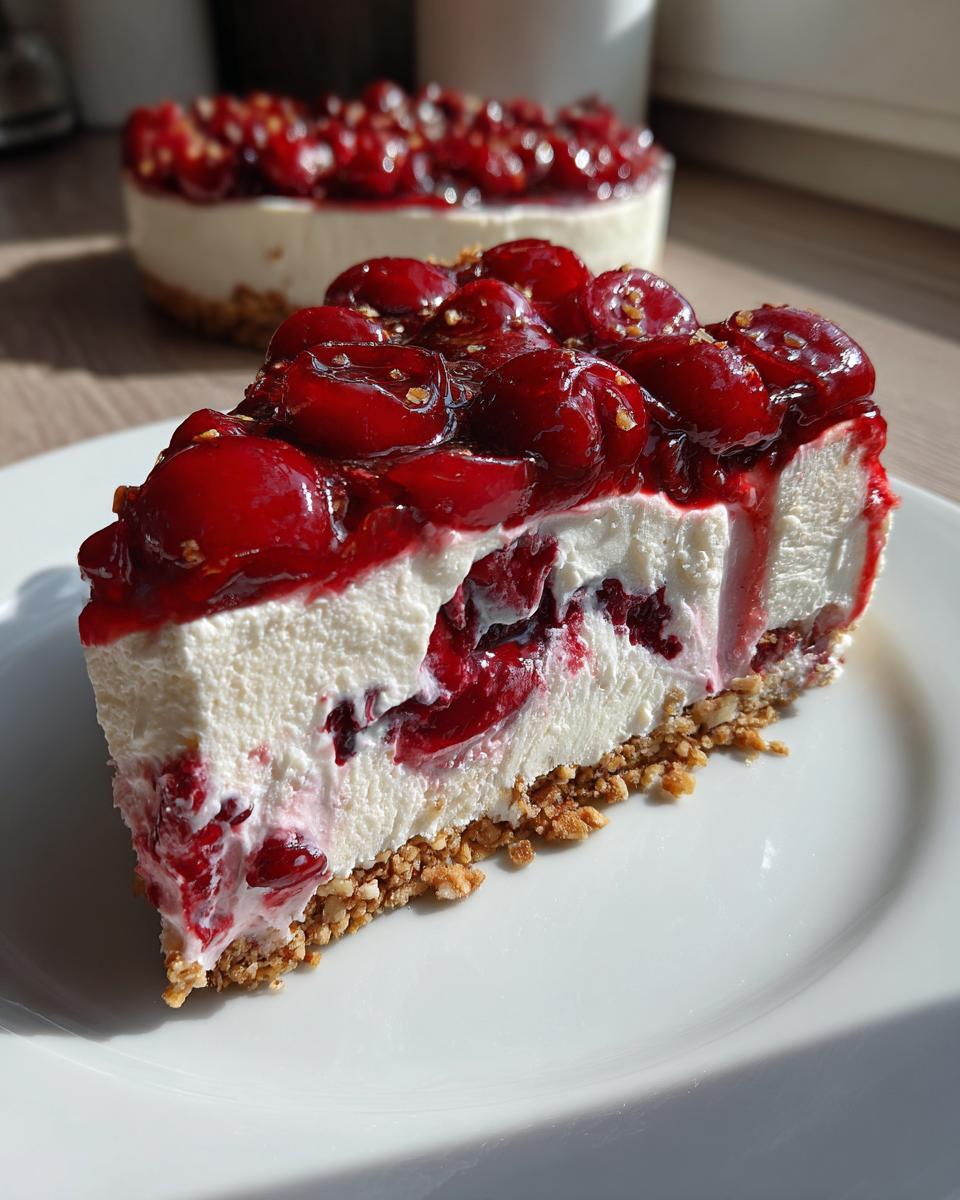
Oh, that smell! You know, the one that just screams “comfort” and “home”? It instantly takes me back to Maddie’s childhood kitchen, where the air was always thick with the promise of something delicious. For me, there’s nothing quite like pulling together a stunning dessert that looks like you spent *hours* on it, but really, it practically makes itself! That’s exactly what this Cherry Pecan Cheesecake Lush is all about. Imagine layers of crunchy pecan crust, a dreamy cream cheese filling, smooth vanilla pudding, and topped off with bright, jewel-toned cherries. It’s a no-bake layered dessert that’s seriously impressive and ridiculously easy to make. It’s the kind of dish that makes mouths water before you even take a bite, and trust me, it disappears fast at any gathering!
- Why You'll Love This Cherry Pecan Cheesecake Lush
- Gather Your Ingredients for Cherry Pecan Cheesecake Lush
- Crafting Your No-Bake Layered Dessert
- Tips for a Perfect Cherry Pecan Cheesecake Lush
- Make-Ahead and Storage for Your Layered Lush Recipe
- Frequently Asked Questions about Cherry Cheesecake Lush
- Nutritional Information for Cherry Pecan Cheesecake Lush
- Share Your Cherry Pecan Cheesecake Lush Creations!
Why You’ll Love This Cherry Pecan Cheesecake Lush
Seriously, what’s not to adore about this dessert? It’s my go-to when I need something show-stopping without the fuss!
- No-Bake Wonder: Forget fussing with the oven! This beauty comes together perfectly without ever turning it on.
- Super Easy: Even if you’re new to baking (or just want a quick win!), you can totally nail this. It’s all about assembling layers.
- Make-Ahead Magic: Need to prep for a party? This lush is even better made a day ahead, saving you last-minute panic.
- Crowd-Pleaser Extraordinaire: The combination of crunchy pecans, creamy cheesecake, smooth pudding, and tart cherries is a total winner every single time. Perfect for potlucks, holidays, or just because!
Gather Your Ingredients for Cherry Pecan Cheesecake Lush
Okay, let’s get our game face on for this luscious creation! Building this no-bake layered dessert is a breeze when you have all your beautiful ingredients ready to go. Here’s what we’ll need to make this Cherry Pecan Cheesecake Lush absolutely sing:
- 1 ½ cups crushed pecans: You want these finely crushed, almost like coarse sand.
- ¼ cup melted butter: Just enough to bind those lovely pecans together for the crust.
- 1 (8 ounce) package cream cheese, softened: Make sure it’s nice and soft, folks! This is key for a smooth layer.
- ½ cup powdered sugar: For that perfect touch of sweetness to the cream cheese layer.
- 1 teaspoon vanilla extract: A little splash to really make those flavors pop!
- 1 (8 ounce) container frozen whipped topping, thawed: Unthaw it gently, and keep it nice and cool until you’re ready to fold it in.
- 1 (3.4 ounce) package instant vanilla pudding mix: The speedy way to get a perfectly set pudding layer.
- 2 cups milk: Whole milk gives the best creamy texture for your pudding.
- 1 (21 ounce) can cherry pie filling: Don’t drain this! We want all that sweet, chunky cherry goodness.
Crafting Your No-Bake Layered Dessert
Alright, let’s get this beautiful Cherry Pecan Cheesecake Lush assembled! It’s really more about putting together gorgeous layers than actual cooking, which is my kind of kitchen magic. You’ll see how easy it is to build this showstopper step-by-step, and I’ll let you in on a little secret for those super clean slices everyone raves about.
Creating the Pecan Crust
First things first, we make that yummy pecan base. Just toss your crushed pecans with the melted butter in a bowl until everything is nicely combined. Then, press this glorious mixture evenly into the bottom of your 9×13 inch pan. I like to use the bottom of a measuring cup to get it nice and firm. It’s the perfect nutty foundation! If you love pecan crusts, you might also dig my Pecan Cream Pie – it’s to die for!
Whipping Up the Cream Cheese Layer
Now for the dreamy part! In a medium bowl, beat that softened cream cheese, powdered sugar, and vanilla extract together until it’s super smooth and creamy. Honestly, making sure the cream cheese is soft is the key here – no lumps allowed! Then, gently, gently fold in your thawed whipped topping. You just want to combine it until there are no streaks left. Maddie taught me to fold with a spatula, like you’re gently turning clouds into the mixture. It keeps it nice and airy. Take a peek at my tips for cream cheese desserts if you want even more smooth-layer secrets!
Preparing the Pudding and Cherry Topping
Next up, the pudding layer! In a separate bowl, whisk that instant vanilla pudding mix with the milk. Give it a good whisking until it starts to thicken up – it happens so fast! Don’t let it sit too long before you pour it. Spoon this thick, luscious pudding evenly over the cream cheese layer. Once that’s settled, spread that beautiful, bright cherry pie filling right on top of the pudding. Make sure to get it all the way to the edges!
Chilling for Perfect Texture
This is where the patience comes in, but trust me, it’s worth it! Cover your pan snugly and pop it into the fridge. You need at least 4 hours for it to set up properly. But, if you’re aiming for those picture-perfect clean slices, I highly recommend chilling it for 6 hours, or even better, overnight. This gives all those layers time to meld and firm up beautifully, so when you slice into it, everything stays put. It’s amazing how chilling transforms it!
Tips for a Perfect Cherry Pecan Cheesecake Lush
Alright, let’s talk about making this Cherry Pecan Cheesecake Lush just absolutely perfect! It’s pretty straightforward, but a few little tricks can really make a difference, ensuring your dessert is as beautiful as it is delicious. And trust me, I’ve learned a few things along the way – like that time I rushed the chilling and ended up with a beautiful mess!
First off, make sure your cream cheese and whipped topping are truly softened and thawed, respectively. Cold cream cheese just won’t mix smoothly, and you’ll end up with little knobs in your creamy layer. For that smooth, whipped topping fold, gently does it. Don’t overmix, or you’ll lose all that lovely airiness. And for those clean slices everyone loves? That extra chilling time is seriously your best friend. It makes such a difference in how neatly everything cuts. Trust me on this one!
Make-Ahead and Storage for Your Layered Lush Recipe
You know, one of the best things about this make-ahead dessert is how it actually gets *better* with a little time! Seriously, this layered lush recipe is perfect for prepping the day before a party. Just assemble everything as usual, cover it up tight, and pop it in the fridge. Those flavors really get to mingle and deepen overnight, and you’ll be so glad you did when you’re not scrambling at the last minute.
Got leftovers? Lucky you! Just cover the pan tightly with plastic wrap and keep it in the refrigerator. It’ll stay delicious for about 3-4 days. Just scoop out a portion whenever that craving hits! And no need to reheat this beauty; it’s meant to be enjoyed chilled. Super easy, right?
Frequently Asked Questions about Cherry Cheesecake Lush
Got questions about this dreamy Cherry Pecan Cheesecake Lush? I’ve got answers! Making this layered lush recipe is pretty foolproof, but it’s always good to know a few extra tips.
Can I use a different nut for the crust?
Absolutely! While pecans are fantastic, you could totally swap them for chopped walnuts or even buttery graham cracker crumbs for a different vibe. Just keep the quantities similar for the crust consistency.
How long does the Cherry Pecan Cheesecake Lush need to chill?
For it to set up properly, you need at least 4 hours in the fridge. But for those super clean slices? Trust me, let it chill for at least 6 hours, or even better, overnight. It just makes everything firmer, like a magical dessert lasagna!
Can I use fresh cherries instead of pie filling?
You sure can! If you go the fresh cherry route, you’ll want to pit about 3 cups of them and cook them down with a little sugar (maybe 1/4 cup, adjust to taste) and a tablespoon of cornstarch until they’re thick and jammy. Let them cool completely before layering!
Is this a good potluck dessert?
Oh, 100%! This potluck dessert is a total champion. It travels well, you can make it ahead, and everyone always devours it!
Nutritional Information for Cherry Pecan Cheesecake Lush
Just a heads-up, these numbers are estimates, since every kitchen and ingredient can be a little different! Based on the recipe, you’re looking at roughly 350 calories per slice. This includes about 20g of fat, 3g of protein, and 35g of carbohydrates, with around 30g of that being sugar. Sodium is typically around 150mg. It’s a rich and satisfying treat!
Share Your Cherry Pecan Cheesecake Lush Creations!
I absolutely *love* seeing what you all whip up in your kitchens! If you make this Cherry Pecan Cheesecake Lush, please leave me a comment below and tell me how it turned out! A star rating is always super helpful too. And hey, if you snap a pic, tag me on social media – I’d be thrilled to see your gorgeous layered dessert!
PrintNo-Bake Cherry Pecan Cheesecake Lush
A simple, layered no-bake dessert featuring a pecan crust, creamy cheesecake filling, pudding, and a sweet cherry topping. Perfect for potlucks and holidays.
- Prep Time: 20 min
- Cook Time: 0 min
- Total Time: 4 hr 20 min
- Yield: 12 servings 1x
- Category: Dessert
- Method: No-Bake
- Cuisine: American
- Diet: Vegetarian
Ingredients
- 1 ½ cups crushed pecans
- ¼ cup melted butter
- 1 (8 ounce) package cream cheese, softened
- ½ cup powdered sugar
- 1 teaspoon vanilla extract
- 1 (8 ounce) container frozen whipped topping, thawed
- 1 (3.4 ounce) package instant vanilla pudding mix
- 2 cups milk
- 1 (21 ounce) can cherry pie filling
Instructions
- Combine crushed pecans and melted butter. Press into the bottom of a 9×13 inch pan.
- In a medium bowl, beat together softened cream cheese, powdered sugar, and vanilla extract until smooth.
- Gently fold in the thawed whipped topping until well combined.
- Spread the cream cheese mixture evenly over the pecan crust.
- In a separate bowl, whisk together the instant vanilla pudding mix and milk until thickened.
- Pour the pudding mixture over the cream cheese layer.
- Spread the cherry pie filling evenly over the pudding layer.
- Cover the pan and refrigerate for at least 4 hours, or until firm.
- Slice and serve chilled.
Notes
- For cleaner slices, chill the dessert for at least 6 hours or overnight.
- You can make this dessert a day in advance.
- Substitute graham cracker crumbs for pecans for a different crust flavor.
Nutrition
- Serving Size: 1 slice
- Calories: 350
- Sugar: 30g
- Sodium: 150mg
- Fat: 20g
- Saturated Fat: 8g
- Unsaturated Fat: 12g
- Trans Fat: 0g
- Carbohydrates: 35g
- Fiber: 1g
- Protein: 3g
- Cholesterol: 30mg