
You know those smells that just instantly wrap you up in a warm blanket? For me, that’s apples baking with cinnamon. Forget fancy layer cakes; if I need real comfort, I pull out the apples. This recipe for the Ultimate Easy Homemade Apple Cobbler with Buttery Biscuit Topping is my absolute kitchen staple when I’m craving something truly classic. It brings me right back to those noisy, busy days in our family kitchen, even when I’m rushing between meetings!
This isn’t one of those fussy desserts that requires hours of work. We’re talking tender, spiced apples simmering beneath a rich, flaky, buttery topping. This apple cobbler tastes exactly like the homemade goodness you remember, but honestly, it comes together way faster than you might think. Seriously, it’s pure magic in a baking dish.
- Why This Easy Apple Cobbler Recipe Is Your New Favorite Comfort Food Dessert
- Ingredients for the Ultimate Easy Homemade Apple Cobbler
- Step-by-Step Instructions for Your Apple Cobbler
- Expert Tips for a Flawless Rustic Apple Cobbler
- Simple Variations on the Classic Apple Cobbler Recipe
- Storing and Reheating Your Warm Apple Dessert
- Frequently Asked Questions About Making Apple Cobbler
- Nutritional Estimates for this Apple Cobbler
- Share Your Homemade Apple Cobbler Creations
Why This Easy Apple Cobbler Recipe Is Your New Favorite Comfort Food Dessert
Listen, I’ve been there. You want that classic, soul-soothing dessert, but you don’t have all afternoon to fuss around. That’s exactly why I perfected this recipe. It’s the ultimate Comfort Food Dessert because it delivers high-impact flavor with low effort. We’re talking about a dish that tastes like it simmered all day long, but honestly, it’s ready to serve warm in about an hour total. Who doesn’t need a Quick Apple Dessert that tastes this honest?
If you’re trying to step away from relying on mixes, this is your moment. You get all the wonderful taste of a good, From Scratch Apple Cobbler without needing professional skill. It’s reliable comfort, every single time, and it makes your whole house smell like a dream. You can find more quick bakes like this in my collection of delicious dessert recipes.
Achieving the Perfect Homemade Buttery Apple Cobbler
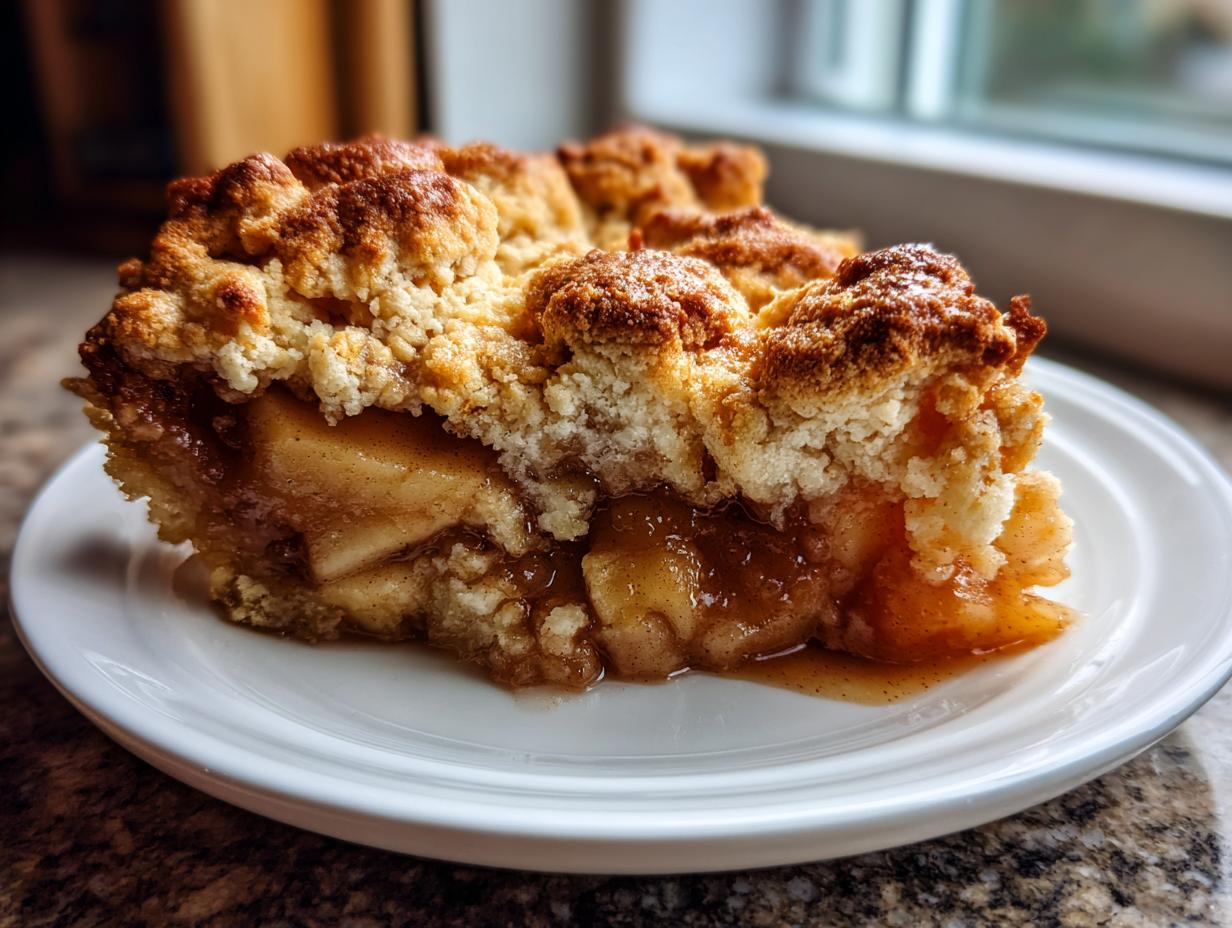
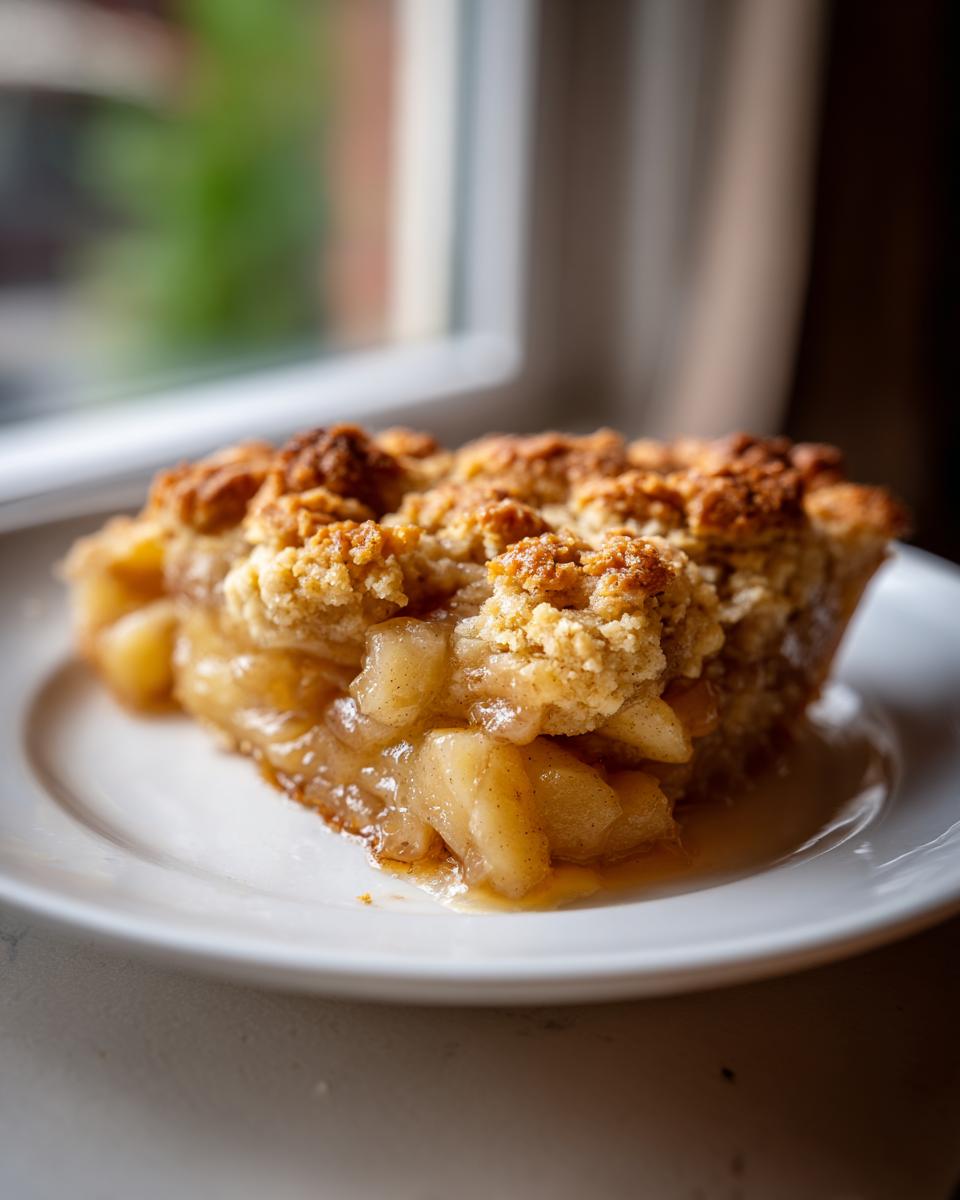
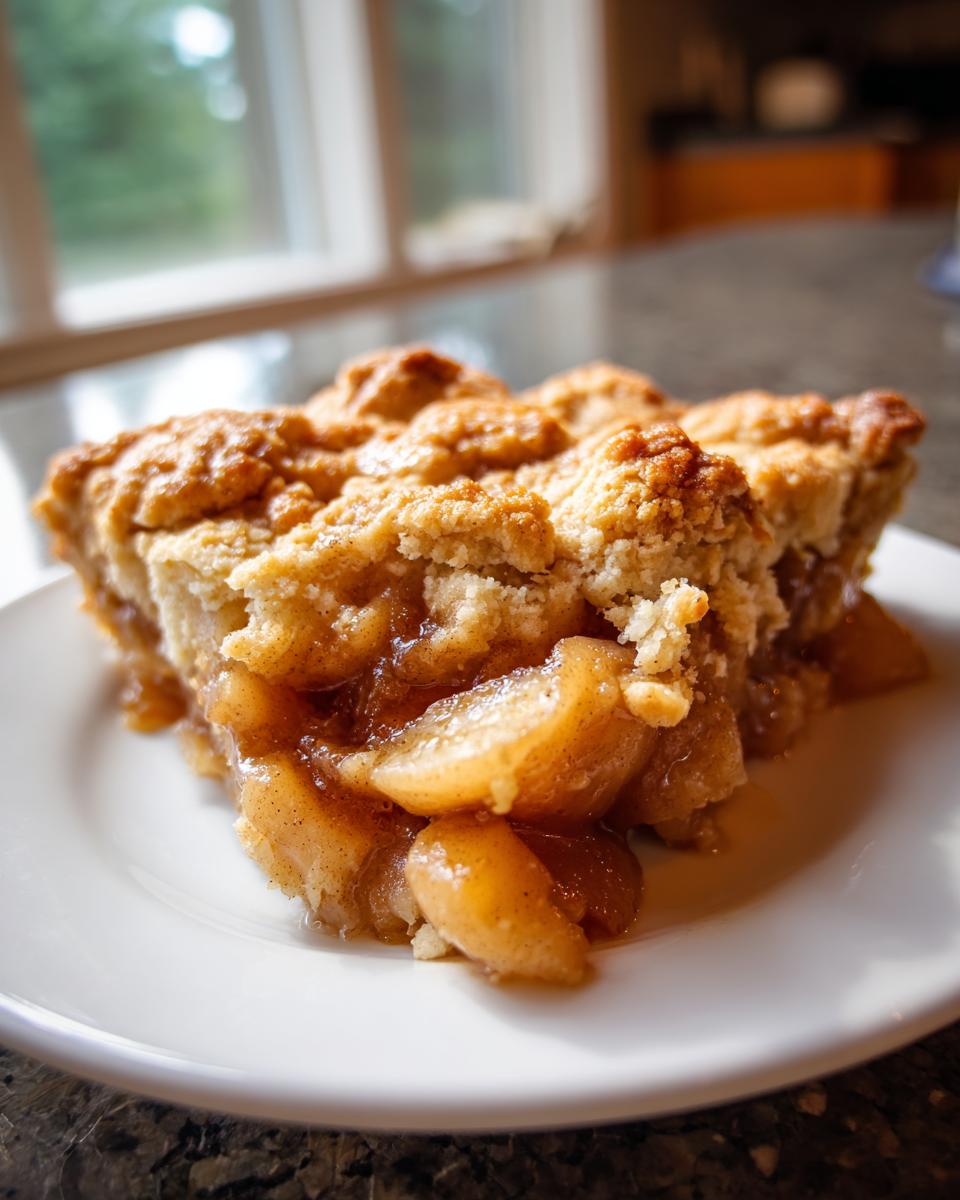
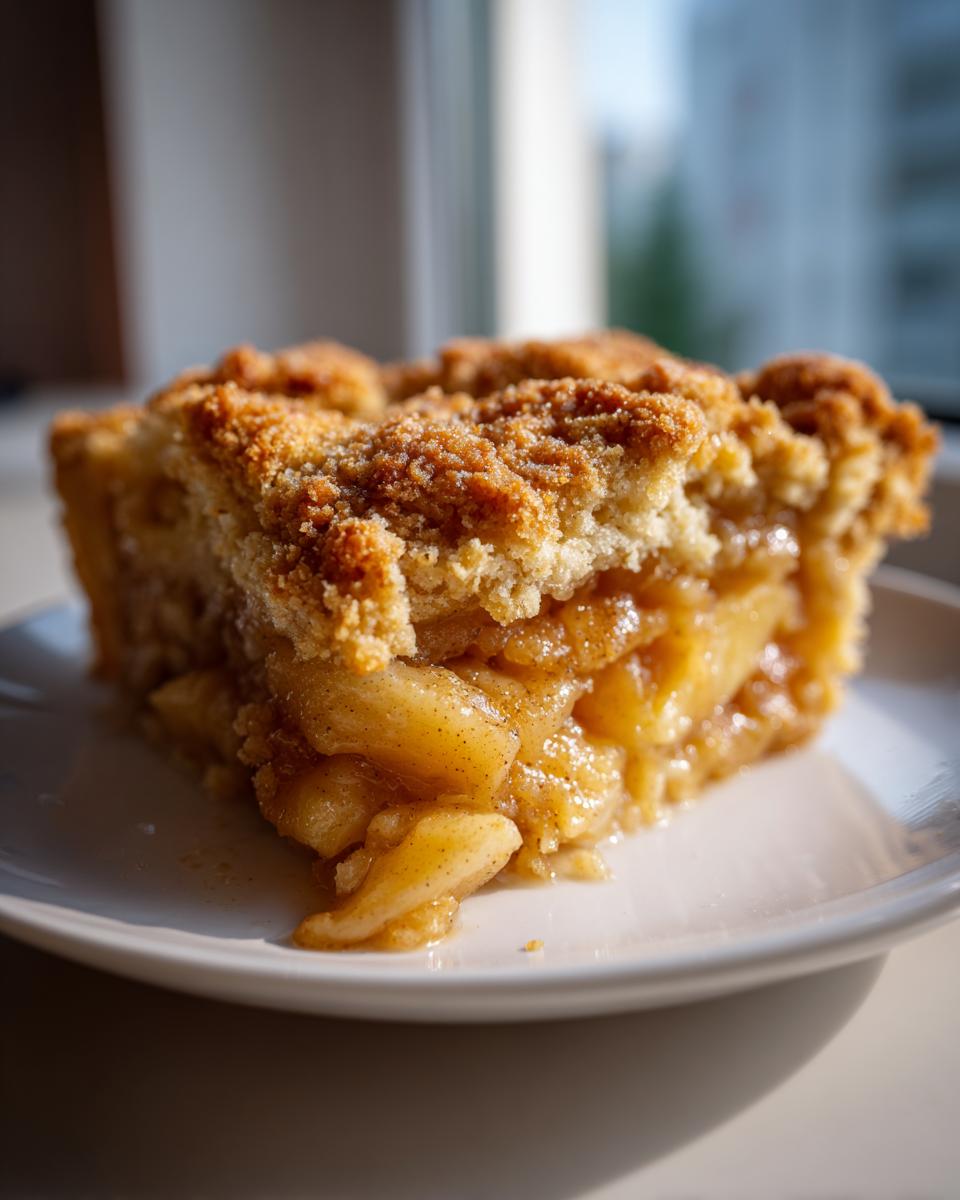
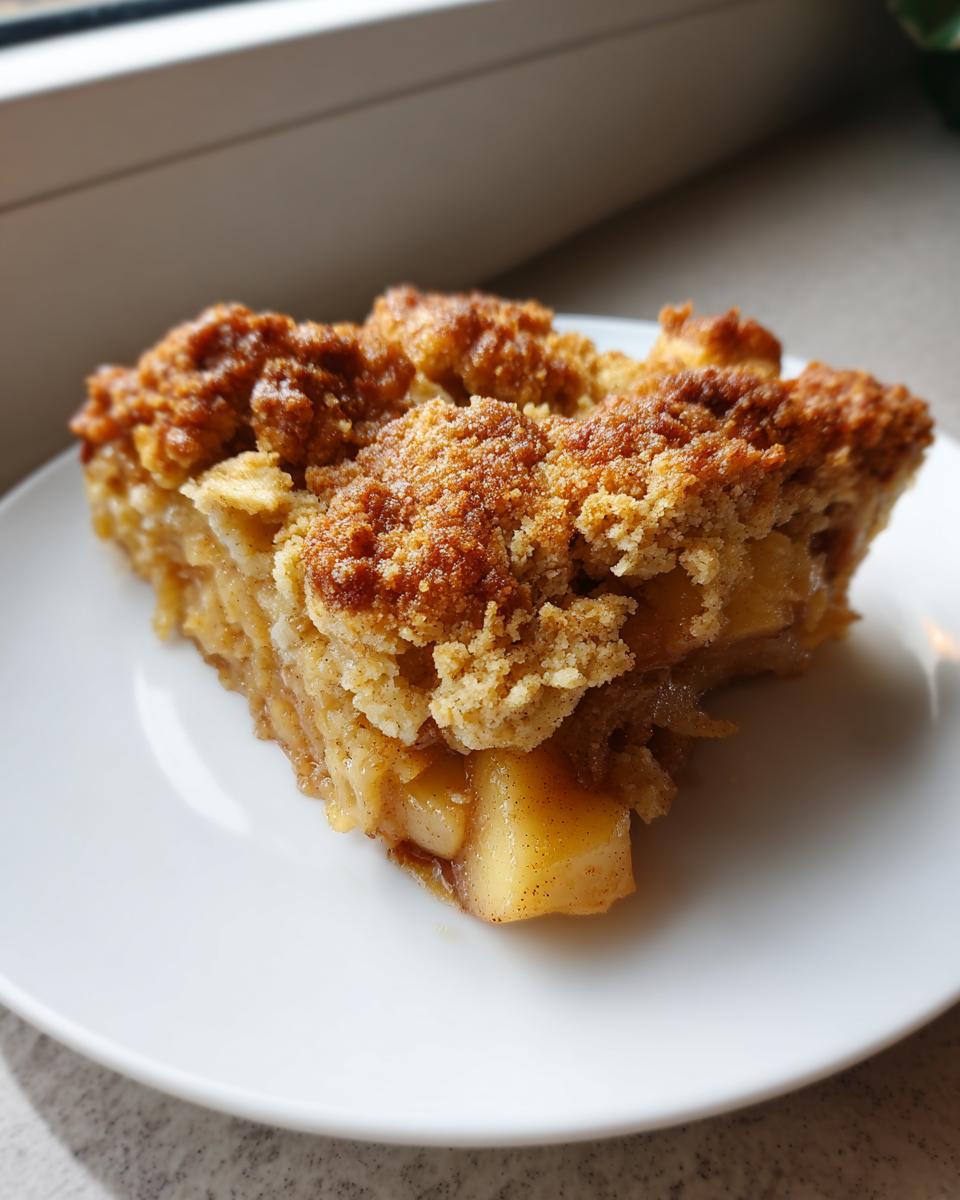
The true magic here isn’t the speed, it’s the texture contrast. You get those soft, tender apples swimming in warm, cinnamon-spiced syrup, but then you hit that beautiful topping! I designed this topping to be slightly biscuity—tender on the inside but perfectly golden and slightly crunchy where it peeks through the filling. It’s the perfect balance.
It’s rich, it’s buttery, and it’s everything a homemade topping should be, yet we mix it up faster than you can peel all those apples. That’s the win-win I’m always chasing in my kitchen!
Ingredients for the Ultimate Easy Homemade Apple Cobbler
Okay, let’s talk ingredients! Because this is a from-scratch recipe, the quality matters, but don’t panic—these are all things you stock already. I’ve broken it down so you know exactly what goes where for the filling versus that glorious topping. When you pull out the butter, remember that it needs to be seriously cold and cut small. That’s crucial for the texture!
For the apples, you’ll need 6 medium fruits, and yes, you must peel, core, and slice them before tossing them in the bowl. We mix those with the sugar, a little flour for thickening, and those necessary warm spices like cinnamon and nutmeg. Don’t forget the tiny splash of lemon juice; it brightens everything up!
For the topping, it’s standard flour, baking powder, salt, and we use 1/2 cup of cold, cubed butter. Finish it off with milk until you get a soft dough, and keep the mixing light!
Selecting Apples for the Best Apple Cobbler Filling
This is where a lot of apple cobbler recipes fall flat if they don’t use the right fruit! If you want that perfect structure that holds up but still creates that thick, amazing, Gooey Apple Filling, you need a mix. I always use mostly Granny Smith because they hold their shape and bring the necessary tartness to cut through the sugar.
If you can’t find Granny Smiths, use Honeycrisp. They are sweet but still firm when baked. The lemon juice we add isn’t just for flavor; it helps keep those slices from turning murky brown while you assemble the rest of the dessert. Trust me, choosing the right apple is half the battle won!
Step-by-Step Instructions for Your Apple Cobbler
Alright, let’s get baking! Preheat your oven right away to 375°F (190°C). Grab your 9-inch pie dish or an 8×8 inch pan and give it a light grease—we don’t want any sticking drama later. In your biggest bowl, toss those prepared apples with the filling’s sugar, the tablespoon of flour, cinnamon, nutmeg, and lemon juice. Make sure everything is coated nicely before you pour that filling right into your prepared dish. Then, give it a little sprinkle of water over the top; this helps steam things up perfectly!
Now for the part I love! You can find my tips for getting dinner on the table fast, even when you’re dessert-focused, in my guide on quick weeknight dinners, but for this cobbler, we take our time just for the topping.
When it comes out of the oven, and you can hear it bubbling, let it sit on the counter for a full 15 minutes. Seriously, don’t skip this rest time. It lets that gooey apple filling settle down so it doesn’t run everywhere when you serve it warm!
Creating the Perfect Biscuity Topping Cobbler Texture
This is the make-or-break moment for that Golden Crust Dessert! In a separate bowl, whisk your dry topping ingredients together. Now, take that cold butter—and I mean *cold*—and work it into the flour mix. You want it to look like coarse crumbs, not smooth butter! Use your fingers or a pastry blender; just work fast so the butter doesn’t get warm.
Stir the milk in until it just comes together into a soft dough. Stop mixing the second it forms a ball! Overmixing creates tough biscuits, and we want tender, biscuity topping goodness. Drop spoonfuls over those apples, sprinkle on the last bit of sugar, and get it in the oven!
Expert Tips for a Flawless Rustic Apple Cobbler
I’ve made this apple cobbler more times than I can count, and I’ve picked up a few tricks that keep it firmly in the “favorite” category. The biggest winner is the cold butter for the topping. If your butter melts even a little while cutting it in, your topping will bake up more like a cookie than a tender biscuit structure. Work fast, okay? It keeps those layers defined!
Also, remember that rule about stirring the topping dough? Don’t stir it! Mix until *just* combined. We want shaggy bits of dough; that’s what creates those wonderfully crisp edges while keeping the inside soft. This is what makes it a true heirloom, or as some people call it, an Old Fashioned Apple Cobbler.
And listen, I know you want to serve this baking hot right out of the oven, but please let it cool for that 15 minutes I mentioned. It lets the juices thicken up so you get that perfect structure. Then, for the grand finale, you absolutely must serve it warm with a generous scoop of vanilla ice cream. That contrast between warm spice and cold vanilla is what turns this from a good dessert into something legendary. For more simple baking how-tos, check out my guide on easy fall baking projects. If you need inspiration for the ultimate pairing, check out the experts over at Just A Little Bit Recipes for ideas on the best Dessert with Ice Cream Topping!
Simple Variations on the Classic Apple Cobbler Recipe
I absolutely love keeping my recipe flexible! While this base recipe gives you that incredible Old Fashioned Apple Cobbler flavor, sometimes you just need a little boost, or maybe you’re craving something different next time around. I always keep these easy swaps in my back pocket because life is busy, right?
If you are having a crazy week, don’t sweat peeling and slicing apples. You can totally shortcut the filling by using one standard 21-ounce can of apple pie filling. Just drain off a little liquid if it looks overly soupy, and use what I mentioned in the recipe. It turns this into a super quick dump-and-bake item!
For a fun twist that makes this feel extra special, try leaning into the spice! To give it a Snickerdoodle vibe, I add a little extra cinnamon and some cream of tartar right into the dry topping mix. The texture stays biscuit-like, but the flavor profile shifts beautifully. It’s a fun little secret to pull out for company! You can see how I play with cinnamon flavors in my pumpkin snickerdoodle cookies too.
No matter which way you go, whether the shortcut or the spice swap, it’s always going to be better than store-bought. For more inspiration on flavor twists, I always look at what my friends are doing, like the great versions over at The Food Charlatan!
Storing and Reheating Your Warm Apple Dessert
Okay, let’s be real—sometimes you can’t finish the whole thing at once, even though you really, really tried! If you have leftovers of this Warm Apple Dessert, cover the dish tightly with foil or transfer the cobbler into an airtight container.
It holds up beautifully on the counter overnight, but if you’re holding onto it for longer than that, pop it in the fridge for up to three days. Don’t even think about the microwave! To bring back that crispy, Golden Crust Dessert, you absolutely must reheat it in a toaster oven or a regular oven at about 325°F (160°C) until it’s hot all the way through. That little rest makes all the difference!
Frequently Asked Questions About Making Apple Cobbler
I get so many questions every time I post this recipe, which just proves how much we all love a classic dessert! Here are the things I hear most often when folks are tackling their first batch of this easy apple cobbler.
What are the absolute best apples for this cobbler?
This is my favorite question, because the apple choice really matters for a good, thick filling! I always tell people to aim for a blend of tart and sweet that won’t turn to mush. Granny Smith is your best friend here because they hold their shape beautifully. If you want a slightly sweeter result, mix half Granny Smith with a firm, sweet apple like Honeycrisp or Fuji. Avoid Red Delicious; they tend to break down too much and make your filling watery instead of having that wonderful, thick texture.
Can I make the apple cobbler filling ahead of time?
You absolutely can! This is one of the secrets to making life easier. You can mix up the apple filling—apples, sugar, spices, everything—and keep it sealed tight in the fridge for up to two days. Just before you bake, transfer it to your greased dish. However, I never recommend assembling the topping ahead of time. If you do, that cold butter starts melting, and you lose the lift in your biscuity topping!
What’s the best way to serve this dessert?
Honestly, if you are skipping serving this piping hot with vanilla ice cream, you’re missing out! That cold, creamy vanilla contrasts perfectly with the warm, cinnamon-spiced apples. It just elevates the whole experience. If you don’t have ice cream, a big dollop of fresh whipped cream works wonderfully, too. For more practical recipes, feel free to check out my easy breakfast ideas post while you’re here!
Is this truly a quick apple dessert?
For a homemade dish, yes, it is incredibly quick! Prep time is strictly about 20 minutes because we aren’t dealing with pie crusts or complicated layers. Once it’s in the oven, you’re looking at about 40 minutes of baking time. So, you can have a rustic, amazing dessert on the table in about an hour door-to-door! It’s fantastic for last-minute company.
Nutritional Estimates for this Apple Cobbler
Okay, now for the part where we pretend we’re not going to eat the entire thing ourselves! I always like to include some basic nutritional estimates here because, let’s be honest, we all know this is pure comfort food, not a diet staple, but knowledge is power, right?
These numbers are based strictly on the ingredients listed and reflect one standard serving size, but take them with a grain of salt—literally! We are using real butter and sugar, which is why it tastes so amazing. This calculation is just a general guideline based on standard preparation methods. I am not a dietitian, so treat this as a rough idea, not a strict nutritional breakdown!
- Calories: 380
- Fat: 18g
- Carbohydrates: 55g
- Protein: 5g
If you decide to skip the scoop of vanilla ice cream (I highly recommend you don’t!), you’ll definitely shave off some calories, but trust me, that cold scoop on top of this warm, spiced goodness is the whole point of having an apple cobbler!
Share Your Homemade Apple Cobbler Creations
When you finally pull this apple cobbler out of the oven, steaming and smelling like pure autumn magic, I absolutely need to know about it! This is what home cooking is all about—sharing that joy and connecting over something delicious.
If you made this Ultimate Easy Homemade Apple Cobbler and loved that buttery biscuit topping, please, please leave me a rating! Five stars if it earned it in your book. I check the comments every single day, and when I see a note from someone who got that warm, comforting feeling I was aiming for, it just makes my whole week.
Don’t be shy about snapping a quick picture! Tag me on social media when you serve it up, maybe with that scoop of melting vanilla ice cream on top. Seeing our recipes come to life in your kitchens is the whole reason I do this work. It keeps the heart of that old-fashioned family cooking alive, and I love that you’re letting me be a little part of that tradition!
If you want to learn more about why I started sharing these family-centered recipes, you can always read up on my story here. Happy baking, and don’t forget to tell me how it turned out!
PrintUltimate Easy Homemade Apple Cobbler with Buttery Biscuit Topping
This recipe delivers the ultimate comfort food: tender, cinnamon-spiced apples beneath a rich, buttery biscuit topping. It is simple to assemble from scratch and tastes like a classic, old-fashioned dessert. Serve this warm apple dessert with vanilla ice cream for the best experience.
- Prep Time: 20 min
- Cook Time: 40 min
- Total Time: 60 min
- Yield: 6 servings 1x
- Category: Dessert
- Method: Baking
- Cuisine: American
- Diet: Vegetarian
Ingredients
- 6 medium apples (like Granny Smith or Honeycrisp), peeled, cored, and sliced
- 1/2 cup granulated sugar
- 1 tablespoon all-purpose flour
- 1 teaspoon ground cinnamon
- 1/4 teaspoon ground nutmeg
- 1 tablespoon lemon juice
- 1/4 cup water
- 1 1/2 cups all-purpose flour (for topping)
- 2 teaspoons baking powder
- 1/2 teaspoon salt
- 1/2 cup cold unsalted butter, cut into small pieces
- 1/2 cup milk (or buttermilk for extra tang)
- 2 tablespoons granulated sugar (for sprinkling)
Instructions
- Preheat your oven to 375°F (190°C). Lightly grease a 9-inch pie dish or an 8×8 inch baking dish.
- In a large bowl, combine the sliced apples, 1/2 cup sugar, 1 tablespoon flour, cinnamon, nutmeg, and lemon juice. Toss gently until the apples are evenly coated.
- Pour the apple mixture into the prepared baking dish. Pour the 1/4 cup of water over the apples.
- Prepare the buttery biscuit topping: In a separate medium bowl, whisk together the 1 1/2 cups flour, baking powder, and salt.
- Cut in the cold butter using a pastry blender or your fingertips until the mixture resembles coarse crumbs.
- Stir in the milk until just combined to form a soft dough. Do not overmix.
- Drop spoonfuls of the dough evenly over the apple filling, leaving small gaps for steam to escape.
- Sprinkle the remaining 2 tablespoons of sugar over the topping.
- Bake for 35 to 45 minutes, or until the topping is golden brown and the apple filling is bubbling thickly.
- Let the cobbler cool for at least 15 minutes before serving warm with vanilla ice cream.
Notes
- For a shortcut, you can substitute the apple filling ingredients with one 21-ounce can of apple pie filling.
- If you prefer a snickerdoodle flavor, add 1 teaspoon of ground cinnamon and 1/2 teaspoon of cream of tartar to the dry topping ingredients.
- This rustic apple cobbler is best served warm to enjoy the gooey apple filling.
Nutrition
- Serving Size: 1 serving
- Calories: 380
- Sugar: 35g
- Sodium: 250mg
- Fat: 18g
- Saturated Fat: 11g
- Unsaturated Fat: 7g
- Trans Fat: 0.5g
- Carbohydrates: 55g
- Fiber: 3g
- Protein: 5g
- Cholesterol: 45mg