
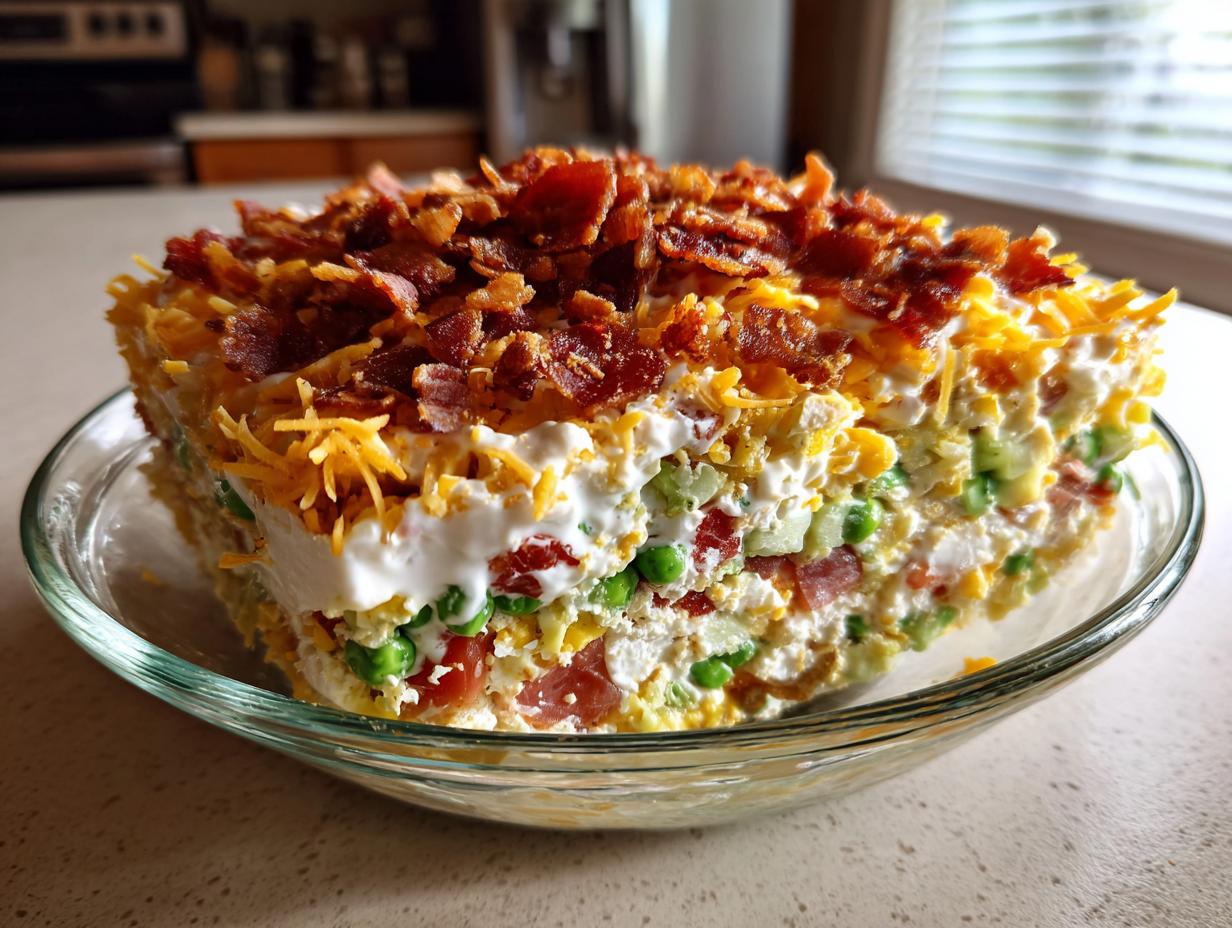
You know that one dish that disappears the second you set it down at a church supper or a summer barbecue? For me, that’s the true symbol of comfort food magic happening right there on the picnic table. I felt that same nostalgic pull when I was trying to recreate some of the best flavors from my childhood—the ones that remind me of my grandmother’s kitchen, even when life gets crazy busy. That’s exactly why I’m sharing what I consider the ultimate, foolproof recipe for the classic 7 layer salad.
This isn’t some fussy modern creation; this is the real deal. It’s sturdy, it travels well, and honestly, it tastes even better the next day. This 7 layer salad bridges that gap between needing a showstopper that’s easy to manage and wanting a recipe filled with genuine, comforting flavor. Trust me when I say this creamy, crunchy side dish is about to become your new easy side dish champion.
- Why This Classic 7 Layer Salad is a Potluck Staple (E-E-A-T)
- Gathering the Ingredients for Your 7 Layer Salad
- Step-by-Step Instructions for Assembling the 7 Layer Salad
- Tips for Success with Your Retro Salad Recipe
- Variations on the Traditional 7 Layer Salad
- Serving Suggestions for This Holiday Side Dish
- Storage and Reheating Instructions for Chilled Salad Recipes
- Frequently Asked Questions About the Seven Layer Vegetable Salad
- Sharing Your Experience with This Potluck Salad Idea
Why This Classic 7 Layer Salad is a Potluck Staple (E-E-A-T)
I completely stand by this recipe because it delivers results when you need them most—when you’re rushing out the door to a gathering. This 7 layer salad isn’t just pretty to look at; it’s completely reliable. Building it is straightforward, and that clear glass bowl just screams, “Look how good this is!” It means you never have to show up with a sloppy mess, which, let’s be honest, is half the battle at any potluck.
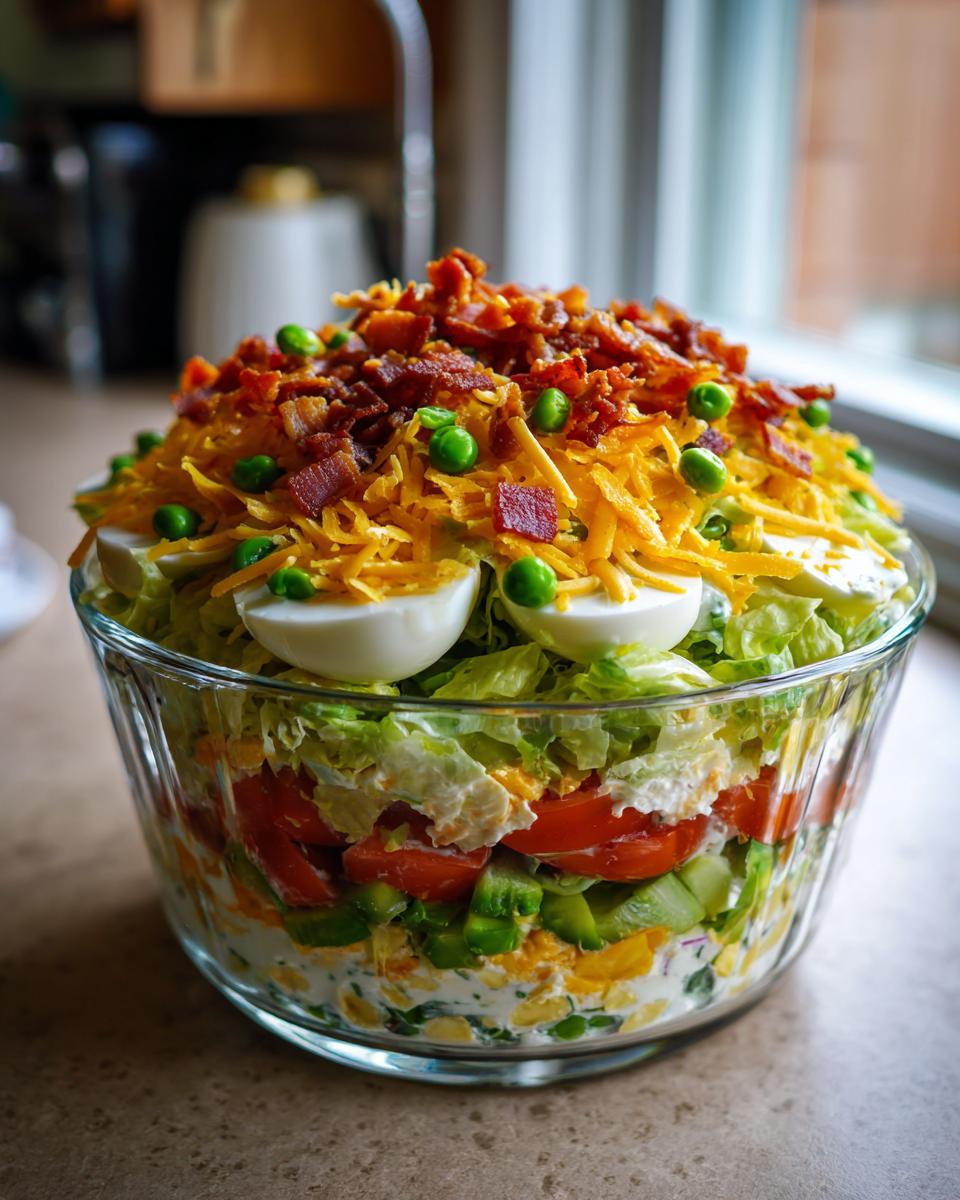
It’s famous for a reason! It’s the quintessential potluck staple because it holds up beautifully compared to flimsy green salads.
The Magic of a Make Ahead Salad
The real secret sauce, pun intended, is that this is a true make ahead salad. You aren’t just assembling it beforehand; you’re actually *improving* it! When you let it chill overnight, the creamy dressing sinks just enough to seal those fragile bottom layers, keeping them crisp. This means zero wilted lettuce stress in the morning. You just pull it from the fridge, top it with the bacon and cheese, and you’re ready to go. You can check out my method for prepping casseroles ahead of time, just like this one, for hash brown egg casserole.
I use the same advance prep approach for my jiffy corn casserole, which also relies on that overnight chill time to set up perfectly!
Gathering the Ingredients for Your 7 Layer Salad
Okay, let’s talk structure! When you’re building an actual tower of flavor like this 7 layer salad, everyone needs their own little job. I always lay out my ingredients in the order they go in, so there’s no mental messing up the system when it’s time to assemble. Getting your prep work done first—like cooking the bacon and chopping the hard-boiled eggs—is what makes the final assembly so fast. Getting the dressing just right is the most important step, so we’ll tackle that first!
For the Creamy Layered Salad Dressing
This dressing is what binds the entire thing together, so don’t skimp on letting it hang out in the fridge with the veggies! You’ll need:
- 1 cup mayonnaise (This is non-negotiable for that classic texture!)
- 1/4 cup sour cream
- 2 tablespoons white vinegar
- 1 teaspoon sugar
- 1/2 teaspoon salt
- 1/4 teaspoon black pepper
The Essential Vegetable Layers
This particular combination is my absolute favorite because it hits all the texture notes you want in a great salad with bacon and cheese. Make sure everything is prepped before you start layering!
- 1 head iceberg lettuce, chopped (Make sure it’s dry!)
- 1 cup frozen green peas, thawed completely
- 1 cup chopped celery
- 1 cup chopped red onion
- 2 cups cherry or grape tomatoes, halved
- 4 hard-boiled eggs, chopped coarsely
- 1 cup sharp cheddar cheese, shredded
- 6 slices bacon, cooked until crisp and crumbled
Step-by-Step Instructions for Assembling the 7 Layer Salad
This is where the fun begins! Honestly, assembling this 7 layer salad is like making a beautiful, edible Jenga tower. Because we did all the chopping and cooking first, this whole process should fly by. Remember, the presentation matters here—we want those defined bands of color, so make sure you are using a big, clear bowl for the best effect. Take your time, don’t rush the layers, and it will be perfect! This straightforward assembly is what makes it that perfect easy side dish.
Making the Creamy Layered Salad Dressing First
You absolutely have to get the dressing done first, just like we discussed with the ingredients. Grab a small bowl—not one of your giant mixing ones! You just need to whisk everything together until it’s totally smooth and silky. Don’t worry about tasting it yet; we need to let it chill out by itself for a bit before it meets the veggies. Once it looks uniform, tuck it away in the fridge.
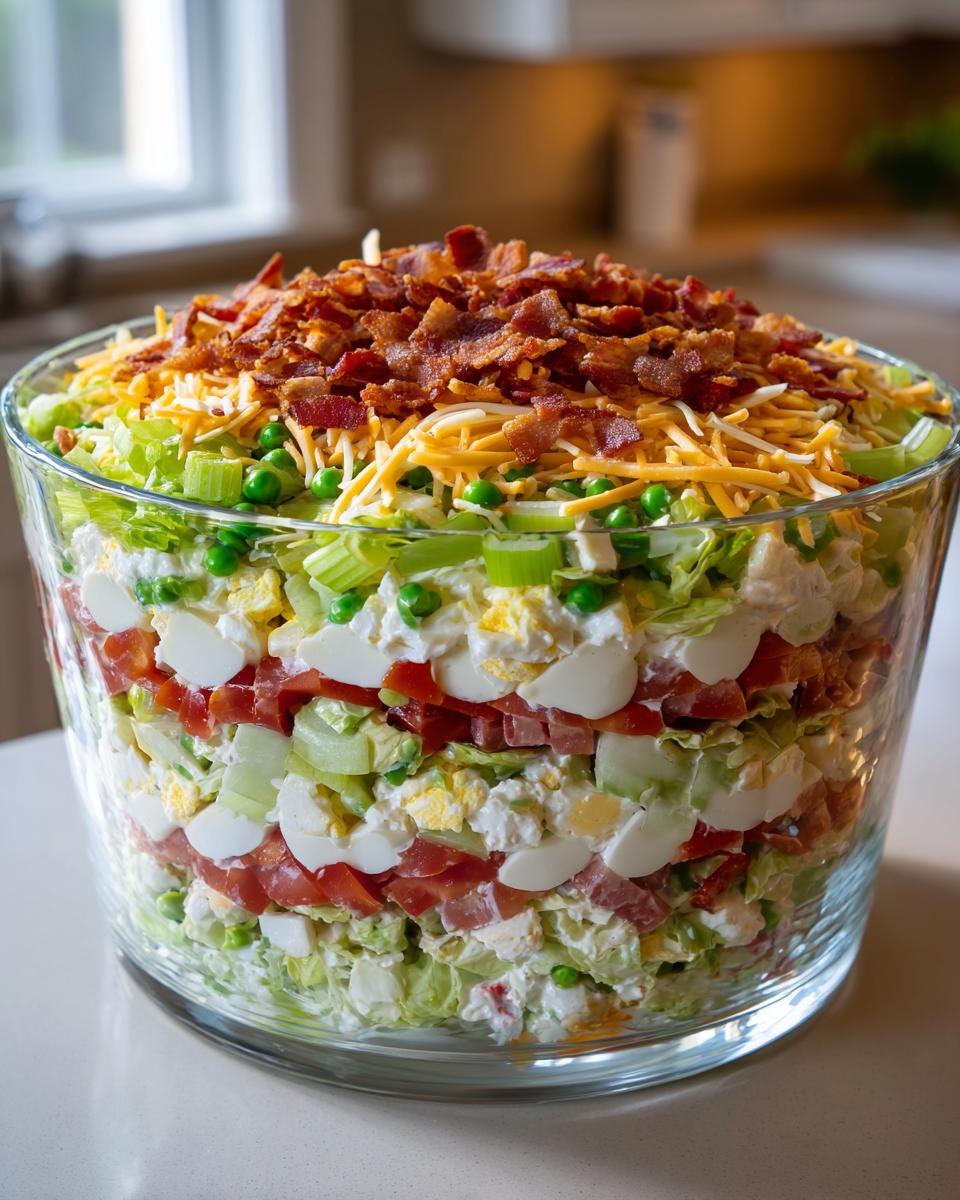
Building the Seven Layer Salad Structure
Get that gorgeous glass bowl ready! We start from the bottom up to keep things sturdy. Put in your chopped iceberg last, which acts as the base. Then, gently layer the thawed peas on top. Next, carefully add your celery, followed by that nice bite of red onion, and then the halved tomatoes. Finally, spread those chopped hard-boiled eggs evenly over the tomato layer. Try not to press down; we’re building volume here!
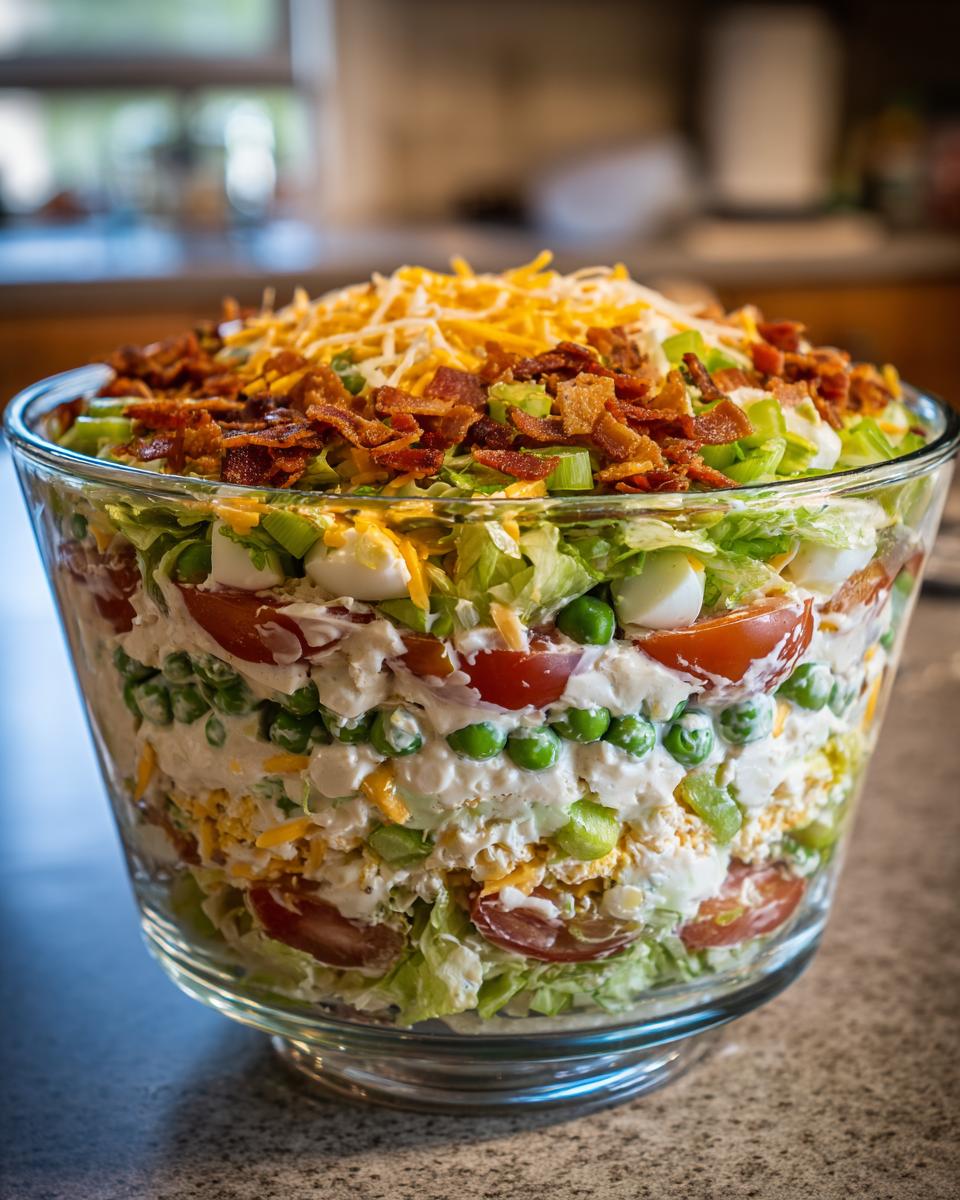
Sealing and Chilling Your Make Ahead Salad
This is the step I never skip! Take that creamy dressing and spread it out gently over the eggs, making sure it covers everything edge to edge—this is what seals in the freshness. Then, it’s time for the grand finale toppings: sprinkle on that sharp cheddar cheese, and finish with all that salty, crinkly bacon. Cover the whole thing tightly and pop it in the fridge for at least four hours, but honestly, overnight is magic. This final chill is what makes it such a successful make ahead salad.
Tips for Success with Your Retro Salad Recipe
When you’re dealing with a retro salad recipe where presentation is almost as important as flavor—because, hello, you *need* those layers to show—you have to be smart about the prep. This isn’t just about throwing things in a bowl; it’s about architecture! I learned this the hard way once when I forgot to dry the lettuce before a big family reunion. By the time we served the meal, my beautiful layers had started to weep a sad, watery mess! Ever since then, I treat my lettuce prep like it’s sacred for any salad for parties.
Achieving Perfect Crisp Vegetable Layers
Seriously, don’t skip drying your lettuce! If you’re using iceberg, chop it up, put it in a salad spinner, and run it at least twice. If you don’t have a spinner, you can lay it out on several layers of paper towels and gently pat it dry. Any excess water will sneak down and sabotage your beautiful creamy dressing later. You want crispness, not soup! This little step makes all the difference, especially when you’re planning to make this salad ahead of time. When the layers stayed distinct at my cousin’s baptism party, everyone actually stopped talking just to look at the bowl before digging in. That’s the visual payoff we are aiming for!
If you want to see an amazing example of how to keep things crisp in other dishes, check out this technique used in preparing bacon for my bacon dishes I love.
Variations on the Traditional 7 Layer Salad
Even though I am absolutely devoted to the classic lineup, I know sometimes you need to switch things up based on what’s in the fridge or what your crowd loves. The beauty of this classic 7 layer salad is that it’s really just a template for layered greatness! You have so much room to personalize it without losing that nostalgic charm.
The layers below that creamy dressing are pretty flexible. If you’re looking to boost the crunch factor, you can absolutely sneak in some English cucumber! Just make sure you toss it with a tiny bit of salt and let it drain for about 15 minutes before adding it in. That way, you avoid adding extra water to your beautiful chilled layers.
Dairy is another easy swap. Forget the sharp cheddar if you’re not feeling it—I’ve done half cheddar and half Monterey Jack, and it melts beautifully into the dressing when it chills. Sometimes, I even use Mozzarella if I’m taking this to a summer cookout where I want a milder flavor.
My friends who love a bit more zip often add a layer of finely chopped radishes right above the lettuce. They add a gorgeous pink hue and a clean, peppery bite that cuts through the richness of the dressing. It’s a small change that makes it feel totally new! If you’re swapping main components, remember to keep toppings like bacon and cheese until the very end, just like in our main recipe. For more easy family favorites where you can swap ingredients around, you should check out my recipe for chicken bacon ranch tater tot casserole.
If you want to see how some other famous cooks adjust this beloved dish, take a look at the fun twists featured in this Pioneer Woman salad roundup—she always has great ideas for fresh twists!
Serving Suggestions for This Holiday Side Dish
Because this 7 layer salad is so rich and creamy—thanks to all that glorious cheese and bacon, right?—it really shines when you pair it with something straightforward and clean. It’s never going to be the main feature, but it certainly steals the show from the side dish table! When I think of a big family gathering during the holidays, this salad is right there next to the main protein.
If you’re planning a big Easter or Christmas meal, this salad is the perfect counterpoint to something heavy. Imagine slicing into a beautifully glazed baked ham; the cool, crisp texture of the salad cuts right through that richness. It pairs fantastically and acts as your vegetable component all in one tidy package. For parties, I often pair it with a simple baked version of garlic parmesan shrimp—it’s elegant but doesn’t require much hands-on time while the salad chills.
And, naturally, if you’re serving Thanksgiving or Christmas dinner, this holiday side dish is a wonderful, lighter (in theory!) companion to classics like turkey. I always love having something cold and crunchy next to my warm, comforting turkey stuffing recipe. It just balances out the whole plate, and since we made it ahead, you can focus entirely on the main event when everyone arrives!
For summer cookouts, this salad is fantastic alongside anything grilled—think simple grilled chicken breasts or even good quality hot dogs. It requires zero last-minute cooking effort, making it the ultimate easy side dish when you’re already tending the grill.
Storage and Reheating Instructions for Chilled Salad Recipes
This is the glorious part about making a truly amazing chilled salad recipe like our 7 layer salad—it’s actually *designed* to last! Because we took the time to create that airtight seal with the creamy dressing layer, these leftovers are surprisingly resilient. You don’t have to worry about this wilting away after one day, which is fantastic for busy weeks.
You really want to keep this salad cold from the moment it gets into the fridge until the moment it hits the plate. We are talking cold side dishes only here! Do not, under any circumstances, try to warm this up. Can you imagine trying to reheat lettuce, raw onions, and mayonnaise? Nope! That’s a fast track to a culinary disaster, trust me. This always needs to be served straight from the refrigerator.
So, how long does it hang out nicely in the fridge? If you sealed it up well and kept it covered tightly, you can generally get away with keeping leftovers for up to two full days. By day three, the texture starts to get a little sad, especially the lettuce, even with the dressing seal. But honestly? I rarely have leftovers past the first evening because everyone eats it all!
When you take it out after a night of chilling, don’t stress about the ingredients looking a little *too* melded together. Just give it a gentle stir right before you serve a portion, remembering to scoop straight down through the sides of the bowl so everyone gets a bit of every layer, especially that crunchy bacon topping you added!
Frequently Asked Questions About the Seven Layer Vegetable Salad
I know that when you’re planning a big meal, you need zero guesswork, especially when it comes to a recipe like this seven layer vegetable salad that needs to sit and chill. Here are some things people always ask me when they are making this stunning dish for the first time. Don’t worry—we’ve ironed out all the kinks so your layers look perfect!
Can I substitute the iceberg lettuce in this 7 layer salad?
That’s a super common question! While the traditional recipe calls for iceberg because it’s incredibly crisp and holds almost no water, you can definitely make a swap if you prefer. I would steer clear of soft, floppy leaf lettuces. Instead, try using chopped romaine hearts. They offer great crunch and hold up really well against the creamy dressing. You can also mix the romaine with a little bit of finely chopped green cabbage for extra staying power. Just remember the rule: super dry lettuce is your best friend!
How long can I make this layered salad recipe ahead of time?
We talked about how this is a fantastic make ahead salad, and my absolute favorite time frame is overnight—that’s a good 12 to 16 hours. This gives the flavors time to settle into each other without everything collapsing. You can push it to a full 24 hours, but I wouldn’t go much past that, especially since this is a layered salad recipe loaded with fresh veggies. If you’re chopping vegetables on Monday for a Wednesday party, wait to layer the lettuce or the dressing until Tuesday night to keep everything optimally fresh.
Is this salad suitable for vegetarian diets?
That’s such an important consideration! In its standard form, this 7 layer salad isn’t vegetarian because of the hard-boiled eggs and the bacon. However, it is so easily adapted to become a wonderful seven layer vegetable salad! You can simply omit the bacon entirely; keeping the cheddar cheese maintains that rich flavor element. If you still want that salty, savory crunch, you could try topping it with toasted, seasoned sunflower seeds or crispy fried onions, which give you a similar texture payoff without the meat. Just remember to double-check your cheese source if you need it truly vegetarian!
If you need other straightforward recipes that can work for various diets, check out my guide to making an easy side dish.
Sharing Your Experience with This Potluck Salad Idea
Now that you have the secrets to building the most reliable and delicious 7 layer salad on the block, I really want to hear all about it! Seriously, I live for the feedback. Did you assemble this masterpiece for a big family dinner or maybe trot it out at a summer barbecue?
Making one of these classic potluck salad ideas should feel like a win, so tell me everything! I need to know the deets: What was the reaction when you brought it out? Did everyone stop to admire the layers before digging in?
Hop down to the comments below and let me know which layer totally stole the show at your party. Was it the crunchy celery, the savory bacon topping, or maybe that homemade creamy dressing? Don’t forget to leave a star rating so other home cooks know just how much you loved this perfect make-ahead dish. And if you snapped a photo of your beautiful creation—the whole point of using that glass bowl!—tag me on social media so I can see your handiwork. I’m always looking for new ways to serve up these nostalgic comfort foods. If you’re already planning your next big prep session, you might want to check out my tips for quick breakfast ideas!
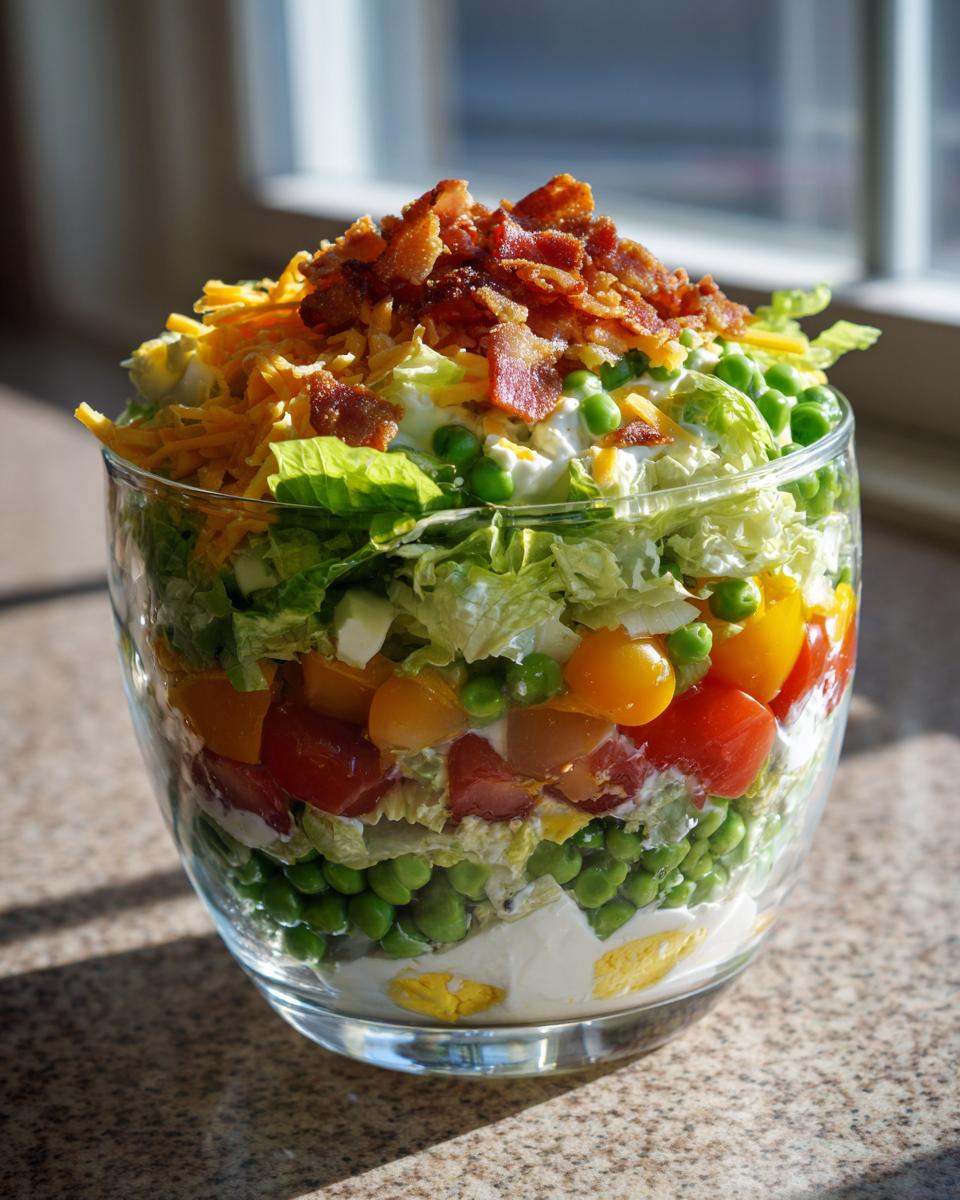
PrintClassic Make-Ahead 7 Layer Salad

This classic 7 layer salad recipe layers fresh vegetables, bacon, and cheese with a creamy dressing. It is a perfect potluck staple that you can prepare the day before serving.
- Prep Time: 30 min
- Cook Time: 10 min
- Total Time: 40 min
- Yield: 8 servings 1x
- Category: Side Dish
- Method: Layering/Chilling
- Cuisine: American
- Diet: Vegetarian
Ingredients
- 1 head iceberg lettuce, chopped
- 1 cup frozen green peas, thawed
- 1 cup chopped celery
- 1 cup chopped red onion
- 2 cups cherry or grape tomatoes, halved
- 4 hard-boiled eggs, chopped
- 1 cup sharp cheddar cheese, shredded
- 6 slices bacon, cooked and crumbled
- For the Creamy Dressing: 1 cup mayonnaise
- 1/4 cup sour cream
- 2 tablespoons white vinegar
- 1 teaspoon sugar
- 1/2 teaspoon salt
- 1/4 teaspoon black pepper
Instructions
- Prepare the dressing: In a small bowl, whisk together the mayonnaise, sour cream, vinegar, sugar, salt, and pepper until smooth. Set aside.
- Prepare the vegetables: Wash and chop all vegetables according to the ingredient list. Cook the bacon until crisp, drain, and crumble. Thaw the peas. Chop the hard-boiled eggs.
- Assemble the salad in a large glass bowl to show the layers. Start with the lettuce as the base layer.
- Add the next layers in this order: thawed peas, celery, red onion, tomatoes, and chopped eggs.
- Spread the prepared creamy dressing evenly over the egg layer, covering all ingredients completely. This seals the layers.
- Top the dressing with the shredded cheddar cheese, followed by the crumbled bacon.
- Cover the bowl tightly with plastic wrap. Refrigerate for at least 4 hours, or preferably overnight, to allow the flavors to meld and the dressing to set.
- When ready to serve, slice the salad straight down through all the layers to serve each portion with all seven components.
Notes
- Making this salad ahead of time is key; the flavors deepen overnight, and the dressing seals the lower layers from wilting.
- Use a clear glass bowl to display the beautiful layers, which makes this an ideal salad for parties.
- If you are serving this at a large gathering, you can substitute the mayonnaise in the dressing with Greek yogurt for a slightly lighter version.
Nutrition
- Serving Size: 1 serving
- Calories: 320
- Sugar: 4g
- Sodium: 450mg
- Fat: 28g
- Saturated Fat: 8g
- Unsaturated Fat: 20g
- Trans Fat: 0g
- Carbohydrates: 9g
- Fiber: 2g
- Protein: 10g
- Cholesterol: 75mg