
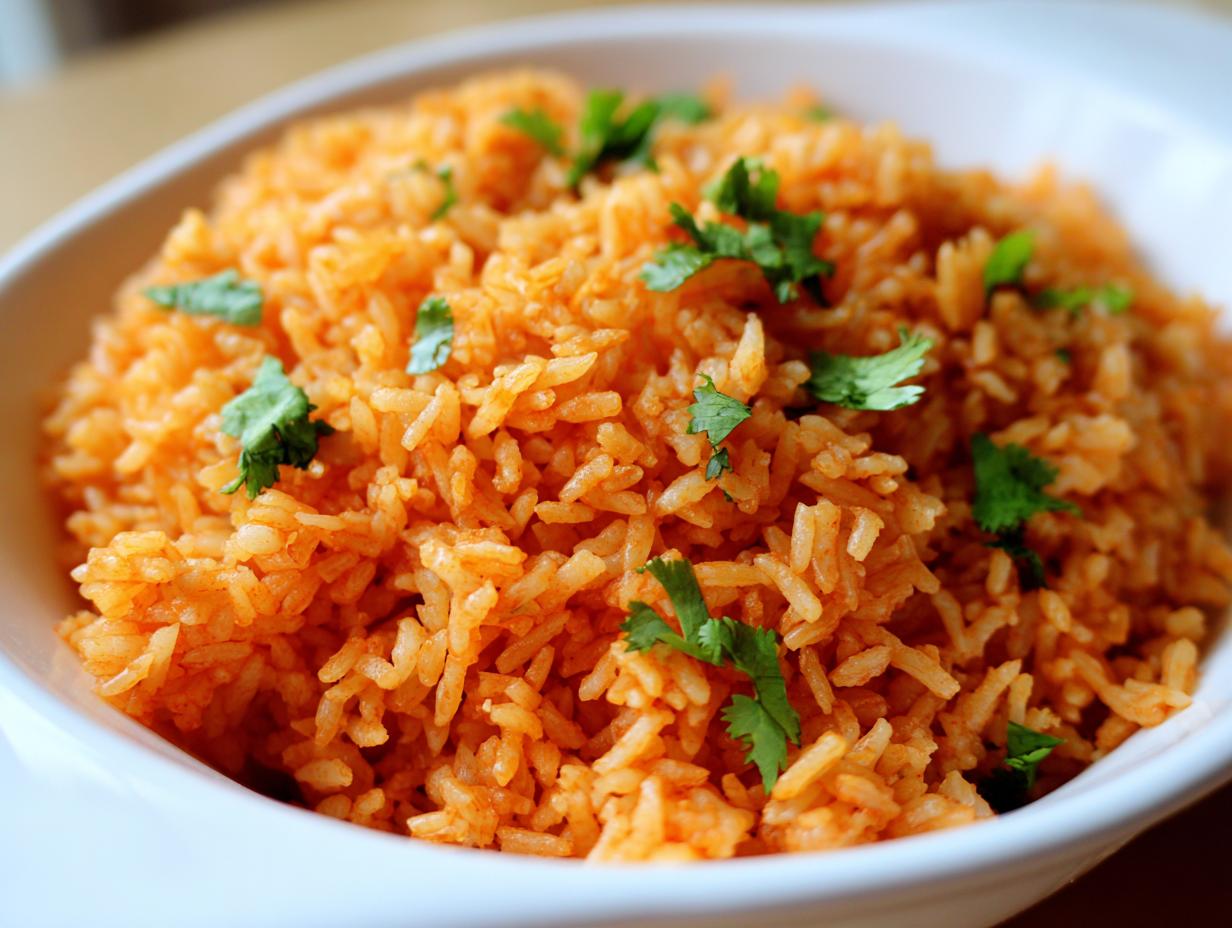
You know that moment, right? You’re halfway through a fantastic plate of tacos or maybe some cheesy enchiladas, and you hit that perfect mound of red rice. It’s fluffy, savory, and you think, “Why can’t I ever get my mexican rice recipe to taste this good at home?” Believe me, I’ve been there! Back when I was rushing through life, I thought that restaurant texture was just impossible unless a professional chef made it. But here at MDLATDMM, we take those treasured flavors from our past and make them work for your busy life. This Authentic Restaurant-Style Mexican Rice captures that vibrant, perfect texture without needing a full afternoon in the kitchen. Consider this your bridge back to those amazing, comforting flavors!
- Why This is the Best mexican rice recipe for Your Table
- Ingredients for Authentic Mexican Rice (Arroz Rojo)
- How to Make Mexican Rice Perfectly: Step-by-Step Instructions
- Tips for Success with Your Quick Side Dish for Tacos
- Variations: Making Your Own Tex Mex Rice Recipe
- Serving Suggestions for Your Best Mexican Side Dish
- Storage and Reheating Instructions for Fluffy Mexican Rice
- Frequently Asked Questions About This mexican rice recipe
- Share Your Homemade Mexican Side Dish
Why This is the Best mexican rice recipe for Your Table
I know you’ve probably scrolled past a dozen rice recipes, but what makes mine the Best Mexican Side Dish? It all comes down to locking in that incredible flavor and texture before the liquid even hits the pot. We aren’t just boiling rice here; this is my true Fluffy Mexican Rice Tutorial, designed to give you that glorious, separate grain look—no clumps allowed! This Restaurant Style Mexican Rice is special because it respects the grain. You can see other ideas online, like those shared over at The Kitchn, but trust me, my toasting method is the key to reliability.
Achieving Fluffy Mexican Rice Texture Every Time
The absolute secret, the step I beg you not to skip, is the toasting. We cook the rice in oil for a good five to seven minutes until it just barely turns golden brown. This coats every grain in fat, creating a barrier that stops the starch from turning everything sticky later. Then, once the broth is in? You walk away. Seriously. You bring it to a boil, cover it tight, turn the heat to the absolute lowest setting, and you do not peek for fifteen minutes. That silent simmer builds steam and cooks the rice perfectly evenly.
Quick Side Dish for Tacos and More
Don’t let the attention to detail scare you—this whole process, start to finish, clocks in at about 35 minutes total! That makes this Easy Homemade Rice Side perfect for any weeknight. Whether you’re rounding out a Taco Tuesday spread or just need a vibrant Quick Side Dish for Tacos, this rice delivers authentic flavor without making you wait an hour. It just *works*!
Ingredients for Authentic Mexican Rice (Arroz Rojo)
When you’re aiming for that truly authentic, vibrant red rice that tastes like it came straight from your favorite place, the choice of ingredients really matters. Don’t overthink it, though! We are sticking to simple pantry champions here. My goal is always to make this whole process accessible, so everything listed below should be easy to grab. Plus, if you want to jazz it up later, I’ll give you some ideas below, but this base is what gets that perfect flavor profile. If you enjoy recipes that bring that comforting, savory feeling, you might also love my recipe for slow cooker mexican street corn soup!
Rice and Base Components
For this Authentic Mexican Rice, you’ll need to measure carefully, but don’t worry, it’s straightforward. Grab your long-grain white rice—that’s non-negotiable for the texture, by the way! We start by toasting one cup of that rice in two tablespoons of vegetable oil. Then come the aromatics: half a medium white onion, finely chopped, and two cloves of garlic, minced up nice and small. For that beautiful color and deep flavor, you’ll dice up one medium tomato and mix that with 1/4 cup of tomato sauce. The liquid base is two cups of broth—and listen here, switching water for chicken or veggie broth is one of those little secrets that makes this such a Flavorful Rice Recipe!
The seasoning is simple: just half a teaspoon of ground cumin and salt to taste. That’s it for the core cooking process!
Optional Additions and Garnish for your mexican rice recipe
To make this feel a little more like a dinner side and less like plain rice, I love tossing in about 1/4 cup of frozen peas right near the end. They steam perfectly in that final resting stage. Once it’s all fluffed up and ready to go on the plate, you need a good sprinkle of fresh, chopped cilantro. That bright green cuts through the richness beautifully. If you really want to make it pop, serving it with a little lime wedge on the side lets everyone add that final, necessary dash of acid. It’s these small touches that take an Easy Homemade Rice Side to the next level!
How to Make Mexican Rice Perfectly: Step-by-Step Instructions
Okay, this is where the magic happens! Getting those beautiful grains separated—that’s the main goal when you’re learning How to Make Mexican Rice Perfectly. Forget everything you think you know about just rinsing rice and throwing it in water; we follow a specific sequence here to guarantee success. If you’re looking for other easy, flavorful stovetop meals, my one-pot taco soup is another winner!
Toasting the Rice: The Key to Restaurant Style Mexican Rice
First things first: heat up two tablespoons of oil in your pot over medium heat. Now, add your cup of raw rice. You need to toast this rice, stirring it pretty frequently, for a good five to seven minutes. Seriously, watch it, but don’t panic! You want it to get a lovely light golden brown color. This is the single most important step for that Restaurant Style Mexican Rice texture you crave. Toasting seals the outside of the grain, preventing it from turning into a gummy mess when the liquid is added. Soon enough, you’ll smell that nutty aroma—that means it’s ready for the next step! We want that lovely texture that folks are raving about, like the kind you see when checking out other great recipes, like this one from Recipes by Maya.
Simmering and Steaming for Fluffy Mexican Rice Tutorial
Next up, we cook down those aromatics (onion and garlic) until they smell sweet, then mix in your tomato bits and sauce. Now, pour in the broth, cumin, and salt, and bring the whole thing to a rolling boil. My number one rule for this Fluffy Mexican Rice Tutorial? Once it boils, cover the pot tight, turn the heat down to the absolute lowest setting you have, and let it be! You simmer for exactly 15 minutes—no peeking allowed, I mean it! After the simmer, kill the heat completely. Stir in your optional peas, keep that lid firmly shut, and let it rest, steaming off the burner, for ten more minutes. That final rest period seals the deal for perfectly tender rice. Once done, fluff it up gently with a fork, and you’re ready to serve this Flavorful Rice Recipe!
Tips for Success with Your Quick Side Dish for Tacos
So, you’ve nailed the toasting and the crucial resting period. Awesome! But I always get questions about making this already great recipe even better or adapting it when I’m missing something. That’s the beauty of home cooking, right? We make it work! These are the little tweaks I’ve learned over the years to ensure this Easy Homemade Rice Side always comes out exactly how I want it, whether I’m serving it as a standalone dish or alongside some killer tacos.
Ingredient Substitutions for this mexican rice recipe
Let’s talk swaps, because nobody wants to run to the store for just one thing. The biggest flavor question is the liquid. You definitely *can* use water instead of broth, but please know it won’t have the depth of flavor that chicken or vegetable broth brings. If you use water, I highly recommend adding an extra pinch of salt and maybe even a tiny dash of onion powder to compensate. High-quality broth is one of those things that just screams “restaurant quality” in this dish.
If you’re out of vegetable oil, no worries! Any neutral cooking oil will do the job when you’re toasting the rice. Olive oil works fine, though it has a slightly lower smoke point, so just keep an eye on it. If you want a really velvety smooth sauce instead of rice with noticeable bits of tomato and onion, here’s a trick I saw some folks use successfully when developing this: take your diced tomato, onion, garlic, and tomato sauce, and blend it all together *before* adding it to the toasted rice. You’ll get that gorgeous uniform red color of Mexican Red Rice Arroz Rojo immediately, and the texture is much silkier. If you want to see another great take on speedy rice, check out my ground chicken fried rice; similar idea but totally different flavor profile!
And if you’re looking for texture tips, remember that site My Flavor Vine talks about fluffiness? They are right! Make sure your broth is hot before you pour it in, even if it’s just warm; cold liquid shocks the rice and messes with that beautiful texture we worked so hard to create during the toasting phase!
Variations: Making Your Own Tex Mex Rice Recipe
Now that you’ve mastered the absolute basic, fail-proof mexican rice recipe, it’s time to start playing around! This is where we take that beautiful, fluffy base and turn it into whatever kind of meal we’re craving tonight. You can easily shift this from a purely traditional Mexican Red Rice Arroz Rojo into something with a bit more punch, leaning right into that delicious, robust Tex Mex Rice Recipe territory.
Adding Heat and Spice to Your Mexican Red Rice Arroz Rojo
If your family likes a little fire—and honestly, I often do—the time to add heat is right alongside those onions and garlic. Grab one small jalapeño, slice it thin, take the seeds out if you want it milder, and sauté it gently with the onion. It softens up beautifully and infuses the oil with a lovely warmth. Don’t be shy with the spices, either! While cumin is essential, try boosting it by adding about 1/4 teaspoon of chili powder or a pinch of smoked paprika when you add the cumin. That little bit of smoke really leans into that satisfying Tex Mex Rice Recipe flavor profile. It makes the rice smell completely different while cooking, you’ll love it!
Making this a One Pot Mexican Rice Meal
We established this is a fantastic One Pot Mexican Rice side dish, but sometimes a side just needs to turn into the main event, right? That’s easy to do in the final moments. Since the rice is already cooked, you aren’t adding anything that requires more than a few minutes to heat through. Right when you’re about to cover the pot for that final steam (Step 6), toss in about one cup of pre-cooked protein. Shredded rotisserie chicken is amazing here! You can also use cooked, crumbled ground beef, or even some black beans if you’re going meatless but want more substance. Just stir it in gently with the peas, cover it up, and let that final rest time heat everything through evenly. It’s instant comfort food!
If you’re looking for other ways to use up leftover chicken in a one-pot format, definitely take a peek at my slow cooker mexican street corn soup—it’s another winner that feels incredibly authentic without all the fuss!
Serving Suggestions for Your Best Mexican Side Dish
The best part about mastering this mexican rice recipe is knowing you always have the perfect, fluffy side ready to go. Seriously, this isn’t just filler rice; it’s robust enough to hold its own! I love having this on hand because it instantly makes any weeknight dinner feel more festive. Think of it as the foundation of a great meal.
For the classic experience, you absolutely have to serve it alongside some hearty main dishes. It pairs beautifully with anything smothered in sauce, like my creamy white chicken enchiladas, or piled next to crunchy, homemade tacos. If you’re doing grilled meats, whether it’s carne asada or just some simple lime-marinated chicken, this rice soaks up all those delicious juices.
But don’t stop there! Because this is such a great One Pot Mexican Rice base, I often turn it into a quick bowl meal. Just pile on some seasoned ground beef, top it with cheese, a dollop of sour cream, and maybe some avocado slices. Suddenly, you’ve got a super satisfying meal that took almost zero effort, thanks to this speedy side dish. It really is the Best Mexican Side Dish because it’s so flexible!
Storage and Reheating Instructions for Fluffy Mexican Rice
You made a big batch, which is smart, because this rice is even better the next day, in my opinion! You want to make sure you store your leftovers properly so you don’t lose that lovely texture we worked so hard to achieve in the pot. It’s all about respecting the grains, even when they are cold!
First, make sure the rice has cooled down a bit before you seal it up tight. If you put hot rice straight into an airtight container and immediately into the fridge, that trapped steam can make things mushy. I usually let it sit on the counter for about 30 minutes until it’s just warm to the touch.
Pop it into a sealed, airtight container. It keeps beautifully in the refrigerator for about three to four days. If you’re planning ahead, this stuff even freezes really well! Just cool it completely, freeze it flat in zipper bags so it doesn’t take up too much space, and it’s good in the freezer for up to three months. Having this mexican rice recipe waiting in your freezer for a weeknight emergency is one of my favorite meal prep tricks. If you like prepping ahead, you should check out how I manage my leftovers for my chicken broccoli casserole!
Bringing Back That Fluff
Reheating is where people usually mess up and end up with sticky rice again, but don’t worry, I have the fix! My biggest piece of advice here is to avoid the microwave if you can, especially if you’re reheating a large portion. Microwaves tend to heat unevenly and dry things out fast.
The stovetop is your best friend. Scoop the amount you need into a small saucepan over medium-low heat. Here’s the magic trick: add just a tiny splash of broth or water—like one tablespoon for every two cups of rice. Cover it again and let it warm slowly. That little bit of added moisture turns back into steam and puffs those grains right back up to where they were when they were first done. It’s the easiest way to restore that perfectly fluffy mexican rice texture!
If you absolutely *must* use the microwave, put the rice in a microwave-safe bowl, add that spoonful of broth or water, cover it loosely with a damp paper towel, and heat in short bursts (30-45 seconds) until it’s warm through. That damp towel acts like a mini-steamer and keeps it from drying out too much.
Frequently Asked Questions About This mexican rice recipe
I get so many questions after folks try this recipe, and honestly, it’s usually because they’re wondering how they ever lived without this perfect side dish! Since this is based on traditional techniques, sometimes people wonder about comparisons or little tricks to make it their own. Don’t worry if you have questions—that just means you’re serious about getting that consistent, fluffy texture!
What is the difference between Mexican Rice and Homemade Spanish Rice?
This is such a popular question! When people look for Homemade Spanish Rice, they are often looking for something very similar, but traditionally, the difference comes down to the color source. My mexican rice recipe gets its beautiful, warm red hue from being cooked with tomato sauce and sometimes fresh tomatoes. Classic Spanish rice, sometimes called yellow rice, usually gets its color from saffron or turmeric, giving it a brighter, yellower look. Both are delicious, but we are aiming for that rich, savory red here!
Can I make this mexican rice recipe in a rice cooker?
You totally *can* use a rice cooker, but I have to be honest: this specific recipe is perfected for the stovetop where we get that crucial toasting phase and the sealed, off-heat steaming period. That toasting step is what makes it Restaurant Style Mexican Rice and stops it from getting gummy. If you are set on an appliance, you could potentially toast the rice right in the cooker pot on the sauté setting, but you’d need to monitor it super closely so it doesn’t burn! For the absolute best, fluffiest results, I always suggest sticking to the stovetop method detailed above.
How to make this a vegetarian mexican rice recipe?
Good news! This recipe is incredibly easy to adapt for vegetarian or vegan diets. As written, if you just swap out the chicken broth for vegetable broth, you’ve made yourself an amazing, Flavorful Rice Recipe that is completely meat-free. The flavor that broth brings is huge, especially since we skip other rich meats typically found in a full chicken and rice dish. That’s why using quality veggie broth is key to keeping this a Best Mexican Side Dish!
If you try this out, I’d love to hear about it! Check out an awesome take on restaurant rice over at The Cookin’ Chicks for another perspective on flavor building.
Share Your Homemade Mexican Side Dish
Now you have everything you need to make my Authentic Mexican Rice, and I mean *everything*! From toasting the rice until it’s perfectly golden, to nailing that fifteen-minute silent simmer, this recipe is yours. I really hope this becomes your go-to side dish, too. Remember what I believe here at MDLATDMM: the best cooking connects us back to comfort and love, and what’s more comforting than a perfect mound of fluffy rice?
When you make this, please do me a huge favor and come back! I desperately want to know how it turned out for you. Leave a rating below—five stars if it tasted just like your favorite spot! And if you share any photos over on social media, tag me. Seeing your beautiful, homemade Mexican side dish spread out on your table is honestly what keeps me going in the kitchen. Happy cooking, my friend!
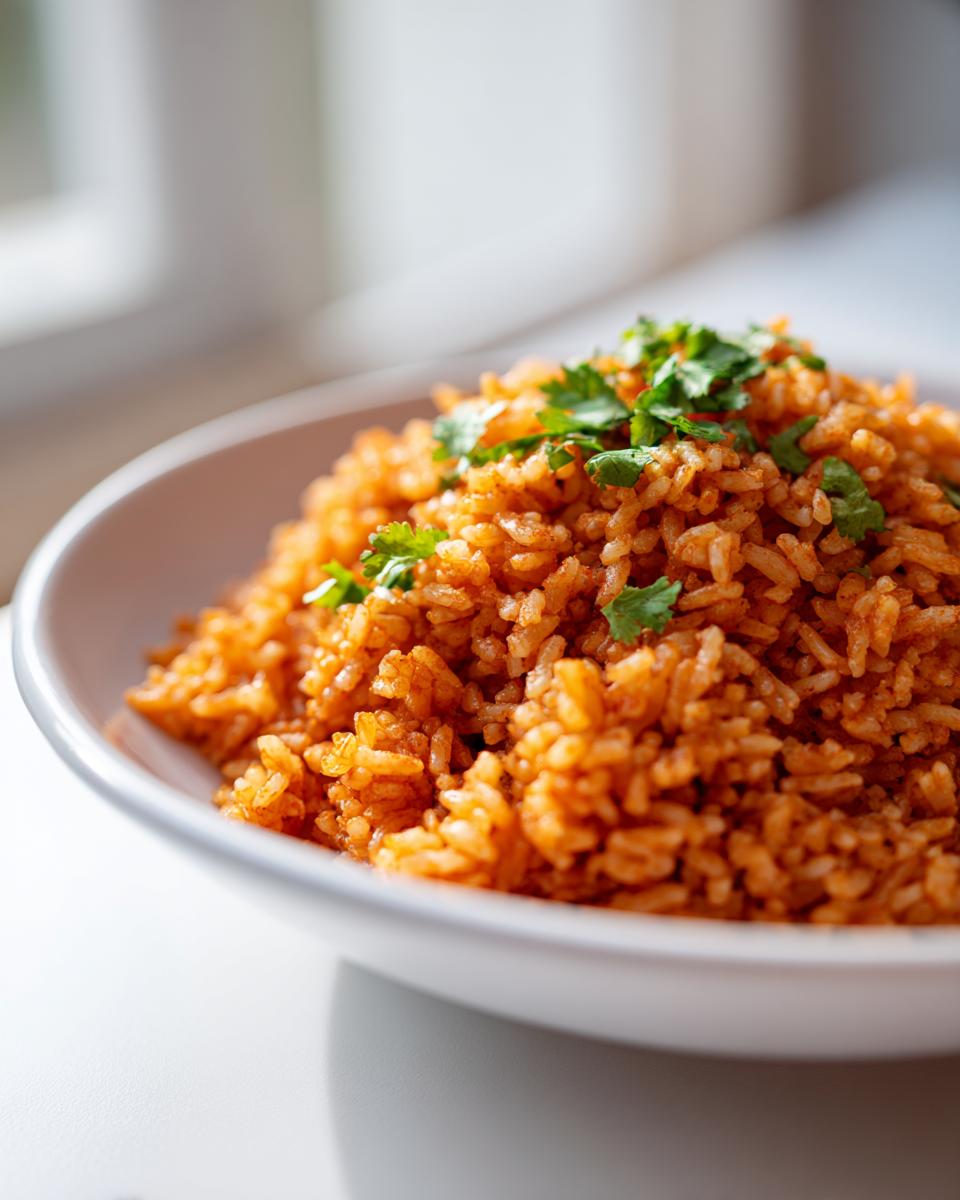
PrintAuthentic Restaurant-Style Mexican Rice (Arroz Rojo)

You can recreate the flavorful, fluffy Mexican rice you love from your favorite restaurants right in your own kitchen. This recipe uses simple ingredients and straightforward steps to deliver authentic Arroz Rojo every time.
- Prep Time: 10 min
- Cook Time: 25 min
- Total Time: 35 min
- Yield: 4 servings 1x
- Category: Side Dish
- Method: Stovetop
- Cuisine: Mexican
- Diet: Vegetarian
Ingredients
- 2 tablespoons vegetable oil
- 1 cup long-grain white rice
- 1/2 medium white onion, finely chopped
- 2 cloves garlic, minced
- 1 medium tomato, finely diced
- 1/4 cup tomato sauce
- 2 cups chicken or vegetable broth
- 1/2 teaspoon ground cumin
- 1/2 teaspoon salt, or to taste
- 1/4 cup frozen peas (optional)
- Fresh cilantro, chopped, for garnish
Instructions
- Heat the vegetable oil in a medium saucepan or pot over medium heat.
- Add the rice to the hot oil and toast, stirring frequently, for about 5 to 7 minutes until the grains turn light golden brown. This step is key for fluffy Mexican rice.
- Add the chopped onion and minced garlic to the pot. Cook for 2 minutes until fragrant.
- Stir in the diced tomato and tomato sauce. Cook for 3 minutes, stirring to coat the rice evenly.
- Pour in the broth, ground cumin, and salt. Bring the mixture to a boil.
- Once boiling, reduce the heat to the lowest setting, cover the pot tightly with a lid, and simmer for 15 minutes without lifting the lid. Do not stir during this time.
- After 15 minutes, remove the pot from the heat. If using, gently stir in the frozen peas.
- Keep the pot covered and let the rice steam off the heat for another 10 minutes. This helps the rice become perfectly fluffy.
- Fluff the Mexican rice gently with a fork before serving. Garnish with fresh cilantro.
Notes
- Toasting the rice properly is essential for achieving that restaurant-style, non-sticky texture. Watch it closely so it does not burn.
- For a richer flavor, use high-quality chicken broth instead of water. This is a great way to add depth to your Mexican side dish.
- If you prefer a smoother sauce base, blend the tomato, onion, and garlic with the broth before adding it to the toasted rice.
Nutrition
- Serving Size: 1 cup cooked
- Calories: 220
- Sugar: 2
- Sodium: 450
- Fat: 5
- Saturated Fat: 1
- Unsaturated Fat: 4
- Trans Fat: 0
- Carbohydrates: 38
- Fiber: 3
- Protein: 5
- Cholesterol: 0