
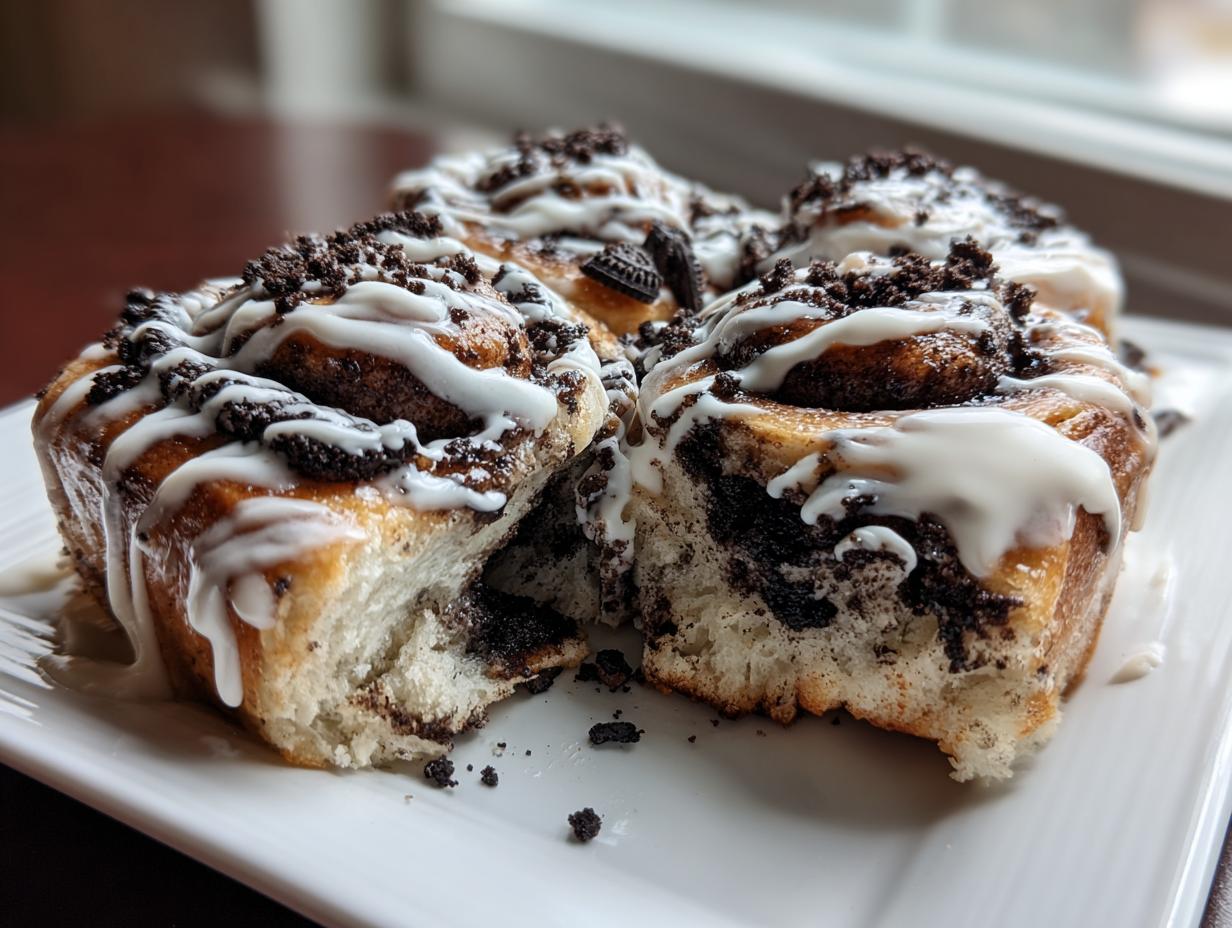
Forget everything you thought you knew about boring, dry morning pastries, friends! When I decided to bring a little extra comfort back into my life—moving away from takeout and back toward the kitchen counter—it had to be something truly over the top. That’s why I’m sharing my recipe for the Ultimate Gooey, Bakery-Style Oreo Cinnamon Rolls (Made From Scratch). Trust me, these oreo cinnamon rolls deliver that incredible, soft texture you only find in those high-end bakeries, but they have the heart of a true homemade treat. It’s the perfect weekend baking project that tastes like pure nostalgia in every single bite.
- Why You Will Make These Ultimate Gooey Oreo Cinnamon Rolls
- Essential Ingredients for Perfect Oreo Cinnamon Rolls
- Step-by-Step Instructions for Homemade Oreo Treats
- Tips for Perfect Bakery Style Cinnamon Rolls
- Make-Ahead and Storage for Decadent Breakfast Pastry
- Storage and Reheating Instructions for Your Indulgent Sweet Rolls
- Frequently Asked Questions About Cookies and Cream Rolls
- Nutritional Estimate for Indulgent Sweet Rolls
- Share Your Homemade oreo cinnamon rolls Experience
Why You Will Make These Ultimate Gooey Oreo Cinnamon Rolls
These aren’t your average cinnamon rolls, not by a long shot! When you make these completely from scratch, you get that deep satisfaction of creating something truly special. We’re talking about combining warm spices with crunchy, familiar cookies. It’s the ultimate brunch upgrade, honestly.
- These rolls are unbelievably soft and totally satisfying—just like the ones from that fancy bakery downtown.
Achieving Bakery Style Fluffy Oreo Buns
The secret to those light and airy Fluffy Oreo Buns is really all in that first rise! When you knead the yeast dough until it’s perfectly smooth and let it double in size, you’re building structure. That gentle second proof just before baking locks in the air so they puff up beautifully in the oven. Patience with the yeast pays off massively here!
The Secret to No Leak Oreo Cinnamon Rolls Filling
We’ve all suffered the sad, flattened rolls where the filling just oozes out everywhere, right? Well, for these No Leak Oreo Cinnamon Rolls, I mix softened cream cheese right into the butter base. That slight tang helps bind the crushed Oreos just enough so they stay snug inside the roll during that crucial second rise and bake. They stay perfectly gooey inside, not messy outside!
Essential Ingredients for Perfect Oreo Cinnamon Rolls
Listen, when we go the distance to make these Oreo Cinnamon Rolls completely from scratch, we have to treat our ingredients right! Getting the texture perfect—that pillowy soft dough paired with the rich, chocolate filling—comes down to precision here. I always lay out everything ahead of time, just like my mom taught me. If you want that gorgeous result, make sure your butter and eggs are at room temperature unless specified otherwise. If you’re looking for the best glaze recipe out there, check out my thoughts on cream cheese frosting for other applications, but for these rolls, we stick to the plan below!
For the Fluffy Dough
This dough needs the right conditions to wake up those yeast buddies! That milk has to be warm, not hot—think bathwater temperature, around 110°F. If it’s too hot, you kill the yeast, and then your rolls won’t proof right. It’s a delicate balance!
- For the Dough: 3 cups all-purpose flour, plus extra for dusting
- ¼ cup granulated sugar
- 1 packet (2¼ tsp) instant yeast
- ½ tsp salt
- ¾ cup warm milk (110°F/45°C)
- 1 large egg, room temperature
- ¼ cup unsalted butter, melted
For the Chocolate Sandwich Cookie Rolls Filling
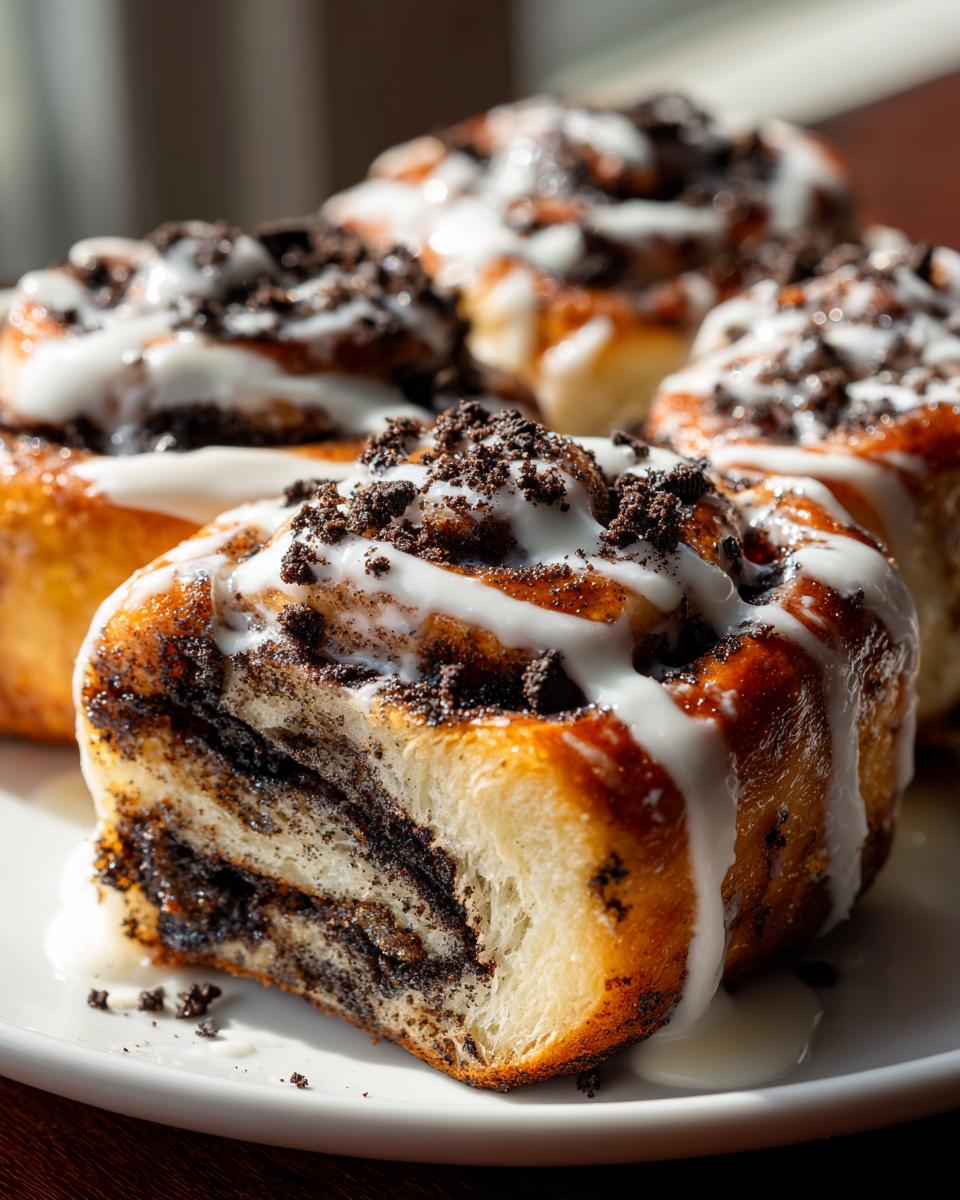
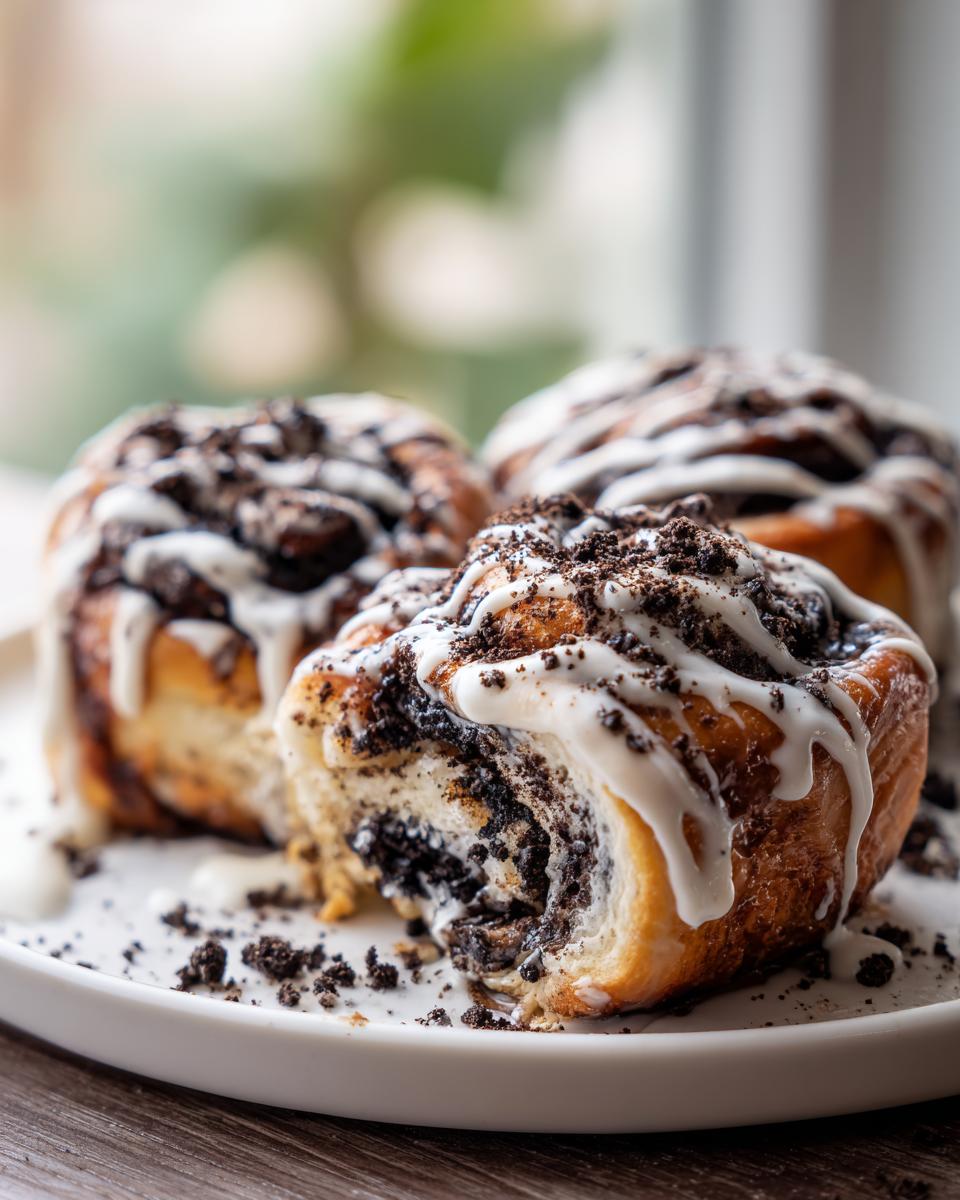
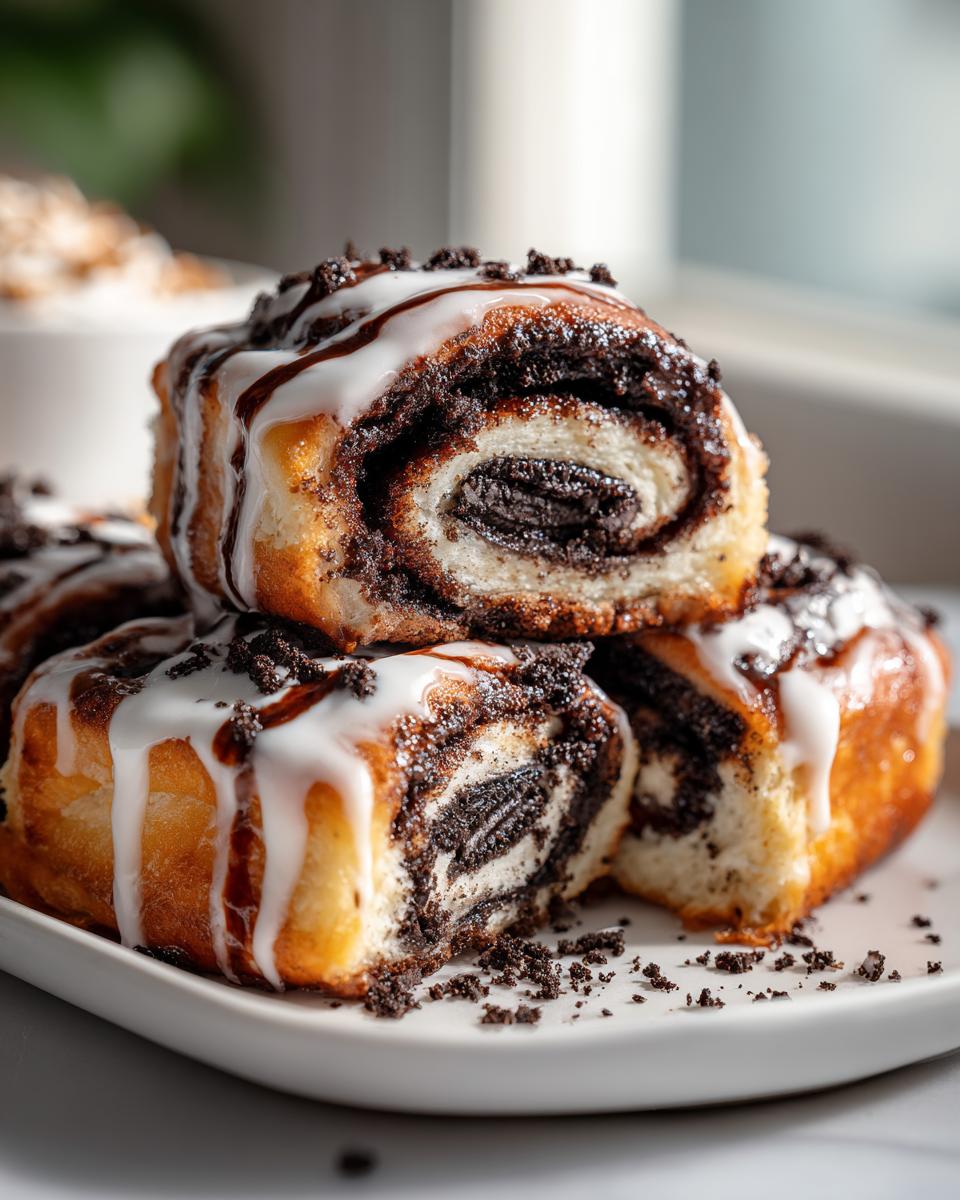
This is where the magic happens! We are loading these rolls up with texture. When you crush your Oreos, don’t turn them into dust—we want those little clusters of cookie and cream. That contrast between the soft cinnamon side and the crunchy cookie pieces makes these Chocolate Sandwich Cookie Rolls so fantastic!
- For the Filling: ½ cup unsalted butter, softened
- ½ cup packed brown sugar
- 1 tbsp ground cinnamon
- 12 Oreo cookies, coarsely crushed
- 4 oz cream cheese, softened
For the Cream Cheese Frosting Cinnamon Rolls
The glaze has to be thick enough to coat but still pourable so it melts perfectly into those warm layers. The cream cheese in there gives it just the right amount of tang to cut through all that sweetness. This Cream Cheese Frosting Cinnamon Rolls topping is non-negotiable for me!
- For the Cream Cheese Glaze: 1 cup powdered sugar
- 2 tbsp milk
- ½ tsp vanilla extract
- Extra Oreo crumbs for garnish
Step-by-Step Instructions for Homemade Oreo Treats
Okay, I know making things from scratch can sound intimidating, especially yeast dough! But honestly, this is where the fun is. Think of this as your delicious Weekend Baking Project. Don’t rush the rises, and you’ll see why these Oreo Cinnamon Rolls turn out so much better than anything you can grab frozen. Trust me, dedicating the time makes the reward so much sweeter. If you want to see how another baker handles these beauties for some extra visuals, check out Chelsweets’ technique—always good to see different paths to perfection! I also have a fantastic recipe for pumpkin banana bread if you are looking for another fun weekend bake!
Making the Yeast Dough and First Rise
First things first, we need to wake up that yeast! Mix your yeast into that warm milk—remember, 110°F! It should get foamy in about 10 minutes. If it doesn’t foam, your milk was too hot, and we have to start that part over, oops! Once it’s happy, mix that into your dry goods, melted butter, and egg until you get what I call a ‘shaggy dough.’ Don’t overwork it yet! Just bring it together, then turn it out onto the counter for proper kneading. You’re looking for smooth and elastic after about 6 to 8 minutes. Then, cover it up and let it chill out somewhere warm for 1 to 1.5 hours until it’s nice and puffy.
Assembling the Gooey Cinnamon Rolls Filling
While that dough is working hard, get your filling ready. This is crucial for that dreamy middle! You need your butter and cream cheese good and soft. Beat them together first until they turn into one creamy base. Then you mix in your brown sugar and cinnamon. The absolute last thing you mix in are those coarsely crushed Oreos. We mix the cream cheese in first so it acts like glue for the cookies. This is what creates those pockets of chocolate goodness in your Gooey Cinnamon Rolls!
Rolling, Cutting, and Second Rise for Stuffed Cinnamon Rolls
When your dough has doubled, gently punch it down—that’s the fun part! Roll it out into that big rectangle (I aim for about 12 by 18 inches). Spread that glorious Oreo filling right over the top, leaving about a half-inch border on one of the long sides. This border is your seal! Roll it up nice and tight, starting from the side *without* the border. Make sure that seam gets pinched shut! For cutting these Stuffed Cinnamon Rolls, I swear by unflavored dental floss! Slide it under the log, cross the ends over the top, and pull gently. It cuts cleaner than a knife and keeps those beautiful swirls intact.
Once cut, place them snugly in your greased 9×13 pan. Cover them softly and let them enjoy another rise for about 30 to 45 minutes until they look puffy again. They’re getting ready for their big moment!
Baking and Glazing Your Oreo Cinnamon Rolls Recipe
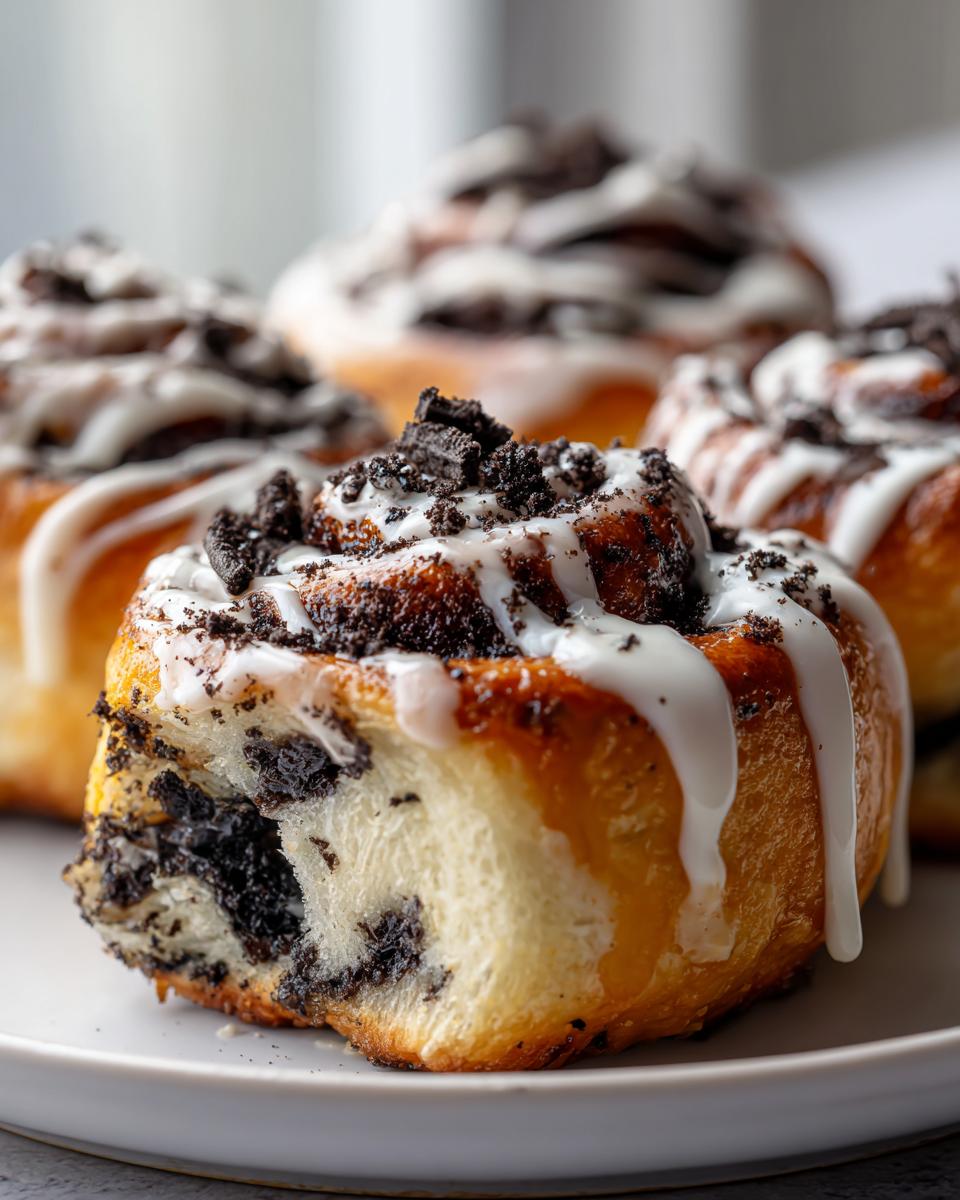
Time to bake! Get your oven set to 350°F (175°C). Pop these in for 20 to 25 minutes. Keep an eye on them; if the tops go too dark before the center seems done, just tent them lightly with foil. Nobody wants a burnt top! Once they come out golden brown, let them cool down just a little bit. They should still be warm when you pour that glaze right over the top. That warmth lets the glaze melt down into every single crevice of your oreo cinnamon rolls recipe. Don’t forget that final sprinkle of extra Oreo crumbs—we eat with our eyes first, you know!
Tips for Perfect Bakery Style Cinnamon Rolls
You deserve rolls that look as amazing as they taste, right? Since we are aiming for that high-end bakery experience here with these Oreo Cinnamon Rolls, I wanted to share a few little secrets I picked up from lots of testing. It’s these tiny tweaks that keep your rolls from getting sad or messy. For more ideas on making things chewy and amazing, you can look at my notes on chocolate chip cookies—it’s all about handling the dough!
Ingredient Temperature Matters for Creamy Oreo Cinnamon Rolls Glaze
When you make the frosting, remember that the final texture is all about the liquid you add. We listed 2 tablespoons of milk, but if you’re having a humid day, or maybe you just want an extra thick topping for your oreo cinnamon rolls, don’t add it immediately! My note suggests reducing that down to just 1 tablespoon. You can always add more milk later, but you can never take it out once it’s in there! We want a thick layer you can barely pour.
Enhancing the Chocolate Swirl Rolls Flavor
If you really want to lean into that deep, dark cookie flavor without changing the texture of the filling too much, I highly recommend adding just a touch of black cocoa powder. It’s what makes the filling in the *Chocolate Swirl Rolls* look intensely dark and gives a much deeper chocolate note than just the Oreos alone. It’s totally optional, of course, but if you are baking for serious chocolate lovers, try adding just one tablespoon to the filling mixture. It really amps up the ‘wow’ factor when you see that dark swirl inside!
For an extra layer of inspiration on flavor additions, take a peek at how Cambrea handled their filling—seeing outside recipes helps us all get better at what we do!
Make-Ahead and Storage for Decadent Breakfast Pastry
I love these rolls, but let’s be real—who has time for a full yeast bake on a Tuesday morning? Making these Oreo Cinnamon Rolls ahead of time is my favorite trick for having a spectacular Decadent Breakfast Pastry ready whenever company drops by! You can absolutely manage the dough a day ahead, which lets the flavors meld even better, by the way.
If you are preparing the dough the night before, after you cut the rolls and place them in the greased pan, skip the second rise. Cover that pan tightly with plastic wrap (I usually spray the wrap lightly with oil so it doesn’t stick to the frosting potential!). Put the whole pan in the fridge overnight. The cold temperature slows the yeast way down.
When you wake up the next morning, just pull them out about an hour before you want to bake them so they can warm up slightly and get puffy for that second proof. Or, if you’re prepping for a real holiday rush, you can freeze the unbaked rolls! Just use an extra layer of plastic wrap and foil, and pop them in the freezer for up to a month. When you’re ready, let them thaw in the fridge overnight before doing that final proof on the counter. It’s almost like cheating, but it tastes homemade! For more great tips on making dishes ahead of time, take a look at how I prep my breakfast casseroles.
Once they are baked and cooled down (or slightly warm, honestly), they store great too! Keep any leftovers in an airtight container at room temperature for up to three days. If they start to look a little sad or dry by day two, don’t panic! A quick 15-second zap in the microwave brings the gooiness right back. If you want to skip the make-ahead step entirely and just bake them fast, check out this guide—it’s great for when you need those rolls ASAP!
Storage and Reheating Instructions for Your Indulgent Sweet Rolls
You are going to have leftovers, just try not to eat them all in one sitting! These Oreo Cinnamon Rolls are honestly better the next day because the frosting has time to soak down into those soft layers, making them even gooier. But we need to store them correctly so they don’t turn into little bricks overnight, right?
For short-term storage, keep them in an airtight container right on the counter. They should stay beautifully soft at room temperature for about two to three days. I wouldn’t suggest sticking them in the fridge unless you absolutely have to, because cold air tends to dry out bread products really quickly. If you simply must refrigerate them, make sure they are sealed super tight so they don’t absorb any weird fridge smells!
How to Bring Back the Gooey Texture
If you stored them in the fridge, or if they are just a day old and you need that fresh-baked feel, reheating is key. The microwave is your best friend for speed! Take one or two rolls—no more than that, or the heating will be uneven—and zap them for about 10 to 15 seconds. That gentle heat melts the frosting again and softens the dough right up. Instant gratification!
If you have a whole pan of them or you’re feeling a little fancy, the oven is the way to go. Wrap the rolls loosely in foil—we don’t want them to dry out! Pop them in a 300°F (150°C) oven for about 10 minutes just until warmed through. That gently heat brings back that bakery-style softness we worked so hard to achieve! Remember, you can look up how other folks handle their leftovers too; for instance, Magazine Meal has some thoughts on keeping rolls soft for longer.
Frequently Asked Questions About Cookies and Cream Rolls
It’s totally normal to have questions when you’re tackling a big, decadent bake like these Oreo Cinnamon Rolls! I gathered the things folks ask me most often over on social media, usually concerning shortcuts or making sure the filling doesn’t decide to escape during baking. We want reliability, right? If you’re tweaking this recipe for other uses, you might find my thoughts on homemade granola helpful for understanding ingredient ratios!
Can I use store-bought dough for these oreo cinnamon rolls?
Oh, yes, you absolutely can if you’re in a pinch! I developed this recipe using my from-scratch dough because that’s how you get that signature pillowy soft texture, but convenience is key sometimes. If you grab a can of refrigerated rolls, just unroll them and proceed with the filling instructions—use about two-thirds of the filling recipe listed here, as canned dough is usually thinner. For the glaze, you can definitely use the frosting packet that comes with the can, but stir in an extra tablespoon of softened cream cheese and maybe a tiny splash of milk to make it taste a little more robust and match these intense Cookies and Cream Rolls!
How do I make the cream cheese frosting thicker for these Sweet Rolls with Cookie Filling?
That’s a great question, because we want that glaze to sit proudly on top, not disappear immediately! If your finished glaze seems too runny, don’t reach for milk! Instead, grab your powdered sugar. Just whisk in one extra tablespoon of powdered sugar at a time until you get that perfect thick consistency where it holds its shape a little when you lift the whisk. Alternatively, if the frosting is too thick, add milk one half-teaspoon at a time. Getting the glaze right is essential for that final visual appeal on your Sweet Rolls with Cookie Filling.
Can I make these oreo cinnamon rolls ahead of time?
This is the game-changer for me! You want fresh rolls without waking up at 4 AM, right? Assemble the entire thing exactly as written—dough, filling, roll, and cut—and place the rolls snugly in your greased 9×13 pan. Cover it tightly with plastic wrap (I spray the wrap underneath with a little non-stick spray so it doesn’t tear the top layer of dough when you remove it). Pop the covered pan into the fridge. They can hang out there for up to 12 hours. When company arrives, pull them out, let them sit on the counter while the oven preheats, and they’ll get that perfect puffy second rise right before baking. They come out tasting just as fresh!
Nutritional Estimate for Indulgent Sweet Rolls
Okay, let’s talk details! I know we are making something truly decadent here, so these are certainly not diet food, but I believe in knowing what goes into our bodies, even when we’re treating ourselves. When you’re baking legendary Oreo Cinnamon Rolls, you have to expect the indulgence! I put together an estimated breakdown based on the ingredients we used for 12 rolls.
Please remember, this is just a rough guide! Because the exact fat content in the cream cheese or the size of the egg can change things slightly, these numbers are just estimates for one big, glorious roll. If you manage to make them last longer than a day and skip the glaze, your numbers will drop dramatically (but where’s the fun in that?).
- Serving Size: 1 roll
- Calories: 450
- Sugar: 35g
- Sodium: 350mg
- Fat: 24g
- Protein: 6g
- Carbohydrates: 55g
These Indulgent Sweet Rolls definitely fall into a celebration category, and they are worth enjoying fully! Just make sure you have a big cup of black coffee ready to balance out all that wonderful sweetness!
Share Your Homemade oreo cinnamon rolls Experience
Now that you know all my secrets for achieving those towering, gooey, oreo cinnamon rolls, the most important step is getting them into your kitchen! I truly believe that sharing food is a way of sharing love, and I want to see what you create. This recipe felt like an extension of my own kitchen history, and I hope it becomes a beloved tradition in yours, too!
Once you pull these beauties out of the oven, please, snap a picture! Seeing your gorgeous, chocolate-swirled creations always makes my day. Tag me over on social media so I can admire your work—especially if you tried my tip about using dental floss to get those perfect cuts!
And don’t hesitate to leave a rating and a comment right here on the blog. Did you add extra cinnamon? Did you stick with the cream cheese glaze or use a simple vanilla drizzle? I want to hear all the gritty details about your baking journey! Your feedback helps me keep these recipes honest and reliable for everyone else tackling this Decadent Breakfast Pastry. For more fun ideas for sharing the love through dessert, check out my collection of delicious dessert recipes. Happy baking, friends!
PrintUltimate Gooey, Bakery-Style Oreo Cinnamon Rolls (Made From Scratch)

You can create bakery-style Oreo cinnamon rolls that are incredibly soft and gooey right in your home kitchen. This recipe takes the classic cinnamon roll and swirls in crushed chocolate sandwich cookies for a decadent cookies and cream experience, finished with a rich cream cheese frosting.
- Prep Time: 45 min
- Cook Time: 25 min
- Total Time: 145 min
- Yield: 12 servings 1x
- Category: Dessert
- Method: Baking
- Cuisine: American
- Diet: Vegetarian
Ingredients
- For the Dough: 3 cups all-purpose flour, plus extra for dusting
- ¼ cup granulated sugar
- 1 packet (2¼ tsp) instant yeast
- ½ tsp salt
- ¾ cup warm milk (110°F/45°C)
- 1 large egg, room temperature
- ¼ cup unsalted butter, melted
- For the Filling: ½ cup unsalted butter, softened
- ½ cup packed brown sugar
- 1 tbsp ground cinnamon
- 12 Oreo cookies, coarsely crushed
- 4 oz cream cheese, softened
- For the Cream Cheese Glaze: 1 cup powdered sugar
- 2 tbsp milk
- ½ tsp vanilla extract
- Extra Oreo crumbs for garnish
Instructions
- Activate the yeast: In a small bowl, combine the warm milk, a pinch of sugar, and the yeast. Let it sit for 5 to 10 minutes until foamy.
- Mix the dough: In a large bowl, whisk together the flour, remaining sugar, and salt. Pour in the yeast mixture, melted butter, and egg. Mix until a shaggy dough forms.
- Knead the dough: Turn the dough onto a lightly floured surface and knead for 6 to 8 minutes until the dough is smooth and elastic. Place it in a lightly oiled bowl, cover it, and let it rise in a warm place for 1 to 1.5 hours, or until doubled in size.
- Prepare the filling: While the dough rises, beat the softened butter, brown sugar, cinnamon, and softened cream cheese together until well combined. Stir in the coarsely crushed Oreo cookies.
- Shape the rolls: Punch down the risen dough and roll it out into a large rectangle, about 12×18 inches. Spread the Oreo filling evenly over the dough, leaving a small border on one long edge.
- Roll and cut: Starting from the long edge opposite the border, tightly roll the dough into a log. Pinch the seam closed. Use unflavored dental floss or a sharp knife to cut the log into 12 equal rolls.
- Second rise: Place the rolls snugly in a greased 9×13 inch baking pan. Cover the pan loosely and let the rolls rise again for 30 to 45 minutes until puffy.
- Bake the rolls: Preheat your oven to 350°F (175°C). Bake the rolls for 20 to 25 minutes, or until they are golden brown. If the tops brown too quickly, lightly tent them with foil.
- Make the glaze: While the rolls cool slightly, whisk together the powdered sugar, milk, and vanilla extract until smooth.
- Frost and serve: Pour the glaze evenly over the warm rolls. Sprinkle with extra Oreo crumbs immediately. Serve these gooey cinnamon rolls warm.
Notes
- To achieve a truly bakery-style soft texture, make sure your milk is warm, not hot, to avoid killing the yeast.
- For an extra chocolatey swirl, you can add 1 tablespoon of black cocoa powder to the filling mixture.
- If you prefer a thicker, creamier frosting, reduce the milk in the glaze to 1 tablespoon.
Nutrition
- Serving Size: 1 roll
- Calories: 450
- Sugar: 35g
- Sodium: 350mg
- Fat: 24g
- Saturated Fat: 14g
- Unsaturated Fat: 10g
- Trans Fat: 0.5g
- Carbohydrates: 55g
- Fiber: 2g
- Protein: 6g
- Cholesterol: 45mg