
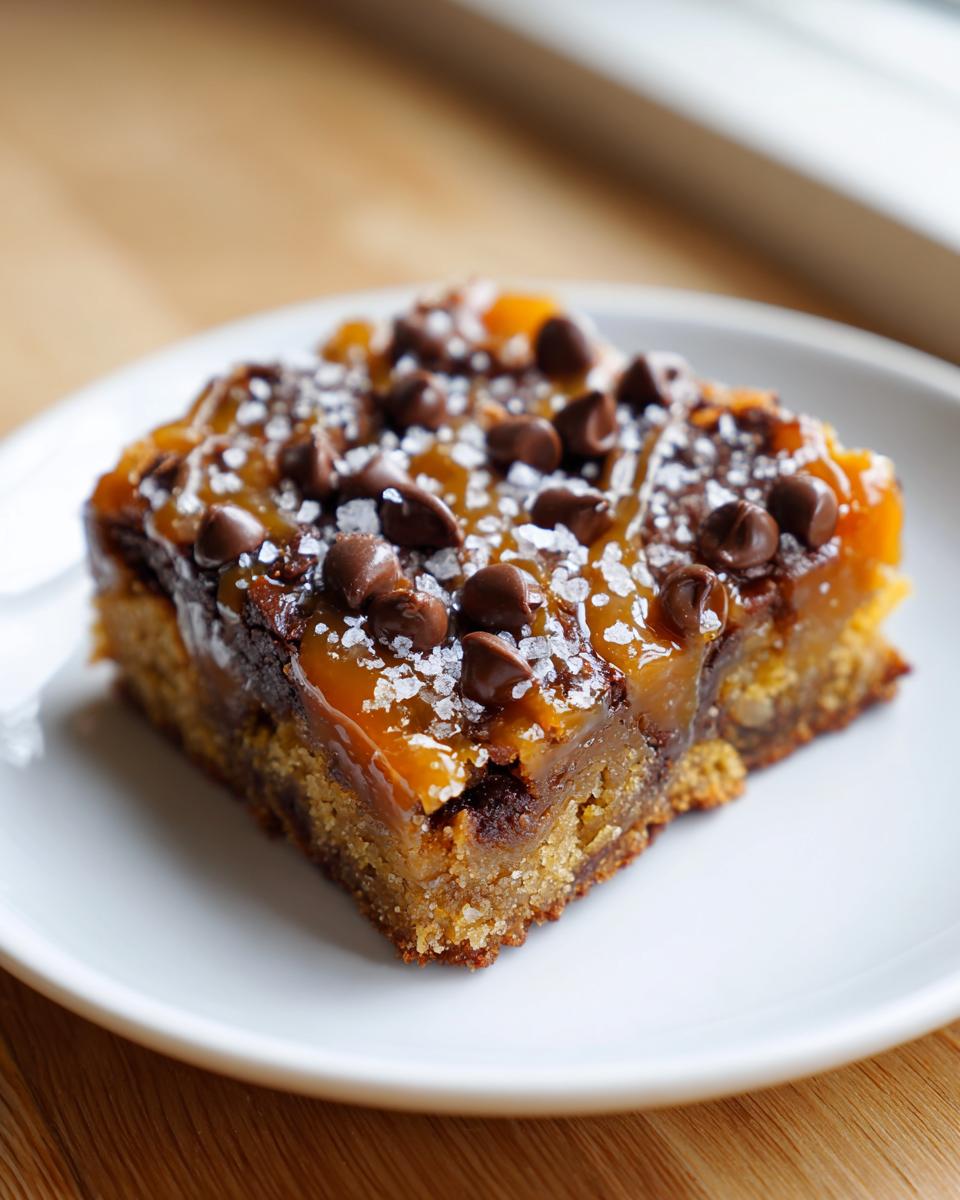
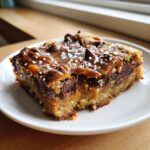
Sometimes, you just need a dessert that hits all the right notes without making your sink look like a war zone afterward, right? That’s exactly why I adore these rich, decadent **cookie bars**. When I was first figuring out how to bring the comfort of my family kitchen back into my busy city life, it wasn’t the towering layer cakes that brought me solace. It was realizing I could pack all that gooey, satisfying flavor into one simple pan. These Ultimate Chewy Chocolate Chip Cookie Bars are truly the answer—a fantastic, one-pan solution for everyone needing a slice of home. They are my go-to when I need quick sweet treats that feel truly homemade and satisfying.
- Why These Chocolate Chip Cookie Bars Are a Family Favorite (Easy Dessert Bars)
- Gathering Ingredients for Your Ultimate Cookie Bars
- Step-by-Step Instructions for Making Amazing Cookie Bars
- Tips for Baking Perfect Pan Baked Desserts Like These Cookie Bars
- Storage and Make Ahead Dessert Bars
- Serving Suggestions for Your Homemade Bar Cookies
- Frequently Asked Questions About Cookie Bars
- Estimated Nutritional Overview for These Cookie Bars
- Share Your Ultimate Chewy Chocolate Chip Cookie Bars Experience
Why These Chocolate Chip Cookie Bars Are a Family Favorite (Easy Dessert Bars)
Honestly, these are the ultimate indulgence that require the least amount of fuss. Why wouldn’t they be my family favorite? They satisfy that craving for something rich and comforting without the marathon baking session. When I need a dessert that travels well and pleases absolutely everyone, I reach for this pan. They’re just the best kind of sweet treats!
- They qualify as one of the best easy dessert bars you can make—seriously!
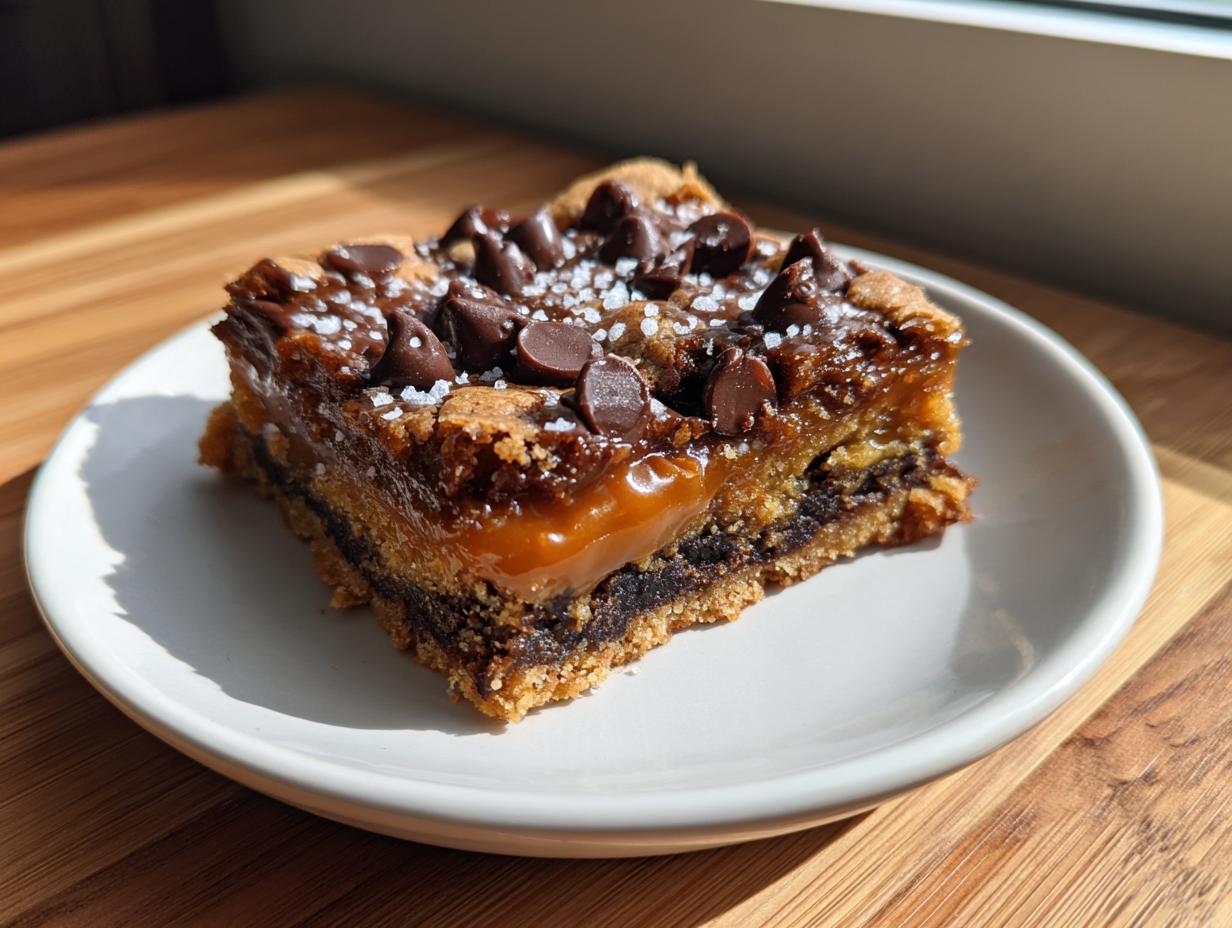
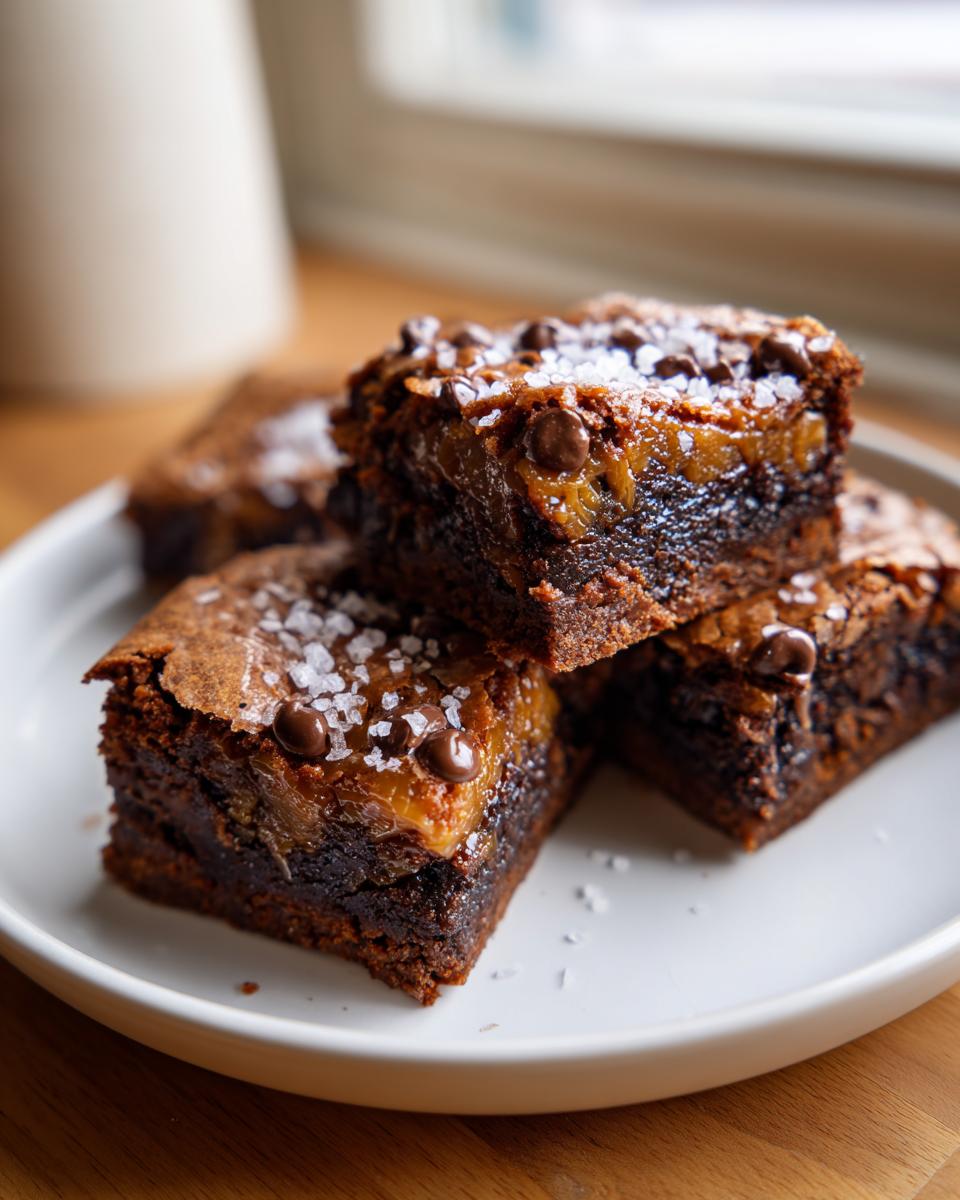
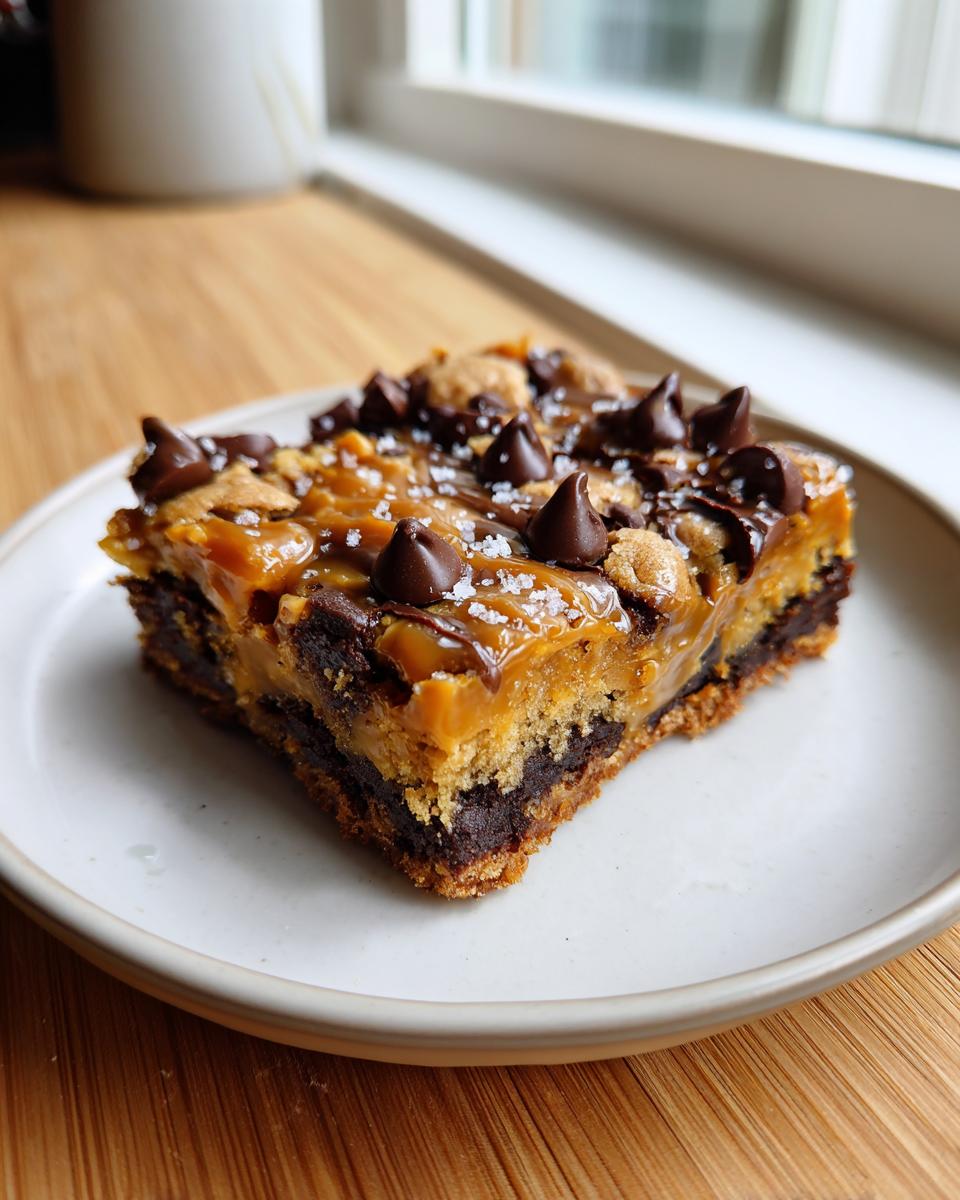
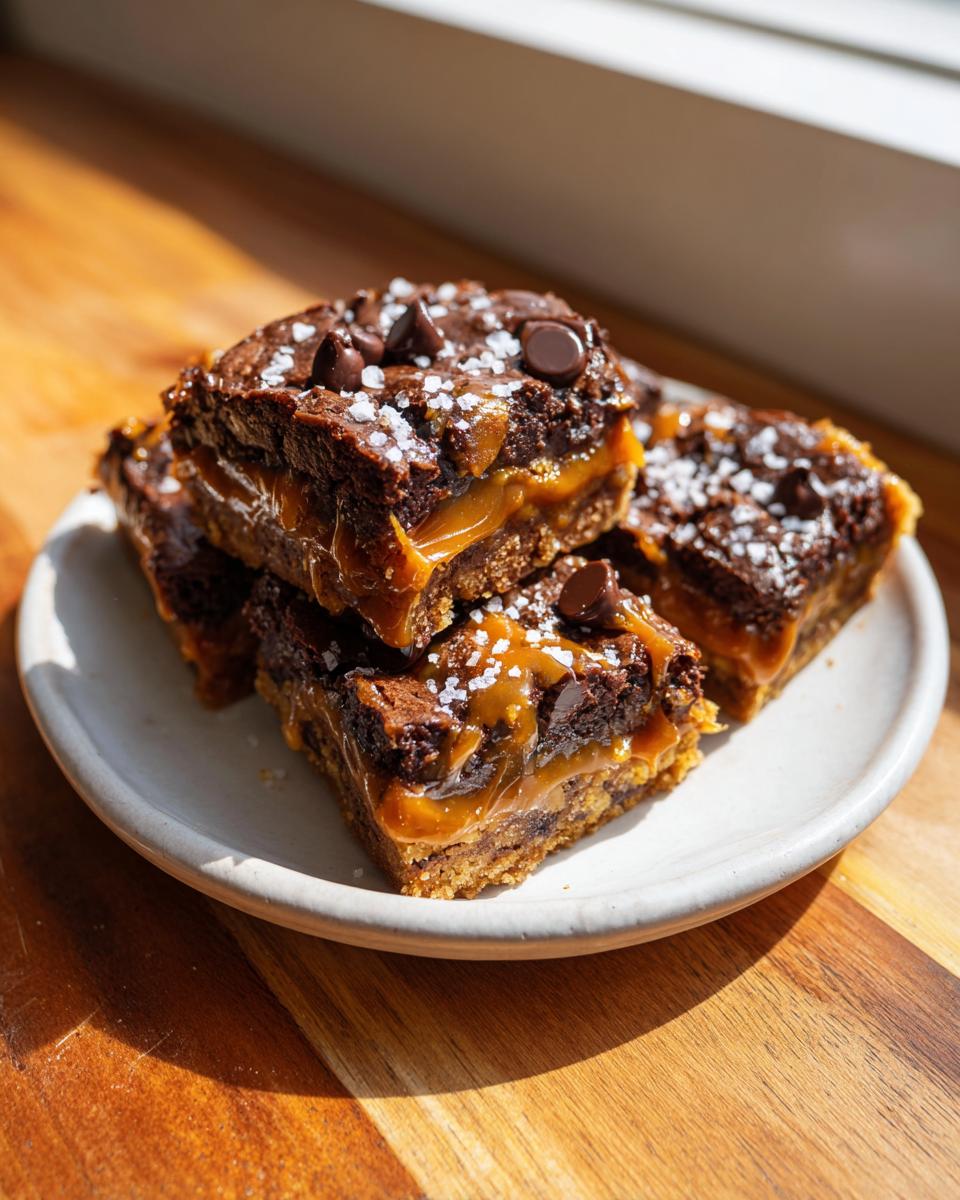
- The texture is perfectly chewy cookie bars; never cakey, always gooey in the middle.
- It’s truly the magic of one pan cookies; cleanup is a breeze!
- You get that amazing flavor without scooping dozens of individual cookies.
Simple Steps for Perfect Cookie Bars
This is what I love most about this recipe—it’s all about getting that bakery vibe without the bakery effort. Because we’re using a big 9×13 pan, we skip the tedious process of scooping out mounds of dough, which means less mess on my counters. These glorious pan baked desserts come together right in the bowl, and the reward is huge compared to the work involved. If you’re looking for genuinely simple cookie recipes that pack a punch, this is it. Just mix, press, and bake!
If you’re looking for more straightforward indulgence, check out my collection of delicious dessert recipes; they all follow the same easy-does-it philosophy!
Gathering Ingredients for Your Ultimate Cookie Bars
Okay, let’s talk about what goes into these spectacular things. Remember, the quality of your base ingredients really shines through, especially in simple recipes like these cookie bars. We need a full cup of that unsalted butter; make sure it’s truly softened to room temperature, not even a little bit melted! We’re looking for both granulated and that wonderfully rich, packed brown sugar—that brown sugar is key for that deep flavor and chewy texture we are aiming for. And yes, we are using two full cups of chocolate chips—a mix of semi-sweet and milk chocolate gives the absolute best melt factor!
Ingredient Notes and Substitutions for Chewy Cookie Bars
If you want truly phenomenal chewy cookie bars, don’t skimp on the vanilla! I always use a higher quality, pure vanilla extract because it just deepens the flavor profile against the chocolate. Another tiny trick for maximum moisture? If you feel like your dough seems a *tad* dry during mixing, you can sneak in an extra tablespoon of that packed brown sugar—it won’t hurt a thing! Also, please, please use room temperature eggs. Cold eggs deflate the butter mixture when you add them in, and we need all the fluffy air we can get when creaming for that perfect bar lift.
Step-by-Step Instructions for Making Amazing Cookie Bars
Alright, let’s get baking! The first thing you absolutely must do is get that oven warming up to 350°F (175°C). While it’s heating, tackle the pan prep. This is non-negotiable for easy removal later: line your 9×13 inch baking pan with parchment paper, making sure you leave a generous overhang on the sides. Trust me, you’ll use those little paper handles later to lift the whole slab out in one piece!
Now for the mixing magic. In your big bowl, get that softened butter, granulated sugar, and brown sugar beaten together until it’s light and fluffy. Don’t rush this creaming part; it’s where the air gets trapped! Next, beat in those eggs one at a time before stirring in that splash of vanilla. In a separate small bowl, whisk your flour, baking soda, and salt together first—this distributes everything evenly.
When you add the dry stuff back to the wet, do it gradually, mixing on low speed, and stop mixing the second everything just comes together. Seriously, stop! Overmixing is what turns these gorgeous cookie bars tough. Finally, fold in those two kinds of chocolate chips gently. Press the dough smoothly into your lined pan. You’re looking for those edges to turn golden brown, but the center should still look just a tiny bit soft when you pull them out. That visual cue is everything!
Baking and Cooling: Critical Timing for Gooey Dessert Recipes
This is where patience pays off, especially if you’re chasing that perfect, gooey dessert recipes texture. Remember how I said they look slightly soft when they come out? That’s intentional! They are still cooking on residual heat for a good 15 to 20 minutes after leaving the oven. Do not—I repeat, do NOT—try to cut them right away. If you try cutting them hot, they will totally fall apart, and you’ll end up with chocolate chip soup!
You need to let those chocolate chip bars cool completely in that pan on a wire rack. If you can manage it, letting them cool for at least two hours is ideal, or even chill them for 30 minutes after they’ve cooled on the counter. The total time commitment (15 minutes prep, 30 minutes cook, and about an hour of cooling) is still way faster than baking individual cookies, but the payoff in texture is astronomical. That patience turns a simple mix into show-stopping classic chocolate chip cookies, just in bar form!
Tips for Baking Perfect Pan Baked Desserts Like These Cookie Bars
Even with a foolproof recipe, sometimes these pan baked desserts can try to give you grief, right? The biggest culprit I see when people write to me is sticking! That parchment overhang we talked about is your absolute best friend here, but if you want extra insurance, make sure you grease the exposed pan sides *before* you lay in the parchment. As for texture—if you find your edges tend to dry out before the middle is done, next time try reducing your oven temperature by about 10 degrees. Also, if you skip my advice and use cold ingredients, the batter won’t incorporate properly, leading to a tighter, drier crumb. Remember, room temperature butter and eggs are crucial for that amazing melt we are looking for in these bars!
Customizing Your Chocolate Chip Bars
While I could eat this ultra-chewy base recipe plain forever, swapping out some of those chocolate chips is a fun way to keep things fresh! This is still a fantastic base for so many variations of chocolate chip bars. If you’re feeling nutty, toss in about a cup of chopped pecans or walnuts when you fold in the chips. That little crunch against the chew is divine! Another super popular change is swapping out some semi-sweet for butterscotch chips—you get a little extra caramel note running through there. You can also stir in some dried cherries for a tart little pop. Honestly, these bars are so forgiving, you can really make them your own family favorite!
For other ways to mix things up in the kitchen, don’t forget to check out my full list of delicious dessert recipes for more simple inspiration!
Storage and Make Ahead Dessert Bars
One reason these are such a hit, especially for busy weeks, is how perfectly they stack up as make ahead dessert bars. Once you’ve resisted cutting into them immediately (which is the hardest part, I know!), these sweet treats store like a dream. At room temperature, just keep them tightly covered in an airtight container—they stay wonderfully soft and chewy for about four days. Don’t even bother putting them in the fridge; cold temps actually make them a bit firm!
But if you need to stash them for longer, the freezer is your friend! Once cooled completely, cut them into squares first. Then, freeze them flat on a baking sheet for about an hour until they are solid. After that, you can stack them up in a freezer-safe container, just make sure you slip little squares of parchment paper between the layers. This keeps your beautiful homemade bar cookies from sticking together. They thaw out perfectly on the counter in under an hour, ready to go!
If you make a big batch because you know you shouldn’t stop at one square, remember you can find more make-ahead friendly options in my guide to delicious dessert recipes.
Serving Suggestions for Your Homemade Bar Cookies
Now that you’ve waited patiently for your amazing homemade bar cookies to cool completely, it’s time for the fun part: eating them! While these are absolutely delicious eaten all by themselves—maybe slightly warm, even—they reach peak decadence when you dress them up a little. I mean, who can resist a warm, gooey square after dinner?
My favorite way to present these to the family is with a big scoop of vanilla bean ice cream right on top. It melts just enough to create its own little pool of milky goodness. If you’re serving these for a party snack, a light drizzle of salted caramel sauce over the top of the cut squares makes these feel seriously gourmet. They are also fantastic slightly warmed up and served alongside a strong cup of coffee in the afternoon. Enjoy every bite of these wonderful sweet treats!
For more ideas on how to turn a simple bake into a fabulous dessert spread, take a peek at my delicious dessert recipes collection!
Frequently Asked Questions About Cookie Bars
Can I use melted butter instead of softened butter in these cookie bars?
Oh, I totally understand the temptation to skip melting the butter, especially when you are rushing to get these cookie bars mixed up! But please, resist the urge! If you use melted butter, it changes the whole outcome. Melted butter makes for a flatter, denser, and almost greasy result when it cools. We absolutely need that softened butter so we can properly cream it with the sugars. That creaming step is what traps the air and gives these chocolate chip bars that gorgeous structure and chew we are looking for!
How do I ensure my cookie bars are not dry?
This is the number one fear folks have with any batch of dessert recipes easy to make, but I have two non-negotiable rules. First, when you add the flour, stop mixing the second you no longer see white streaks. Seriously, stop stirring! Overmixing those chewy cookie bars develops gluten, and that’s what makes them tough and dry. Second, pull them out when the center still looks a little soft and shiny. Remember what I said about residual heat? That carries them right through to perfect doneness as they cool. That guarantees the best texture every time!
Are these cookie bars good for baking for a crowd?
Good for a crowd? Honey, they were *designed* for a crowd! That’s one of the biggest selling points for these amazing pan baked desserts. We are using a big ol’ 9×13 inch pan which yields about two dozen good-sized squares. You bake it once, and then you can slice them however you want—perfect squares for a bake sale or skinny rectangles for a huge party where everyone wants just a little taste. It truly simplifies the whole process of baking for a crowd!
Estimated Nutritional Overview for These Cookie Bars
Now, I always like to give a little disclaimer here because I am, after all, just a home cook sharing my passion with you, not a registered dietitian! These numbers are estimates based on the specific ingredients listed in the recipe above, and they can definitely fluctuate depending on the exact brands of chocolate or butter you happen to use. Don’t let this list scare you away though—these are special occasion sweet treats, after all!
For one square serving of these Ultimate Chewy Chocolate Chip Cookie Bars, here is what you can generally expect:
- Calories: About 250 calories
- Fat: Around 13 grams
- Carbohydrates: Approximately 32 grams
- Protein: Tagging in at about 3 grams
If you’re planning ahead for a party or just want to track things, it’s good to have a general idea. What I mostly focus on is that they are rich, satisfying, and perfectly baked, which guarantees everyone will be asking for the recipe for these wonderful cookie bars!
Share Your Ultimate Chewy Chocolate Chip Cookie Bars Experience
Gosh, I really hope you give these a try soon! There’s nothing that makes me happier than knowing one of my family’s favorite recipes is making its way onto someone else’s table. Once you’ve let these glorious cookie bars cool down and cut them into perfect squares, I’d absolutely love to hear what you thought!
Head down to the comments section below—tell me how they turned out for you! Did you stick strictly to the recipe, or did you try adding some of those fun variations we talked about? Rate the recipe with stars so I know how much you loved these incredible sweet treats. Honestly, knowing that you found success and joy in making these simple but decadent bars is the best feeling in the world. Happy baking, and thank you for letting me share a piece of my kitchen with yours! If you’re already planning your next bake, remember you can find more simple, heartfelt recipes in my guide to delicious dessert recipes!
PrintUltimate Chewy Chocolate Chip Cookie Bars
Make the ultimate chewy chocolate chip cookie bars in one pan. This simple recipe delivers rich, gooey, family-favorite dessert bars perfect for baking for a crowd.
- Prep Time: 15 min
- Cook Time: 30 min
- Total Time: 45 min
- Yield: 24 servings 1x
- Category: Dessert
- Method: Baking
- Cuisine: American
- Diet: Vegetarian
Ingredients
- 1 cup unsalted butter, softened
- ¾ cup granulated sugar
- ¾ cup packed brown sugar
- 2 large eggs
- 1 tablespoon vanilla extract
- 2 ¼ cups all-purpose flour
- 1 teaspoon baking soda
- ½ teaspoon salt
- 2 cups semi-sweet chocolate chips
- 1 cup milk chocolate chips
Instructions
- Preheat your oven to 350°F (175°C). Line a 9×13 inch baking pan with parchment paper, leaving an overhang on the sides for easy removal.
- In a large bowl, cream together the softened butter, granulated sugar, and brown sugar until the mixture is light and fluffy.
- Beat in the eggs one at a time, mixing well after each addition. Stir in the vanilla extract.
- In a separate medium bowl, whisk together the flour, baking soda, and salt.
- Gradually add the dry ingredients to the wet ingredients, mixing on low speed until just combined. Do not overmix.
- Fold in both types of chocolate chips using a spatula.
- Press the cookie dough evenly into the prepared 9×13 inch pan.
- Bake for 25 to 30 minutes, or until the edges are golden brown and the center is set but still slightly soft.
- Let the cookie bars cool completely in the pan on a wire rack before lifting them out using the parchment paper overhang.
- Cut into squares and serve your easy dessert bars.
Notes
- For extra gooey results, slightly underbake the bars by about 2 minutes.
- You can substitute half the chocolate chips with chopped nuts or butterscotch chips for a variation.
- These pan baked desserts freeze well once cut; place parchment paper between layers before freezing.
Nutrition
- Serving Size: 1 bar
- Calories: 250
- Sugar: 20
- Sodium: 150
- Fat: 13
- Saturated Fat: 8
- Unsaturated Fat: 5
- Trans Fat: 0
- Carbohydrates: 32
- Fiber: 1
- Protein: 3
- Cholesterol: 35